



Today we gonna learn “The Clever One’s Guide to Buying Windows 10 VPS”. However, before we start this tut there are some points to remember. Whether you are a tech enthusiast, developer, or business owner, our Windows 10 virtual server is tailored to meet your specific requirements. You need a Windows VPS with an uptime % 99.99, Connection without delay, simple, scalable, customizable, and affordable prices.
Windows 10 virtual server is a virtual machine you can use as a dedicated environment to your web projects, So get ready to elevate productivity.
To begin! Go to the NeuronVM website, Click on “Buy VPS” then choose “Buy Windows VPS“:

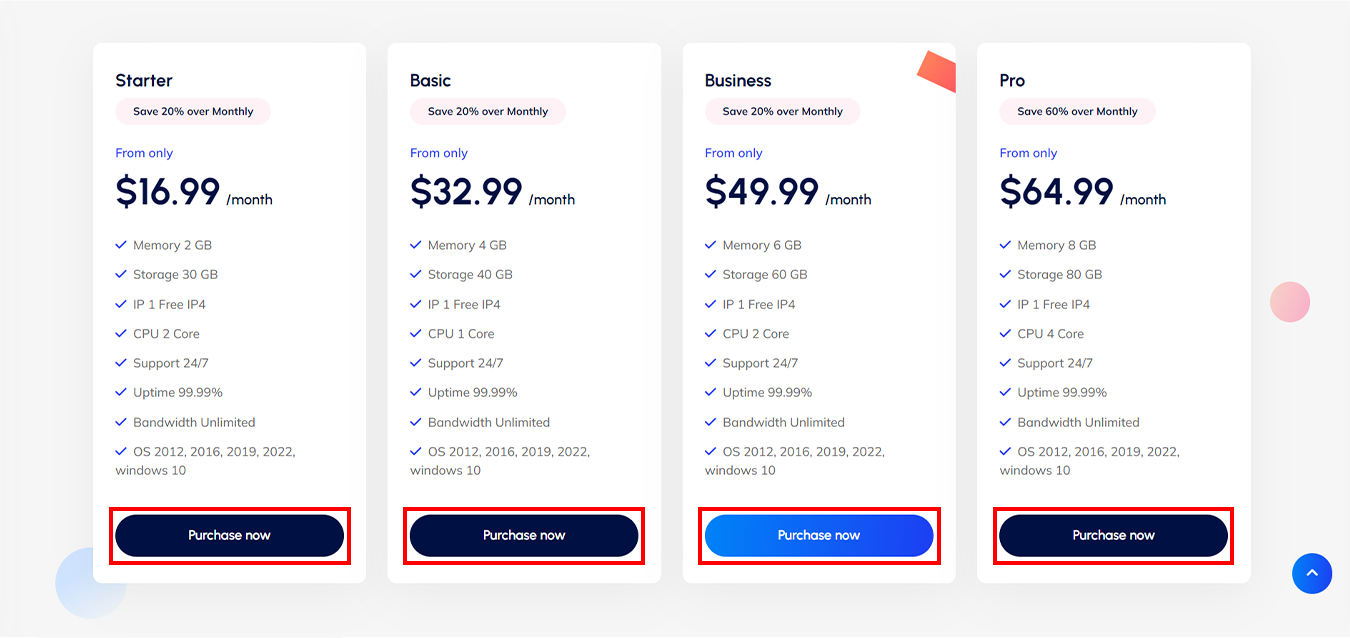
Choose a plan that fits your goals:
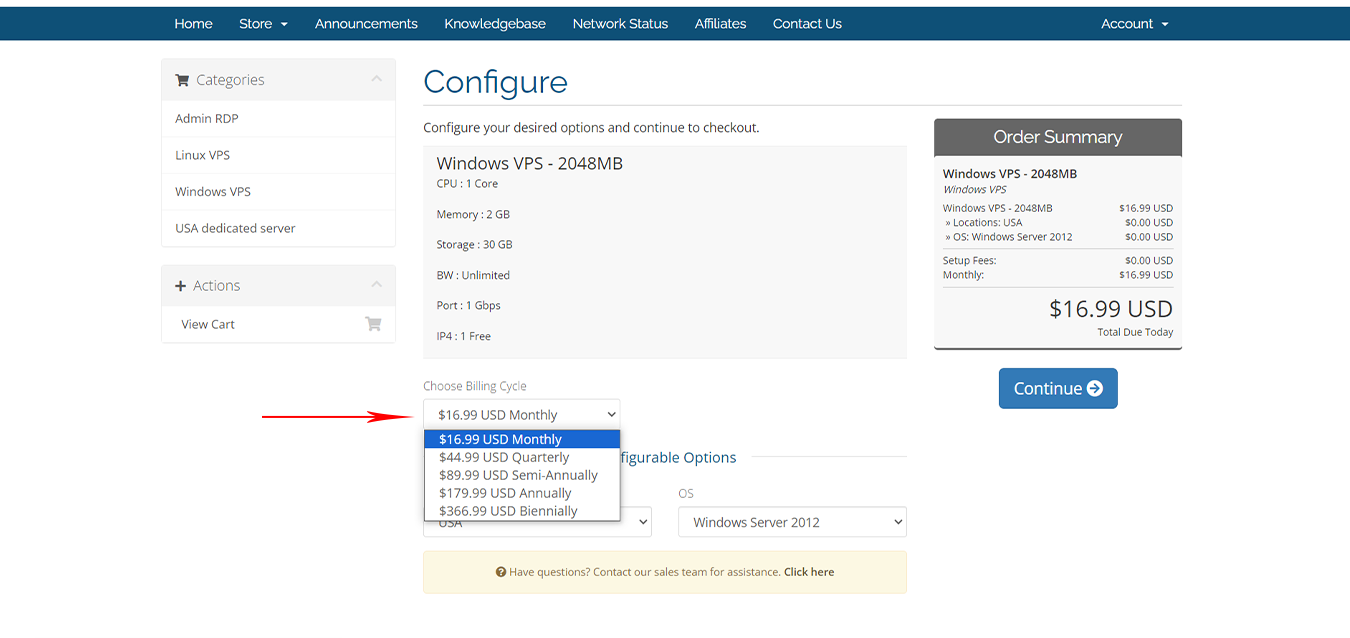
Choose your ” Billing Cycle “:
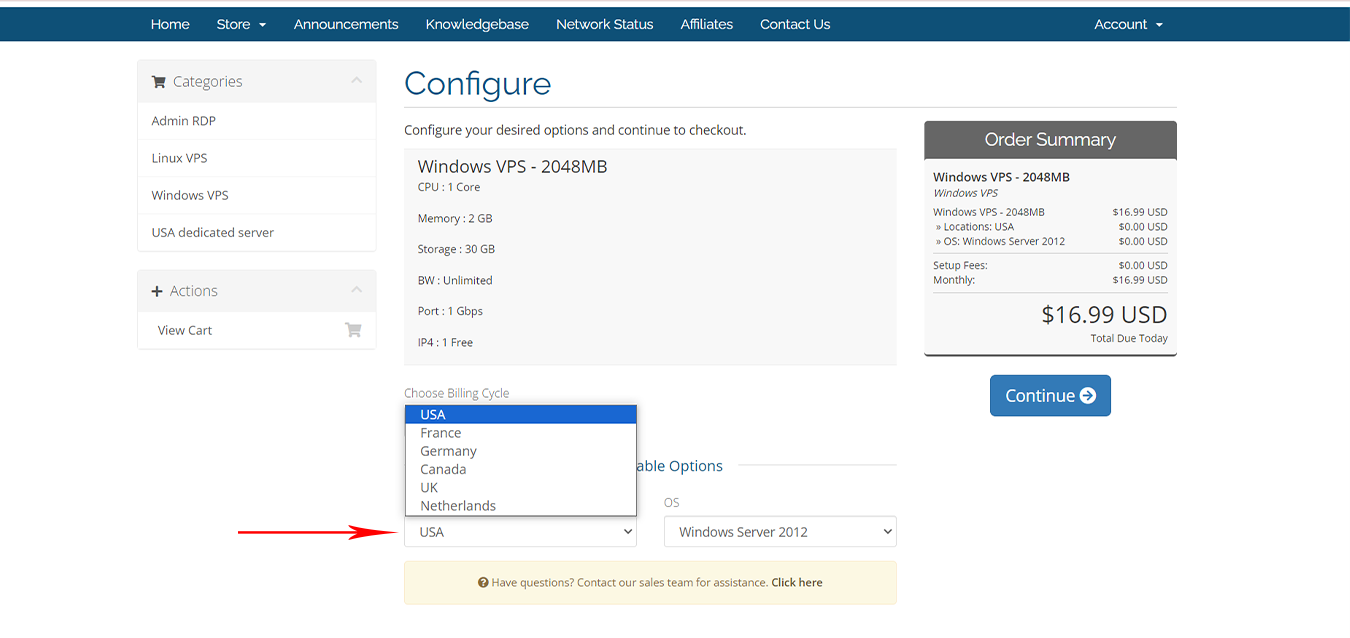
Next, choose one of the 6 available options for the location:
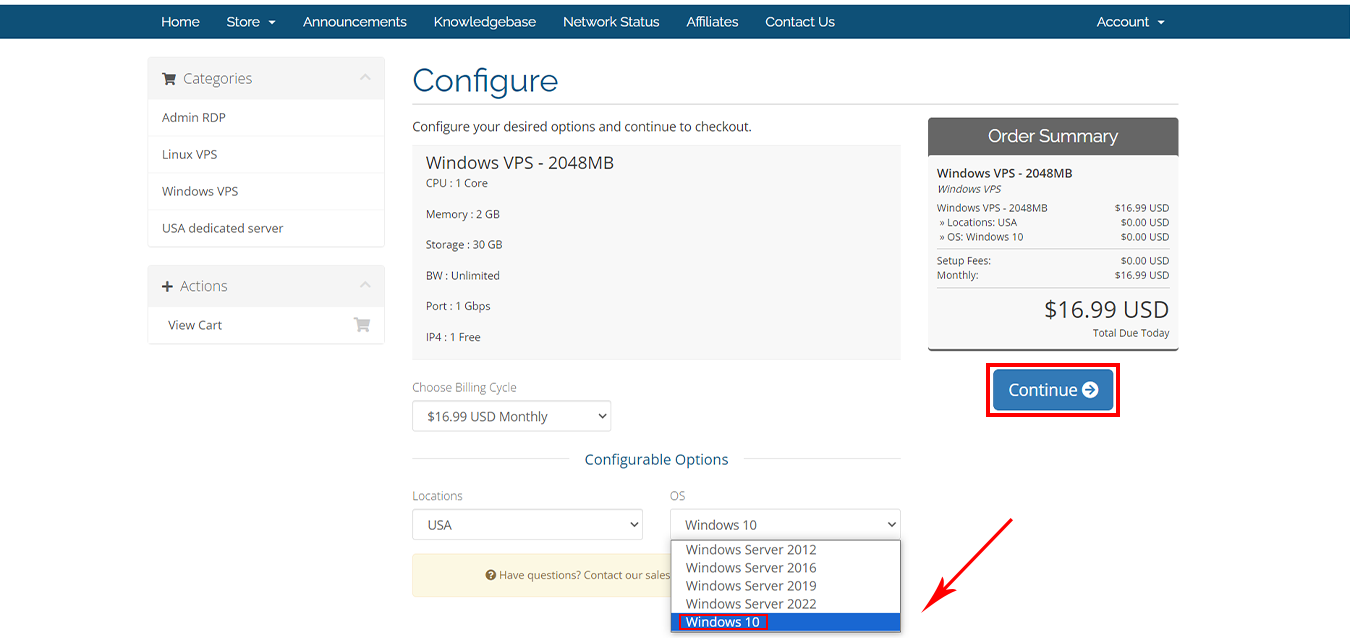
At this stage, to buy a Windows 10 VPS, select the ” Windows 10 ” option from the operating systems, And press ” Continue “:
If you have any promo code apply that and checkout:

Fill blanks with your ” Personal Details ” and scroll down for more:
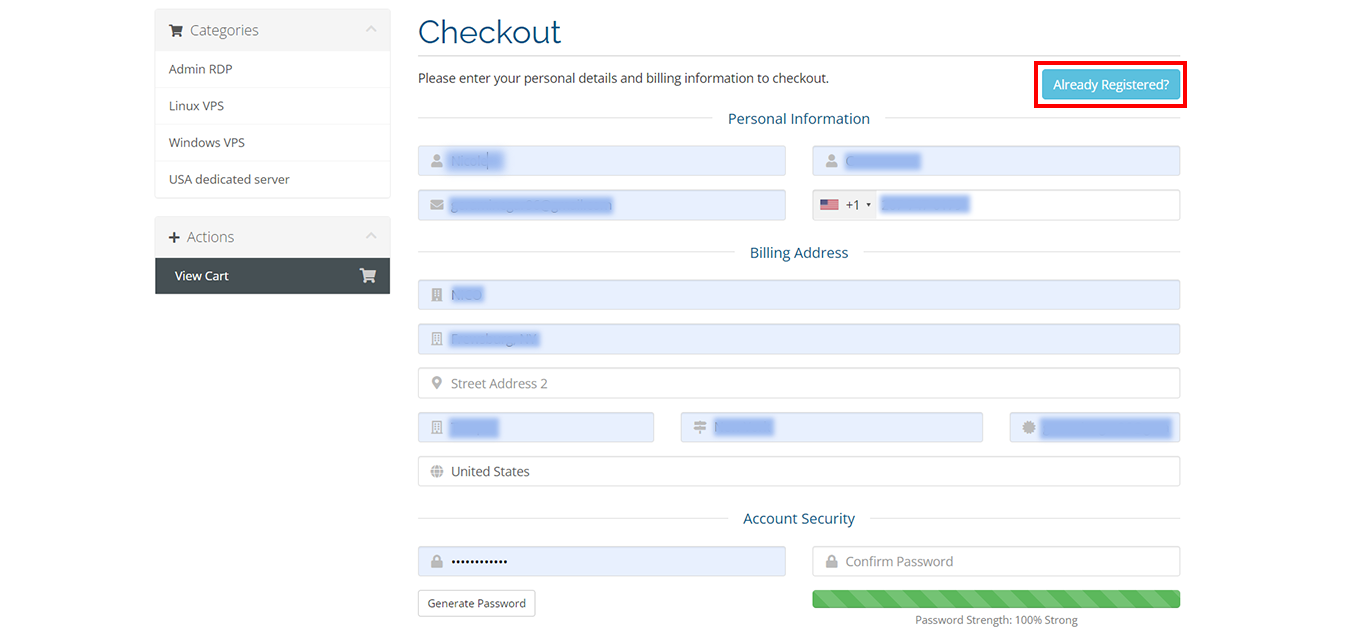
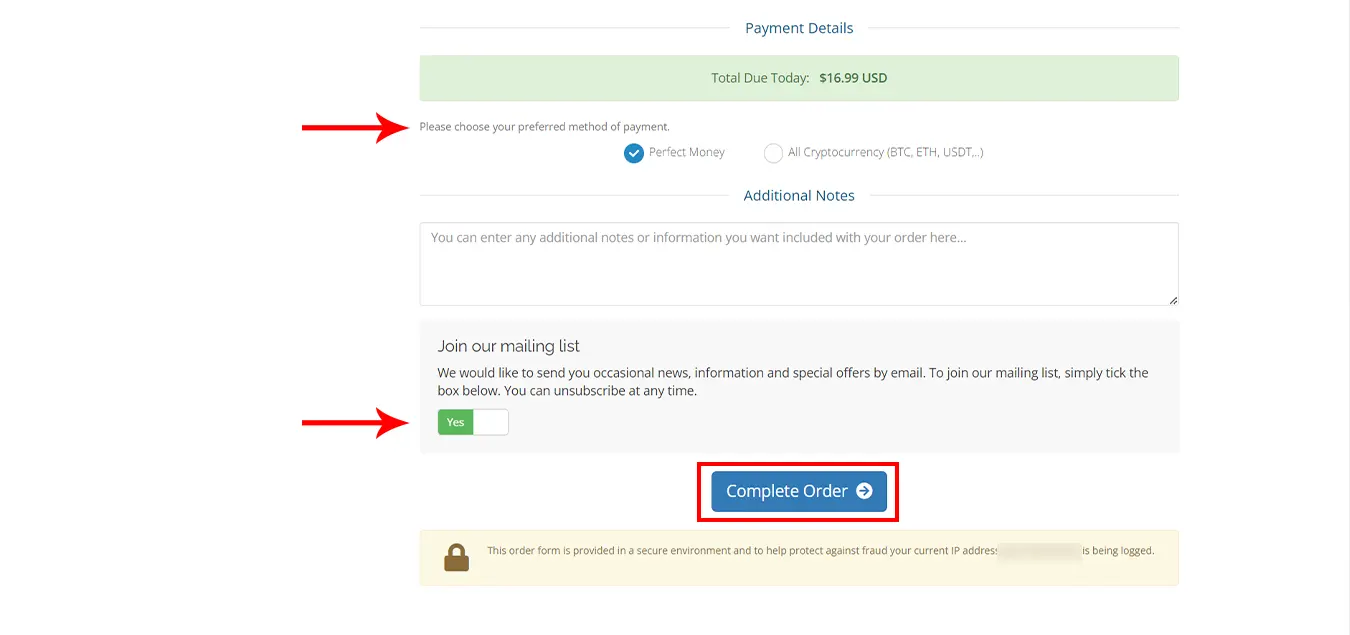
You can choose your method of payment ” Perfect Money ” Or ” All Cryptocurrency like BTC, ETH, USDT.. “:
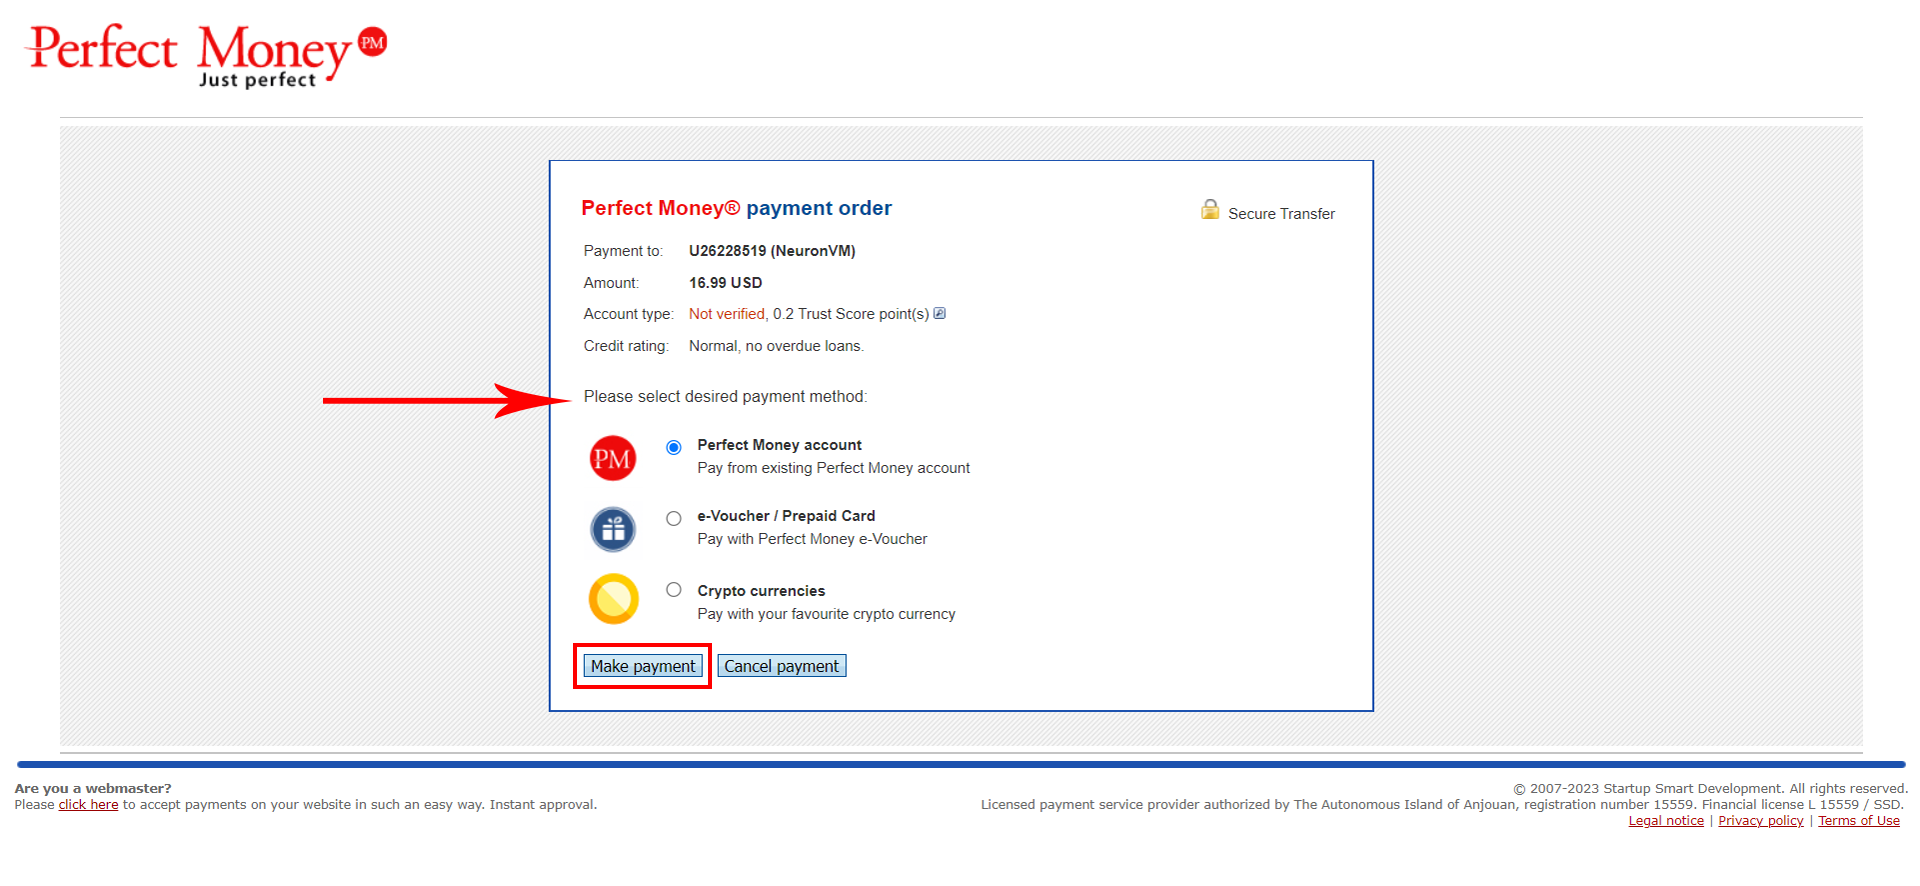
Please select the desired payment method:
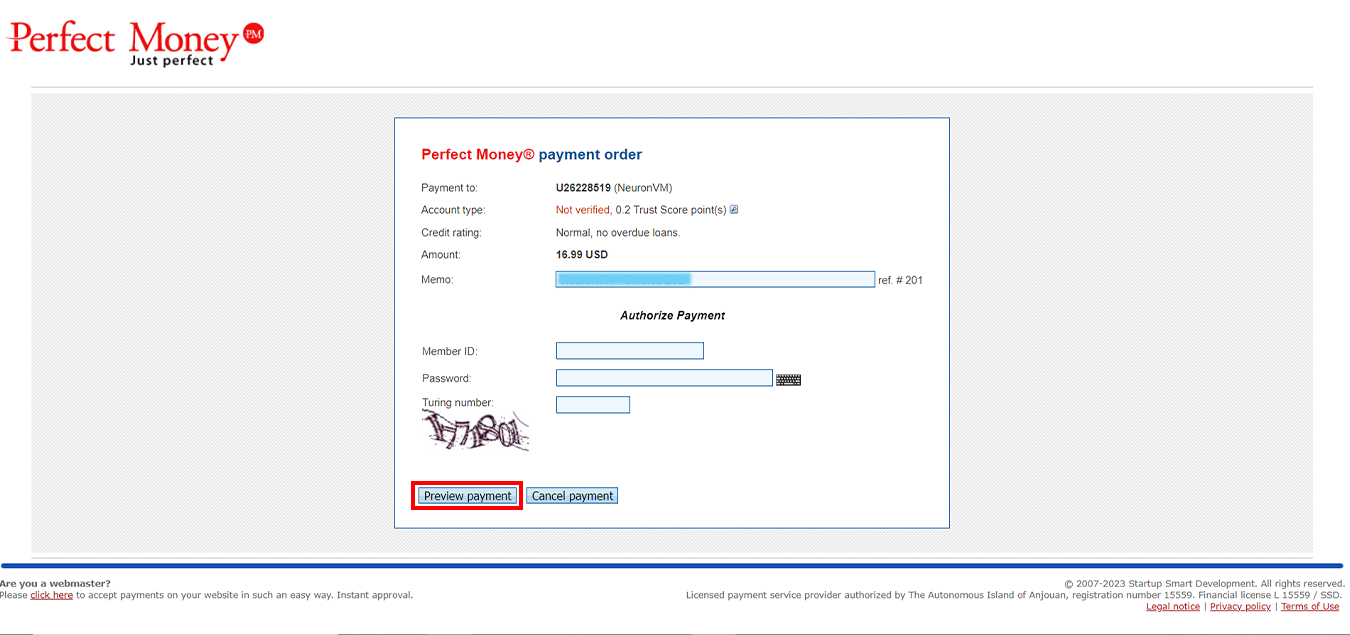
Please fill “ Member ID “, ” Password ” and ” Turning number “:
Your purchase is now completed. Your desired server information will be sent to your email after a few minutes.
Thank you for being with us! For more information, visit the website.
If you have a problem or question in any of the above steps, you can contact our experts 24/7 via ticket section in your user area.
How useful was this post?
Click on a star to rate it!
Average rating 5 / 5. Vote count: 2
No votes so far! Be the first to rate this post.
 Tags
Tags

Mikrotik is a powerful and versatile operating system that can be installed on various hardware plat...


 Tags
Tags

Our article topic is an introduction to IPMI and its features. For those who prefer to manage their ...


 Tags
Tags
What is your opinion about this Blog?


