Tag: Linux Tutorials

  • Desktop Google Drive for Windows, Mac and Linux

    Desktop Google Drive for Windows, Mac and Linux

    In this article, we will show how you can download and use Desktop Google Drive for Windows, Mac & Linux. When we talk about Google Drive it makes sense a lot, Because this drive makes it easy to access and use your cloud storage files. It is very popular, useful, and also compatible with Google online tools. We should mention that if you want to use this drive, you should have a Google account and if you desire to have it, then the best way is to install it on your desktop and mount it to access. Google Drive consolidates with Google’s other services and systems like Chrome, Gmail, Google Docs, YouTube, Google+, and so on.

    If you need to use a Windows VPS or Linux VPS server, we suggest you visit our website plans, which are offered with a wide variety and location of your choice.

    Google Drive Features

    Now let’s analyze some main features of Google Drive:

    – Capability of storing files and folders and serving a backup solution

    – Integration of Google Office apps

    – Include different apps and icons like Google Docs, Google Sheets, Google Forms, and so on

    – Allow to share files and invite others to view, edit, and download them

    – Accessibility of files from any smartphone, tablet, or computer online or offline

    –  Possibility of comprehensive search

    – Saving files safely and protecting them with an AES256 or AES128 encryption

    How to Download and Use Google Drive on Windows / Mac

    Now that you’re familiar with Google Drive, let’s see how we can install it on your desktop for Windows or MacOS. Actually, you can easily do the installation process and it is entirely free for you, so follow our instructions and enjoy your application.

    Navigate to the Google Drive download page and select the option to download Drive for Desktop. As the website is intelligent, it can automatically recognize your operating system and will download the appropriate file type for you:

    how to download google drive

    At this step, as soon as the window appears, select which folder you need to save the installation file and click the Save button.

    For Windows, you should use Googledrivesetup.exe, and for Mac Googledrive.dmg file name.

    Also, you can choose to open files automatically:

    save google drive on desktop

    Now you can click the Install button to start the process.

    Note: on MacOS, an extra window will appear, requiring your Mac password to confirm the installation.

    So enter the Password and click Install Software:

    install google drive on windows

    Wait for the installation to complete.

    If your operating system is Windows, a new drive named Google  Drive (G:) will be added to the desktop. But if it is MacOS the Drive icon will show up in the top menu bar:

    Download and use Google Drive on mac

    In the last step, sign in to your Google account to complete your task. On Windows, you will be redirected to the browser and go to the login page. But on Mac, first of all, you should click the drive icon on the top menu bar and if you complete the installation successfully then you can log in to Google Drive.

    How to Download and Use Google Drive on Linux

    As you see, we can use Google Drive on Windows and Mac. But Google hasn’t released an official version for Linux. Don’t worry cause we can use other tools to fill the gap.

    You should know that Google officially recommended using the Google Driver Website on Linux. But if you want to find it on your desktop, then follow our instructions:

    First of all, you should know that Gnome supports Google Drive on its version 3.18 desktop environment. Also, the Ubuntu desktop includes Nautilus which is part of Gnome. You need to spend extra time getting the Google Drive integration. To start this process you should install the Gnome Control Center and Gnome Online accounts package. So open the terminal and use the command below:

    sudo apt install gnome-control-center gnome-online-accounts

    Enter your password and type “y” to install the software.

    Then open the dashboard and search for “Gnome Control Center“. Navigate to the application settings:

    setting linux

    At the window, click the “Online Accounts” icon in the Gnome Control Center window:

    online accounts on linux

    Now click the “add account” then select “Google” and sign into your Google account.

    You can give access to your account and ensure that the files option is enabled:

    running google drive on linux

    You can see the Google Account email address as an option in the sidebar at the file manager window.

    Then click to view Google Drive files. You can browse, open, and save files, but files are not synced offline to the desktop. The modified copy will be automatically uploaded by the system:

    Download-and-use-Google-Drive-on-Linux

    If you want to see the thumbnail preview, follow the pass below and then select “always“:

    Edit >> Preferences >> Preview, click the “Show Thumbnail”   

    how to use google drive on linux

    That’s it! Now you can use Google Drive on your desktop.

    Conclusion

    Ok, guys! We tried to guide you in learning how to download and use Google Drive on Windows, Mac, and Linux. Now you can easily download it on your operating system, and also manage and access your cloud storage files without any worries about security. We hope you enjoy this article and suggest that you read the interesting infographic post, Cloud Computing Structure.

    FAQ

    1) Is there any difference between Google Drive and Google Drive for Desktop?

    The desktop version synchronizes and stores the content of Google Drive locally on the computer, but the first one streams all files and folders from the cloud.

    2) What is the maximum storage for desktop Google Drive?

    Actually, it comes with 15 GB storage, but if you upgrade it to Google One, your total storage increases to 100 GB or more.

  • Tutorial Install and Run Netstat on Fedora 33

    Tutorial Install and Run Netstat on Fedora 33

    Netstat is a powerful networking command-line tool used to display network information and statistics in Linux-based operating systems. You can easily run Netstat on Fedora to help troubleshoot network-related issues and monitor network connections on your system. This article will walk you through the steps to install and run Netstat on Fedora 33. Before starting the training, we suggest you use the Linux VPS server plans provided on our website. It should be noted that these plans are offered in multiple locations with immediate delivery.

    Tutorial Install and Run Netstat on Fedora 33

    How to Install Netstat on Fedora 33

    Note that the Netstat command is provided by the net-tools package on Fedora servers.

    In the first step, you should open a new terminal and log into your server via SSH as a root user or as a sudo user.

    Now you can install Netstat on Fedora 33 server by entering the following command:

    sudo dnf install net-tools

    If you asked for confirmation, you should enter “y” and then press “Enter“:

    Install 1 Package
    
    Total download size: 305 k
    Installed size: 989 k
    Is this ok [y/N]: y

    Next, Verify the installation by checking the netstat version:

    netstat -V

    How to Download and Install Netstat rpm on Fedora 33

    First, you should log in to your Fedora 33 server as root.

    Now enter the following command to download the net-tools package. This command downloads the net-tools package from the fedoraproject.org website:

    wget https://download-ib01.fedoraproject.org/pub/fedora/linux/releases/32/Everything/x86_64/os/Packages/n/net-tools-2.0-0.56.20211201git.fc32.x86_64.rpm

    Also, you can download the rpm file:

    rpm -ivh net-tools-2.0-0.56.20211201git.fc32.x86_64.rpm

    If you use the above command to install, you should download and install dependencies manually:

    dnf install net-tools-2.0-0.56.20211201git.fc32.x86_64.rpm

    How to Run Netstat on Fedora 33

    You can find services that run on various ports:

    netstat -tulpn

    This allows you to identify if the service is listed on each port.

    Command parameters include:

    t: is used to print TCP connections

    u: is used for printing UDP connections

    l: Print all listening server sockets

    p: Print all PID/Program names for sockets

    n: Don’t resolve names from IPs

    Conclusion

    This article taught you how to install and run Netstat on Fedora 33. Installing and running Netstat on Fedora 33 is a simple process that can provide valuable insights into your system’s network connections and statistics. By following the steps outlined in this article, you can easily install the net-tools package and run Netstat commands to troubleshoot network-related issues and monitor network activity on your Fedora 33 system. Take advantage of the powerful capabilities of Netstat to better understand and manage your network connections. If you want to use an editor with a lot of customization, you can read the article Introduction and Install Atom on Fedora 34.

  • Tutorial Install WordPress on LAMP on Ubuntu 21.04

    Tutorial Install WordPress on LAMP on Ubuntu 21.04

    Content Management Systems are a group of software that allows users to produce, publish, organize, and organize content; Without the need to get involved in the complexities of programming. Web content management systems are built specifically for creating web pages, and you can use them to create your favorite web pages without even a single line of code. The most famous and popular web content management system is WordPress. So keep studying to learn how to install WordPress on LAMP on Ubuntu 21.04.

    Prerequisites

    To install WordPress on LAMP on Ubuntu you must first provide the prerequisites, which are:

    – A Linux VPS server with Ubuntu 21.04 operating server.

    – A non-root Sudo user

    – Install a LAMP stack

    – Secure your site with TLS/SSL technology.

    After providing all the prerequisites, you should now create a MySQL database. Because WordPress uses MySQL to manage and store site and user information.

    Install WordPress on LAMP on Ubuntu Linux

    To install WordPress on LAMP on Ubuntu, first, you should create a MySQL Database and user for WordPress.

    Use the following command to log in to a MySQL root account:

    mysql -u root -p

    In this step, you will be asked for the password that you set when installing MySQL root.

    If you do not have access to the MySQL database via root, you should update the root user password by logging in as a Sudo user:

    sudo mysql -u root

    After you receive the MySQL prompt, you should Put a strong password instead of new_password in the following command:

    ALTER USER 'root'@'localhost' IDENTIFIED WITH mysql_native_password BY 'new_password';

    Now you need to enter “EXIT” and exit the database.

    Then log back into the database by entering your new password:

    mysql -u root -p

    In this step, you need to create an exclusive database to control WordPress. To do this, enter the following command:

    CREATE DATABASE wordpress DEFAULT CHARACTER SET utf8 COLLATE utf8_unicode_ci;

    Note: there is a semi-colon (;) at the end of each MySQL statement.

    Now you should create a separate account for the MySQL database to support you in terms of management and security. You will use this account to operate with your new database.

    By typing the following command, you can create an account, set a password, and access the created database.

    CREATE USER 'wordpressuser'@'%' IDENTIFIED WITH mysql_native_password BY 'password';

    In this step, to inform a database that the WordPress user has full access to the setup database, run the following command:

    GRANT ALL ON wordpress.* TO 'wordpressuser'@'%';

    Now you should flush the privileges so that the current MySQL instance is aware of recent changes. To do this, enter the following command:

    FLUSH PRIVILEGES;

    To exit MySQL, run the following command:

    EXIT;

    Keep in mind that when setting up the LAMP stack, PHP needs a minimum set of extensions to communicate with MySQL, and WordPress uses the additional PHP extension.

    In this stage, you should Install additional PHP plugins. Before downloading PHP, you must update the system with the following command:

    sudo apt update

    You must download and install some PHP extensions by entering the following command:

    sudo apt install php-curl php-gd php-mbstring php-xml php-xmlrpc php-soap php-intl php-zip

    Remember to check your plugin documentation to discover its PHP requirements. If they are available, you must install them.

    In this step, you have to restart Apache again with the help of the following command. Because you make more configurations on Apache to download new extensions:

    sudo systemctl restart apache2

    Then you should configure Apache to allow overriding and rewriting .htaccess.

    Now you should create a configuration file for your site in the /etc/apache2/sites-available/ directory.

    In this tutorial, you should put the configuration file path instead of /etc/apache2/sites-available/WordPress.conf. Also, use the webroot specified in your configuration instead of /var/www/ WordPress as the WordPress installation root directory.

    Note that you may use the 000-default.conf configuration (with /var/www /html as your webroot). If you are just hosting a website on this virtual server, it would be fine. Otherwise, it is best to split the required configuration into logical sections, in one file per site.

    By identifying your paths, you can start working with .htaccess so that Apache can make configuration changes based on any directory.

    Now to Enable .htaccess overrides you should do the following methods. the use of .htaccess files is disabled. WordPress and many WordPress plugins use these files extensively for in-directory tricks on virtual web server behavior.

    You can open the Apache configuration file for your website by entering the following command:

    sudo nano /etc/apache2/sites-available/wordpress.conf

    You should allow .htaccess files, to do this you need to put the AllowOverride instruction in a directory block that points to the root of our document. To make sure you are using the correct web root directory, add the following text block inside the VirtualHost block:

    <Directory /var/www/wordpress/>
    AllowOverride All
    </Directory>

    When done, you should save and close the file. To do this in nano, press CTRL and X together, then Y, and ENTER.

    At this point, you should enable the rewrite module so you can use the permalink WordPress feature. To do this enter the following command. After doing this you will have more human-readable permalinks to your posts.

    sudo a2enmod rewrite

    The above command activates the specified module in the Apache configuration by calling the script. Now Enable changes. Before making the changes, check that you have not made any syntax errors by entering the following command:

    sudo apache2ctl configtest

    If you want to override the above line, just add a ServerName instruction to your main (global) Apache configuration file in /etc/apache2/apache2.conf. The server name can be the domain or IP address of your virtual server. However, this is only a message and does not affect the performance of your site. You can continue as long as the output contains Syntax OK.

    Now to make changes you need to restart Apache with the following command:

    sudo systemctl restart apache2

    After completing the above steps, you can now install WordPress.

    In this stage, you should Navigate to a writable directory and download the compressed version.

    cd /tmp
    
    curl -O https://wordpress.org/latest.tar.gz

    You should run the following command to extract the compressed file:

    tar xzvf latest.tar.gz

    You should add a bogus .htaccess file to make it available for later use in WordPress. To do this enter the following command:

    touch /tmp/wordpress/.htaccess

    Then you need to copy the sample configuration file with the name of the file that WordPress reads. To do this, enter the following command:

    cp /tmp/wordpress/wp-config-sample.php /tmp/wordpress/wp-config.php

    You can create an updated directory with the following command. By doing this, WordPress will not be licensed automatically after updating the software:

    mkdir /tmp/wordpress/wp-content/upgrade

    In this step, copy all the contents of the directory to the root of your document. The dot used at the end of the source directory indicates that everything in the directory, even hidden files, should be copied:

    sudo cp -a /tmp/wordpress/. /var/www/wordpress

    Remember to replace the /var/www/wordpress folder with the directory set on the virtual server.

    How to Configure WordPress on LAMP on Ubuntu 21.04

    You must first give ownership of all files to the user and the www-data group. This is the user as the Apache virtual web server runs, and Apache must be able to read and write WordPress files to serve the website and perform automatic updates.

    Now you should update ownership with the following command that allows you to change file ownership. Then you should refer to the relevant directory of your virtual server:

    sudo chown -R www-data:www-data /var/www/wordpress

    You can set the correct permissions in WordPress directories and files with the following commands:

    sudo find /var/www/wordpress/ -type d -exec chmod 750 {} \;
    
    sudo find /var/www/wordpress/ -type f -exec chmod 640 {} \;

    By opening the file, our first task will be to set some secret keys to provide a security level for your installation. WordPress provides a reliable generator for these values ​​so there is no need to try to achieve the right values ​​alone. These are only used indoors, so using sophisticated and safe amounts here will not be a problem.

    With the following command, you can get safe values from the WordPress secret key generator. You can add the output of the following command to the configuration file:

    curl -s https://api.wordpress.org/secret-key/1.1/salt/

    Now you need to open the WordPress configuration file. To do this, enter the following command:

    sudo nano /var/www/wordpress/wp-config.php

    Then you need to look for the section that has example values for those settings:

    define('AUTH_KEY', 'put your unique phrase here');
    define('SECURE_AUTH_KEY', 'put your unique phrase here');
    define('LOGGED_IN_KEY', 'put your unique phrase here');
    define('NONCE_KEY', 'put your unique phrase here');
    define('AUTH_SALT', 'put your unique phrase here');
    define('SECURE_AUTH_SALT', 'put your unique phrase here');
    define('LOGGED_IN_SALT', 'put your unique phrase here');
    define('NONCE_SALT', 'put your unique phrase here');

    After deleting those lines, you need to paste in the copied values from the command line:

    define('AUTH_KEY', 'VALUES COPIED FROM THE COMMAND LINE');
    define('SECURE_AUTH_KEY', 'VALUES COPIED FROM THE COMMAND LINE');
    define('LOGGED_IN_KEY', 'VALUES COPIED FROM THE COMMAND LINE');
    define('NONCE_KEY', 'VALUES COPIED FROM THE COMMAND LINE');
    define('AUTH_SALT', 'VALUES COPIED FROM THE COMMAND LINE');
    define('SECURE_AUTH_SALT', 'VALUES COPIED FROM THE COMMAND LINE');
    define('LOGGED_IN_SALT', 'VALUES COPIED FROM THE COMMAND LINE');
    define('NONCE_SALT', 'VALUES COPIED FROM THE COMMAND LINE');

    In this step, you must set the database name, database user, and associated password in MySQL to change some of the database connection settings at the beginning of the file.

    Then you need to setup a method that WordPress uses to write to the file system. Set the file system method to “Direct” because the webserver is allowed to write wherever needed. Failure to do so with your current settings will result in WordPress requesting FTP credentials when performing certain actions.

    You should add the above settings below the database connection settings. Note that you can add the file anywhere else:

    // ** MySQL settings - You can get this info from your web host ** //
    /** The name of the database for WordPress */
    define( 'DB_NAME', 'wordpress' );
    
    /** MySQL database username */
    define( 'DB_USER', 'wordpressuser' );
    
    /** MySQL database password */
    define( 'DB_PASSWORD', 'password' );
    
    /** MySQL hostname */
    define( 'DB_HOST', 'localhost' );
    
    /** Database Charset to use in creating database tables. */
    define( 'DB_CHARSET', 'utf8' );
    
    /** The Database Collate type. Don't change this if in doubt. */
    define( 'DB_COLLATE', '' );
    
    . . .
    
    define('FS_METHOD', 'direct');

    Finally, save it before closing the file.

    How to Setup WordPress on Ubuntu 21.01

    Once the server configuration is complete, install it via the web interface. To do this first go to the public IP address or domain name of your server from the web browser using the following command:

    https://server_domain_or_IP

    Then choose your language.

    At this stage, you will enter the main setup page.

    Then you need to choose a unique name for the WordPress site and a username. Then a strong password is automatically generated that you must save. Now you need to enter your email address and check the box of discouraging search engines from indexing this site.

    1-setup_installation ordpresson ubuntu

    After clicking on Install WordPress, you will be redirected to the following page that asks you to Log In:

    2-login_prompt to wordpress dashboard

    After clicking on login, you will enter the WordPress admin dashboard:

    3-wordpress dashboard panel

    Finally, you can start designing your WordPress website.

    Conclusion

    The WordPress platform is one of the most popular and widely used content management tools for creating great websites. In this tutorial, you have learned all the necessary things related to installing WordPress on Ubuntu. But note that you must have a MySQL database and install PHP for WordPress. After a successful installation, now you can log in to your WordPress admin dashboard and start customizing your website. We hope this guide was helpful enough.

  • Tutorial Install and Run MongoDB on Ubuntu 20.10

    Tutorial Install and Run MongoDB on Ubuntu 20.10

    Programmers use different databases in web and application development. SQL or NoSQL-based databases have different uses according to system requirements and programmers’ preferences. MongoDB is one of these databases. MongoDB is one of the most popular No SQL databases, which has a flexible structure and is mostly used in projects with large volumes of data. This article will teach you How to Install and run MongoDB on Ubuntu 20.10.

    Prerequisites

    – A Linux VPS with Ubuntu operating system

    – Root or sudo access

    – Sufficient system resources including disk space, RAM, and CPU.

    How to Install MongoDB on Ubuntu 20.10

    First, your Ubuntu 20.10 must have a non-root executable user and a UFW-configured firewall. You need to install the latest version of MongoDB software. To install and run MongoDB on Ubuntu, you should put the dedicated MongoDB package repository in your APT resources. You can now install MongoDB.

    Tutorial-Install-and-Run-MongoDB-on-Ubuntu-20.10

    Enter the following command to enter the public GPG key for the latest stable version of MongoDB:

    curl -fsSL https://www.mongodb.org/static/pgp/server-4.4.asc | sudo apt-key add -

    cURL is a command-line tool used in many operating systems to transfer data. cURL reads the data stored in the URL and prints the content to the system output. If the GPG server crashes or cURL is unable to connect to the GPG server, cURL will not add the resulting error code to your list of valid keys.

    If the key is added successfully, you will see the following command key:

    Output
    OK

    To double-check how to add the key correctly, you must enter the following command:

    apt-key list

    You can return the MongoDB key somewhere in the output by entering the following command:

    Output
    /etc/apt/trusted.gpg
    --------------------
    pub rsa4096 2019-05-28 [SC] [expires: 2024-05-26]
    2069 1EEC 3521 6C63 CAF6 6CE1 6564 08E3 90CF B1F5
    uid [ unknown] MongoDB 4.4 Release Signing Key <[email protected]>
    . . .

    The APT looks for online sources of packages for download and installation in either sources.list file or sources.list.d directory. The sources.list.d directory allows you to add sources.list them as separate files. sources.list Lists the active sources of APT data. So that your first preferred sources are at the top of the list and a source is mentioned in each line.

    Creates a file in the sources.list.d directory named mongodb-org-4.4.4 by running the following command:

    echo "deb [ arch=amd64,arm64 ] https://repo.mongodb.org/apt/ubuntu focal/mongodb-org/4.4 multiverse" | sudo tee /etc/apt/sources.list.d/mongodb-org-4.4.list

    In this step, to find the mongodb-org package, enter the following command and then update the local server package index:

    sudo apt update

    After activating the repository, install the mongodb-org package by entering the following command:

    sudo apt install mongodb-org

    In this step, to confirm the installation of the package, you must select Y and then ENTER.

    How to Run MongoDB on Ubuntu 20.10

    MongoDB is now installed on your system but cannot be used. At this point, you start the MongoDB service and test the databases.

    Tutorial-Install-and-Run-MongoDB-on-Ubuntu-20.10-2

    You can manage MongoDB with various systemctl commands. Start Daemon MongoDB and activate it by entering the following command:

    sudo systemctl start mongod.service

    Now you should check the status of the service. Note that this command does not include .service in the service file definition. It is not necessary to enter systemctl in the following command. If it is not already present, it will automatically add to any argument you pass:

    sudo systemctl status mongod

    The output will look something like the following and indicate that the service is active:

    mongod.service - MongoDB Database Server
    Loaded: loaded (/lib/systemd/system/mongod.service; disabled; vendor preset: enabled)
    Active: active (running) since Tue 2020-06-09 12:57:06 UTC; 2s ago
    Docs: https://docs.mongodb.org/manual
    Main PID: 37128 (mongod)
    Memory: 64.8M
    CGroup: /system.slice/mongod.service
    └─37128 /usr/bin/mongod --config /etc/mongod.conf

    You must now confirm “the service is running as expected“.

    Activate the MongoDB service by entering the following command to start it at startup:

    sudo systemctl enable mongod

    To check if the installation is successful, use the following command to connect to the MongoDB database server and extract the current version, server address, and port:

    mongo --eval 'db.runCommand({ connectionStatus: 1 })'

    In the output below, the value of 1 for the ok field in the response indicates that the server is working as expected:

    Output
    MongoDB shell version v4.4.0
    connecting to: mongodb://127.0.0.1:27017/?compressors=disabled&gssapiServiceName=mongodb
    Implicit session: session { "id" : UUID("1dc7d67a-0af5-4394-b9c4-8a6db3ff7e64") }
    MongoDB server version: 4.4.0
    {
    "authInfo" : {
    "authenticatedUsers" : [ ],
    "authenticatedUserRoles" : [ ]
    },
    "ok" : 1
    }

    How to Configure MongoDB on Ubuntu 20.10

    Like other Ubuntu services, you can manage MongoDB using standard systemctl commands. The systemctl status command checks the status of the MongoDB service:

    sudo systemctl status mongod

    You can stop the service with the following command:

    sudo systemctl stop mongod

    Run the following command to start the service again:

    sudo systemctl start mongod

    You can restart the running server with the following command:

    sudo systemctl restart mongod

    To disable automatic startup, enter the following command:

    sudo systemctl disable mongod

    Now enter the following command to re-enable it to startup:

    sudo systemctl enable mongod

    If you wish, you can read The Ultimate Guide to Install MongoDB on Ubuntu 22.04.

    Conclusion

    In this guide, we walked you through the process of installing and running MongoDB on Ubuntu. By following these steps, you have successfully set up MongoDB on your Ubuntu machine and can now start leveraging its powerful features for handling large volumes of data. Remember to keep your installation updated by regularly checking for MongoDB updates and applying them as needed.

  • 2 Ways to Install Aircrack-ng on Kali Linux

    2 Ways to Install Aircrack-ng on Kali Linux

    In today’s digital landscape, ensuring the security of computer networks and systems is of utmost importance. Penetration testing, also known as ethical hacking, plays a crucial role in identifying vulnerabilities and strengthening the overall security posture. One such powerful tool used by security professionals is Aircrack-ng, a suite of wireless network assessment tools. This article aims to show you how to install Aircrack-ng on Kali Linux, a popular ethical hacking operating system, enabling you to harness the capabilities of this versatile tool for effective penetration testing. For this tutorial, you can also use Linux VPS and save yourself a lot of time and resources. So, let’s dive in and explore the installation process step-by-step, unlocking the potential of Aircrack-ng on your Kali Linux environment.

    Requirements

    1. Kali Linux OS: Aircrack-ng is usually pre-installed in Kali Linux. Make sure you have the latest version of Kali Linux installed.
    2. Root Access: You need to have root access or superuser privileges to install and use Aircrack-ng.
    3. Wireless Adapter: Aircrack-ng requires a compatible wireless adapter that supports monitor mode and packet injection. Not all wireless adapters are compatible, so ensure that you have a supported adapter. You can check the Aircrack-ng website for a list of compatible wireless adapters.
    4. Dependencies: Aircrack-ng has some dependencies that you need to install. To install these dependencies, open a terminal and run the following command:
    sudo apt-get install build-essential libssl-dev libnl-3-dev libnl-genl-3-dev ethtool

    If you need to buy Linux VPS server, we suggest you to use the various plans offered on our website, which have a wide variety of locations and immediate delivery.

    Aircrack-ng Installing Methods on Kali Linux

    Once you have met these requirements, you should be able to install and use Aircrack-ng on Kali Linux.

    A security tool for penetration testing - How to Install Aircrack-ng on Kali Linux

    A. Installing Aircrack-ng on Kali Linux Using the apt Package Manager

    Well, now it’s time to learn how you can install Aircrack-ng on Kali Linux using the apt package manager. This is the first method of the two methods explained in this article.

    • Open a Kali Linux terminal.
    • Update the package lists by running the command:
    sudo apt update
    • Install Aircrack-ng by running the command:
    sudo apt install aircrack-ng

    The installation process will begin, and you will be prompted to confirm the installation. Type ‘Y‘ and hit Enter.

    • Once the installation is complete, you can start using Aircrack-ng.

    That’s it! Using this method you can easily download and install Aircrack-ng on your Kali Linux machine. Some people may prefer to manually install this tool. If you’re one of those people, we’ve written the next section for you.

    B. Aircrack-ng Manual Installation on Kali Linux

    Another way of installing Aircrack-ng is the manual installation from the source. Here’s how:

    • Open a Kali Linux terminal.
    • Download the latest version of Aircrack-ng by running the command
    wget https://download.aircrack-ng.org/aircrack-ng-1.6.tar.gz
    • Extract the downloaded archive by running the command:
    tar -zxvf aircrack-ng-1.6.tar.gz
    • Change into the extracted directory by running the command:
    cd aircrack-ng-1.6
    • Compile Aircrack-ng by running the command:
    make
    • Install Aircrack-ng by running the command:
    sudo make install
    • The installation process will be complete, and you can start using Aircrack-ng.

    And here’s how you can manually install Aircrack-ng on your machine. Both methods are somehow similar but you can choose the method that suits you better.

    A security tool for penetration testing-How to Install Aircrack-ng on Kali Linux

    Troubleshooting Common Issues

    There are certain factors that you need for Aircrack-ng to run smoothly. We gathered a short list of them for you, so you can find the issue easier and faster.

    • Monitor mode not supported: Some wireless cards do not support monitor mode, which is required for certain Aircrack-ng functions. Check if your card supports it.
    • Driver issues: Ensure that your wireless card is compatible with Aircrack-ng and you’ve installed the correct drivers.
    • Interface not detected: If Aircrack-ng does not detect your wireless interface, try restarting the network manager or manually configuring the interface using commands like “ifconfig” or “iwconfig.”
    • Incorrect password or handshake capture: Make sure you have captured a valid handshake or have the correct password when attempting to crack a Wi-Fi password.
    • Insufficient signal strength: Weak signal strength can affect the success rate of Aircrack-ng attacks. Try moving closer to the target access point or using a more powerful wireless card.
    • False positives: Some antivirus software may falsely detect Aircrack-ng as a malicious tool. Disable or whitelist Aircrack-ng in your antivirus software if necessary.

    Conclusion

    In conclusion, Aircrack-ng is a powerful tool for assessing the security of wireless networks. By understanding its capabilities and following the installation guide provided, you can successfully install Aircrack-ng on Kali Linux. Remember to ensure compatibility with your wireless card, troubleshoot any issues that may arise, and exercise responsible and ethical usage. With Aircrack-ng at your disposal, you can enhance your network security knowledge and protect against potential vulnerabilities.

  • How to Install and Uninstall Samba on AlmaLinux 8

    How to Install and Uninstall Samba on AlmaLinux 8

    Samba is a widely used open-source software suite that allows interoperability between Linux and Windows systems, enabling file and print sharing across networks. AlmaLinux 8 is a popular Linux distribution that is a drop-in alternative to CentOS 8. This guide will teach you about install and uninstall Samba on AlmaLinux 8, ensuring seamless integration between your AlmaLinux system and Windows-based networks.

    Requirements

    To install Samba on AlmaLinux 8, you need to meet the following requirements:

    – Access to an AlmaLinux 8 machine with root privileges.

    – Internet connectivity to download the necessary packages.

    – RAM: It is recommended to have at least 2 GB or more.

    If you need to buy a Linux VPS server to run Samba, we suggest you to use the various, high-quality and location-variety plans offered on our website.

    How to Install Samba on AlmaLinux 8

    install samba on almalinux

    In the first step, you should install Samba on AlmaLinux 8 by executing the following command:

    sudo dnf install samba samba-client

    SMB is a daemon that handles the actual transfer and sharing operations and nmb performs the NetBIOS name resolutions and allows resources to appear in Windows while browsing the network.

    After installing the packages, you need to start and enable the SMB and the NMB daemons at the boot:

    sudo systemctl enable --now {smb,nmb}

    AlmaLinux has a firewalld that is enabled by default. The firewall blocks other connections of computers trying to access the Samba service. In this step, you need to allow the proper ports through the firewalld with the help of the following command:

    sudo firewall-cmd --permanent --add-service=samba
    sudo firewall-cmd --reload

    You can add the –zone option to the above command if configuration is needed.

    How to Create a Samba User on AlmaLinux 8

    You can setup a Samba Share without the need for an account, But it’s better for people who connect to Samba Share to create user accounts. Each Samba user needs a normal user account on the AlmaLinux account.

    You can create a new Samba account by running the following command:

    sudo adduser -M sambauser -s /sbin/nologin

    The -M option is the short form for –no-create-home, and the -s option allows you to specify a shell: /sbin/nologin. There is no need to set a password for a user account, just a password for the Samba service.

    You can create a Samba password for the newly created user by entering the following command:

    sudo smbpasswd -a sambauser

    How to Configure Samba to Share a Directory on AlmaLinux 8

    Now it’s time to configure the directory you want to share via Samba:

    configure samba on almalinux 8

    In this tutorial, a shared directory is made at /mnt/shared:

    sudo mkdir -p /mnt/shared
    sudo chmod 777 /mnt/shared

    Then you need to open your configuration file with your favorite text editor to edit it:

    sudo nano /etc/samba/smb.conf

    Next, you should go all the way to the bottom of the file and paste the following lines:

    [neuronvm]
            path = /mnt/shared
            guest ok = no
                    read only = no

    Save the changes to the file and exit it. You should restart the Samba service by entering the following command for the changes to take effect:

    sudo systemctl restart {smb,nmb}

    Now it’s time to allow Samba through SELinux. SELinux is also enabled by default in AlmaLinux. You should assign the appropriate context to your shared directory and files. This allows Samba to function while keeping SELinux in the recommended enforcing mode:

    sudo chcon -R -t samba_share_t /mnt/shared

    Connecting to Samba Server from AlmaLinux

    Other systems should be able to connect to this directory to upload or download files from the Samba server.

    First, you need to create an empty directory by entering the following command to use it as a mount point for the remote Samba share:

    sudo mkdir -p /mnt/fileserver

    In this step, you need to install the remote Samba share to the folder you just created by executing the following command:

    sudo mount -t cifs -o username-sambauser //192.168.1.10/neuronvm/mnt/fileserver

    Enter the password to mount Samba Share.

    Now you should access your Samba share from Gnome’s file manager:

    smb://127.0.0.1/neuronvm/

    Remember to replace the IP address.

    The Samba share will be installed on the left side of the Gnome file manager.

    How to Uninstall Samba on AlmaLinux 8

    You can remove Samba from your AlmaLinux server by executing the following command:

    sudo apt-get remove --purge samba

    If you have client problems, enter the following command to remove the SMB client:

    sudo apt-get remove --purge smbclient libsmbclient

    Conclusion

    Install and uninstall Samba on AlmaLinux 8 is a straightforward process that allows you to enhance cross-platform compatibility between Linux and Windows systems. By following the steps outlined in this comprehensive guide, you can easily set up Samba to share files and printers, and later remove it if desired. Enjoy seamless integration and efficient network collaboration between your AlmaLinux system and Windows-based networks.

    FAQ

    Where is the Samba configuration file on Linux?

    You can find the samba configuration file at /etc/samba/smb. conf.

    Which one is better, Samba or FTP?

    If we compare these two, FTP is much faster and more efficient than samba. file transferring protocol in FTP is better.

  • Tutorial Configure and Use Ansible on AlmaLinux 8.5

    Tutorial Configure and Use Ansible on AlmaLinux 8.5

    Ansible is known as a free, open-source automation tool that allows system administrators to configure and control hundreds of nodes from a central server without having to install any agents on the nodes. This tool is a better management solution than Poppet and Chef due to its easy installation and use. You will learn How to Configure and Use Ansible on AlmaLinux 8.5 by studying this article.

    Requirements

    To configure and use Ansible on AlmaLinux 8.5, you need to ensure that your system meets the following requirements:

    – Processor: You will need at least a 1 GHz processor or higher.

    – RAM: It is recommended to have at least 4 GB of RAM for better performance.

    – Storage: A minimum of 20 GB of storage should be sufficient.

    – Network Connectivity: A stable network connection is essential for Ansible to communicate with the target hosts.

    Notice that to use this helpful tool on distributions like AlmaLinux you can purchase Cheap Linux VPS servers from NeuronVM.

    How to Install Ansible on AlmaLinux 8.5

    First, you need to make sure the system is up to date using the following commands:

    sudo dnf update
    sudo dnf upgrade

    Then you need to install EPEL using the following command:

    sudo dnf install epel-release

    Then, use the following commands to install Python 3 and run other dependencies:

    sudo dnf module install python3.8
    sudo alternatives --config python

    In this step, install Ansible from the official AlmaLinux repository:

    sudo dnf install ansible

    To install Ansible, you need to run the following commands:

    sudo pip3 install setuptools-rust wheel
    sudo pip3 install --upgrade pip
    sudo python3 -m pip install ansible

    When done, it is time to confirm the installation using the following command:

    ansible –version

    How to Configure Ansible on AlmaLinux 8.5

    In the first step of this step, to configure Ansible, it is necessary to install OpenSSH-server using the following commands:

    sudo dnf install openssh-server
    sudo systemctl enable ssh

    Enter the following command to allow port 22 in the firewall:

    sudo ufw allow 22

    You can use the following commands for RHEL or CentOS Linux VPS:

    sudo dnf install openssh-server
    sudo systemctl enable sshd

    You should allow port 22 in the firewall:

    sudo firewall-cmd --zone=public --permanent --add-port=22/tcp

    To perform these steps, you must have three servers: Ubuntu, Debian, and CentOS:

    Ubuntu – server_IP
    CentOS – server_IP
    Debian – server_IP

    How to Use Ansible on AlmaLinux 8.5

    In the continuation of this article, we intend to teach you step-by-step How to Use Ansible on AlmaLinux 8.5.

    How to Generate SSH Keys on Ansible Installed AlmaLinux

    To install the package or deploy it on the target remote server, create a pair of SSH keys on the localhost and then press them on each remote server so that you can manage them using SSH.

    Type the command and press the Enter key several times until the keys are generated:

    ssh-keygen

    How to Copy SSH keys to Remote or Target Servers

    Press the key created in almaLinux to the remote servers that you want to configure or manage. You need to know the username of the remote server or use the default root user.

    Tip: Replace Linda with sudo users on remote servers or use the default root and replace the IP address with the server address.

    ssh-copy-id linda@Ubuntu – server_IP
    ssh-copy-id linda@CentOS – server_IP
    ssh-copy-id linda@Debian – server_IP

    Run the following command on each server so that you can run sudo commands on them using Ansible without entering a password:

    echo "$(whoami) ALL=(ALL) NOPASSWD:ALL" | sudo tee /etc/sudoers.d/$(whoami)

    How to Inventory Files for Remote Hosts

    In Ansible, create a file that defines the entire remote host or target system that you want to manage. Also create a group of hosts, for example, a group is a web server that only includes a remote system that runs some web servers such as Apache, and another group can be a Mysql group running a Database server and so on. The Inventory file is also important because it uses the commands, modules, and tasks in a playbook.

    Now as you have three remote servers in this tutorial, add them to the Ansible host file:

    sudo dnf install nano -y
    sudo nano /etc/ansible/hosts

    If you do not want to create a group, put your remote server IP address or domain name in the file, and specify a group before adding IP addresses.

    Edit the default values of the Ansible inventory file that already contains samples, or add your own samples at the bottom of the file. In this section, add two servers to a host group identified by the web servers, and one server is defined as an individual.

    They are in a group called a web server. The advantage of creating a group is that you can issue a command to a complete set of servers defined in that particular group of hosts.

    Inventory with custom SSH port

    If you are using a server that does not have a default SSH port 22, for example, a server running on a Docker, you can also define it by its IP address:

    your_IP_address ansible_user=remote-server-username ansible_port=49153

    Tip: In the above command, replace the IP address, remote-server username, and port number and add it to the inventory file:

    Tutorial-Configure-and-Use-Ansible-on-AlmaLinux-8.5.2

    To save the file, just press Ctrl + X, Type “-y” and press Enter.

    How to Ping all added Remote Servers on AlmaLinux

    Once you have successfully created the inventory file, check if Ansible can ping all the added servers for it. To ping group server:

    ansible -m ping group-name

    example:

    ansible -m ping web-servers

    To ping a single server:

    ansible -m ping ip-address

    example:

    ansible -m ping your_IP_address

    Finally, you can type the following command to ping all:

    ansible -m ping all

    Ansible Commands to Install Packages from Remote Servers

    Suppose you want to install the Apache web server on a group of servers that you have defined in the Inventory file. Use a web server, as we have already mentioned here, you can use any name you give to your server group.

    Command Syntax 

    You can use the following command as a syntax command:

    ansible -b --become-method = sudo -m shell -a 'command to execute' web servers

    For example, running an update and installing the Apache server on Debian and Ubuntu remote systems simultaneously:

    ansible -b --become-method=sudo -m shell -a 'apt update' webservers

    Installing Apache

    You can use the following command to install Apache:

    ansible -b --become-method=sudo -m shell -a 'apt install -y apache2' webservers
    Tutorial-Configure-and-Use-Ansible-on-AlmaLinux-8.5.webp

    To execute the same command above for all defined remote PCs:

    ansible -b --become-method=sudo -m shell -a 'apt install -y apache2 ' all

    For non-grouped hosts, you can use their IP address, for example, the following command:

    ansible -b --become-method=sudo -m shell -a 'apt install -y apache2' your_IP_address

    Also use other commands that do not require sudo, such as working time check:

    ansible -m command -a "uptime" group-name/ip-adress

    The command can be used for other purposes, just replace the uptime with the command you want to run on the remote server and rename the group/IP address.

    Troubleshooting

    1) Ansible command not found:

    If you are unable to run Ansible commands on AlmaLinux, it could be due to the package not being installed. You can troubleshoot this by running the following command to ensure Ansible is installed on your system.

    sudo dnf install ansible

    2) SSH connection failure:

    Ansible relies on SSH for remote execution, so if you are unable to establish an SSH connection to the target host, it will prevent Ansible from working. Troubleshoot this issue by checking if SSH is installed and correctly configured on both the Ansible control node and the target host.

    3) Inventory file not found:

    Ansible uses an inventory file to define the hosts and groups it manages. If Ansible is unable to locate the inventory file, it will fail to execute playbooks. Verify the path to the inventory file specified in the Ansible configuration file (typically “ansible.cfg“) and ensure that it exists.

    4) Permission denied for SSH key:

    When using SSH key-based authentication, ensure that the SSH key is correctly configured and has the necessary permissions. The private key file should have permissions set to 600 (i.e., only readable by the owner) to prevent permission-denied errors.

    5) Playbook syntax errors:

    If you encounter issues with running Ansible playbooks, syntax errors within the playbook YAML files could be the cause. Use the “ansible-playbook” command with the “–syntax-check” flag to validate the syntax of the playbook files and troubleshoot any errors or warnings reported by the command. Also, ensure that indentation is correct, as YAML is sensitive to correct indentation.

    Conclusion

    In this tutorial, you have learned how to configure and use Ansible on AlmaLinux 8.5. We covered the installation process, configuring Ansible using an inventory file, testing the connection to remote hosts, writing Ansible playbooks, and running them to automate tasks on your server infrastructure. With Ansible, you can easily manage and deploy applications, configurations, and systems across your network, saving time and effort in the process. Experiment with Ansible, explore its vast capabilities and unlock the power of automation in your IT operations.

  • Unearthing the Best Game on Linux in 2023

    Unearthing the Best Game on Linux in 2023

    It’s close to the end of the year and almost everyone is listing their favorite products of 2023. We thought it would be a cool idea to take a look at the best games on Linux in 2023, because why not?! As the popularity of Linux continues to rise, gamers are eagerly searching for the best game that embraces this open-source operating system. In this article, we delve into the world of Linux gaming to discover the ultimate champion in 2023. By examining some of the most beloved Linux games, including Minecraft, Dota 2, and Team Fortress 2, we aim to determine the best game on Linux in 2023, captivating players with its immersive gameplay and unrivaled Linux support.

    Remember to play these games you can easily get a Linux VPS and try them out right away.

    Best Linux Game 2023

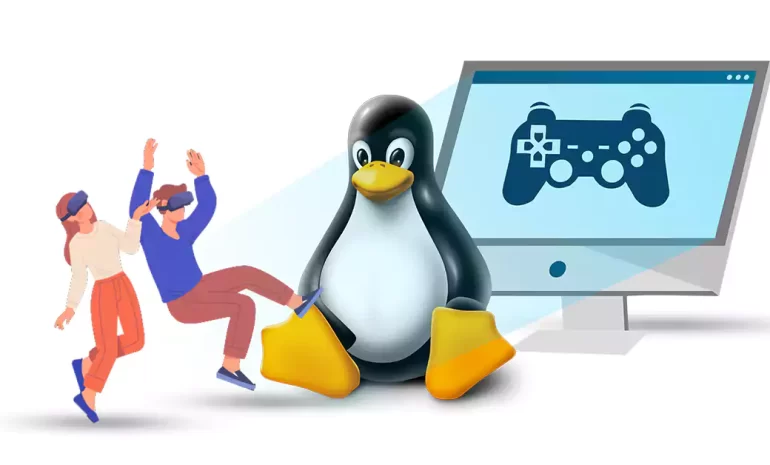
    Introduction to Linux Gaming

    In 2023, the concept of Linux gaming is gaining traction and becoming increasingly popular in the IT world. A considerable 3% of individuals prefer Linux over other operating systems, contributing to the growth of this dedicated and enthusiastic community.

    Notably, the Linux gaming community is known for its active and inquisitive nature, always seeking new experiences and improvements. As a result, the number of game developers choosing to publish their games on the Linux OS is steadily increasing, exemplifying the expanding support for this platform.

    The Linux gaming community is known for its active and inquisitive nature, always seeking new experiences and improvements.

    Choosing The Best Linux Game 2023

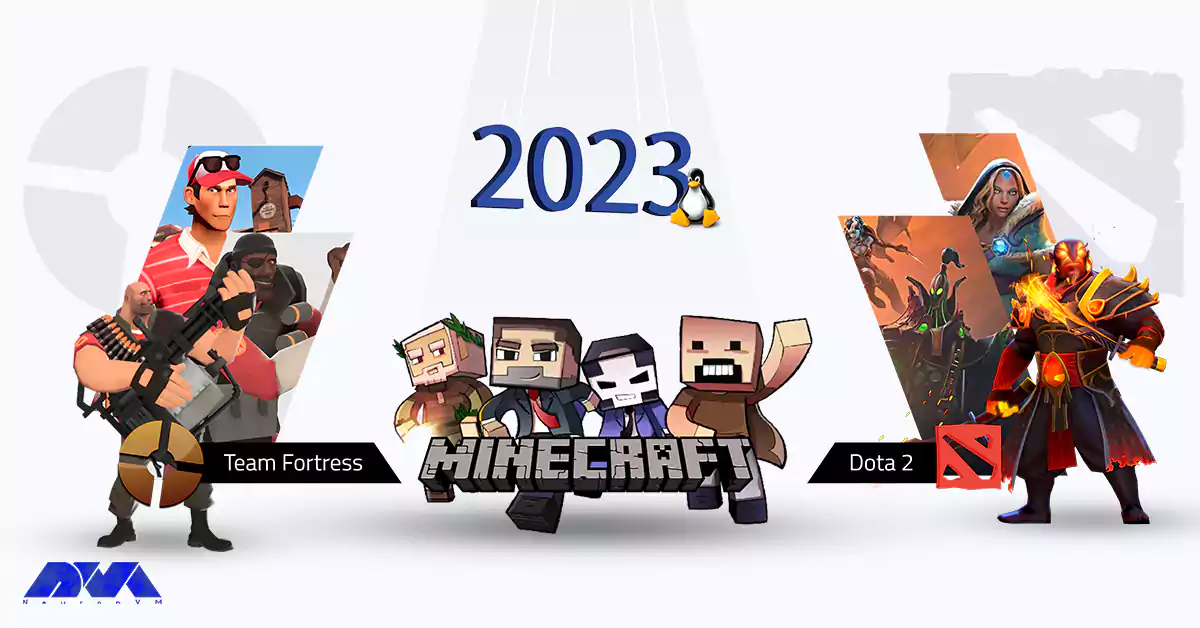
    In 2023, when choosing the top Linux game, certain contenders stand out: Minecraft, Dota 2, and Team Fortress 2.

    Minecraft, known for its widespread acclaim, supports Linux and has a large player base. Players can freely express themselves and build virtual worlds in the sandbox-style gameplay of Minecraft. Regular updates and user-created content enhance the appeal for Linux enthusiasts, making Minecraft a formidable candidate for the best Linux game in 2023.

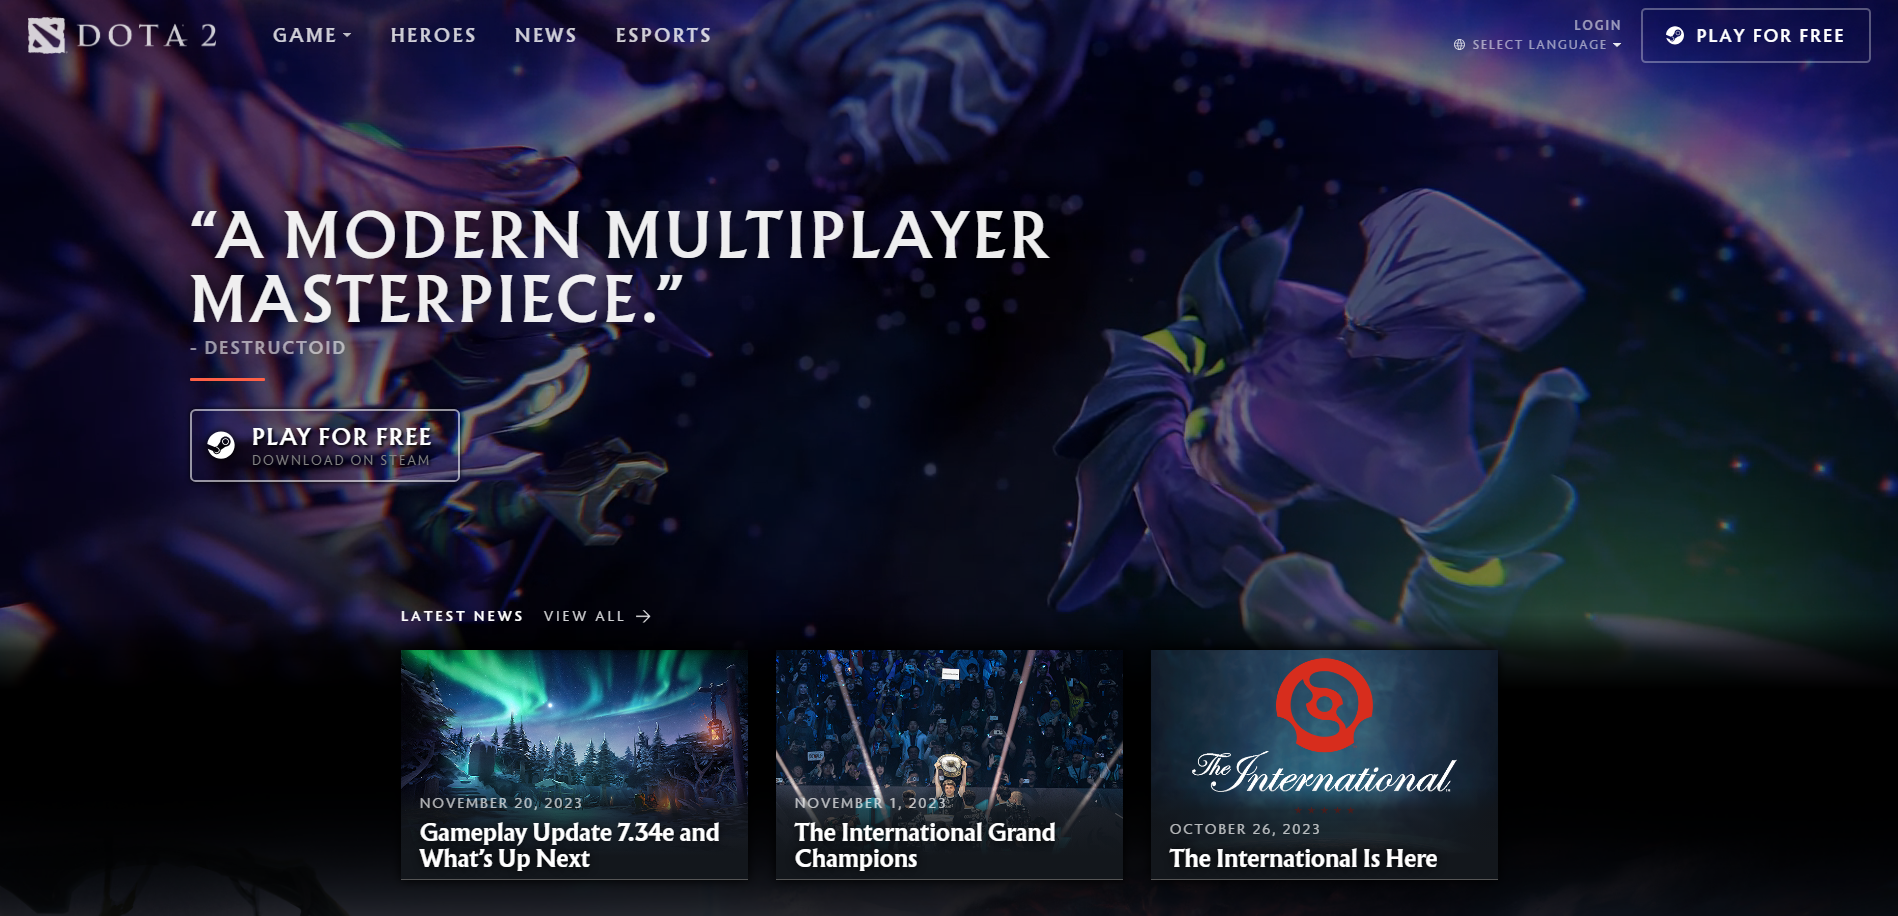
    Dota 2, a MOBA game, is well-known in the gaming community. Developed by Valve Corporation, it offers exciting gameplay on Linux. It has complex mechanics and a strong competitive scene, attracting a dedicated fan base. Regular updates and an active community contribute to its ongoing success. With its popularity and longevity, Dota 2 could be the best Linux game in 2023.

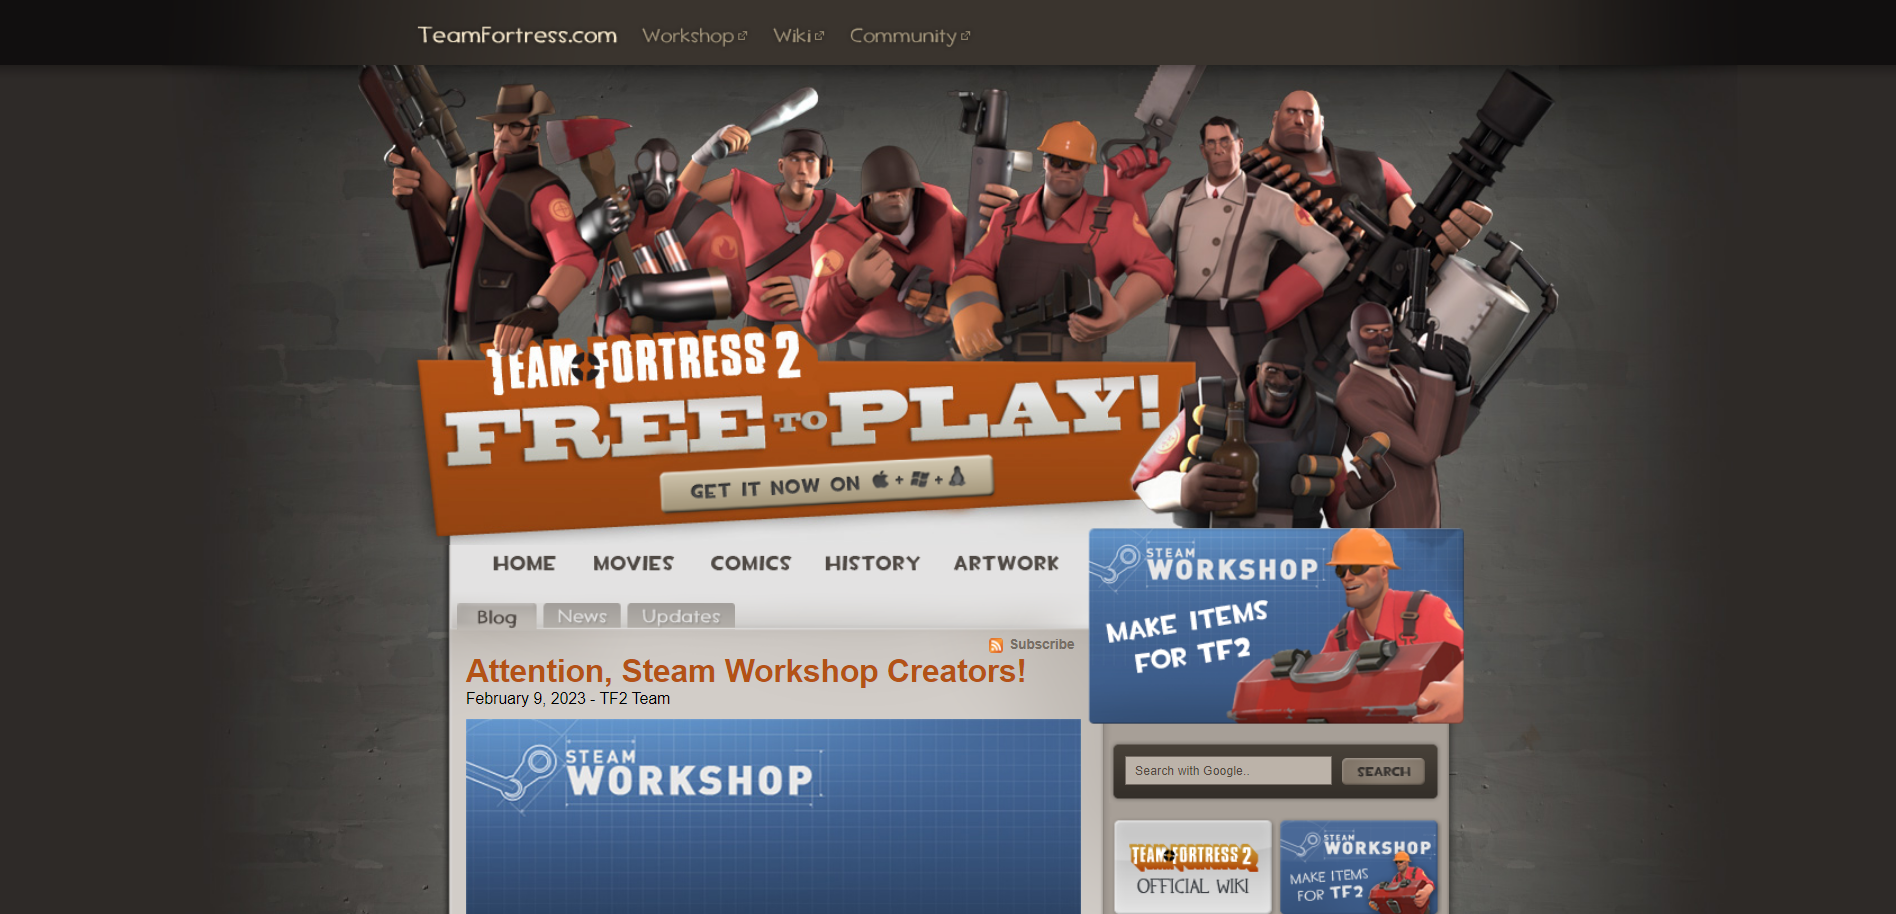
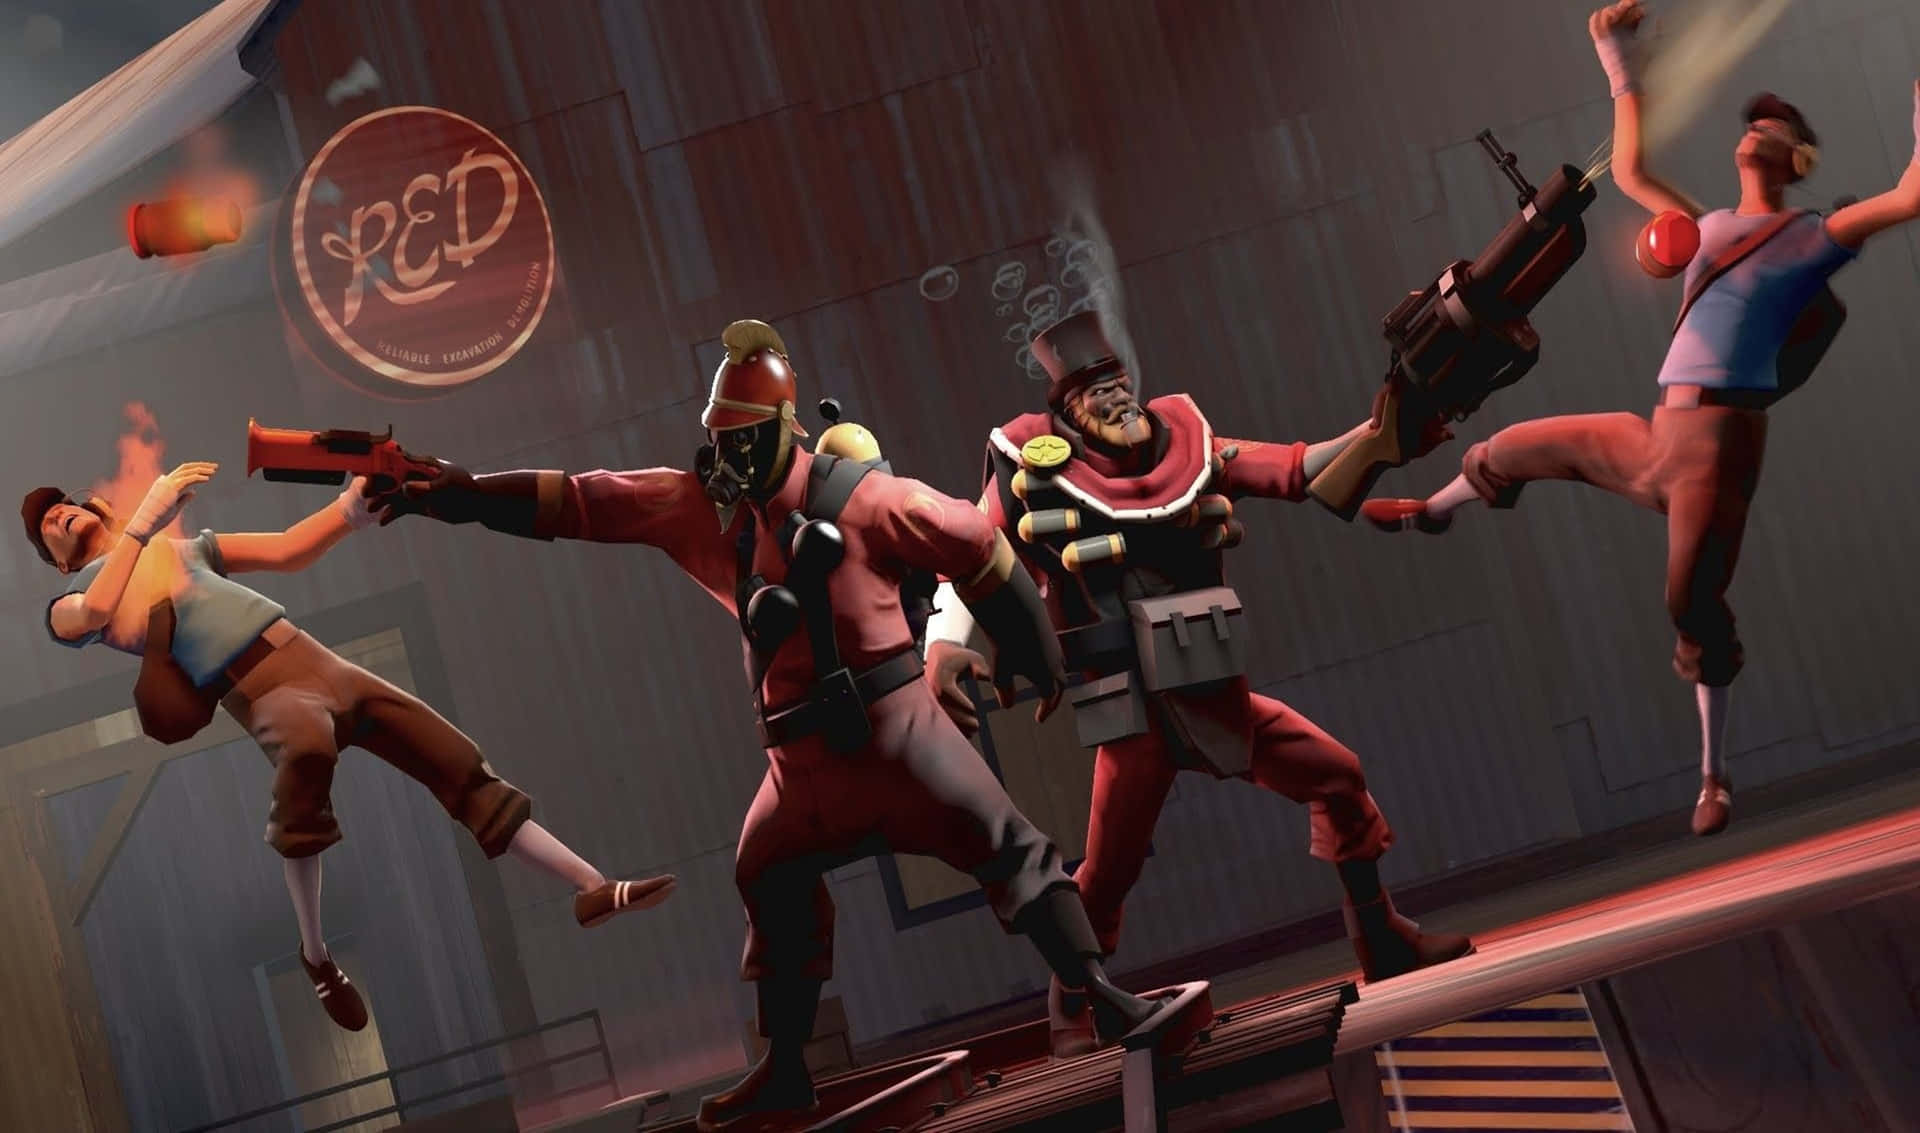
    While Minecraft and Dota 2 are great, it’s important not to overlook Team Fortress 2. Developed by Valve Corporation, this class-based first-person shooter has a Linux version. With its fast-paced action, unique character classes, and vibrant art style, Team Fortress 2 offers a refreshing gaming experience. It also has well-balanced gameplay, extensive customization options, and a dedicated community that shares user-generated content. Due to its solid reputation and enduring popularity, Team Fortress 2 is a strong contender for the best Linux game in 2023.
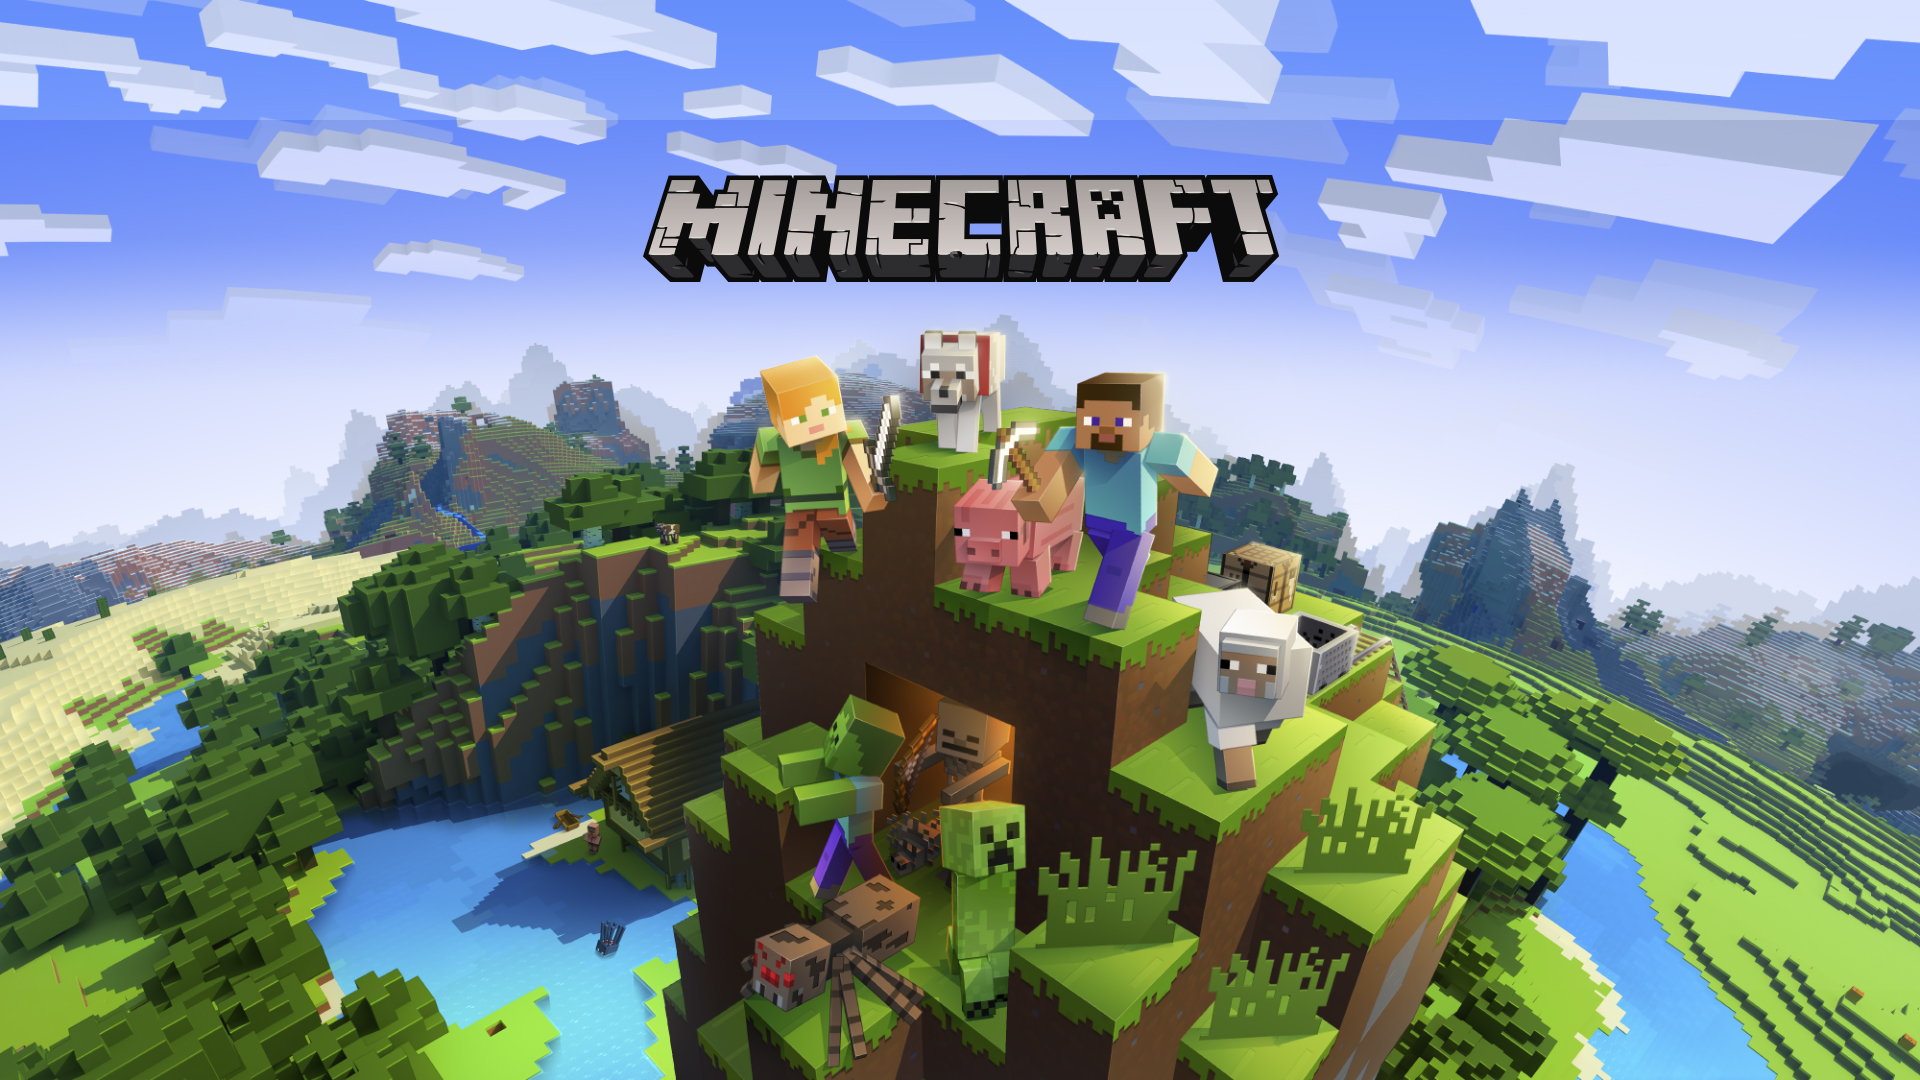
    Team Fortress, Minecraft, Dota 2

    Minecraft

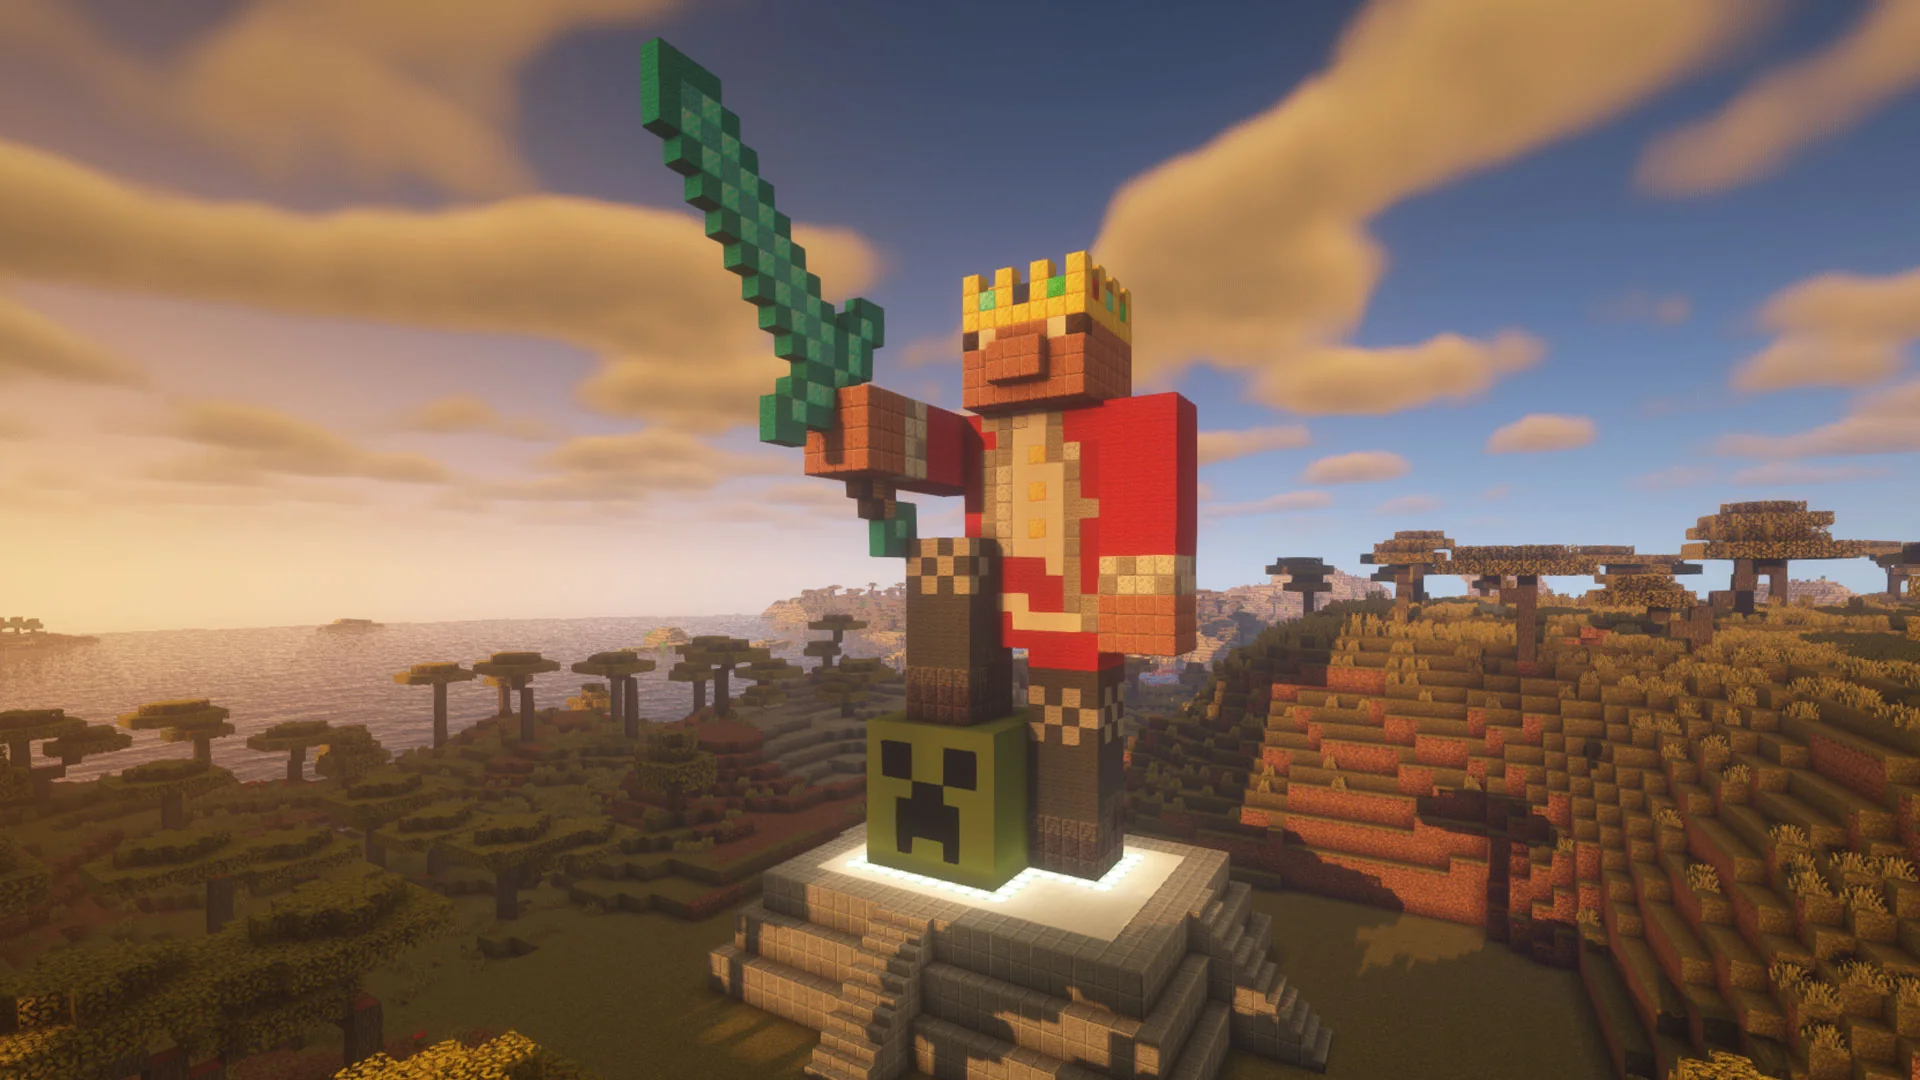
    A Limitless World of Creativity! Minecraft is a game that needs no introduction, stands as a true testament to the possibilities of Linux gaming. With its ever-expanding player base, Minecraft shines as the epitome of the best game on Linux in 2023.

    The game’s sandbox nature encourages players to explore, craft, and build their virtual worlds in an open-ended environment, captivating users with its boundless creativity. With robust modding support and a passionate community sharing their creations, Minecraft remains a firm favorite even as the gaming landscape evolves.

    Best Game on Linux 2023: Minecraft

    Dota 2 

    The Unparalleled MOBA Experience Among the avid Linux gaming community, Dota 2 has emerged as a frontrunner, offering an unrivaled multiplayer experience. This free-to-play multiplayer online battle arena (MOBA) game has taken center stage in the competitive gaming scene.

    Captivating players with its strategic depth and heart-pounding action, Dota 2 is without a doubt a beast of a game. Dota 2’s Linux support remains top-notch, solidifying its place in the list of the best games on Linux in 2023. With regular updates, a dedicated community, and an intense esports scene, Dota 2 continues to thrive and enthrall players on the Linux platform.

    Best Game on Linux 2023: Dota 2

    Fortress 2

    Timeless Multiplayer Brilliance Team Fortress 2. It’s a classic title known for its engaging multiplayer gameplay, remains an all-time favorite in the Linux gaming community. The game’s iconic art style, fast-paced action, and well-balanced classes contribute to its status as one of the best games on Linux in 2023.

    With ongoing developer support, regular updates, and an enthusiastic player base, Team Fortress 2 has stood the test of time. It showcases its dedication to the Linux platform and its ability to maintain a loyal following.

    Best Game on Linux 2023: Team Fortress 2

    Comparison and Winner: The Best Game on Linux 2023

    From the start I knew that Choosing between these three really awesome games is going to be really hard. And yes, my estimation was true! When it comes to choosing the best Linux game of 2023, a lot of it just comes to personal taste. But I want to say putting everything together, my choice is still Minecraft! It’s The Undisputed Best Game on Linux 2023.

    While Dota 2 and Team Fortress 2 both have their merits, Minecraft emerges as the winner, securing its position as the best game on Linux in 2023.

    With its limitless creativity, tremendous modding potential, and cross-platform compatibility, Minecraft has built a thriving community that transcends platforms. Additionally, Minecraft’s extensive support for Linux and its constant evolution through updates and community-driven content continually rejuvenate the game. It actually makes the game an unparalleled experience for Linux gamers.

    The Winner: Minecraft

    Final Thoughts

    Linux gaming gains traction as more game developers prioritize support for the open-source operating system. Minecraft claims the top spot in 2023, thanks to its captivating gameplay and dedicated community involvement. Like its rivals being Dota 2 and Team Fortress 2, Minecraft excels in fostering boundless imagination and creativity. The unwavering Linux support for Minecraft ensures that Linux gamers can rely on it for immersive gaming experiences well into the future.

  • A Clever Guide to Installing Linux Mint from a USB Drive

    A Clever Guide to Installing Linux Mint from a USB Drive

    Linux Mint, a free and open-source operating system, is built upon the Linux kernel and the Ubuntu operating system. It has been specifically developed to be accessible and intuitive for Linux beginners. Linux Mint features various desktop environments such as Cinnamon, MATE, and Xfce, ensuring diverse user experiences to meet individual preferences. Additionally, it comes with pre-installed applications for web browsing, document editing, and multimedia playback among other functionalities. The primary objective of Linux Mint is to deliver a dependable, robust, and high-performing operating system for personal computers. In the continuation of this article, learn the best installation method with the tutorial on Installing Linux Mint from a USB Drive.

    Prerequisites

    The prerequisites to install Linux Mint are:

    1. A computer with at least:

    – 1 GHz CPU

    – 1 GB of RAM (Recommended: 2 GB or more)

    – 20 GB of free disk space (Recommended: 40 GB or more)

    – A USB of at least 4 GB in size.

    2. A stable internet connection (recommended for downloading updates during installation)

    How to Install Linux Mint from a USB Drive

    Before we start the installation process, we recommend you to visit the Linux VPS server plans offered on our website and use them if you wish.

    To install Linux Mint from a USB drive, follow the steps below:

    Step1: Download the Linux Mint ISO file from the official website. Make sure to choose the correct architecture and edition for your system:

    how to install linux mint

    Step2: Insert a USB drive with at least 4GB of storage into your computer.

    Step3: Download and install a utility called “Rufus” from the official website. Rufus is used to create a bootable USB drive:

    download rufus

    Step4: Open Rufus and select your USB drive from the “Device” drop-down menu.

    Under the “Boot selection” section, click on the “Select” button and locate the Linux Mint ISO file you downloaded earlier:

    Leave the other settings as default unless you have specific requirements.

    Click on the “Start” button to begin creating the bootable USB drive. Rufus will erase all data on the USB drive before copying the Linux Mint ISO file onto it:

    download rufus and using it to install linux mint

    Tip: Once Rufus finishes creating the bootable USB drive, safely remove the USB drive from your computer.

    Step5: Restart your computer and access the boot menu. The key to access the boot menu may vary between computers, but it is typically F12, F10, or Esc.

    Step6: Select the USB drive from the boot menu to boot into the Linux Mint live environment.

    Step7: Click on Start Linux Mint 21.1 Cinnamon 64-bit as shown below:

    Select-Linux-Mint to install

    Step8: Once inside the live environment, double-click on the “Install Linux Mint” icon on the desktop:

    install-linux-mint-from-live-usb

    Step9: Follow the on-screen instructions to choose the language, keyboard layout, and installation options:

    keyboard layout selection on linux mint

    *

    install codecs on linux mint

    **

    erase disk and install mint - installing linux mint from usb drive

    ***

    timezone selection linux mint - installing linux mint from usb drive

    Tip: When prompted, select the option to install Linux Mint alongside your existing operating system or choose the custom partitioning option if you want to manually partition your hard drive.

    Step 10: Set a username and password for your Linux Mint installation:

    create user while installing linux mint- installing linux mint from usb drive

    Wait for the installation process to finish.

    linux mint welcome screen - installing linux mint from usb drive

    Congratulations, you have successfully installed Linux Mint from a USB drive!

    Linux Mint Installation Troubleshooting

    If you are experiencing issues while installing Linux Mint, here are some troubleshooting steps you can try:

    1- Check your hardware compatibility

    2- Check the installation media

    3- Try a different installation method

    4- Disable Secure Boot

    5- Check the BIOS/UEFI settings

    6- Try different installation options

    7- Check for hardware issues

    8- Update firmware and drivers

    If you encounter any problem while installing Linux Mint, ask us about it in the comments section below this post.

    Conclusion

    In conclusion, installing Linux Mint from a USB drive is a straightforward and convenient process. It allows users to take advantage of the benefits of Linux Mint without altering their existing operating system. With its user-friendly interface and abundance of features, Linux Mint is an excellent choice for both beginners and experienced users.