Samba is a widely used open-source software suite that allows interoperability between Linux and Windows systems, enabling file and print sharing across networks. AlmaLinux 8 is a popular Linux distribution that is a drop-in alternative to CentOS 8. This guide will teach you about install and uninstall Samba on AlmaLinux 8, ensuring seamless integration between your AlmaLinux system and Windows-based networks.
Requirements
To install Samba on AlmaLinux 8, you need to meet the following requirements:
– Access to an AlmaLinux 8 machine with root privileges.
– Internet connectivity to download the necessary packages.
– RAM: It is recommended to have at least 2 GB or more.
If you need to buy a Linux VPS server to run Samba, we suggest you to use the various, high-quality and location-variety plans offered on our website.
How to Install Samba on AlmaLinux 8
In the first step, you should install Samba on AlmaLinux 8 by executing the following command:
sudo dnf install samba samba-client
SMB is a daemon that handles the actual transfer and sharing operations and nmb performs the NetBIOS name resolutions and allows resources to appear in Windows while browsing the network.
After installing the packages, you need to start and enable the SMB and the NMB daemons at the boot:
sudo systemctl enable --now {smb,nmb}
AlmaLinux has a firewalld that is enabled by default. The firewall blocks other connections of computers trying to access the Samba service. In this step, you need to allow the proper ports through the firewalld with the help of the following command:
You can add the –zone option to the above command if configuration is needed.
How to Create a Samba User on AlmaLinux 8
You can setup a Samba Share without the need for an account, But it’s better for people who connect to Samba Share to create user accounts. Each Samba user needs a normal user account on the AlmaLinux account.
You can create a new Samba account by running the following command:
sudo adduser -M sambauser -s /sbin/nologin
The -M option is the short form for –no-create-home, and the -s option allows you to specify a shell: /sbin/nologin. There is no need to set a password for a user account, just a password for the Samba service.
You can create a Samba password for the newly created user by entering the following command:
sudo smbpasswd -a sambauser
How to Configure Samba to Share a Directory on AlmaLinux 8
Now it’s time to configure the directory you want to share via Samba:
In this tutorial, a shared directory is made at /mnt/shared:
Then you need to open your configuration file with your favorite text editor to edit it:
sudo nano /etc/samba/smb.conf
Next, you should go all the way to the bottom of the file and paste the following lines:
[neuronvm]
        path = /mnt/shared
        guest ok = no
                read only = no
Save the changes to the file and exit it. You should restart the Samba service by entering the following command for the changes to take effect:
sudo systemctl restart {smb,nmb}
Now it’s time to allow Samba through SELinux. SELinux is also enabled by default in AlmaLinux. You should assign the appropriate context to your shared directory and files. This allows Samba to function while keeping SELinux in the recommended enforcing mode:
sudo chcon -R -t samba_share_t /mnt/shared
Connecting to Samba Server from AlmaLinux
Other systems should be able to connect to this directory to upload or download files from the Samba server.
First, you need to create an empty directory by entering the following command to use it as a mount point for the remote Samba share:
sudo mkdir -p /mnt/fileserver
In this step, you need to install the remote Samba share to the folder you just created by executing the following command:
sudo mount -t cifs -o username-sambauser //192.168.1.10/neuronvm/mnt/fileserver
Enter the password to mount Samba Share.
Now you should access your Samba share from Gnome’s file manager:
smb://127.0.0.1/neuronvm/
Remember to replace the IP address.
The Samba share will be installed on the left side of the Gnome file manager.
How to Uninstall Samba on AlmaLinux 8
You can remove Samba from your AlmaLinux server by executing the following command:
sudo apt-get remove --purge samba
If you have client problems, enter the following command to remove the SMB client:
Install and uninstall Samba on AlmaLinux 8 is a straightforward process that allows you to enhance cross-platform compatibility between Linux and Windows systems. By following the steps outlined in this comprehensive guide, you can easily set up Samba to share files and printers, and later remove it if desired. Enjoy seamless integration and efficient network collaboration between your AlmaLinux system and Windows-based networks.
FAQ
Where is the Samba configuration file on Linux?
You can find the samba configuration file at /etc/samba/smb. conf.
Which one is better, Samba or FTP?
If we compare these two, FTP is much faster and more efficient than samba. file transferring protocol in FTP is better.
Ansible is known as a free, open-source automation tool that allows system administrators to configure and control hundreds of nodes from a central server without having to install any agents on the nodes. This tool is a better management solution than Poppet and Chef due to its easy installation and use. You will learn How to Configure and Use Ansible on AlmaLinux 8.5 by studying this article.
Requirements
To configure and use Ansible on AlmaLinux 8.5, you need to ensure that your system meets the following requirements:
– Processor: You will need at least a 1 GHz processor or higher.
– RAM: It is recommended to have at least 4 GB of RAM for better performance.
– Storage: A minimum of 20 GB of storage should be sufficient.
– Network Connectivity: A stable network connection is essential for Ansible to communicate with the target hosts.
Notice that to use this helpful tool on distributions like AlmaLinux you can purchase Cheap Linux VPS servers from NeuronVM.
How to Install Ansible on AlmaLinux 8.5
First, you need to make sure the system is up to date using the following commands:
sudo dnf update
sudo dnf upgrade
Then you need to install EPEL using the following command:
sudo dnf install epel-release
Then, use the following commands to install Python 3 and run other dependencies:
In the continuation of this article, we intend to teach you step-by-step How to Use Ansible on AlmaLinux 8.5.
How to Generate SSH Keys on Ansible Installed AlmaLinux
To install the package or deploy it on the target remote server, create a pair of SSH keys on the localhost and then press them on each remote server so that you can manage them using SSH.
Type the command and press the Enter key several times until the keys are generated:
ssh-keygen
How to Copy SSH keys to Remote or Target Servers
Press the key created in almaLinux to the remote servers that you want to configure or manage. You need to know the username of the remote server or use the default root user.
Tip: Replace Linda with sudo users on remote servers or use the default root and replace the IP address with the server address.
Run the following command on each server so that you can run sudo commands on them using Ansible without entering a password:
echo "$(whoami) ALL=(ALL) NOPASSWD:ALL" | sudo tee /etc/sudoers.d/$(whoami)
How to Inventory Files for Remote Hosts
In Ansible, create a file that defines the entire remote host or target system that you want to manage. Also create a group of hosts, for example, a group is a web server that only includes a remote system that runs some web servers such as Apache, and another group can be a Mysql group running a Database server and so on. The Inventory file is also important because it uses the commands, modules, and tasks in a playbook.
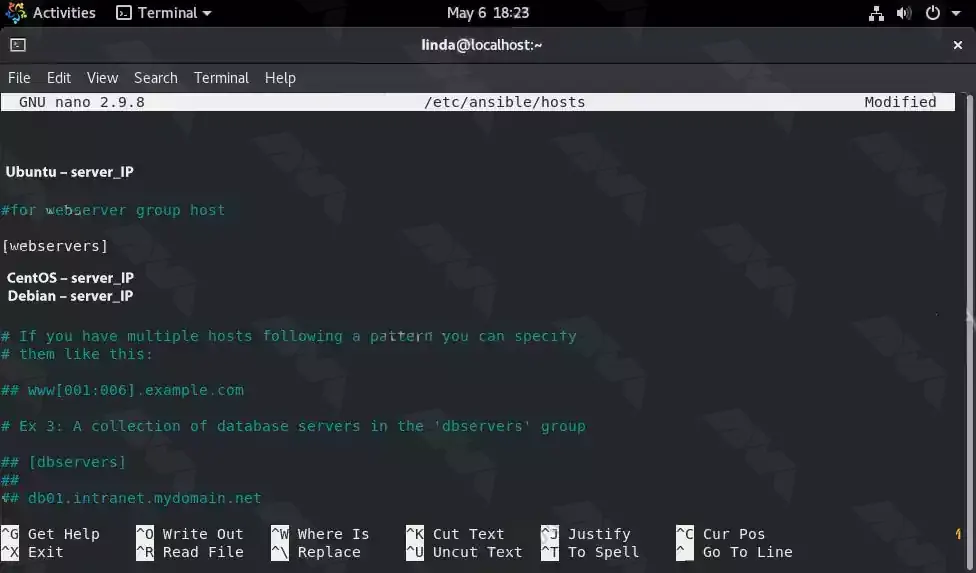
Now as you have three remote servers in this tutorial, add them to the Ansible host file:
sudo dnf install nano -y
sudo nano /etc/ansible/hosts
If you do not want to create a group, put your remote server IP address or domain name in the file, and specify a group before adding IP addresses.
Edit the default values of the Ansible inventory file that already contains samples, or add your own samples at the bottom of the file. In this section, add two servers to a host group identified by the web servers, and one server is defined as an individual.
They are in a group called a web server. The advantage of creating a group is that you can issue a command to a complete set of servers defined in that particular group of hosts.
Inventory with custom SSH port
If you are using a server that does not have a default SSH port 22, for example, a server running on a Docker, you can also define it by its IP address:
Tip: In the above command, replace the IP address, remote-server username, and port number and add it to the inventory file:
To save the file, just press Ctrl + X, Type “-y” and press Enter.
How to Ping all added Remote Servers on AlmaLinux
Once you have successfully created the inventory file, check if Ansible can ping all the added servers for it. To ping group server:
ansible -m ping group-name
example:
ansible -m ping web-servers
To ping a single server:
ansible -m ping ip-address
example:
ansible -m ping your_IP_address
Finally, you can type the following command to ping all:
ansible -m ping all
Ansible Commands to Install Packages from Remote Servers
Suppose you want to install the Apache web server on a group of servers that you have defined in the Inventory file. Use a web server, as we have already mentioned here, you can use any name you give to your server group.
Command Syntax
You can use the following command as a syntax command:
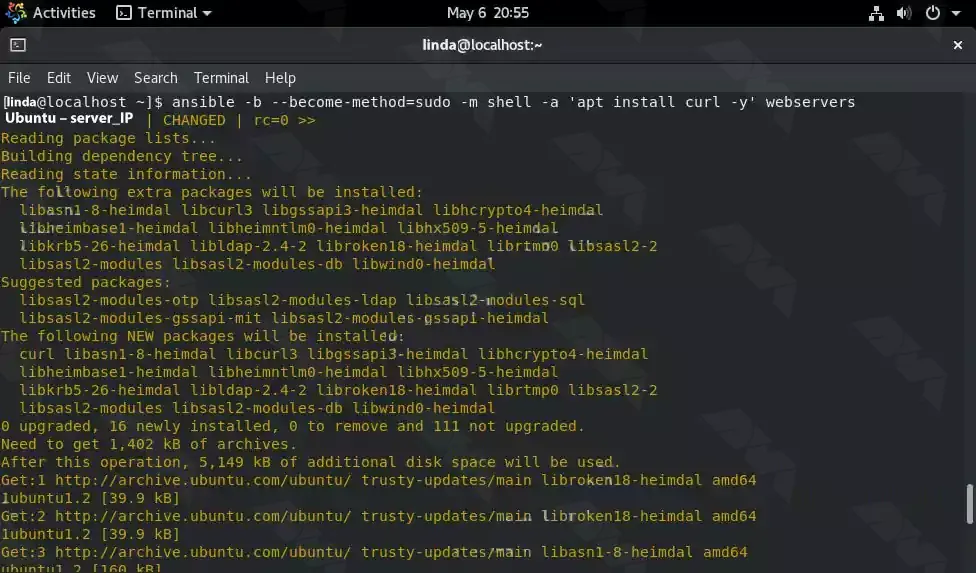
ansible -b --become-method = sudo -m shell -a 'command to execute' web servers
For example, running an update and installing the Apache server on Debian and Ubuntu remote systems simultaneously:
ansible -b --become-method=sudo -m shell -a 'apt update' webservers
Installing Apache
You can use the following command to install Apache:
Also use other commands that do not require sudo, such as working time check:
ansible -m command -a "uptime" group-name/ip-adress
The command can be used for other purposes, just replace the uptime with the command you want to run on the remote server and rename the group/IP address.
Troubleshooting
1) Ansible command not found:
If you are unable to run Ansible commands on AlmaLinux, it could be due to the package not being installed. You can troubleshoot this by running the following command to ensure Ansible is installed on your system.
sudo dnf install ansible
2) SSH connection failure:
Ansible relies on SSH for remote execution, so if you are unable to establish an SSH connection to the target host, it will prevent Ansible from working. Troubleshoot this issue by checking if SSH is installed and correctly configured on both the Ansible control node and the target host.
3) Inventory file not found:
Ansible uses an inventory file to define the hosts and groups it manages. If Ansible is unable to locate the inventory file, it will fail to execute playbooks. Verify the path to the inventory file specified in the Ansible configuration file (typically “ansible.cfg“) and ensure that it exists.
4) Permission denied for SSH key:
When using SSH key-based authentication, ensure that the SSH key is correctly configured and has the necessary permissions. The private key file should have permissions set to 600 (i.e., only readable by the owner) to prevent permission-denied errors.
5) Playbook syntax errors:
If you encounter issues with running Ansible playbooks, syntax errors within the playbook YAML files could be the cause. Use the “ansible-playbook” command with the “–syntax-check” flag to validate the syntax of the playbook files and troubleshoot any errors or warnings reported by the command. Also, ensure that indentation is correct, as YAML is sensitive to correct indentation.
Conclusion
In this tutorial, you have learned how to configure and use Ansible on AlmaLinux 8.5. We covered the installation process, configuring Ansible using an inventory file, testing the connection to remote hosts, writing Ansible playbooks, and running them to automate tasks on your server infrastructure. With Ansible, you can easily manage and deploy applications, configurations, and systems across your network, saving time and effort in the process. Experiment with Ansible, explore its vast capabilities and unlock the power of automation in your IT operations.
Varnish Cache technology increases performance by keeping duplicate web pages in memory. In effect, when a user searches for a web page, it receives a cached copy, bypassing the time-consuming process of waiting for the original web server to recreate the page. This function provides better control over the performance of your website and allows for more fine-tuning for the main results. Because Varnish Cache is open source and user-friendly, it is used by millions of websites worldwide to increase performance. In this post, we will tell you how you can Experience Lightning-Fast Website Loading with Varnish Cache on AlmaLinux.
What is Varnish Cache?
Varnish Cache is an open-source web application accelerator that helps optimize web pages for faster loading. It does this by storing copies of web pages in memory. When a user requests a web page, it retrieves the cached version instead of waiting for the original web server to generate the page from scratch.
This reduces server load and page load times, making websites more responsive and improving user experience. Varnish also allows you to control how pages are stored in your cache using HTTP cache control headers. Using these, you can specify when the cached version of a page should expire before Varnish sends it back to the origin server to be regenerated.
This gives you more control over the performance of your website and allows you to fine-tune it even more for optimal results. Because it’s open-source and relatively easy to use, millions of websites around the web now use Varnish Cache to improve performance.
Benefits of using Varnish Cache on AlmaLinux
Varnish Cache on AlmaLinux offers several significant benefits that enhance the performance and user experience of a website:
1- Faster Content Delivery: Varnish Cache stores a copy of the most commonly accessed pages on your website in memory. This reduces the need for frequent requests to your server, resulting in significantly faster delivery of content to end users.
2- Reducing Server Load: Because Varnish Cache serves content from its own cache instead of relying on the server to regenerate content for each request, it significantly reduces server load and increases the overall performance of your website.
3- Scalability: Cache Varnish can help your website handle increased traffic more easily by serving cached content to a large number of concurrent users. This feature makes it a great tool for scalability.
4- Ability to Customize: Varnish Cache uses a flexible programming language called VCL. This allows you to create specific storage rules and policies tailored to your website’s needs.
5- Increasing Accessibility: In cases where the backend server is down or unreachable, Varnish Cache can serve the old version of the content from its cache. As a result, the availability and uptime of your site will increase.
6- Edge Side Includes (ESI) support: Cache Varnish supports ESI. A technology that allows you to cache different parts of a web page separately. This feature is especially useful for websites with dynamic content.
7- GeoIP support: With Varnish, you can serve localized content using GeoIP extensions to identify users’ geographic locations.
These benefits make Varnish Cache an invaluable tool on AlmaLinux for anyone looking to increase the performance, scalability, and reliability of their web server.
Installing Varnish Cache on AlmaLinux
Before we start teaching how to install Varnish Cache on AlmaLinux, it is necessary to have a Linux VPS server with the AlmaLinux operating system.
In the first step, you must log in to the server using the following command through SSH as the root user:
ssh root@IP_ADDRESS -p PORT_NUMBER
Update the packages on the server with the help of the following command:
dnf update -y
Disable the default Varnish repo by running the following command:
dnf module disable varnish
Now you need to install the EPEL repository:
dnf install epel-release -y
Then you can install the Varnish repo using the following command:
In this section, we will teach how to configure the varnish cache on AlmaLinux. In order for Varnish to listen on port 80, you need to open the configuration file using a text editor:
nano /usr/lib/systemd/system/varnish.service
Now you can change the default port 6081 to port 80 using the following command:
ExecStart=/usr/sbin/varnishd -a :80 -a localhost:8443,PROXY -p feature=+http2 -f /etc/varnish/default.vcl -s malloc,2g
After saving the configuration file and exiting it, you can now reload the systemd daemon by running the following command:
sudo systemctl daemon-reload
Finally, to apply the changes, restart Varnish with the help of the following command:
sudo systemctl restart varnish
To configure Nginx to work with Varnish, you need to first install the Nginx package:
sudo dnf install nginx
Then you need to run the Nginx configuration file using a text editor:
Also, reload the firewall settings to apply the new changes:
sudo firewall-cmd --reload
Testing website performance with Varnish Cache
In this section, we are going to check the performance of cache varnish using wrk. Note that wrk is a modern tool written in C language and used to measure HTTP. This tool can be used to load test web servers with many requests per second. To install wrk, it is necessary to first install some build tools for C and git using the following command:
In some cases, the varnish may show incorrect behavior. In other words, it doesn’t behave the way you want it to. There are a few places you can check to troubleshoot these, including:
varnishlog
/var/log/syslog
/var/log/messages
In the following, we will introduce you to the basic troubleshooting method in Varnish.
1) Varnish won’t Start
Sometimes the varnish may not start. There are many reasons for not starting Varnish. Start Varnish in debug mode with the following command:
The output of the above command will be as follows:
Using old SHMFILE
Platform: Linux,2.6.32-21-generic,i686,-smalloc,-hcritbit
200 193
-----------------------------
Varnish Cache CLI.
-----------------------------
Type 'help' for command list.
Type 'quit' to close CLI session.
Type 'start' to launch worker process.
Now you can tell the main process to start the cache by running the command:
start
bind(): Address already in use
300 22
Could not open sockets
2) Varnish is Crashing (panics)
The next thing is that when the varnish wears off, the child’s processing may be damaged. Note that when Varnish encounters this, the save process will be disabled in a controlled manner. It should be noted that this failure may be due to incorrect configuration. You can check the status of panic messages by running the following command:
panic.show
The output of the above command may be as follows:
Assert error in ESI_Deliver(), cache_esi_deliver.c line 354:
  Condition(i == Z_OK || i == Z_STREAM_END) not true.
thread = (cache-worker)
ident = Linux,2.6.32-28-generic,x86_64,-sfile,-smalloc,-hcritbit,epoll
Backtrace:
  0x42cbe8: pan_ic+b8
  0x41f778: ESI_Deliver+438
  0x42f838: RES_WriteObj+248
  0x416a70: cnt_deliver+230
  0x4178fd: CNT_Session+31d
  (..)
3) Varnish is Crashing (segfaults)
The next error you may encounter is Varnish crashing (segfaults). In other words, Varnish may encounter a segmentation fault. When this event is registered by the child process, the core is unloaded and the child process is restarted. But to debug a segfault, you need to provide some data.
First, you need to make sure you have installed Varnish with debug symbols. After that, you need to make sure that kernel dump is allowed in the main shell:
ulimit -c unlimited
Open the kernel with gdb and issue the following command. By doing this you will get a stack trace of the thread that caused the segfault error:
bt
4) Varnish gives me Guru Meditation
To fix this problem, it is necessary to first find the corresponding log entries in varnishlog. Since it can be difficult to trace the entries, you can set varnishlog to log all your 503 errors using the following command:
$ varnishlog -q 'RespStatus == 503' -g request
To get varnishlog to process the entire shared memory log, just run the following command:
$ varnishlog -d -q 'RespStatus == 503' -g request
Best practices for using Varnish Cache on AlmaLinux
To get the most out of Varnish Cache in AlmaLinux, it’s important to follow best practices. Some key best practices include:
1) Fine-tune the Varnish configuration: Experiment with different TTL values and URL patterns to find the optimal configuration for your website.
2) Monitor website performance: Regularly monitor website performance using tools like GTmetrix or Pingdom.
3) Keep Varnish Cache up-to-date: Update Varnish Cache regularly to make sure you’re using the latest version with the latest features and bug fixes.
Alternatives to Varnish Cache
10 alternatives to Varnish Cache are:
1) ApacheBooster
2) Squid-Cache
3) Speed Kit
4) WampServer
5) W3 Total Cache
6) Amazon DynamoDB Accelerator (DAX)
7) TwicPics
8) F5 NGINX
9) F5 NGINX Plus
10) Varnish Software
Conclusion
As you read in this article, Varnish Cache is a powerful open-source web application accelerator that is widely used to increase the speed and performance of websites. By storing cached versions of web pages, it significantly reduces server load and improves page load times. Customization through its configuration language allows tailored storage rules based on specific website needs. Due to the use of Varnish cache and its importance, in this article, we tried to teach you how to Lightning-Fast Website Loading with Varnish Cache on AlmaLinux.
If you are going to prevent malicious traffic or data coming from the Internet or other networks to your system, you need to know what a firewall is and how it works. Generally, a firewall is a device and network security mode that monitors incoming and outgoing network traffic and blocks or allows packets or information data to pass based on its security rules. In this post, with an Ultimate Guide to Protect Your System from Cyber Threats, we will tell you how to Secure Your AlmaLinux with Firewall.
Introduction to Firewall in AlmaLinux
A firewall is used to prevent sabotage and security of any system of this system. We must say that every system connected to the Internet needs its firewall to be active to prevent malware attacks and the penetration of dangerous data. It is interesting to note that AlmaLinux and other RHEL-based Linux distributions use firewalls to manage firewall rules. Before we start and explain to you the methods of Secure Your AlmaLinux with Firewall, we recommend you choose and buy a plan from the Linux VPS server plans presented on our website. After installing AlmaLinux on our servers, you will enjoy their high quality.
How to Secure Your AlmaLinux with Firewall
In the rest of this article, we will comprehensively teach you how to Secure Your AlmaLinux with Firewall.
Harden Access with SSH
If we want to describe SSH with a simple example, we should say that it is like the door of your house. Therefore, securing the front door will keep your home safe. When you purchase a Linux server, your service provider will provide you with SSH root access. To increase security, you should start with SSH access. In the following, we will teach you 5 ways to harden SSH access.
To carry out the steps that we will tell in the rest of this article, it is enough to open the configuration file using your desired text editor:
nano /etc/ssh/sshd_config
It is also necessary to save and exit the configuration file after completing each step. Then, to apply the changes, you must restart the sshd file by running the following command:
systemctl restart sshd
1: Setting an idle timeout
The first method is to exit SSH if the user is inactive. Therefore, you can search for the following command inside the configuration file:
#ClientAliveInterval 0
Now, if you want to set the idle time to 5 minutes, for example, you need to set it in seconds. That is 300 seconds:
ClientAliveInterval 300
2: Limit the maximum authentication attempts
In the second method, you can reduce the number of unsuccessful attempts to enter the system. (3 unsuccessful logins):
MaxAuthTries 3
3: Changing the SSH Port number
Another very effective method is to change the SSH port. Given that the default SSH port is 22, you can easily change it to the desired number by running the following command. (for example port 1022):
#Port 22
and change it to:
Port 1022
4: Disable Tunneling and forwarding
It should be noted that SSH tunnels allow connections made to a local port to be forwarded to a remote device over a secure channel. To disable some unnecessary options related to tunneling and forwarding, you can search for the following commands in the configuration file:
#AllowAgentForwarding yes
#AllowTcpForwarding no
#PermitTunnel no
Now you need to change the above commands as below and save the configuration file and exit it:
AllowAgentForwarding no
AllowTcpForwarding no
PermitTunnel no
5: Using authentication without a password and public key
To generate your public key on a desktop computer on different platforms, you need to do the following. If you are using OpenSSH Client on Windows, you must use the following command in the command prompt:
ssh-keygen
But if you don’t use OpenSSH Client, you can generate SSH keys using PuTTYgen.
Also, if you use MacOS or Linux operating systems, you can use the following command:
ssh-keygen
Again, it is necessary to run the configuration file after entering the server by running the following command:
nano /.ssh/authorized_keys
Put your public key in a row in the file and save it. After doing this you can connect to SSH using your private key. Now it’s time to run the following command:
/etc/ssh/sshd_config
Finally, you need to paste the following lines in the desired path:
AlmaLinux has a default firewall but we recommend CSF firewall for intrusion detection, intrusion detection, and security in this article. This firewall is very popular among the users of the popular control panels CPanel, DirectAdmin, and Webmin. To install the CSF firewall, you must first install the necessary prerequisites using the following command:
dnf install perl-libwww-perl.noarch perl-LWP-Protocol-https.noarch perl-GDGraph wget tar perl-Math-BigInt
Now you can run the following commands to download, extract and install CSF Firewall:
cd /usr/src
wget https://download.configserver.com/csf.tgz
tar -xzf csf.tgz
cd csf
sh install.sh
In the next step, you can use the following command to check if your server has iptable modules or not:
perl /usr/local/csf/bin/csftest.pl
After learning the relevant explanations, you should turn off the test mode:
sed 's/TESTING = "1"/TESTING = "0"/g' /etc/csf/csf.conf
Finally, you can restart the CSF firewall by running the following command:
csf -r
Install ClamAV Antivirus
ClamAV is an open-source, cross-platform, anti-malware toolkit developed by Cisco Systems Inc. This kit contains a new protection system to deal with Trojans, viruses, worms, and other types of malware. This antivirus is basically a light and command-line-based system that is combined with other tools such as FreshClam, ClamDaemon, ClamDTop, ClamScan, and Clamtk and offers many valuable features such as automatic database update and real-time scanning and scheduled scanning.
You can run the following commands to install ClamAV on AlmaLinux:
dnf install clamav
dnf install clamd
You should know that ClamAV uses FreshClam to check for new database versions periodically. Run ClamAV to update the signature database. To do this, just follow the instructions below step by step.
Stop the freshclam service by running the following command:
systemctl stop clamav-freshclam
You can also run Freshclam using the following command:
freshclam
Run the following command again to start the Freshclam:
systemctl start clamav-freshclam
After completing the installation process, you can use the following command to run a full system scan and remove malware:
clamscan --infected --recursive --remove /
AlmaLinux update
As you know AlmaLinux is a binary-compatible fork of the RHEL and CentOS base. On the other hand, RHEL and CentOS are secure enough for an enterprise environment. However, it is important to try to always keep AlmaLinux up-to-date by running the following command:
dnf update all
How to enable the Firewall on AlmaLinux
In the first step, you can check the status of the firewall on AlmaLinux by running the following command:
systemctl status firewalld
Check the services configured in the firewall using the following command:
sudo firewall-cmd --list-all
You can stop the firewall with the help of the following command:
sudo systemctl stop firewalld
You can also run the following command to start the firewall again:
sudo systemctl start firewalld
To restart the process, use the following command:
sudo systemctl restart firewalld
As you know, by default, the firewall starts automatically after the system boots. To disable the firewall, you can use the following command:
systemctl disable firewalld
It should be noted that if the above command is executed with the systemctl stop firewalld command, the firewall will be disabled forever.
The interesting thing is that you can reactivate the firewalld service at any time:
sudo systemctl enable firewalld
Conclusion
In this article that you read, we tried to fully familiarize you with the steps to secure AlmaLinux so that you can be safe from cyber-attacks. We also tried to teach you how to Secure Your AlmaLinux with Firewall. In this way, now you can easily install FirewallD on AlmaLinux and other RPM-based Linux systems. By doing this you will partially secure your system from the outside world.
By reading the step-by-step guide of this article, you can easily Install Virtualizor on AlmaLinux 8. Virtualization is a creative and very practical idea and solution to create a virtual version of storage devices, servers, networks, and other resources that were once only physically available to users. You can virtualize with Virtualizor.
What is Virtualizor?
Virtualizor is a powerful web-based admin control panel for KVM, XEN, and OpenVZ virtualizers. This control panel forms a very powerful virtualization system by combining the virtualizers. One of the most important features of this powerful panel is the limitation of bandwidth for each virtual server.
Virtualizor lets you create virtual servers with just one click. Virtualizor uses the OS Template feature and through this option, installing operating systems and creating a virtual server is done in less than a few seconds.
Features of Virtualizor
1. Configure the Server on which Virtualizor is installed
noos: Add noos=true as a parameter to avoid downloading the DomU operating system for DomU
beta: If you add beta=true as a parameter, you can test the new version of the existing Virtualizor
nested_virt: Adding nested_virt=1 as a parameter enables nested virtualization on the server. Enabling this will install a new kernel to enable nested virtualization
Ivg (optional): If you are going to use LVM for the VPS storage
interface: You can specify the default interface you want to set. If not specified, it is considered eth0
license: You will get the internal license key, by opening the support ticket
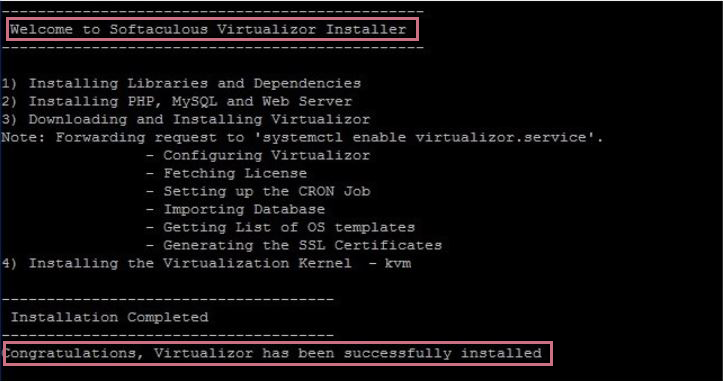
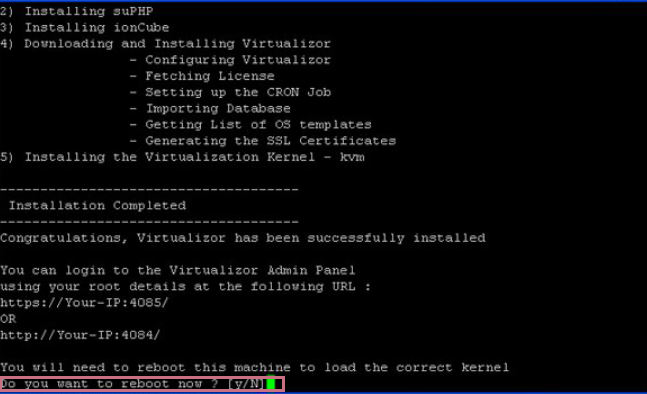
After completing the installation process, you will see the following output:
After the installation is complete, restart the system by typing and running “Y“:
/root/virtualizor.log is an installation process log file that is created after installation.
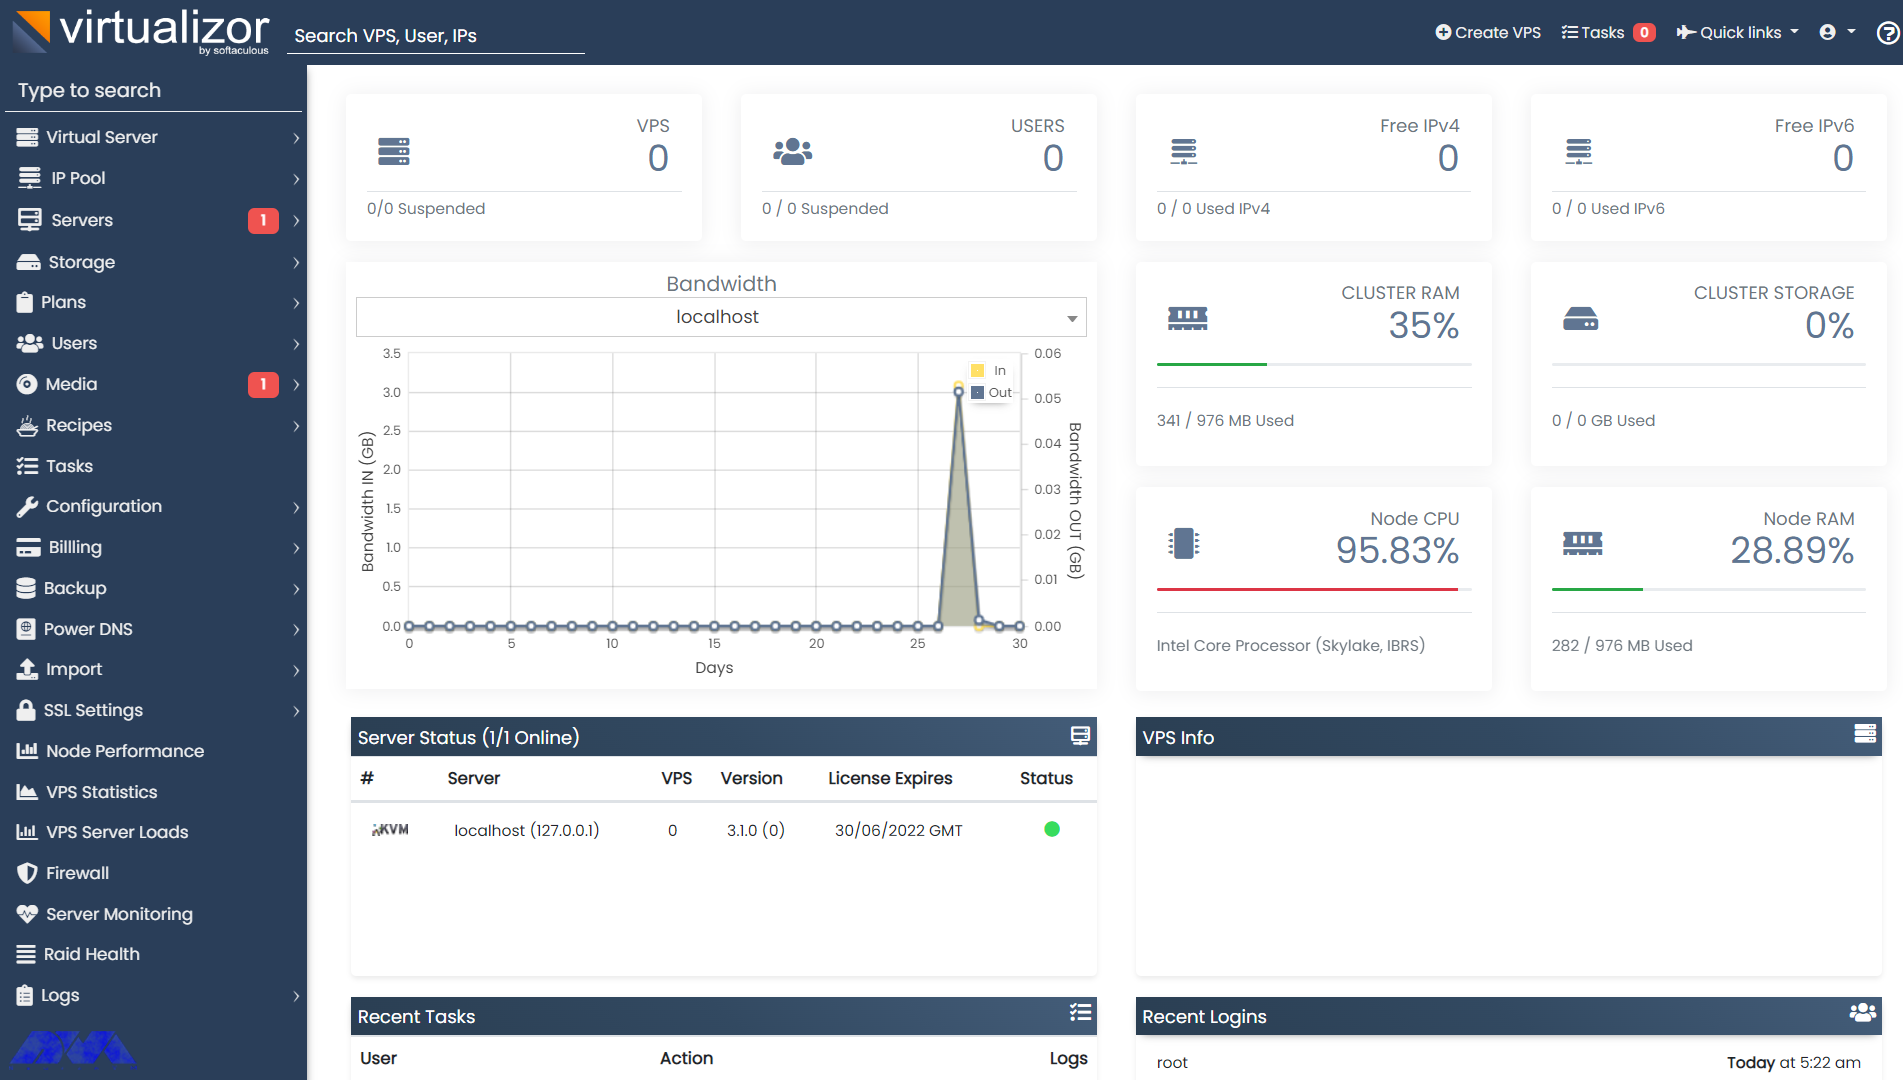
You can create a Storage and Virtual Server and also manage your server from the Admin Panel.
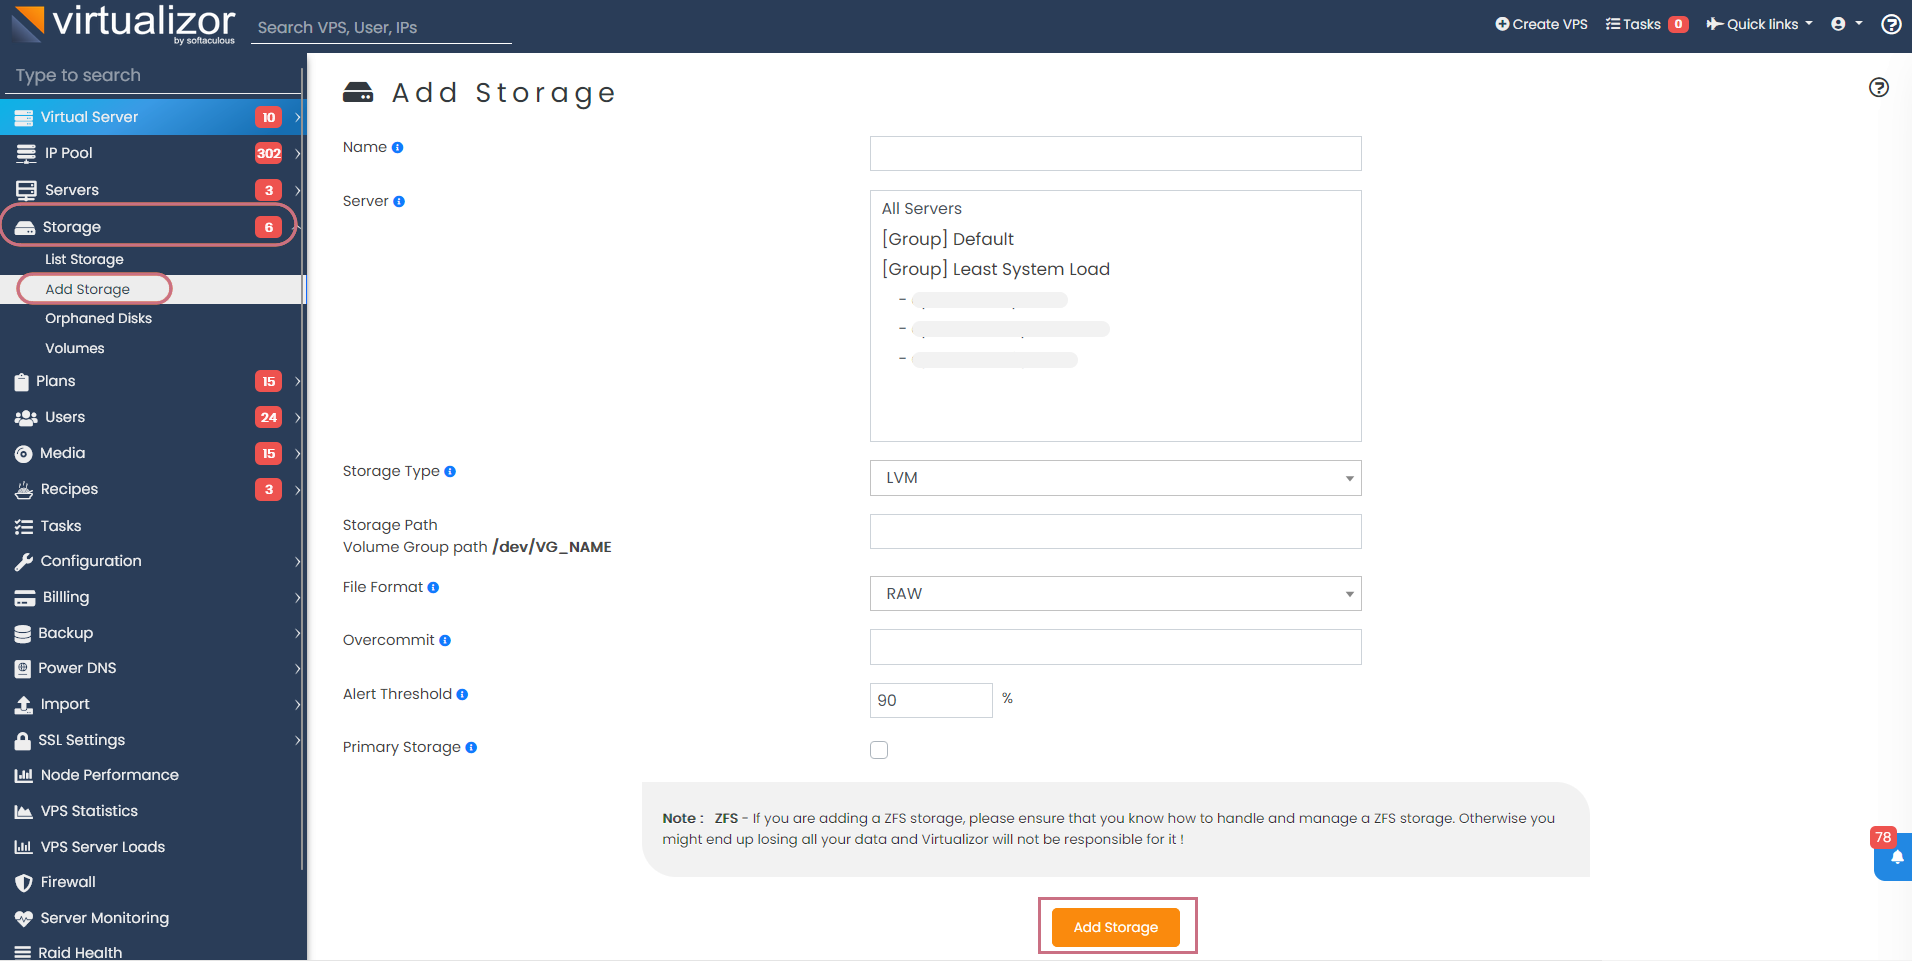
At this point, you need to define storage. To do this first, go to the Virtualizor Admin Panel and select Storage from the left column, and finally click Add Storage. Then fill in the details and define the storage:
As mentioned earlier, the network interface is considered eth0 by default. Therefore, to add the desired network interface to Virtualizor, you need to do the following steps:
1) Go to Virtualizor Admin Panel
2) Select Configuration
3) Click Save Settings
Manage the Bridge
A viifbr0 bridge is created by Virtualizor that detects the IP, Netmask, and GATEWAY from the following:
If you change the above file, remember to restart the Virtualizor network with the following command:
service virtnetwork restart
Enter the following command to start Virtualizor:
service virtnetwork start
And you can use the following command to stop Virtualizor:
service virtnetwork stop
You can Make the bridge permanent
Run the following commands to make the bridge permanent, so that, it can be started as soon as the operating system is booted, and the network is created.
Tip: You should have the bridge-utils package on your server backup ifcfg-eth0.
– Take a Backup from ifcfg-eth0.
/etc/sysconfig/network-scripts/ifcfg-eth0 directory will contains the content below:
Tip: If the eth0 is the NIC name, then you should change the interface name in that route file to viifbr0:
root# mv route6-eth0 route6-viifbr0
As the last step, you should restart the network.
We should mention that virtnetwork is out of work now and you should restart only with the network, so use the command below:
service network restart
Conclusion
This article taught you how to install Virtualizor on AlmaLinux 8 and also you learned how to log in to the Virtualizor Admin Panel. Users can manage VPS on dedicated servers with the help of Virtualizor. I hope this tutorial was useful for you.
FAQ
Is virtulizor suitable for AlmaLinux?
Yes, you can install virtulizor for this operating system. It is proper for Linux distributions, including AlmaLinux.
What is the maximum RAM and CPU for Virtualzor?
At least, you should dedicate 4 GB RAM and 64-bit CPU for using virtualizor. (8 GB is recommended)
Certainly, one of the important pillars of any network is having a monitoring system to check the structure of the network. Cacti is one of the free network monitoring software. If you want to compare the monitoring tools, Cacti is in a higher position in order to its open-source and availability of resources. If you follow this post until the end, you will learn how to Install and Configure Cacti on AlmaLinux 8 step by step.
What is Cacti?
Cacti make a connection to your devices using the SNMP protocol and analyze them during the interval. Cacti software is based on PHP/MySQL, which is basically installed on Linux Operating Systems and uses the RRDTool software to present its graphs. It should be noted that Cacti also allows you to provide a monitoring panel to your customers. In this software, you can specify which ports the subscriber will have access to after logging in. Cacti has made the monitoring process powerful by having a web-based management environment and various templates for different operating systems and devices.
Follow us in the continuation of this article by teaching how to install and configure Cacti on Almalinux.
How to Install Cacti on AlmaLinux 8
Cacti is a web-based tool, so you need to create an Apache web server on which to run Cacti. You can install the Apache web server by entering the following command:
sudo dnf install httpd -y
To start the Apache web server, execute the following command:
sudo systemctl start httpd
Now you should enter the following command to enable the Apache webserver:
sudo systemctl enable --now httpd
At this point, Cacti requires a database to store the collected data, which in this article uses the MariaDB database. To install the MariaDB database, execute the following command:
sudo dnf install -y mariadb-server mariadb
You should enter the following command to start the MariaDB database:
sudo systemctl start mariadb
Then you can use the following command to enable MariaDB to start on boot:
sudo systemctl enable mariadb
Since Cacti is written in PHP, PHP and PHP extensions should be installed. So use this command to add the Remi repository:
The next step is to create a database and user for the Cacti and then grant all the necessary privileges to the Cacti user. So, enter the following command:
mysql -u root -p

MariaDB [(none)]> CREATE DATABASE cactidb;
MariaDB [(none)]> GRANT ALL ON cactidb.* TO cacti_user@localhost IDENTIFIED  BY 'passwd123';
MariaDB [(none)]> FLUSH PRIVILEGES;
MariaDB [(none)]> EXIT;
Now you should import the mysql test data timezone.sql file into the MySQL database:
mysql -u root -p mysql < /usr/share/mariadb/mysql_test_data_timezone.sql
Now you should enter the following command to connect to the MySQL database and then provide the Cacti user access to the mysql.time zone name table:
MariaDB [(none)]> GRANT SELECT ON mysql.time_zone_name TO cacti_user@localhost;
MariaDB [(none)]> FLUSH PRIVILEGES;
MariaDB [(none)]> EXIT;
Then you should add the following configuration to the mariadb-server.cnf file under the [ mysqld ] section:
sudo vi /etc/my.cnf.d/mariadb-server.cnf
Remember to paste the following configuration.
collation-server=utf8mb4_unicode_ci
character-set-server=utf8mb4
max_heap_table_size=32M
tmp_table_size=32M
join_buffer_size=64M
# 25% Of Total System Memory
innodb_buffer_pool_size=1GB
# pool_size/128 for less than 1GB of memory
innodb_buffer_pool_instances=10
innodb_flush_log_at_timeout=3
innodb_read_io_threads=32
innodb_write_io_threads=16
innodb_io_capacity=5000
innodb_file_format=Barracuda
innodb_large_prefix=1
innodb_io_capacity_max=10000
You can exit after saving the changes.
Because the Cacti package is available in the EPEL (Extra Packages for Enterprise Linux) repository. First release it with the following command:
sudo dnf install epel-release -y
Now you can install the Cacti monitoring tool by executing the following command:
sudo dnf install cacti -y
Then you should verify the installation of Cacti with the following command:
rpm -qi cacti
Now to determine the default Cacti database path, execute the following command:
rpm -ql cacti | grep cacti.sql
Then you should import the default cacti database tables into the MariaDB cacti database using the following command:
mysql -u root -p cactidb < /usr/share/doc/cacti/cacti.sql
You should modify the cacti configuration file according to the following database details:
sudo vim /usr/share/cacti/include/config.php
Now you should change the database name, username, and password to reflect the name you have already created and then set the timezone in the php.ini file. Remember to change the following parameters:
First, you should visit your server’s IP with the following command:
http://server-ip/cacti
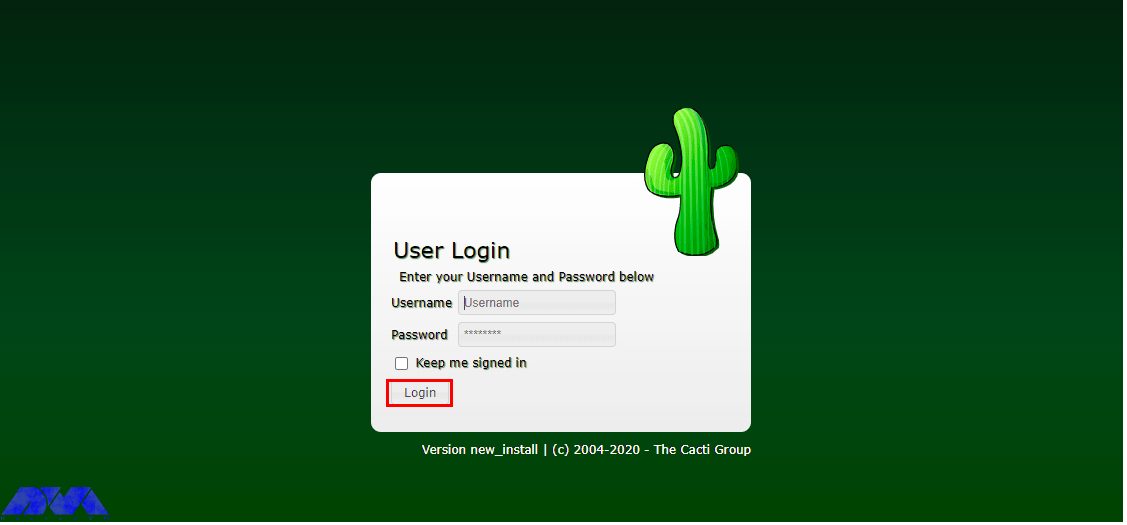
After viewing the login page, you should log in with the default credentials:
Username: admin
Password: admin
Then click on Login:
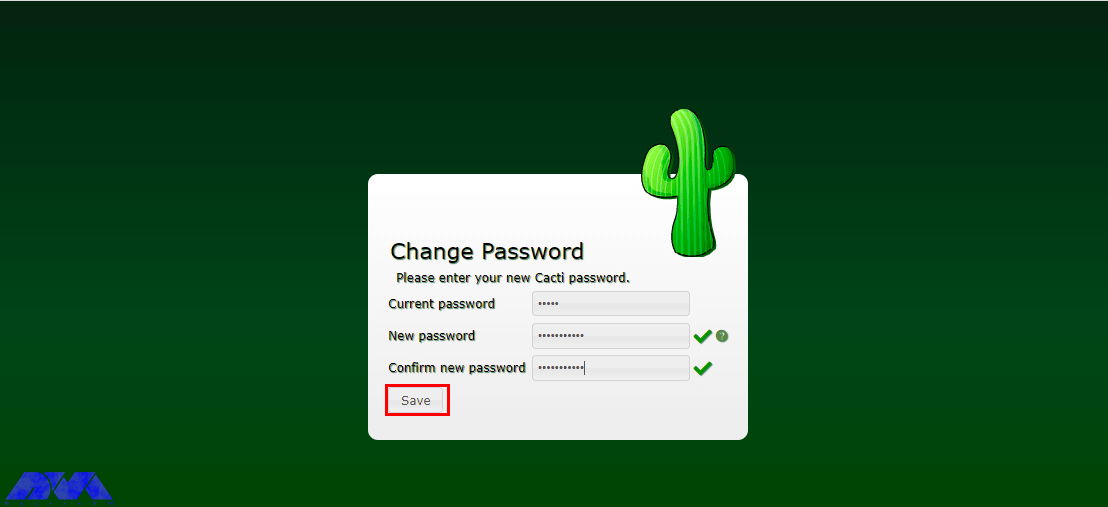
Now you need to set the default Cacti admin login password:
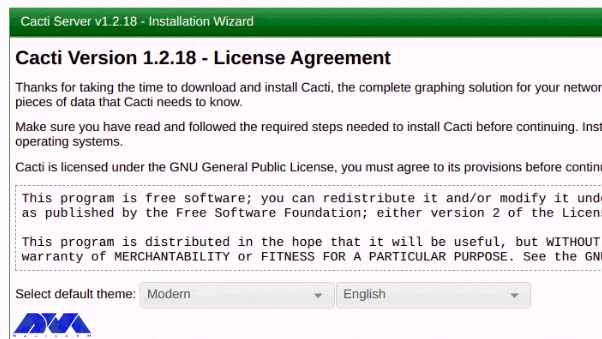
Next, you should accept the GPL license agreement and then click on Begin:
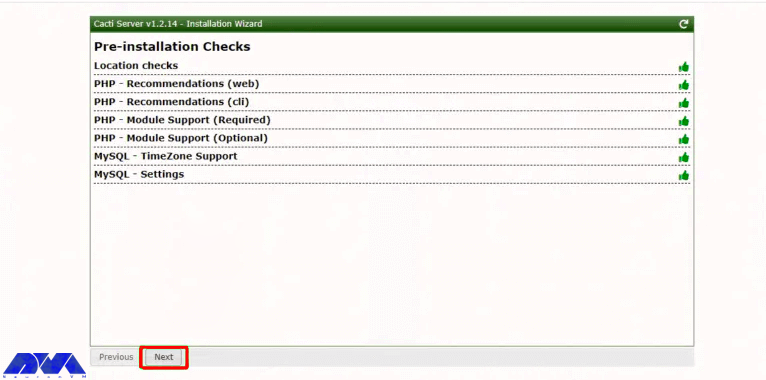
Cacti execute pre-installation tests to ensure that the necessary PHP modules and database settings are installed. Then, click Next to continue:
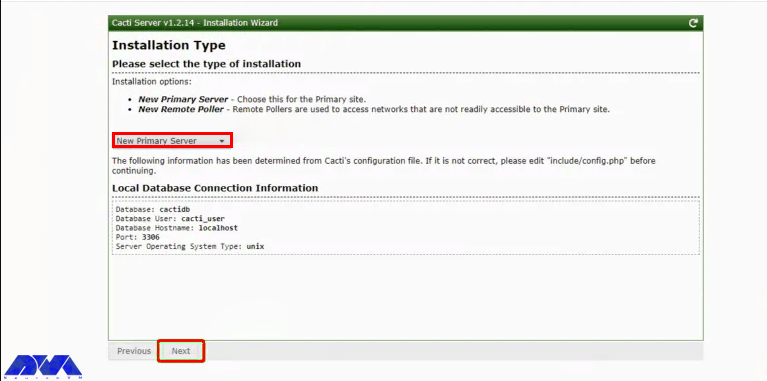
Now you should choose the New Primary Server as the type of installation and then verify the database connection parameters are right:
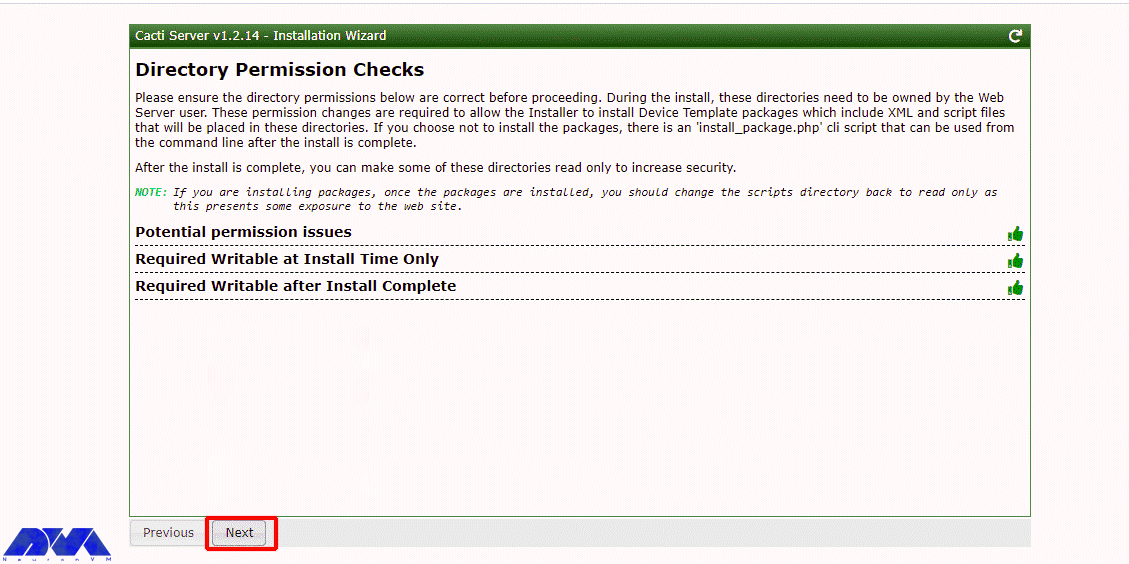
At this point, you can check for directory issues and confirm that there are proper permissions. Then click on Next; but if there is a problem you should click on Previous and correct the problems:
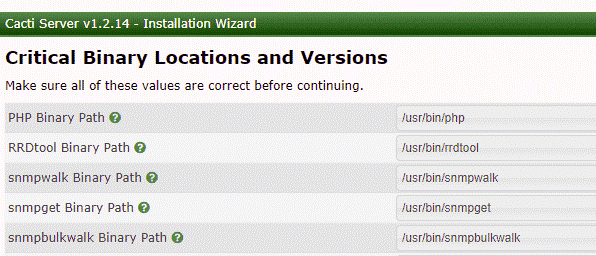
Then the installation of binary paths of the required packages is checked by the installer:
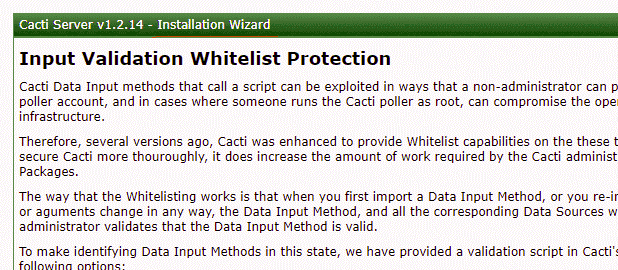
Now you should validate the data input methods and read the instructions; then check the ‘I have read this statement’ box:
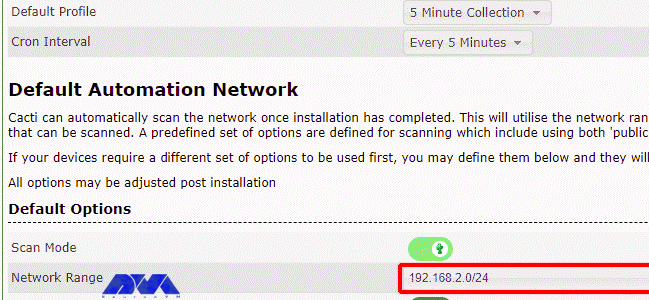
Next, you need to choose the cron interval and input your network subnet. Then click Next:
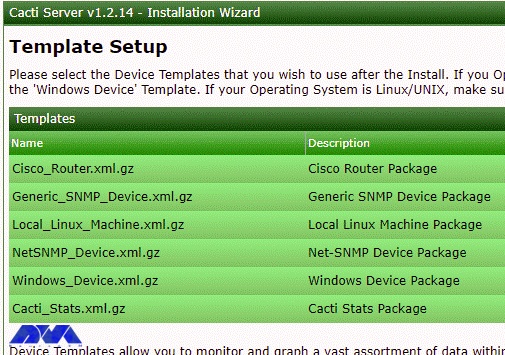
Cacti has templates with which you can monitor and graph a variety of network devices, including Linux and Windows computers. Check all the options to make sure you get all the templates you need. Then click on Next:
Now it is being checked whether the database/server collation is compatible with UTF8. Then click on Next:
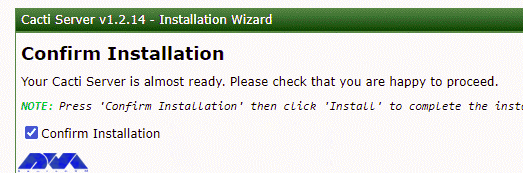
Now you should click on the Confirm Installation checkbox and then click on the Install:
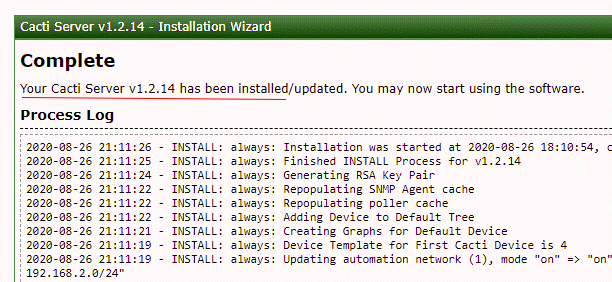
After completing the installation of the necessary packages, you can click on Get Started:
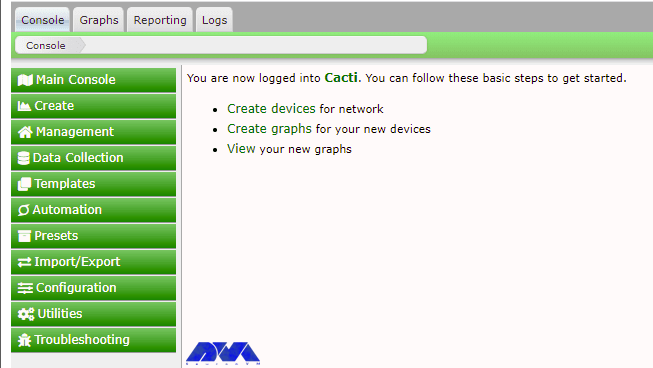
Finally, you can see the Cacti dashboard:
You can navigate through Graph –> Default Tree –> Local –> Choose Your Device to view the graphs:
Conclusion
This article introduced one of the best monitoring tools called Cacti. In the continuation of the article, we taught how to install and configure Cacti on AlmaLinux 8. If you want to install Cacti on your AlmaLinux system, you can get inspired by this tutorial.
FAQ
Do we need any additional steps after installing Cacti?
Yes, you should setup device polling, configure graphs and you should define devices in cacti monitoring.
Is it possible to install Cacti on other distributions?
Yes, you can install it o various Linux distributions like CentOS, Rocky Linux, Ubuntu, and so on.
The Control Panel is a set of sub-programs that can be used to configure various aspects of the Operating System. The Control Panel is the center of all operating system settings and is designed to make changes to the mouse, keyboard, sound, speakers, and screen. Webmin is also a Control Panel and Graphical User Interface for hosting. After reading this article, you can learn how to Install and Use Webmin on AlmaLinux 8.4 from the AlmaLinux training series.
What is Webmin?
Webmin is a web-based Control Panel and Graphical User Interface for Linux systems that can be used for free. You can configure all aspects of the system through your web browser with Webmin. It should note that Webmin removes the need to manually edit Linux/Unix configuration files, allowing you to manage a server from the console or remotely. It also allows you to control many machines through a single interface or seamless access to other Webmin hosts on the same subnet or LAN.
Webmin Features
1- Configure Email Server
2- Configure Apache Web Server
3- Configure DNS Server
4- Data Backup
5- Manage users and User groups
How to Install Webmin on AlmaLinux 8.4
First, you should buy a Linux VPS with the AlmaLinux Operating system. Then, switch to root user and log in as root to run all commands:
sudo -i
You need to add the yum Webmin repository to AlmaLinux 8.4 so that you can fetch Webmin packages for installation. Enter the following command in your Terminal and press Enter:
Then you should update the system by entering the following command, which refreshes the repository cache and makes the system recognize the latest added repo of Webmin:
dnf update
In this step, you can download and install Webmin on the AlmaLinux RPM-based Linux Operating System:
dnf install webmin
Next, you should open Webmin port 10000 in the firewall to access the web interface of this web-based system configuration tool from any system browser that can access the IP address of the server or domain. Run the following command:
Open Webmin through your web browser and specify the name of the computer and port that Webmin is running on. Note that if the Webmin installed in AlmaLinux is managed through a browser, its IP address or domain should be specified in the URL box along with port 10000. But if you are using Webmin in a GUI system, the management should be done using the local URL in the web address http://localhost:10000 and if only encrypted communication is possible in the system, just replace http with https:
https://server-ip-address:10000
or
https://example.com:10000
If SSL isn’t implemented, you will receive a ‘Your connection is not private‘ alert. You should click on Advanced and then click the Proceed to x.x.x.x link.
Now you should enter your username and password. Be sure to enter AlmaLinux 8.4 server root as your username and password.
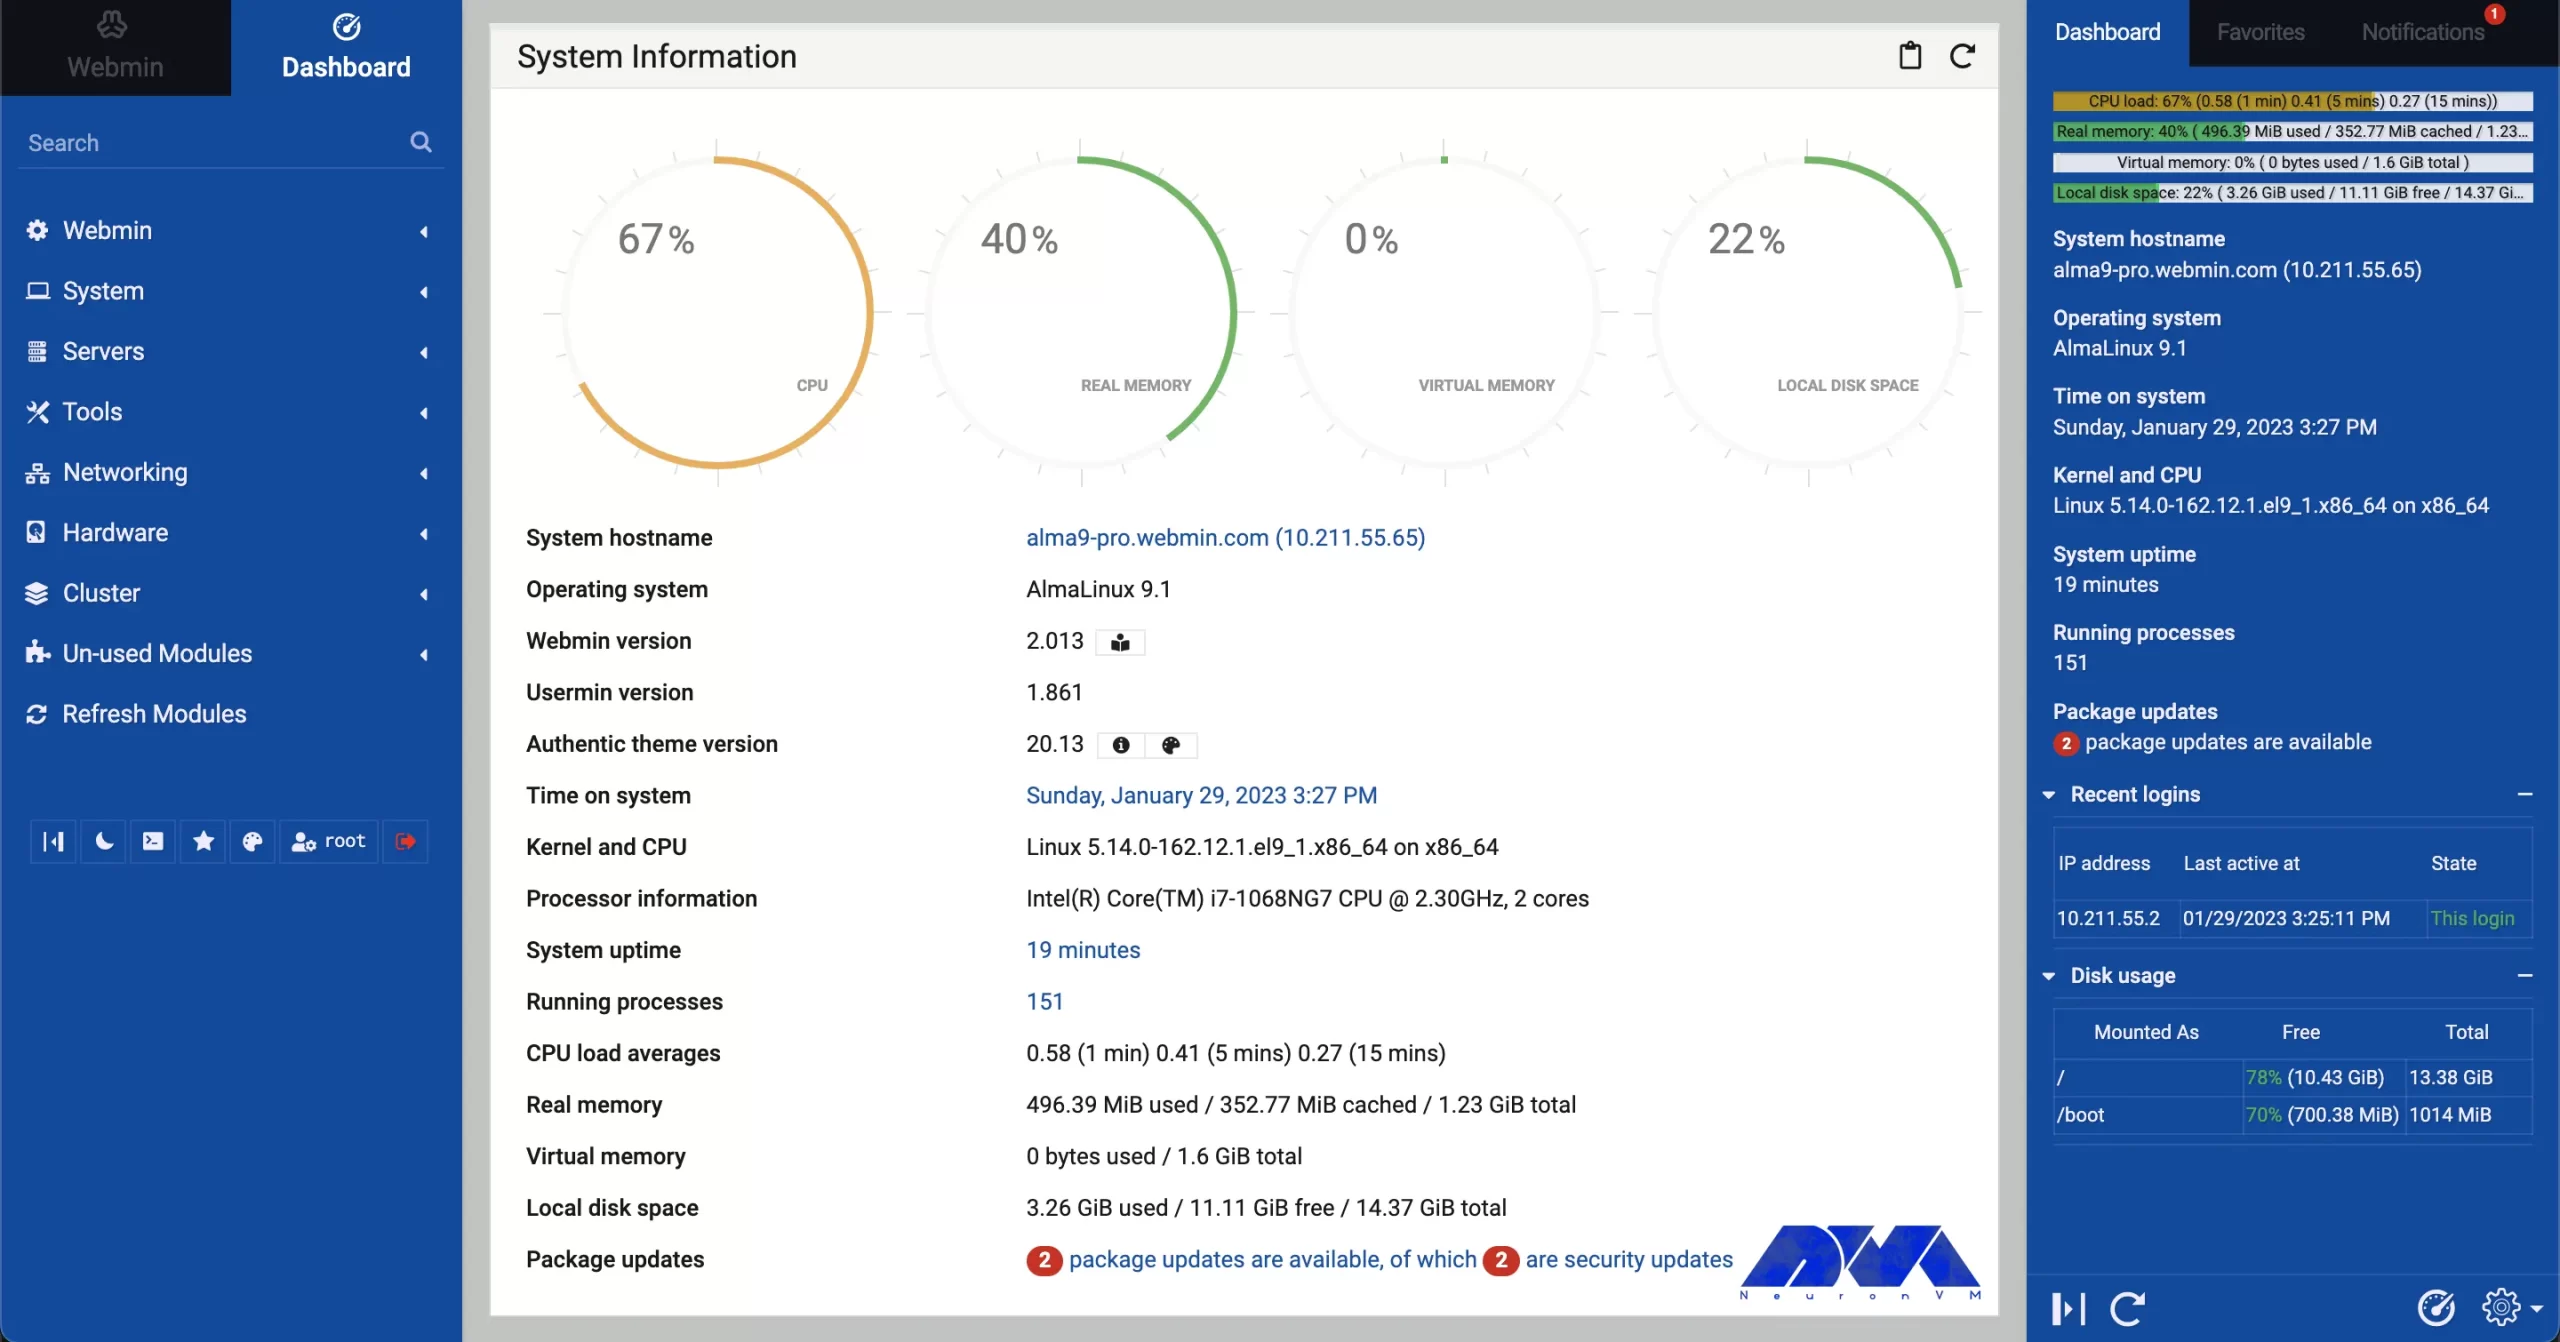
The Webmin Dashboard running on AlmaLinux is as follows, where the user can manage its server:
Conclusion
Webmin is easy to use and offers several options for administrators to manage their Linux server through web-based remote access. In this article, Webmin Control Panel was introduced and how to install and use Webmin on AlmaLinux 8.4 was taught.
Docker is a free and open-source containerization tool that allows developers to package their applications in containers. The installation of these software packages can be done in the same way as the usual installation by the package manager of your operating system to download a program. The only difference is that Docker does everything automatically. After reading this post you will earn a top way to install Docker on AlmaLinux.
Installing Docker on AlmaLinux
After a little explanation about Docker, now we have a step-by-step guide for you, so you can install this useful tool easily.
Prerequisites
– A Linux VPS Server with the AlmaLinux operating system
– Minimal 10 Gb free disk space
– Sudo privileges with admin rights
– Have a good internet connection
– 2 GB RAM and 2 CPU/vCPU
Step1. Uninstalling Podman and Buildah
In order not to get confused and have an easy installation process, you should remove Podman and Buildah from your AlmaLinux system before installing Docker. You can use the following command:
sudo dnf remove -y podman buidah
Tip: If you don’t have them on your system as a default, skip this part.
Step 2. Enabling Docker Repository
You should use the following command to enable Docker official repository because the Docker package is not available in the default AlmaLinux:
You should use the Docker command without sudo for adding your local user to the Docker group:
sudo usermod -aG docker $USER
newgrp docker
Use the following command to see the Dockers version:
docker --version
Docker version 20.10.18, build b40c2f6
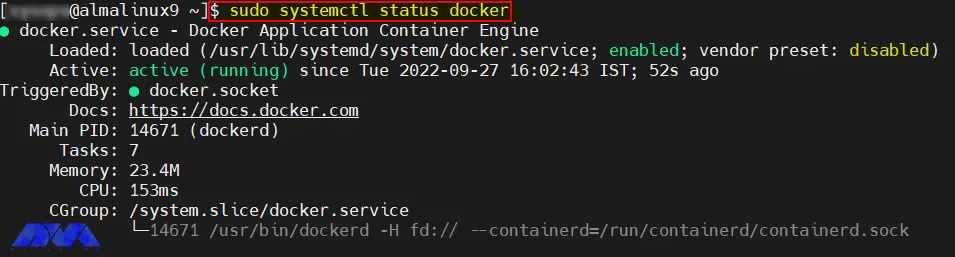
In addition, we have another easy and quick way to see how many Docker containers are running. Also you can see some of docker’s configured options:
sudo docker info
Step 5. Testing Docker Installation
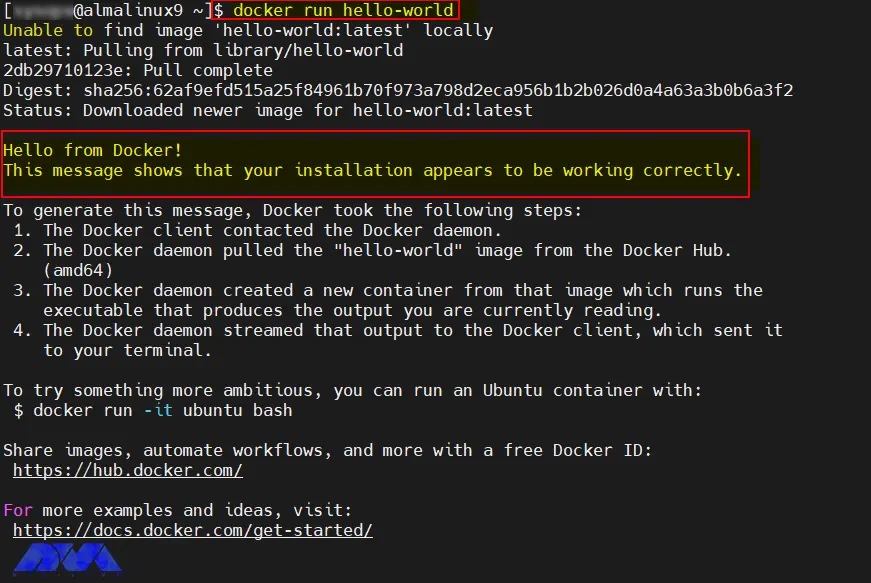
If you want to test your Docker installation, use the following command:
docker run hello-world
If you see the below message from the Docker container, you can be sure that the Docker is working perfectly and the installation process is successful:
How to Remove Docker from AlmaLinux
At last, if you decide to remove Docker from your system, you should run the command below:
Here, we tried to show a simple installation guide for install Docker on AlmaLinux. Now, you can use Docker to install software packages. We hope this guide was useful to you. If you have any ideas or questions please share them with a comment.
How we can install the Docker plugin on Linux?
You should use the Docker plugin install command which pulls the plugin from Docker Hub or your private registry and prompts you to grant permissions if necessary.
Is Docker only for Linux?
You can run this tool on both Linux and Windows programs and executable in Docker containers.