


Want to run Ubuntu on your Windows 10 machine? With Windows Subsystem for Linux (WSL), you can easily install and use Ubuntu alongside your existing Windows 10 installation. This comprehensive article will teach you about installing Ubuntu on Windows 10, from prerequisites to the installation steps, allowing you to experience the power of Ubuntu without requiring a separate partition or virtual machine.
Prerequisites
– Enabled Windows Subsystem for Linux (WSL)
– An active internet connection
– 25GB of free disk space
You may want to have a Windows VPS server and run Ubuntu after installing Windows 10. In this case, we suggest you test and use the Windows VPS plans provided on our website.
Press the Windows key and search for “Turn Windows features on or off.” Open the first result:
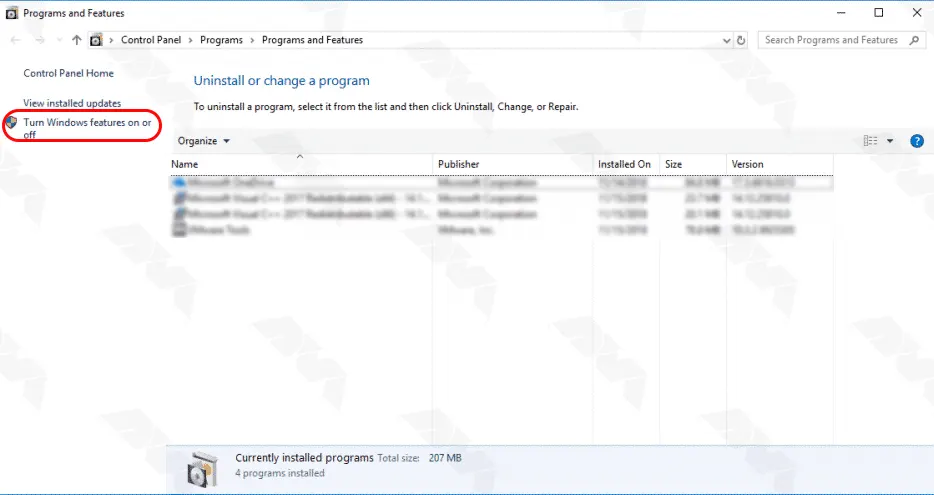
In the Windows Features dialog, scroll down, locate “Windows Subsystem for Linux” and enable it:
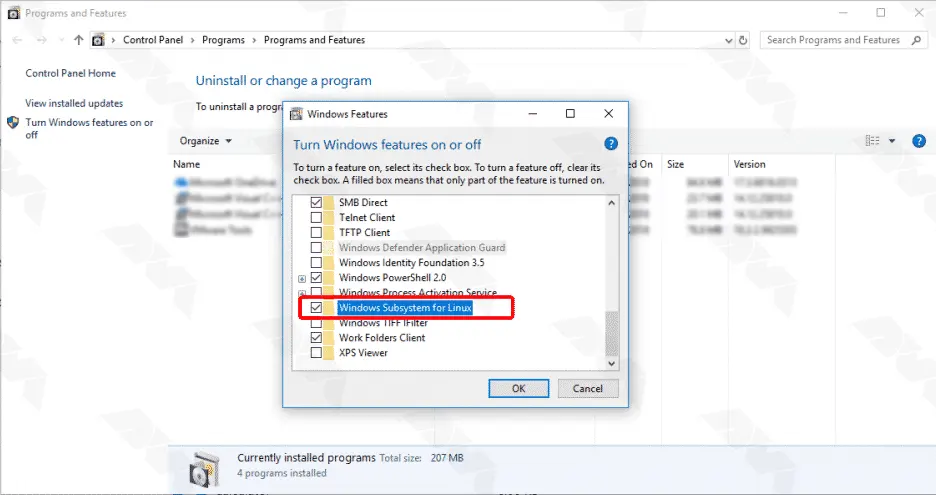
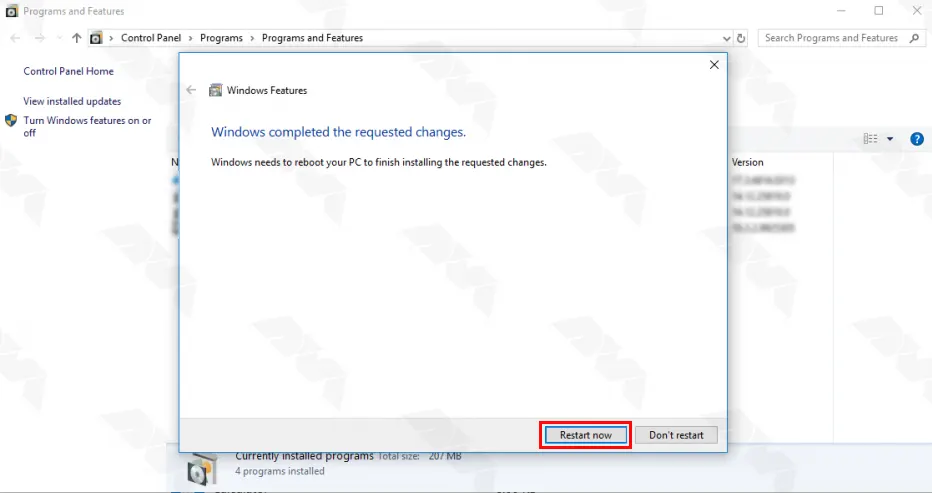
Click “OK” and restart your computer when prompted:
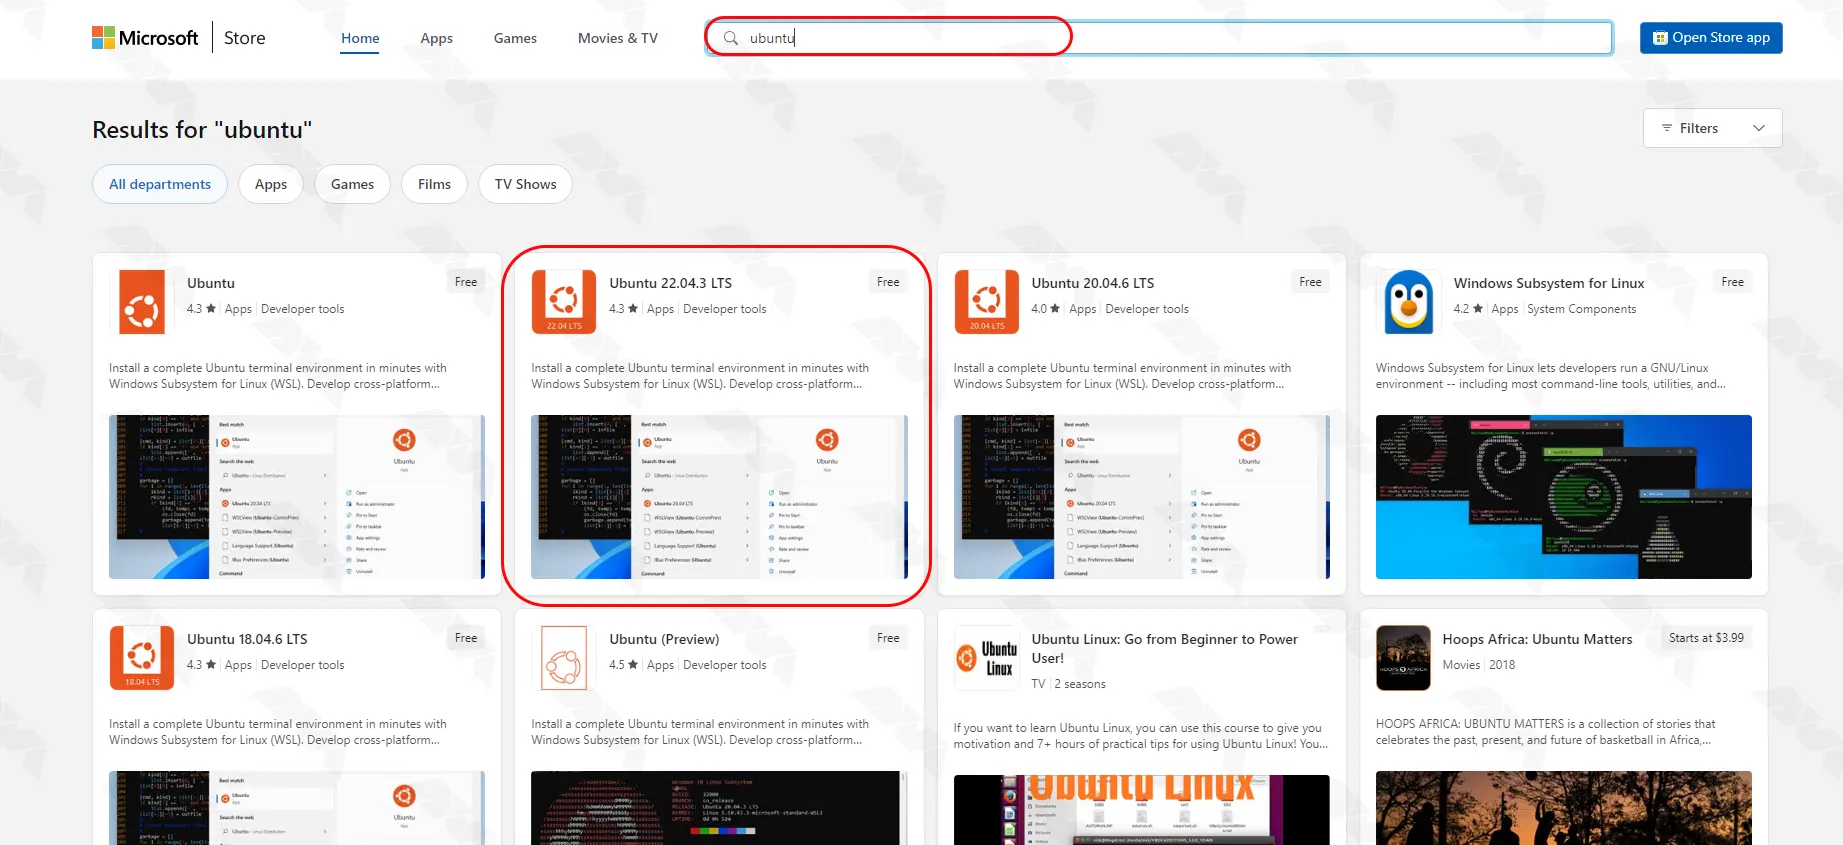
Open the Microsoft Store on your desired web browser on a Windows 10 machine:

Search for “Ubuntu” and choose your desired version or the latest version of Ubuntu available. Then, click on the Ubuntu app to open its description page:
Click on “Install” or “Get” to start the installation process:
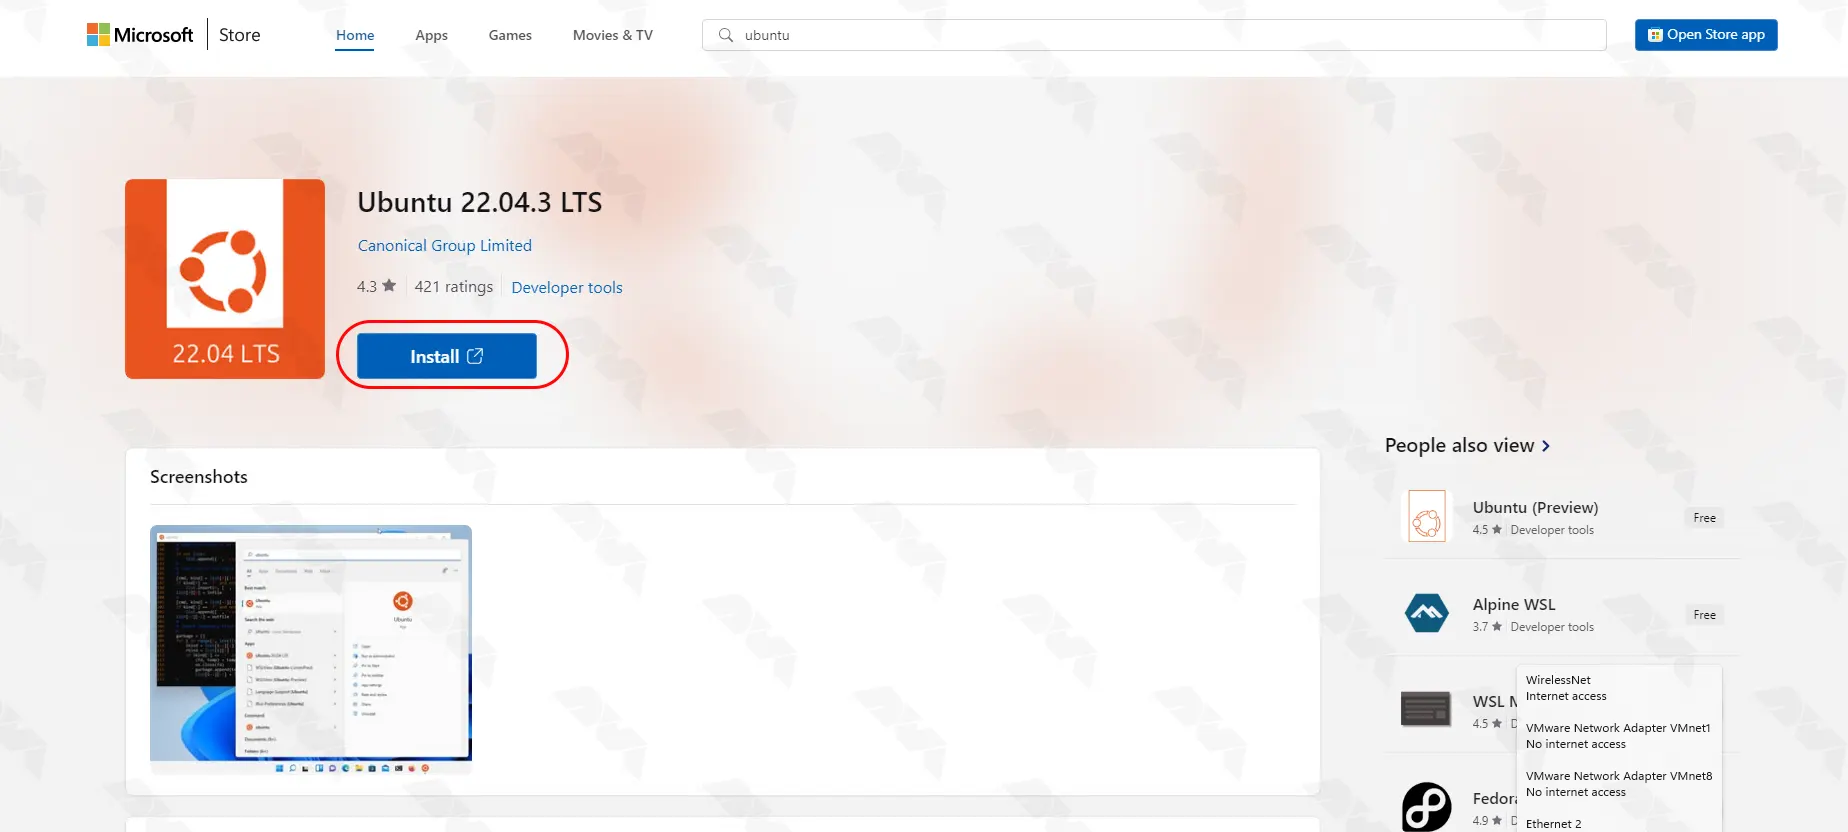
Note: Wait for the installation to complete.
After the installation, you can either click “Launch” or simply search for “Ubuntu” in the Windows start menu:
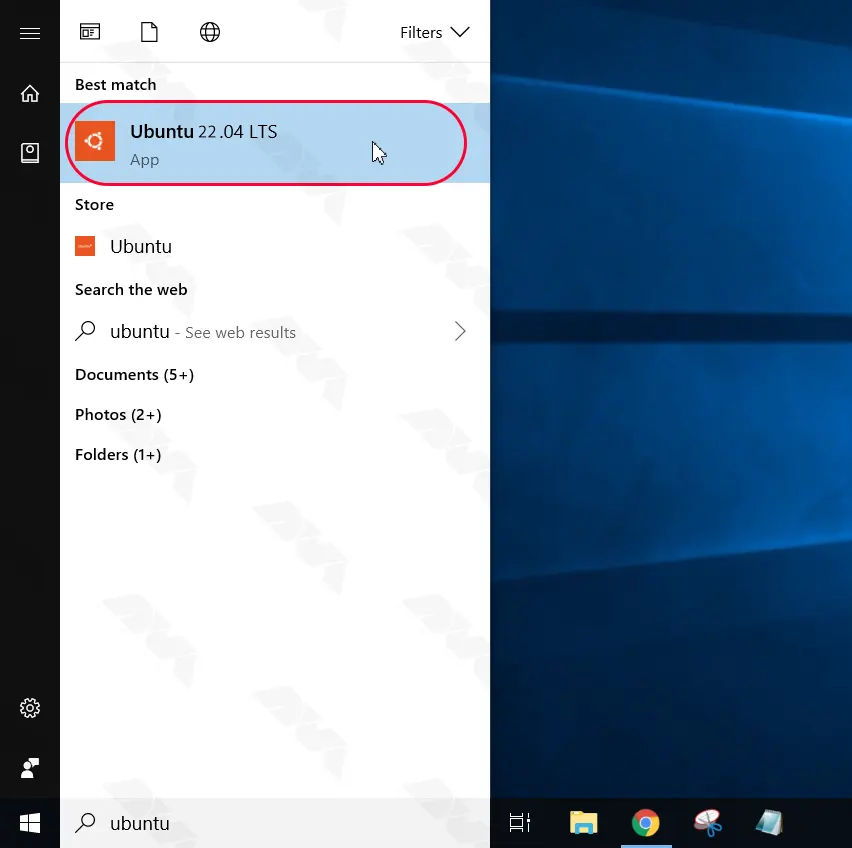
Ubuntu will launch, and a console window will appear indicating the installation process.
Follow the prompts to create a new user with the desired username and password:

*

Once the installation is complete, it is recommended to update Ubuntu to the latest packages using the following command:
sudo apt update && sudo apt upgrade
Press “Y” if prompted to confirm the update.
With Ubuntu up and running, you can now install and use various command-line tools, and applications, or even set up development environments.
Another interesting suggestion for you can be a tutorial on how to install Ubuntu on a USB Drive.
You have successfully installed Ubuntu on Windows 10 using WSL. Now you can enjoy the benefits of both worlds, harnessing the power and versatility of Ubuntu alongside your familiar Windows environment. You have learned how to enable WSL, install Ubuntu from the Microsoft Store, launch Ubuntu, update the installation, and get started with exploring its features. So go ahead, experiment, and make the most out of your Ubuntu experience on Windows 10.
How useful was this post?
Click on a star to rate it!
Average rating 3.1 / 5. Vote count: 27
No votes so far! Be the first to rate this post.
 Tags
Tags

Have you ever faced a situation where you want to use another system that is not yours but has your ...


 Tags
Tags

In today's digital age, Remote Desktop Protocol (RDP) solutions have become increasingly essent...


 Tags
Tags
What is your opinion about this Blog?


