


Have you ever faced a situation where you want to use another system that is not yours but has your own settings? This is possible with Linux distributions. That is, you can use your customized Linux operating system on any other device, and this will only be possible with the help of a USB drive. So, let’s use the simple steps of this post to learn how to installing Linux via USB drive.
In order to be able to install Linux distros with a USB drive, you must provide the following items:
Here we suggest you to use the various Linux VPS server plans provided for you on the NeuronVM website.
An important thing to always note is that there are many tools for creating a bootable horse drive. Since different operating systems are used by users, we decided to install the steps with a software called Unetbootin, which is as follows:
First of all, you should download a program to create a bootable live USB drive. You will follow a simple instructions for that:
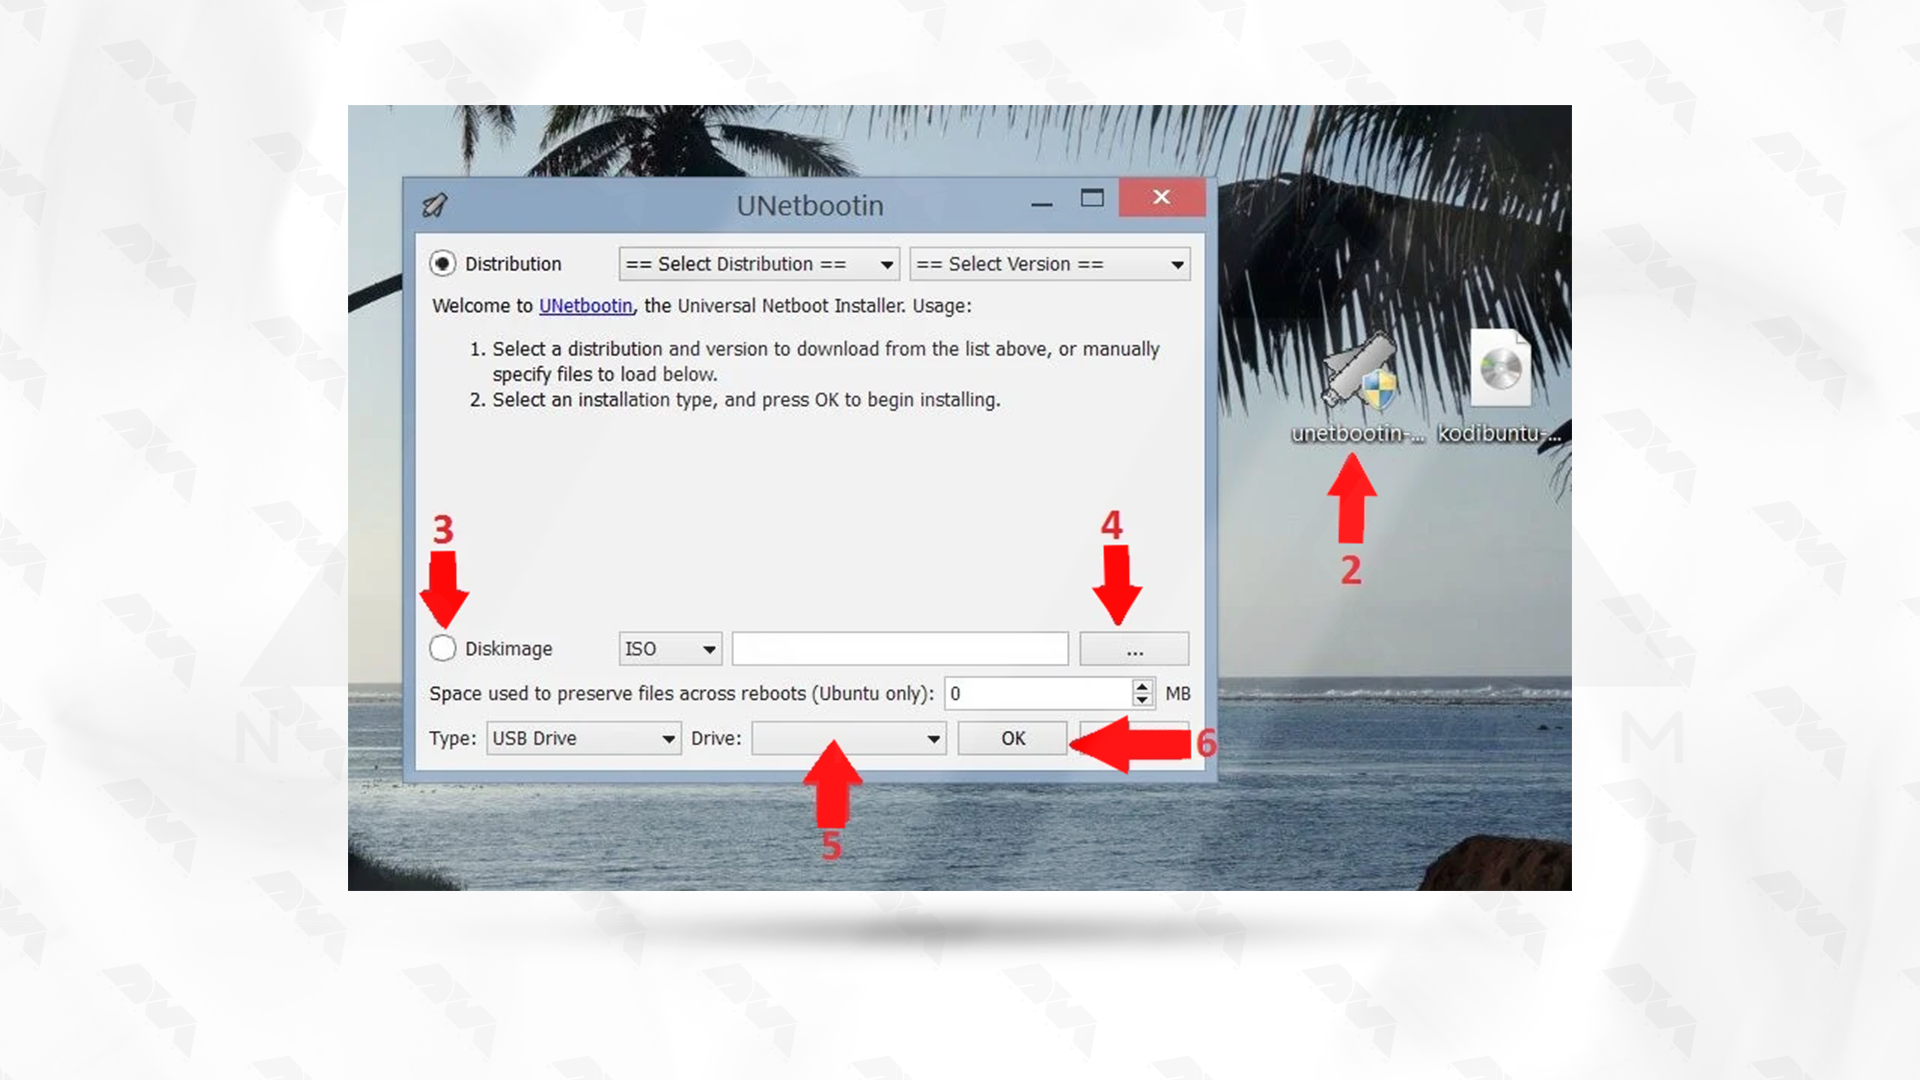
1- Put your USB device in and find the corresponding drive section.
2- Now open the related program.
3- Mark the Diskimage radio button.
4- Choose your Diskimage.
5- Now choose the correct drive name for the USB drive.
6- Click the OK button to confirm the changes and see the magic.
***
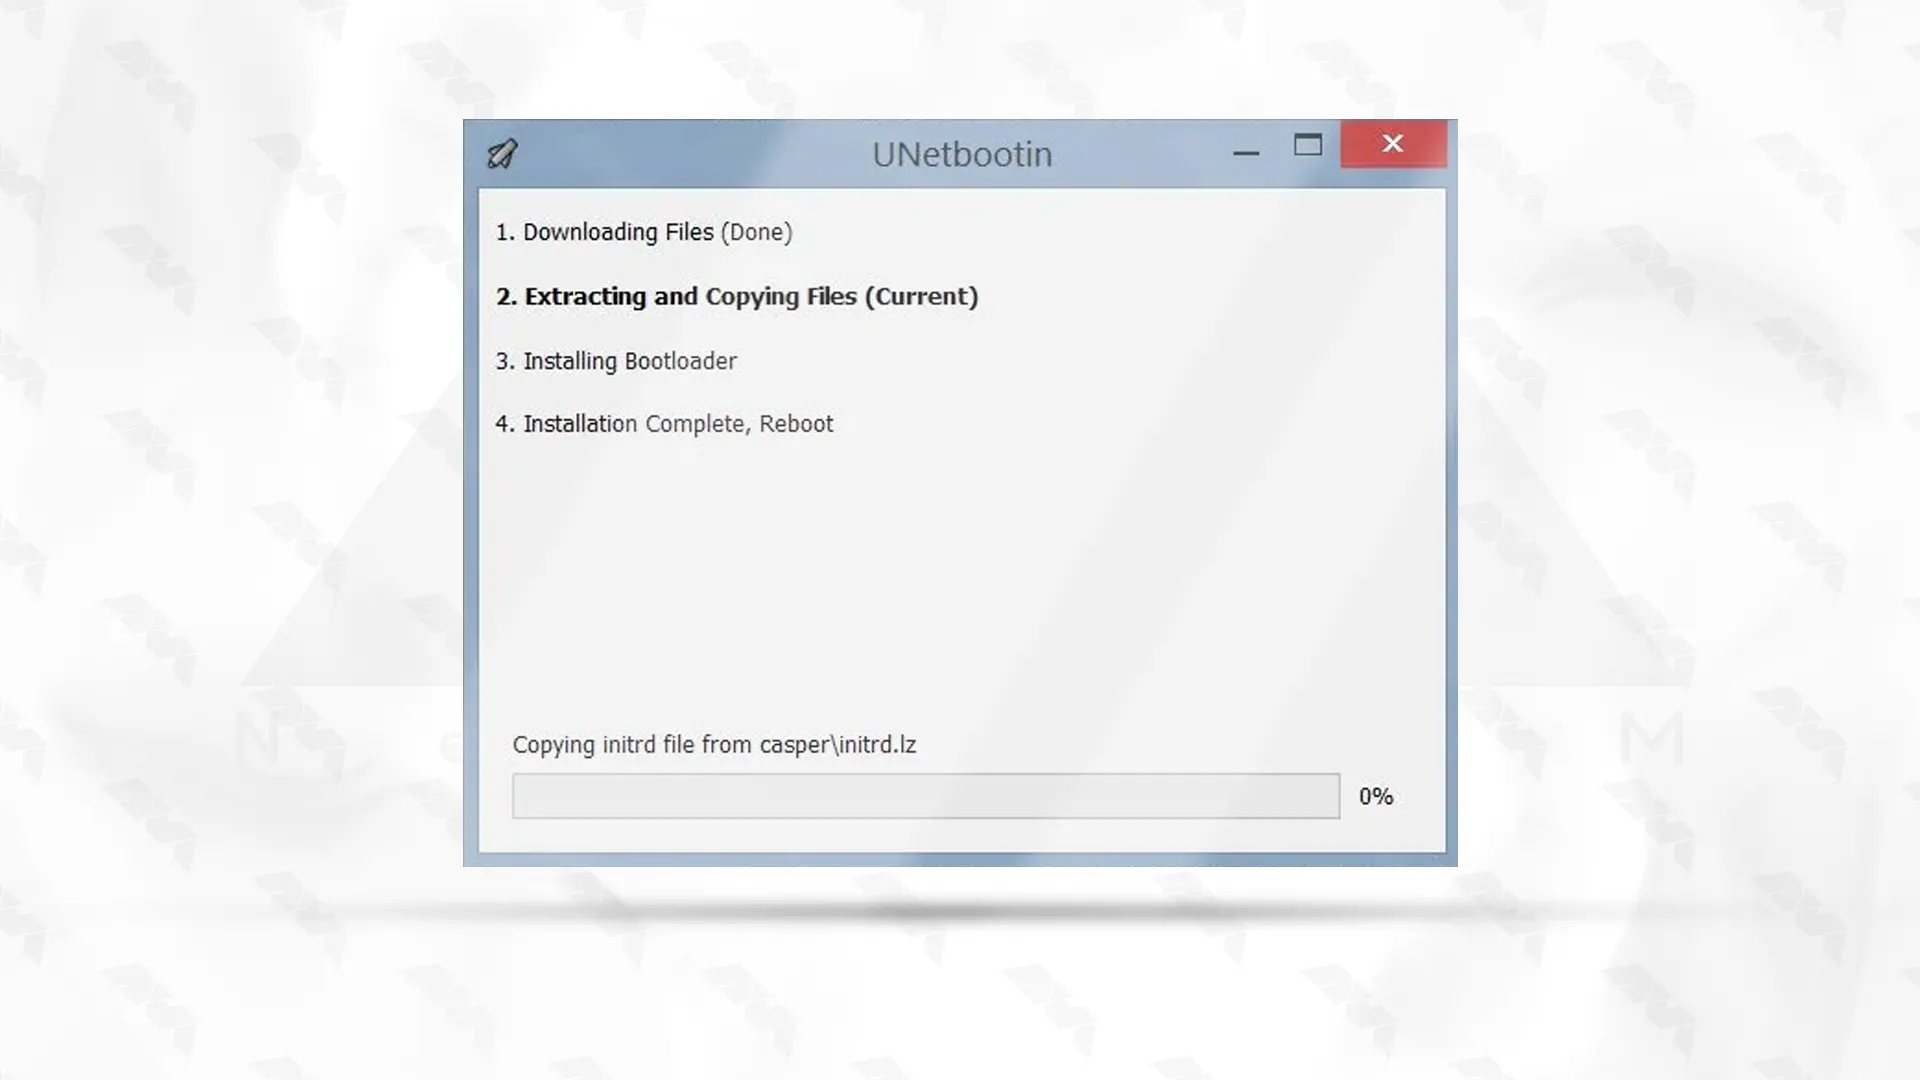
Now you are ready to install the preferred operating system via USB on your device.
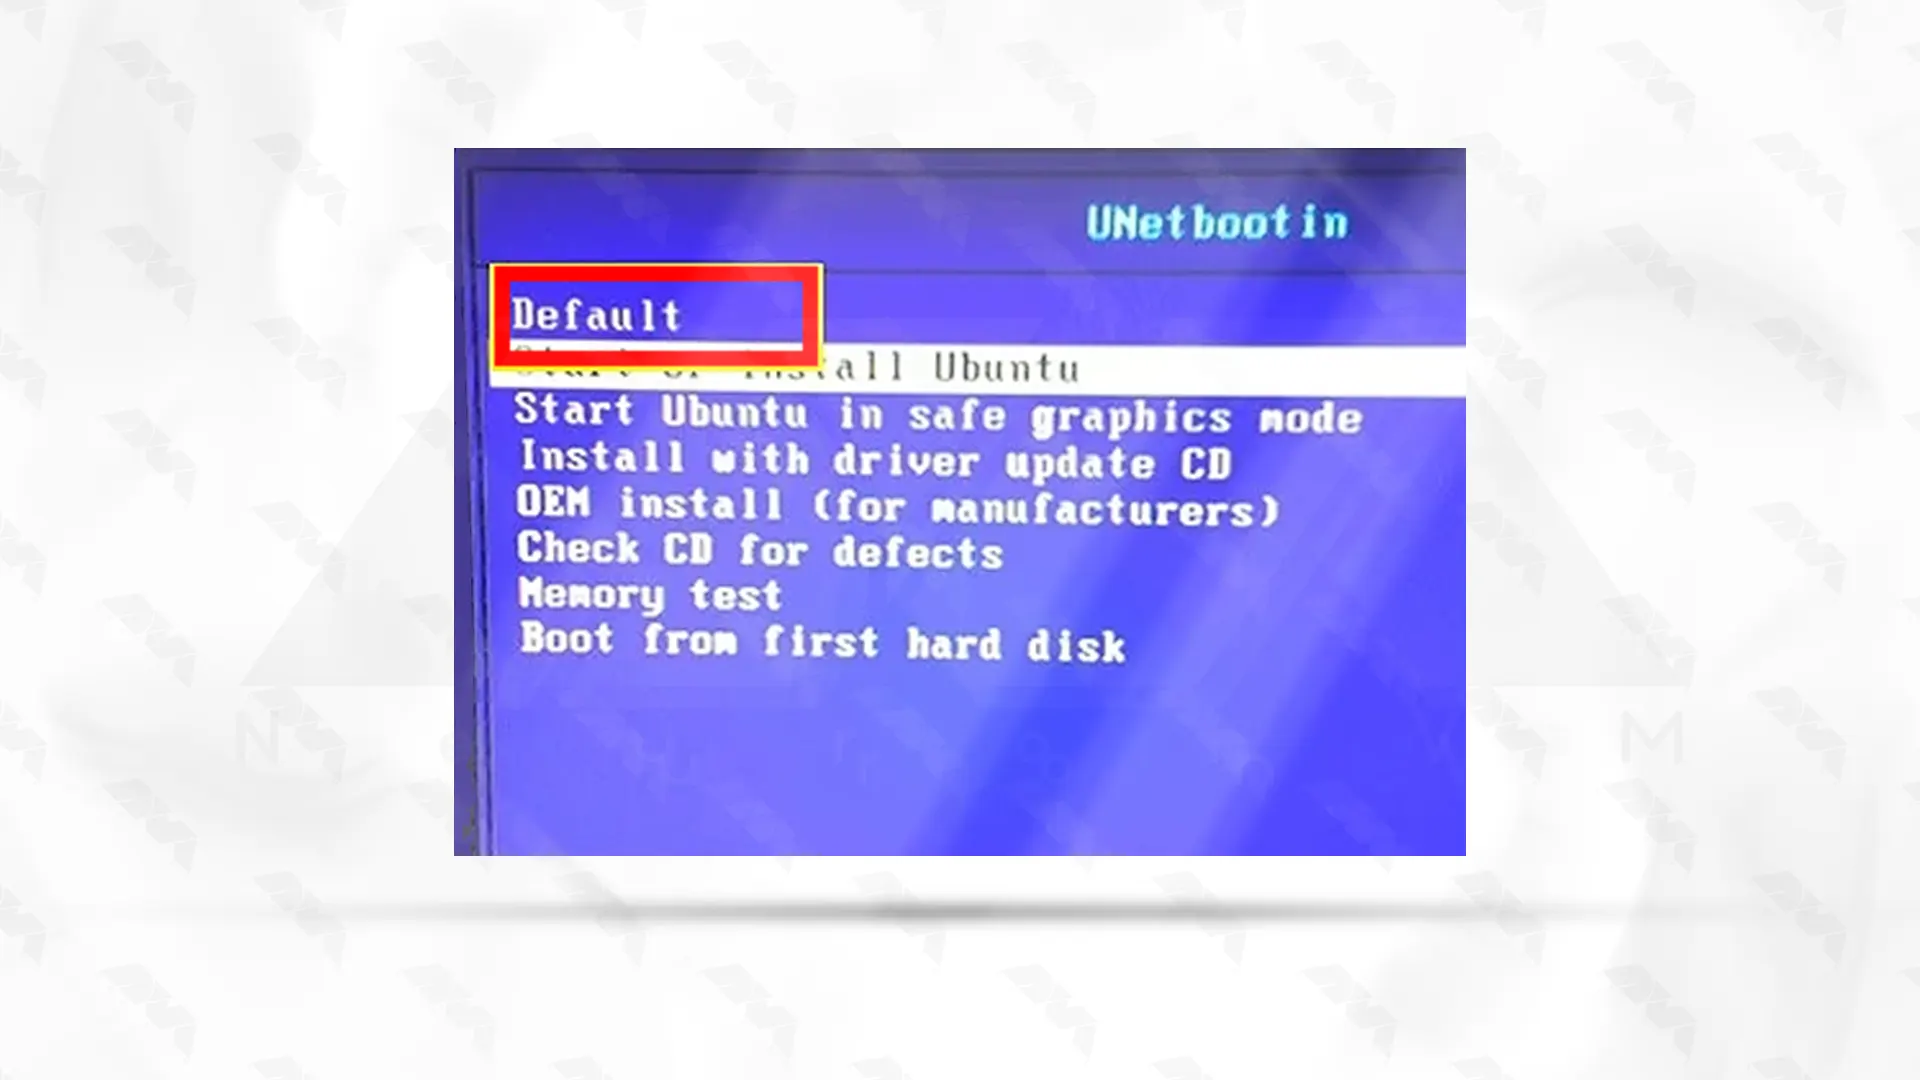
In the next step, you need to go to BIOS and set it to read from USB when running. Note that this section is different for each device. After the app reboot is enabled by connecting the USB, you will see the image below. Now select the default mode and take it easy.
Now you can see the loaded file on the main page. You will see an icon that looks like a disk. Click on it and wait for your Linux installation.
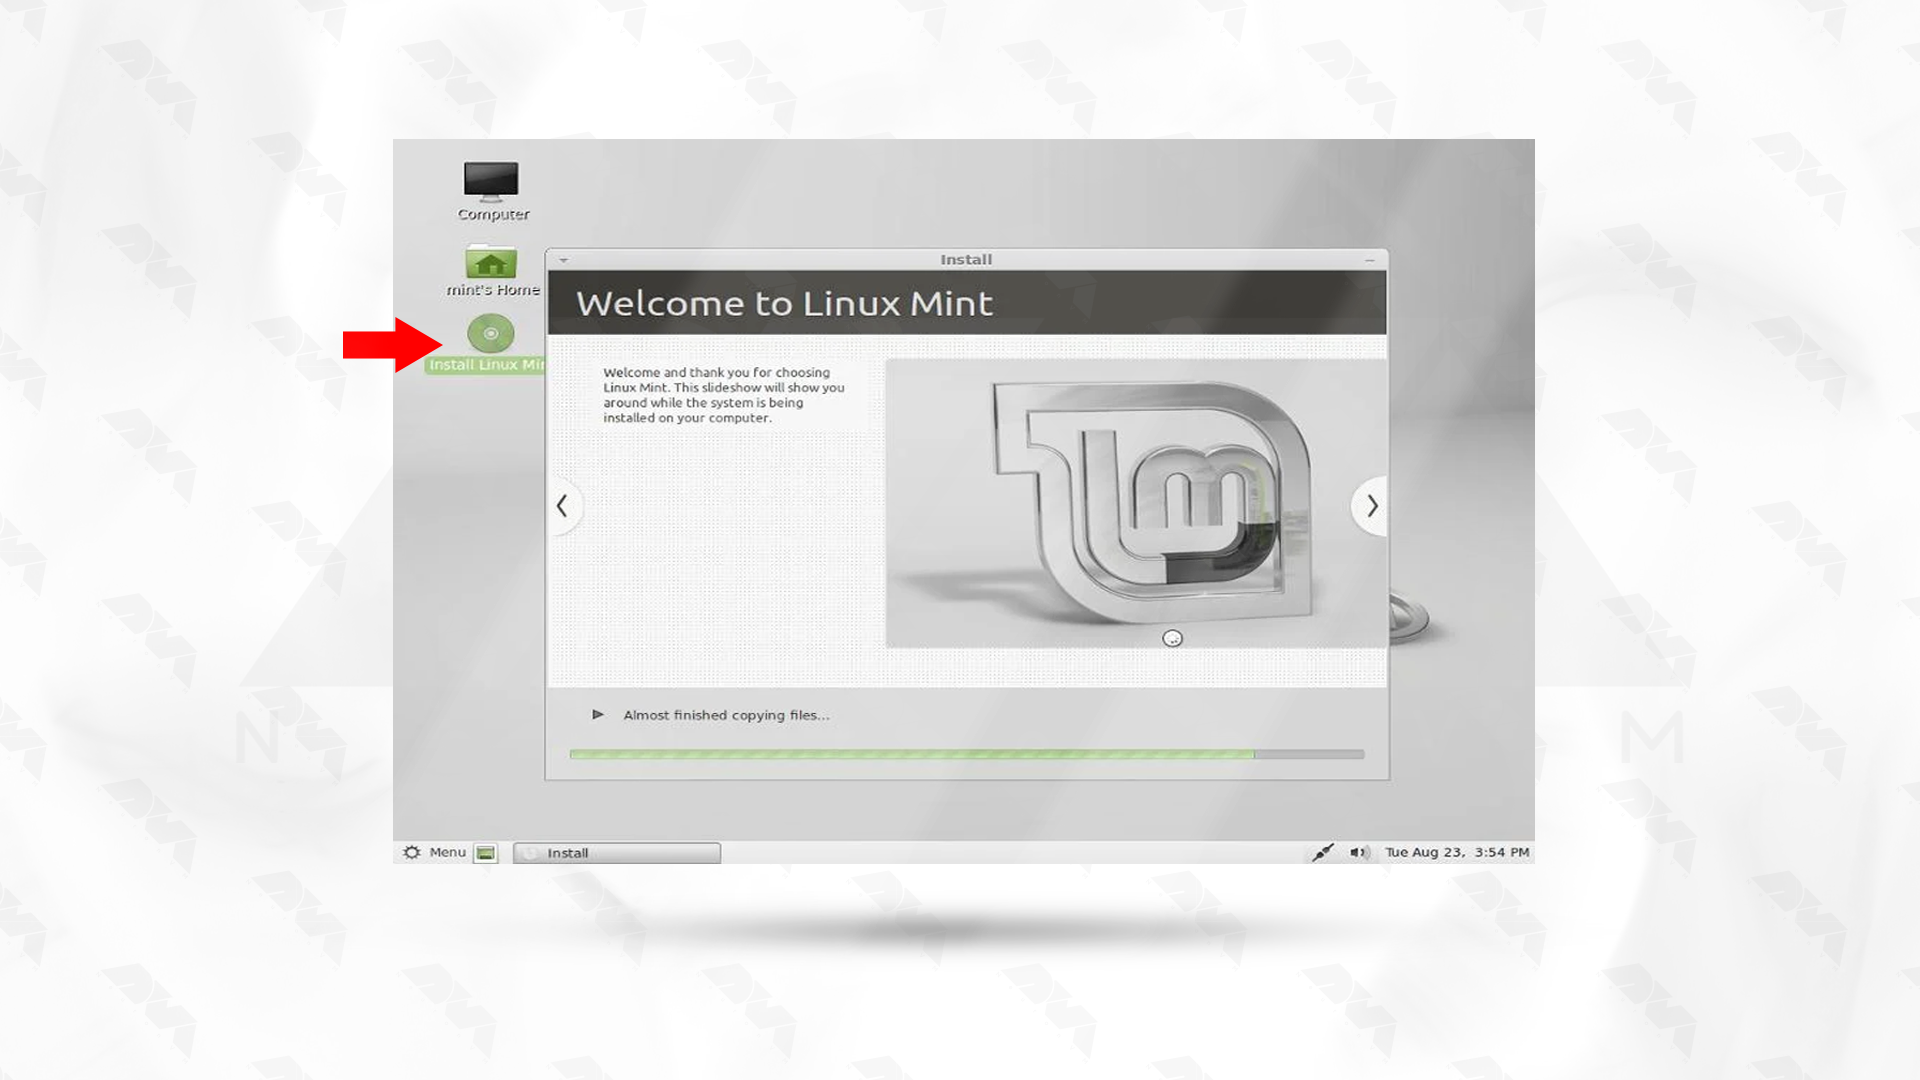
Note that the system will ask you questions during installation so that the desired settings can be made correctly. Now restart the system to apply the changes. So simple!
Tip: The distribution we are considering is Linux Mint.
Installing Linux via USB is a common and convenient method. However, like any installation process, it can sometimes encounter issues. Here are some common problems and solutions:
1- The USB drive is not bootable.
Solution:
Ensure that you have created a bootable USB drive using a reliable tool like Rufus, UNetbootin, or the dd command (Linux). Double-check that the ISO image is compatible and not corrupted.
2- The computer doesn’t recognize the USB drive as a bootable device.
Solution:
Access the BIOS/UEFI settings during startup (usually by pressing a key like F2, F10, F12, or Del), and check that the USB drive is set as the primary boot device. Also, make sure that the system is set to boot in UEFI or Legacy mode, depending on your USB drive and system compatibility.
3- Wi-Fi not working after installation.
Solution:
Ensure that your wireless card is supported. If necessary, use a wired connection during installation. After installation, update your system and install the appropriate drivers for your wireless card.
4- The installation process couldn’t be completed successfully.
Solution:
Check the error messages displayed during installation for clues. You may need to restart the installation process, ensuring that you follow the steps carefully.
Installing Linux distributions with a USB drive is an easy and straightforward way. I hope that by going through these steps, you will be able to install the distribution you want on any device and configure it as you wish. Thank you for your attention to this article. You can share with others if necessary.
How useful was this post?
Click on a star to rate it!
Average rating 0 / 5. Vote count: 0
No votes so far! Be the first to rate this post.
 Tags
Tags

In this day and age, businesses require reliable and secure hosting solutions to ensure their online...


 Tags
Tags
In a today's world, Remote Desktop Protocol (RDP) has become an integral part of businesses and...


 Tags
Tags
What is your opinion about this Blog?


