


WordPress is a common and well-known content management system provided as an open-source and accessible tool. You can install WordPress on a dedicated server in different ways. Here, we will mention two practical ways to install this CMS. One of these methods is via FTP and the other is an installer provided by a web hosting service.
Now follow the steps below to have a successful installation process for WordPress. We should say that installing WordPress on dedicated servers has some advantages like great speed and performance, the safety of the website and the least concern about hackers and malware, the ability to customize your website, more control over your hardware and software, and so on. We recommend that you use the cheap dedicated server plans that are available on our website to install WordPress and enjoy its speed and quality.
One of the excellent and simple ways to install WordPress on your website is by making a few clicks through the Softaculous app installer. WordPress is an applicable and popular content management system and more than one million websites are powered by it. let’s see how we can install WordPress using this beautiful software.
Install WordPress through Softaculous. Most companies will offer Cpanel when you sign up:
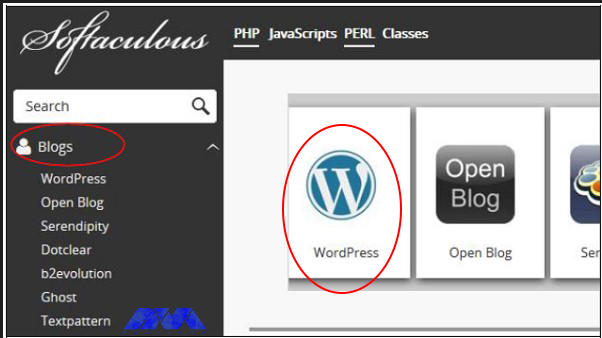
1. click on Blogs on the left side of your menu and press WordPress:
2. Click on the Install button to start the process of installing WordPress:

3. Now you should do some configuration to complete the installation process:
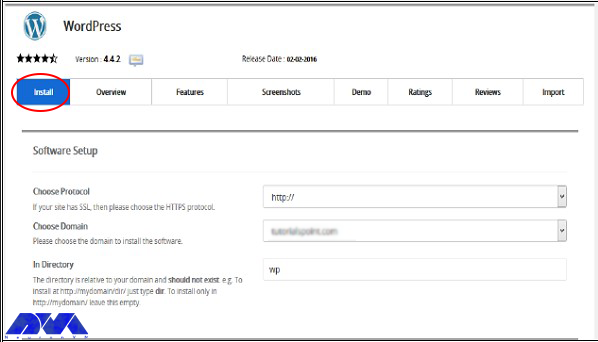
Here, you will have three options for software setup
Protocol: You should choose the appropriate WordPress protocol. These protocols can be HTTP or HTTPS. Note that if you choose HTTPS, you should have an SSL certificate.
Domain: Here, you can open the dropdown menu and choose any root domain or subdomain that you created.
Directory: You can select the directory, in which you wish to install WordPress. But if you desire to install the program on the root website, leave this one empty.
Site Name: create a name for your website.
Site Description: give a short description of your website.
Enable Multisite: As you mark this field, it will install a WordPress network installation
Username: Insert the administrator username.
Password: Insert the administrator password here.
Email: Put the email address on which you prefer to receive the necessary notifications.
As the final touch, select your language for the installation and install some extra plugins, and also do the advanced settings. This part is optional.
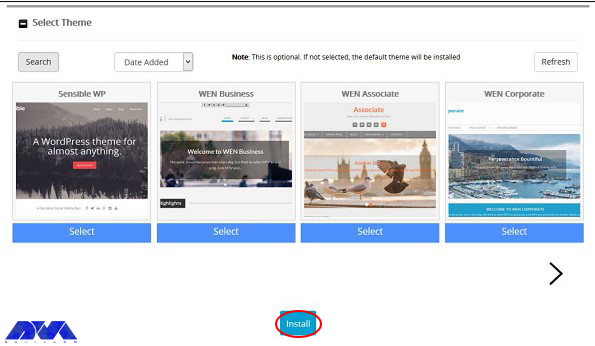
Last, select your desired Theme and click on the Install button:
This method is not necessary, cause most hosting companies will already install WordPress for your server or you can use automatic installers on your Cpanel. But if you want to install manually follow the instructions here:
You should use an FTP application like FileZilla or SmartFtp before starting installation. Now go to the official page of WordPress and download the last version:
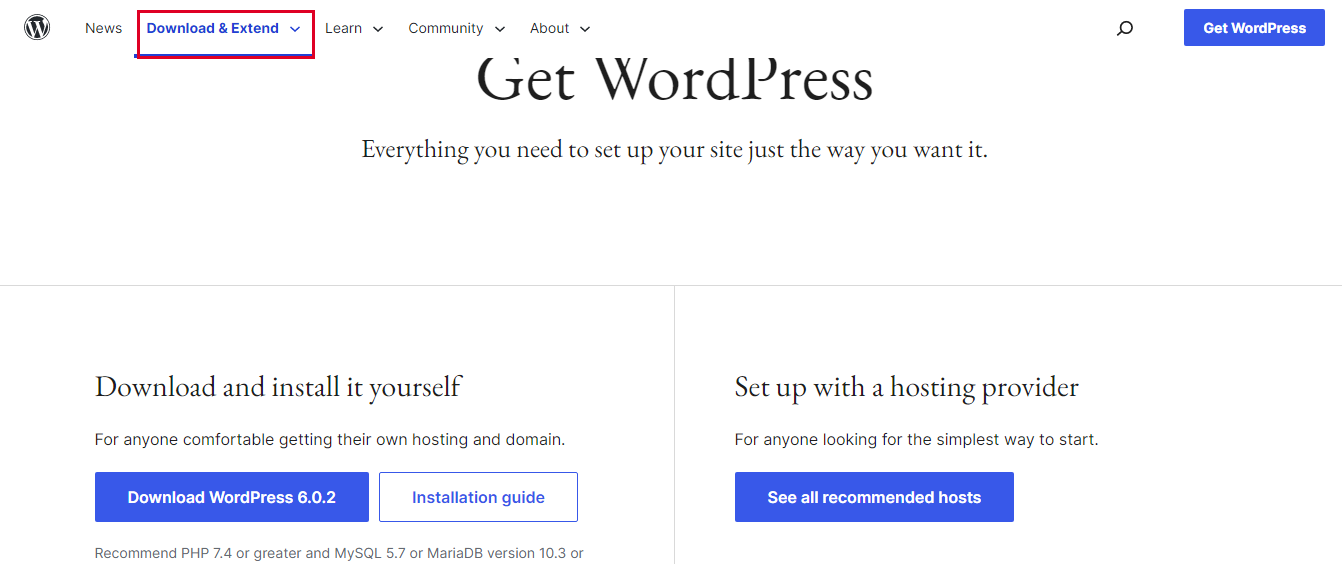
Unzip the WordPress archive and place it in your public directory which is called public_html:
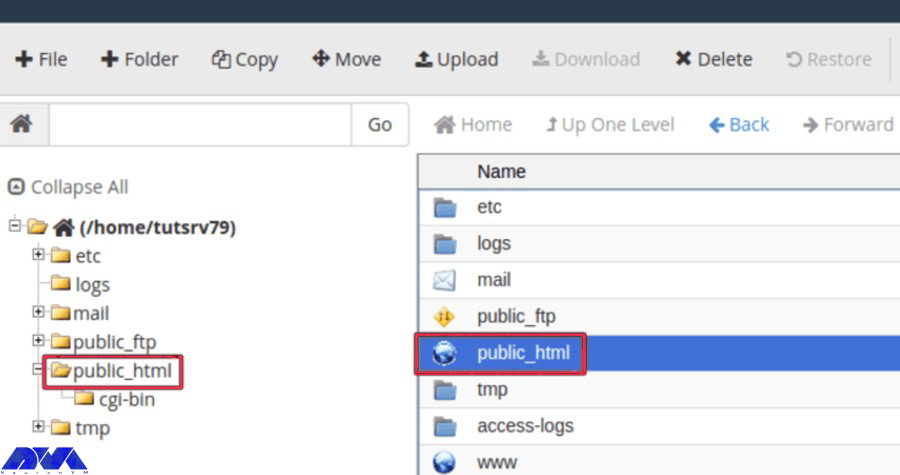
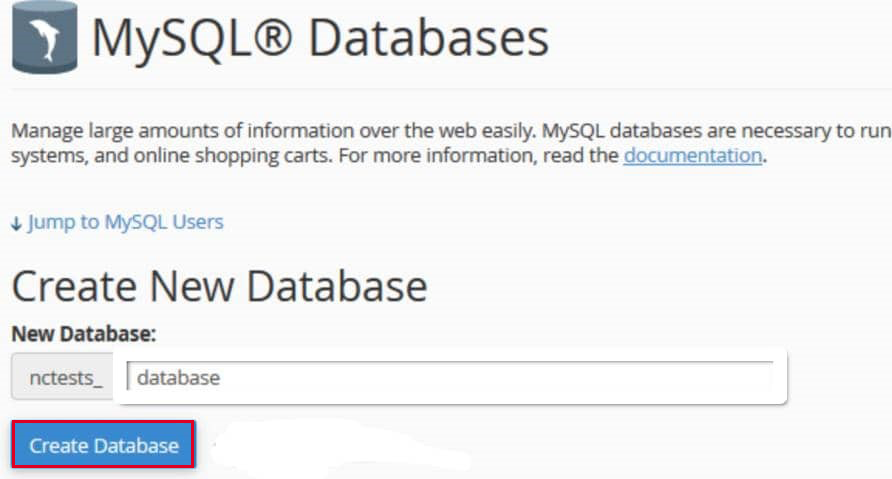
Find the “MySQL Databases” button on your Cpanel:

When it is needed insert your database name and as you have finished select the “Create Database” option:
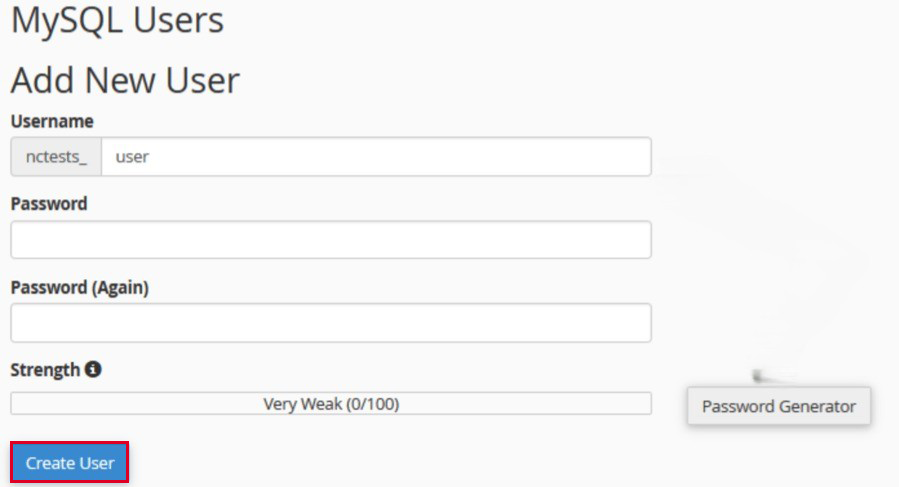
As you created the database, it’s time to establish a “User” from the MySQL account.
After entering the username and password, click on the “Create user” button:
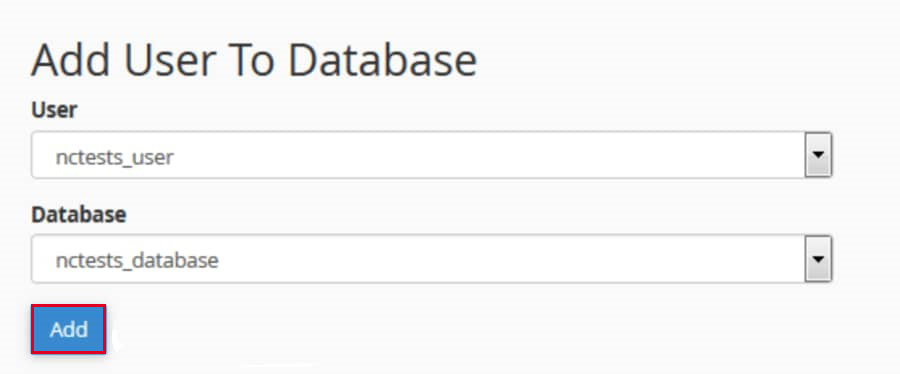
Once you have entered the required details and the name of the database, you can allow the user to access:
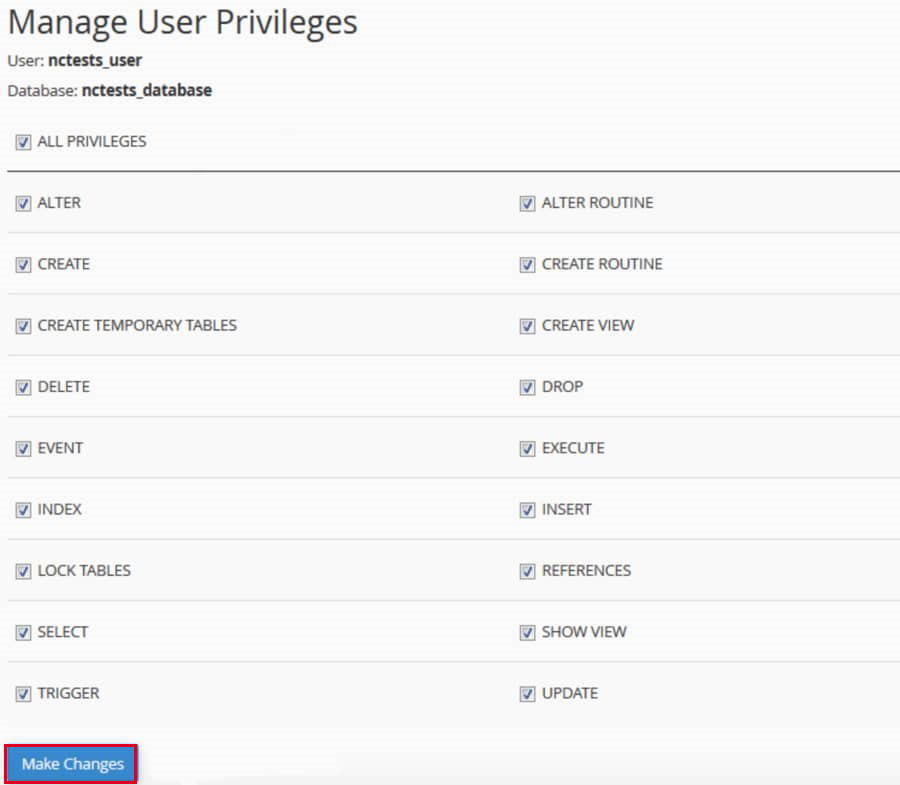
Be sure to check all the permissions you want to grant on the page below:
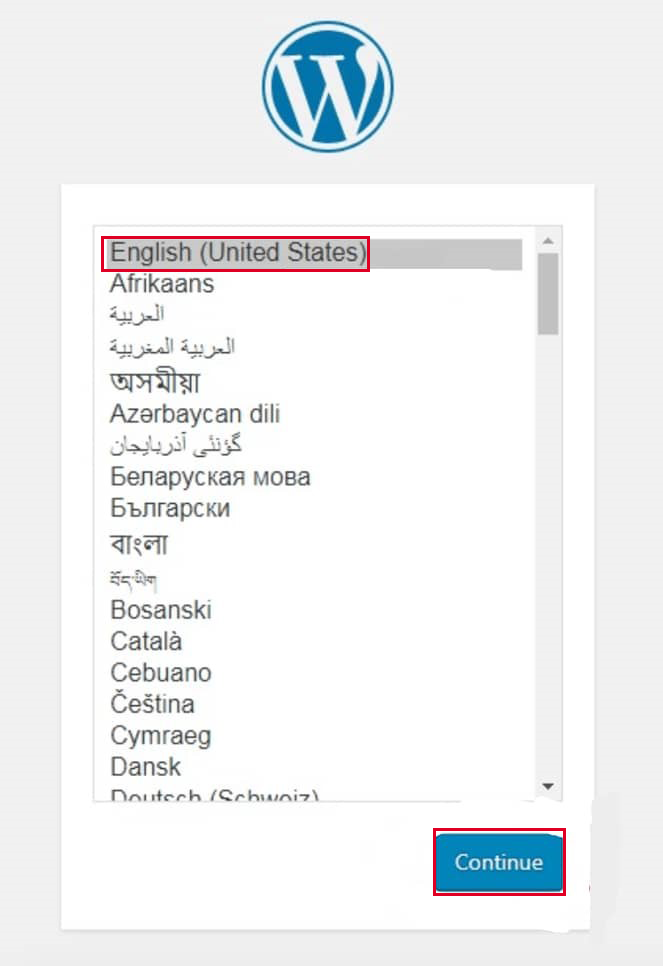
Now you need to go to your site domain and finish the installation, so that, your FTP transfer is finished. When you visit your domain, then you will need to select your language after a successful transfer:
Here, select your language and press Continue:
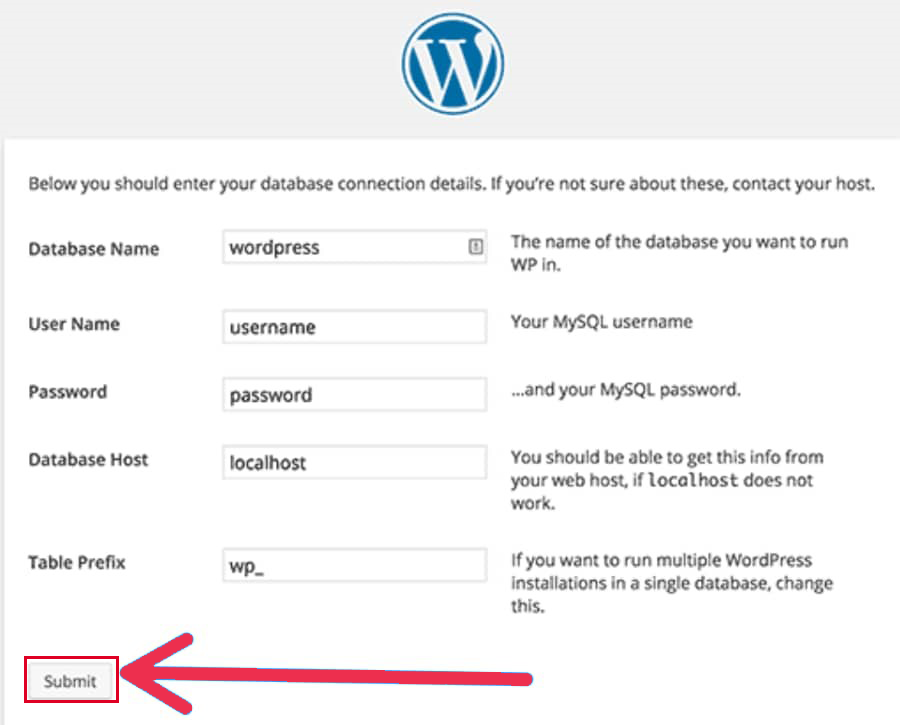
Now, insert your database information like Name, Username, Password, Database Host, and table prefix, and once you are finished, click Submit:
You should select “run the install” from the menu. Then you have to insert admin information like Site Title, Username, Password, and Email:
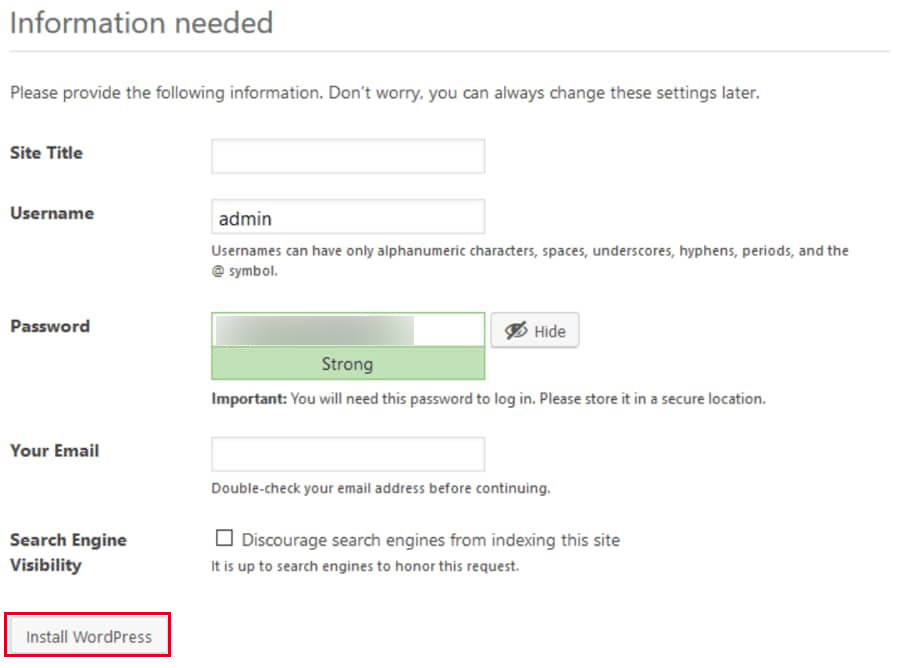
In the end, click Install WordPress” and finish your task. the only thing you have to do is to enter your username and password.
Well done! WordPress is manually installed on your server.
In this tutorial, we thought about how to install WordPress on a dedicated server. Now you can use this popular CMS and enjoy controlling your system as you wish. Hope this guide was useful for you. If you have any questions, leave a comment.
Yes, by hosting WordPress, you can tweak caching rules and optimize your site on the server. You can have your dedicated CPU and memory.
WordPress is suitable for Linux-based dedicated servers but it is technically possible to install it on a Windows server.
How useful was this post?
Click on a star to rate it!
Average rating 5 / 5. Vote count: 1
No votes so far! Be the first to rate this post.
 Tags
Tags

Traceroute, is a computer network diagnostic tool that tracks the path of network packets from a sou...


 Tags
Tags

Kubernetes is a cutting-edge open-source platform for orchestrating containers. It effectively strea...


 Tags
Tags
What is your opinion about this Blog?


