Author: Jannson Miller

  • Tutorial Install CWP on Centos 8

    Tutorial Install CWP on Centos 8

    CWP, or CentOS Web Panel, is a control panel for web hosting on Linux and is a free alternative to Cpanel. This tutorial has been prepared to introduce you to the Tutorial Install CWP on CentOS 8. Its easy-to-use interface and several other features make it a good choice for beginners. The reason for the ease of using this control panel is that you don’t need to access the server with SSH for every task.

    What Is CWP?

    As we mentioned in the introduction, Control Web Panel is a management tool that is generally created on unmanaged VPS for users who are interested in working with the command line. If you need to get more information about CWP you can refer to A Full Introduction to CWP.

    Some Points to Mention Before CWP Installation

    There are some critical points that you should consider before the installation process of CWP:

    – It is not possible to remove it after the installation.

    – If you want to remove CWP from your Linux VPS, you should reinstall the server.

    – Your hostname should be different from the other names on any domain on your server.

    – The installation should be on the newly installed operating system without any configuration changes.

    – The dynamic, Sticky, or internal IP addresses are not supported.

    Steps to Install CWP on CentOS 8

    Now let’s find out how we can install CWP on CentOS 8. Follow the instructions below to have a successful installation process.

    The first step is to prepare the server by installing the EPEL repository on CentOS 8:

    sudo dnf install epel-release

    Use the command below to install the required packages like wget to install CWP:

    sudo dnf install wget -y

    The next step is to update your server using the following command:

    sudo dnf update -y

    You should reboot your system to make the changes applied:

    reboot

    Now the system is completely ready to install CWP. So, use the cd command to change the directory /usr/local/src by this command:

    sudo wget http://dl1.centos-webpanel.com/files/cwp-el8-latest

    Here, you should run the command below to install the downloaded shell script:

    sudo sh cwp-el8-latest

    Now you have successfully installed CWP on your CentOS system. Reboot the server again to apply changes:

    reboot

    Also, you can use the command below to automatically reboot the system after the installation:

    sudo sh cwp-el8-latest -r yes

    Configuring CWP on CentOS 8

    In the configuration section, your first step is to access the web panel user interface by giving the IP address and port number 2030.

    http://server_IP_address:2030/

    You can check the server’s IP by opening the terminal of your system on which you installed CWP. Use the following command:

    ip a

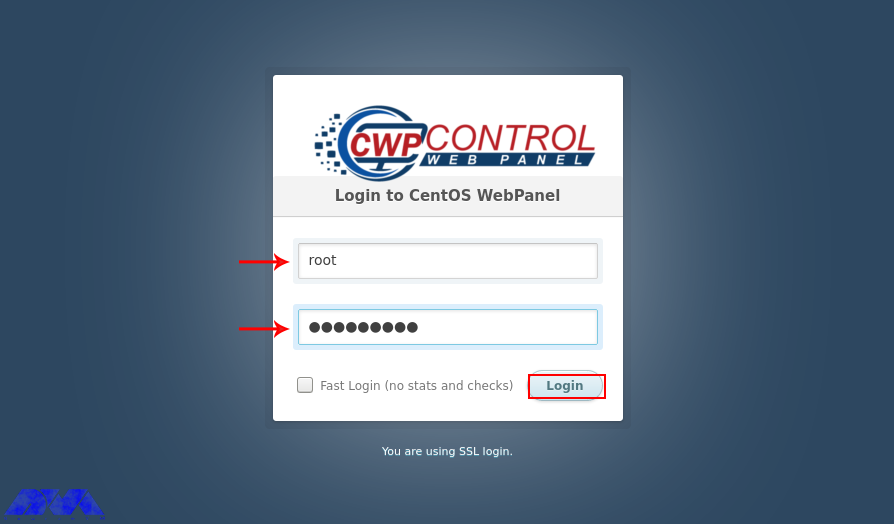
    Her, you can access the admin control panel using your IP address. Use the root username and password to login to the CWP:

    CWP login page

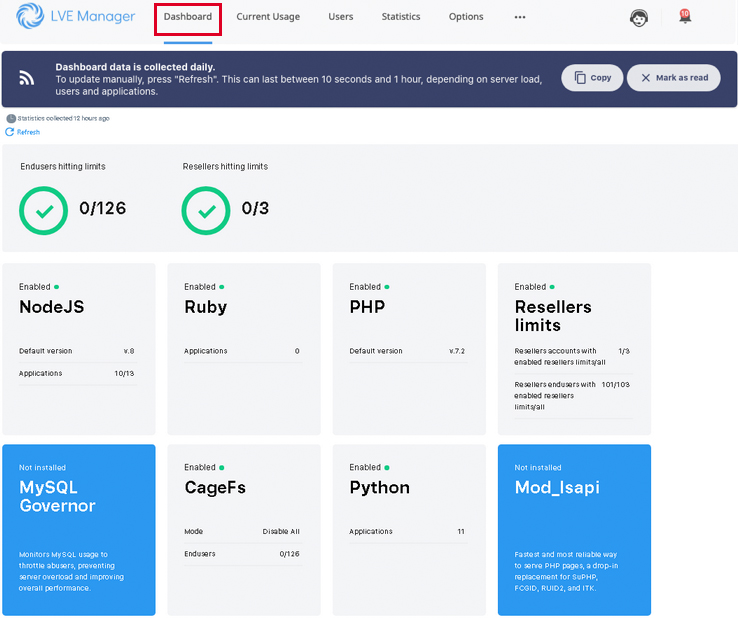
    You can see the dashboard here:

    cwp dashboard - install cwp on centos 8

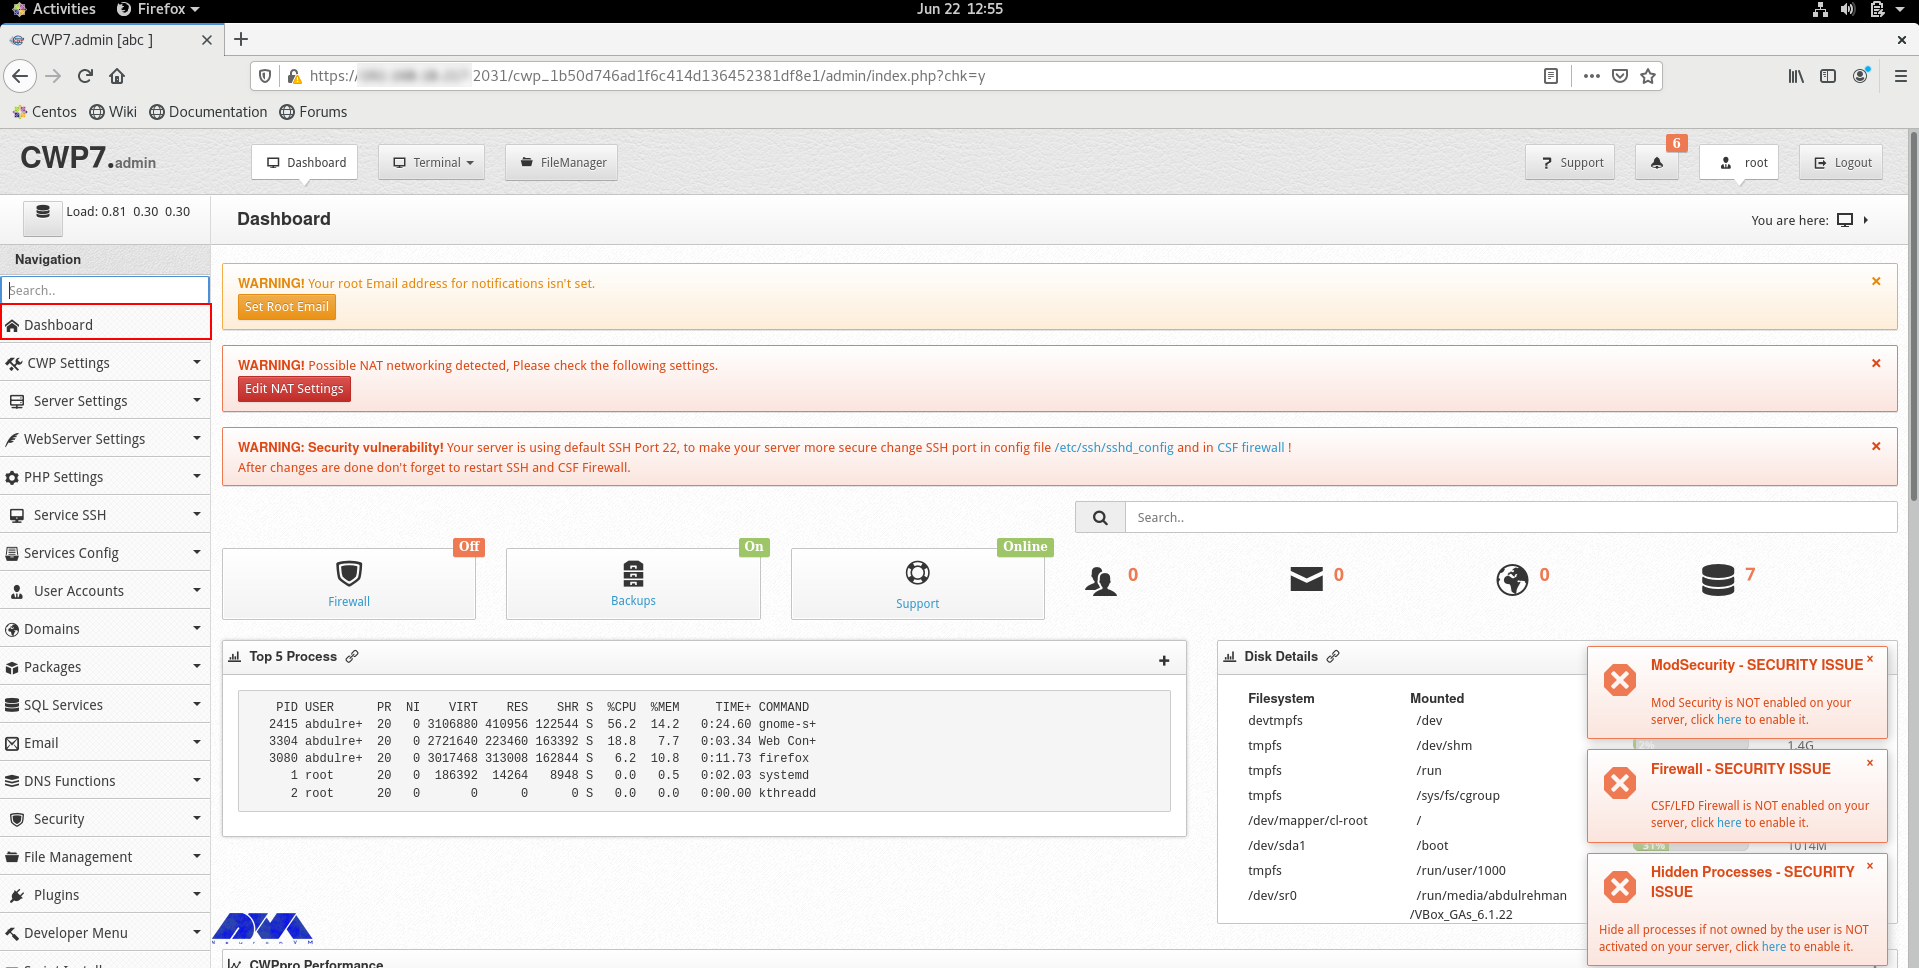
    If you can log in to the dashboard easily, it shows that your installation is successful.

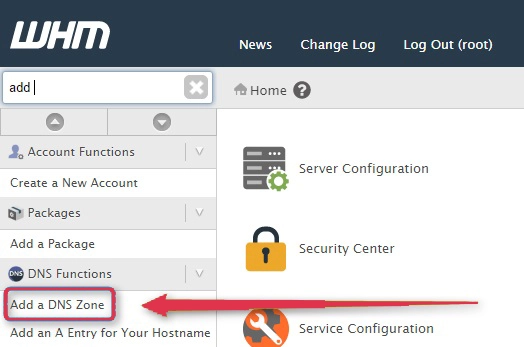
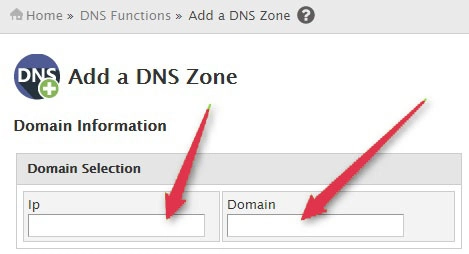
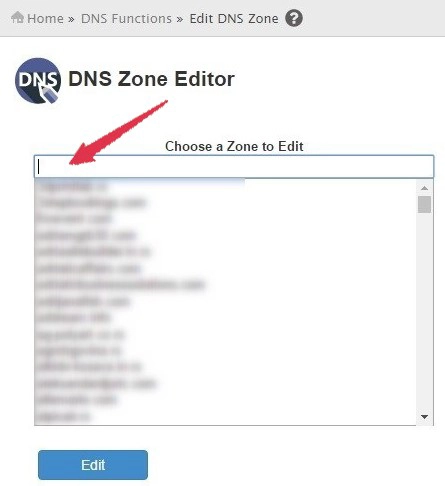
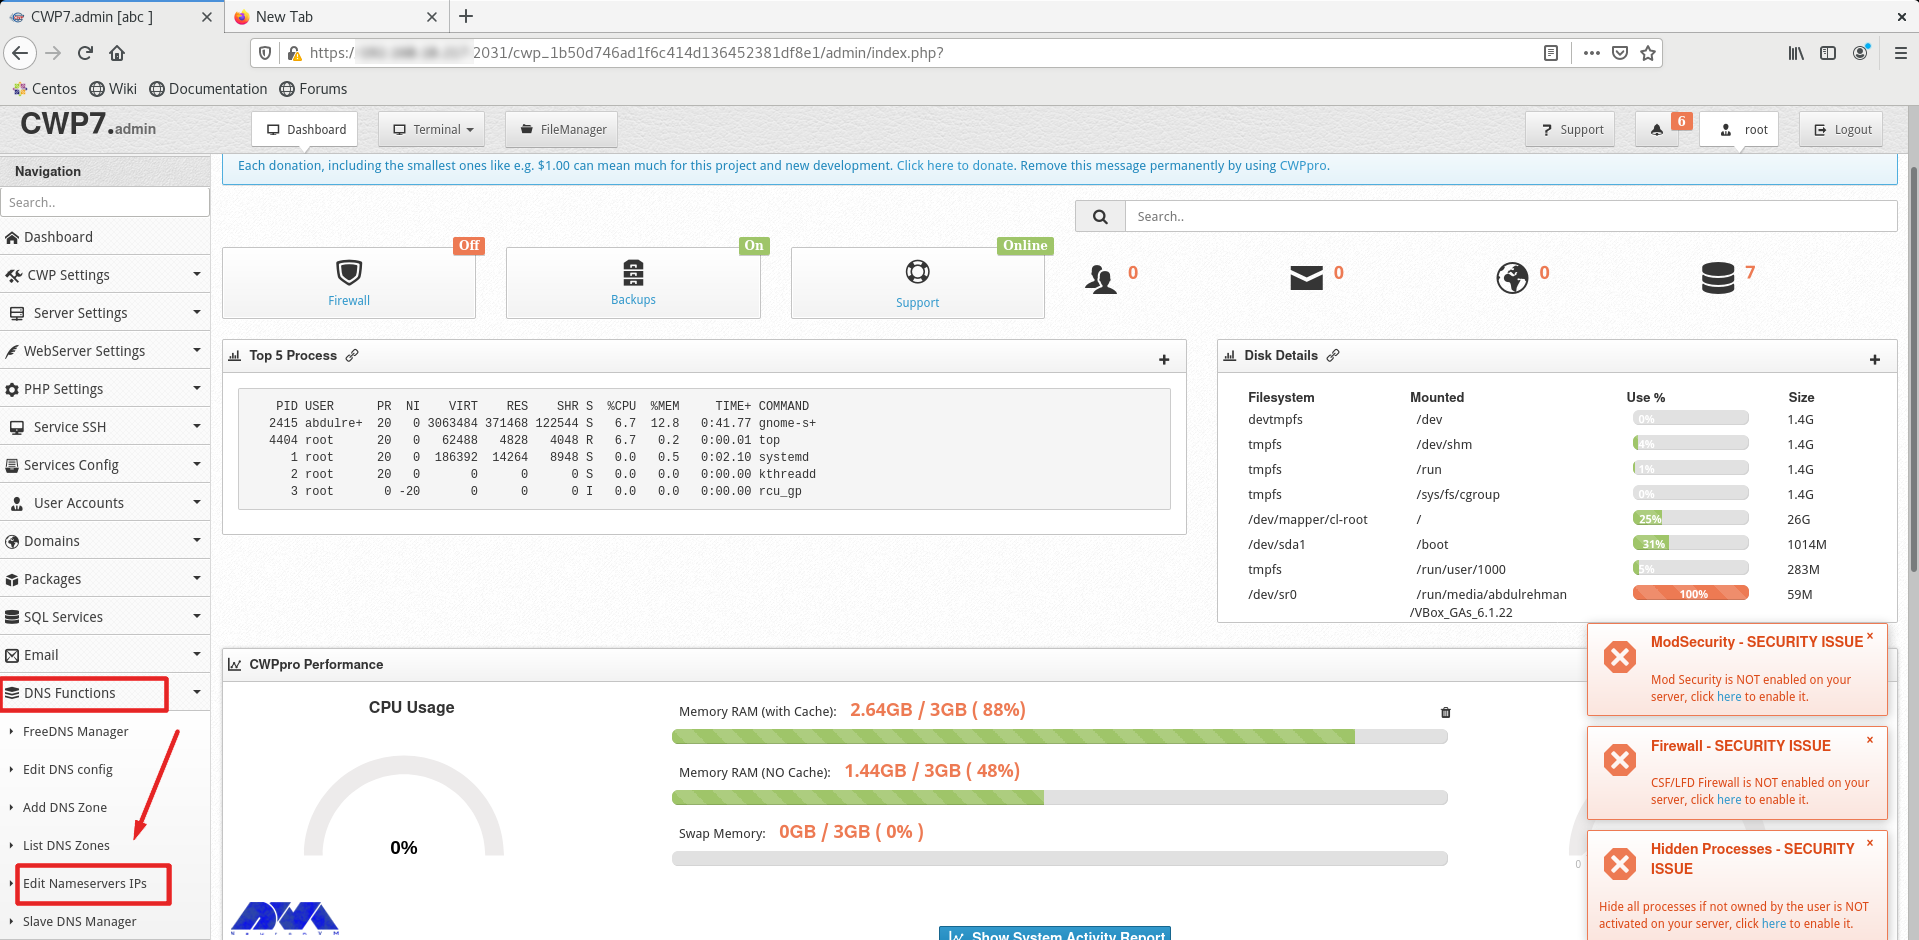
    You should do a couple of instructions, to prepare the domain for domain hosting. On the dashboard, you should refer to DNS Functions part and choose Edit Name Server IPs:

    configuring cwp on centos

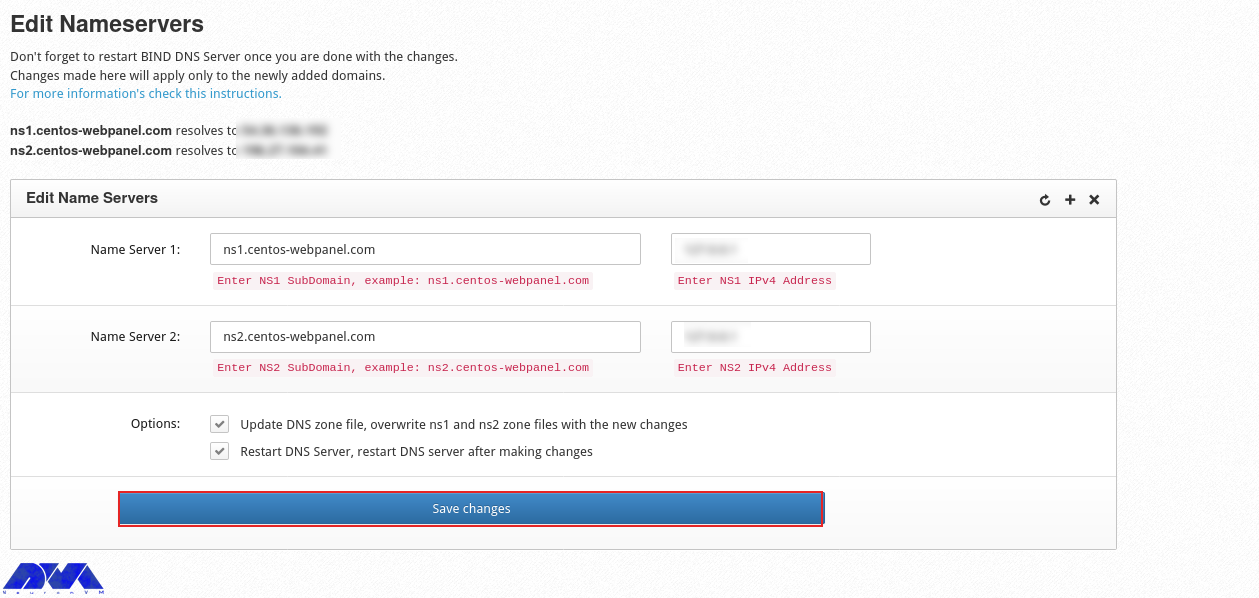
    You should add nameserver 1 and 2 with related IP addresses and click on Save Changes Button:

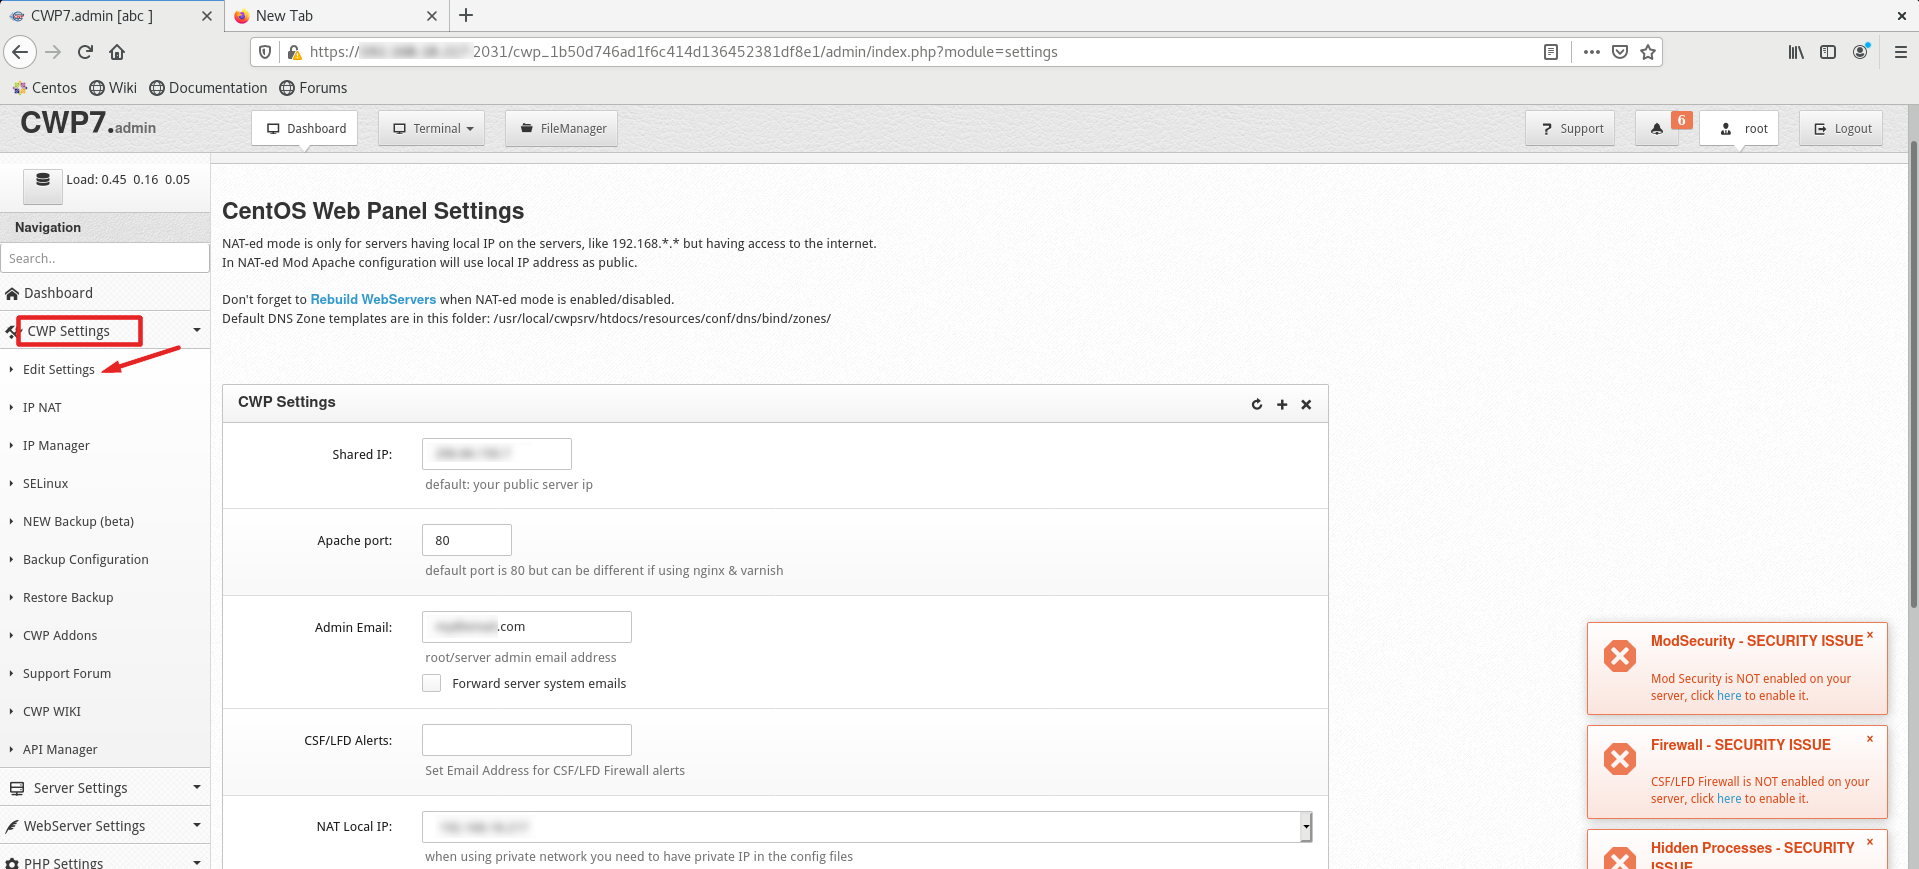
    Then go to the CWP Settings and select Edit Settings to determine the shared IP address:

    cwp settings - install cwp on centos 8

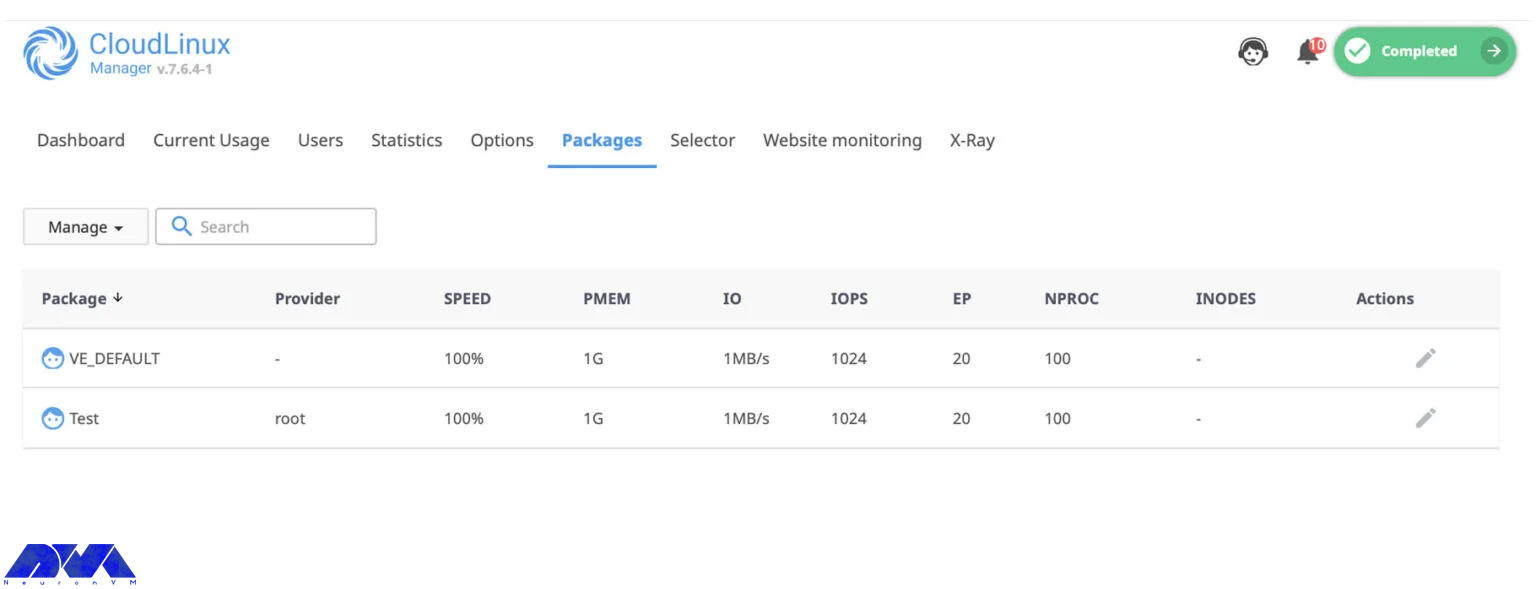
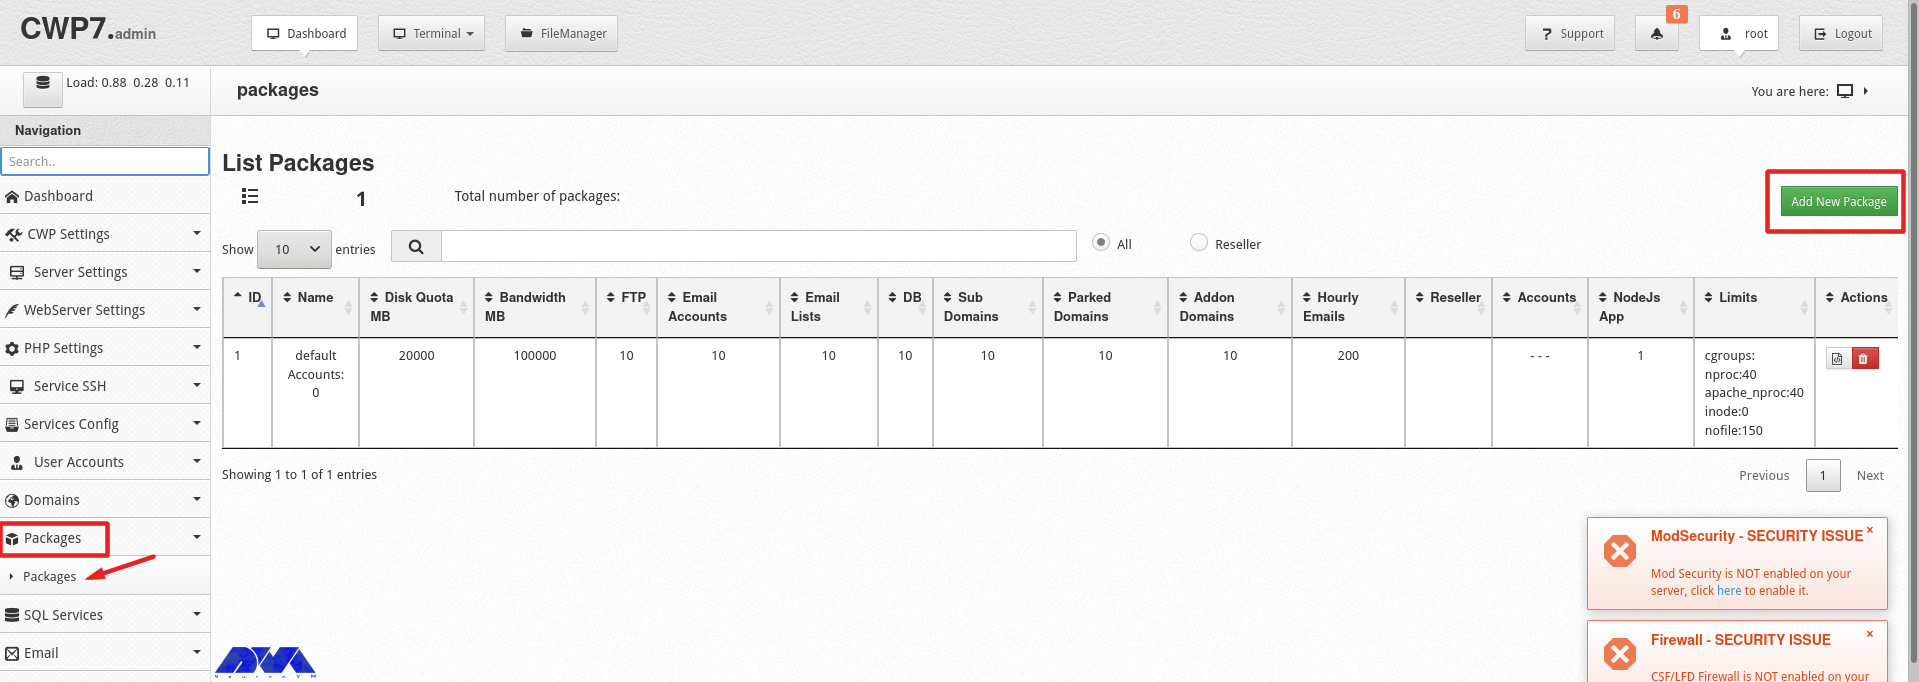
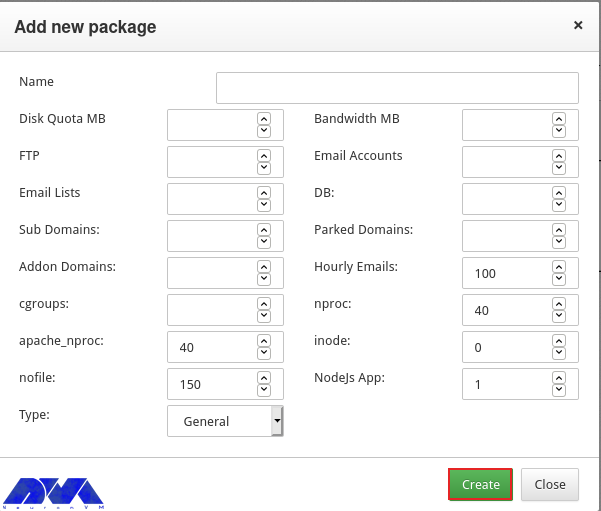
    Go to the Packages part and choose to Add a Package:

    add packages on cwp

    In the end, you will see a pop-up window to add a package, insert the needed values and click on Create button:

    add packages on cwp-2

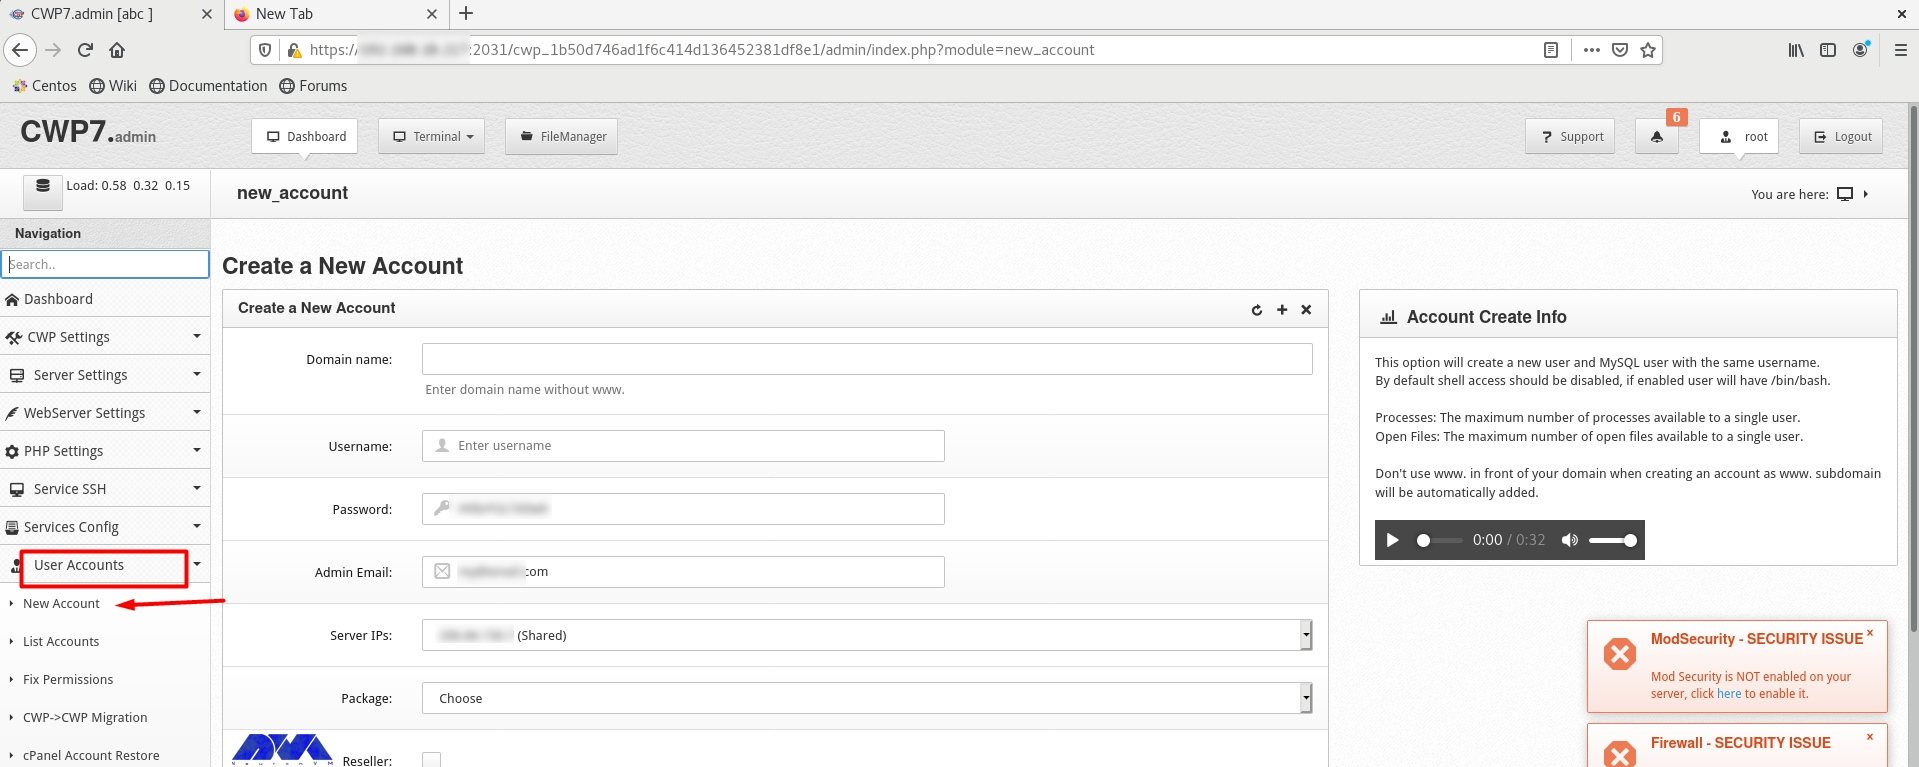
    Go to the User Accounts and click on the New Account, to create an account and fill in the necessary information:

    create account on cwp

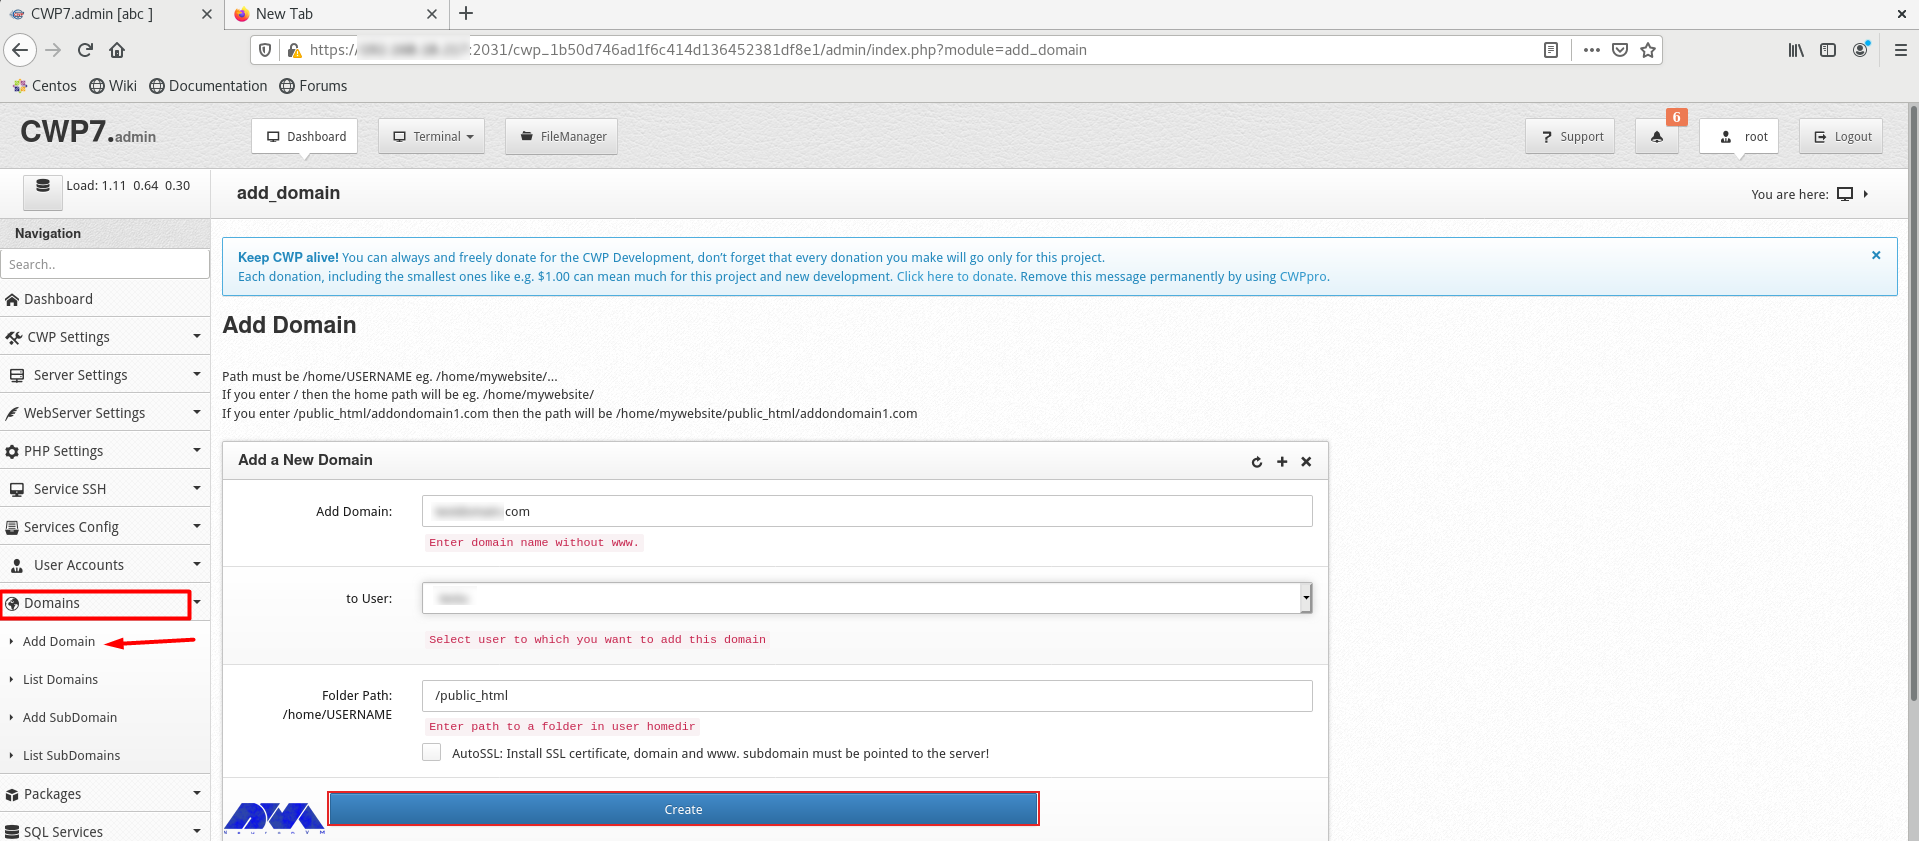
    As the final step, add a domain. Click on Domains and then Add Domain by providing the name of the domain and pressing Create button:

    add domian on cwp

    Conclusion

    CWP is a practical control panel for web hosting with an intuitive interface and great features to manage servers. So, we decided to analyze it and show the way to install CWP on CentOS 8. We also presented all the instructions to configure this management tool.

    FAQ

    What is required before CWP installation?

    A minimum of 2 GB RAM and a 64-bit operating system. Although we recommend using 4 GB RAM.

    Which port is used by CWP on CentOS?

    The console access ports are 2030 (without SSL) and 2031 (with SSL).

  • How to Manage JSON Data with PostgreSQL

    How to Manage JSON Data with PostgreSQL

    Want to know the way to manage JSON data with PostgreSQL? Read this article to have a full understanding of this issue. I believe that most people don’t use it correctly, and it causes problems and unhappiness in the long run. So, first of all, we will explain PostgreSQL and JSON data briefly and then go on with the rest of this article.

    Brief Explanation of PostgreSQL JSON Data Type

    We have another data type in PostgreSQL, which is called JSON data and stands for Javascript Object Notation. JSON data is a user-friendly data format for users who are willing to transfer data in a network at high-speed. JSON replaces XML in various fields rapidly. Also, nowadays, developers enhance their software capability by pairing their application’s JSON data with PostgreSQL to reach a query processing environment.

    In other words, the main purpose and role of JSON is transporting data between a server and a web application. JSON has a human-readable format. Since, version 9.2, PostgreSQL supports native JSON data and provides a lot of functions and operators to control JSON data.

    Manage JSON Data With PostgreSQL

    Now that you have a clear understanding of this issue, let’s go further and learn the way to manage JSON data step by step with PostgreSQL. We suggest that you visit the Linux VPS server plans provided on our website before starting the process of Managing JSON Data with PostgreSQL.

    How to Create a New Table to Practice JSON Data Type

    – In the first step, let’s create a new table to practice JSON data type:

    CREATE TABLE orders (
    id serial NOT NULL PRIMARY KEY,
    info json NOT NULL
    );

    As you see above, our orders table includes 2 columns:

    1- The id column is the primary key column that identifies the order.

    2- The info column saves the data in the form of JSON data type.

    How to Insert JSON Data after Creating a Table

    – The next step is to insert JSON data after creating a table.

    Now that you have created a PostgreSQL table, to insert data, you have to make sure that data is in a valid format. So, apply the following Insert statement and then put a new row into your order table, as we do here:

    INSERT INTO orders (info)
    VALUES('{ "customer": "Terri Person", "items": {"product": "coffee","qty": 6}}');

    The above command represents that our customer, Terri Person bought 6 cups of coffee. Now, use the below command to insert multiple rows at the same time in your table:

    INSERT INTO orders (info)
    VALUES('{ "customer": "Linda Evanty", "items": {"product": "Toy Car","qty": 24}}'),
    ('{ "customer": "Will Path", "items": {"product": "Teddy bear","qty": 1}}'),
    ('{ "customer": "Jannson Miller", "items": {"product": "Doll","qty": 2}}');

    Querying JSON Data

    – The last step is to query JSON data. Finally, if you want to query the JSON data, you should use the select statement and present your data in a manner similar to other native data types. So, use the below command:

    SELECT info FROM orders;

    Now, you will see that PostgreSQL converts a result set in the form of JSON.

    Key Operators of PostgreSQL to Get the JSON Data

    PostgreSQL JSON provides several operators to manipulate your data in a useful way. Some of the operators that are useful for inserting JSON data in PostgreSQL are as follows:

    -> operator: This operator helps to return the JSON object field by key.

    ->> operator: This operator helps to return the JSON object field by text.

    e.g: In the following query, the -> operator is used to get all customers in the form of JSON:

    SELECT info -> 'customer' AS customer
    FROM orders;

    e.g For this query, the ->> operator is used to get all customers in the form of text:

    SELECT info ->> 'customer' AS customer
    FROM orders;

    At this point, you can chain operator -> with operator ->> to retrieve a specific node.

    e.g, the following statement returns all products sold:

    SELECT info -> 'items' ->> 'product' as product
    FROM orders
    ORDER BY product;

    As the last part, use the JSON operator in the Where clause:

    To filter the returning rows, you can use JSON operators in the WHERE clause.

    For example, to figure out who bought the Toy Car, you should use the following query:

    SELECT info ->> 'customer' AS customer
    FROM orders
    WHERE info -> 'items' ->> 'product' = 'Toy Car';

    If you want to know who bought 2 products at the same time, you should use the query below:

    SELECT info ->> 'customer' AS customer,
    info -> 'items' ->> 'product' AS product
    FROM orders
    WHERE CAST ( info -> 'items' ->> 'qty' AS INTEGER) = 2

    Conclusion

    Well, Done! In this article, we tried to show how you can manage JSON data with PostgreSQL, and you learned how to use operators to process JSON data efficiently. Now, you can easily use this data and manage it.

  • How to Protect Against Brute Force Attacks on Dedicated Server

    How to Protect Against Brute Force Attacks on Dedicated Server

    A Brute Force attack is one of the hacker’s methods to find passwords. Usually, this work is done by special software. In this attack, the hackers do not take any steps to decrypt the password. Rather, using software, it tries to guess the password and check all possible situations to find the correct password. After reading this comprehensive article, you will learn how to Protect Against Brute Force Attacks on Dedicated Server.

    What is a Brute Force attack?

    Brute Force attack is a trial-and-error method to decode important and sensitive data. The most common applications of brute force attacks include cracking passwords and encryption keys.

    This type of attack requires two factors, a lot of time and high processing power, which have reduced the efficiency of hackers to some extent. The decoding process is a complex computational operation. To do it, a high-power of a computer software system is needing. Since computers with better hardware and thus higher processing speed have been launched, finally these operations and attacks have become faster and more effective.

    How does Brute Force work?

    You might imagine that the brute force attack creates a lot of load on the CPU. But it is not bad to know that the most effective hardware for brute force attacks is the graphics card (GPU).

    In this type of attack, all possible modes of the password are checked as a combination of characters, including different permutations of numbers, lowercase and uppercase letters, and special characters. This check usually starts with one character, and after checking all cases of one character, check all cases of two characters, three characters, etc., and this process will continue until the relevant password is discovered. Theoretically, this method will eventually reach the answer, for example, if the corresponding 6-digit password is 123456, it can be easily guessed by this method in a relatively short time.

    But imagine that the corresponding password is very long and complicated; In this case, this process will take a long time. According to the complexity of the password and algorithms used, it may take a few hours, a few days, a few months, or even several years.

    Protection against Brute Force attacks on a Dedicated Server

    In the rest of this article, we will explain 6 ways to prevent brute force attacks on a dedicated server. To get started, you can buy a cheap dedicated server from NeuronVM and run the steps mentioned in this post on it.

    1. Microsoft Windows Firewall

    Microsoft Windows Firewall is a powerful security tool that can help protect your dedicated server from malware. Activating a firewall, prevents unauthorized access to the server and the installation of spyware and protects data from theft.

    Microsoft Windows Firewall

    2. CSF Firewall

    Config Server Firewall, also known as CSF, is a firewall configuration script that is installing on servers to maintain security. CSF provides an advanced user interface for complete firewall management in cPanel, DirectAdmin, Webmin, etc. Also, among the features of CSF, we can mention preventing public access to services and allowing connection only through FTP and LFD systems. If you want to increase the security of your server, you need to enable CSF.

    CSF Firewall to preventing brute force attack on dedi cated server

    3. Use Strong Passwords

    One of the basic steps to prevent brute force attacks is choosing a strong password. A strong password is one that is difficult for others to guess and that you can easily remember. One thing you should pay attention to is that your password should be long. A strong password should have at least 20 characters. If your password is 8 characters or less, it will crack in 58 seconds.

    Use Strong Passwords to prevent brute force attack

    A strong password should contain symbols, numbers, lowercase, and uppercase letters. Including symbols and numbers makes your password more difficult to guess because you create more possible combinations using these symbols.

    4. Strengthen Your Login Process

    Another effective way to deal with brute force attacks is to strengthen the login processes. For this purpose, you can use two-step authentication. Another way is to ask users for a confirmation code when they log in. Another way to protect the login page is to restrict the login page to certain IPs. It means that only the IPs you specify can access this page.

    Strengthen Your Login Process

    5. Monitor User Activity

    User activity should always be monitored to identify suspicious behavior. If the system administrator notices an increase in the number of logins or login attempts from unknown users, he can take action to protect his system.

    Monitor User Activity to brute force attack

    6. Use Captcha

    Normally, a login form contains two fields: username and password. By adding a captcha box with a specific phrase written inside it, the user must enter it in the lower box, which is called the security phrase. You can also use the security question instead of the security phrase, which the user must answer in the box below.

    use capcha to prevent Brute Force Attacks on Dedicated Server

    Until the phrase or security question is answering, even if the username or password is correct, it is not possible to log in, which is an important security barrier against brute force attacks. Considering that Brute Force attacks are carried out by robots and software, therefore, by creating a captcha code, the robot or software does not have the necessary intelligence to respond to the captcha code; Because human questions are raised.

    Conclusion

    In this article, you learned How to Protect Against Brute Force Attacks on Dedicated Server. What distinguishes Brute Force attacks from other cracking methods is that it does not use any intellectual strategy, but try to combine different characters to achieve the correct combination. Just like a thief trying different combinations of numbers to open a safe.

  • What is KVM?

    What is KVM?

    KVM stands for Kernel-based Virtual Machine, an open-source Linux virtualization technology that allows the Linux kernel to be used as a hypervisor. Introduced in 2006 and was then integrated into the original version of the Linux kernel. Also, it is part of the Linux code and uses every Linux feature, maintenance, and development without engineering. In this article, we are going to teach you What is KVM?

    What is Virtualization?

    Virtualization refers to a simulated computing resource that mimics the corresponding real resource and makes many resources, from software to specialized hardware devices, to complete hardware platforms. It also covers virtual machines, which include devices such as CPU, memory, network card, disk, graphics adapter, and operating system. The software in question that creates and runs virtual machines is called a hypervisor.

    Necessities and Benefits of Virtualization

    Years ago, in data centers, development, and practice organizations, all machines ran a version of the same operating system, such as Windows, FreeBSD, and Linux. But today, different operating systems such as Linux and Windows and even different versions of an operating system are placed in a computer environment without virtual machines; several physical machines are deployed and maintained to run programs on multiple operating platforms. Virtualization also allows multiple virtual machines, each potentially running a different operating system, to run on a single physical machine.

    In the rest of this article, we are going to introduce the KVM to you.

    Introduction to KVM

    KVM is classified as a type 2 hypervisor, which means it runs on a host operating system. It is also based on the kernel, more precisely, the Linux kernel. It only supports Linux as its host operating system. If you need a type 2 open-source multi-platform hypervisor, VirtualBox is the right choice. VirtualBox also runs natively on Windows, Linux, Mac OS X, and Solaris.

    We recommend that you visit the cheap dedicated server that is offered on our website, and after choosing the plan you want, install KVM on it.


    what is kvm

    It competes in an industry with open-source alternatives such as Xen VirtualBox and proprietary products such as VMware vSphere, Citrix XenServer, and Microsoft Hyper-V. In the past, hypervisor solutions at the time, such as Xen and VirtualBox, were all software-based, and the x86 architecture could not support virtualization. It wasn’t until 2005 that the introduction of the Intel VT and AMD-V extension instruction sets permanently changed the virtualization landscape.

    You can currently install KVM on any 32-bit or 64-bit x86 computer, the “host machine” in Hypervisory parlance, that supports the Intel VT or AMD-V plug-in. Today, modern hypervisors typically support hybrid virtualization, which is hardware-assisted and software-assisted for older chipsets.

    KVM Features

    KVM supports the virtualization of the following guest operating systems:

    1- Linux distributions including Debian, Ubuntu, Centos, Fedora, RedHat Enterprise Linux

    2- BSD like OpenBSD, FreeBSD, and NetBSD

    3- Solaris

    4- Windows

    It currently runs unmodified guest OS images. This feature is also known as full virtualization, in contrast to para-virtualization, where the guest operating system is modified to specifically handle operations that are much more difficult to execute on the virtual machine than on the host machine.

    How does KVM Work?

    KVM has 2 technology components: kernel and user space. The kernel component consists of 2 loadable kernel modules: kvm.ko and kvm-intel.ko or kvm-amd.ko

    kvm.ko module: provides kernel architecture-independent virtualization processing.

    kvm-intel.ko and kvm-amd.ko modules: correspond to modules for Intel and AMD processors. Also, these modules were integrated into the Linux kernel version 2.6.20.

    KVM uses QEMU, which runs in user space, to create virtual machines that interact with the guest operating system. Each virtual machine is simply a normal Linux process, and you can use Linux commands like top and kill to monitor and manage virtual machines.

    Virtual Machine Manager appears in the Applications -> System Tools menu. First, create a new connection to the local QEMU instance from the File -> Add Connection menu. Localhost (QEMU) or QEMU/KVM should appear in the virtual machine list. You can now create a virtual machine by pressing the top left button and the new virtual machine toolbar button.

    Conclusion

    After more than several years of development and operation, KVM has become the standard machine-level virtualization tool in many Linux distributions. In this educational article, you learned What is KVM? We hope this educational article was useful for you. Share your comments with us through the form below.

  • How to Buy NL RDP Server with Bitcoin

    How to Buy NL RDP Server with Bitcoin

    The way RDP Protocol works is that it connects a computer to a remote computer and the client computer can view the remote computer screen. The purpose of this post is to teach How to Buy NL RDP Server with Bitcoin.

    What is an RDP Server?

    Remote Desktop is the ability of computers to connect to each other remotely and also control their desktop. In Remote Desktop, the user controls that system, except that this connection is established through the network platform. It should be noted that Remote Desktop or RDP is a protocol owned by Microsoft and is available for most versions of Windows and other Operating Systems, including Linux, macOS, iOS, Unix, and Android.

    The port for this protocol is 3389 by default and you can change it to another desired port by making settings in the Windows registry. The Remote Desktop feature should enable the destination operating system to connect to a remote destination computer or server. The username that is authenticating on the destination system should be used. To use the Remote Desktop protocol, the user should use RDP client software or Remote Desktop Connection, while the host computer should run the RDP Server service software.

    Introducing Bitcoin

    Bitcoin is an electronic currency that allows you to send money anywhere in the world or use it to buy goods and services. Bitcoin is a digital currency based on blockchain. Blockchain is a platform for recording digital transactions. Blockchain actually does the job of the Central Bank differently, and the platform is officially cryptocurrency-based. Compared to other online payment gateways, Bitcoin charges a lower fee for moving customers. It is interesting to know that Bitcoin is managed in a decentralized manner, and it isn’t controlled by any entity or organization.

    Get NL RDP Server with Bitcoin

    In the first step, you should go to our website and select Admin RDP on the main page or directly go to the Admin RDP page:

    how to buy rdp server with btc

    Now go down to this page, choose your favorite Admin RDP plan to purchase, and click on the Purchase Now button:

    choose the rdp plan on neuronvm

    Next, you should choose the Netherlands (NL) from the Location section and also choose your desired Operating System, and then click Continue:

    choose rdp location

    Check the details and Click on Checkout.

    Tip: If there are any Promo Codes, insert them in the box for discount.

    purchase details of rdp plan on neuronvm - buy nl rdp server with bitcoin

    Here, you should fill in your personal information and sign in to the NeuronVM website, or if you have an account, click on the Already Registered button:

    registration part of neuronvm

    In this step, as the last option on this page, select the All Cryptocurrency option. Also, you can add extra information about your purchase in the Additional Note box and click on Complete Order:

    get nl rdp server with bitcoin

    Finally, you will be redirected to the payment page. Choose Bitcoin as your preferred currency and click on Complete Checkout:


    how to buy admin rdp wit btc

    At last, you should open the relevant code in your wallet and complete the payment process:

    payment ID for purchasing rdp

    Conclusion

    In this article, the Remote Desktop protocol and Bitcoin digital currency were introduced. In the continuation of the article, how to register on NeuronVM and how to buy NL RDP Server with Bitcoin were taught. I hope you can easily buy the Netherlands RDP Server from our site with the help of this article.

    FAQ

    What is an NL RDP server?

    It refers to the Netherland server, which is physically located in the Netherlands and provides remote desktop access to users.

    Can we use any payment methods to buy Admin RDP?

    Yes, you can use most of the cryptocurrencies and perfect money to make the payment.

  • How To Install CloudLinux on Dedicated Server

    How To Install CloudLinux on Dedicated Server

    After reading this post, you will learn How to Install CloudLinux on Dedicated Server step by step. This platform is a great operating system that can be deployed on various systems like dedicated servers, cloud servers, or virtual machines. It can be said that one of the best solutions to secure the hosting environment on servers is to isolate the file system and keep the user’s process secret.

    What is CloudLinux?

    CloudLinux is an operating system that helps create a secure and stable platform for shared hosting. This cloud computing system is based on CentOS and Cause users to have more control over server resources:

    Features of CloudLinux

    – Isolation of user accounts prevents users from influencing each other.

    – It prevents users from seeing each other’s configuration files or private information.

    – Allows you to monitor and control limits such as RAM, CPU, and I/O.

    – Monitor and implement MySQL usage.

    – It provides CageFC, which is a type of file system.

    – It allows users to choose between different versions of php

    – Prevent symbolic link attacks

    – It is compatible with all major control panels.

    Install CloudLinux on a Dedicated Server

    Now, it’s time to find out how to install CloudLinux on your dedicated server. To start and install CloudLinux on a dedicated server, you must have a dedicated server in the first step. Therefore, we suggest you visit the Cheap Dedicated Server plans presented on our website. So follow the instructions in this section carefully so that you can do the installation successfully.

    The first step is to run the following command to download cldeploy script:

    wget https://repo.cloudlinux.com/cloudlinux/sources/cln/cldeploy

    The installation step should be done based on the activation key, so run the command below:

    sh cldeploy -k < CL activation_key >

    If you want to get permission based on IP, use the following command:

    sh cldeploy -i

    When you finish the installation part, it’s time to run the command below to reboot the Linux server:

    reboot

    Now you have CloudLinux on your system. After rebooting, you can run the server through CloudLinux shared OS.

    Configure CloudLinux on Dedicated Server

    After installing CloudLinux on your server, you should apply the configuration by using the following commands:

    If your control panel is Cpanel, navigate WHM, then LVEmanager.

    If you use DirectAdmin, then go through Dashboard and then CloudLinux Manager.

    Tip: The CoudLinux user interface is always the same for every control panel.

    At last, open CloudLinux through the control panel. In this case, you will face a welcome page, and you can click on the Start wizard option to finish the process:

    Configure CloudLinux on Dedicated Server

    Now, you can continue the configuration part. Here, your first choices are like this:

    Cagefc- It is a kind of virtual file system and set of tools that keeps the user hidden.

    LSAP- This case is actually a kind of Apache module, based on Lightspeed API technology for PHP and great performance of that.

    MySQL Governor- This software integrates and monitors MySQL in a shared hosting environment.

    Node.js selector- This tool is one of the components of CloudLinux that allows the user to easily create Node.js applications and also select them and other parameters based on their needs.

    Configure PHP- With this tool, you can also configure selectors and PHP interpreters. It also allows users to choose their versions and modules.

    After you have made your selection, click Finish & Install, and keep in mind that the installation may take a few minutes depending on the hardware:

    configure cloudlinux on dedicated server

    Now we are going to take a look at the interface of CloudLinux by presenting pictures.

    Dashboard:

    Here, you can see the summary interface for CloudLinux. This summary gives information about the status of every other feature enabled with CloudLinux. In addition, you can see the number of users and resellers hitting the resource limits.

    configure cloudlinux on dedicated server

    Current usage:

    This interface is used to get information about the live usage of users who hit the limits. (like CPU, RAM, etc.)

    Configure CloudLinux on Dedicated Server

    Users:

    This interface shows the list of users and their adjusted limits. In addition, you can change the individual user’s custom assignment of the resources.

    Configure CloudLinux on Dedicated Server

    Statistics:

    This one is called the statistics interface. This interface will filter the average usage of every parameter for users according to the time.

    Configure CloudLinux on Dedicated Server

    Options:

    This interface is a configurable option used to configure notifications, MySQL, Python Selector, CageFS, and so on.

    Configure CloudLinux on Dedicated Server

    Packages:

    The package interface is used to configure the limitations of the packages.

    Configure CloudLinux packages

    Selectors:

    You can configure the PHP selector setting using this interface.

    Configure CloudLinux on Dedicated Server

    Website Monitoring:

    Use this interface to monitor the website’s number of requests and PHP reports.

    website monitoring on CloudLinux

    Configure CloudLinux Package

    After you have created the packages, go to the CloudLinux packages section to configure package restrictions. Now, you can see a list of already created packages. Then click the Pencil icon to edit the package:

    Configure CloudLinux package

    The Limits of CloudLinux are shown here, and you can configure them for every individual package:

    Speed: Speed limit for CPU

    VMEM: limitation of Virtual memory

    PMEM: Limitation of Physical memory

    IO: Combines the operation of reading and writing.

    IOPS: This limit restricts the total number of reading and writing per second

    NPROC: Maximum number of processes on LVE

    EP: It represents a maximum number of connections that happen simultaneously to dynamic Apache scripts and SSH and corn jobs.

    Now that you have set the limit of the required parameters, you can click the save button. Note that you can apply the same procedure to other packages:

    package-limits-parameters-cloudlinux-1

    Conclusion

    In this article, we tried to teach how you can install CloudLinux on a dedicated server. We hope you enjoy this useful content. It represents a complete guide for you. If you have any questions, just comment.

    FAQ

    Does cloudLinux include technical support?

    Yes, it offers technical support services.

    Can we test CloudLinux before purchase?

    CloudLinux offers a trial period. So you can use it to test the service. Go to the website to get the trial.

  • Tutorial Add a New DNS Zone with WHM on Dedicated Server

    Tutorial Add a New DNS Zone with WHM on Dedicated Server

    In this tutorial, you will learn how to add a new DNS zone with WHM on the dedicated server. To explain this process with an example, we will assume that you have a DNS server with Cpanel permission. In order to be able to display your site on the internet, the only way is to setup the DNS server correctly. So you need to add a DNS zone for your address and run it in the right way.

    What is the DNS Zone?

    DNS is the domain name system and it has the role of converting domain names into IP addresses. In this way, allows browsers to access internet resources and websites. IP addresses are actually like site identifiers and other devices can use them to find your system location.

    Prerequisite

    – A Dedicated Server (We recommend you visit the Cheap Dedicated Server plans presented on our website and choose a plan.)

    – Install cPanel on Dedicated Server

    Buying Cpanel License is easy. Cpanel has a graphical interface and it is like you can manage your server even with little information as a beginner. Of course, you should have some knowledge to control and make changes to this control panel. Because, if you do not master what you are doing, then will disrupt the performance of your server.

    How to Add a New DNS Zone with WHM on Dedicated Server

    Actually, if you have a least Cpanel license, the process of adding a DNS zone is simple and easy. So as the first step, login WHM and follow the direction below:

    login to whm/cpanel

    Go to the DNS functions > Add a DNS Zone

    Add a New DNS Zone with WHM on Dedicated Server

    Then go through the following steps to add a new DNS zone:

    1- You should go to the Domain selection part and as you see the IP field enter the IP address.

    2- Now you see the domain field. Enter your domain name.

    3- At last click the add zone Button, and add a new zone on your server.

    how to add a dns zone on whm

    The Way to Edit an Existing Zone

    In this way, again you should log in to WHM and find the Edit DNS Zone option:

    The Way to Edit an Existing Zone

    Here, you will see the Choose a zone to edit option. In the box, type the domain name of your DNS zone to edit and then click the Edit button to start:

    dns zone editor

    If you want to edit a zone, you should have basic information about your preferred parameters to change. The instructions to apply are from the developers, hosting, and internet service provider. This instruction is based on the model of replacing an entry with the new one.

    For any DNS domain, NS and A records are critical. In this way, the nameservers are specific to the IP addresses that the DNS server responds to. Be careful not to change them randomly because if you make a mistake, your site will fail.

    Conclusion

    Here, we tried to show how you can add a DNS zone with WHM on dedicated server. We did this by using Cpanel. Keep in mind that, if you want to control and manage your WHM server, check to make sure the domain is pointing to your correct server IP.

    FAQ

    Where is the DNS storage location?

    These files are stored on the DNS server and are used by the authoritative name server to perform DNS lookups for the domain.

    Is it possible to delete the DNS zone?

    Of course. First, select a domain name from the choose zones to delete menu. Then click delete on the next interface to confirm that you wish to delete the selected zone

  • How to Install and Configure Antivirus on Linux Dedicated Server

    How to Install and Configure Antivirus on Linux Dedicated Server

    If you are worried about the penetration of viruses, malware, exploits, or shell scripts into your system, then you should do it. For this, there are tools and antivirus software for your Linux system’s WHM panel that you can use to scan your damaged content. After reading this post you will learn How to Install and Configure Antivirus on Linux Dedicated Server.

    Install and Configure Antivirus on Linux Dedicated Server

    In this article, we will teach installing antivirus on CentOS, Ubuntu, and Debian distributions of Linux dedicated servers. To do this you can use different antivirus software the most popular among them is ClamAV which is an open-source solution against security threats. So follow the instructions here to secure your system.

    install antivirus on dedicated server

    Prerequisite

    – A Dedicated Server (We recommend you visit the Cheap Dedicated Server plans presented on our website and choose a plan.)

    Install cPanel on Dedicated Server

    Install ClamAV on Dedicated Server (CentOS)

    First, you should know that ClamAV is not prepackaged on CentOS. Therefore, we need to add a repository (epel) by running “Yum” commands in the order:

    sudo yum -y install epel-release
    sudo yum clean all

    Now, you are ready to install ClamAV on the CentOS operating system. So, use the following command line:

    sudo yum -y install clamav-server clamav-data clamav-update clamav-filesystem clamav clamav-scanner-systemd clamav-devel clamav-lib clamav-server-systemd

    How to Configure ClamAV on CentOS

    Here you can find the steps to configure ClamAV on CentOS. But before configuring the first step is to remove the example string from the configuration:

    sudo sed -i -e "s/^Example/#Example/" /etc/clamd.d/scan.conf

    Now it’s time to specify the type of server. Open the configuration file using your text editor (here is nano):

    sudo yum install nano -y

    Then, open the ClamAV configuration file:

    Sudo nano/Etc/cmd.d/scan.conf

    You should find the line below :

    #LocalSocket /var/run/clamd.scan/clamd.sock

    On the command below, remove the example string from the ClamAV fresh clam update configuration file:

    sudo sed -i -e "s/^Example/#Example/" /etc/freshclam.conf

    At last, use this command to run the ClamAV database update:

    sudo freshclam

    Then you can run and boot the Clam service:

    sudo systemctl start clamd@scan
    sudo systemctl enable clamd@scan

    Install ClamAV on Dedicated Server (Ubuntu/Debian)

    In this section, we are going to show how to install ClamAV antivirus on Ubuntu or Debian. Since the installation process and commands are the same in both operating systems, we will examine the instruction as follow.

    install ClamAV on dedicated server

    In both operating systems, use the command line below to update your system:

    sudo apt update

    Now, go to the installation process using this command:

    sudo apt install clamav clamav-daemon

    To check the installation status, you can run the command below:

    clamscan --version

    How to Configure ClamAV on Ubuntu/Debian

    To configure ClamAV on Ubuntu or Debian follow the commands below:

    First, you should stop the daemon to update the ClamAV database manually and then Usenet command to update:

    sudo systemctl stop clamav-freshclam 
    sudo freshclam

    The next step will be to download the latest database signature file by the command below:

    sudo wget https://database.clamav.net/daily.cvd

    Copy the file to the required directory with the related command:

    sudo cp daily.cvd /var/lib/clamav/

    In the end, start the fresh clam daemon using the following command:

    sudo systemctl start clamav-freshclam

    Conclusion

    That’s all! Here we tried to teach how to install and configure antivirus on Linux dedicated server. Now you can safely use and protect your system. We hope you enjoy this article. Don’t forget that if you own a Linux dedicated server, you must install an antivirus to protect from danger and malicious files. For any question leave command.

    FAQ

    Is it essential to use antivirus?

    Yes, Operating systems do need antivirus protection. Linux is really safe among other operating systems but it can also be affected by malware and viruses.

    Is it possible to use the same antivirus on a dedicated server and my personal computer?

    It’s not recommended.

  • 2 Ways to Install Redis on Ubuntu 22.04

    2 Ways to Install Redis on Ubuntu 22.04

    Redis is a kind of data structure storage and is used as a message broker, key-value database, and also cache system. It is written in C language and supports a large amount of data types like strings, lists, hashes, and many others. Here, we are going to analyze this applicable data store and learn 2 ways to install Redis on Ubuntu 22.04.

    Steps to Install Redis on Ubuntu 22.04

    Installing Redis is an easy process that may take just a few minutes. But first, you should prepare some requirements.

    Prerequisites

    – A Linux VPS with Ubuntu 22.04 OS

    – A root user or non-root user with sudo privileges

    1- Updating system packages

    Before you start the installation part, your system should be up to date. So, use the following command:

    sudo apt update

    2- Adding PPA repository

    This section will show how you can add the PPA repository to the Ubuntu operating system.

    sudo add-apt-repository ppa:redislabs/redis

    3- Installing Redis

    As you add the PPA repository, use the following command to start the installation process:

    sudo apt-get install redis

    4- checking the version of Redis

    If you desire to see the version of the installed Redis, you can run the following command:

    redis-server -v

    After the installation, It’s time to do the configuration part.

    Configuring Redis on Ubuntu 22.04

    Here, you can use step-by-step instructions to Configure Redis on your Ubuntu system.

    1- Enabling Redis on Ubuntu

    If you want to configure Redis, first of all, you should enable the Redis service by running the following command:

    sudo systemctl enable --now redis-server

    2- Opening the Configuration File

    In this section, you should open the Redis configuration file in your desired editor to make changes:

    Tip: Here, we will use nano editor.

    Sudo nano/etc/redis/redis.conf

    Here is what the configuration file looks like:

    redise-config-file

    Now, you should find the Bind address line (127.0.0.1) and replace it with the (Bind 0.0.0.0):

    how to configure redis on ubuntu

    You will need a password for the configuration part which must be specified with the “Requirepass” attribute. Then hit the Ctrl+O keys to apply the changes and return to the terminal:

    install redis on ubuntu

    3- Restarting the Redis

    In this section, you can use the command below to restart the Redis:

    sudo systemctl restart redis-server

    4- Verifying Redis IP and Port

    Use the command below to check the IP and Port number which is used by this service:

    ss -tunelp | grep 6379

    Tip: To have a TCP connection you can use port: (6379)

    sudo ufw allow 6379/tcp

    5- Testing Redis Server

    Run the related command to test the Redis server and connect locally:

    redis-cli

    Now, you should run the “AUTH” command and specify the password you set in the configuration part:

    AUTH specify_the_password

    For a stable connection and positive output (Ok), you should enter the correct password.

    6- Checking the Redis Info

    Use the Info command to get detailed information about Redis:

    INF0

    You can use the ping command to ping the Redis:

    ping

    7- How to exit Redis

    To exit Redis, use the “quit” command:

    quit

    Uninstalling Redis on Ubuntu 22.04

    If you decide to uninstall Redis from your Ubuntu operating system, you can run the following command:

    sudo apt remove --autoremove redis-server -y

    This method was the best and easiest way to install and use Redis on Ubuntu OS.

    Conclusion

    You can install Redis on any server. But here we decided to focus on the Ubuntu operating system. Here, you learned how to install Redis on Ubuntu 22.04. We thought about the way of installation and configuration of this service. Also, we showed how you can uninstall Redis. Hope you enjoyed this article.

    FAQ

    How many connections can we have on Redis?

    There can be up to 10000 connections on Redis or 4 simultaneous connections per MB of your memory.

    Can we use multiple CPUs on Redis?

    As Redis is single-threaded, it can not use multiple cores of the server’s CPU.