


Backup is a vital part of a server and a helpful action to save data and important information about your system. So read this guide and follow the instruction to backup your system in the best way. After reading this article, you will learn a superior method to Configure a backup Server on a dedicated Server using JetBackup, just follow us until the end of this article.
A great way to store important files is to save them in a zip file using a backup server. This server is affordable and can be zipped into the system of the hard drive. of course, some of these servers are also available for free but some good options are only accessible in paid version. If you are computer savvy, you can upload the backup file to your server safely and easily using the built-in FTP function. Note that to track supporting files the log for supported and unsupported ones.
You can use a backup server to backup your data, applications, and databases. That is, you can rent a cheap dedicated server from a host and then lunch your backup solution. Now to learn the configuration of this backup server follow the steps below:
Tip: We will use the JetBackup server for this process.
you should prepare the minimum system requirements to use Jetbackup on your server:
– Centos 7/ Cloudlinux 7/ Redhat 7
– 64-bit OS
– cPanel version 68 and above
– WHM Tweak Settings, Max CPanel process memory, require at least 2 GB
You should follow to steps to install Jetbackup:
You should enter to server as a root user and then run the following commands on the CLI to start the processes of installation of the JetApps repository and plugin manager on the cpanel server:
yum install http://repo.jetlicense.com/centOS/jetapps-repo-latest.rpm
yum clean all --enablerepo=jetapps*
yum install jetapps-cpanel --disablerepo=* --enablerepo=jetapps
Tip: If LFD is enabled on your cPanel. You have to be sure to restart LFD before passing to the next step and making changes in csf.pignore.
As you have finished the installation of the repo and plugin manager, you can proceed to install Jetbackup for cpanel using one of the two options here:
The first option (using the command line): Run the following command with your chosen tier on the same console.
jetapps --install jetbackup stable
Now JetBackup will start the installation and then specifies the version and will inform you that the installation is complete.
The second option (using GUI): Use your root account to access the cPanel WHM server GUI. Then go to the plugin menu and click on JetApps > JetBackup (More Details). Choose your favorite tier and confirm the installation.
After a complete and successful installation, go to the WHM interface and go to the plugin section to access JetBackup. You can spend a little time reviewing the Getting Started guide to setup and run JetBackup.
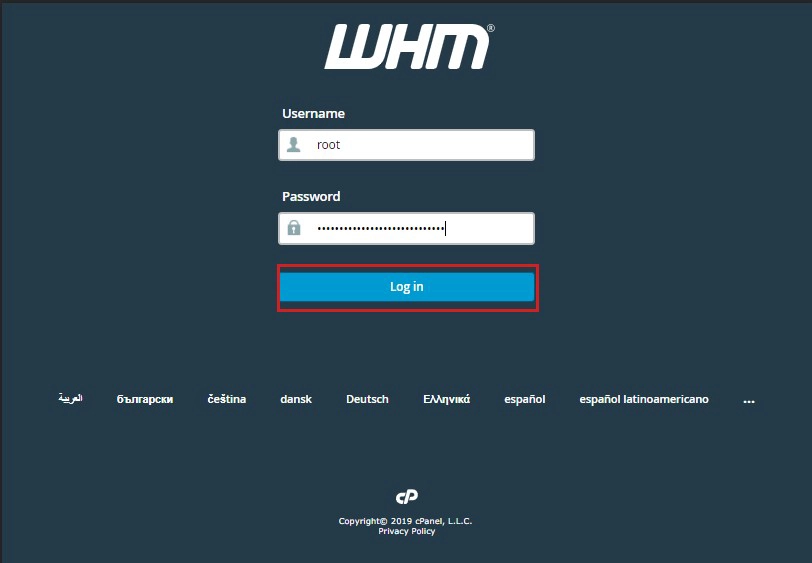
Now it’s time to configure JetBackup. Login to cPanel/WHM by using https:://{hostname/ip}:2087 address on your browser:
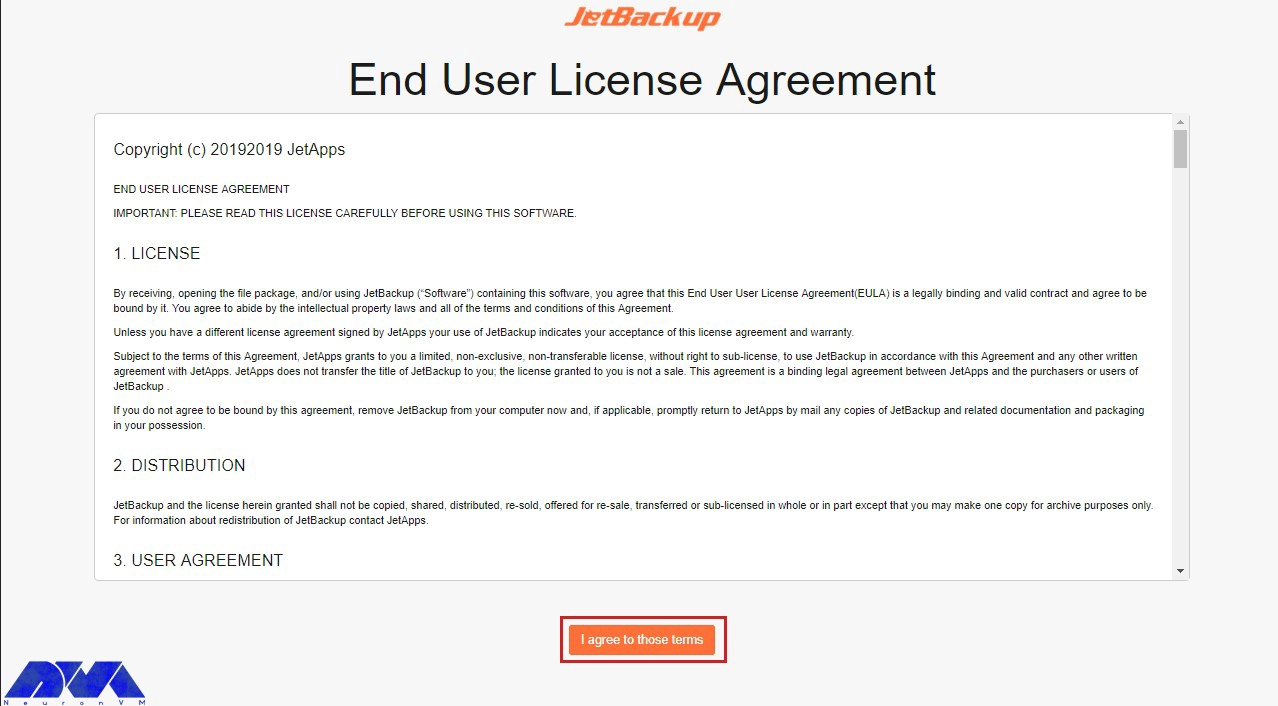
As you open JetBackup you will encounter JetBackup End User License Agreement. After you have read and agreed to the terms included in the EULA, select the “I agree to those terms” option:
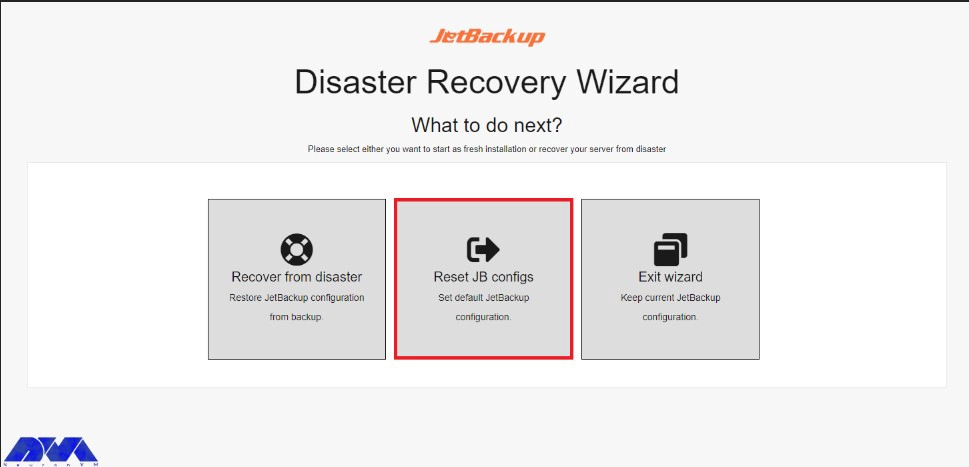
If you already have an exciting JetBackup configuration on your server, then just click the Exit Wizard tab.
Or click on the “Reset JB Configs” tab to login to your panel and start with a new installation and default configuration:
As you entered the dashboard area, start your task by adding a backup destination Which will be saved as your storage location.
In the next part, we recommend you enable Export JB Config on a destination to backup your JetBackup settings and configurations. This action will allow more seamless Disaster Recovery. Now you can start the backup process.
Here you can see some backup types:
_ Local to Local: Used to copy cPanel accounts to a specific local folder
_ Local to Remote: Used to copy cPanel accounts to remote folder
_ General Files Backup: Used to only backup files
_ MySQL Backups: Used to backup cPanel accounts database
By default, JetBackup creates backup copies using its internal backup engine. If you select the cPanel backup engine, you can restore backups created in the cPanel backup system.
As we mentioned here, you can backup your files and important data on your dedicated server using a system like backup server. So the purpose of this tutorial is to show how to configure a backup on a dedicated server. We hope you enjoyed the article.
Important data should be backed up at least once a week, but we recommended this action once every twenty-four hours.
How useful was this post?
Click on a star to rate it!
Average rating 0 / 5. Vote count: 0
No votes so far! Be the first to rate this post.
 Tags
Tags

Say Goodbye to Shared Hosting! Shared hosting may not provide the speed, security, and customization...


 Tags
Tags

If you have read our previous articles, you must be familiar with the RDP server and know what advan...


 Tags
Tags
What is your opinion about this Blog?


