


If you want to know how to configure a DNS server on admin RDP, the following article will be a helpful guide for you. You can use two practical methods for this. Also, this article contains the installation process in two ways, configuration of the DNS server and removing the DNS server role.
Before we start to explain the way to install and configure DNS, there are some requirements that you have to prepare. So let’s analyze them first. Then we will discuss how to install and configure DNS Server using PowerShell and GUI and we will teach you step by step.
– An admin RDP server
– An administrator group member or equivalent
– A valid static IP
We can install and configure admin RDP in two different ways. These two methods include a graphical user interface and PowerShell. Now let’s examine each one.
If you prefer to install Active Directory Domain Services and use the installation wizard, you have the automatic install option and configure a DNS server. In this way, the DNS zone is merged with the AD DS namespace. But if you decided to do the installation manually (as a standalone server), go through the steps below:
You can use the install-Windowsfeature command below to install the DNS server role.
First, in an elevated session, Run PowerShell on your system by searching for PowerShell from the Start Menu.
Second, apply the following command to install the DNS role. Here you don’t need to reboot:
Install-WindowsFeature -Name DNS
Use the server manager of your Windows desktop to install the DNS server role and follow the instructions:
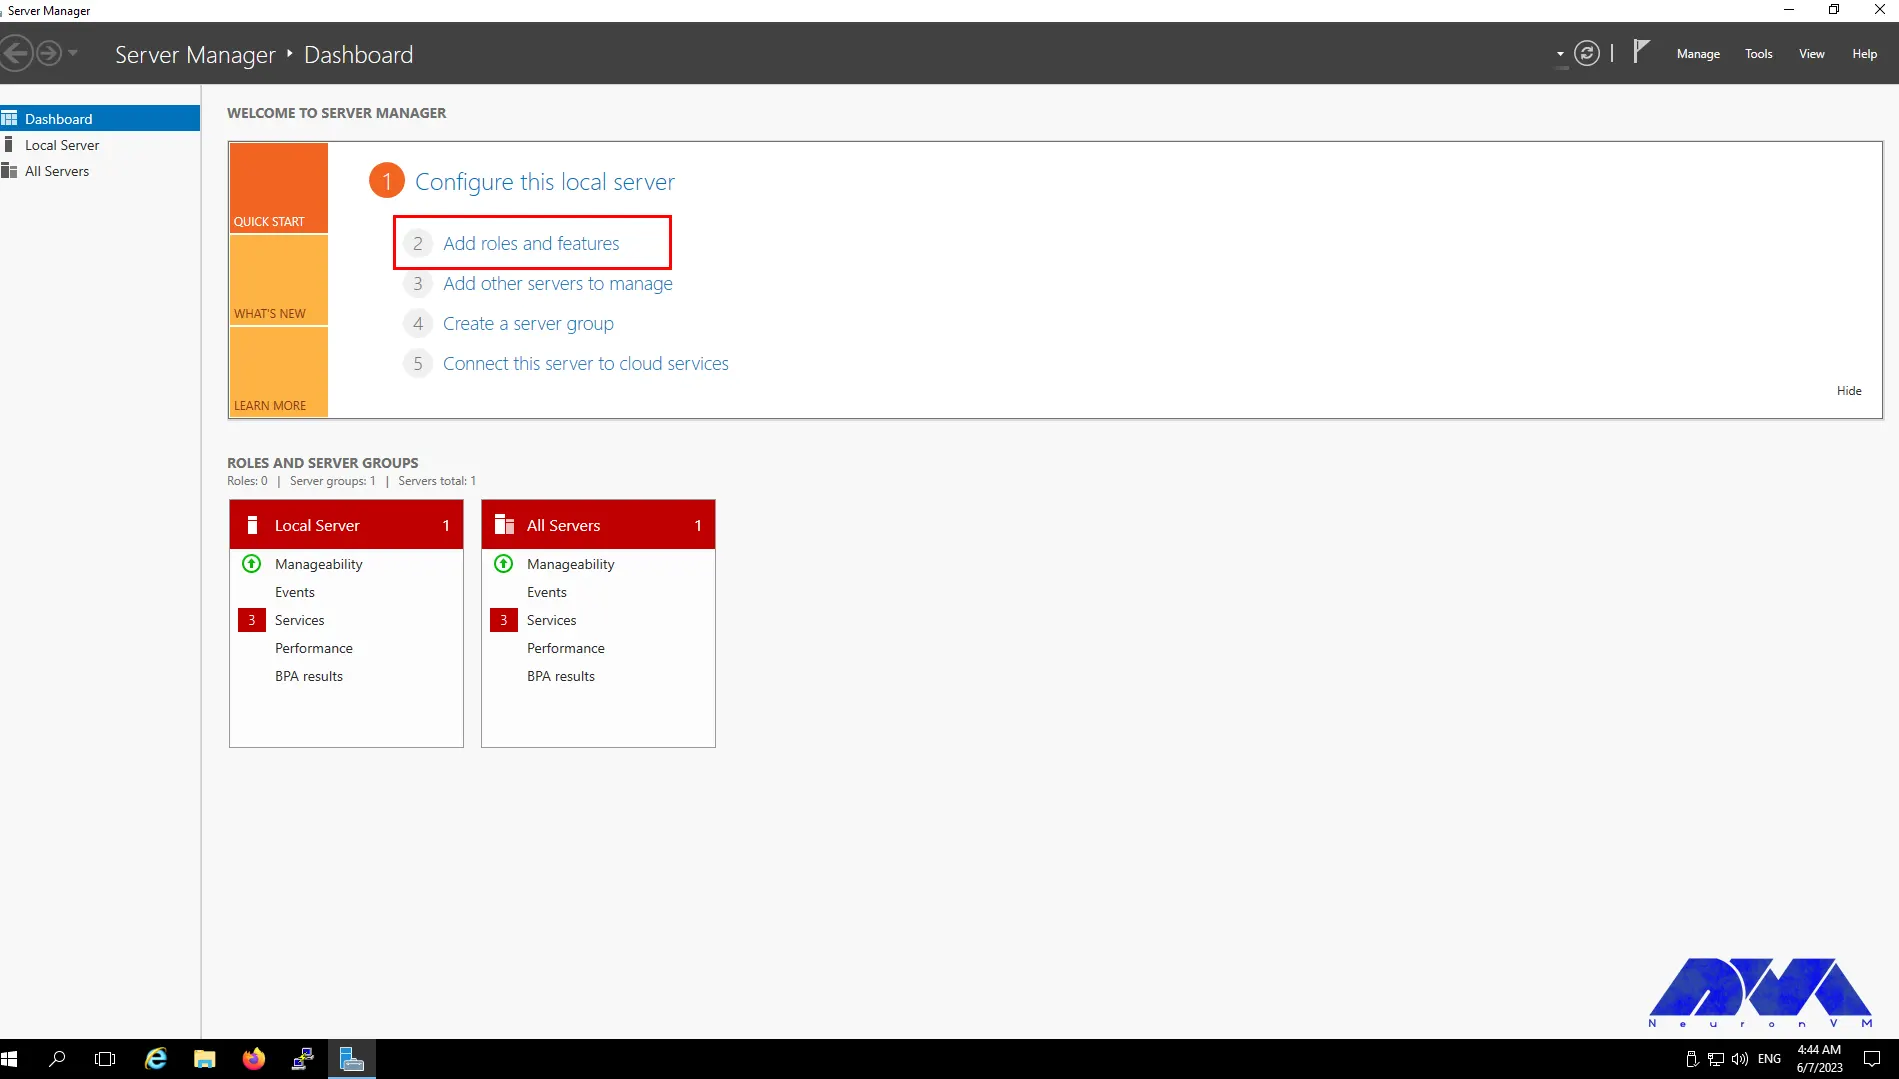
– The first step here is to click on the Start Menu on the desktop and select the Server Manager option.

– Then go to the Manage part and choose to Add Roles and Features option.
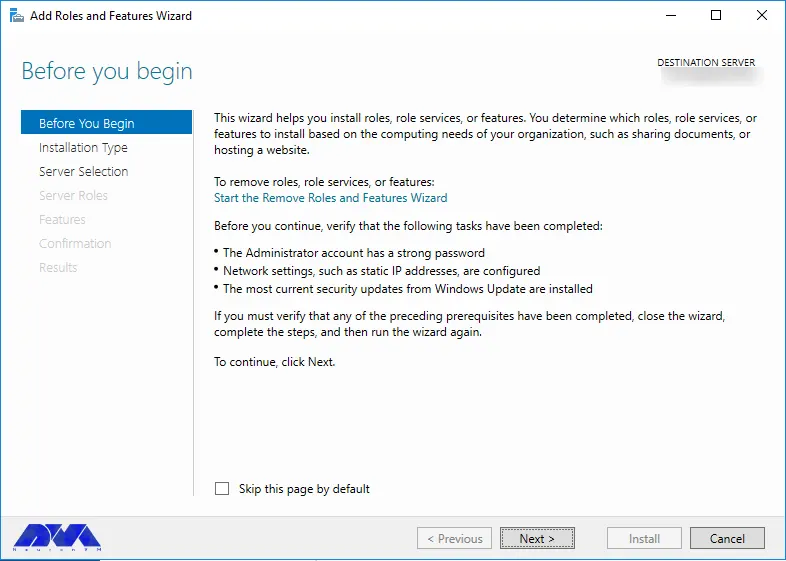
– Now you will visit the Before You Begin and click on Next to begin.
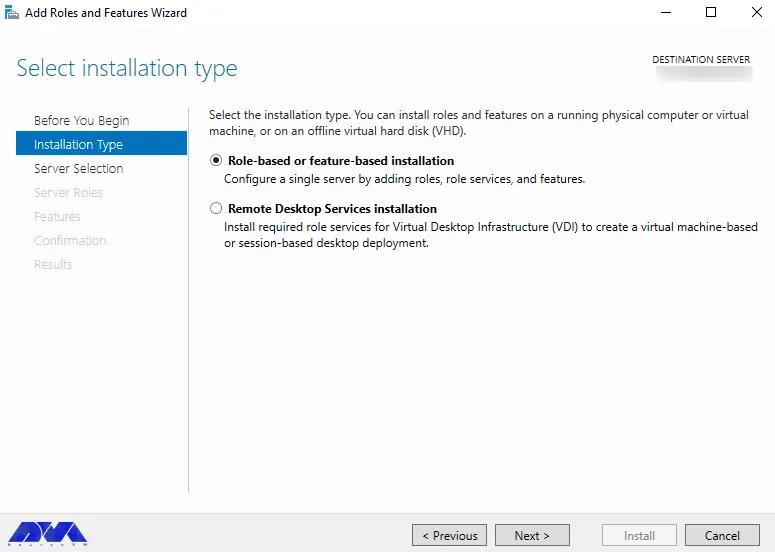
– On this page, go to the Select Installation Type, select the Role-based or featured-based option, and press on the Next button.
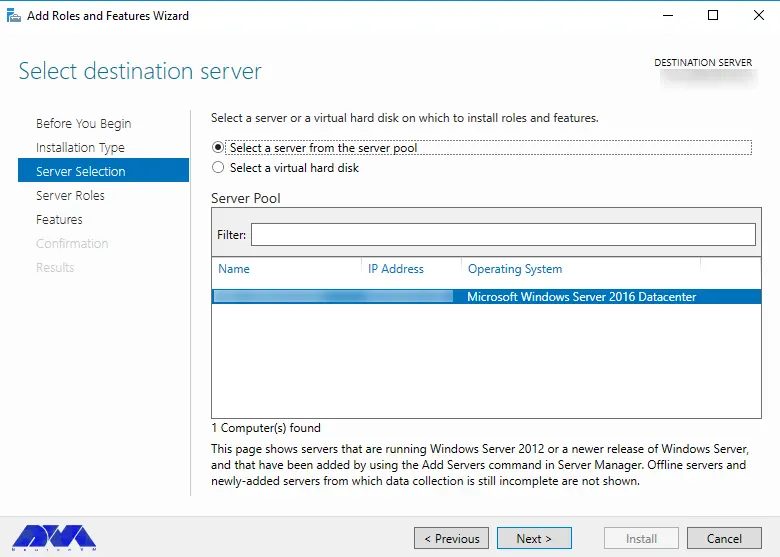
– Here, you can select the destination. Go to the Select Destination Server and leave it as default, then press Next.
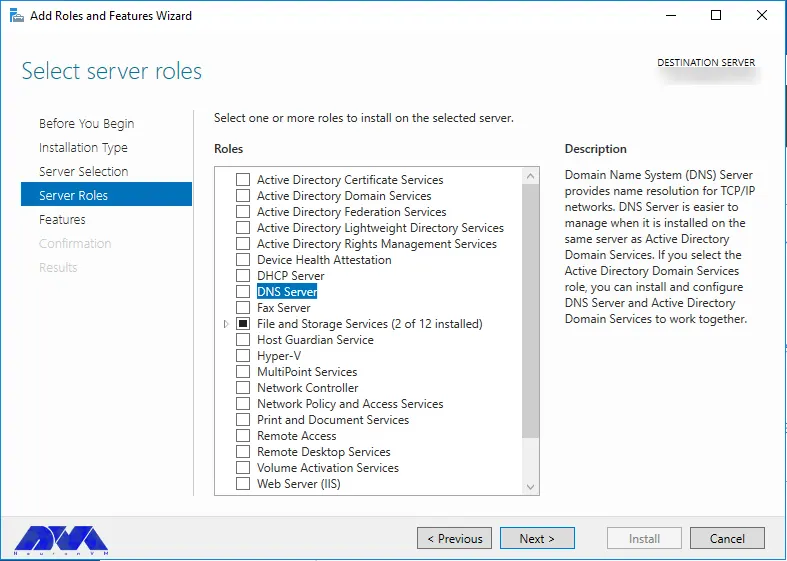
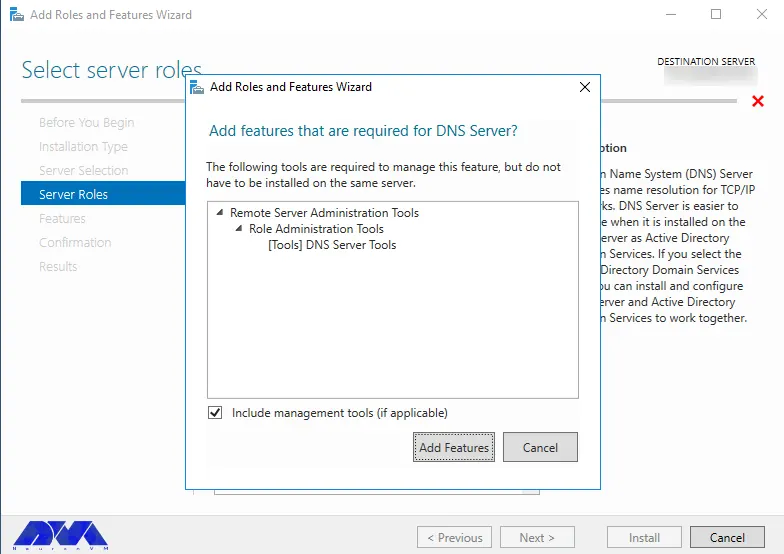
– To select server roles, you can go to the Select Server Roles option, then mark the DNS Server checkbox and click Next. In this part, you should add features that are required for DNS. If the default setting is acceptable to you, press Add Features.
###
###
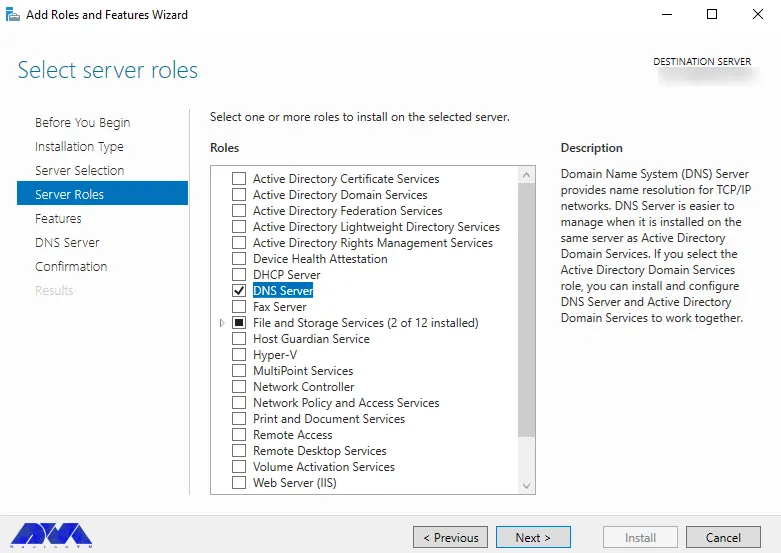
– On the next page, you can leave the setting as default and select next.
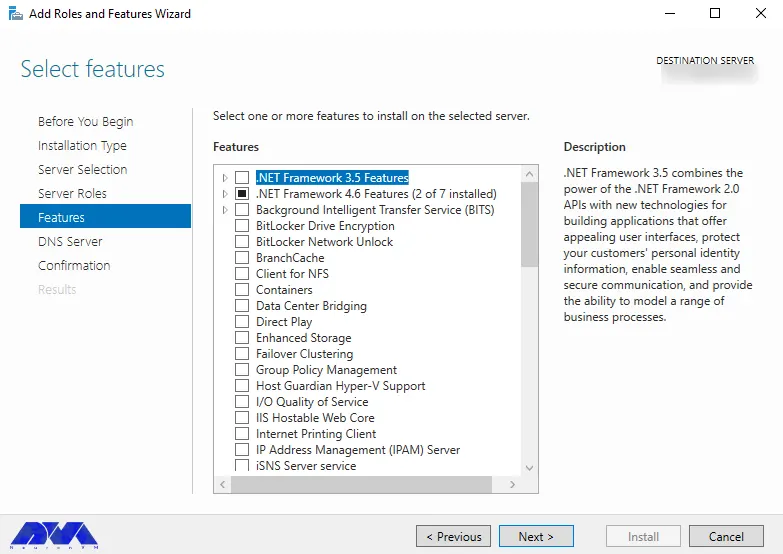
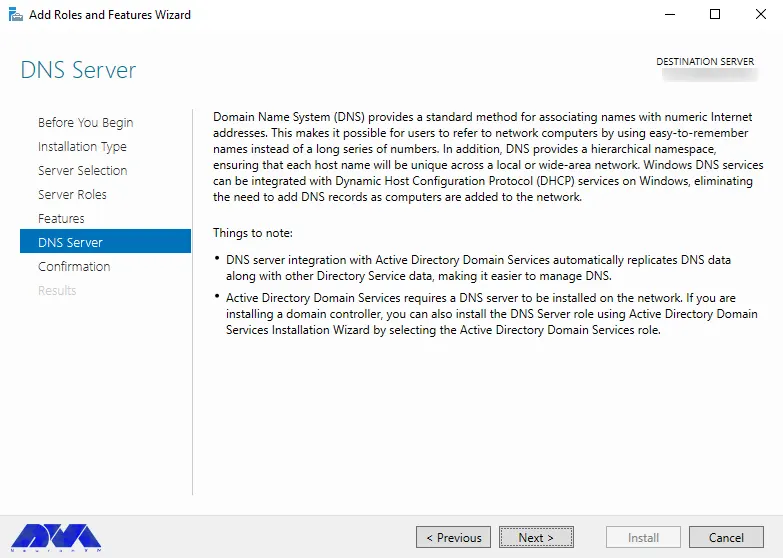
– Now you can see the DNS server page, review the descriptions carefully and press next.
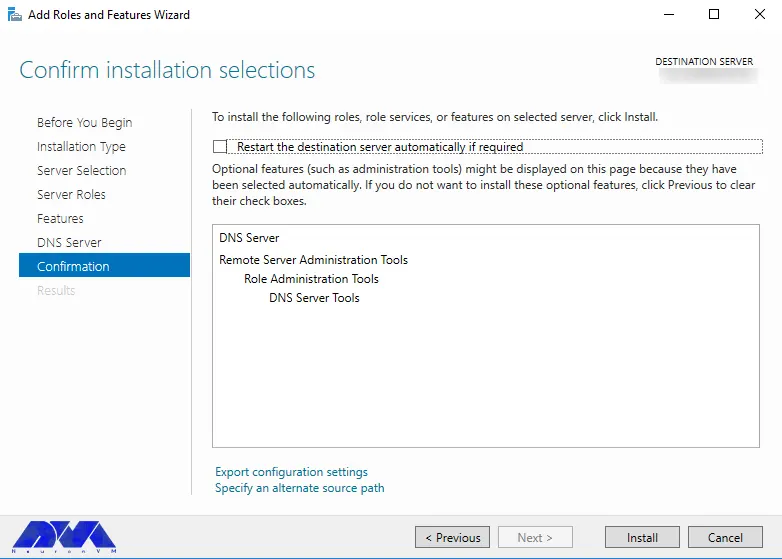
– Here, you should confirm your installation selections by reviewing the selected roles and features, and at the end select the Install button to begin the installation.
– When you complete the installation press the close button, and take note that there’s no need to reboot.
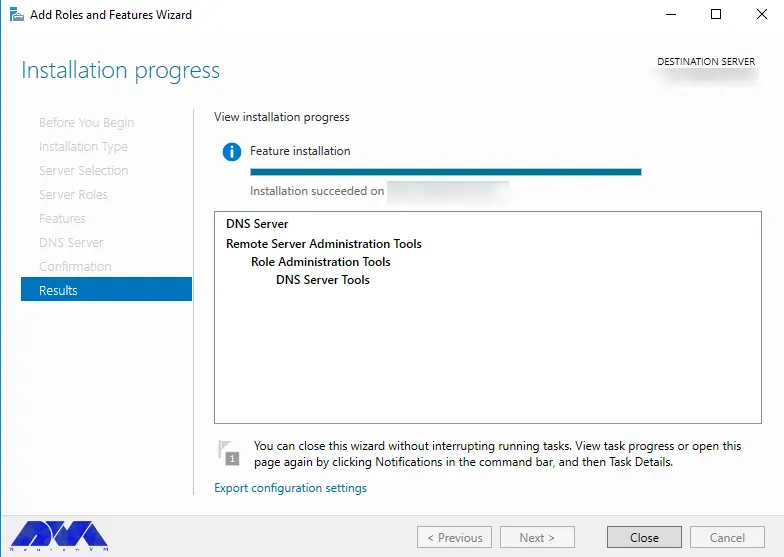
As you finished the installation part, it’s time to set the configuration for your DNS server. A DNS server can listen for requests on all IP address interfaces. But you can configure the DNS server to listen for a specific interface using PowerShell or GUI.
If you want to set the configuration using PowerShell, follow the instructions here:
– First, you should go through set-DNSServerSetting.
– In an elevated session, run PowerShell on your system.
– Apply the related command to find your system’s exciting IP address and make a note of that:
Get-NetIPAddress | fl IPAddress,InterfaceAlias
– Here, you should store the current setting in an impermanent variable and adjust the ListeningIpAddress. Then apply your new settings using the following command. Replace the <IP_Address> with the IP you stored before:
DnsServerSettings = Get-DnsServerSetting -ALL
DnsServerSettings.ListeningIpAddress = @("")
Set-DNSServerSetting $DnsServerSettings
– The first step is to open the Start Menu and go to the Windows Administrative Tools then DNS.

###
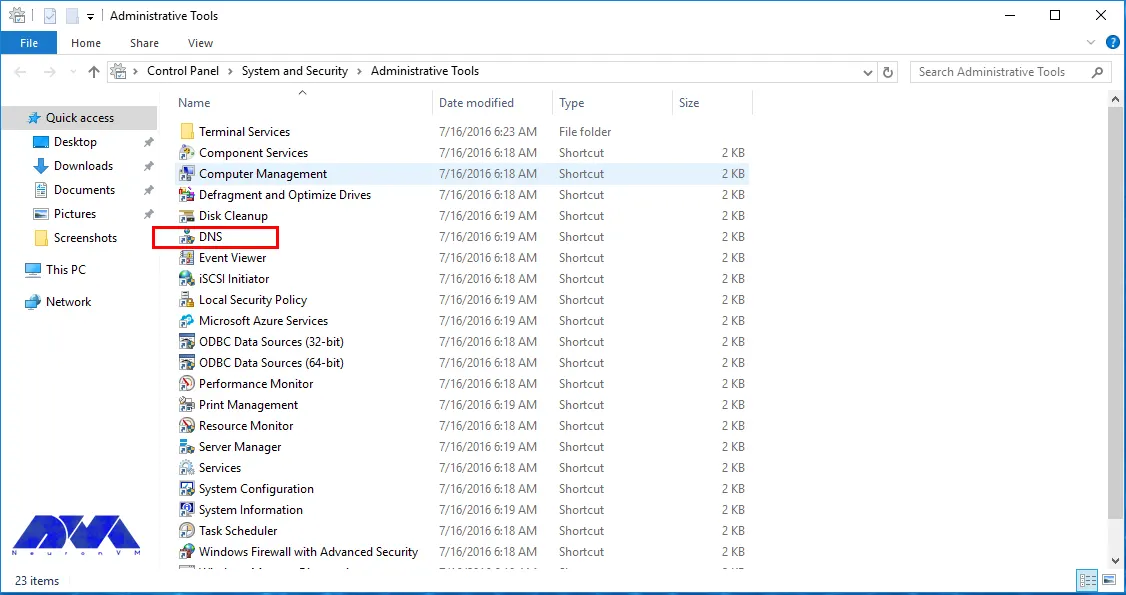
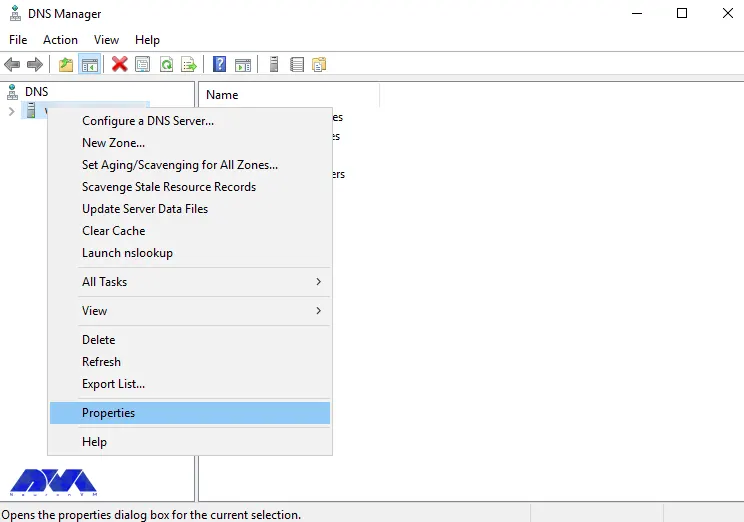
– Next, you can Right-click on your server and choose Properties.
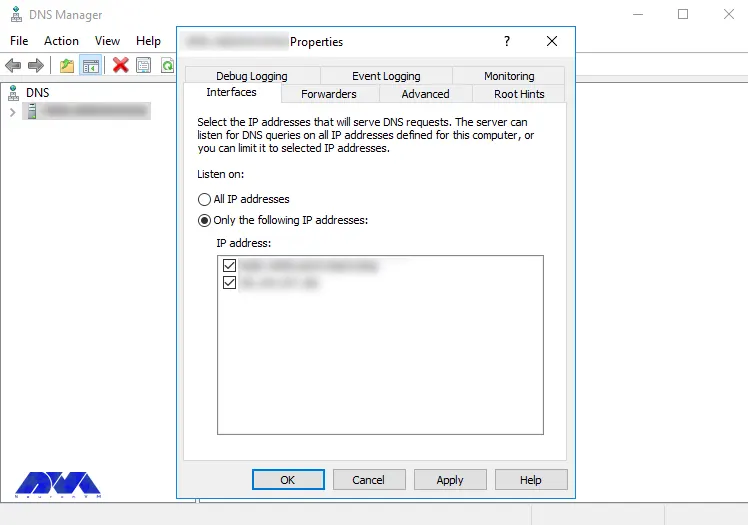
– By selecting Only the following IP addresses and choosing the IP address you wish to use, you can limit the DNS server to use a specific IP address.
You can use Root hints servers for resolving DNS address information, for the time when the DNS server is unable to resolve the query locally from a hosted zone or DNS cache. The root hint name server is populated by default in your new installations. Again you can use PowerShell or GUI to edit the list of root name servers.
Actually, you can not remove all root hint servers, But you can go through this pass to disable it.
Go to the DNS manager console and choose advanced tab. Select the disable recursion server option. This act will disable any configured forwarders.
To start the instruction to configure root hints server, you should apply the Set-DnsServerRootHint command. Now follow the steps below:
– Execute PowerShell on your system In an elevated session.
– Run the Get-DnsServerRootHint cmdlet command to find your system’s IP address. Notice that you should save the name server:
Get-DnsServerRootHint
– Use the following command to save the current DNS server setting in a variable and put the placeholder of <root-hint-name-server> instead of the stored root hint name server.
RootHintServer = (Get-DnsServerRootHint | Where-Object {$_.NameServer.RecordData.NameServer -match ""} )
– You can use the following commands to configure the Ipv4address property in temporary variable:
RootHintServer.IPAddress[0].RecordData.Ipv4address = ""
– Use the command below to insert the updated record:
Set-DnsServerRootHint $RootHintServer
– At last, if you want to check the updated root hints, use the following command:
Get-DnsServerRootHint
Here, you can use the Manager console to root hints:
– Go to the Start Menu and then Window Administrative Tools, and select DNS.
– Right-click or select on your server and choose properties.
– Choose the Root hints tab and select your item and choose edit.
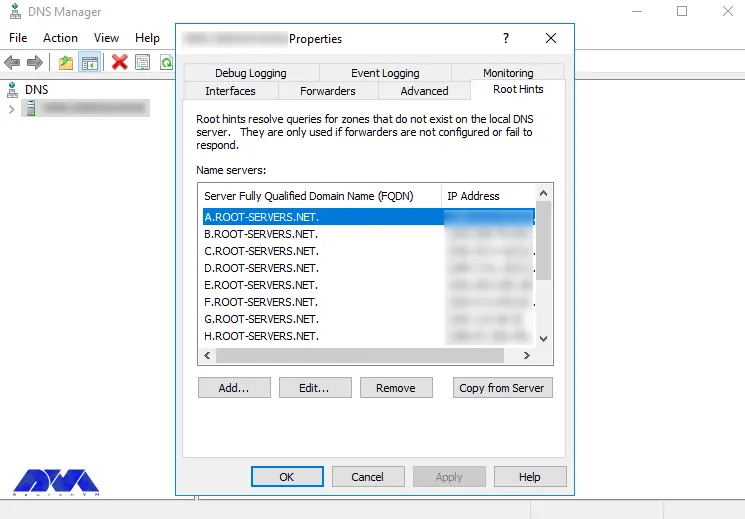
– Now you should enter the domain name and click on Resolve. You should verify your IP address and edit if necessary.
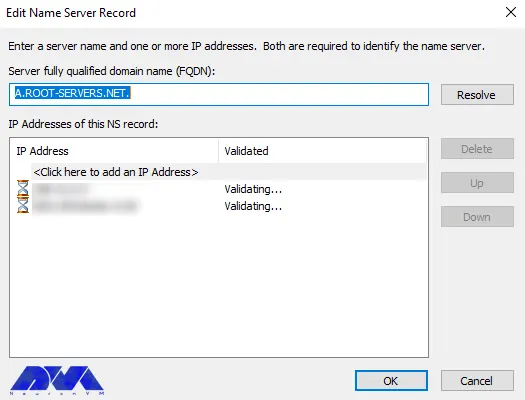
– Click on Ok button.
– As the last action, check the updated root hint server in the list and when your done, click on ok.
This part is optional and it is to configure a forwarder to resolve DNS address information. You can use PowerShell or GUI for this reason.
Tip: You should use the DNS root hints Just the time your forwarders fail to response.
By using Install-WindowsFeature command, you can install DNS server role. In the same direction follow the instructions below.
– In an session, execute PowerShell on your system.
– Put the placeholders <ip_forwarder_1> and <ip_forwarder_2> instead of IP address of the DNS server, to be used as your forwarders and run the command below:
$Forwarders = "",""
Set-DnsServerForwarder -IPAddress $ForwardersHere, we will show the way of configuring forwarder using GUI. So follow the steps:
– Go to start menu and select Windows Administrative Tools then DNS.
– Right-click on your server and select Properties.
– Choose the forwarders tab and click on Edit.
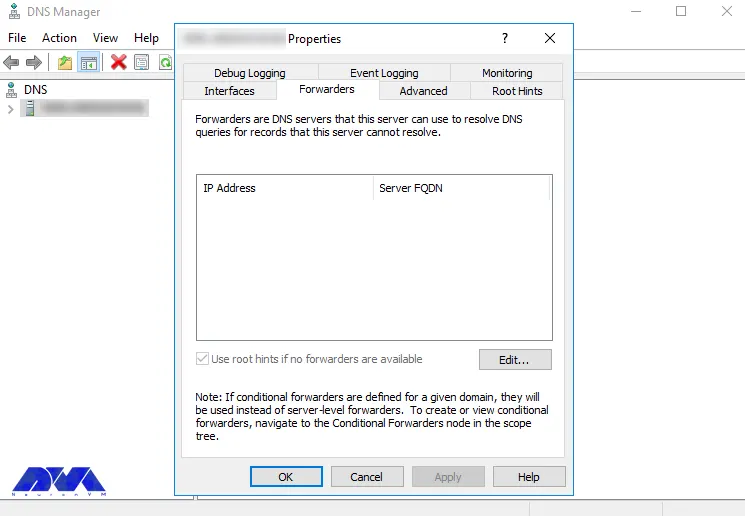
– Enter DNS IP address to forward requests to. You should repeat this action as many time as it is needed and select Ok.
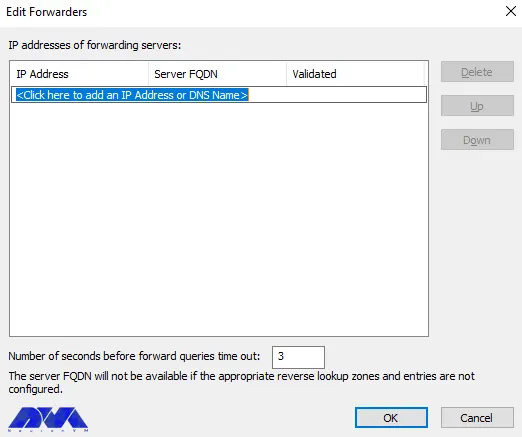
– As the last action, check the DNS server in the list. Select Ok and confirm configuration.
Follow the instruction in this section to remove DNS server:
Use the following command in an elevated prompt:
Uninstall-WindowsFeature -Name DNS
– Go to the Start menu and select the Server Manager.
– Go to the Manage part and select Removes roles and features .
– Here, you will encounter Before you begin page and select Next.
– On Destination page, choose the serer that you want to remove DNS server role service from and click Next.
– On the list, you should clear the DNS server checkbox . In this part, you should remove features that requires DNS server. Select Remover Features and click on Next button.
– Here, on the Remove Features page, Leave the default setting and press Next button.
– Then you will see Confirm Removal Selections page, check the selected roles and features and choose Remove.
– As you removed the roles and features, select Close.
– At last, restart your system and complete the uninstallation process.
Tip: Pay attention to these points as you are removing the DNS server role service:
– If a DNS server is hosting AD DS-integrated zones, the saving or deleting action will be done according to their storage type.
– If a DNS server is hosting standard DNS zones, the zones file will be stayed in the %systemroot%\System32\Dns directory, but you can reload them if the DNS server is reinstalled.
This article tried to show you the way to install and configure DNS server on Admin RDP. Also we tried to give a complete explanation of DNS server configuration steps, so that, you will encounter no problem during the installation. If you have any questions or if you know any other method please share.
A smart DNS is faster than VPN because it only changes your DNS address while a VPN encrypts data traffic and spoof the location by changing your IP.
DNS is not related to internet speed in a direct way, but it can influence the speed of appearing individual webpage on your computer.
How useful was this post?
Click on a star to rate it!
Average rating 0 / 5. Vote count: 0
No votes so far! Be the first to rate this post.
 Tags
Tags
Minecraft has been a sensation in the gaming world for its endless possibilities and creative gamepl...


 Tags
Tags

As the cryptocurrency market continues to gain momentum, an increasing number of Virtual Private Ser...


 Tags
Tags
What is your opinion about this Blog?


