


If you aim to install Xubuntu on VirtualBox, you are on the right pass. In this context, we will introduce you to the best way to install this beautiful and user-friendly operating system. Xubuntu is designed for those who want to get the most out of their services and is derived from the Ubuntu operating system.
As we mentioned in the introduction part, Xubuntu is a user-friendly and lightweight distribution based on Ubuntu which is used Xfce as its graphical desktop and is a stable desktop environment for users. a good feature of this distribution is its satisfactory performance on old hardware. Xubuntu is developed by Canonical Ltd. The noticeable point is that this operating system only includes GTK+ applications.
In this section, we will examine Xubuntu installation step-by-step on VirtualBox. But before starting the installation process, it is better to provide the necessary prerequisites. You must first install VirtualBox on the system. We suggest that you visit the plans offered in NeuronVM to buy a Windows VPS server.
1- As the first step you should download the VirtualBox from the VirtualBox official website, so that, you can run Xubuntu on it and click on Windows hosts.
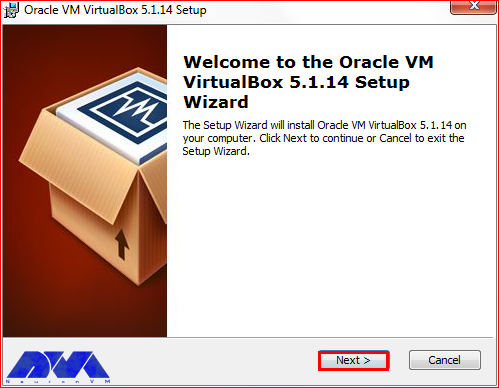
2- As you finished downloading the .exe file. You can start the installation process using the VirtualBox wizard. Press Next to continue:
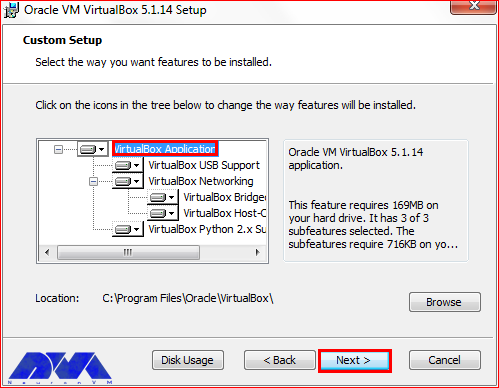
3- In the custom setup, choose the VirtualBox application and select the location of your installation file by pressing the Browse button. Now press Next:
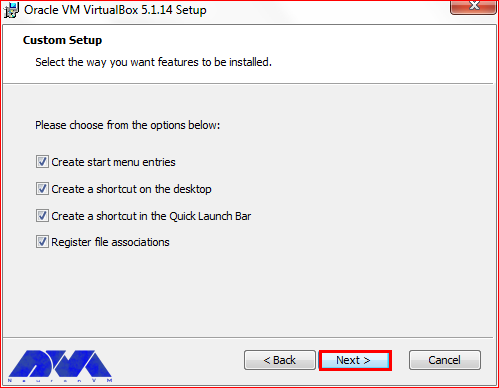
4- You can choose the way you want features to be installed and press Next:
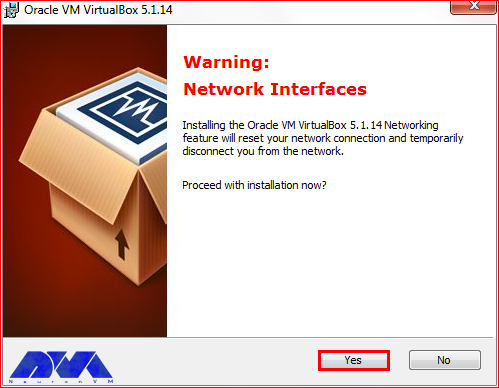
5- In this section, by pressing the Yes button you will accept the installation:
6- At the last window, you can press the Install button and start the installation:
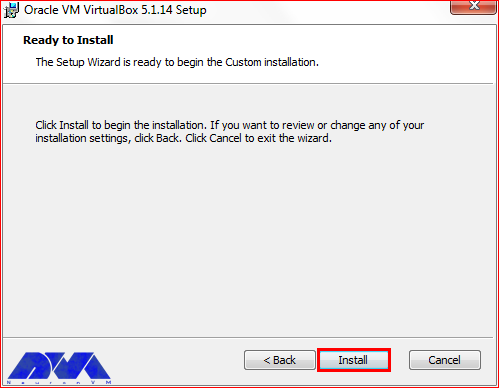
***
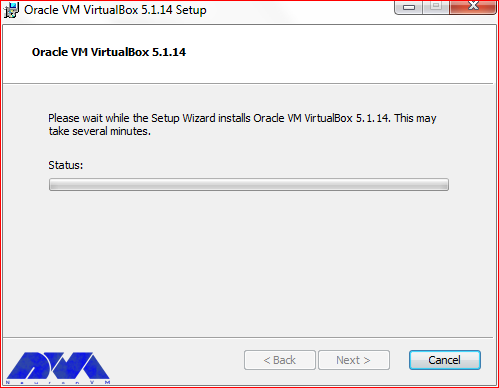
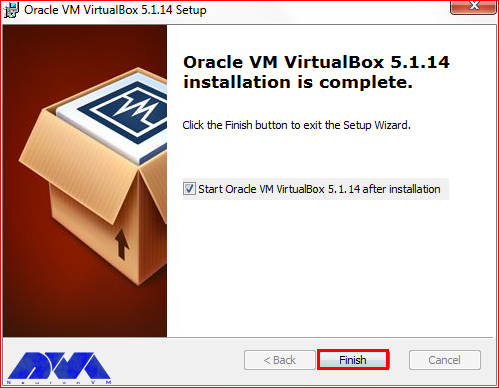
8- As you finished the installation part, press the Finish button:
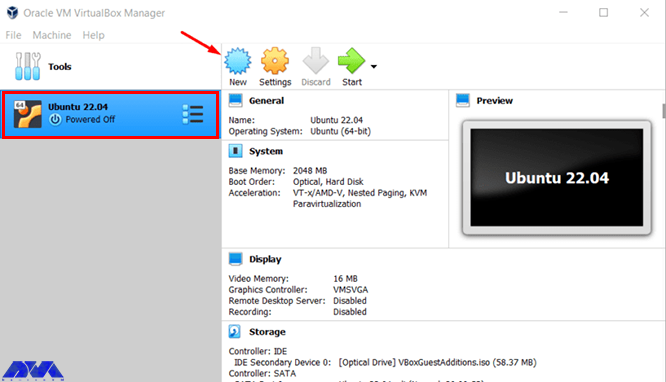
Now that you have VirtualBox on your system, it’s time to create it. For this reason, open the VirtualBox manager from your desktop shortcut and click on the New button, which will look like this:
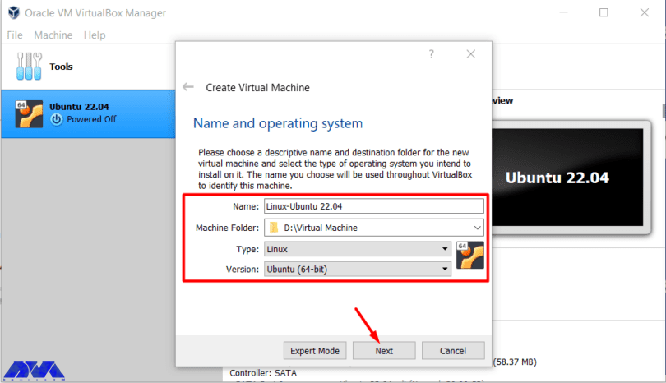
Here, you should choose a Name for your VirtualBox and set the type on Linux, and the version on Ubuntu:
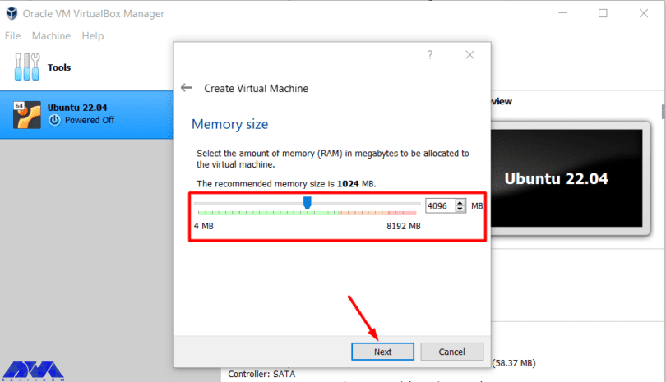
Now, choose the proper Memory size and press Next:
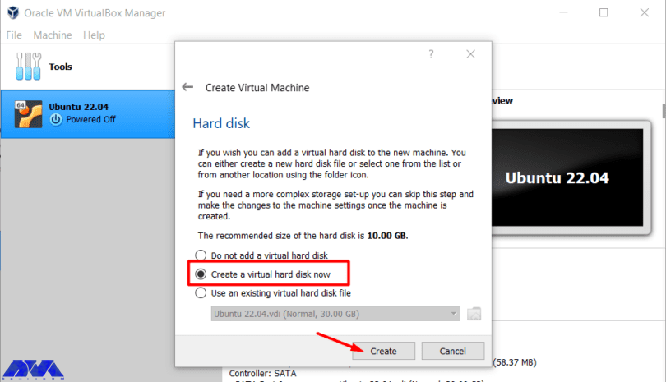
On the created virtual machine window, check the Create a virtual hard disk now option and Create to add a hard disk to your virtual machine:
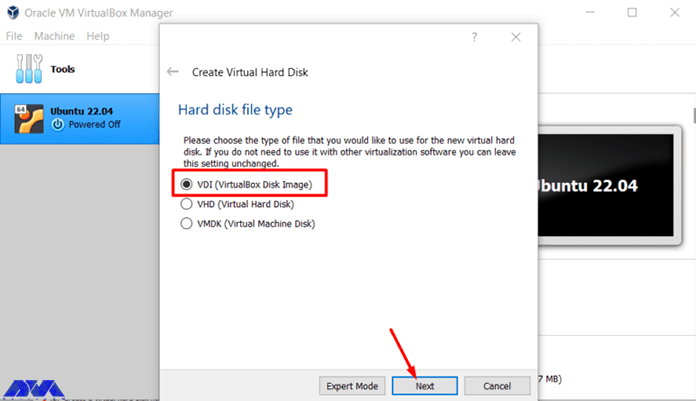
Here you should choose the type of file you want for your hard disk:
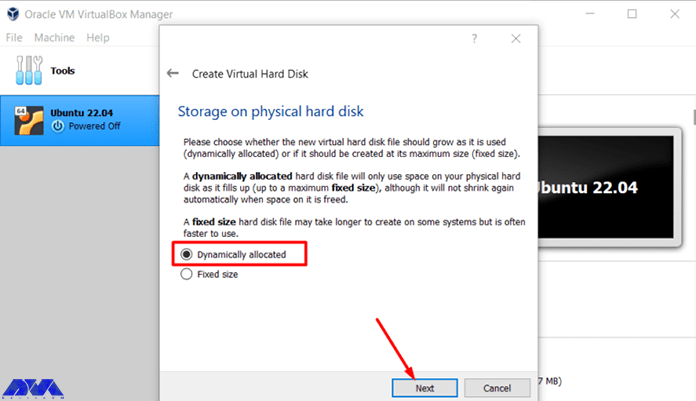
Choose the storage of your hard disk. It is better to check the Dynamically allocated option and press Next:
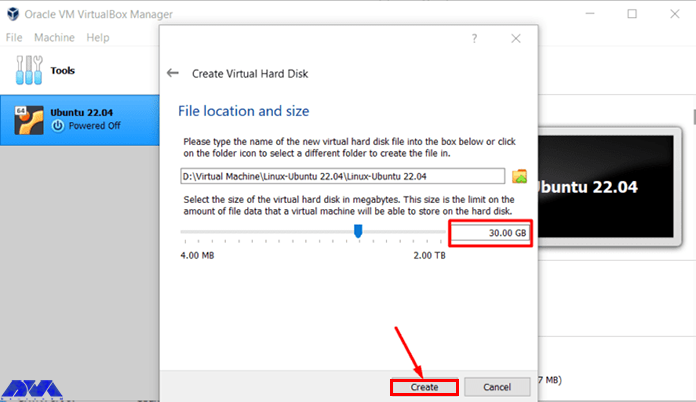
Here, in the first box, you should type the name of your virtual machine and specify the size of the virtual hard disk. At last, press create:
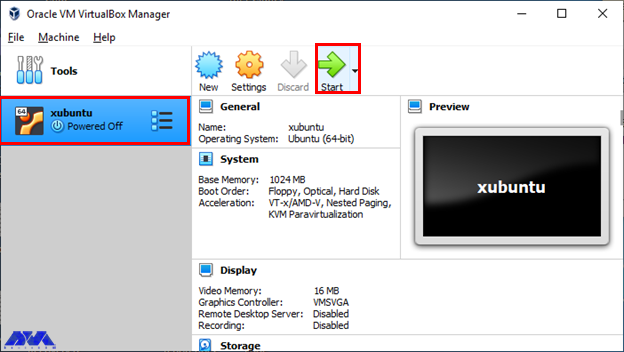
Now, you can see the created VirtualBox and it’s time to add the Xubuntu operating system.
After downloading the iso file, save the desired file in a specified path. Open VirtualBox and click on the Start button to boot the virtual machine and go to the browse part to put the Xubuntu file. Like the image below:
As you created the virtual machine, let’s do the instruction below to add Xubuntu. Notice that you should download the iso file of Xubuntu on a 64-bit operating system. For this reason, go to the official page of Xubuntu.
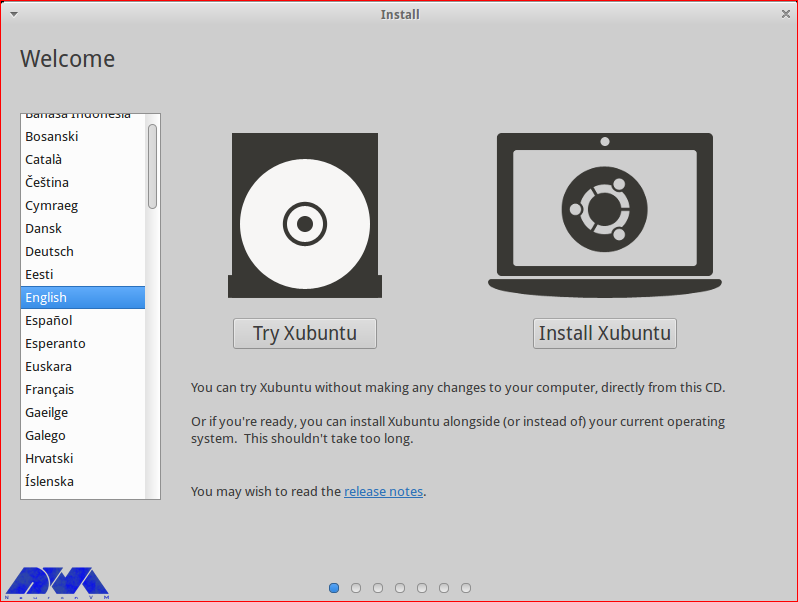
Here, you will see the Welcome page. Choose the preferred language and click on Install Ubuntu:
In this section, choose the Erase disk and install Xubuntu and click on Install Now:
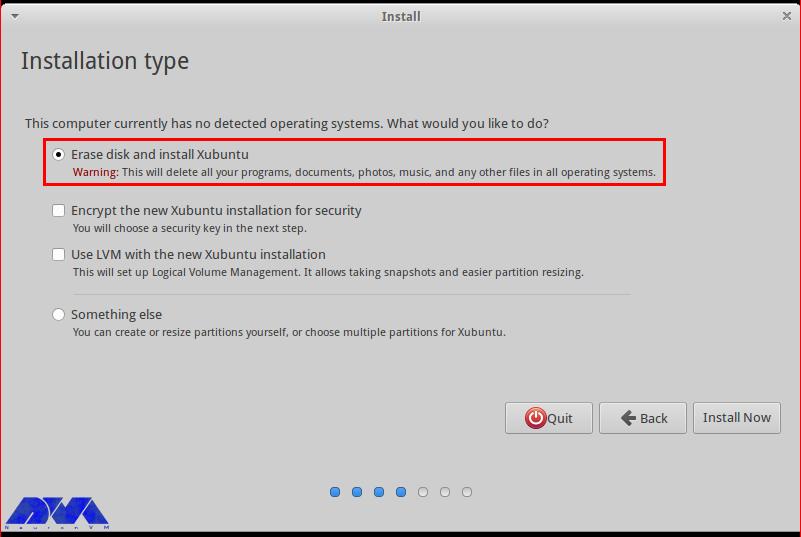
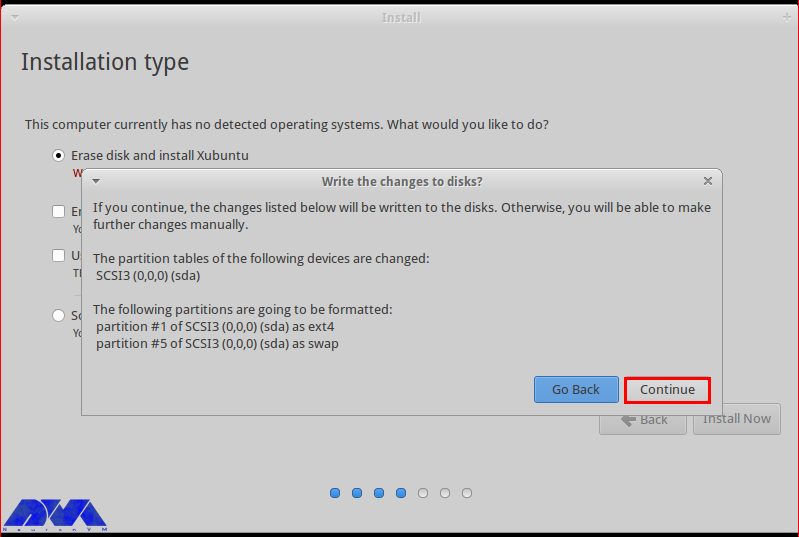
There will appear a pop-up window. Press Continue to confirm the changes you did to the disk:
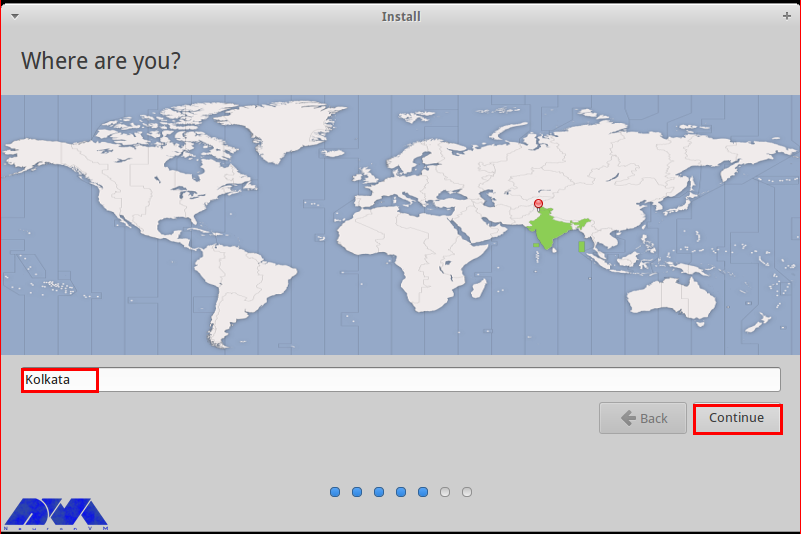
Choose the proper location and go to the next part:
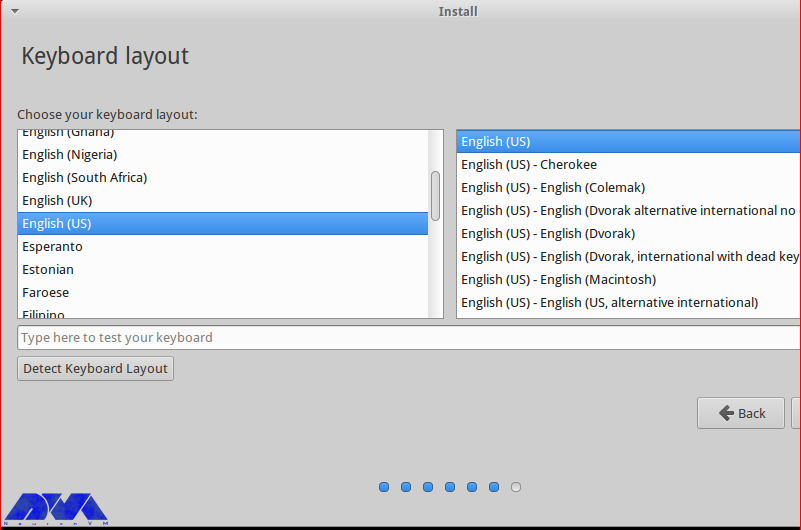
Choose the language of the keyboard layout and continue:
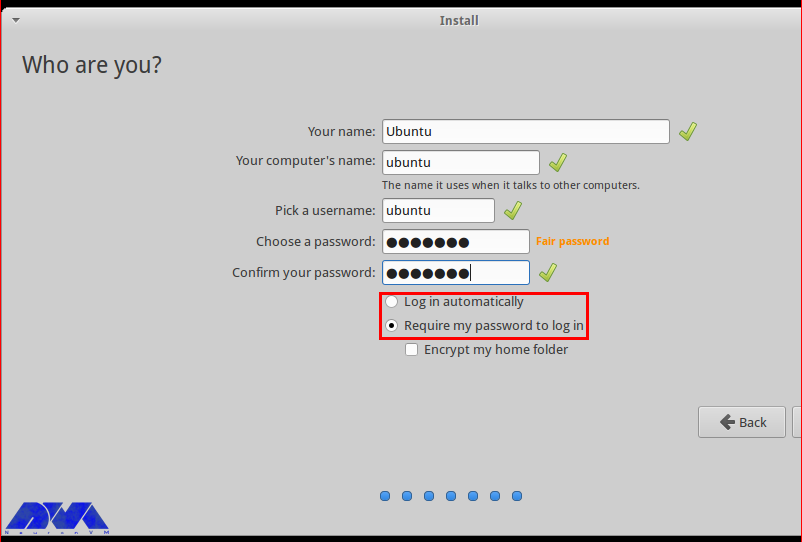
In this section, fill the related details and determine the login way:
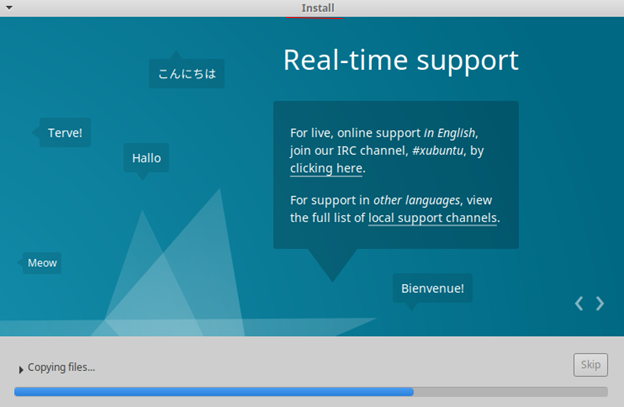
As you continue the process, here you will encounter the Xubuntu Welcome page and the installation process will begin:
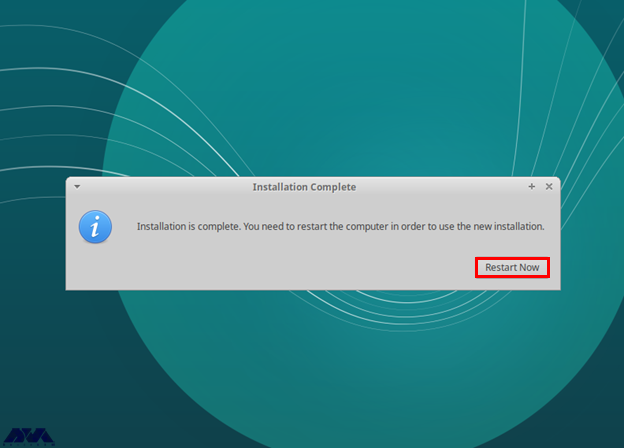
Well done. The following image shows that you successfully finished the installation part. You will restart the system to confirm the changes:
As a result, you have Xubuntu on your VirtualBox. Enjoy using this applicable operating system.
Xubuntu is an operating system, based on Ubuntu and if you decided to use it on your system, you should use a virtual machine. Also, as we mentioned in this article, you should download the iso file. We tried to guide you to install Xubuntu on Windows using a VirtualBox and hope it was helpful for you. If you have any questions, leave a comment.
In fact, Xubuntu is the LTS version which means it has been supported for a long time. LTS versions are also provided as stable.
As a minimum, you should allocate 512 MB RAM for Xubuntu but the recommended amount is 2 GB.
How useful was this post?
Click on a star to rate it!
Average rating 0 / 5. Vote count: 0
No votes so far! Be the first to rate this post.
 Tags
Tags

Memory object storage systems such as Memcached can optimize the performance of the backup database ...


 Tags
Tags

The impact of the virtual machine in the system is such that it abstracts the computer hardware such...


 Tags
Tags
What is your opinion about this Blog?


