Linux distributions have gained significant popularity over the years, offering a robust and flexible alternative to traditional operating systems. With a vast range of choices available, selecting the ideal Linux distribution can be quite daunting. This article aims to provide a comprehensive overview of the top 10 Linux distributions, shedding light on their unique features and suitability for various user preferences and purposes.
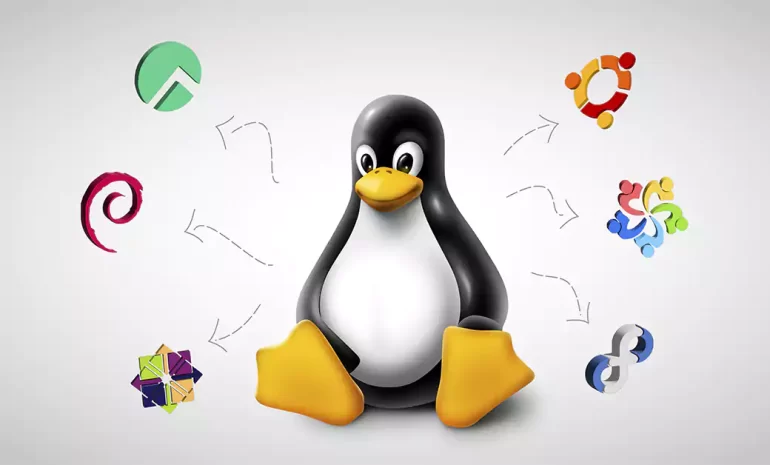
Linux Distributions in One Photo
What you will see below, is a infographic showcase of top distributions from the very beginning. SinceLinux is an open-source operating system, there are a lot of official and unofficial distributions of it. Although this 10 distributions are the ones that either have stood the test of time or gathered a significant number of audience in a short time.
By delving into the history and growth of these distributions, we hope to shed light on their pioneering nature and exceptional qualities that have solidified their status over the years. From the early days of Linux, these distributions have consistently pushed the boundaries, offering a diverse range of tools, features, and customization options that have empowered users to tailor their computing experience to their specific needs and preferences.
Furthermore, each of these distributions has attracted a dedicated and passionate community. This community-driven aspect has played an instrumental role in their success, fostering continuous development, robust support forums, and a wealth of tutorials and resources available to users worldwide. The widespread adoption and unwavering loyalty these distributions have garnered in a relatively short time span highlight their exceptional quality and appeal.
It is our belief that this curated infographic will serve as both a celebration of the remarkable Linux ecosystem and a valuable resource for curious users seeking to navigate through the vast array of available distributions. Whether you are an experienced Linux user or just beginning your exploration of this rich operating system, we invite you to dive into this comprehensive showcase and discover the top 10 Linux distributions that have left an indelible mark on the world of open-source technology.
USA RDP (Remote Desktop Protocol) allows users to gain control of a remote computer located in the United States from anywhere in the world. This technology provides individuals with the flexibility to access and use a computer that is physically located in the US, giving them the ability to perform various tasks remotely. In this article, we will explain to you how to Gain Control and Flexibility with USA RDP.
How can we have more control over our online activities?
Using USA RDP can provide you with increased control over your online activities and enhance your overall internet experience. Here are some steps you can take to gain control:
1. Choose a reliable RDP provider: Select a reputable provider that offers USA-based servers. Look for providers with a solid track record, good customer reviews, and affordable pricing plans.
2. Check server locations: Ensure that the provider has multiple server locations in the USA. This will give you more flexibility in choosing the location that best suits your needs.
3. Opt for dedicated resources: Consider opting for a dedicated USA RDP instead of a shared one. Shared RDPs can be more affordable, but they might have limitations in terms of resource allocation and performance. A dedicated RDP will offer you a more stable and reliable connection
4. Strong security measures: Make sure the RDP provider offers robust security measures like data encryption and two-factor authentication. This will help protect your online activities and ensure that your connection is secure.
5. Customization options: Look for an RDP provider that allows you to customize your RDP environment. This could include selecting the operating system, installing specific software, or adjusting resource allocation according to your requirements. This level of customization will give you more control over your RDP experience.
6. Reliable customer support: Ensure that the RDP provider offers reliable customer support that is available 24/7. In case you encounter any issues or need assistance, having responsive customer support will be crucial in gaining control over your RDP.
By following these steps, you can gain control and enjoy a seamless online experience with a USA RDP. Remember to also comply with the terms of service and laws in your country to ensure that your activities are legal and ethical.
Flexible Work Solutions: Discover the Benefits of USA RDP
Flexible work solutions have become increasingly popular in today’s workforce, and one of the tools that enables this flexibility is the use of USA RDP. This service allows individuals to access their work computers or servers remotely from anywhere in the world, using only an internet connection.
Here are some of the key benefits of using USA RDP for flexible work solutions:
1. Location Independence: One of the biggest advantages of USA RDP is that it allows individuals to work from anywhere, as long as they have an internet connection. This is particularly beneficial for individuals who prefer a nomadic lifestyle or need to travel extensively for work. It eliminates the need for physical office space and allows individuals to work from the comfort of their own homes or any other location of their choice.
2. Cost Savings: With USA RDP, businesses can save on various costs associated with maintaining physical office spaces. This includes rent, utilities, office equipment, and other operational expenses. Instead, employees can work remotely, reducing the need for a physical office and enabling businesses to allocate their budget to other important areas.
3. Increased Productivity: Studies have shown that remote workers tend to be more productive compared to those working in traditional office settings. USA RDP provides individuals with the flexibility to work during their most productive hours without the distractions often found in office environments. This results in increased efficiency and output.
4. Work-Life Balance: USA RDP allows individuals to achieve a better work-life balance. Remote work enables employees to spend more time with their families, reduce commuting time, and have more flexibility in managing their personal commitments. This flexibility often leads to higher job satisfaction and overall happiness.
Choosing the Best USA RDP Provider
Choosing the best provider depends on your specific needs and requirements. Here are some factors to consider while selecting a provider:
– Server Locations: Ensure that the provider has servers located in the USA to ensure low latency and reliable connections.
– Performance and Speed: Look for a provider that guarantees high-performance servers with fast network speeds, as this directly affects your browsing, streaming, and downloading experience.
– Security and Privacy: Prioritize providers that offer strong encryption protocols to protect your data and ensure your online activities remain private.
– Scalability: If you anticipate needing to scale your operations, consider providers that offer flexibility and scalability in terms of server resources and upgrade options.
– Customer Support: Look for providers that offer 24/7 customer support, preferably through multiple channels such as live chat, email, and phone, to assist you in case of any technical issues.
– Pricing and Plans: Compare pricing plans offered by different providers, considering factors such as server specifications, bandwidth allowance, and additional features like dedicated IP or DDoS protection.
Our website (NeuronVM) offers USA RDP service to users at a competitive price compared to other competitors, the highest quality and efficiency, and 24/7 support.
Buying USA RDP involves selecting a reliable service provider, comparing pricing plans, selecting the desired specifications, and making an online payment. Once the payment is confirmed, the user receives the RDP credentials to access a remote desktop located in the USA. You can learn how to Buy USA Admin RDP by Crypto from NeuronVM by referring to the article.
Conclusion
In conclusion, utilizing USA RDP provides individuals with the advantage of increased control and flexibility in their online activities. Whether it is for personal or business purposes, having access to a reliable and secure RDP can greatly enhance productivity and efficiency in today’s digital world.
With the increasing importance of digital currencies in the global market and significant developments in this field, new coins have grown continuously and are stable. All those who are interested in making money and are interested in this field want a piece of their pie and are looking for better and cheaper ways to reach their goals. Servers are a great way to gain crypto. So, in this article, we will focus on mining on a dedicated server.
A Comprehensive Guide About Mining
Mining on a dedicated server typically refers to cryptocurrency mining, where individuals or groups use dedicated servers to perform the computational work required to validate and secure transactions on a blockchain network. The emergence of various servers with high capabilities has made the path smoother for users. NeuronVM’s dedicated server has good mining options and is a wise choice for people who want to mine hassle-free:
Step 1: Choosing the Right Dedicated Server Provider
When you want to buy a hosting provider and a dedicated server for mining purposes, the factors you consider should not be limited only to price and resources. There are essential factors to consider when choosing the right provider. These factors include:
– Server Specifications: Consider your specific resource requirements, such as CPU, RAM, storage, and bandwidth. Ensure the provider offers servers with the specifications you need to meet your performance goals.
– Security Features: Verify the security features in place, such as firewalls, DDoS protection, and physical security at the data center. Data security is crucial to protect your server and the data it holds.
– Support: Assess the quality of customer support. Look for providers with responsive support teams available 24/7, especially if you’re not experienced in server administration.
– Pricing: Understand the pricing structure and contract terms. Make sure there are no hidden fees, and choose a provider that fits your budget.
– Reliability: Look for a provider with a strong track record of uptime. Uptime guarantees of 100%. This is crucial to ensure your website or application is accessible to users at all times.
– Data Center Locations: Choose a provider with data centers in locations that are geographically close to your target audience. This can help reduce latency and improve performance.
NeuronVMis one of the most reliable and robust providers to offer dedicated server services for miners. One of its biggest goals is to pay attention to all these factors and provide better services.
Step 2: Server Preparation and Setup
When you want to prepare for mining on a dedicated server, you have to consider some important hardware. Most mining applications need these:
– Graphical Processing Unit (GUI)
– Central Processing Unit (CPU).
Tip: High-performance servers are generally preferred for mining.
Step 3: Installing Mining Software
Miners install specialized mining software on their dedicated server. This software is designed to interact with the cryptocurrency network, solve complex mathematical problems, and facilitate the mining process Of mining cryptocurrencies like Ethereum. One of the most popular mining software is CGMining. Let’s see how to install this great tool:
1- Update your system using the command below:
sudo apt update
sudo apt upgtrade
2- The next step is todownload CGMiner on a dedicated server. Unzip the downloaded package. Open .bat file in your desired text editor.
The other way is the following command that helps you to get the CGMiner repository. (replace <version>) with the desired version:
wget http://ck.kolivas.org/apps/cgminer//cgminer-.tar.bz2
tar -xvf cgminer-.tar.bz2
3- CGMiner may require certain dependencies to be installed. The specific dependencies can vary, but common ones include:
4- Navigate to the extracted CGMiner directory and run the following commands to configure and compile CGMiner:
cd cgminer- ./configure make
5- Now you can start your mining software using the related command:
./cgminer
You’ll need to create a configuration file to specify your mining pool, username, and other settings. Refer to CGMiner’s documentation for details on how to configure it:
cgminer.conf
Step 4: Mining Pool Selection
To increase their chances of successfully mining a cryptocurrency and receiving rewards, miners often join mining pools. A mining pool is a group of miners who combine their computational power and share the rewards based on the amount of work contributed.
You have various mining pool options to choose from, like Slush Pool, ViaBTC, Poolin, Ethermine, Dwarfpool, and so on. So choose the best and most suitable one for you:
It’s essential to research and choose a reputable and reliable mining pool based on your specific needs and preferences. Additionally, the cryptocurrency mining landscape is constantly evolving, so it’s important to stay informed about any changes or developments in the industry.
Step 5: Monitoring and Optimization
Regularly monitor the performance of your mining server, and be prepared to address any issues that may arise. Here’s a step-by-step guide on how to monitor and optimize your mining operation:
Hardware Monitoring: Use monitoring tools like HWiNFO, MSI Afterburner (for GPUs), or built-in system monitoring tools to keep an eye on your server’s hardware health.
Mining Software Monitoring: Most mining software provides real-time statistics on your mining operation. Keep an eye on hash rates, accepted shares, and rejected shares.
Temperature Control: Ensure that your server’s temperature remains within safe limits. Use cooling solutions like fans and heat sinks to regulate temperatures.
Power Monitoring: Monitor your server’s power consumption to optimize energy usage. Use power meters or built-in power monitoring tools.
Uptime Monitoring: Set up a monitoring system to track server uptime and receive alerts in case of unexpected downtime.
Mining Software Configuration: Adjust the configuration settings in your mining software to optimize performance.
Overclocking/Underclocking: Experiment with overclocking or underclocking your GPUs and CPUs to find the right balance between hash rate and power consumption.
Mining Pool Selection: Periodically review the mining pool you’re using. Switch to a more profitable pool if necessary.
Coin Selection: Consider mining different cryptocurrencies based on their profitability. Some coins may be more profitable to mine at different times.
Optimize Power Efficiency: Configure your server’s power settings to maximize energy efficiency.
Hardware Maintenance: Regularly clean and maintain your server’s hardware. Dust buildup can lead to overheating and reduced performance.
Regular Backups: Back up your mining configuration files and important data regularly.
Step 6: Maintenance and Troubleshooting
Dedicated server mining involves using dedicated servers or hardware to solve complex mathematical problems and validate transactions on a blockchain network. While it can be profitable, it also has several issues and challenges. Here are some common issues and potential solutions for dedicated server mining:
1- Mining requires a significant amount of energy, which can be costly and environmentally unsustainable.
Solution:
To address this issue, consider renewable energy sources, energy-efficient hardware, or mining in regions with lower electricity costs.
2- Mining equipment generates a lot of heat, which can lead to overheating and reduced hardware lifespan.
Solution:
Adequate cooling solutions, such as fans, air conditioning, or immersion cooling, can help manage this issue.
3- The mining industry is a target for cyberattacks and is risky.
Solution:
Implementing robust security measures, such as firewalls, encryption, and regular software updates, can help protect your mining operation.
4- Regular maintenance is essential to keep your mining hardware running smoothly.
Solution:
Develop a maintenance schedule and have backup hardware in case of unexpected downtime.
Conclusion
Before starting mining on a dedicated server, it’s important to do thorough research and understand the specific requirements and risks associated with the cryptocurrency you want to mine. Mining can be competitive and complex, so careful planning and ongoing maintenance are necessary to achieve success. We hope this post was useful for you. Enjoy mining!
In a today’s world, Remote Desktop Protocol (RDP) has become an integral part of businesses and individuals across the globe. The ability to access computers or servers remotely provides unprecedented convenience and flexibility. When it comes to purchasing RDP, opting for various locations like France can offer distinct advantages. Notably, the ability to buy France RDP with Bitcoin presents an easy and secure method to acquire this invaluable service. In this article, we will explore the benefits of using France RDP and how businesses and individuals can harness its potential.
France has a distinct internet infrastructure, with features that set it apart from other countries.
Firstly, France has achieved high broadband penetration rates, as a result of significant investments by both the government and private service providers. This has led to widespread access to high-speed internet connections.
Additionally, France has extensively deployed fiber-optic networks, allowing for fast and reliable internet access across homes and businesses. The backbone infrastructure in France is relatively centralized, particularly in cities like Paris, resulting in efficient routing and high-speed connectivity.
The country also boasts a number of established internet exchange points (IXPs), which facilitate the exchange of internet traffic between different networks and ISPs, leading to improved local and regional internet performance.
France’s regulatory environment plays a crucial role in shaping its internet landscape. The country promotes competition among ISPs, resulting in a diverse market with multiple players offering different services. This competitive environment drives innovation and enhances the quality and affordability of internet services.
Furthermore, France places a strong emphasis on privacy, with stringent regulations in place to protect users’ personal information. Notably, the General Data Protection Regulation (GDPR) applies to any entity processing personal data of individuals within the EU, ensuring data protection and privacy.
Additionally, France advocates for content localization policies, requiring certain digital content to be available in French and compliant with local regulations. This includes streaming platforms, online marketplaces, and search engines providing localized versions for French users.
How to Buy France RDP with Bitcoin?
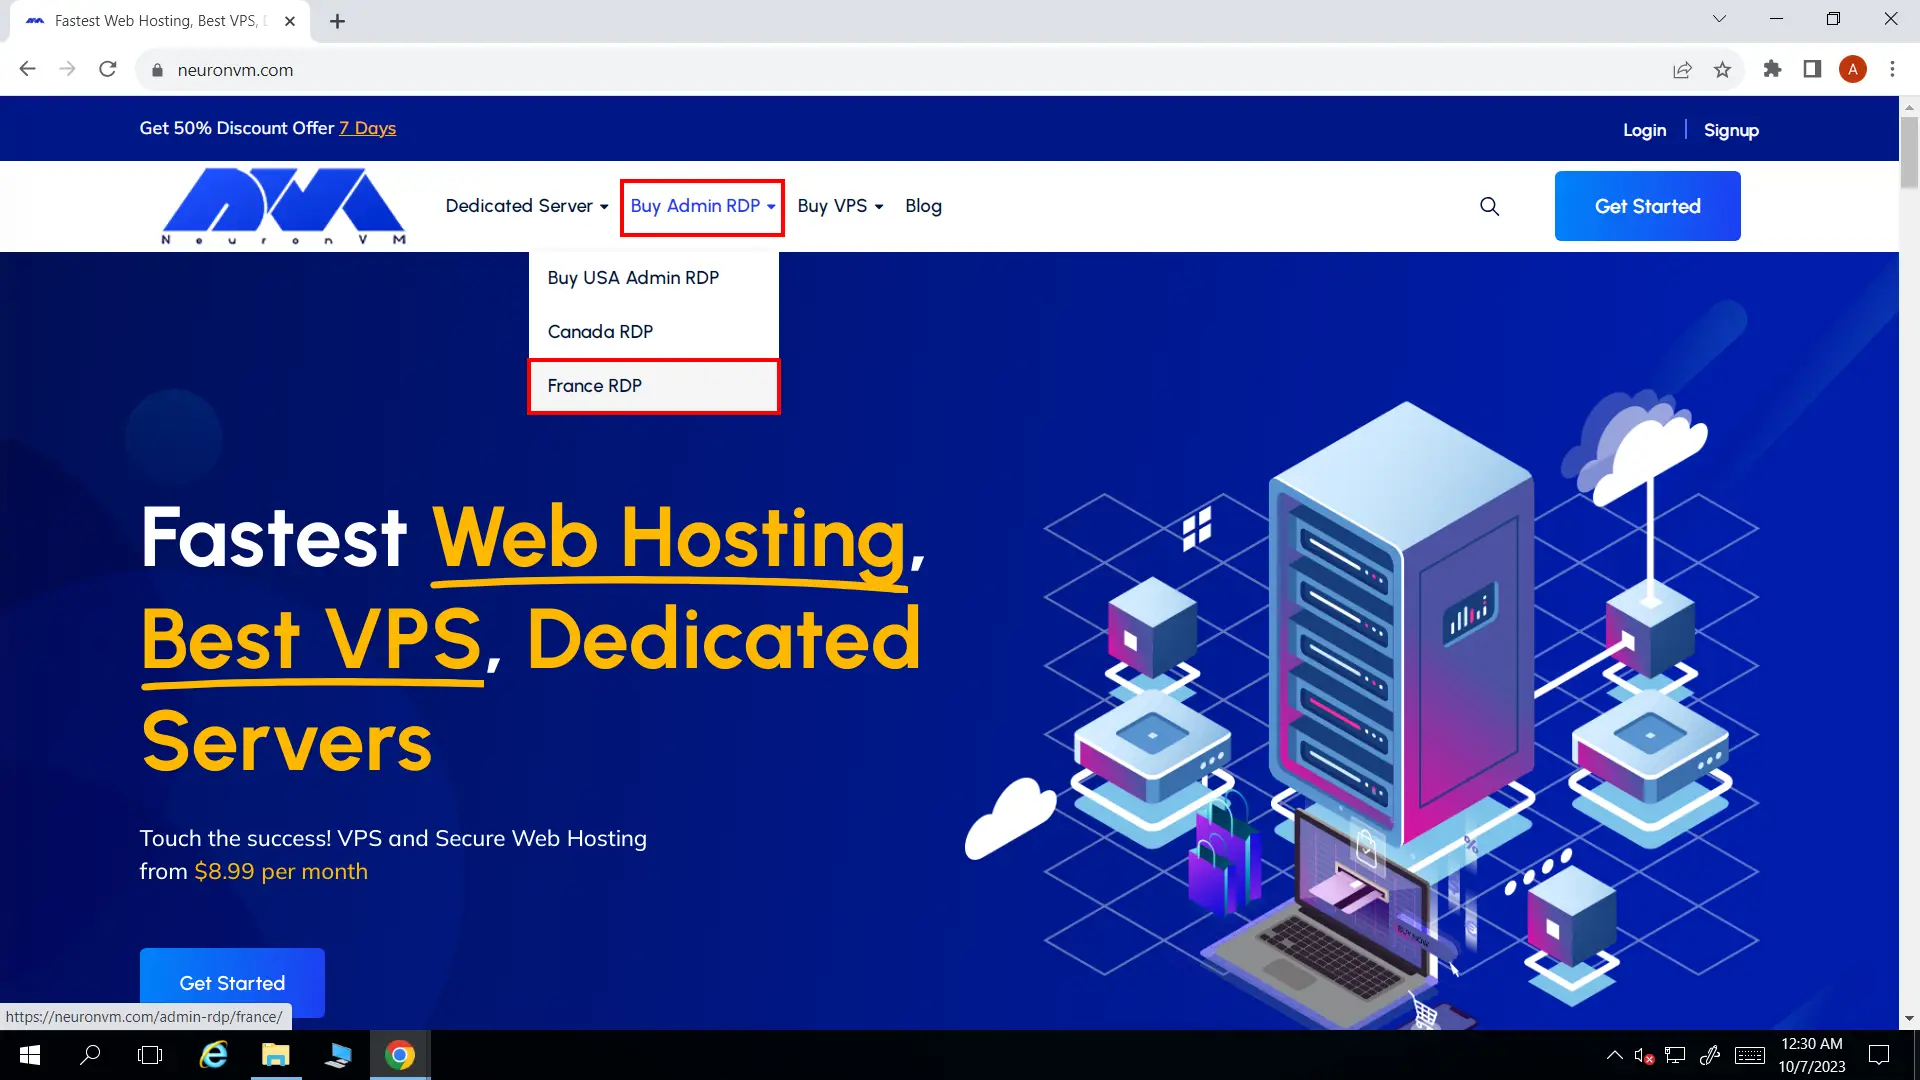
There are not many providers out there that have the bitcoin as one of their payment options, let alone selling it based on location. NeuronVM is one of the few places you can easily buy your needed services and pay with cryptocurrencies like Bitcoin. In this section I’m going to show you how you can buy France RDP with Bitcoin without facing any issues. Here we go:
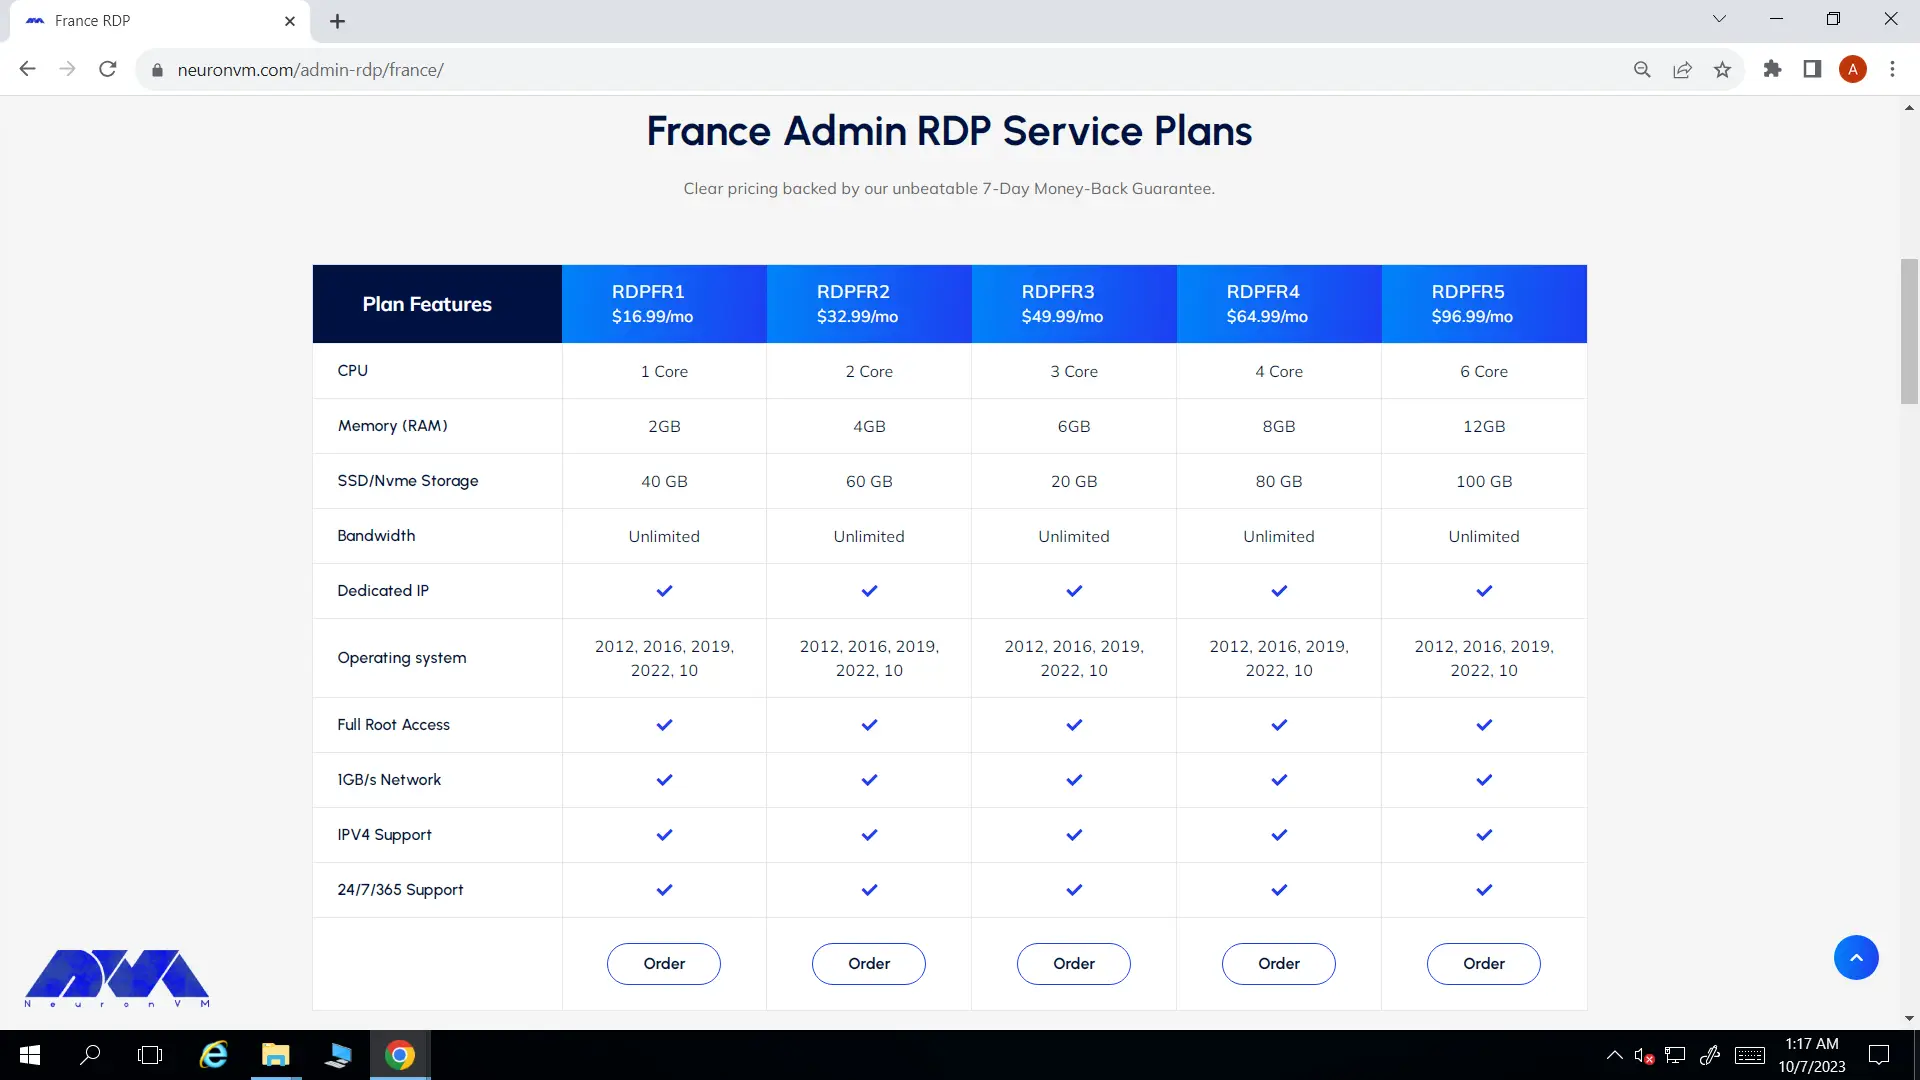
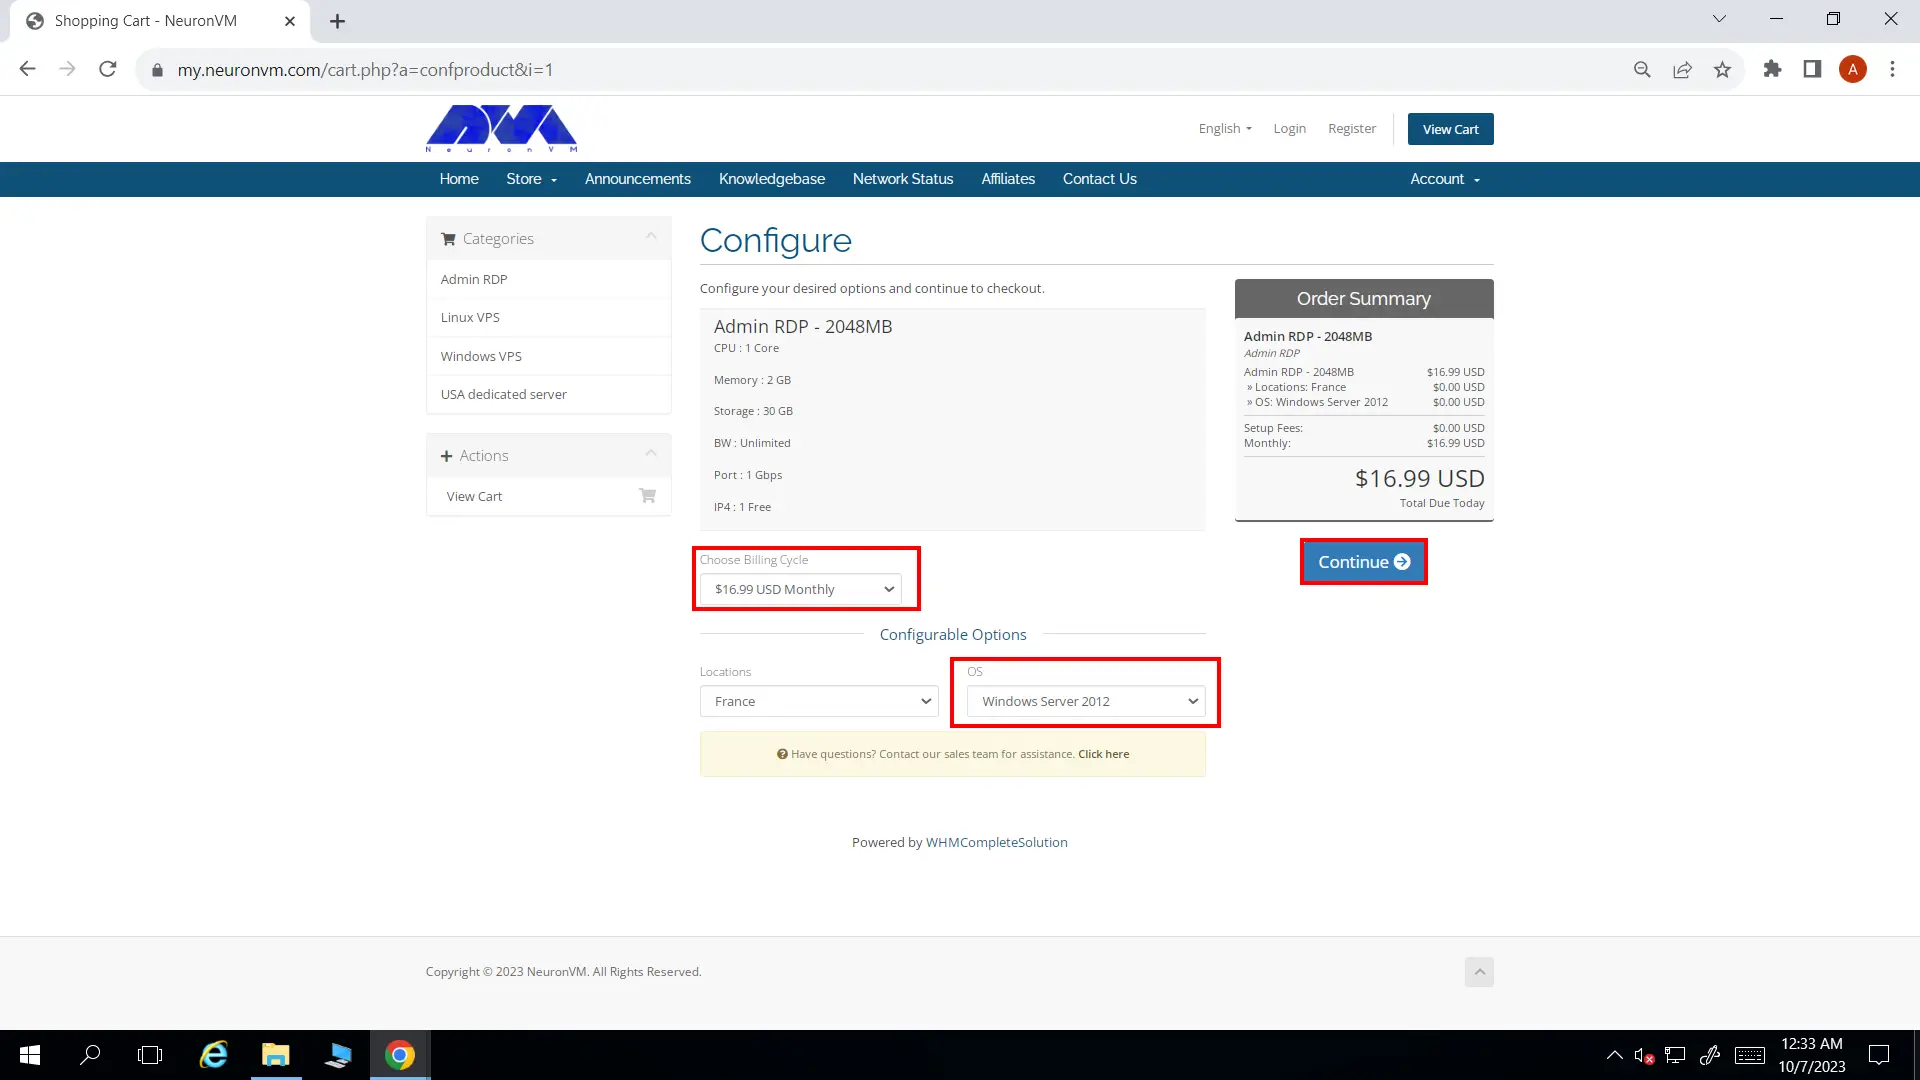
On France RDP page, scroll down and you will see the different plans listed there. Choose your preferred plan and click on Order.
You’ll be landed on configure page. You can change a few options like Preferred OS and the Billing Cycle to your liking.
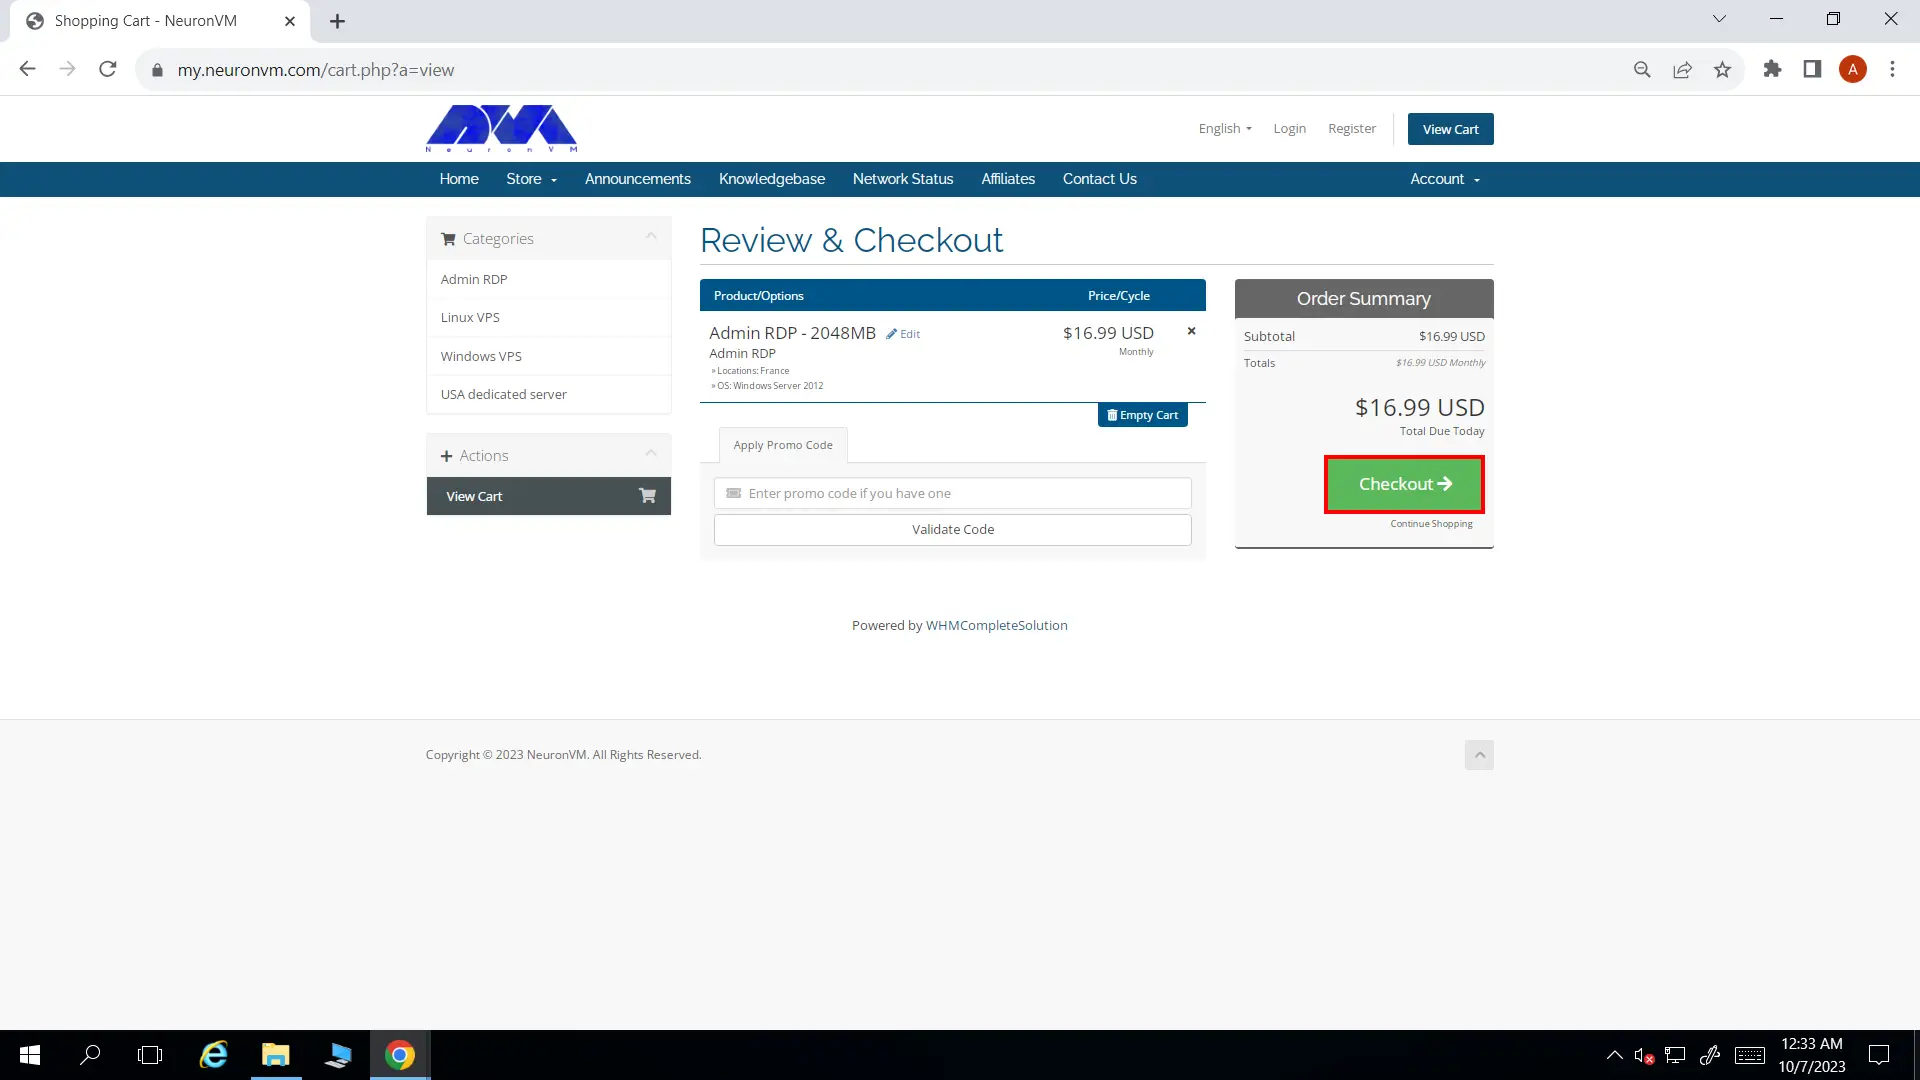
In Review and Checkout page you can enter a promo code if you have any, then click on Checkout button and proceed.
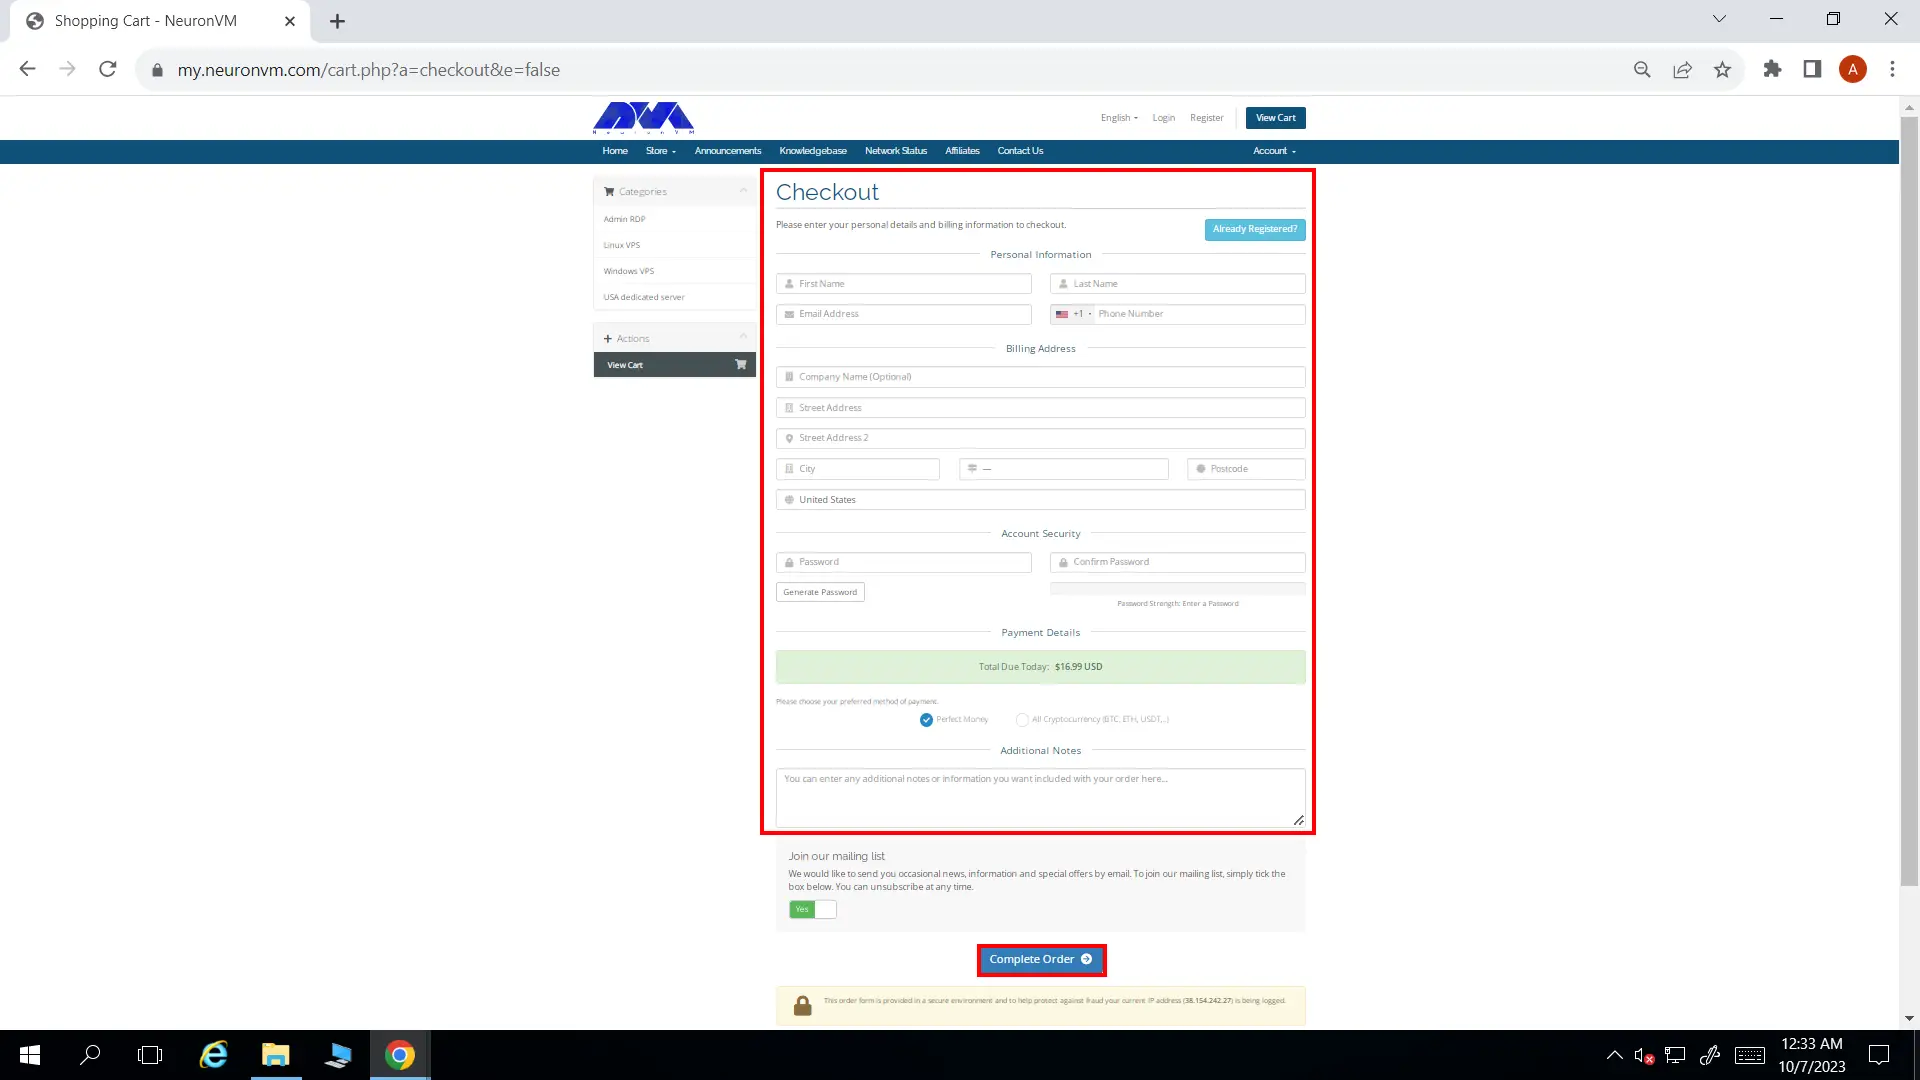
NeuronVM will require some of your information to complete the ordering process. If you’ve registered in our website before, you can simply click on Already Registered button. At the bottom of the page, choose All Cryptocurrencies and then click on Complete Order.
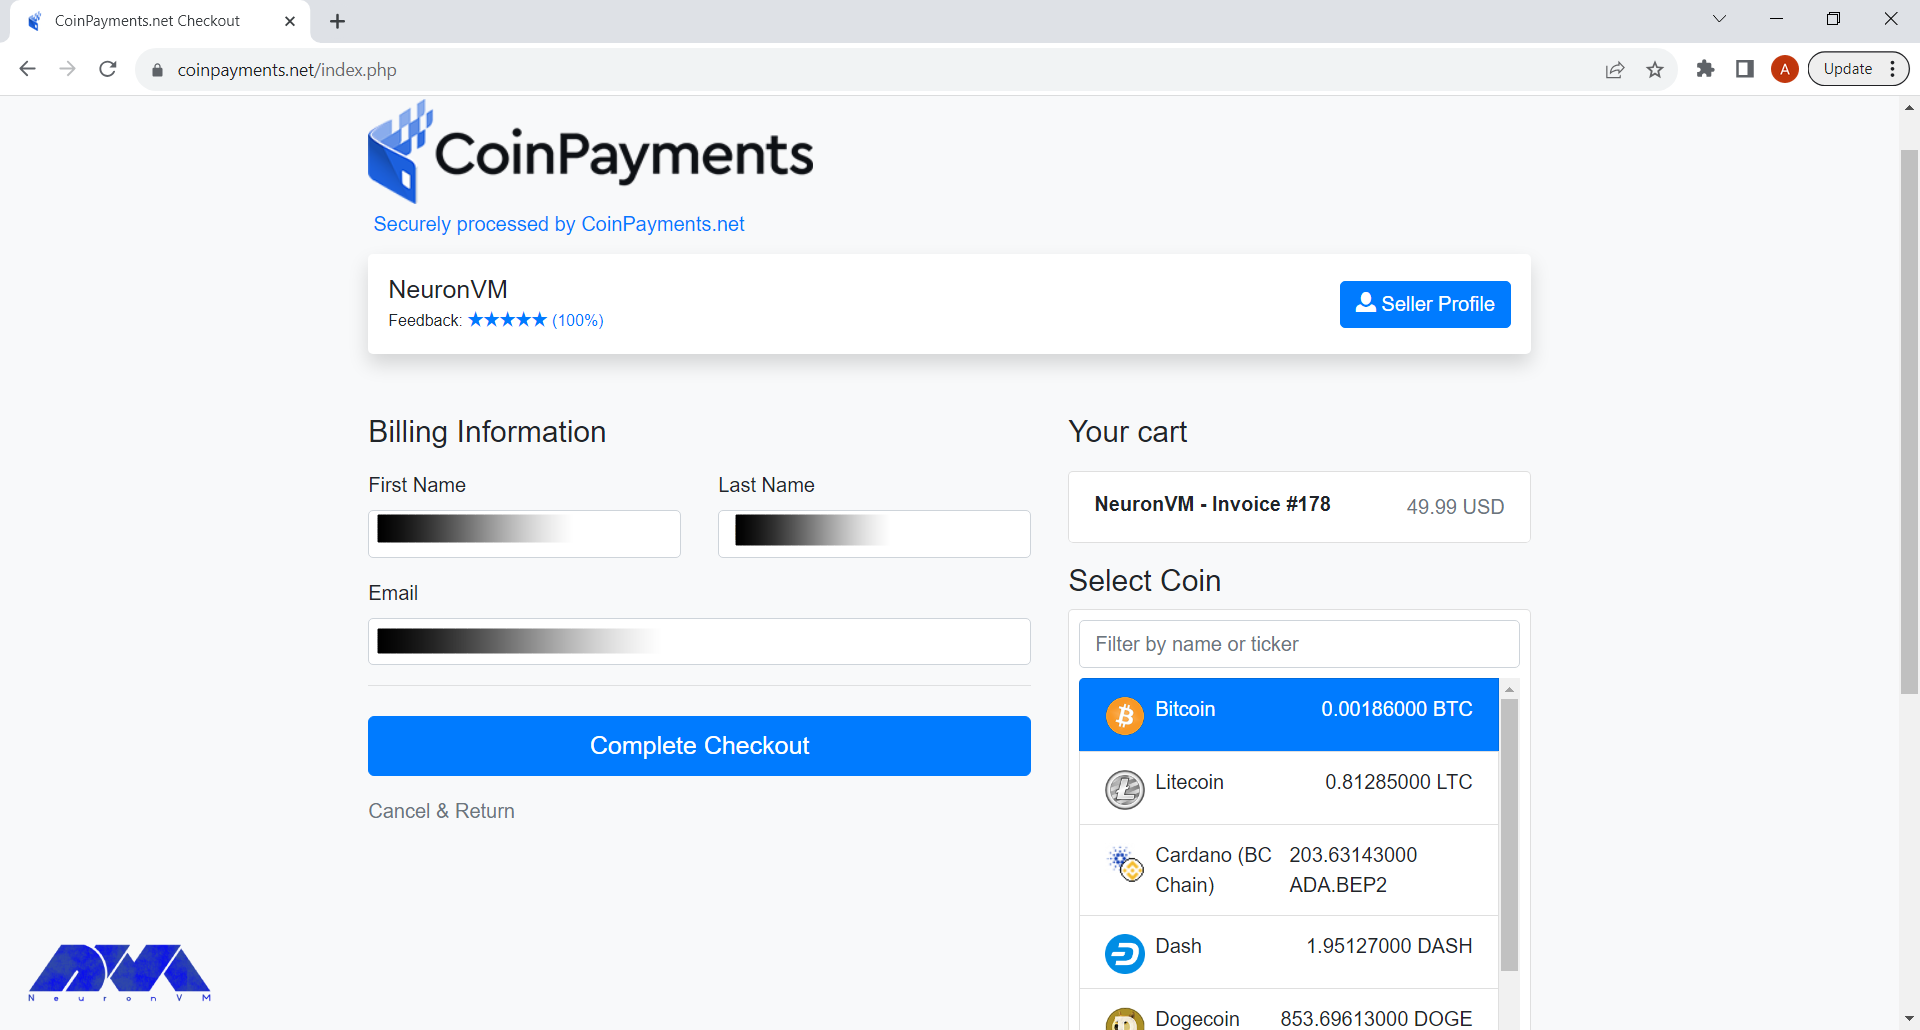
In the final step, choose Bitcoin as your preferred cryptocurrency and complete the buying process.
After the payment is done, NeuronVM will instantly provide you with your France RDP and you can start using it. Remember if you had any issues going through this process, you can either comment down below or contact our friendly support team. We will get back to you in no time.
Conclusion
In conclusion, France RDP offers a multitude of benefits for businesses and individuals seeking reliable remote access solutions. The enhanced performance and connectivity provided by France’s strong network infrastructure ensure seamless and high-speed remote access experiences. Moreover, opting for France RDP means benefiting from advanced security measures, including robust data protection regulations and reliable server monitoring, reducing the risk of data breaches or cyberattacks.
From a business perspective, France RDP allows companies to expand their reach globally, serving clients and customers from around the world with ease. Additionally, it offers cost-effective solutions, saving on hardware costs, maintenance, and operational expenses compared to setting up on-premises infrastructure.
For individuals, France RDP provides access to enterprise-level software and resources at a fraction of the cost, enhancing productivity while saving on personal investments.
With the ability to purchase France RDP using Bitcoin, the process becomes even more convenient and aligned with the modern trend of digital transactions. Embracing France RDP empowers users to bridge geographical barriers, streamline operations, and leverage the remarkable benefits of remote desktop protocol. So, embark on the Bitcoin Boulevard to France and unlock the infinite potential of RDP.
Are you ready to take your website or online business to the next level? If so, it might be time to consider using a dedicated server. While shared hosting may be suitable for beginners or small websites, a dedicated server offers the most control, flexibility, and power. In this guide, we will walk you through the process of mastering the art of dedicated servers. From choosing the right server to configuring it for optimum performance, you’ll be equipped with the knowledge to make the most of this powerful hosting solution.
Determining Your Requirements
Assessing your needs with a dedicated server requires a thorough understanding of your business requirements, resource demands, and growth projections. Here are some key factors to consider:
1. Performance and Scalability: Determine the level of performance required by your applications and consider any potential growth in traffic, users, or data. Evaluate if your current hosting environment can handle the increasing load or if a dedicated server is necessary to ensure optimal performance.
2. Security: Assess the sensitivity of your data and the level of security required. Dedicated servers offer enhanced security features, such as dedicated firewalls and isolated environments, which can be crucial for industries prone to cyber threats or compliance requirements.
3. Customization and Control: Evaluate whether your applications require specific configurations, software installations, or specialized environments. Dedicated servers provide complete control and flexibility, allowing you to tailor the server infrastructure to your exact needs.
4. Cost Considerations: Assess the cost implications of moving to a dedicated server. Calculate the expenses associated with hardware, software licensing, maintenance, and ongoing operational costs. Compare this with the potential benefits and savings from improved performance, scalability, and security.
5. Technical Expertise: Determine if you have the necessary technical expertise or if you require managed dedicated server services. Managed options provide assistance with server setup, maintenance, security, and troubleshooting, allowing you to focus on your core business.
6. Redundancy and High Availability: Evaluate your need for redundancy and high availability. Dedicated servers can be configured with failover solutions, clustered environments, or load-balancing setups to ensure consistent performance and minimal downtime.
7. Support and Service Level Agreements (SLAs): Consider the level of technical support and SLAs needed for your business. Evaluate the responsiveness, availability, and expertise of the hosting provider’s support team.
Selecting the Perfect Hardware
Choosing the right hardware for a dedicated server depends on several factors including the specific requirements of your server workload, budget considerations, and future scalability needs.
Here are some key hardware components to consider when choosing a dedicated server:
Processors (CPU)
Memory (RAM)
Storage
RAID Controllers
Network Connectivity
Power Supply
Server Chassis and Cooling
Remote Management and Monitoring
Scalability
It is recommended to get in touch with our support experts by sending a ticket from the user area to assess your specific needs and select the most suitable hardware for your dedicated server setup.
Operating System Selection
The next step is choosing an operating system (OS) for your server. Popular choices include Linux distributions like Ubuntu, CentOS, or Debian, as well as Windows Server OS. Consider your familiarity with the OS, compatibility with your applications, and any specific requirements when making your decision.
Server Setup
Setting up a dedicated server can be a complex process, but with the right knowledge and guidance, you can master the art of dedicated servers. Here are the key steps in server setup:
Step1: Plan and determine server requirements:
Define the purpose of the server, including the operating system, software, storage, memory, and bandwidth needed.
Step2: Choose a hosting provider:
Select a reliable hosting provider that offers dedicated server hosting services.
Step3: Order and provision the server:
Place an order for the dedicated server with the chosen hosting provider. Provide necessary information, such as the desired configuration, billing details, and initial setup requirements.
Step4: Configure network settings:
Determine the IP address allocation and set up the network configuration, such as assigning static IP addresses, configuring DNS settings, and configuring firewalls.
Step5: Install the operating system:
Install the preferred operating system on the server. This may include Windows Server, Linux distributions like Ubuntu or CentOS, or other customized versions.
Step6: Server hardening:
Enhance the security of the server by applying necessary security measures, such as setting up a strong password policy, disabling unnecessary services, configuring firewall rules, and installing security software.
Step7: Configure server settings:
Customize server settings according to the desired requirements, including optimizing performance, storage configuration, and network settings.
Step8: Backup and disaster recovery:
Establish regular backup processes and implement strategies for disaster recovery to ensure data integrity and availability.
Step9: Testing and optimization:
Test the server to ensure it is functioning properly and optimize its performance by fine-tuning configurations, monitoring system performance, and applying necessary updates and patches.
Tip: It is important to follow best practices and consult with professionals or technical support resources when setting up a dedicated server, as the process can be complex and may require advanced knowledge in server administration and security measures.
Security First: Fortify Your Server
One of the most crucial aspects of managing a dedicated server is ensuring its security:
– Start by installing a firewall to protect against unauthorized access.
– Regularly update your OS and installed software, and consider implementing security measures like two-factor authentication and strong passwords.
– Regularly monitor logs for any suspicious activity.
Software Installation and Server Optimization
Installing software and optimizing a dedicated server involves several steps. Here is a general outline of the process. In the first step, we will examine how to install software on a dedicated server:
1) Connect to the dedicated server using remote desktop software or SSH.
2) Update the operating system to ensure it has the latest security patches and software updates.
3) Install necessary software packages for your server. This could include web servers (such as Apache or Nginx), database servers (such as MySQL or PostgreSQL), programming languages (such as PHP or Python), and any other required applications.
4) Configure the software settings and make any necessary changes to meet specific requirements.
5) Test the installed software to ensure everything is working correctly.
To maximize the performance of your dedicated server, it’s important to optimize its configurations. This includes fine-tuning settings like PHP memory limit, web server caching, and database optimization. Additionally, consider implementing content delivery networks (CDNs) and load balancers to improve website speed and handle high traffic efficiently:
1) Optimize the server’s resources by adjusting server parameters and settings, such as memory allocation, disk read and write buffers, and network configurations.
2) Implement caching mechanisms to improve server performance, such as opcode caching for PHP or content caching for web servers.
3) Enable Gzip compression to reduce the size of files transmitted between the server and clients.
4) Configure server-level caching solutions, such as Varnish or Redis, to store frequently accessed data in memory for faster retrieval.
5) Implement a content delivery network (CDN) to distribute static resources across multiple servers globally for improved speed and reliability.
6) Monitor server performance and utilization using server monitoring tools, and make any necessary adjustments to ensure optimal performance.
Monitoring and Maintenance
Monitoring your server’s performance is crucial for identifying and resolving issues promptly. Implement monitoring tools that track resource usage, server uptime, and website performance. This allows you to identify potential bottlenecks, troubleshoot problems, and optimize your server for the best user experience.
Monitoring tools can be very helpful in ensuring the smooth functioning and optimal performance of a dedicated server. Here are some popular monitoring tools that can be utilized:
Nagios
Zabbix
PRTG Network Monitor
SolarWinds Server & Application Monitor
Datadog
New Relic
These monitoring tools can be installed on the dedicated server to continuously monitor its performance, identify any issues or bottlenecks, and enable proactive troubleshooting and optimization.
Scaling and Future-Proofing
Scaling and future-proofing dedicated servers involves ensuring that the infrastructure can handle increasing demands and technology advancements in the future. Here are some key considerations:
Scalability: A dedicated server should have the option to scale its resources vertically (increasing individual components like CPU, RAM, or storage) or horizontally (adding more servers to a cluster). This allows the server to handle increasing traffic and workload requirements.
Upgradable hardware: Choose a dedicated server provider that offers flexibility in upgrading or replacing hardware components. This ensures that your server can accommodate future advancements in hardware technology without requiring a complete replacement.
Network capacity: Ensure that the dedicated server provider has sufficient network capacity to handle increasing data transfer requirements. This includes sufficient bandwidth, low latency, and scalability to accommodate higher data volumes.
Virtualization support: Dedicated servers that support virtualization technologies such as VMware, Hyper-V, or KVM allow for efficient resource utilization and scalability. This enables the easy deployment of additional virtual machines as needed.
Redundancy and high availability: Consider redundancy options like RAID configurations for data storage, redundant power supplies, and network connections. High availability configurations, such as clustering or load balancing, can ensure that your server remains online even in the event of hardware or network failures.
Future technology support: Stay updated with emerging technologies and trends in server hardware, software, and networking. Regularly review your server infrastructure and consider upgrades or enhancements to keep pace with the latest advancements.
By incorporating these considerations, you can ensure that your dedicated server infrastructure is scalable, adaptable to future requirements, and can effectively handle increasing demands.
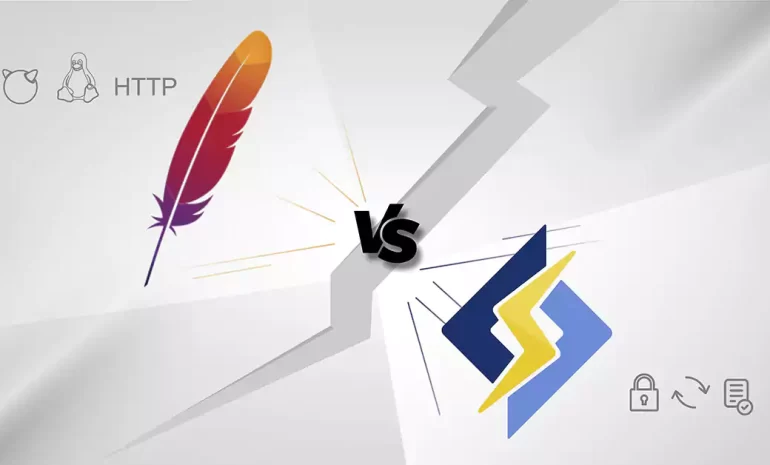
When it comes to web server technology, Apache and Litespeed are two popular options that often make the list. Apache, an open-source web server software, has been the go-to choice for many webmasters for decades. On the other hand, Litespeed, a commercial server software, has gained significant popularity in recent years due to its high performance and efficiency. In this infographic post, we will compare Apache vs Litespeed in terms of their performance, features, and other things to determine which one is the better choice for your website. By examining the strengths and weaknesses of each server, we aim to provide you with valuable insights to make an informed decision in choosing between Apache and Litespeed for your web hosting needs.
Apache vs Litespeed Overview
Apache, known for its stability and versatility, has remained a stalwart in the world of web servers since its inception. With a wide range of modules and extensive community support, Apache offers a comprehensive solution for various web hosting requirements. However, as websites become more dynamic and handle heavy traffic loads, Apache’s processing speed can sometimes lag behind, resulting in longer page load times and reduced server performance. This is where Litespeed emerges as a strong contender in the Apache vs Litespeed debate. Litespeed is designed to tackle the performance limitations of Apache, exhibiting significantly faster response times and better scalability. Additionally, Litespeed incorporates advanced caching mechanisms and efficient resource utilization, allowing it to handle larger volumes of concurrent connections and requests with ease.
In conclusion, the Apache vs Litespeed debate revolves around balancing stability, community support, and cost-effectiveness against superior performance and scalability. While Apache remains the trusted choice for its versatility and extensive plugin ecosystem, Litespeed’s focus on speed and efficiency renders it an appealing alternative, especially for high-traffic websites.
Remember you can always buy a reliable server from NeuronVM and test the things we discuss in our post in a safe environment.
If you want to get the most out of Windows 10 VPS, you have to optimize its performance, security, and Usability. Also, the most important point about a Windows 10 VPS is that it should be a reliable, and efficient tool that supports your specific goals and requirements. It is cheaper than a dedicated server with a user-friendly and strong virtualize. Also, Windows 10 VPS is a good choice for you because you will have server resources exclusively. Here we will focus to get the best of Windows 10 VPS and buy it with bitcoin (BTC).
Why Windows 10 VPS is the Best Choice?
While Windows 10 VPS can be an excellent choice for certain use cases, it may not be the best option for everyone. You can use this server when your workflow or applications require Windows-specific software that is not available or easily adaptable to other operating systems, then a Windows 10 VPS is a natural choice.
It ensures compatibility and seamless operation of such software. Also, Businesses and organizations that rely on Microsoft Active Directory for user management, authentication, and group policies may find Windows 10 VPS to be the best choice due to its seamless integration with these services.
Windows 10 VPS allows you to stay up to date with the latest Windows security patches and updates using Windows Update. It ensures the security and stability of your server.
It’s essential to consider the following factors when determining if a Windows 10 VPS is the best choice for you:
Windows licensing can add to the overall cost of hosting a Windows 10 VPS, making it potentially more expensive than Linux alternatives.
If your applications and workflow are not dependent on Windows-specific software, a Linux VPS might offer a cost-effective and efficient alternative.
If you or your team have expertise in Linux, it may be more practical to choose a Linux VPS and adapt your workflow accordingly.
Ensure that your VPS plan provides sufficient resources (CPU, RAM, storage) to meet your needs. Windows 10 typically has higher resource requirements compared to Linux.
Now if you decide to buy a Windows 10 VPS server, we can recommend NeuronVM website, which is a reliable provider and can satisfy you because of 24/7 professional support and a variety of locations. It also is a great company with the purpose of giving the best services at a reasonable cost.
How to Buy Windows 10 VPS With Bitcoin?
Buying a Windows 10 VPS with Bitcoin involves a few steps, but it is really easy and fast. You’ll need to find a VPS provider (NeuronVM) that accepts Bitcoin as a payment method, create an account with them, select your desired Windows 10 VPS plan, and make the payment using Bitcoin. Follow the instructions below:
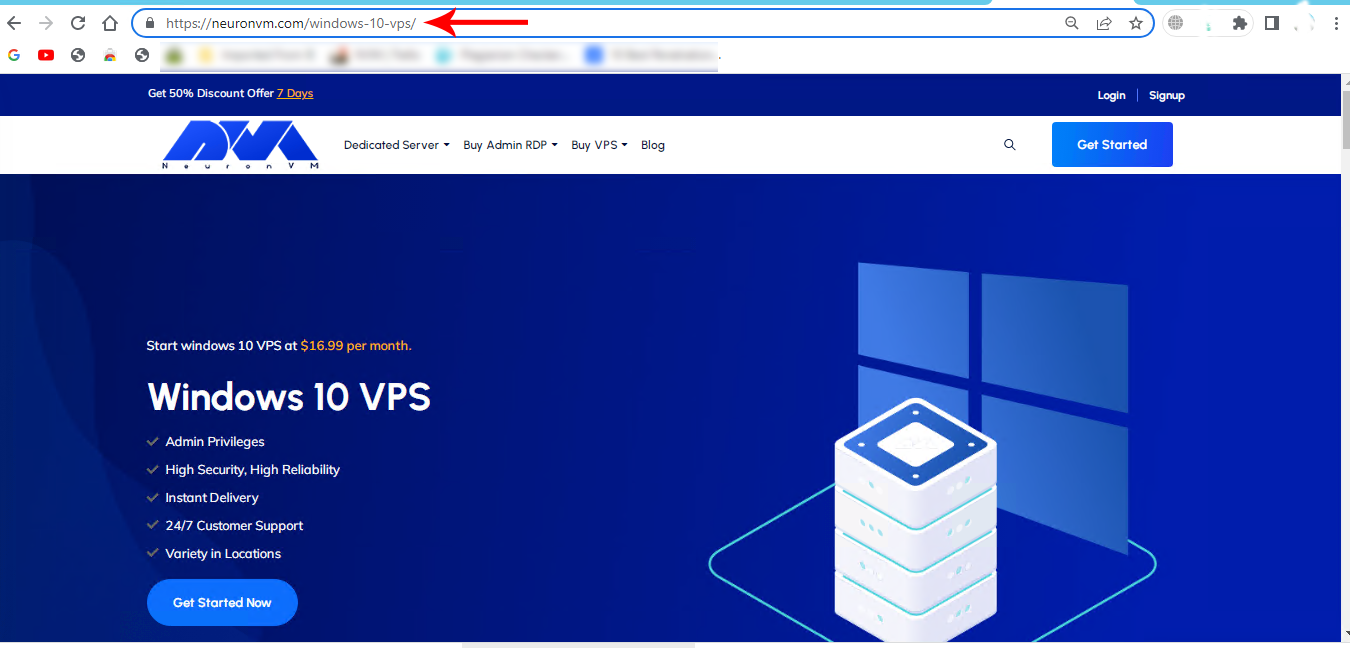
As the first step, refer to the Windows 10 VPS page on the official NeuronVM website to Buying a Windows 10 VPS:
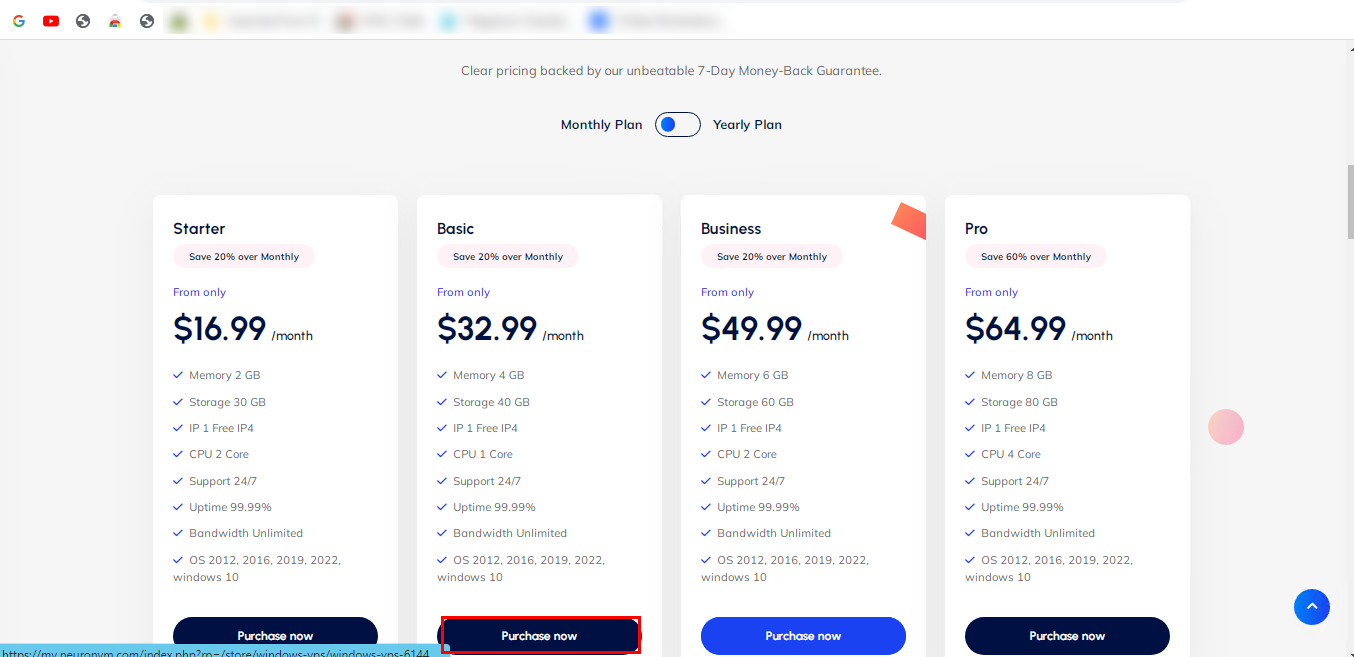
Scroll down and choose the desired plan. Click on Purchase Now:
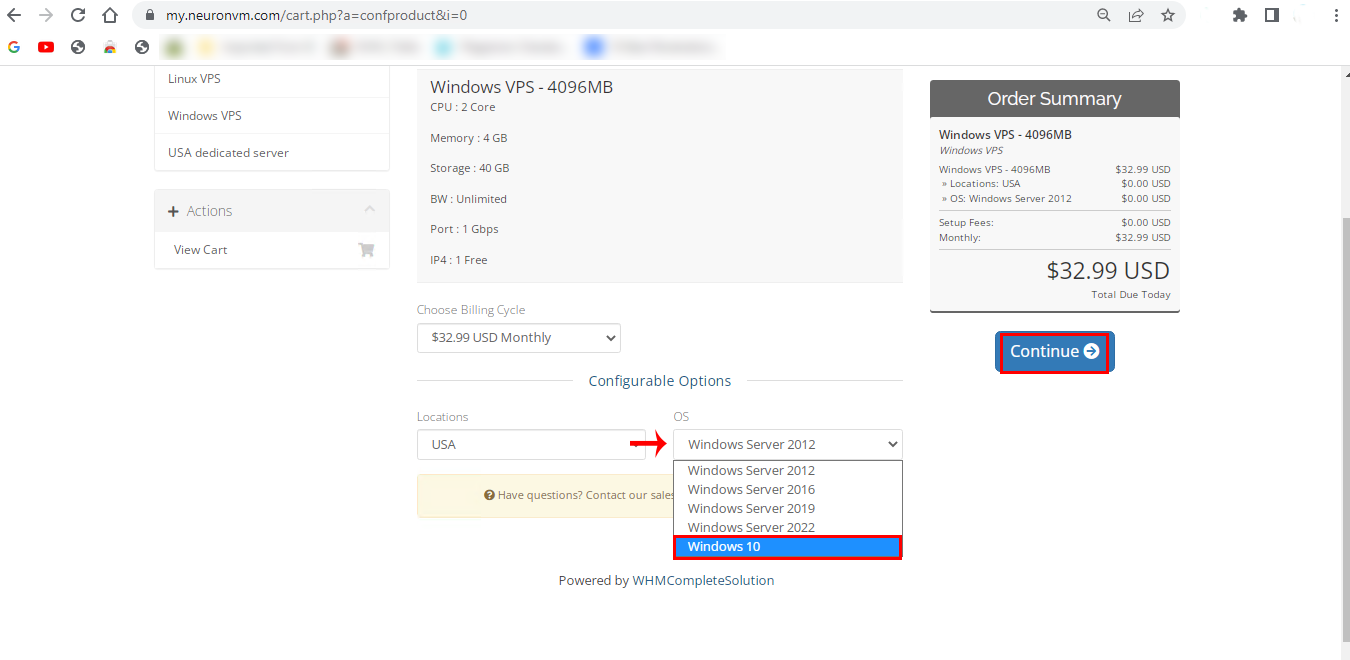
In the next part, choose the Windows 10 option in the OS box. Also, you can choose your locationhere. Then click on Continue:
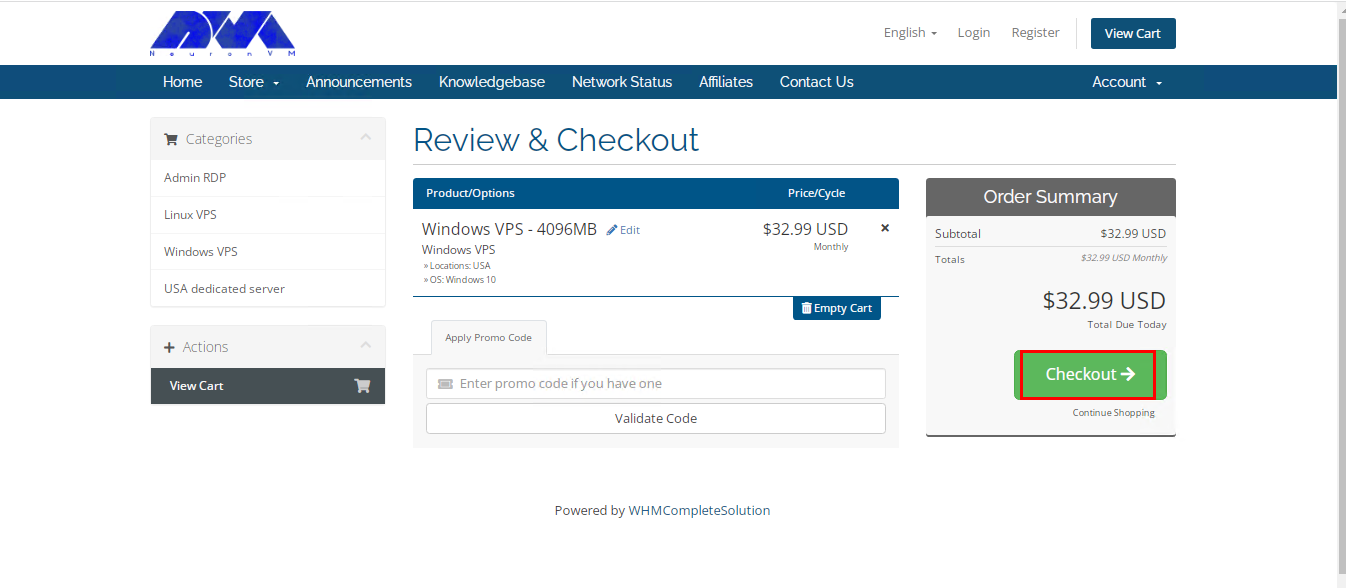
Now you can review the details of the chosen plan. Click on Checkout and continue:
Tip: you have the opportunity to insert the Promo Code for a discount.
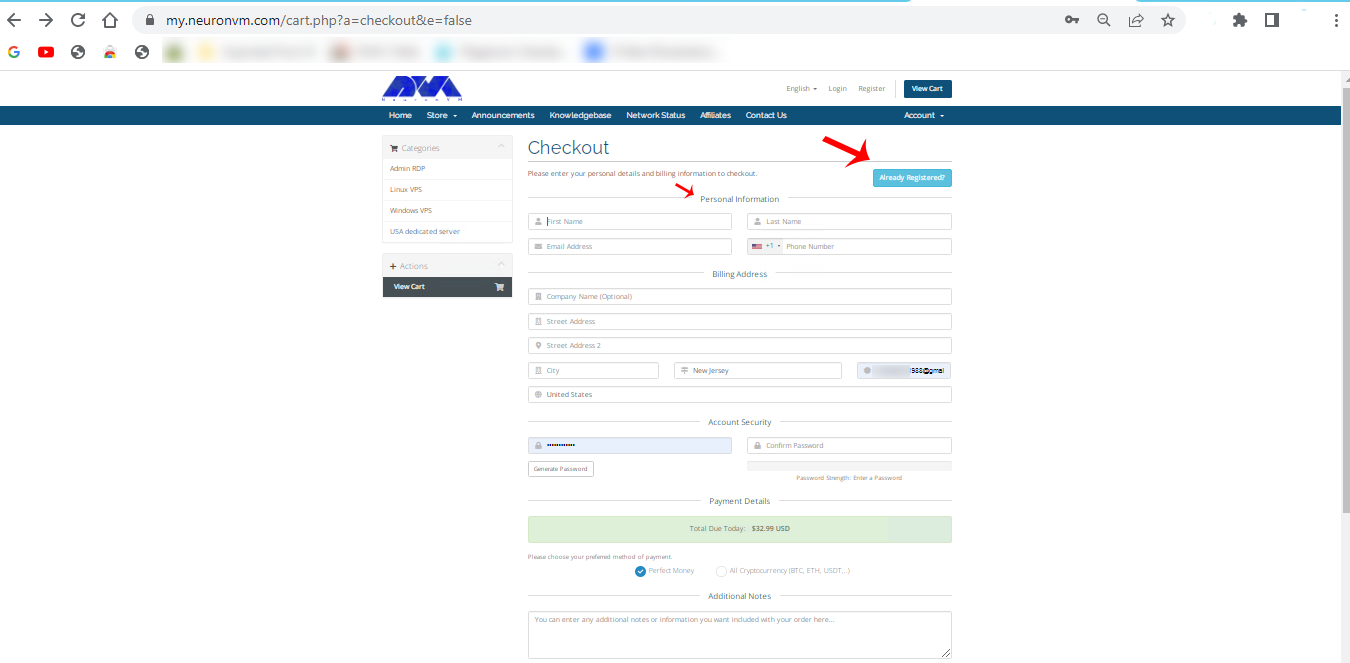
Here is the sign-in section. you can insert the related information and sign in, or you can press Already Registered and insert your email and password to go through the purchase process:
Here you can choose the payment method and add if you need to mention any notes. click on complete Order:
Tip: Your choice should be All Cryptocurrencies (Bit, Eth,…) to use Bitcoinfor your purchase that is windows 10 VPS with BTC.
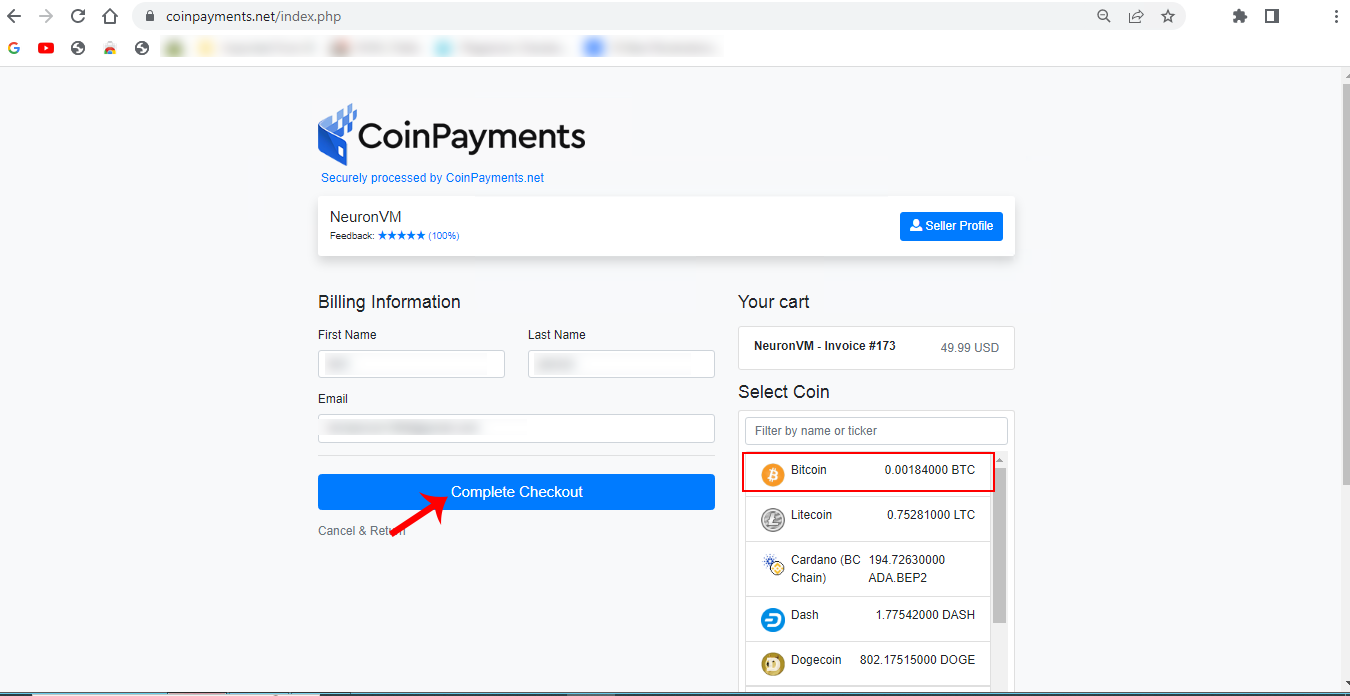
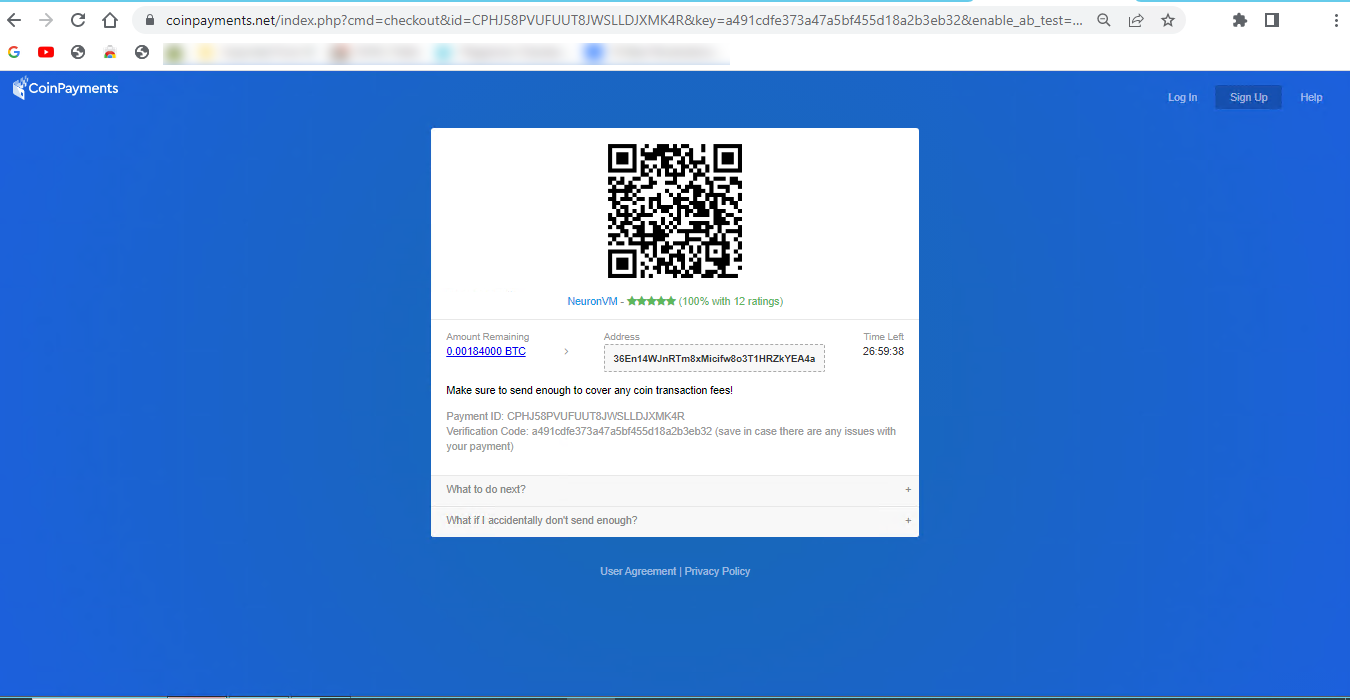
You will see the payment page. Insert personal information and choose Bitcoin, then click on Complete Checkout:
Here is the Payment ID and your payment information. confirm it and make the payment.
As soon as you complete your payment, you will receive the related details about your Windows 10 VPS server.
Best Practices to use Windows 10 VPS?
Using a Windows 10 Virtual Private Server comes with its own set of best practices to ensure that your virtual environment is secure, efficient, and well-maintained. Here are some best practices for using a Windows 10 VPS:
– Start by selecting a reputable VPS provider known for its reliability, customer support, and security. For example: NeuronVM.com
– Use strong, unique passwords for remote access, and consider using SSH keys for added security.
– Keep your Windows 10 VPS up-to-date with the latest security patches and updates to protect against vulnerabilities.
– Configure the Windows Firewall to only allow necessary traffic, blocking unnecessary ports and services.
– Install and configure antivirus and anti-malware software to protect your VPS from threats.
– Setup regular automated backups to ensure that your data is safe and can be easily restored in case of data loss.
– Enable encryption for data in transit and at rest, especially if you’re handling sensitive information.
– If using RDP to access the VPS, change the default RDP port, use strong passwords, and consider implementing Network Level Authentication (NLA) for enhanced security.
– Keep an eye on resource usage (CPU, RAM, disk space) to ensure your VPS is performing optimally. Adjust resources as needed.
– Enable auditing and review logs to monitor user activities and detect any suspicious behavior.
Troubleshooting Common Issues of Windows 10 VPS
Here are some common Windows 10 VPS issues and steps to troubleshoot them:
1- You have a slow performance problem
Solutions:
Check CPU and memory usage using Task Manager. Identify resource-hungry processes.
Consider upgrading your VPS resources if they are consistently maxed out.
Optimize startup programs and services using the “msconfig” utility.
2- Some problems related to networking
Solutions:
Test your internet connection on the VPS using the “ping” command to see if it’s responsive.
Check for any firewall rules that might be blocking traffic.
Ensure your VPS has the correct DNS settings.
3- Blue Screen of Death (BSOD) problem
Solutions:
Record the error code displayed on the BSOD.
Search for the error code online to find specific solutions.
Update drivers and Windows to the latest versions.
Check for hardware issues, especially if BSODs are frequent.
4- Lack of Disk Space Issues
Solutions:
Use the “Disk Cleanup” utility to free up disk space.
Uninstall unnecessary programs or move data to an external drive.
Consider expanding your VPS’s disk space if you consistently run out.
If you’re unable to resolve the issue, consider seeking help from your VPS hosting provider or a knowledgeable colleague. They may have access to additional tools and resources to diagnose and fix the problem.
Conclusion
Ultimately, whether a Windows 10 VPS is the best choice for you depends on your individual circumstances, application requirements, and budget constraints. Remember that the specific steps and details of buying Windows 10 VPS with BTC may vary depending on the VPS provider you choose. We hope you got how beneficial can Windows 10 VPS be for your business, so don’t waste your time and enjoy your server.
The battle between Kali Linux and Arch Linux is a showdown between two powerhouses. Kali Linux, known for its penetration testing capabilities, is favored by cybersecurity professionals. Arch Linux, on the other hand, boasts a minimalistic approach and offers a highly customizable experience. In this article, you will clearly see the result of the comparison between Kali Linux vs Arch Linux.
The Origin Story
Kali Linux and Arch Linux are two popular Linux distributions that emerged from different origins and serve distinct purposes. Before we start and introduce and compare these two distributions for you, we suggest you to test and use the Linux VPS server plans provided on our website.
Kali Linux, formerly known as Backtrack, was initially developed by Mati Aharoni and Devon Kearns of Offensive Security as a specialized distribution for penetration testing and digital forensics. It was first released in 2006 and became popular within the security testing community due to its vast array of pre-installed security tools and utilities. Kali Linux is designed for ethical hacking and security auditing, providing a robust platform for professionals and enthusiasts in the cybersecurity field.
On the other hand, Arch Linux was created by Judd Vinet in 2002 as a minimalist and lightweight distribution focused on simplicity, customization, and flexibility. Arch Linux follows a rolling release model, which means that users have access to the latest software updates without the need for reinstalling the entire operating system. Its philosophy of “Keep It Simple, Stupid” (KISS) appeals to advanced Linux users who prefer to build their systems from the ground up and have complete control over every aspect of their installation.
Although Kali Linux and Arch Linux have different goals, they both share an open-source foundation and have vibrant communities supporting their development. Both distributions enjoy active user bases and periodically receive updates and bug fixes to ensure their security and functionality.
Kali Linux vs Arch Linux: Usability and User Experience
First of all, it should be noted that Kali Linux and Arch Linux both have different focuses, so their usability and user experience may vary.
Kali Linux comes pre-installed with a wide range of security and hacking tools, making it ideal for experienced security professionals. However, for a mainstream user who only requires general computing tasks, Kali Linux may not be the most user-friendly option. It requires a high level of technical knowledge and may not provide a seamless out-of-the-box experience.
On the other hand, Arch Linux is highly customizable distribution that follows a “do-it-yourself” philosophy. Arch Linux provides a more hands-on experience, allowing users to configure and optimize their system according to their specific needs. While this level of customizability can be empowering for experienced users, it may not be the best choice for beginners or those who prefer a more plug-and-play experience.
In terms of user experience, Kali Linux is focused on a specific niche and provides specialized tools for penetration testing and security assessments. Its user interface is tailored to these tasks, with an emphasis on efficiency and accessibility to security tools. However, for day-to-day tasks like web browsing, multimedia, or gaming, the user experience may not be as polished or optimized.
Arch Linux, on the other hand, provides a minimal and lightweight base system, allowing users to customize and install their preferred desktop environment, applications, and utilities. This flexibility offers a more tailored and user-friendly experience, but it also requires a higher degree of technical expertise to set up and maintain.
Package Management Systems
Kali Linux uses the Advanced Packaging Tool (APT) package management system. APT is known for its ease of use and powerful features. It allows users to install, upgrade, and remove software packages easily using simple commands like apt-get. APT also provides extensive dependency management, which ensures that all required libraries and dependencies are installed along with the requested package. Kali Linux also provides its own repositories with a wide range of security and hacking-related tools.
On the other hand, Arch Linux uses its own package manager called Pacman. Pacman is a lightweight and flexible package management system designed specifically for Arch Linux. It follows a minimalist approach and aims to provide a simple and efficient package installation process. Pacman uses a rolling release model, which means that packages are constantly updated to their latest versions. It also has a built-in package build system called the Arch Build System (ABS), which allows users to easily create and install custom packages.
In summary, both APT and Pacman have their own strengths and are suited for different types of users. APT is often preferred for its user-friendly interface and extensive package repositories, while Pacman is favored for its simplicity and rolling release model.
Community Support and Philosophies
Community Support:
Kali Linux: Kali Linux has a large and active community support base due to its popularity among the cybersecurity community. It has a dedicated forum, IRC channel, and various online communities where users can seek help, share knowledge, and discuss topics related to Kali Linux tools and usage.
Arch Linux: Arch Linux also has a strong and active community support system. It has an official forum, IRC channels, and a Wiki page. The Arch Linux community is known for its helpfulness, but it is more focused on user self-sufficiency and encourages users to find solutions on their own by providing extensive documentation.
Philosophies:
Kali Linux: Kali Linux is geared towards penetration testing, security auditing, and digital forensics. It is designed to provide a comprehensive toolkit of specialized tools for cybersecurity professionals. Kali Linux follows a philosophy of “hack responsibly” and promotes ethical hacking and education in the field of cybersecurity.
Arch Linux: Arch Linux follows a minimalist and do-it-yourself (DIY) philosophy. It aims to provide a lightweight and minimal base system that allows to build customized Linux environment according to preferences. Arch Linux focuses on simplicity, user-centricity, and providing the latest bleeding-edge software packages.
Kali Linux has a massive community support base with a focus on cybersecurity, hacking, and forensics, while Arch Linux has an active community that emphasizes self-sufficiency and encourages users to build their customized Linux systems. Choose Kali Linux if you specifically need cybersecurity tools, and choose Arch Linux if you prefer a minimal base system with extensive customization options.
General Overview: Kali Linux vs Arch Linux
In the table below, we have generally compared Kali Linux and Arch Linux. Note that this table provides an overview and may not cover all aspects of each distribution. It is always recommended to research and evaluate specific needs before choosing a Linux distribution.
Features
Kali Linux
Arch Linux
Purpose
Penetration testing
Customizable environment
Target audience
Security professionals
Advanced Linux users
Ease of use
Intermediate
Advanced
Package manager
Apt
Pacman
Number of packages
Extensive
Minimal
Rollingrelease
No
Yes
Stability
Stable
Rolling release
Community support
Excellent
Active and knowledgeable
Documentation
Comprehensive
Extensive and detailed
Customization
Limited
Highly customizable
Hardware support
Wide range
Varies
Installation
Full installation image
Minimal installation image
Default desktop environment
Gnome
None
Security features
Extensive
Limited
Update frequency
Periodically
Continuously
Use cases
Penetration testing, digital forensics
General-purpose use
Final Words
In conclusion, both Kali Linux and Arch Linux offer powerful features and flexibility for different purposes. Kali Linux is designed for penetration testing and security auditing, while Arch Linux is a minimalistic and customizable distribution suitable for advanced users. In this article, we tried to fully compare Kali Linux and Arch Linux, but if you still have any doubts or questions about this, ask us in the comments section.
Kali Linux, a powerful operating system, has emerged as a game-changer for cybersecurity enthusiasts and professionals worldwide. With its arsenal of awesome tools, Kali Linux empowers users to penetrate systems, conduct ethical hacking, and enhance their security defenses. The vast range of these tools covers everything from network analysis, password cracking, and wireless attacks to digital forensics and vulnerability assessment. These meticulously crafted tools, designed and developed by an expert community, equip users with unparalleled capabilities to uncover vulnerabilities, simulate real-world attacks, and fortify their systems against malicious threats.
Whether you’re a beginner or an advanced user, Kali Linux tools offer an immersive and exhilarating experience in the world of cybersecurity. Diving into the realm of network analysis, tools like Wireshark and Nmap enable users to visualize and understand network traffic, perform deep packet inspection, and identify potential weaknesses. For those interested in password security, John the Ripper and Hydra prove invaluable by efficiently cracking encrypted passwords through brute-force attacks and dictionary-based methods. As you progress further, you stumble upon tools like Metasploit and Burp Suite, which provide the ability to emulate actual attacks and test the resilience of systems against various exploits. Additionally, the extensive collection of digital forensics tools allows users to investigate incidents, recover deleted files, and analyze system artifacts. Thus, these tools not only expand your knowledge but also ensure you’re armed with the necessary skills to safeguard your digital assets.
Below, you can see an infographic showcase of the most popular and common Kali Linux tools in 13 different categories. Sure there are way more tools that you can use for penetration testing, but these are the essential ones. Hope this post gives you the bigger picture you may need! You can also download the PDF file if you want to have a closer look!