Linux Mint is one of the popular open-source Linux distributions. One of the positive points of this operating system is its adaptability. It also has an intuitive and user-friendly environment that makes users who move from systems like Windows to Linux not get confused. We will also try to review the Linux Mint operating system for you and guide you on how to get started.
A Brief Explanation of Linux Mint
As we mentioned here, Linux Mint is a popular open-source operating system (OS) based on the Linux kernel and can be installed on Linux VPS. This operating system is built on top of the Ubuntu distribution, which itself is based on Debian. This means it inherits much of Ubuntu’s stability and package management system.
It is a powerful system with full multimedia support out of the box, suitable for moderate and advanced users. Having an impressive user interface, stability, and powerful software center has made it popular.
Starting Linux Mint is a straightforward process, So let’s learn how to start this amazing distribution:
Step 1- Choosing the Proper Linux Mint Edition
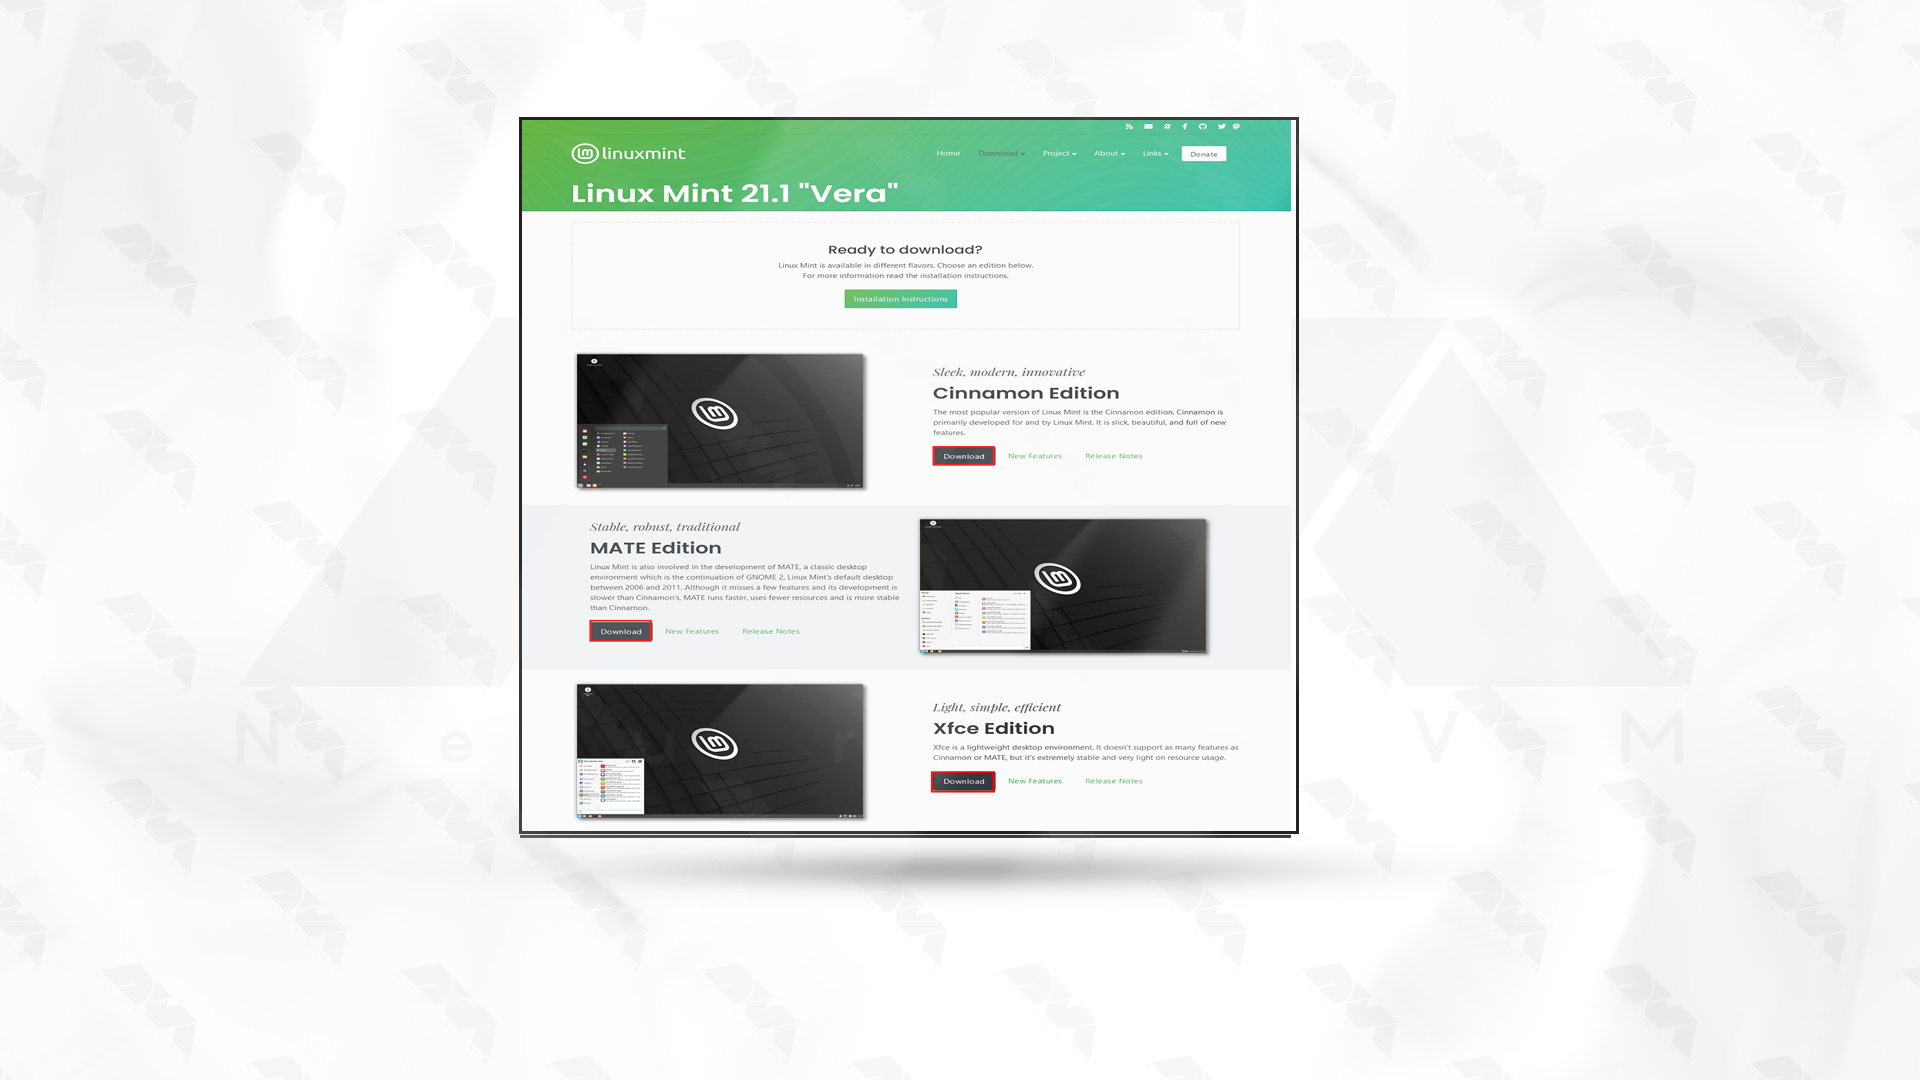
Linux Mint has three different versions, including Cinnamon, Mate, and XFCE. The difference between these three versions is their desktop environment, which defines the functions and user interface. Let’s examine these three editions of Linux Mint:
- Cinnamon: It is the most modern version of Cinnamon Mint, which has the most features. At the same time, it offers a balance between speed and features and has an intuitive and comfortable feel.
- Mate: This version has a classic desktop environment and is lighter than Cinnamon. If you have limited hardware capabilities, Mate is the best choice.
- XFCE: The lightest version of Linux Mint is XFCE. This version is very suitable for old systems because these systems may have problems with the previous two versions.
So, choose the best edition which is suitable for your system.
Step 2- Downloading Linux Mint OS
Now that you have chosen the right version, you should go to the Linux Mint download page.
Now, download the version from there. To be able to do this faster, choose a mirror that is closest to you. Select it, and you will see that the iso file will start downloading:
Step 3- Verifying the ISO file
It is not mandatory to do this step, but you can make sure of the security and integrity of the downloaded ISO file. MD5 checksums are provided for each ISO file. Therefore, after downloading, you can confirm the ISO file with the checksum tool.
Step 4- Creating a Bootable USB or DVD
To be able to install Linux Mint, you need to create a bootable USB or DVD. To do this, you can use tools like Rufus or Balenaetcher. The USB drive used must have at least 2 GB of free space. Or if you want to use a DVD, make sure it is empty.
Step 5- Installing Linux Mint
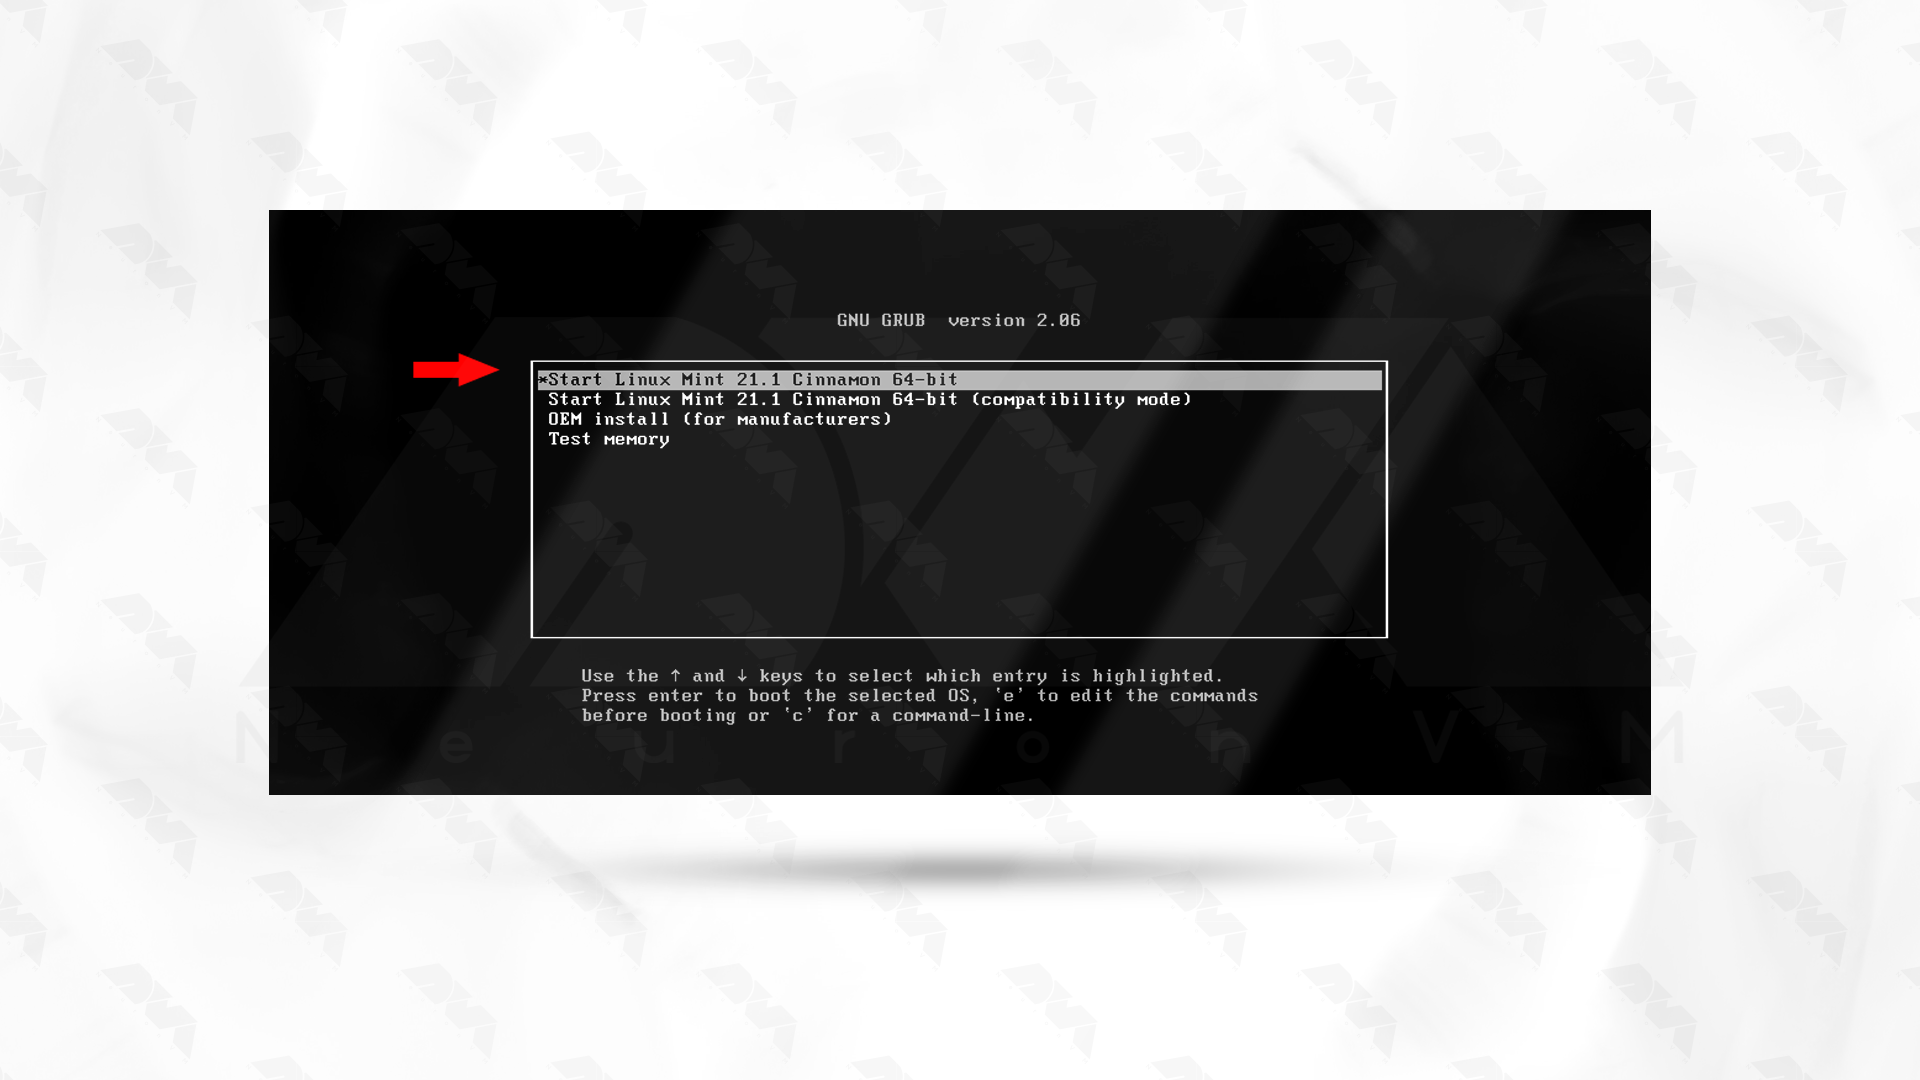
In this section, to start the installation, you need to reboot the DVD or USB file on the computer. Meanwhile, make sure your bios settings are set to boot from USB or DVD. You should now see the Linux Mint logo loading.
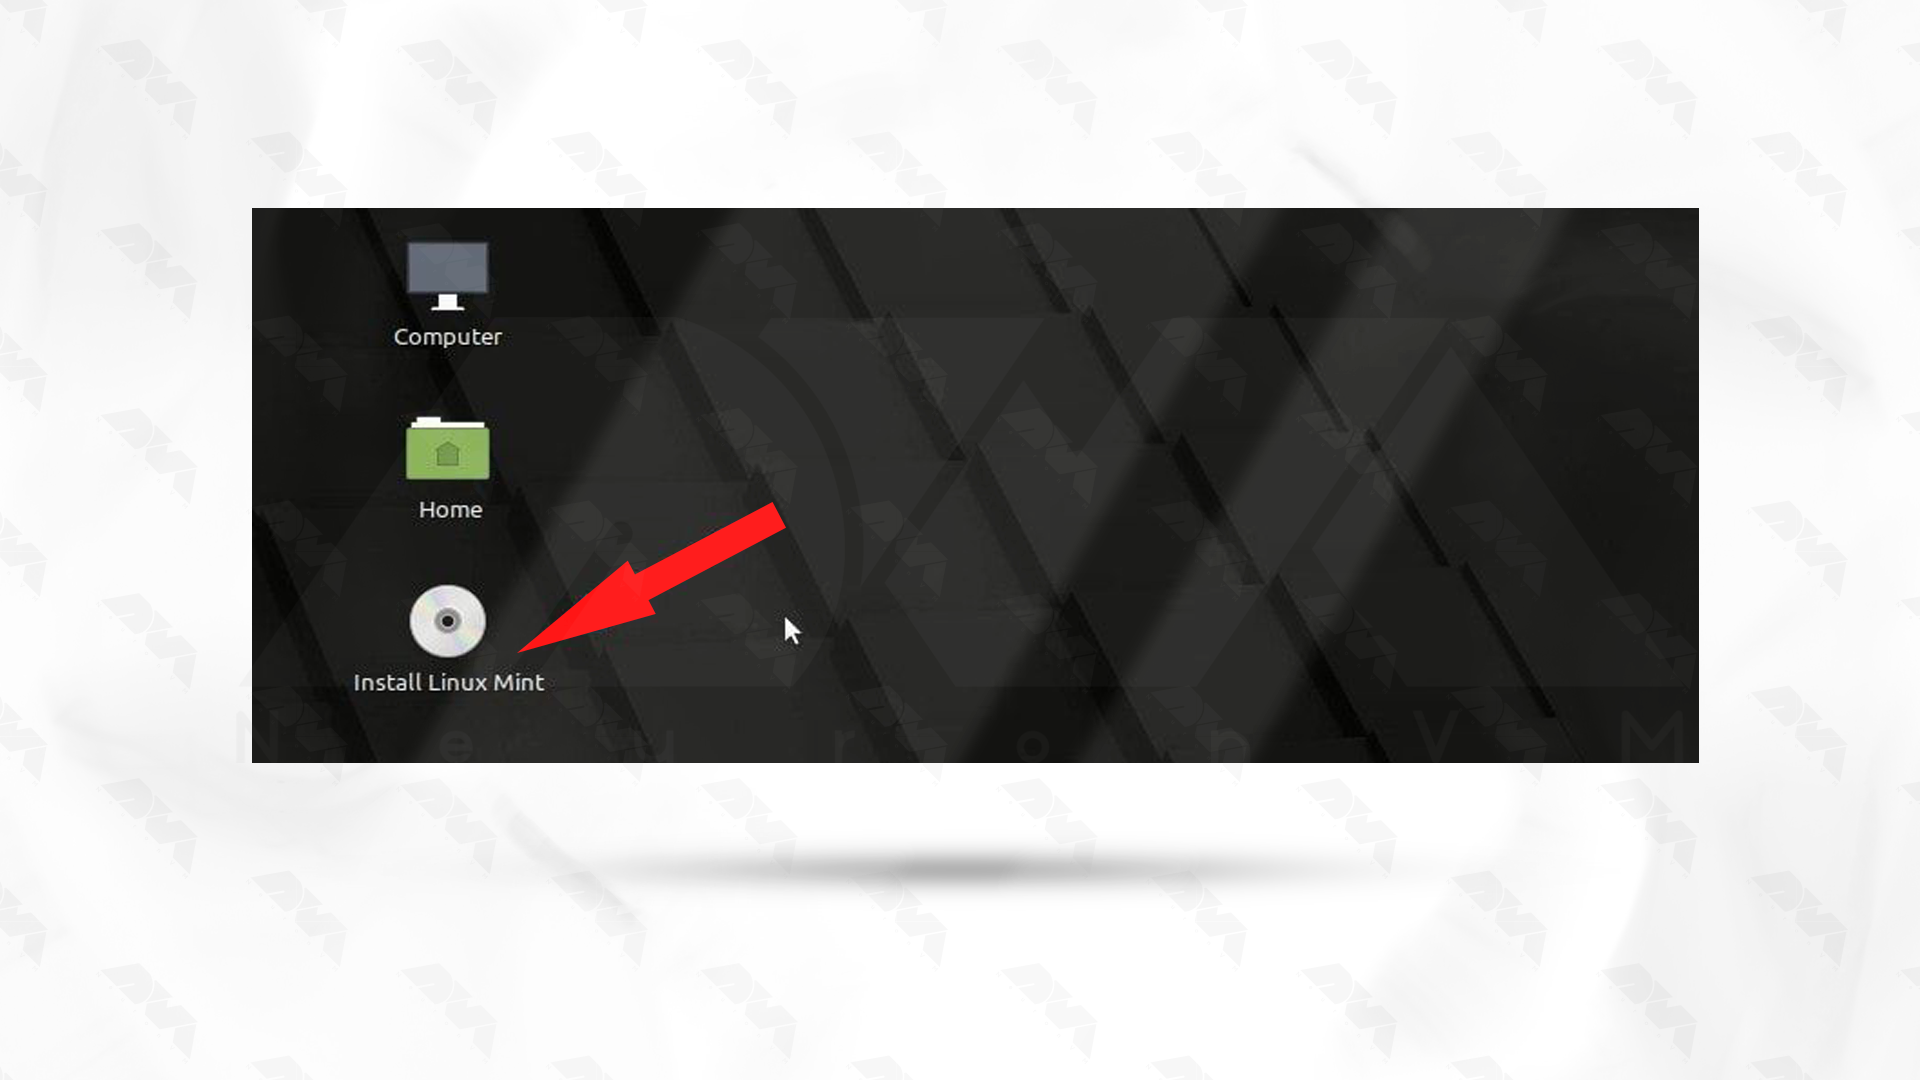
After downloading this operating system, you can see the test or installation option. If you need to test, click the corresponding option; otherwise, choose the Install Linux Mint option to continue the installation.
***
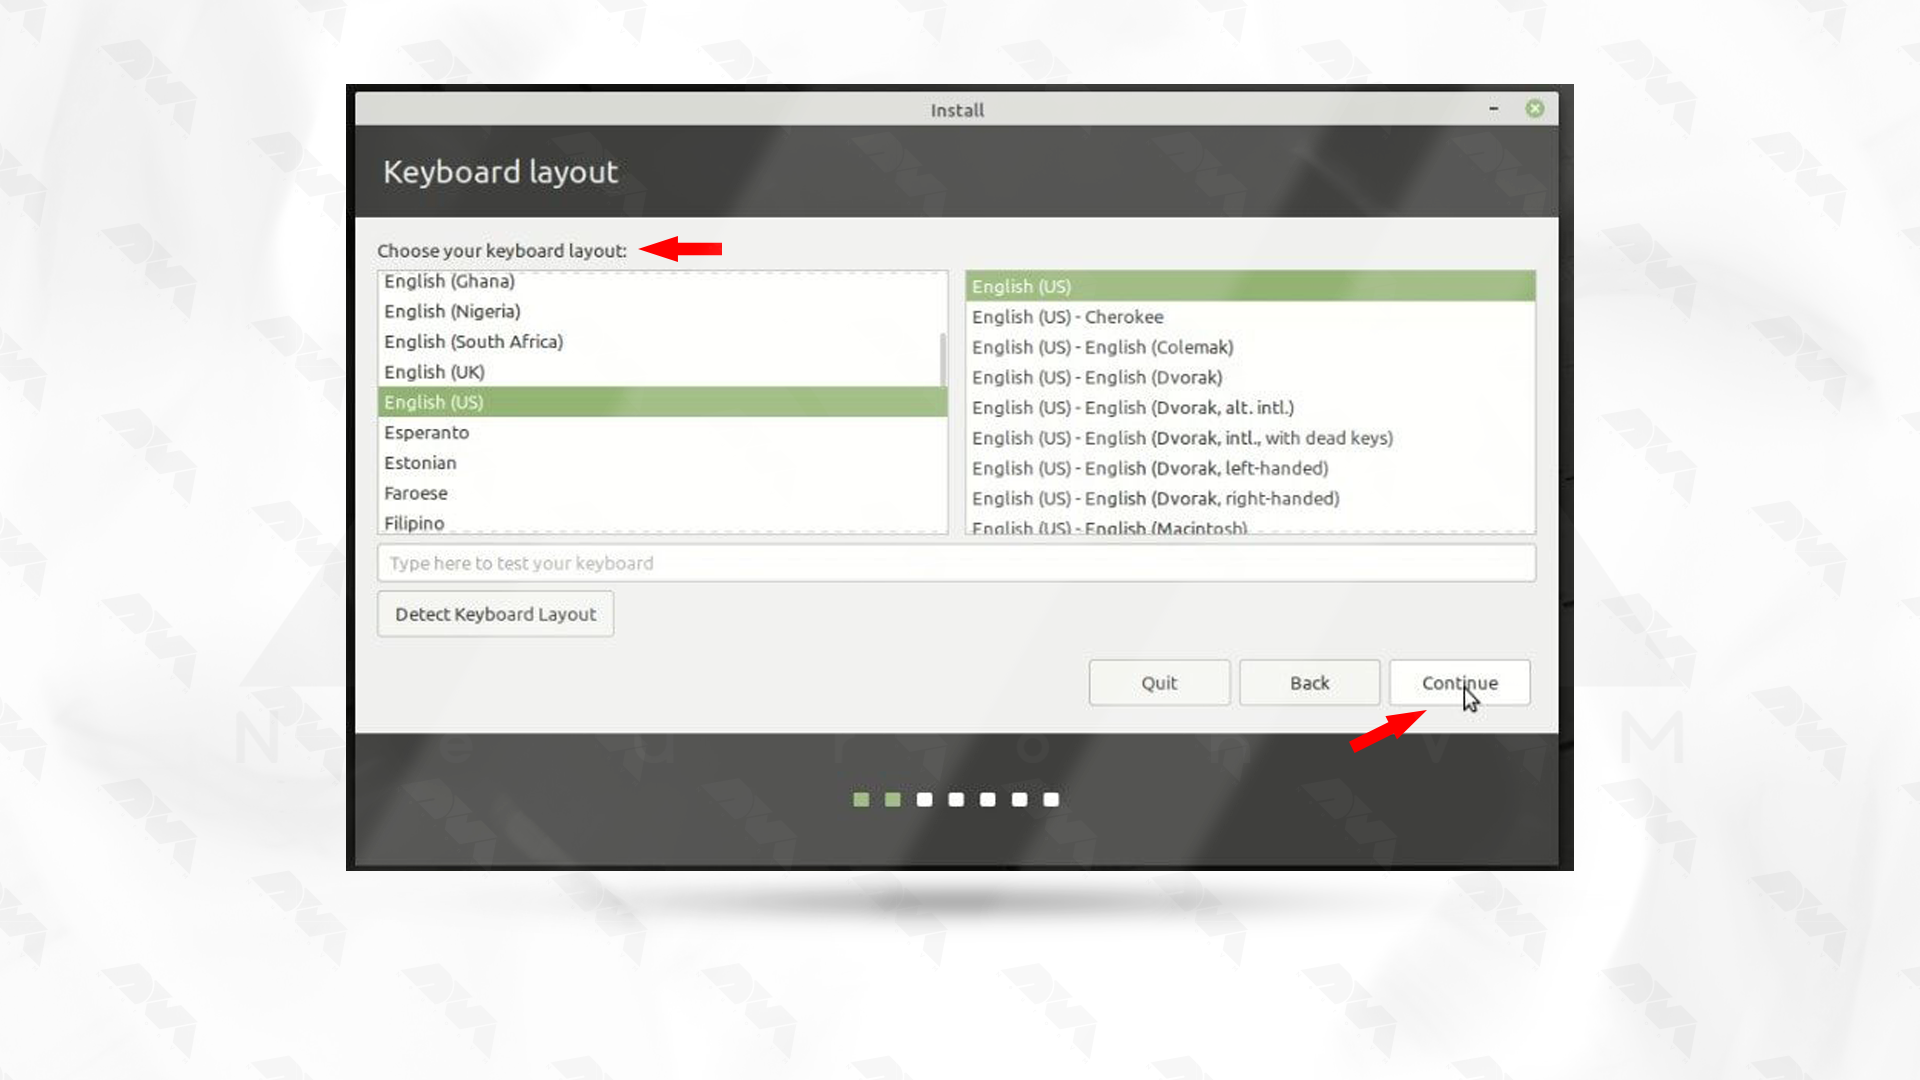
Follow the next instructions on the screen in order and select your appropriate language. Then select your keyboard layout:
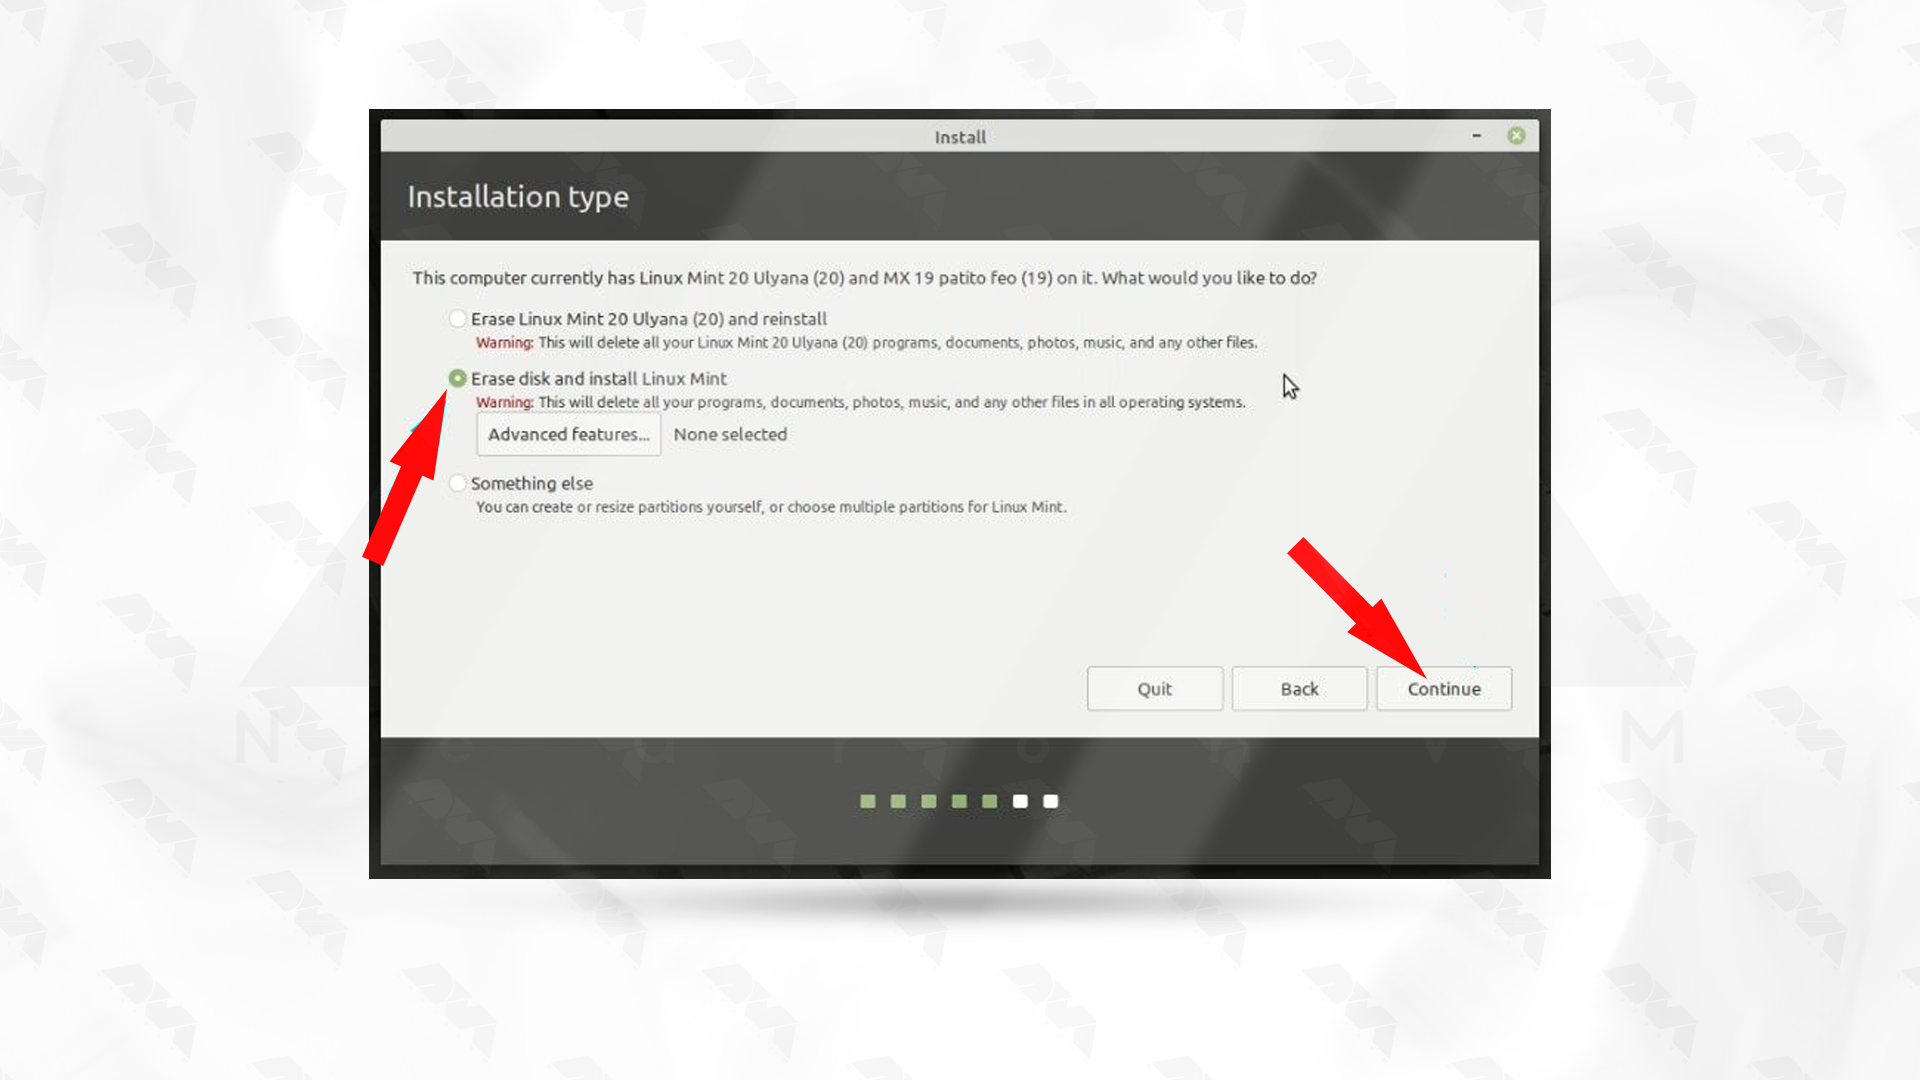
Now, decide your installation type. In this section, Erase disk and install Linux Mint is usually selected:
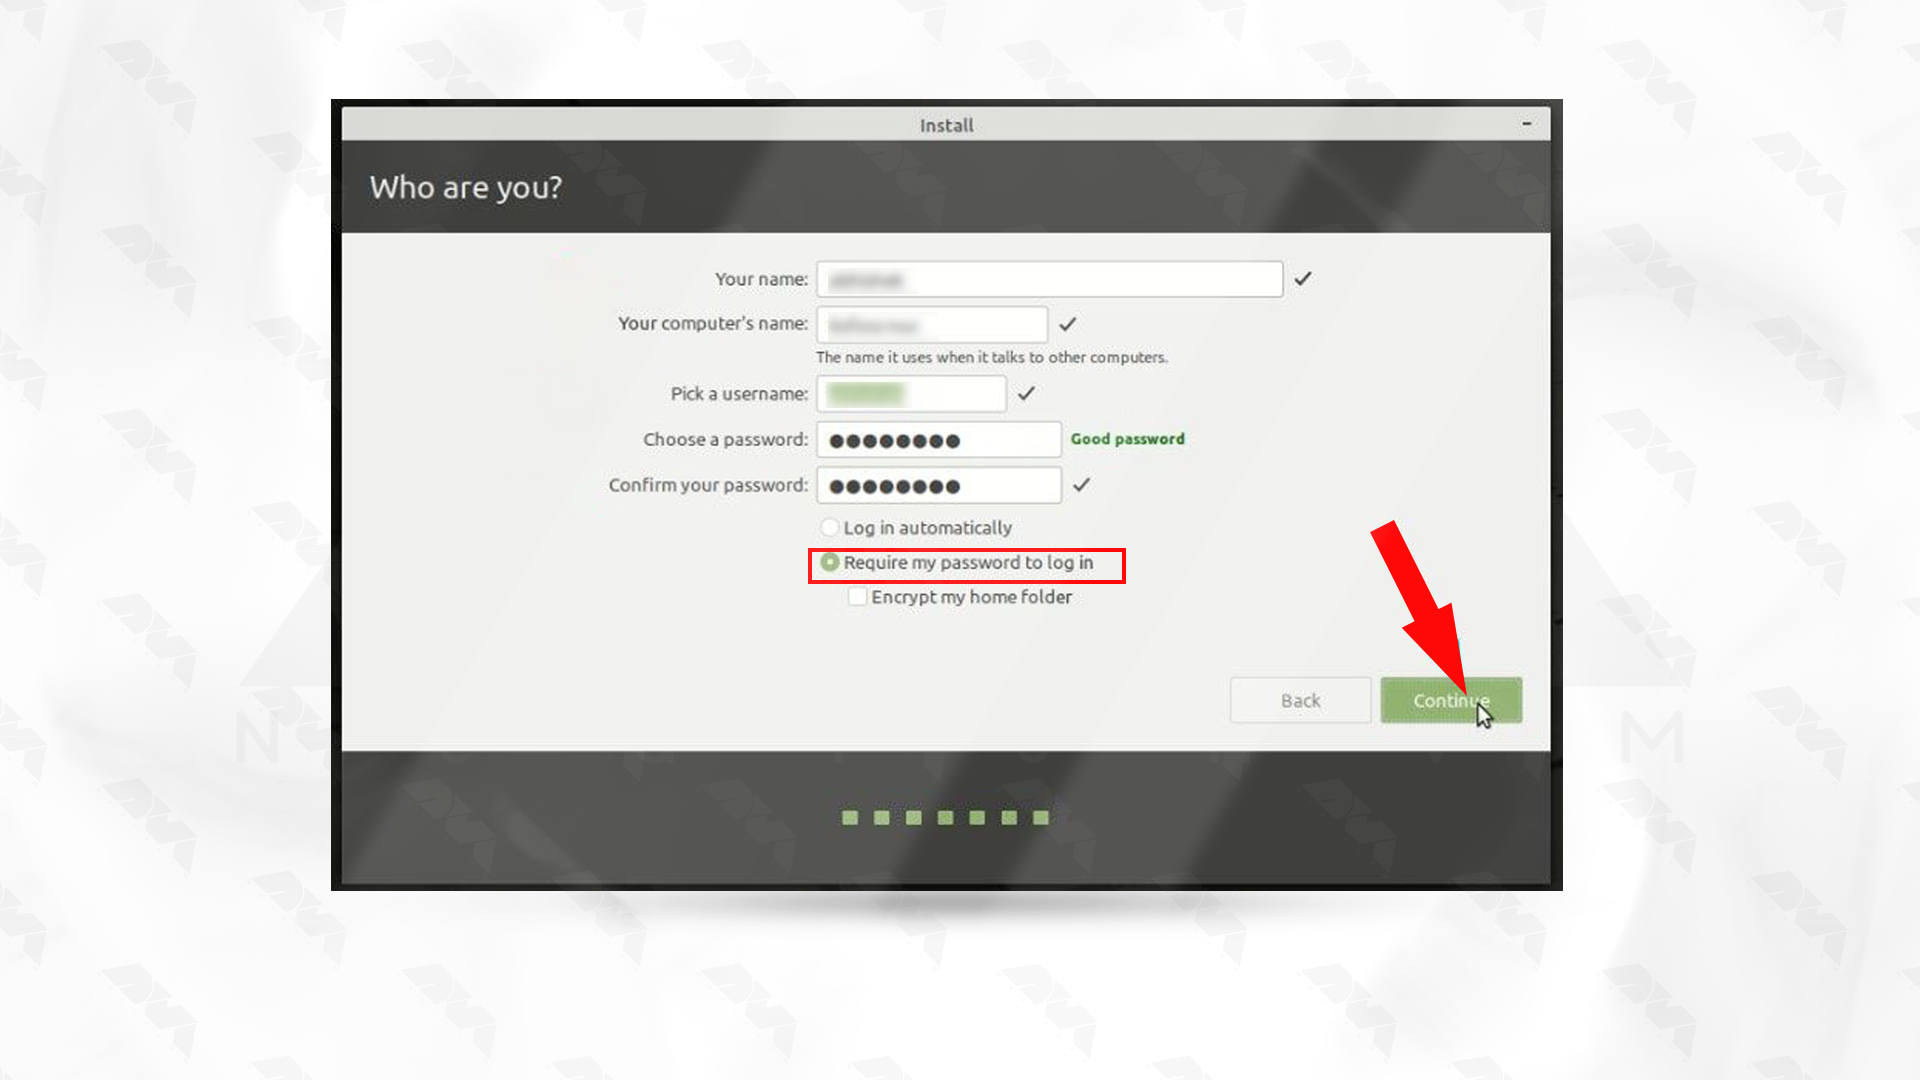
Finally, create your account and start the installation by giving your username and password.
The installation process will take some time, so be patient. Restart your system to apply changes:
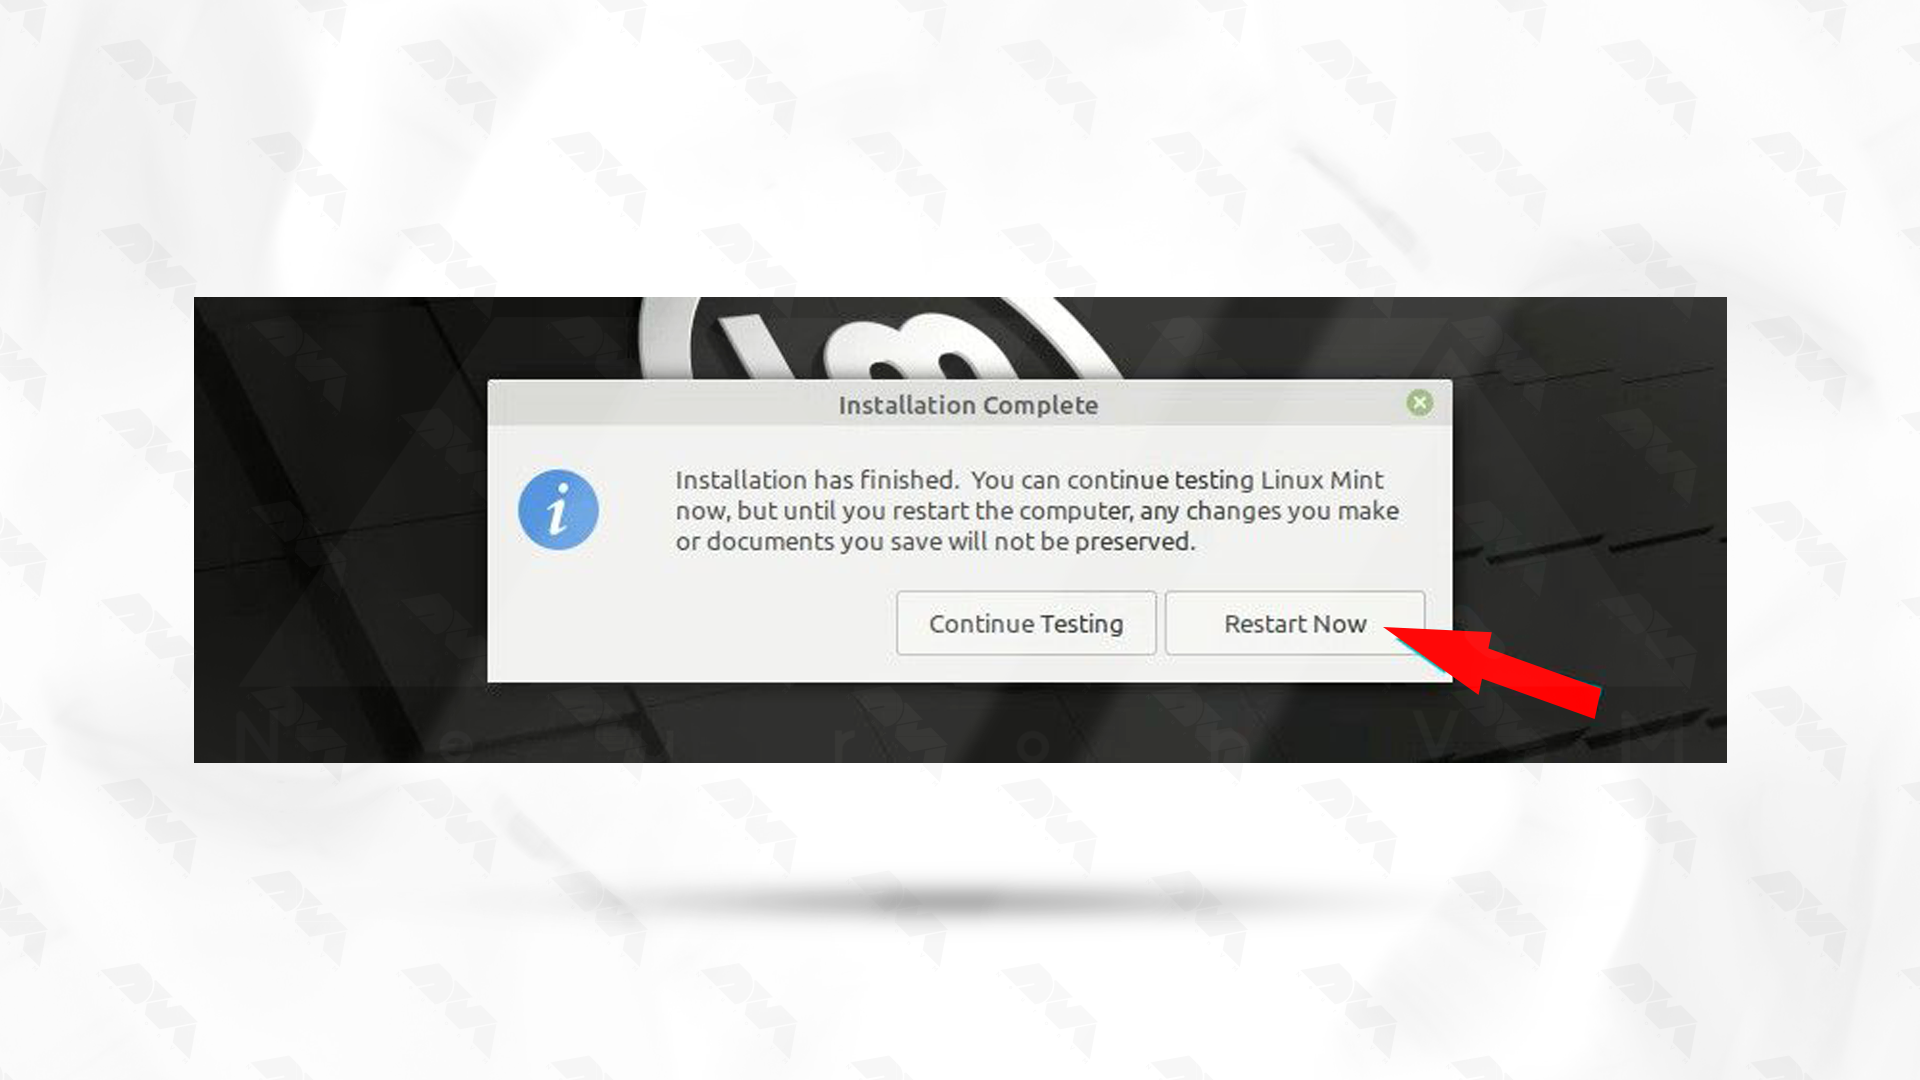
Note: After restarting, the system will prompt you to remove USB and press Enter.
This is it! As you get more familiar with the system, you can explore advanced features, customize your desktop, and get the most out of your operating system experience.
Troubleshooting Issues about Booting Linux Mint
Boot issues with Linux Mint can be caused by various factors, including hardware compatibility, configuration problems, or software issues. Here are some common boot issues and potential solutions:
1- Incompatible or missing graphics drivers can cause boot problems, especially if you’ve recently updated your kernel or graphics drivers.
Solution:
Boot into recovery mode, uninstall or reinstall graphics drivers, or try using the open-source drivers. You can also edit the GRUB configuration to add kernel parameters like nomodeset to temporarily disable the kernel mode setting.
2- GRUB is a common boot loader used in many Linux distributions, including Linux Mint. If there’s an issue with GRUB, it may prevent the system from booting.
Solution:
You can try reinstalling GRUB or repairing it using a live CD/USB. Boot into a live environment, open a terminal, and use commands like grub-install and update-grub to reinstall and update GRUB.
3- Filesystem corruption or errors can prevent the system from booting successfully.
Solution:
Boot from a live CD or USB, open a terminal and run filesystem checks. For example, for an ext4 filesystem, you can use the e2fsck command.
sudo e2fsck /dev/sdXY
Replace /dev/sdXY with the actual partition device.
Conclusion
As mentioned in this section, the Linux Mint operating system is a versatile and user-friendly system that everyone from beginners to professionals can use. The installation process is also very simple, and you can do it successfully in a few simple steps. So install Mint with this guide and enjoy it.