Blog

  • Exploring the Features of Kali Linux: A Comprehensive Overview

    Exploring the Features of Kali Linux: A Comprehensive Overview

    If you are looking for a popular operating system that is useful in security positions and for computer forensic experts, you should turn your attention to Kali Linux. This operating system has many features that are very important in the field of cyber security. This article is presented for exploring the features of Kali Linux and will try to give a comprehensive overview of that.

    What is Kali Linux?

    Kali Linux is an open-source Linux distribution that is based on Debian and introduced in 2013. The Kali Linux operating system is a powerful tool developed to perform tasks such as ethical hacking and manipulation of network tools. The most important advantage of this system is that it is free. To install and run Kali Linux, we recommend you use our high-speed and high-quality Linux VPS servers.

    What are the Most Significant Features of Kali Linux?

    The perception of penetration testing has changed over the years. Kali Linux is also a penetration testing tool and is one of the systems that comes with many features. These features are as follows:

    features of Kali Linux

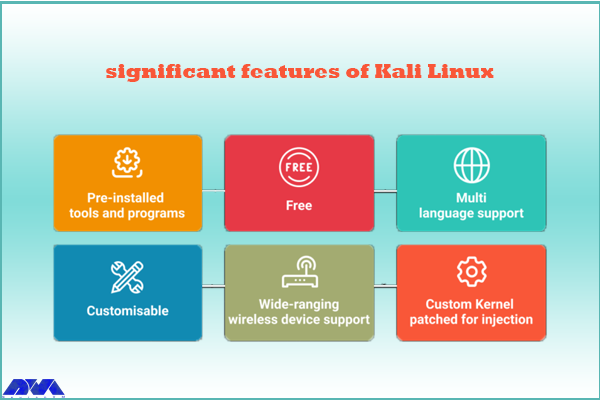
    – Kali Linux contains more than 600 penetration testing tools like Burn Suite, Nmap, Wireshark, Air crack-ng, Metasploit framework, John the Ripper, and so on. These are practical tools for penetration testing and hacking.

    – Kali Linux is provided free and open-source.

    – It is capable of supporting various USB and wireless devices and interfaces.

    – Packages and repositories in Kali Linux are GPG signed.

    – Filesystem Hierarchy Standard (FHS) is maintained in Kali Linux.

    – It supports multiple languages.

    – The users can customize Kali Linux appearance as their choice cause it is completely customizable.

    – It supports MRMEL and ARMHF which makes it available on a wide range of ARM devices like Raspberry Pi.

    – Another prominent feature of Kali is that it supports accessibility features for visually impaired users with voice feedback and braille hardware support.

    – There is regular customization and patching of the kernel for any vulnerability in Kali Linux.

    What are Some Other Special Features of Kali Linux?

    – Live Boot system is supported by Kali Linux using a USB device without any touching of the host operating system.

    – ISOs are customizable on Kali Linux. Every security researcher has their own needs. Users can produce a custom-optimized ISO file with a selected set of meta-packages.

    – Kali is equipped with an encryption mechanism for persistent volume(s). This way, The saved files are able to be secured using Luks Nuck containers.

    – You can use Kali from the Windows Subsystem for Linux or WSL. Use Win-Kex for this reason.

    – Kali NetHunther is a free, open-source Android application and is useful for common attacks such as Bluetooth attacks or USB HID attacks, and so on.

    – Another feature is Kali Undercover. You can blend the appearance of Kali with Windows OS. So, if you activate the Kali Undercover feature, the menu and your desktop will look like Windows OS.

    – Kali is able to support any platform. You can run Kali on ARM, Bare Metal, Cloud, Containers like Ducker and Alsovirtual box, and VMware.

    What are the Negative Points Of Kali Linux?

    – This operating system is a little bit complicated and is not beginners friendly.

    – If you run this system from a virtual machine, It’s possible that all the hacking tools do not work properly.

    – A lot of junk space is taken by Kali.

    Conclusion

    Kali Linux is one of the most advanced operating systems for penetration testing and as mentioned in this article, it contains more than 600 tools such as Nmap and Wireshark. It is mainly used for advanced penetration testing and security auditing. we recommended this platform to professionals and advanced users because it is not beginners friendly. Read this content to get more familiar with the greater features of Kali Linux. If you have any questions, leave a comment here.

    FAQ

    Is Kali a good choice for gaming?

    Game developers don’t focus on Linux because it contains just 2% of the users. As a result, It is not designed for hardcore gaming and Kali is not either.

    How much RAM is needed for Kali Linux?

    You can setup Kali as your basic secure shell server with no desktop with 128 MB RAM but note that 512 is recommended. Also, 2 GB of disk space is needed.

  • A Beginner’s Guide to Setting Up Varnish Cache for Your Website

    A Beginner’s Guide to Setting Up Varnish Cache for Your Website

    Varnish Cache can act as an intermediary between the server and users. In such a way that it receives user requests and instead of sending the request to the server, it returns the corresponding web page from the cache memory to the user. Due to the application and importance of this issue, we decided to teach you how to set up Varnish Cache for Your Website after introducing you to Varnish Cache.

    What is Varnish Cache?

    Varnish Cache is a type of cache system that is used to accelerate website pages. This system receives website requests from users’ browsers and sends them to core or edge servers for processing. Then, the response to the request is stored in the cache memory and delivered to the users at a higher speed. This method improves the performance and loading speed of web pages.

    If a similar request is sent to the website, Varnish Cache compares the new request with the previous request and returns the processing result from its cache memory to the user in case of similarity.

    Another feature of Varnish Cache is the management of website user requests. If the user needs to display certain information from the website, it is possible to store the information related to the user in the cache using Varnish Cache. Therefore, whenever a new request is sent by him, the response will be sent to the user quickly from the cache memory.

    Regarding the use of Varnish cache, it should be noted that this system is not effective by default for content that has an expiration time. In this case, this problem should be solved by using TTL in cache varnish.

    Varnish Cache can also be useful for websites in terms of security. It will give attackers less opportunity to attack the main server infrastructure and protect your site from DDoS attacks. We suggest you use the Windows VPS server plans provided on our website to run your website.

    Features of Varnish Cache

    • Speed
    • Savings
    • Scalability
    • Protection Against Outages
    • Flexibility
    • Experience

    Use and Configuration of Varnish Cache

    Varnish Cache is located on the server side and is deployed as a software module among the server layers. This software is designed using C language and can be installed on different operating systems.

    In order to activate the Varnish cache for the website, we must place it as a layer between the server and the browser. If the content of the request is available in Varnish’s cache, Varnish will respond directly to the browser. Otherwise, the request is sent to the main server and after receiving the response, it is stored in the Varnish cache. With this, the page load time is reducing and the server load is also reducing.

    To install and configure Varnish Cache for your website:

    1- First, install the Varnish software.

    To install Varnish on the Linux operating system, you can use the software repositories available on the operating system. There is also software available to install Varnish on Windows and Mac.

    2- Find and open the Varnish configuration file in /etc/varnish/ or /usr/local/etc/varnish/ (depending on the operating system and Varnish version).

    3- In this configuration file, specify the port number of Apache or Nginx where your web server works. For example, if your web server is running on port 80, change the port number to 8080.

    4- Allocate some system memory to Varnish Cache. This value should be greater than the volume of web server responses. Usually, 20 to 30% of the total system memory is considering cache memory.

    5- Launch Varnish Cache by running the following command:

    sudo service varnish start

    6- Now you can connect your web server to Varnish Cache so that its responses are storing as a cache in Varnish Cache. To do this, you need to specify the Varnish port number as the web server port in your web server configuration file.

    Functional Codes for Varnish Cache Management

    Some useful code for Varnish Cache is listed below:

    vcl_recv: This code is executed when a request is received. By using this code, you can make changes to the received requests.

    vcl_backend_response: This code is executed when receiving a response from the Backend.

    vcl_deliver: This code is executed when the response is sent to the user. You can use it to deliver responses that have been manually modified.

    vcl_miss: This code is executed when a request is missed with the cache key.

    vcl_pass: This code is executed when a request is completely sent to the backend. Using this code, you can also edit the operation before sending the response.

    vcl_pipe: This code is executed when a request is sent as a pipeline.

    How to Install and Setup Varnish Cache for Your Website

    First, you need to disable the Varnish version in the default repository by running the following command:

    sudo dnf module disable varnish -y

    In the next step, you need to install the EPEL repository using the following command:

    sudo dnf install epel-release -y

    Now it’s time to download and install Varnish Cache by running the following commands:

    wget https://packagecloud.io/install/repositories/varnishcache/varnish70/script.rpm.sh
    sudo bash script.rpm.sh
    sudo dnf install varnish -y

    Finally, you can enable the varnish cache by running the following command:

    sudo systemctl enable --now varnish

    Open the Varnish configuration file using the following command:

    sudo nano /usr/lib/systemd/system/varnish.service

    Considering that the default port in Almalinux for Varnish is 6081, you need to search for it and change it to port 80:

    ExecStart=/usr/sbin/varnishd \
    -a :6081 \
    -a localhost:8443,PROXY \
    -p feature=+http2 \
    -f /etc/varnish/default.vcl \
    -s malloc,256m
    ExecReload=/usr/sbin/varnishreload

    Finally, you should save the configuration file and exit. Then restart Varnish Cache:

    sudo systemctl daemon-reload
    sudo systemctl restart varnish

    How to Install and Configure Varnish Cache in Litespeed

    To install Varnish cache in the LiteSpeed environment, you can use the following commands:

    yum install varnish

    Now you can start and enable Varnish Cache by running the following commands and view the installation status:

    systemctl start varnish
    systemctl enable varnish
    systemctl status varnish

    For settings in LiteSpeed, it is necessary to enter the LiteSpeed environment. To do this, click the Add button in the Varnish section from the Configuration > Server > External App menu. Then enter the following values:

    Name: Varnish
    Address: localhost
    Port: 80
    Load Balancing: No
    Max Connections: 1000
    Environment: production
    Initial Request Timeout (secs): 60
    Retry Timeout (secs): 0

    Then click on the Save button to save the changes. Go to Configuration > Server > General and change the port to 8088 in the Default section.

    How to Configure Varnish Cache in Apache

    First, install, start, and enable Apache with the following commands:

    sudo dnf install httpd -y
    sudo systemctl enable --now httpd

    Now you can enable HTTP traffic through the firewall:

    sudo firewall-cmd --zone=public --permanent --add-service=http
    sudo firewall-cmd --reload

    In the next step, you can open the Apache configuration file with the following command:

    sudo nano /etc/httpd/conf/httpd.conf

    Look for the Listen 80 line and then change it to:

    Listen 8080

    Save the Apache configuration file and exit it, and then restart it by running the following command:

    sudo systemctl restart httpd

    Conclusion

    Varnish Cache is one of the most popular cache software in the web world. This software is used to increase the speed of sites and improve the user experience. By using this software, the web pages are loaded faster and the loading time is reduced. Varnish Cache is a basic tool for some big sites like Wikipedia and Facebook. Using Varnish Cache is also very effective on high-traffic sites that have a lot of data and can significantly improve page loading speed. To use Varnish Cache, you can install it on your server and apply the necessary settings. In some cases, you may need to use plugins or extensions designed to manage Varnish Cache. Also, some web servers such as Apache and Nginx support Varnish Cache as one of their modules.

  • The Role of DNS Servers in Website Performance and Speed

    The Role of DNS Servers in Website Performance and Speed

    You probably heard about Domain Name Servers (DNS) before. DNS servers are used to translate human-readable domain names to machine IP addresses. Using DNS you don’t need to insert long numbers when you are going to enter a website. Instead, you can use domain names like example.com and be directed straight to your destination website. Now, this article considers analyzing the role of DNS servers in website performance and speed, so keep reading to get more.

    What is DNS Server?

    DNS works like a kind of internet phone book and is an identifier for your website. This means that users can quickly access their desired online information and website through a domain name like neuronvm.com. The role of DNS is to translate domain names to IP addresses so that browsers can load Internet resources correctly. A unique IP address is allocated to every device connected to the internet and is the identification of the device. We recommend you use the cheap dedicated server plans offered on our website to set up your own DNS server.

    Explanation of IP Address

    An IP address is a set of numbers that characterize devices connected to the Internet. All internet devices from smartphones to tablets and routers have a dedicated IP. These IP addresses allow computers to communicate with other computers. The structure of the IP address can be expressed with an example: 192.168.1.1 is an example of an IP address. This code contains information about your computer’s location and provider information.

    The Effect of DNS Servers on the Speed and Performance of the Website

    DNS servers affect your website in various aspects. If we want to mention two of them, we can mention the speed and performance of the website.

    The Role of DNS Servers on Website Speed

    DNS is not directly related to your internet speed, but since it causes identification and direct connection with the target website, it can affect the speed of displaying a web page on your computer. Also, modifying the router’s DNS servers can help improve your overall speed. There are many programs and machines available to help you find the best server for your router.

    One of the most effective tools for finding IP addresses is DNS Lookup. The process is that the browser must first find the appropriate IP address to display the relevant website. For example, if you type the domain name neuronvm.com and press enter, it will operate to find the IP address associated with the domain name and connect to the website:

    The Role of DNS Servers on Website Speed

    DNS servers are provided in different types such as recursive DNS servers, TLD name servers, Root DNS servers, and authoritative DNS servers. These servers work together to fix domain names into IP addresses.

    Ways to Decrease the Effect of DNS Servers on Website Speed

    DNS servers are responsible for domain name resolution and the speed of this process affects the loading time, so to speed up this task you can choose a reliable high-performing authoritative DNS server provider. These servers are the only type of server that you have the option to go with your preferred provider. But the root and TLD servers do not give you this possibility. So, to increase the speed of website DNS resolution, you should choose a reliable and fast authoritative server provider. Note that a valid DNS Server provider is different from a web hosting provider. In web hosting, you store the contents or data of your website, but in DNS hosting, domain DNS records are stored.

    Another way to reduce the effect of DNS servers is to use DNS cache. Of course, if the IP is already stored, the effect of the DNS servers will not matter, because the browser does not have to wait for the IP address to be delivered by the valid server. So always go with a reliable server to ensure fast DNS resolution speed. Of course, if the IP is already stored, the effect of the DNS servers will not matter, because the browser does not have to wait for the IP address to be delivered by the valid server. So always go with a reliable authoritative server to ensure fast DNS resolution speed.

    In using authoritative DNS servers, you can use different providers. But this choice will be different according to your circumstances. For example, if convenience is important to you and you don’t want to deal with record keeping, you can use your web hosting provider. But if you focus on DNS resolution speed, Cloudflare will be a good choice.

    The Role of DNS Server on Website Performance

    Regarding the performance of the website, suppose you have a website that works slowly, and you have no idea about the reason because the hardware and CPU configuration of the system is suitable and you have high-speed RAM. Also, all code and programs are optimized but website pages still take time to load.

    After a lot of searching and debugging, you realize that the problem is with the website’s TTFP. Another reason for this problem can be your DNS resolution time, i.e. it takes time to convert the domain name to IP address. During the process of website performance testing, your business may suffer and a lot of time will be spent to find the reason for this slowness. So we must know what the domain name system is and what its role is:

    The Role of DNS Server on Website Performance

    DNS servers in website performance

    Important Factors to Improve Website Performance

    Here are some factors to consider if you want to improve your website performance:

    Not using low TTL

    A shorter TTL makes the user’s machine request again for the domain faster. You can use the high TTLs to make sure that the information is stored locally in the DNS ISP and the user’s computer and affects multiple users.

    Backup plan

    It is good to have a backup plan, even if you use a big DNS management company.

    Unreliable Registered

    If you want to build the next page with 100K hits in a second, you have to be sure that your DNS server can handle the load or assign your NS record to anyone with reliability.

    Capacity

    You need to make sure of the capacity of your servers because if you want to receive a lot of requests, you need to have a lot of capacity or let someone else handle your DNS.

    Conclusion

    DNS is an important issue in the field of websites. These servers have an important role in identifying websites and as told before they act as a phonebook. This article tried to focus on DNS servers and their impact on the website’s performance and speed. Also, we tried to analyze each of them and explain how they can affect the website. We hope you enjoy this article.

    FAQ

    Are DNS servers effective in search speed?

    You can improve internet search speed by changing your DNS to something other than what your ISP Provides.

    What is the way of increasing web performance using DNS?

    By caching the A records or IP addresses they receive from DNS queries for a set amount of time.

  • The Ultimate Guide to Install MariaDB on Debian

    The Ultimate Guide to Install MariaDB on Debian

    MariaDB is a popular database and enables you to meet all your workload. MariaDB platform contains more features, better performance, and new storage engines. It is very similar to MySQL and in fact, it is a fork of MySQL. This article will give an ultimate guide to install MariaDB on Debian operating system.

    What is MariaDB?

    MariaDB is an open-source relational database management system used as an alternative to MySQL in the database components of the LAMP (Linux, Apache, MySQL, PHP/Python/Perl) stack. This platform is used for different proposes such as data warehousing, enterprise-level features, E-commerce, and logging applications. You can use it on any scale and any cloud database. MariaDB is well-documented, so if you need to solve a problem, you can get plenty of help online.

    Steps to Install MariaDB on Debian

    If you decide to install MariaDB and you use the Debian operating system, you can follow the step-by-step instruction presented in this article. Before starting the process of installing MariaDB on Debian, we recommend you buy and use the Linux VPS server plans provided on our website and enjoy its high quality and speed.

    install mariaDB on debian

    Prerequisites

    These are the requirements before you start the installation process:

    – Updated Debian operating system

    – Non-root administrative user

    – Firewall Configured with UFW

    Installing MariaDB on Debian

    The first step you have to do before installation is to update your system. You can use the following apt command:

    sudo apt update

    Now, install the necessary packages using the command below:

    sudo apt install mariadb-server

    You should use the script that the mariadb-server package provides so that it can restrict access to the server and makes it possible to remove unused accounts. You should do this cause the default configuration leaves your installation insecure.

    Configuring MariaDB on Debian

    If you want to do a fresh installation of MariaDB, your next step is to run the existing security script. This script is highly effective because it overrides some of the less secure options, such as remote root login and sample users. The command below is to run the security script:

    sudo mysql_secure_installation

    Using this command will take you to a series of prompts with which you can make changes to your MariaDB installation security options.

    As you have a protected root account you can skip the next step by typing n and then pressing enter.

    At the next prompt, you will be asked to change your root password. Answer the question by Typing n and answering no. It’s better to not change the configured authentication methods for that account.

    At the next prompt, you can choose Y and press enter to accept the defaults for all other questions. This action will remove some anonymous users and the test database and also the login to the root will be disabled. After all these steps, you successfully finished MariaDB’s initial security configuration.

    Creating an Administrative User that Uses Password Authentication (Optional)

    Changing the root account is not recommended because most things like rotating logs or stopping the server are done by this user. This change in the /etc/mysql/debian.cnf configuration file may work initially, but updating the package will potentially overwrite these changes. So, instead of changing the root account, it is recommended to create a separate administrative account with a password.

    You should open the MariaDB terminal and use the command below:

    sudo mariadb

    Create a new user with root privileges and password-base access. To match your preferences, you should ensure to change the username and password:

    GRANT ALL ON . TO 'admin'@'localhost' IDENTIFIED BY 'password' WITH GRANT OPTION;

    If you want to ensure that changes are saved and available in your current section, flush the privileges:

    FLUSH PRIVILEGES; 

    The last step is to exit the MariaDB shell:

    exit

    Testing MariaDB

    Now, it is time to test the MariaDB installation. As you installed the repositories, MariaDB will start running automatically. Use the following command to check the status:

    sudo systemctl status mariadb

    If you couldn’t start MariaDB, use the command below for this reason:

    sudo systemctl start mariadb

    Tip: For further checkout, you can connect to the database using mysqladmin tool. This will allow you to run administrative commands.

    Conclusion

    This Guide was a simple and step-by-step explanation for installing MariaDB on Debian operating system. Here, you learned how to install, configure, and as the last action, how to test MariaDB on your system. You also learned how to create an extra administrative user. We hope this was a useful tutorial for you.

    FAQ

    What is the default user for MariaDB in Debian?

    Default MariaDB user accounts and privileges
    The default configuration consists of: A privileged account with a username of root. The root user has remote access to the database.

    Why use MariaDB instead of MySQL?

    When it comes to performing queries or replication, MariaDB is faster than MySQL. So if you need a high-performance relational database solution, MariaDB is a good choice. In addition, MariaDB also easily supports a high concurrent number of connections without much performance degradation.

  • The Top Bitcoin VPS Server Providers for Crypto Enthusiasts

    The Top Bitcoin VPS Server Providers for Crypto Enthusiasts

    When it comes to web hosting, one of the most popular options for businesses is virtual private server (VPS) hosting. A VPS offers more control and flexibility compared to shared hosting, while still being more affordable than dedicated hosting. In this article, we review some of the top Bitcoin (BTC) VPS server providers for Crypto Enthusiasts.

    Top 5 Bitcoin VPS Server Providers in 2023

    In the continuation of this article, stay with us to introduce you to the Top 5 Bitcoin VPS Server Providers in 2023. You can buy and use the services provided on these websites by purchasing with Bitcoin and other cryptocurrencies.

    1) NeuronVM

    Are you looking for a hosting solution that combines the benefits of a Virtual Private Server (VPS) with the convenience and security of Bitcoin (BTC) payments? With a Bitcoin VPS server, you can enjoy fast and reliable hosting while maintaining your privacy and harnessing the power of cryptocurrency. Bitcoin is a consensus network that has created a new payment system and a completely digital form of money. It is the first decentralized peer-to-peer payment network provided by its users without any central authority or intermediary.

    Windows VPS server plans on NeuronVM start at $16.99 per month. This plan includes a dual-core processor, 2GB of RAM, 30GB of storage space, and unlimited bandwidth For more information, you can visit the NeuronVM website.

    neuronvm

    2) Hostinger

    Hostinger was launched in 2004 in Latvia under the name Hosting Media and changed its name to Hostinger in 2011. Since then, this hosting service provider has reached 24 million fixed customers. The best data centers for this collection are located in Brazil, Netherlands, Lithuania, America, and Singapore.

    Hostinger’s VPS server plans start at $4.99 per month. This plan includes a single-core CPU, 4GB of RAM, 50GB of NVMe storage, 1TB of bandwidth, and weekly backups. This site offers more diverse services such as VPS and domain registration to its customers. You can buy the various services you want, including a VPS server, using Bitcoin from this website.

    hostinger

    3) AccuWebHosting

    AccuWebHosting is a hosting provider that specializes in Windows hosting. Their Linux and Windows VPS plans start at $6.99 per month and include 1GB of RAM, a single-core CPU, 40GB of storage space, and 500GB of bandwidth. AccuWebHosting also offers managed hosting services, which means they take care of server management and security. They also offer 24/7 customer support. On this website, you can buy the service you want using Bitcoin or other digital currencies.

    accuwebhosting

    4) Namecheap

    Over the past years, hosting services have improved and gained many fans. You can use Namecheap website hosting packages. When you use the hosting services of this company, this hosting is done in two stages. First, this site will access your information and data such as passwords, DNS information, and user activity, and will help you against any problems you may have with your site. In the next step, all the information inside the site, contents, SSL files, and email logs will be stored entirely for you.

    Namecheap’s VPS server plans start at $5.43 per month. This plan has a dual-core CPU, 2GB of RAM, 40GB of SSD RAID 10 storage, and 1TB of bandwidth. You can use Bitcoin to buy VPS on the Namecheap website.

    namecheap

    5) Hostwinds

    Hostwinds is a hosting provider that offers a variety of hosting plans including Windows and Linux VPS hosting. Their VPS plans start at $12.74 per month and include 1 GB of RAM, 1 CPU core, 30 GB of storage, and 1 TB of bandwidth. Hostwinds also offers 24/7 customer support and a 60-day money-back guarantee. You can choose the service you want and pay using Bitcoin or other digital currencies.

    hostwinds

    Conclusion

    With the increase in the price of VPS servers, the attractive offers of VPS vendor companies have become very tempting. In this article, we have introduced the list of The Top Bitcoin (BTC) VPS Server Providers for Crypto Enthusiasts, which have good quality, competitive prices, and easy payment with crypto. If you have any questions, you can share them with us in the comments section.

  • Why a Dedicated Server is Essential for High-Traffic Websites

    Why a Dedicated Server is Essential for High-Traffic Websites

    Websites need servers for all the information they provide to their users 24 hours a day. This server stores all the texts, images, and data displayed on a website. With the increase in visits and traffic of your website and due to the limitations of shared hosting and VPS server, the need for a dedicated server will become necessary. Therefore, in this post, we will explain the reasons for the importance of a dedicated server for highly visited websites.

    What is a Dedicated Server?

    At the beginning of the way of setting up a website, it is more likely to use shared hosting. Because the costs of renting shared hosting are much lower than the costs of renting or buying a dedicated server. But with the growth of a website and the increase in its visits or the need to increase security, the efficiency of the shared server decreases. Because the resources of a shared server are shared among several websites. But the resources of a dedicated server are dedicated to only one website. Therefore, a dedicated server will provide a more stable and reliable user experience in case of heavy traffic. You can test our dedicated servers for easy control of your website during visits and high traffic. With a cheap dedicated server from our website, you will experience the best feedback.

    Dedicated Server for High-Traffic Websites

    Features of Dedicated Server

    The advantages of buying a dedicated server are:

    • 24/7 Uptime
    • Faster Connection Speed
    • Less risk of virus attacks
    • Automatic Maintenance
    • Dedicated to High Performance
    • Better Security
    • More Reliability
    • Custom Configuration
    • High availability and Monitoring

    The Reasons for the Importance of a Dedicated Server for High-traffic Websites

    Most of the websites start their work with shared hosting. But usually after some time and with the increase in visits and website traffic, they move to a dedicated server. In the following, we will introduce the reasons for the importance of a dedicated server on popular websites.

    1- Increasing website traffic

    Some of the greats of the digital marketing world believe that a website should be ready for 30 times more traffic than its usual daily traffic. Being prepared to handle increased traffic volume in the event of promotions, product enhancements, or other special events is critical. Otherwise, the website may crash or lead to a negative user experience (UX) resulting in financial loss.

    Therefore, it is very important to switch to a dedicated server as soon as you foresee the possibility of growth and an increase in site visits. Although dedicated server costs are high, with shared hosting, the possibility of losing customers and financial losses is more.

    2- Website information security

    In the web world, despite all its advantages, there are also risks such as viruses, hackers, etc. On the other hand, some websites contain confidential emails, card numbers, or other sensitive customer information. So to protect customers’ privacy (like medical information), you absolutely cannot share a server with another company.

    It is important to know that if one of the websites hosted on a shared server is identified as a source of spam, other neighboring websites are also at risk. Because if that website is spam or malicious, it can also open the way for viruses or other malware to spread to your website. For this reason, the use of a dedicated server is considered vital to guarantee the website’s security to some extent. Because the configuration and optimization of a dedicated server are completely based on the opinion and ideals of the website owner.

    Dedicated Server is Essential for High-Traffic Websites

    3- Optimizing Website Loading Time

    Neighbors on a shared server have no idea where a server’s resources are being used the most. In a shared server, the bandwidth used cannot be equal, and this can lead to a decrease in the loading time of the pages of a good blog. As a result of the low interaction of users and the high bounce rate of the site, the SEO of the website is also reduced and its rank is lowered. But choosing a dedicated server ensures that you have enough bandwidth to increase your page load times.

    4- Increasing Website Speed and Improving SEO

    Undoubtedly, more processing resources increase the speed of the site. This increase in speed has a direct impact on improving SEO. Site speed is one of the factors that Google uses to determine the rank of the site in the search engine and to determine the position of the site.

    According to experts, Google uses the “time to first byte” measure as an official site speed measurement tool. Therefore, out of a slow website and a fast website but with equal content, the fast website will rank higher in Google search results. A slow website will have a lower visitor-to-customer conversion rate and therefore less revenue generation. So that every second of the loading time is equal to a 7% less conversion rate, 11% fewer visits, and 16% less customer satisfaction. According to research, 46% of people abandon their shopping carts due to the slow speed of the website.

    5- Coping with the concept of Throttling

    Throttling is the intentional slowing down of online services in response to increased server traffic and demand. That is, the shared server provider can reduce the speed of a particular user or group of users. This action is usually applied due to exceeding a certain usage threshold or excessive pressure on the network. But the bandwidth (data transfer rate through a network path) on a dedicated server is specific to a website. Therefore, it will not suffer from these problems.

    Conclusion

    In all the cases mentioned above, the word control is hidden. Full control over your website server is very important. A dedicated host gives you complete control over the settings and responsibilities of your website. You can freely install any software, operating system, hardware, program, etc. you want on your server. In fact, all the configuration of the server is done by you or based on your opinions and ideals, but by a third party. Two-step authentication, strong firewalls, regular security updates, etc. are all possible through a dedicated server.

  • What is a DNS Server and How Does it Work?

    What is a DNS Server and How Does it Work?

    Every domain or website you visit uses one or more specific DNS. Now what is DNS and where is it located on the website and how does it work? These are the questions that may arise in the minds of users. DNS is a universal system that all websites and domains use, and without it, no website will survive. In this article, we are going to tell you What is a DNS Server and How Does it Work? We suggest that you do not miss this interesting post and stay with us until the end.

    What is DNS?

    DNS stands for Domain Name System, which converts a website’s domain name to an IP address. All computers on the Internet, from smartphones or laptops to website servers, identify and communicate with each other using numbers. These are called IP numbers.

    When you want to enter a website and communicate with its server, you don’t need to enter its IP address. Instead, you only need to enter the domain name of the website and leave the operation of converting the “domain name to IP” to DNS. By doing this, the human-understandable domain name becomes a machine-understandable IP.

    what is dns server

    There are various plans for a dedicated server on our website. You can do the DNS configuration on a cheap dedicated server provided on our website.

    What is a DNS Server or Nameserver?

    When you enter a website address, you need to connect to the server IP associated with your domain. Now, where is this information and how does the system understand which domains belong to which server? A DNS server or Nameserver acts like a phone book and records all DNS records and IPs related to them. In other words, its task is to provide DNS information related to domains.

    Usually, web hosting services manage nameservers. Every host or server you buy has its own IP address that needs to be registered. Each DNS server is responsible for storing information about the domain and IP servers in itself so that it can send the information when called. The DNS inside the Nameservers are spread all over the world and it should be available to all of them for identification. Therefore, domain DNS registration may take up to 48 hours.

    how does dns work

    Each Nameserver has its own DNS address that can store records of many domains and IPs. For example:

    Ns1.neuronvm.com

    Ns2.neuronvm.com

    Each domain name must be at least two-way bound to DNS. Because the server and the main server and subsequent servers are used for times when the main server is not available. When a website’s domain address is called, your server’s IP information is read from the DNS server and sent to the browser, and then a request to receive the information is sent to your server.

    How Does DNS Work?

    As we said, DNS is responsible for returning the IP from the domain. This operation is carried out in several steps until finally, a valid and healthy IP address reaches the user. It is a little difficult to find the IP address of the website among all the DNS servers in the world, which is made easy by the DNS architecture. Each of these steps will help you find the original DNS by sorting out where the DNS is stored. For example, first, the DNS zone and then the DNS servers related to their back-domain are checked in order to reach a suitable location.

    1) DNS Recursor

    In the first step, the user’s request is sent to this section. This section communicates with the set DNS servers to find the IP. To do this, it sends queries to the next three parts, i.e. Root Nameservers, Top-level Domain Nameservers, and Authoritative Nameservers, to find the right IP.

    2) Root Nameservers

    This section is for finding the DNS root zone or DNS from its zone. This section is responsible for responding to requests placed in the same DNS zone. Finally, a list of valid servers matching the domain’s TLD will help find the IP address.

    3) Top-level Domain Nameservers

    It is responsible for keeping the IP related to the TDL of the domain and sends the existing IP and reaches the fourth stage.

    4) Authoritative Nameserver

    Returns the real and final IP address. At this stage, there are two types of servers: the first server is the main server, which is the main IP set in the first DNS, and the second server is your alternate and backup DNS. If the primary server fails, it uses the secondary server and returns the final IP.

    What is a DNS Cache?

    A cache system means temporarily storing data in a closer location, which leads to improved performance and faster response. DNS caching means storing DNS information in the closest location to the user. When sending subsequent requests, the DNS response is read from the user’s cache and no more requests are sent to the DNS chain. Finally, CPU bandwidth consumption decreases, and website loading speed increases. DNS data can be stored in various cache locations and for a specific time period in terms of TTL.

    DNS Cache Location in the Browser

    By default, web browsers support DNS caching and store information about each DNS for a certain period of time so that the DNS response can be read from the browser when it is reloaded. When you open a domain address, before sending a DNS request, the browser cache is first checked, and if there is no information, the request is sent to the DNS chain. In the Chrome browser, you can see the status of the current DNS cache by going to the following address:

    chrome://net-internals/#DNS

    The Best DNS Servers

    Usually, the web hosting service provides you with DNS servers, but you can still change your domain’s DNS. There are free and paid DNS servers that are very fast and secure and use security tools such as firewalls and request filters. Next, we will introduce some of the top DNS servers.

    Cloudflare: Cloudflare is one of the DNS provider services that provides many features to users. In addition to security, Cloudflare prevents DDoS attacks and other attacks and optimizes the security and loading speed of your website with security services and optimized architecture.

    Google Public DNS: Google’s DNS service, which is called Google Public DNS, is slightly different from Cloudflare’s service and is designed for more experienced users. This service has its own uses and facilities that you can use if needed.

    Quad9: Quad9 DNS service is famous for its speed. Also, the service claims to be able to block malicious websites and users using its data.

    Conclusion

    DNS is the communication system between the domain name and the server IP, which ultimately shows the server information to the user. DNS consists of 4 parts, all of which eventually reach the IP server. Also, there are different ways to change domain DNS records (such as NS records and A records) you can connect your server IP to your domain in different ways. Another point is that you can use DNS services to maintain security and speed.

    FAQ

    Is it safe to change DNS?

    It depends. They are always at risk of hacking and to increase security, you can use DNS services.

    Should we use private DNS?

    Yes, private DNS can provide you with more security compared to other DNS.

  • The Benefits of Using a Bitcoin VPS Server for Your Business

    The Benefits of Using a Bitcoin VPS Server for Your Business

    Did you know that you can have a hosting solution that can come with the benefits of a virtual server and provide you with the high security and compatibility of a dedicated server at an affordable price? This server is an adaptable option for users who want to use Bitcoin for payment and full control of their online presence. Our goal in this article is to focus on Bitcoin Servers and review the benefits of using a Bitcoin (BTC) VPS server for your business.

    What is a Bitcoin VPS Server?

    When we talk about Bitcoin VPS, that is you can buy VPS services using Bitcoin or other cryptocurrencies as a form of payment. This crypto payment will help you to quickly access a Windows or Linux VPS anonymously, regardless of your location. This service provides a cost-effective and private solution for web hosting:

    What Is a Bitcoin VPS Server?

    Bitcoin (BTC) VPS server

    What Are the Benefits of Bitcoin VPS?

    Since you got an overview of the Bitcoin VPS server and realized how useful this service can be for you. Now, keep reading to realize some benefits of this perfect service for you:

    Ability to Pay Via Bitcoin

    The ability to pay using digital currencies, especially Bitcoin, is one of the key advantages of this VPS server. It is not necessary to use usual payment methods such as credit cards or bank transfers, and this payment method will make the purchase process faster and safer.

    Possibility of Customization

    Bitcoin VPS gives you complete control over your online appearance. That is, it makes you able to install personalized software and adjust the server you need according to your taste and needs.

    Enhanced Security and Privacy

    Bitcoin VPS increases the security and privacy of your server. Since the blockchain technology used by Bitcoin has encryption and strong security measures, hackers cannot easily access your data. Because, in general VPS is such that you use a central server and are exposed to intrusions and attacks.

    Providing Dedicated Resources

    All your VPS resources are yours alone. You can also access more RAM and CPU. So these things make you run more programs and handle more traffic. The good news is that VPS servers allow you to receive these benefits without spending more.

    Improved Performance

    When it comes to using a Bitcoin VPS server and allocating more resources to your business, you can experience a higher level of performance. In addition, with the increase in capacity and processing power, the loading of your site in the visitor’s browser will increase, and as a result, the interaction will be done at a higher level, and even the SERP ranking will increase.

    How to Buy a Bitcoin VPS from NeuronVM?

    Bitcoin can be ordered for Windows VPS, Linux, Admin RDP, Mikrotik, and even a dedicated server with fast deployment. Therefore, with the increasing use of this currency, a secure encrypted payment system has been created so that customers can pay for their orders with it.

    You can purchase a Bitcoin VPS server, such as NL RDP Server, from the NeuronVM and enjoy your fast and safe purchase. Bitcoin VPS server is provided on our website from different locations like Russia, Canada, Australia, Germany, Japan, France, the United States, Hong Kong, the United Kingdom, the Netherlands, Singapore, Romania, Hungary, Thailand, the Philippines, Ukraine, Bulgaria, etc.

    Conclusion

    If you want to use Bitcoin to pay for your server and maintain your online presence at the same time, Bitcoin VPS is a good option for you. You can use Bitcoin to pay for VPS servers while maintaining your security and staying anonymous. Our goal in this article was to introduce you to Bitcoin VPS so that you can understand its benefits and use it.

    FAQ

    Who is responsible for managing Bitcoin servers?

    Nobody owns a Bitcoin network. Bitcoin is under the control of all of the users around the world.

    Which locations are providing Bitcoin VPS servers?

    Locations like the Netherlands, Australia, Germany, Japan, France, Turkey, Russia, Canada, Singapore, the United States, Hong Kong, the United Kingdom, Romania, Hungary, Thailand, the Philippines, Ukraine, Bulgaria, etc.

  • Top way to Install Node.js on Kali Linux

    Top way to Install Node.js on Kali Linux

    Nowadays, JavaScript is present in different places, and various things are done with it. Although JavaScript is considering to be the core of the web along with HTML and CSS. This high-level and interpretive language is also using as part of the web in creating mobile applications, computer games, desktop programs, etc. Since a long time ago, one of the dreams of JavaScript programmers was to be able to run their codes on the server side, except for the user’s browser. One of the environments that allows programmers to run their JavaScript code on the server side is Node.js. By following this tutorial, you will learn How to Install Node.js on Kali Linux.

    Introducing Kali Linux

    Kali Linux is a Linux distribution based on Debian. This operating system is specifically used for tasks such as network analysis and penetration testing. The presence of many tools installed by default on this distribution has made Kali a Swiss army knife for hackers.

    Kali Linux, formerly known as Backtrack, claims to be more focused on testing tools than previous versions and has removed unnecessary tools, unlike Backtrack, which had different tools for different purposes.

    This operating system is mainly used for advanced penetration testing and security checks. Kali has several hundred tools designed to perform various tasks related to information security such as penetration testing, security research and reverse engineering.

    What is Node.js?

    Node.js is a server-side platform based on the Google Chrome JavaScript engine (V8 Engine). Node.js provides everything you need to run a program written in JavaScript. Mr. Ryan Dahl introduced Node.js in 2009 to show that JavaScript is more powerful than just being used for front-end dynamic web pages. In fact, with the help of Node.js, the JavaScript programming language is executed in the server environment instead of in the browser. Node.js allows you to easily and simply write scalable and large networked applications.

    JavaScript has been evolving since 1995. Although this language did not have a successful presence on the server side until a long time ago, the efforts made by the programmers faded from the minds of other developers over time. Until the introduction of Node.js in 2009, the tide turned and over time JavaScript was used more and more on the server side.

    Features of Node.js

    – High efficiency and flexibility

    – Node.js is cross-platform

    – Ability to combine with microservices

    – The possibility of creating single-page programs (SPA)

    – Ability to build RTA programs

    – The ability to create a chat room

    – The possibility of making online games under the web browser

    How to Install Node.js on Kali Linux

    Before starting the process of installing Node.js on Kali Linux, we suggest you visit the Linux VPS server plans provided on our website, and don’t miss the exceptional opportunity to have a powerful and high-speed server.

    In the first step, it is necessary to install all the required tools by running the following command:

    sudo apt-get install python g++ make check install fakeroot

    Now you need to create the tmp dir with the help of the following command:

    src=$(mktemp -d)

    Then you need to move to:

    cd $src

    At this stage, you can download the latest version of Node.js by running the following command:

    wget -N http://nodejs.org/dist/node-latest.tar.gz

    If you want to use NodeJS LTS 10, you can use the following command:

    wget -N https://nodejs.org/dist/v10.16.3/node-v10.16.3.tar.gz

    Extract the downloaded file with the help of the following command:

    tar xzvf node-latest.tar.gz

    You can also extract the NodeJS LTS 10 version by running the following command:

    tar xzvf node-v10.16.3.tar.gz

    It’s time to go to the directory of the extracted file by running the following command:

    ls
    cd <directory_name_you_know_from_ls_command>/

    As:

    cd node-v10.16.3/

    Run the configuration file using the following command:

    ./configure

    Now the important thing is that you create the .deb for Node using the following command:

    sudo fakeroot checkinstall -y --install=no --pkgversion $(echo $(pwd) | sed -n -re's/.+node-v(.+)$/\1/p') make -j$(( $(nproc)+1)) install

    Finally, it is necessary to replace [node_*] with the name of the .deb package generated in the previous step in the following command:

    sudo dpkg -i node_*

    Conclusion

    Node js is not only in the field of web applications. It can be used in various projects of Rest APIs, Operating Systems, Robotics, and Microcontrollers, and finally, it’s flourishing to build advanced applications such as drones. In this article, we tried to teach you How to Install Node.js on Kali Linux fully and step by step. If you have any questions in this field, you can send them to us in the comments section.