



Have you ever heard the name of the game Minecraft? This game is one of the well-known and popular sandbox games, which has sold more than 100 million copies. Users can do Minecrafting together in this game world. If you have a public Minecraft server, you can create larger structures with the cooperation of other players. Keep in mind that each player is independent and you do not control others. As a result, buy a Minecraft server to have more management and control in the game. Learn how to configure Minecraft on Ubuntu 20.04.
A Minecraft server is a computer system or a hosted online service that allows players to connect and play the popular sandbox video game, Minecraft, together in a multiplayer environment. Minecraft servers come in various forms, from small private servers run by individuals or groups of friends to large public servers that can accommodate hundreds or even thousands of players simultaneously.
Minecraft servers have played a significant role in the game’s enduring popularity, allowing players to create and join diverse communities and experiences within the Minecraft universe. Whether you’re interested in creative building, survival challenges, or unique mini-games, there’s likely a Minecraft server out there that caters to your preferences.
You can get Minecraft from various providers. NeuronVM is one of the recommended providers that offers Minecraft servers. But you should prepare some prerequisites to run this amazing gameplay. Here are the requirements to run and configure Minecraft on Ubuntu:
The first step to run Minecraft server is to install Java because Minecraft is a Java-based gameplay. So follow the command below to install Java:
apt-get install openjdk-11-jre-headless git build-essential -y
To check the installed version use the following command:
java -version
You can use two methods to install Minecraft on Ubuntu. We will show you both of them:
First download the Microsoft Debian package using the command below:
wget -o ~/Minecraft.deb https://launcher.mojang.com/download/Minecraft.deb
Now, install the downloaded package by the following command:
sudo apt install ~/Minecraft.deb
As you run the command successfully, Minecraft will be installed on your Ubuntu system.
The second way or snap is an easier method than Debian for Linux packages. Because Ubuntu 20.04 and later versions have a default snap profile configured. In this method, to install the game launcher, create a terminal and type the following:
sudo snap install mc-installer
That’s it! Now you have Minecraft on your server and you can start using this great application.
In this section, you will access the Minecraft launcher icon. So, login to your Ubuntu desktop manager and click on Show Applications then search for Minecraft in the search box:
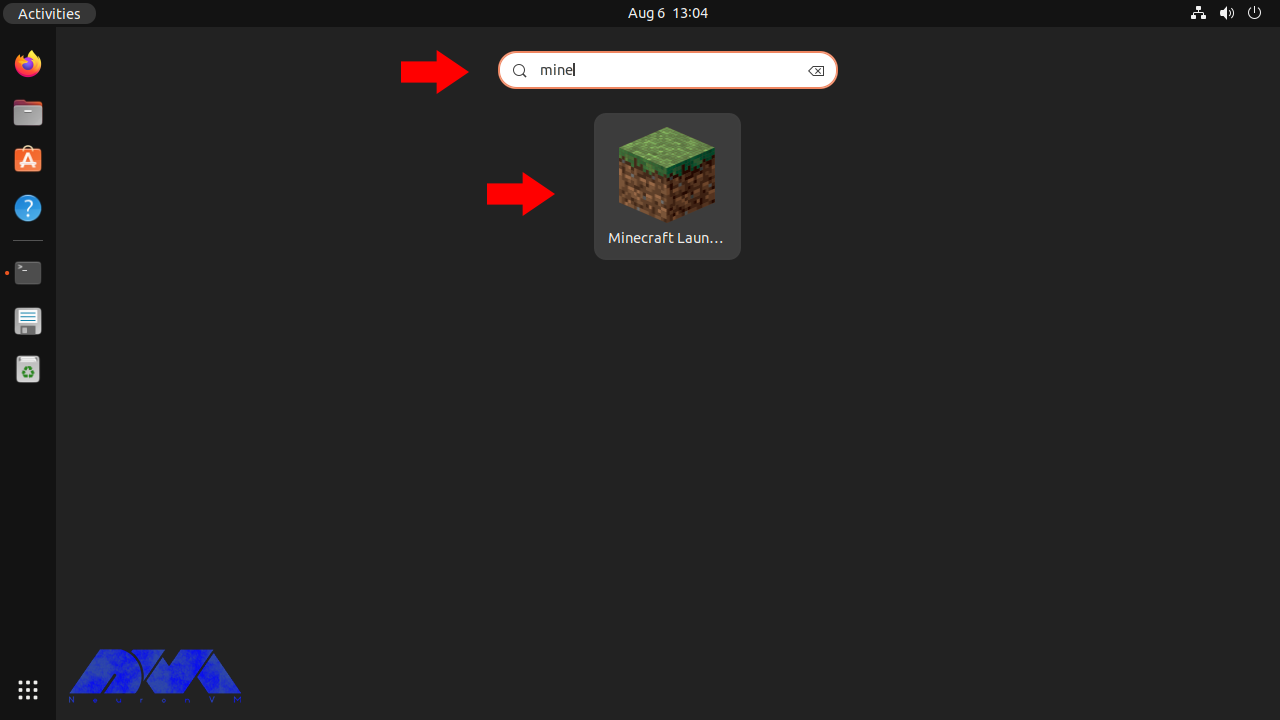
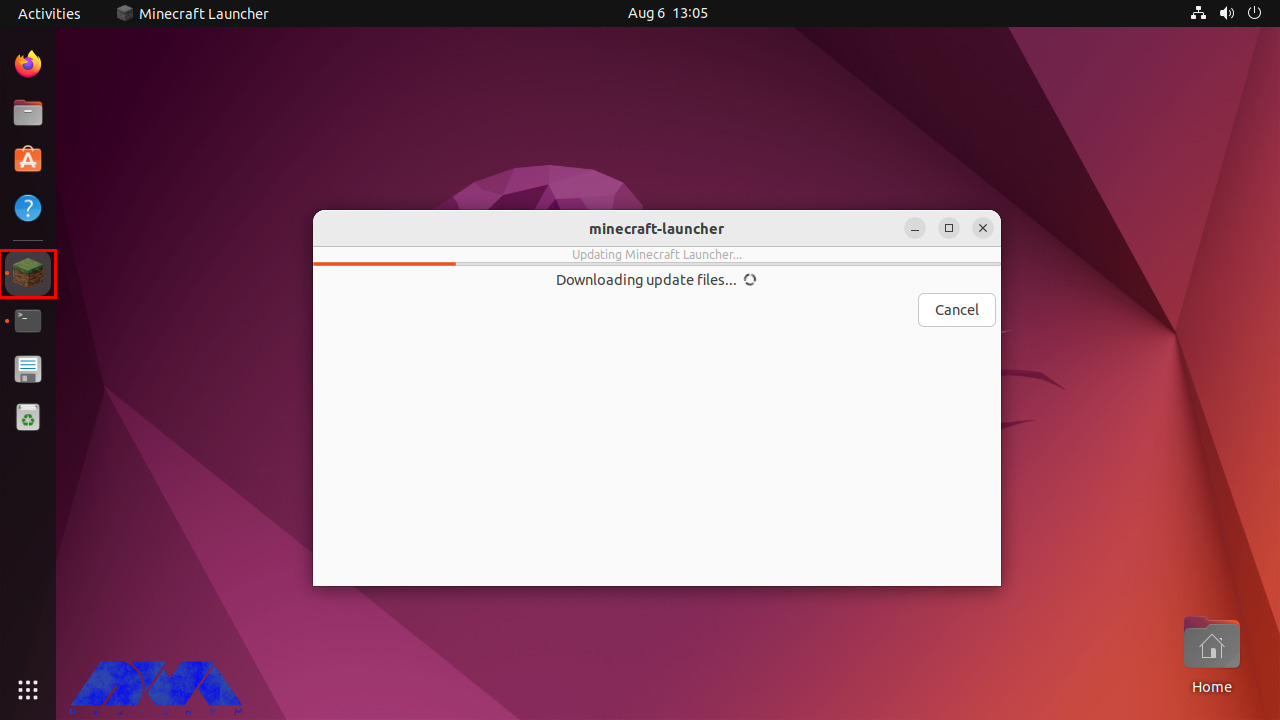
As you see the Minecraft icon, click on it and start the application:
Tip: the application will update automatically during the start.
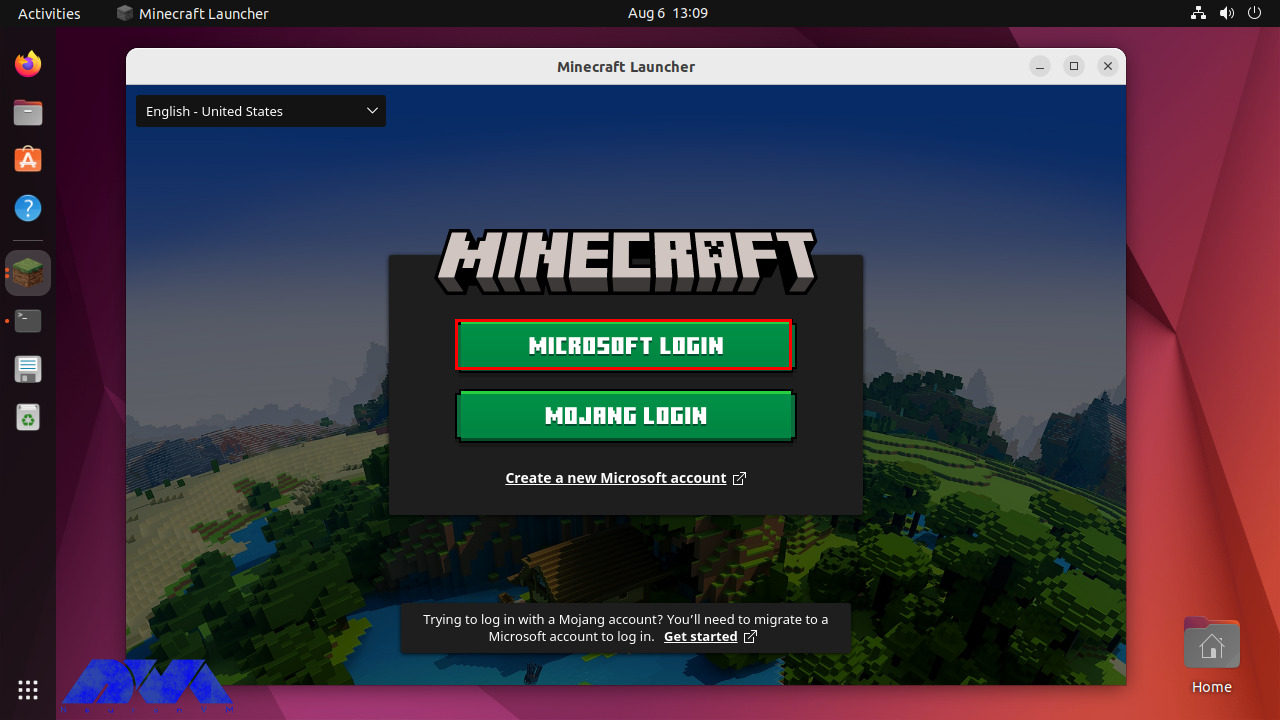
The login screen will appear as soon as you start the game. You should use your Microsoft account to login and run the game:
Minecraft server issues can vary from technical problems to gameplay-related issues. Here are some common Minecraft server issues and their solutions:
1- Server not starting
Solution:
Check that you have the correct version of Java installed, and ensure you are using the correct server JAR file. Review server logs for error messages that can provide more specific clues.
2- Connection problems
Solution:
Verify that the server IP and port are correct. Ensure that your firewall or router is not blocking the server’s port (default is 25565). If hosting locally, use “localhost” as the server address.
3- Lag and Performance Problems
Solution:
Optimize server settings, allocate more RAM if needed, use performance-enhancing server software like PaperMC, and consider upgrading your server hardware or hosting plan if lag persists.
4- Whitelist and Permissions Problems
Solution:
Check your server configuration files for whitelist settings and permissions. Make sure players are added to the whitelist (if required) and have the necessary permissions to join and interact.
Whether you’re a beginner or an experienced player, here are some best practices to enhance your Minecraft experience:
1- If you’re new to Minecraft, start with Survival mode. It introduces you to the core mechanics of the game, such as gathering resources, crafting, and surviving against hostile mobs.
2- Minecraft has a vast and diverse world to explore. Go on adventures, discover new biomes, and look for hidden treasures.
3- Let your creativity shine by building structures, houses, farms, and more. Download and use mods and resource packs to customize your gameplay and visuals.
4- During your first nights, prioritize building a basic shelter to protect yourself from hostile mobs like zombies and skeletons. Later, consider building a more substantial base with defensive features.
5- Establish a reliable source of food through farming. Wheat, carrots, potatoes, and livestock (cows, pigs, chickens) can provide a consistent food supply.
6- Explore caves and mineshafts for valuable resources like iron, coal, and diamonds.
7- Enchanting your weapons, armor, and tools can give you powerful advantages. Set up an enchantment table and explore the world for experience points to use in enchanting.
8- If playing on a multiplayer server, communication and collaboration with other players can be rewarding.
9- Regularly backup your Minecraft worlds, especially if you’ve invested a lot of time and effort into them.
Minecraft is a highly customizable game, and you can tailor your experience to suit your preferences. Whether you enjoy building, exploring, farming, or surviving, there’s a place for you in the Minecraft world.
In summary, Minecraft servers enhance the game’s experience by enabling multiplayer gameplay, fostering communities, offering customization options, and providing unique game modes and events. Whether you’re looking for a collaborative building experience or competitive challenges, there’s likely a Minecraft server that suits your preferences and interests.
How useful was this post?
Click on a star to rate it!
Average rating 3 / 5. Vote count: 15
No votes so far! Be the first to rate this post.
 Tags
Tags

It is useful to have a mail server on your system. Setting up a mail server on a Linux system is a u...


 Tags
Tags

Say Goodbye to Shared Hosting! Shared hosting may not provide the speed, security, and customization...


 Tags
Tags
What is your opinion about this Blog?


