


Netinstall is a powerful tool provided by MikroTik that allows users to reinstall or upgrade the routerOS operating system on MikroTik routers. This guide will teach you about how to install Netinstall on MikroTik devices, ensuring a smooth and efficient installation or upgrade. We suggest you read the article on how to connect to Mikrotik Router for more information.
Prerequisites
Before proceeding with the installation of Netinstall, ensure that you have the following prerequisites:
– MikroTik Router: You should have a MikroTik router device that you want to reinstall or upgrade using Netinstall.
– Ethernet Cable: A working Ethernet cable is required to establish a connection between the MikroTik router and the computer.
– Netinstall Software: Download the latest version of Netinstall software provided by MikroTik from their official website.
MikroTik VPS servers offered on our website have various plans from many locations and instant delivery. We suggest you test and use these servers.
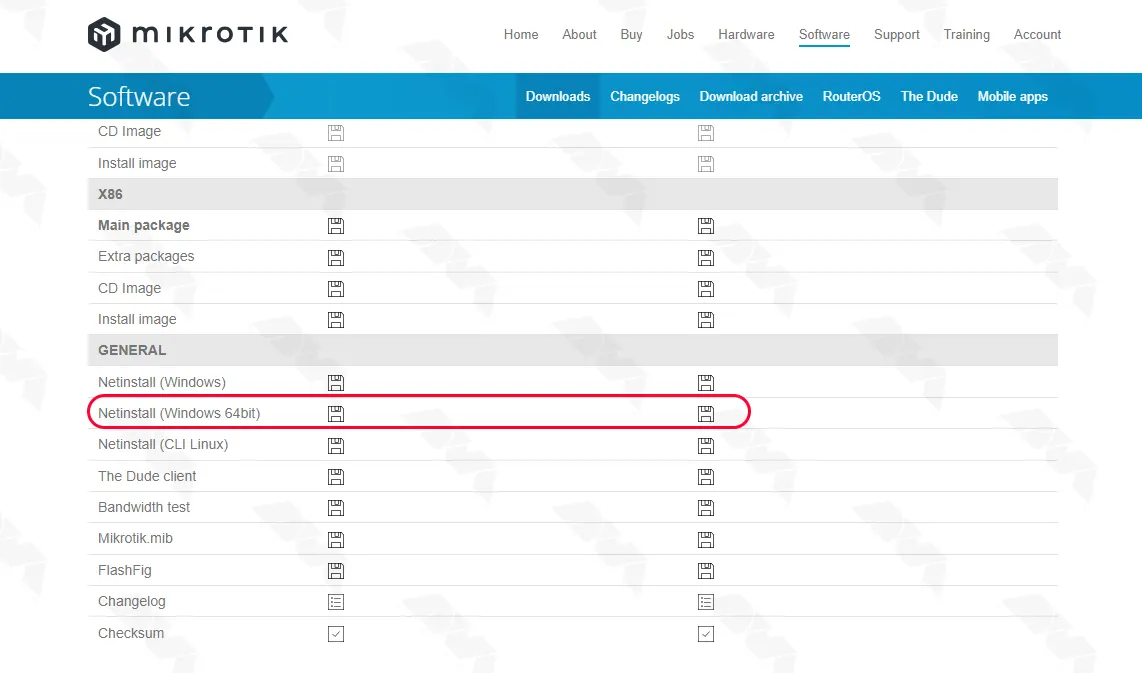
Open your web browser and visit the official MikroTik website.
Click on the “Download” tab and choose the appropriate Netinstall package based on your computer’s operating system.
1) Power off your MikroTik router or device.
2) Connect one end of the Ethernet cable to your computer’s Ethernet port and the other end to any Ethernet port on the MikroTik device.
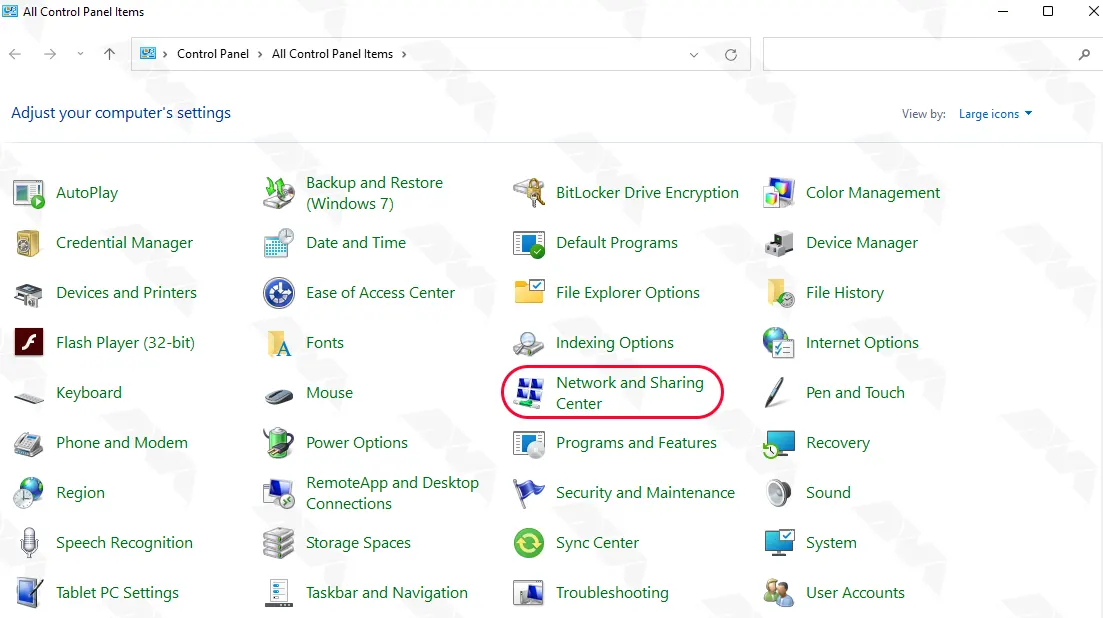
From the start menu, search for the control panel and open it. Then, click on Network and Sharing Center:
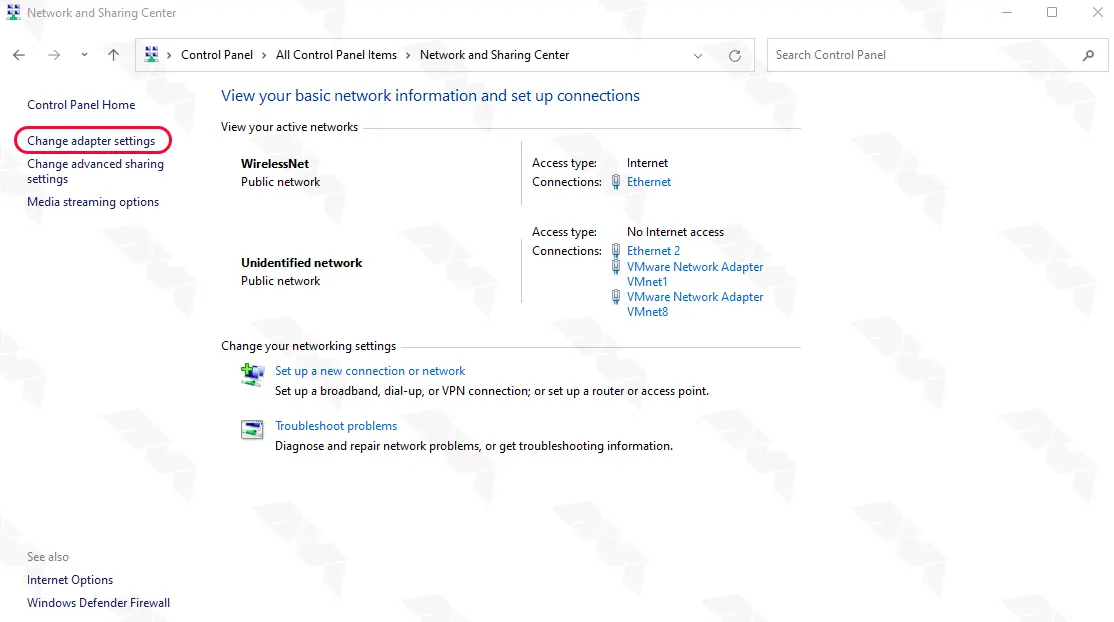
In the next step, click on Change adapter settings from the left column:
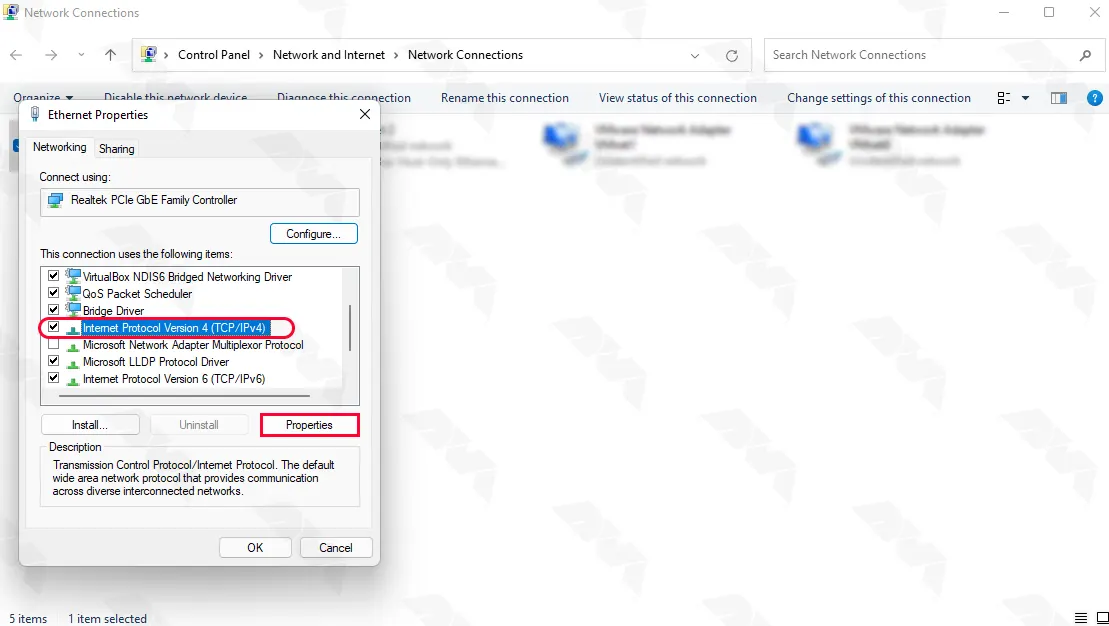
Now you need to right-click on the Ethernet interface you want and then click Properties:

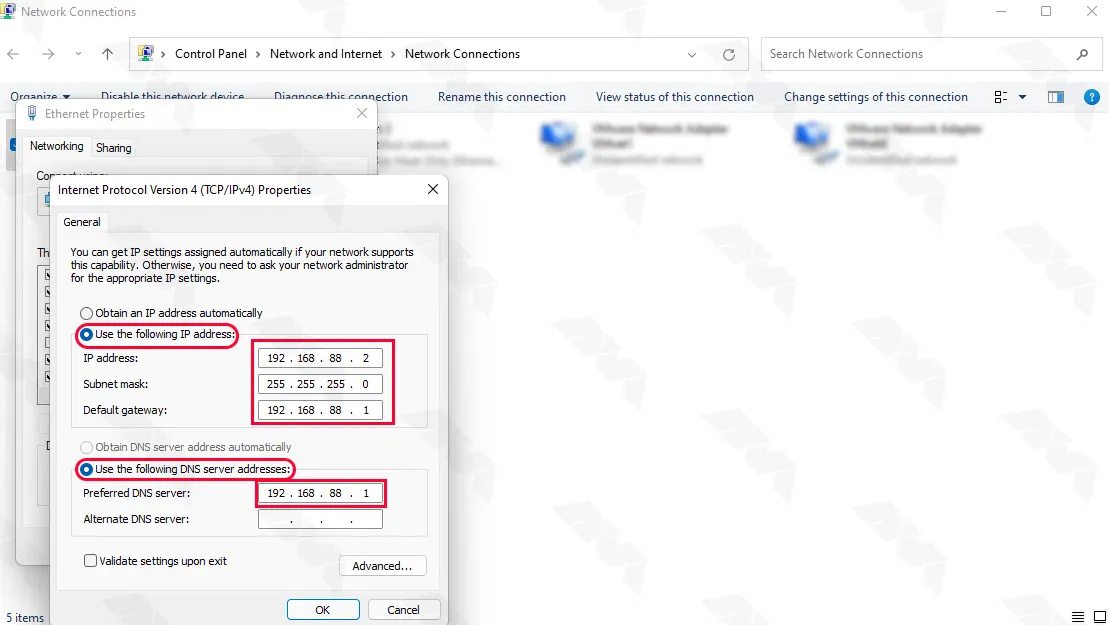
As shown in the image below, highlight the Internet Protocol Version 4 option and then click on Properties:
After selecting the “Use the following IP address” option, complete the required fields as follows and click OK:
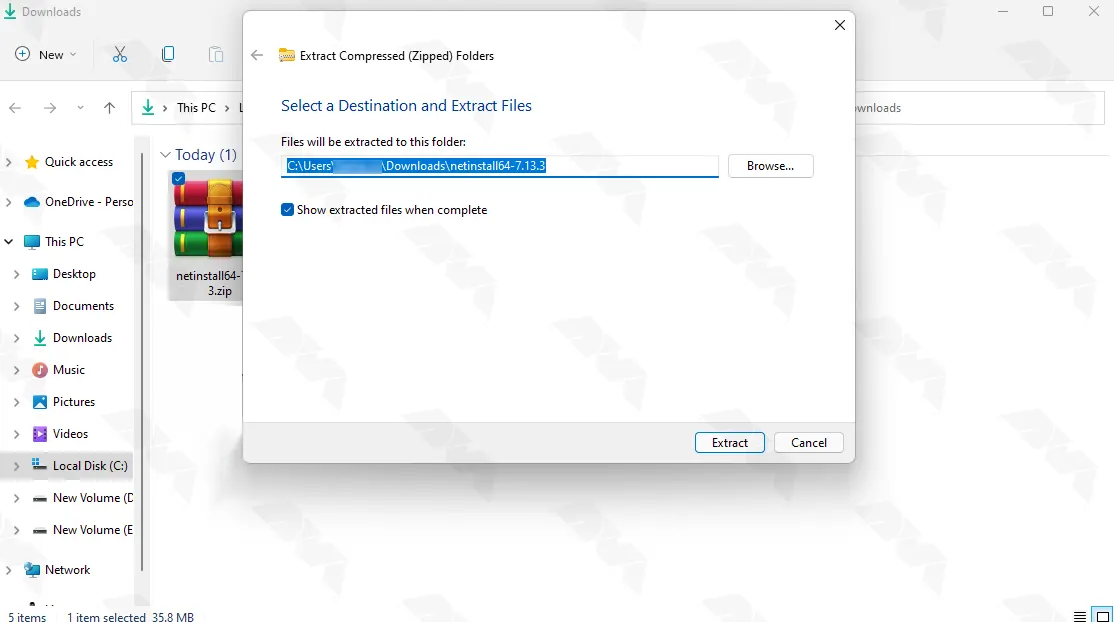
Go to the location where you downloaded the Netinstall file. Then, extract the downloaded Netinstall package to a folder on your computer:
Double-click the extracted Netinstall file to run the installation and install Netinstall on Mikrotik:

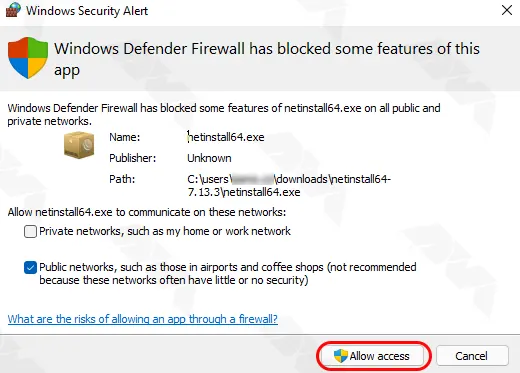
If you see the following window, click Allow Access:
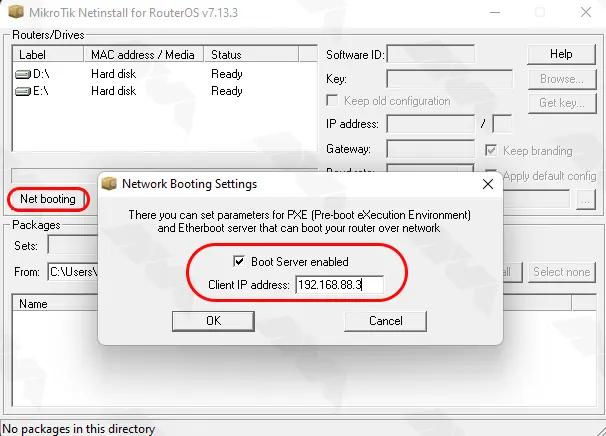
Configure the settings for Net booting and complete the necessary fields as displayed in the image beneath:
Note 1: In this step, you should Power on the MikroTik device and wait for it to boot up.
The device will attempt to make a TCP connection to your computer running Netinstall. Once detected, it will appear in the Netinstall window:
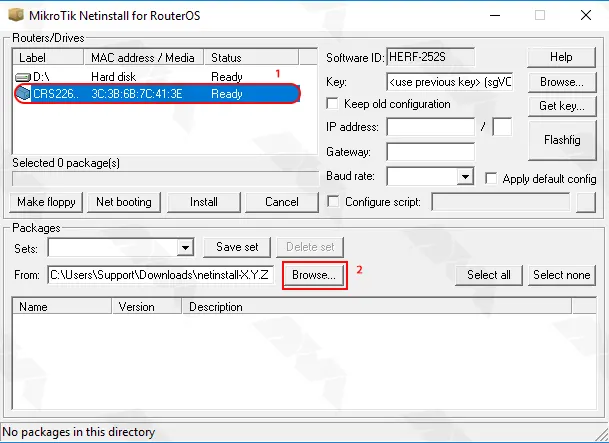
Note 2: If the device does not appear, ensure that your computer’s firewall is not blocking the Netinstall application.
Select the detected MikroTik device from the list and click on the “Install” button:
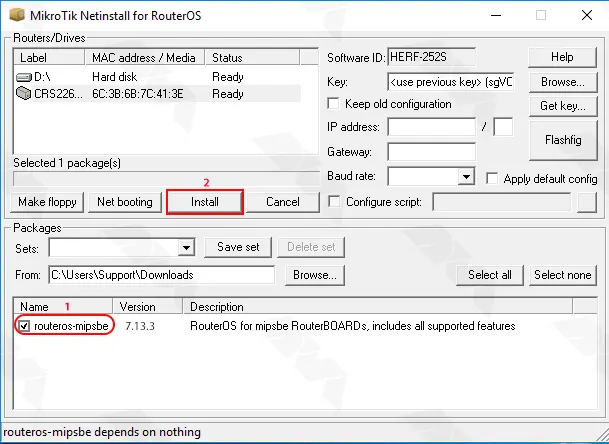
Follow the on-screen instructions to choose the firmware version and additional options, if available.
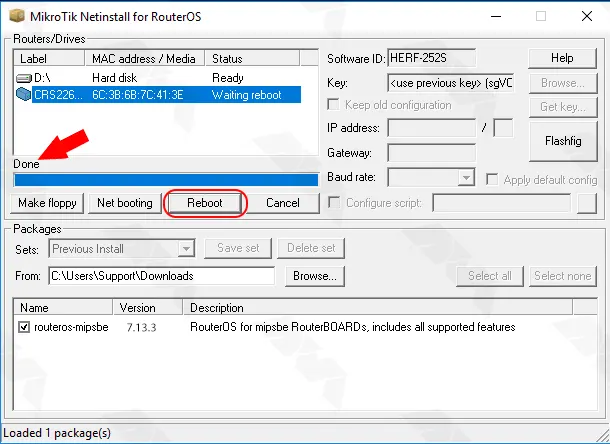
Once the installation process is complete, click on Reboot. After that, the MikroTik device will restart with the new firmware:
By following this article, you should now have successfully installed Netinstall on your MikroTik device. Netinstall allows for precise control over firmware installations and upgrades, enabling network administrators to efficiently manage their MikroTik devices. Always ensure that you have a backup of your device’s configuration before performing any firmware updates or installations. With Netinstall, you can confidently maintain and optimize your MikroTik devices for optimal network performance.
How useful was this post?
Click on a star to rate it!
Average rating 3.2 / 5. Vote count: 17
No votes so far! Be the first to rate this post.
 Tags
Tags

The MacBook Pro is a powerful and popular laptop choice for many professionals and creative individu...


 Tags
Tags

SteamCMD is a command-line tool developed by Valve. This tool is used to download, update, and manag...


 Tags
Tags
What is your opinion about this Blog?


