


After reading this article step by step you will learn How to Install AlmaLinux on VirtualBox. AlmaLinux is an open-source replacement of the CentOS operating system which is not long-term supported. AlmaLinux has been created by CloudLinux developers. You will learn where to download AlmaLinux and how to install this useful operating system on VirtualBox and also how to set the AlmaLinux repository for network install ISO.
If you want to install AlmaLinux on VirtualBox, you must first purchase a Linux VPS server with AlmaLinux OS. For this, you can visit the NeuronVM Linux VPS plans. Then you need to apply this tutorial step by step to have a successful installation process. So follow the instructions below.
The first step to installing AlmaLinux is to download it through its DVD ISO file, which is available on the Almalinux official website. Totally, the method that exists for this task includes three modes, the first mode as mentioned, is full DVD ISO with Gnome GUI desktop, which is better for offline installation.
The second method is to use a network install CD and the last method is minimal ISO. To install AlmaLinux on the desktop the best method is DVD ISO, but if you want the lightweight version we recommended minimal or network one.
_ Possessor: 2 GHz or higher
_ Hard Disk: 20 GB free space
_ RAM: 2 GB for GUI and 512 MB for minimal version
_ Operating system: 64-bit x86
Here are some steps to create a virtual machine:
1- you should run VirtualBox your operating system.
2- Now you will see the New option, so click on it.
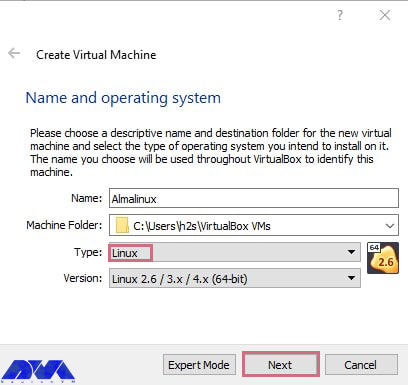
3- Give a name to your machine and choose Linux as the type of your operating system:
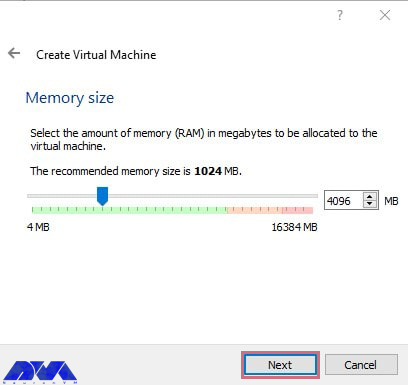
4- You should set the RAM for AlmaLinux OS. Here we have the GUI version then press next:
5- In this step you can create virtual hard disk storage.
6- This step is for selecting storage type VDI or VHD.
Tip: If you want to use it on WMware, then just go for VMDK and click next.
7- You can set the storage space as required. 20 GB is the ideal one to start.
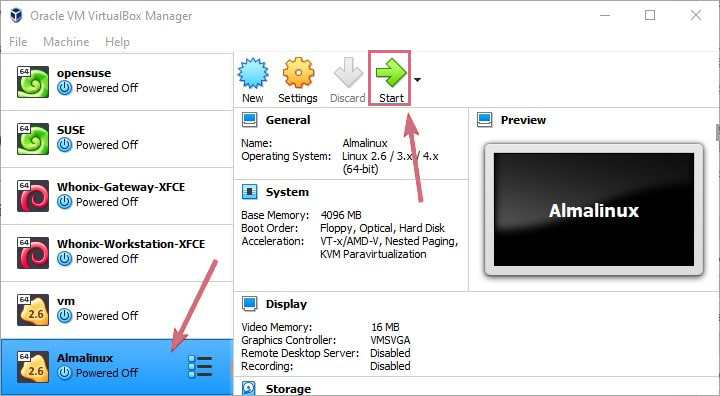
Now VirtualBox is ready to use. To start the machine, go to the left side panel and select it. Then click on the start button:
When starting the virtual machine, you will encounter “Select the startup disk“. In this section, we select and add desired ISO file. Then click on the folder icon as shown below:
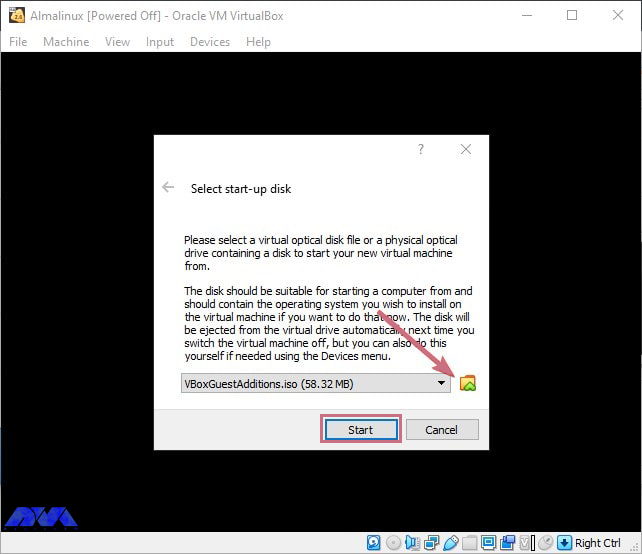
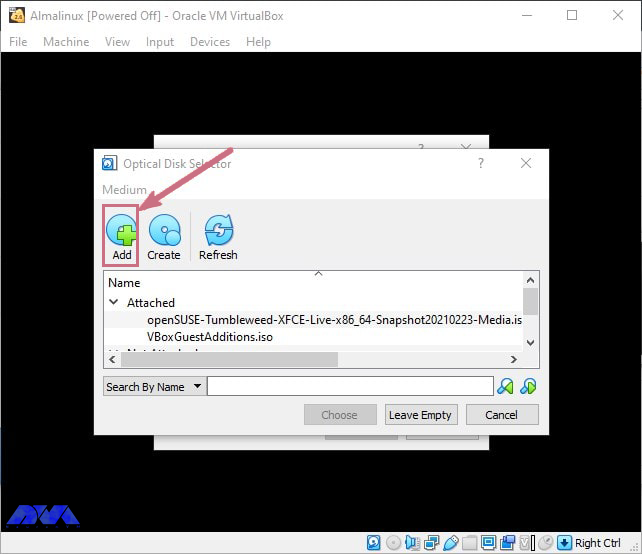
Click on the add option to open the explore file. Then navigate and select the AlmaLinux ISO file:
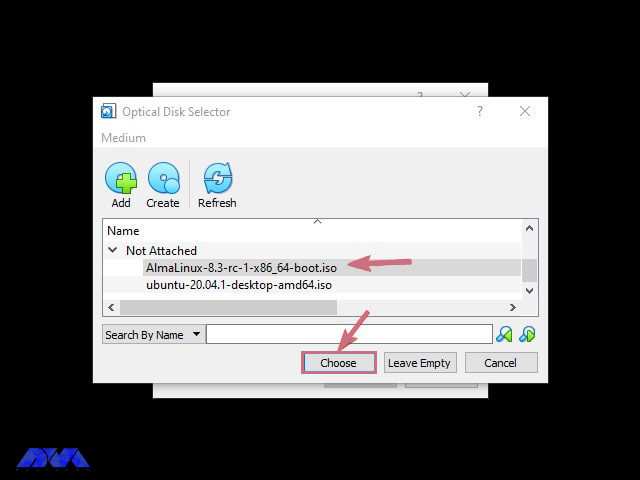
Here, you should select the added file and click on choose button:
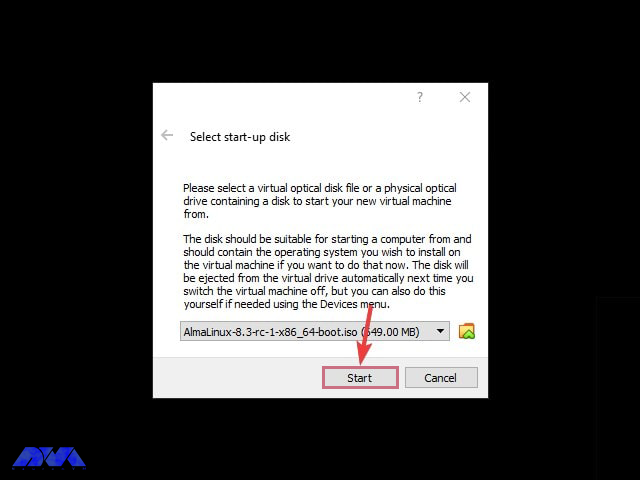
As the final step, press the start button to boot the virtual machine with AlmaLinux ISO:
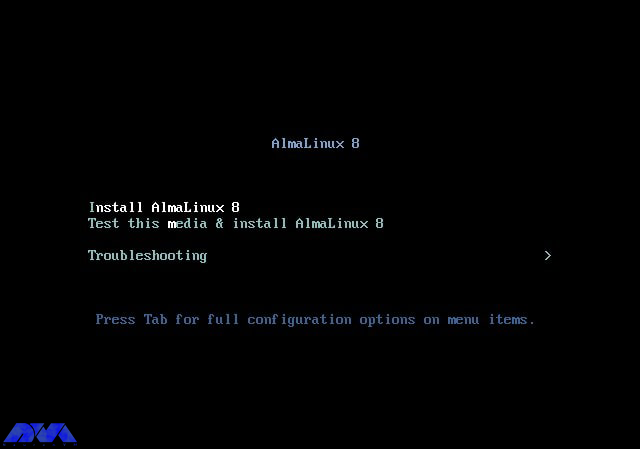
Now, you need to select the first boot menu option using the arrow keys. Then the installation process begins which is the same for all devices:
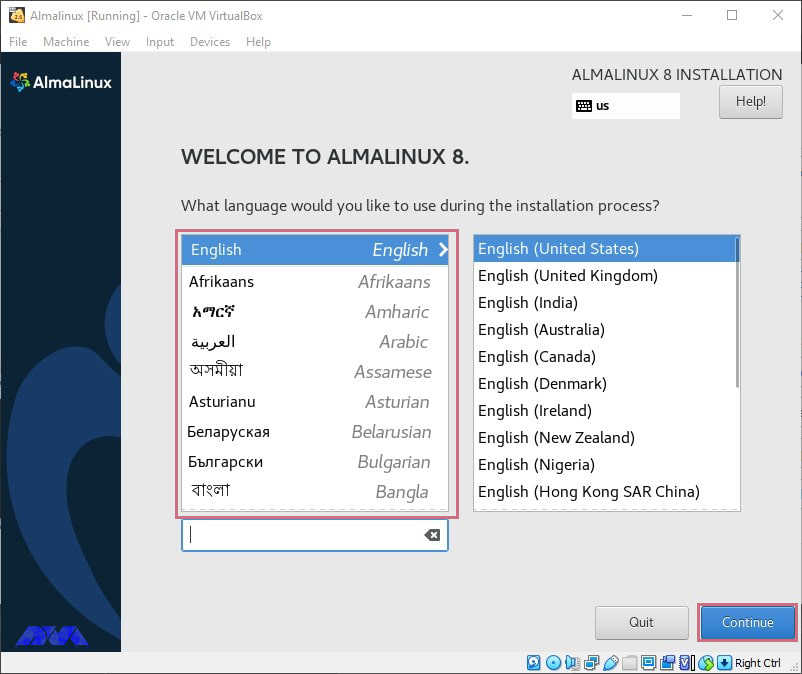
The first step during the installation is to select the appropriate language that you want to use. See the image below:
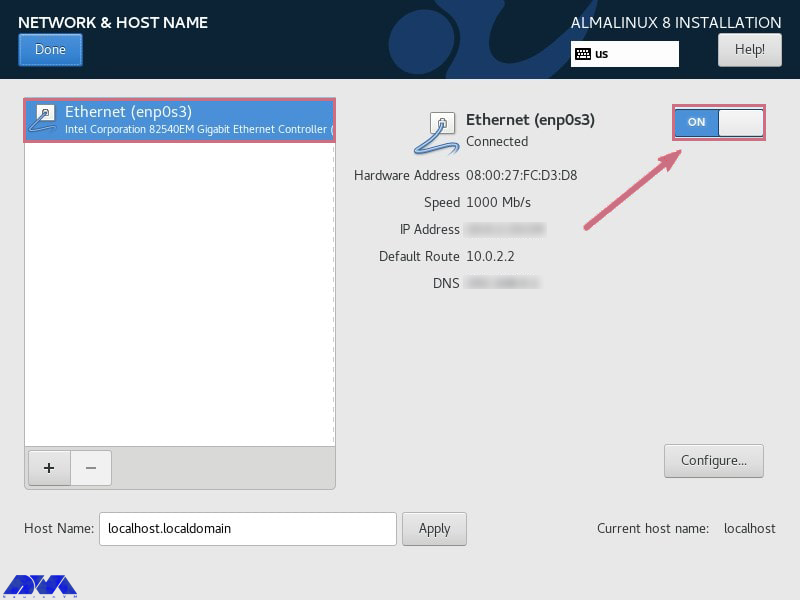
Go to the Installation Summary part and then select the Network and Host Name option. Turn on the toggle button and begin installation:
If you are tempted to use a network install CD, then you should do the setting of installation source manually. So go to the installation source and enter the link in the repository URL box which is given below, after that press Done :
Tip: There is no need to change the installation source that is local if your version is full DVD or minimal ISO.
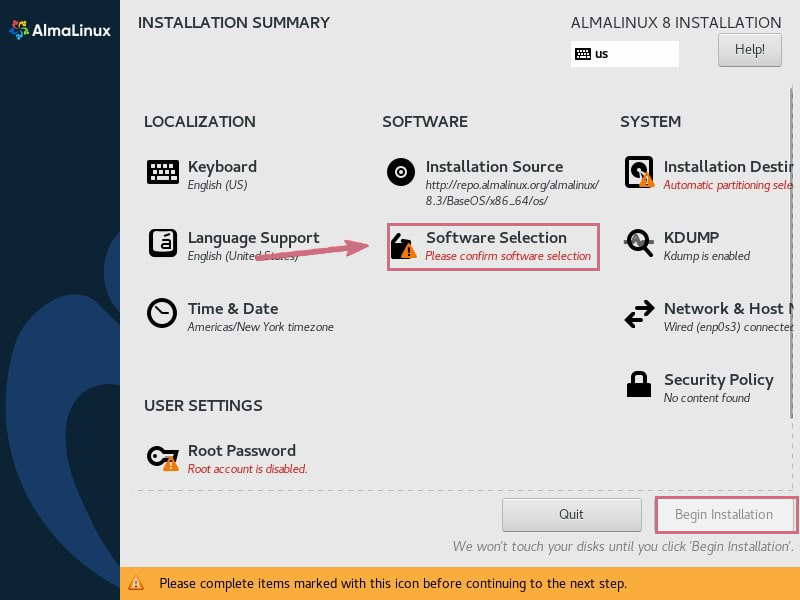
At the software installation phase, especially through the GUI, you should select “Software Selection” and then select the packages you want to install in Linux.
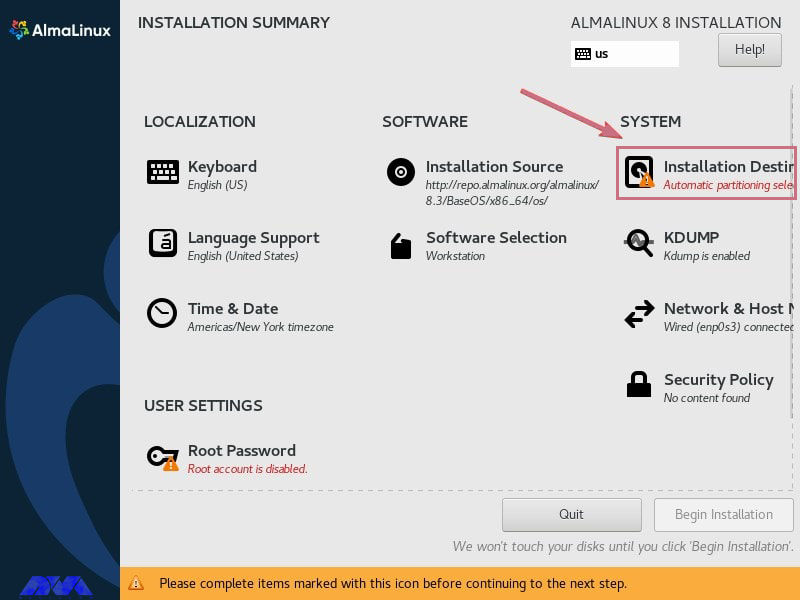
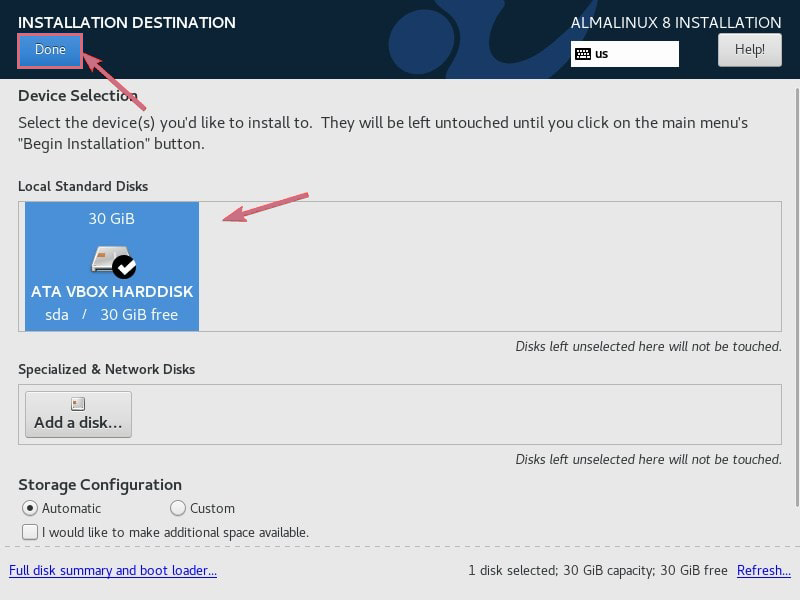
Choose the Installation Destination option to select the virtual or physical hard drive on your system:
###
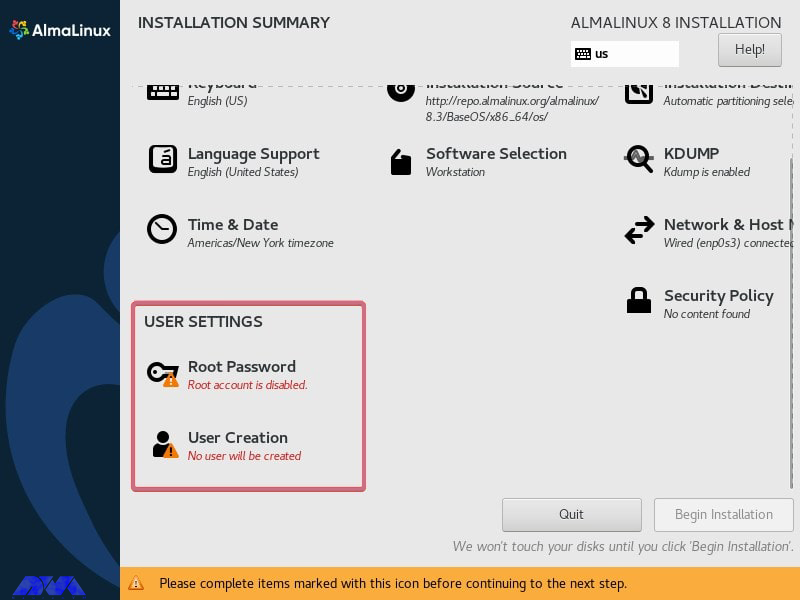
You must have set a root user password and set another user as well. Note that if you give the new user sudo privileges, check the make administrator option. Finally, click on the start button:
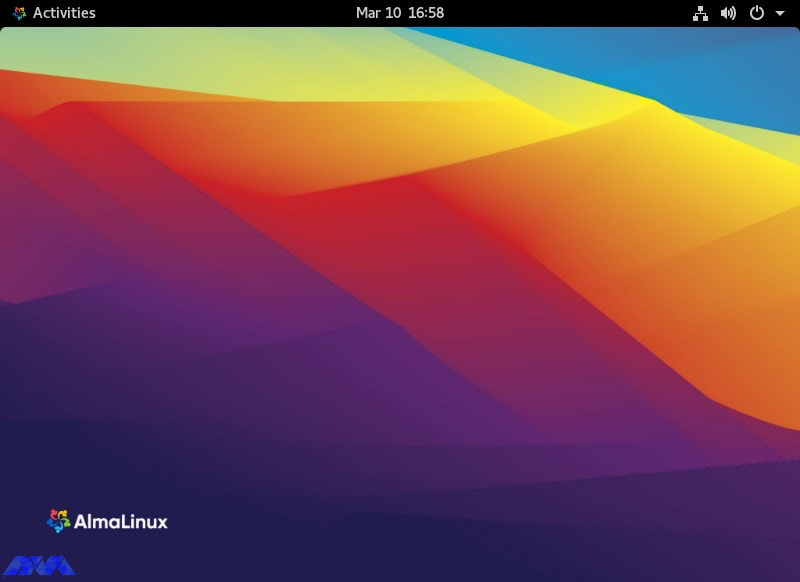
You will see the user account which will be shown automatically for you. Here enter the password you set for it and log in to the AlmaLinux system:
In this article, you learned how to install AlmaLinux on VirtualBox. Now you can use this functional operating system. Also, we tried to provide every step with related images, so this way you can do the installation easier. We hope this article was useful for you. If you have any questions, just leave a comment.
VirtualBox supports all of the virtual disk types like VHD, HDD, and so on. as well as integration tools like Vagrant, but VMWare does not. On the other hand, Virtual machines created by VMWare are faster than those with VirtualBox.
How useful was this post?
Click on a star to rate it!
Average rating 5 / 5. Vote count: 1
No votes so far! Be the first to rate this post.
 Tags
Tags

Docker is a free and open-source containerization tool that allows developers to package their appli...


 Tags
Tags

The database is one of the primary and most essential elements any software needs to work. A website...


 Tags
Tags
What is your opinion about this Blog?


