


A cPanel to cPanel migration refers to the process of moving all data, settings, and configurations from one cPanel account to another. This is often done when you want to transfer your website from one hosting provider to another or when you need to create a backup of your existing cPanel account. Migrating your cPanel account ensures a seamless transition without any data loss or downtime. In this article, we will provide a comprehensive step-by-step guide on how to perform a cPanel to cPanel migration.
You can confidently launch your website on Linux VPS servers that are offered on our website with various plans.
To perform a successful cPanel to cPanel migration, you will need the following requirements:
– Access to both the source and destination cPanel accounts
– Sufficient disk space on the destination server
– Stable internet connection
– WHM (Web Host Manager) access
– Backup of the source cPanel account
– Compatible cPanel versions
– Permission to access firewall settings
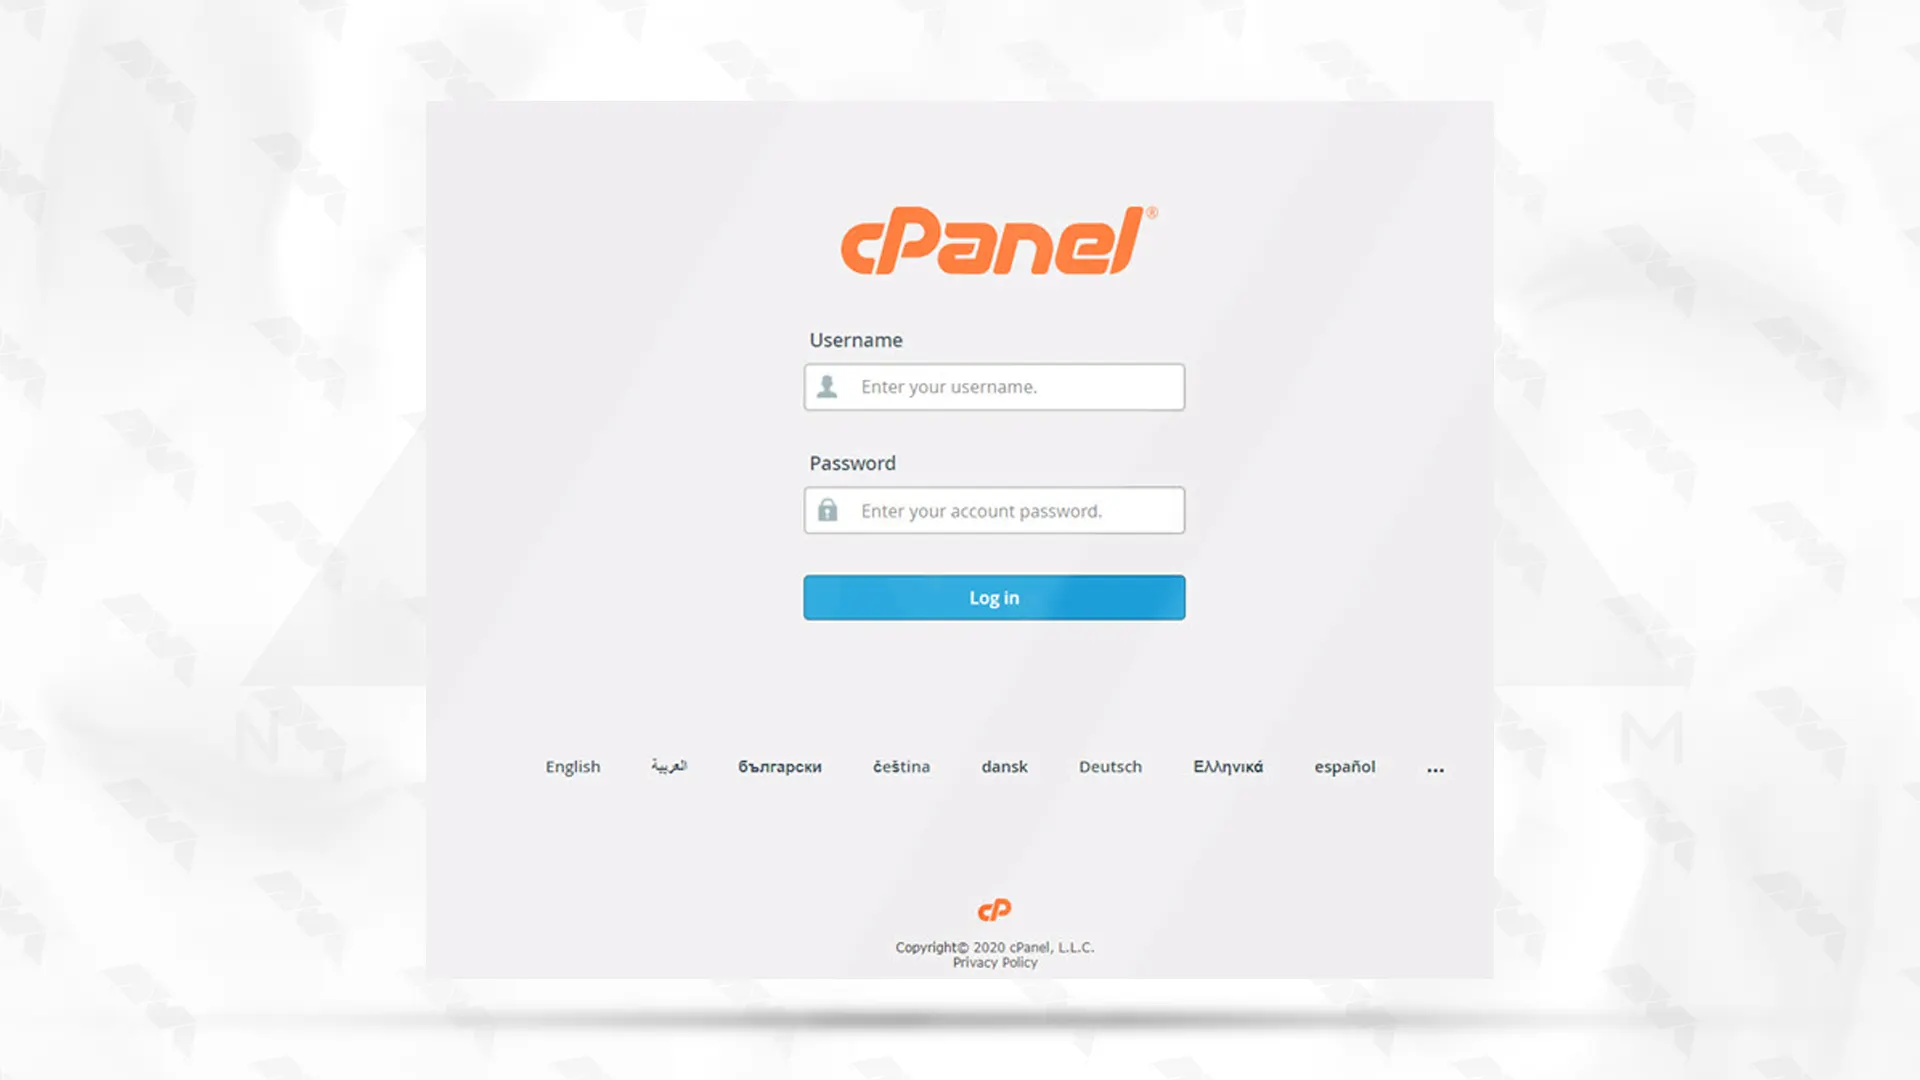
– Log in to your source cPanel account:
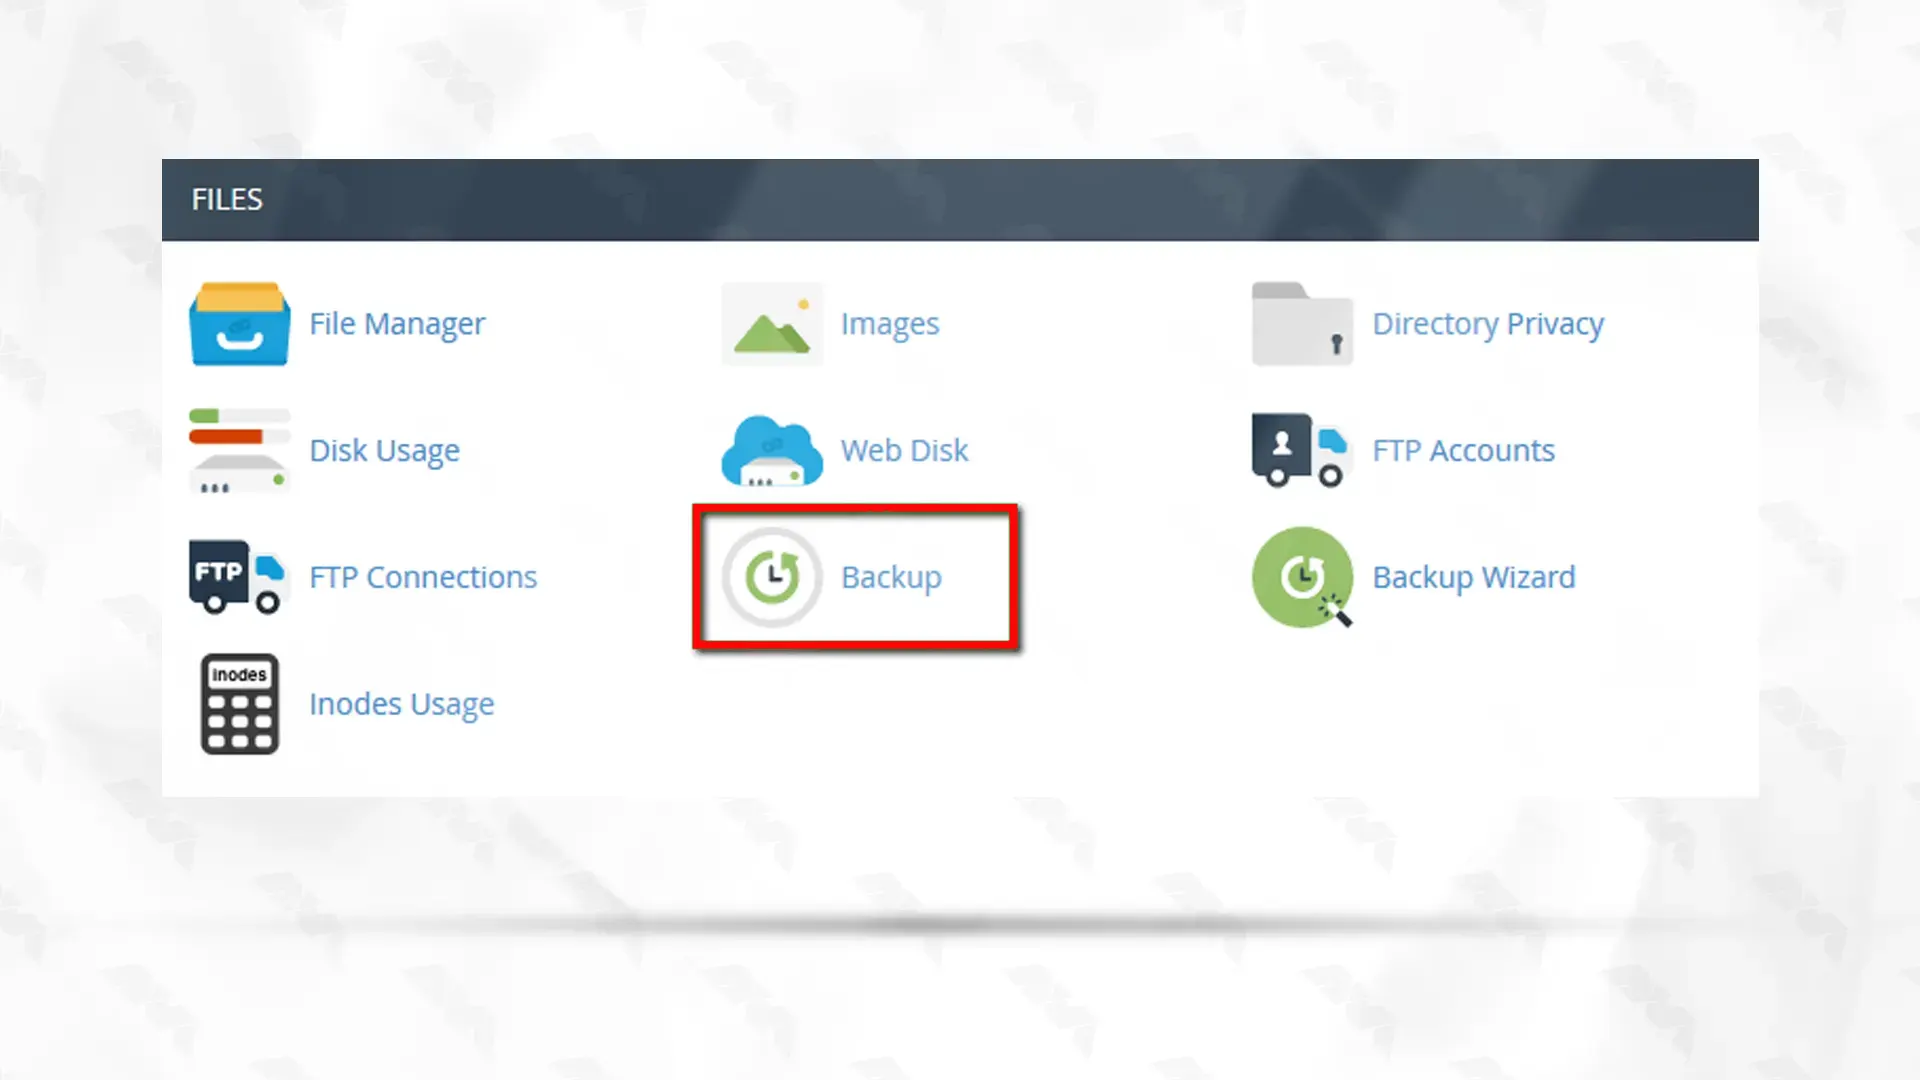
– Navigate to the “Backup” or “Backup Wizard” section within cPanel:
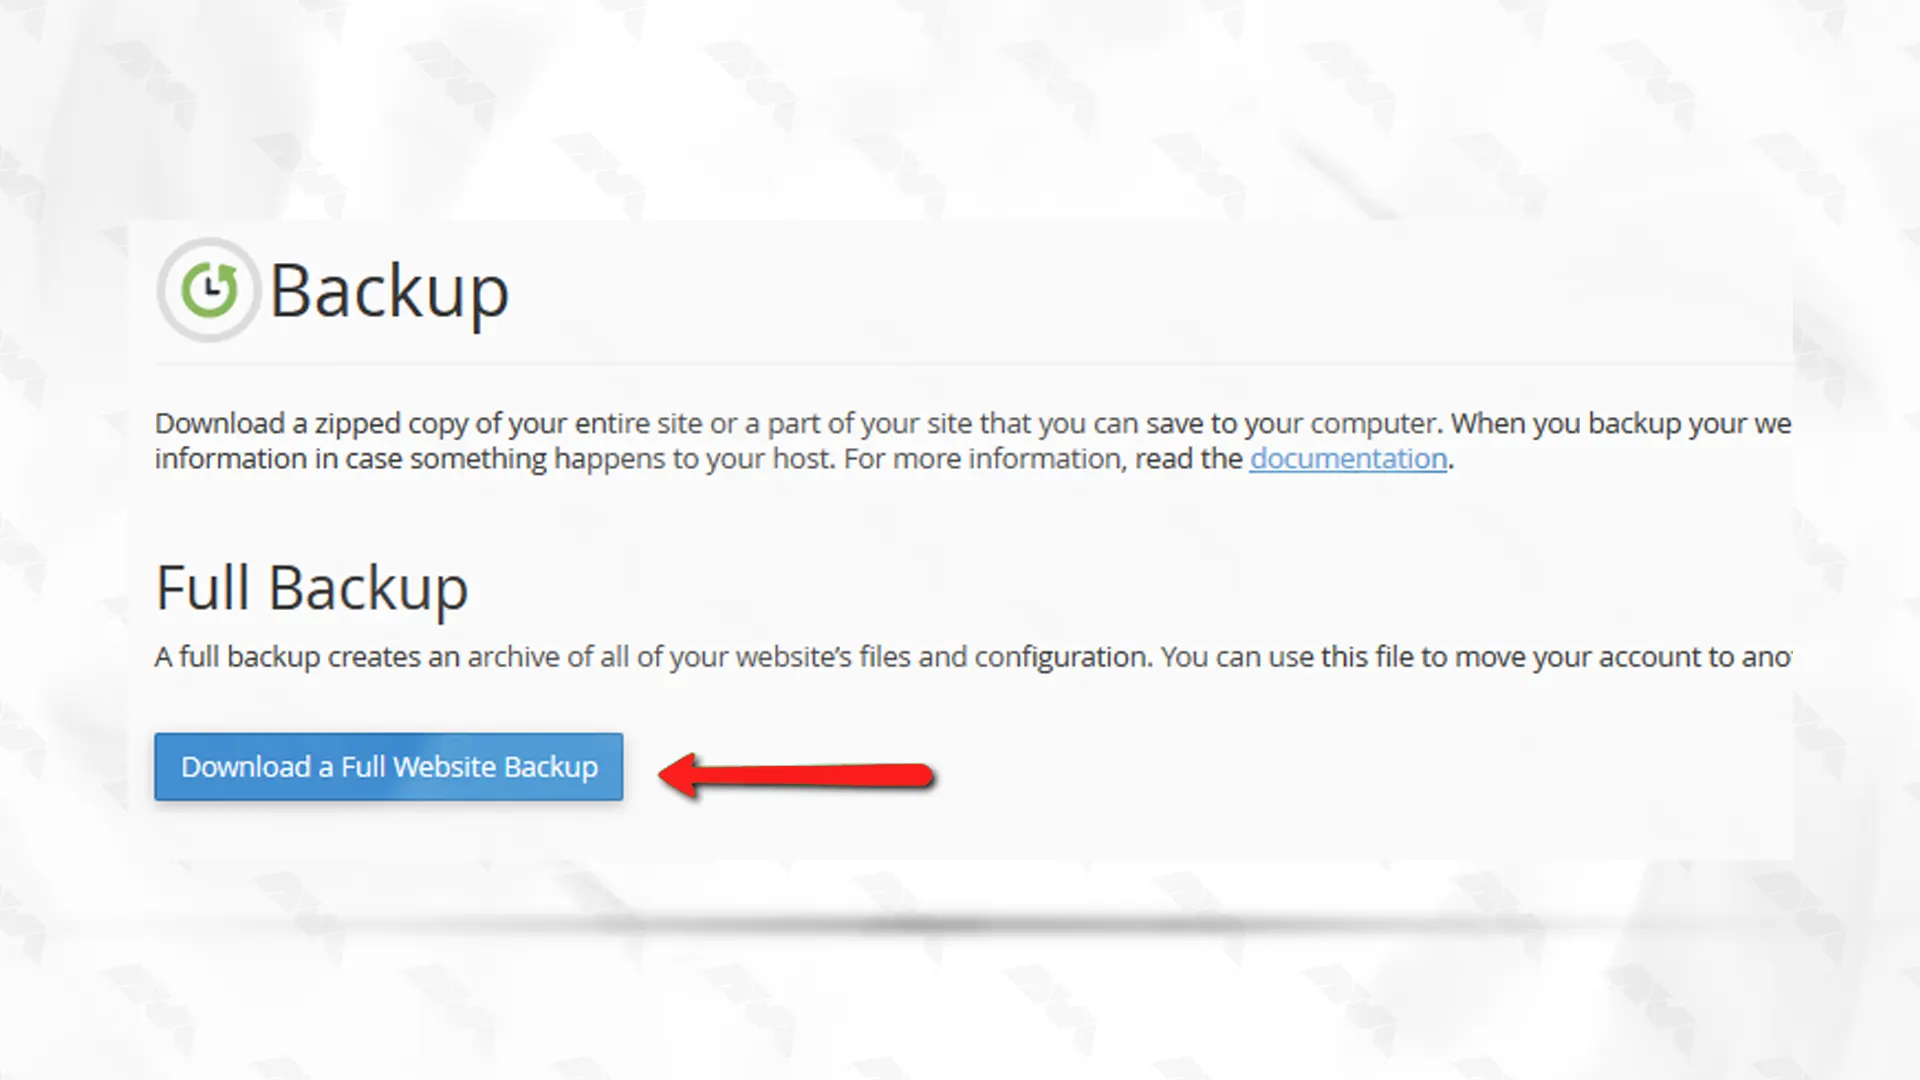
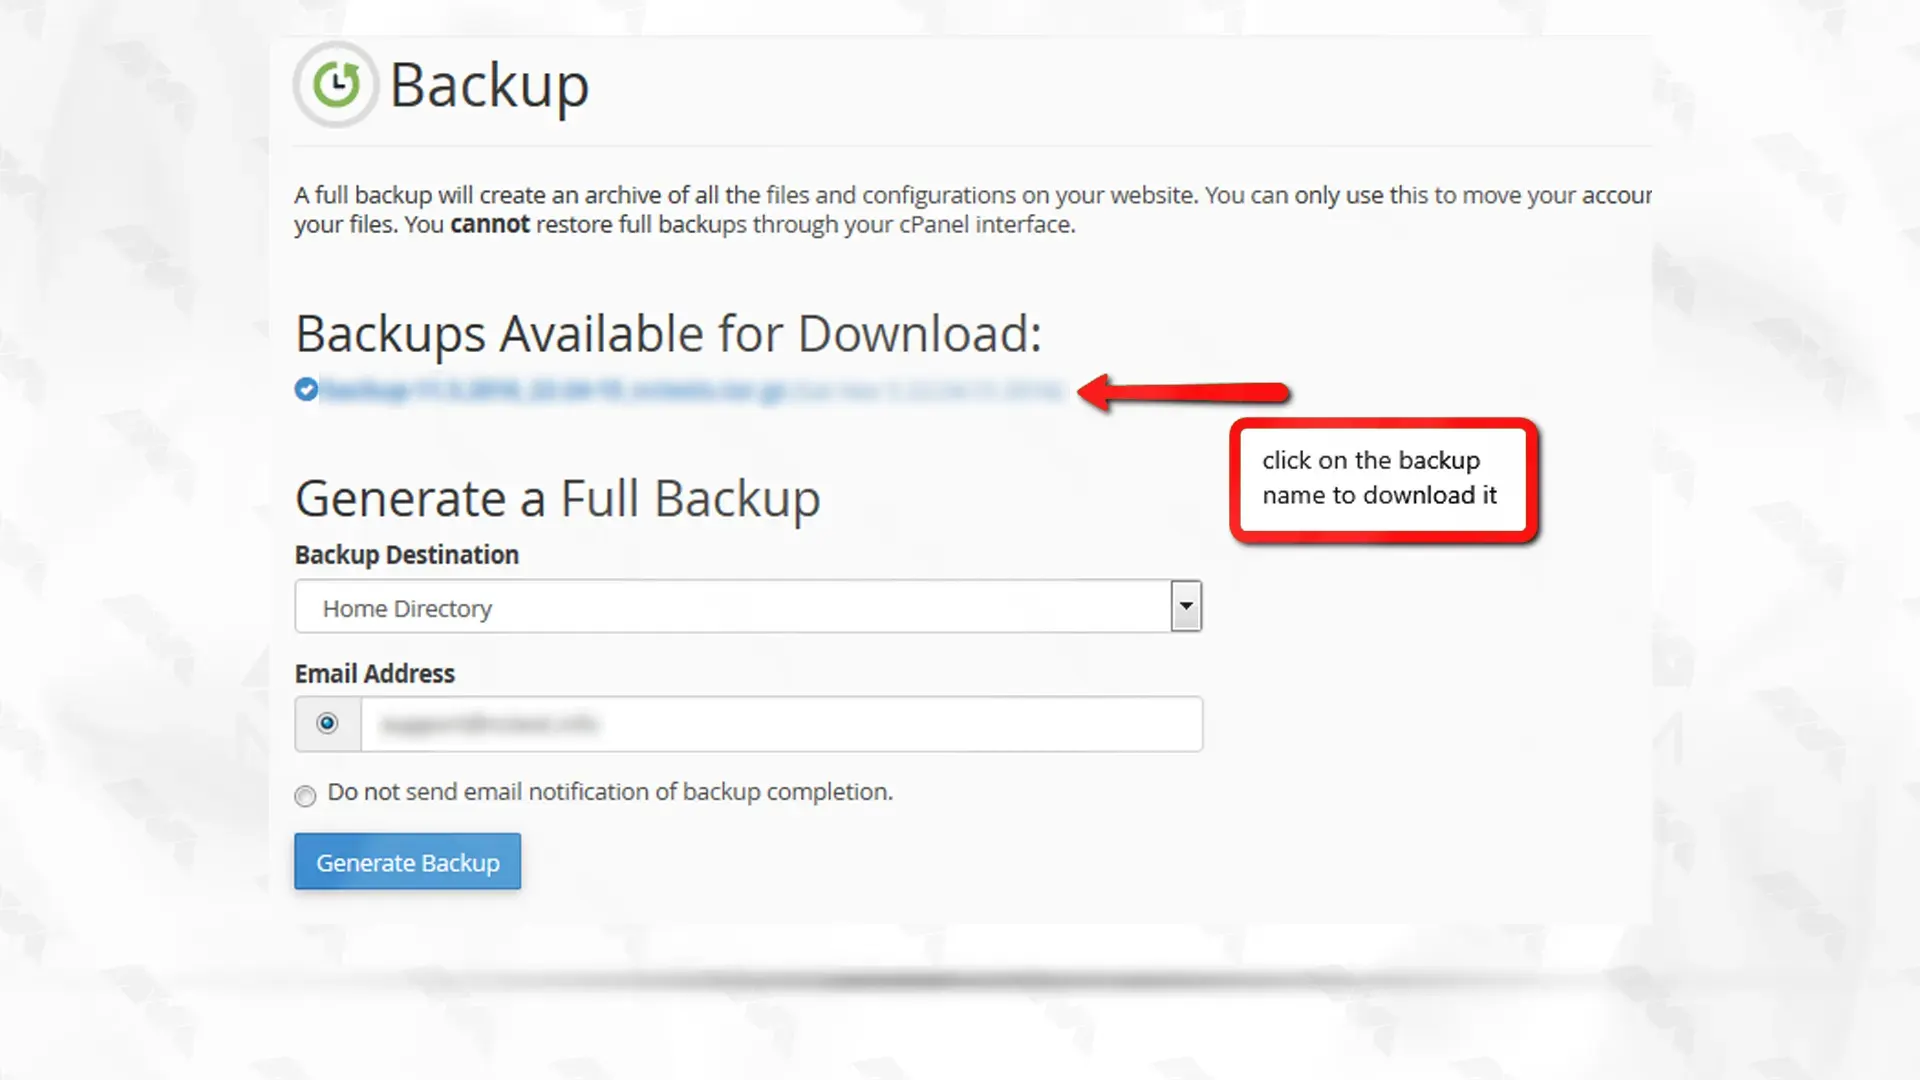
– Click on “Download a Full Website Backup” to create a full backup of your account, including the home directory, databases, email forwarders, and filters:
*
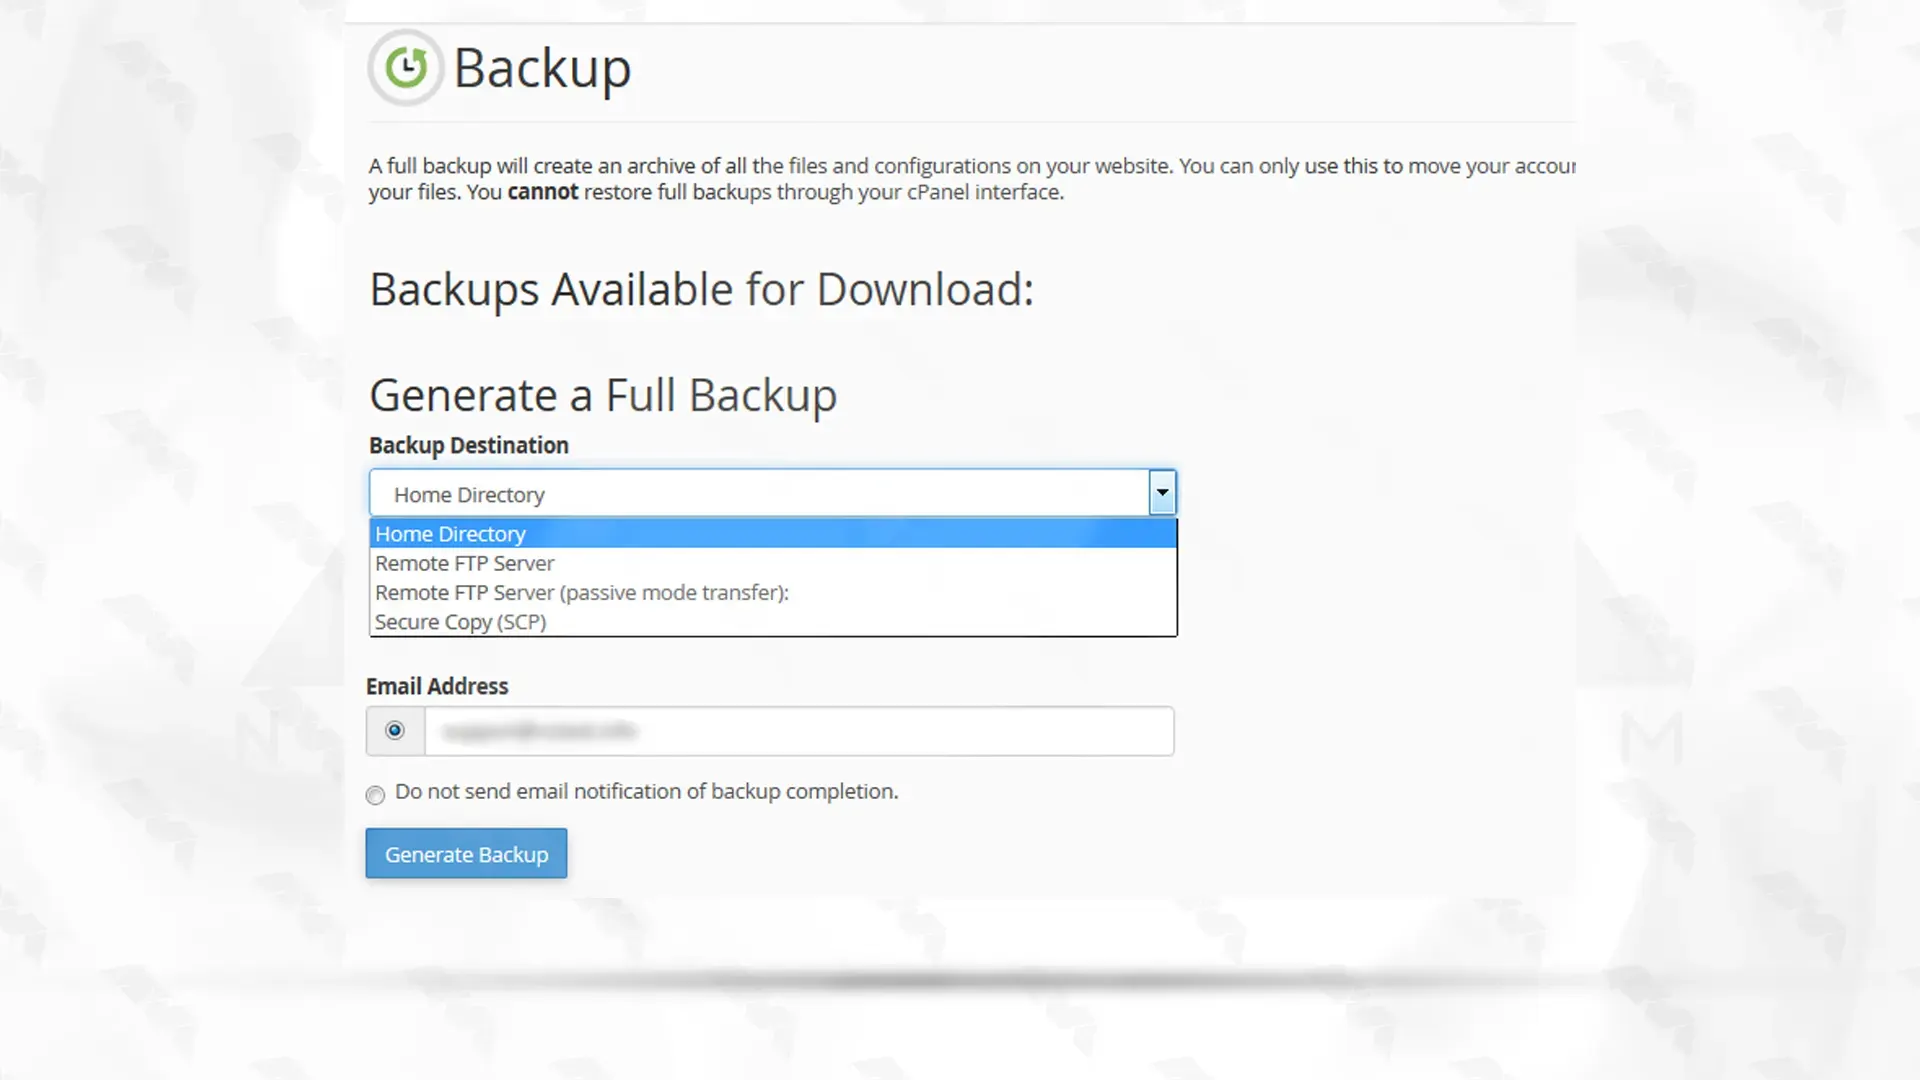
– Save the backup file to a safe location, either on your computer or in cloud storage by clicking on “Generate Backup“:
– Sign up with the new hosting provider or create a new cPanel account with your existing provider for the destination website.
– Make note of the destination cPanel login details.
– Login to the destination cPanel account.
– Navigate to the “Backup” section.
– Click on “Restore a Full Backup/cpmove File” to restore a backup and upload the backup file you created earlier.
– Please complete the restoration process by following the instructions displayed on the screen:
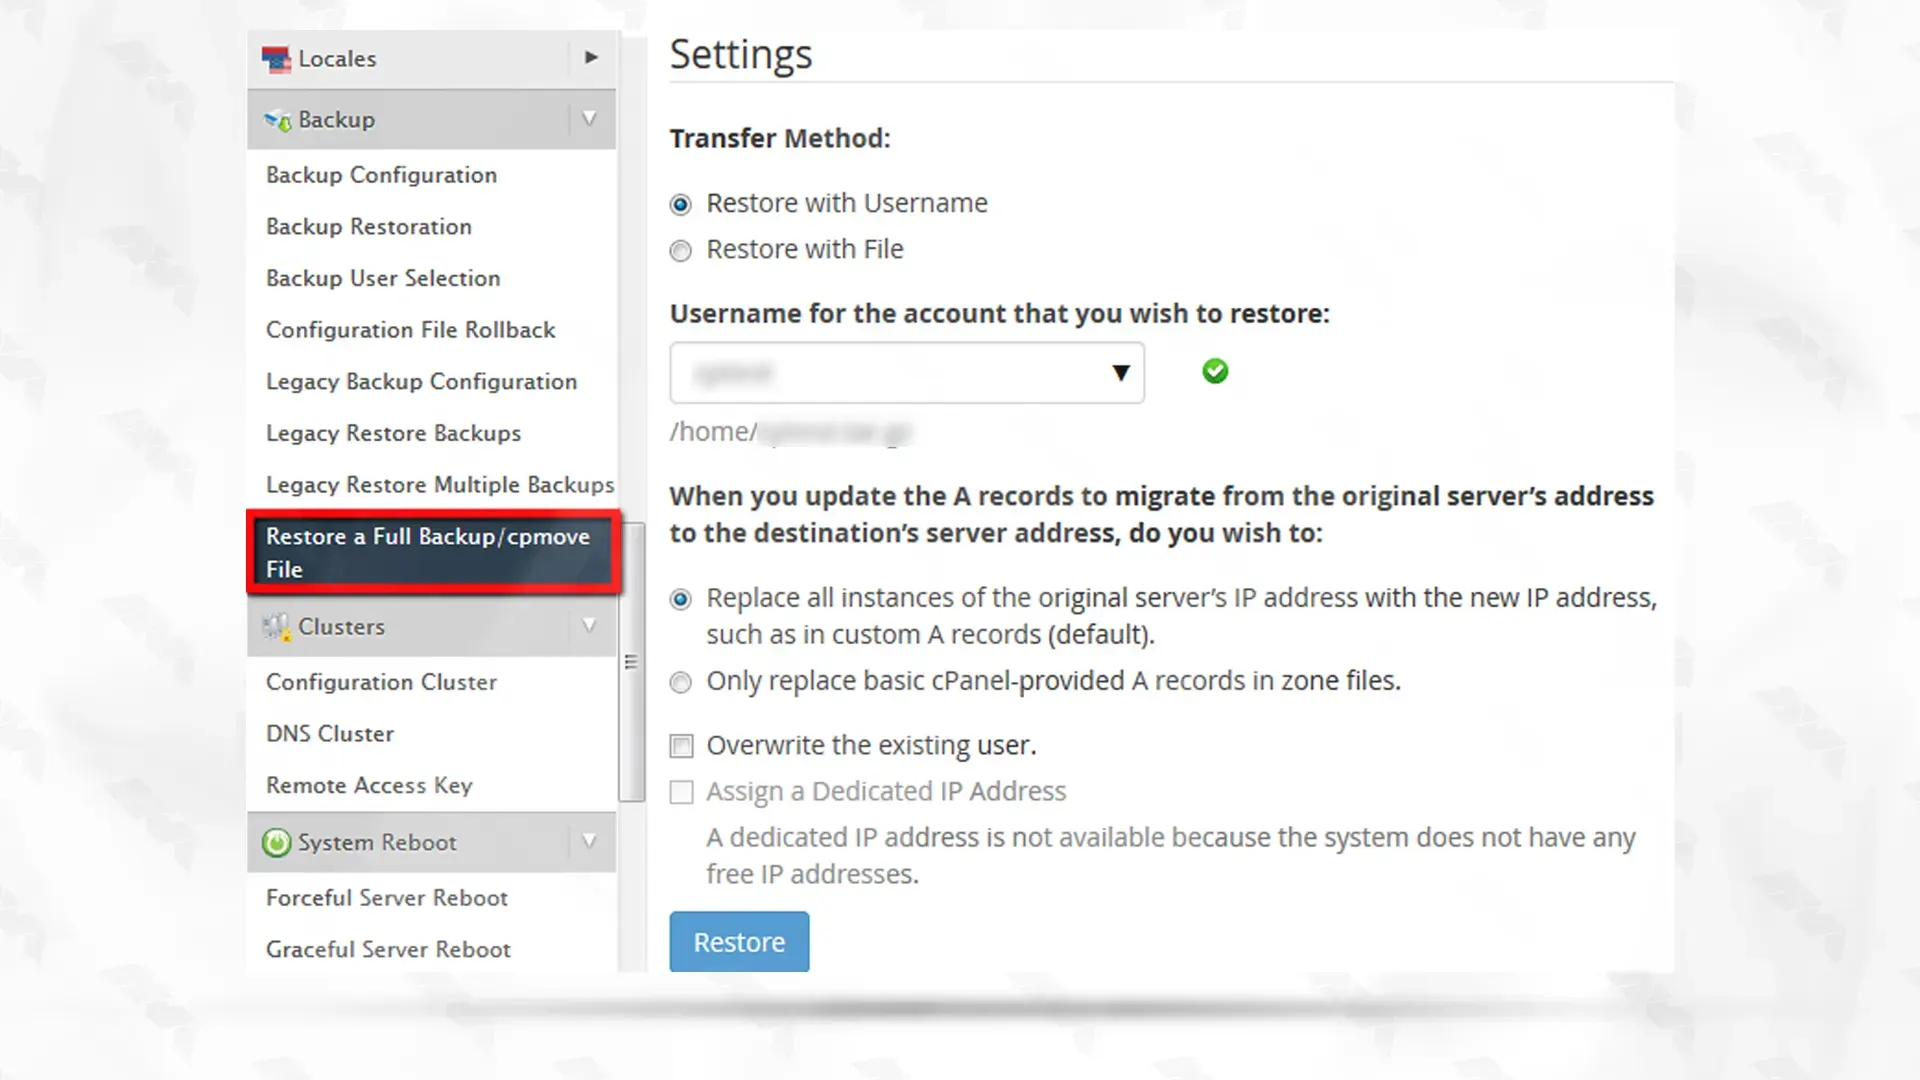
Note: Wait until the restoration process finishes, which may take some time depending on the size of your backup file.
Once the restoration is complete, you need to update your domain’s DNS settings to point to the new server.
1- Log in to your domain registrar or DNS provider.
2- Locate the DNS settings for your domain and update the nameservers to those provided by the new hosting provider.
3- Save the changes and allow some time for the DNS propagation to take effect (usually 24-48 hours).
1. After the DNS propagation, access your website using the domain name or the new server’s IP address.
2. Make sure all the pages, functionalities, and configurations are working correctly.
3. Test email accounts, forms, databases, and any other features associated with your website.
– If you are using any website-specific configurations or plugins, ensure they are properly configured on the new server.
– Update any relevant paths, URLs, or settings in your website’s configuration files or database to match the new server structure.
Migrating from one cPanel account to another involves creating a backup of the source cPanel account, creating a destination cPanel account, restoring the backup to the new server, updating DNS settings, testing the new website, and updating any additional configurations. By following these steps, you can successfully migrate your website without any data loss or downtime. Remember to take regular backups and ensure proper testing to ensure a smooth transition.
How useful was this post?
Click on a star to rate it!
Average rating 5 / 5. Vote count: 1
No votes so far! Be the first to rate this post.
 Tags
Tags

It is useful to have a mail server on your system. Setting up a mail server on a Linux system is a u...


 Tags
Tags

In this article, we will show how you can download and use Desktop Google Drive for Windows, Mac &am...


What is your opinion about this Blog?


