


A remote Desktop is a tool that you can use to connect to your PC and control it. This tool enables remote control of devices. In this case, the users who are in the administrative group or the users you have selected and allowed access will be able to manage or control the system. This article will teach you the way to adding remote desktop users, so stay with us.
Here are the requirements before adding a remote desktop user:
Tip: All the configurations and settings will be done on Windows 10 VPS server.
First of all, Log in to the Server for which you want to add remote desktop users with an administrator account.

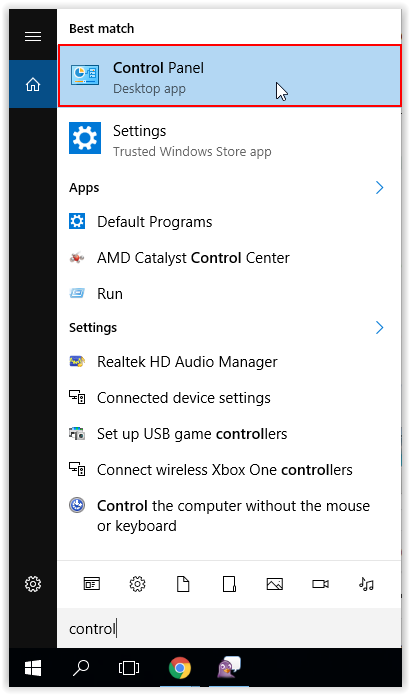
Now you should click the Control panel from the Start menu:
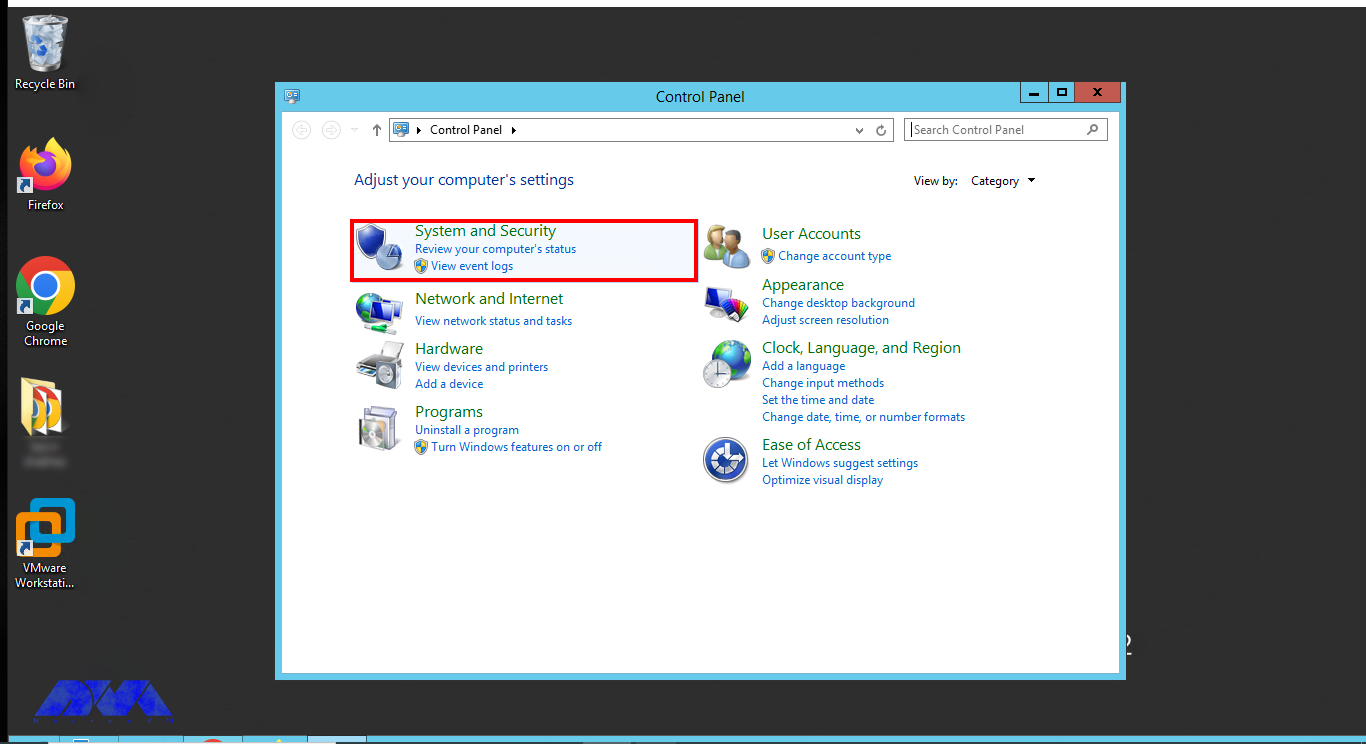
Choose System and Security once the panel opens:
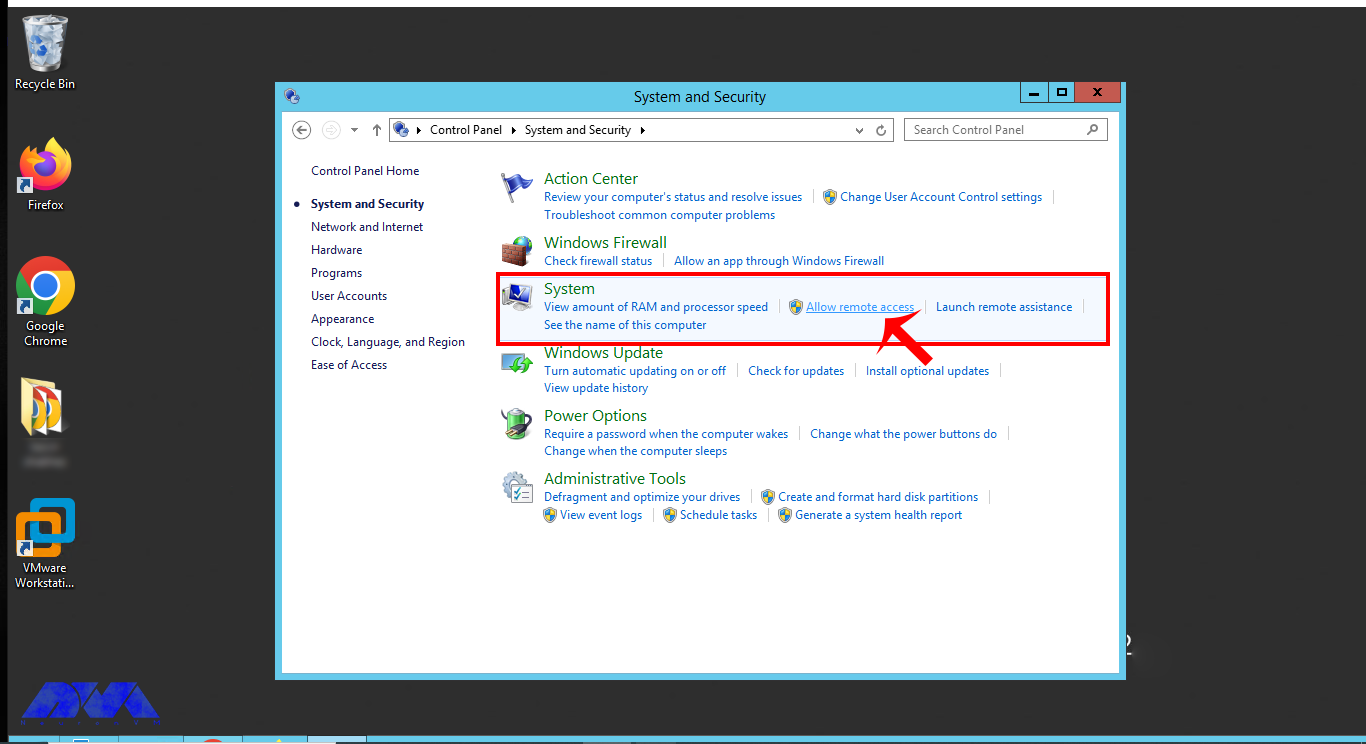
Now choose Allow Remote Access under the System option, This will enable remote access and then you can add Users:
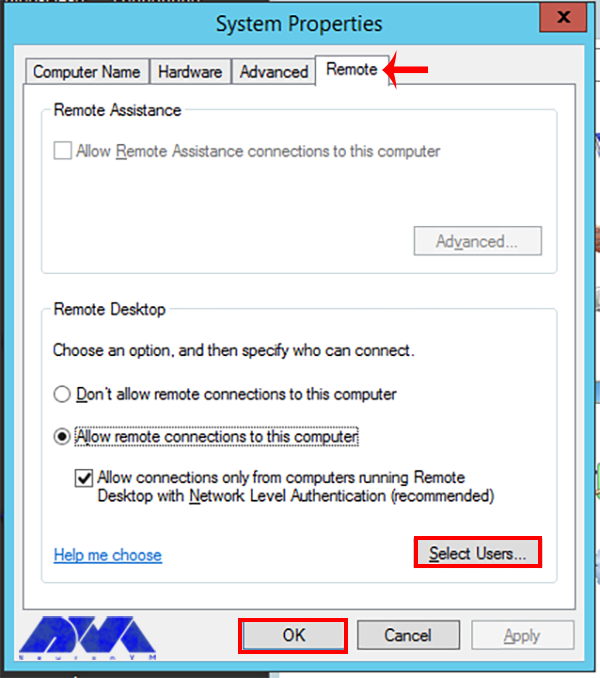
In the System Properties window, go to the Remote tab. You will find several options related to remote desktop settings here.
Now, under the Remote tab, select the option that says Allow remote connections to this computer. Make sure this option is checked:

Click the Select Users button. This will open the “Remote Desktop Users” window:
In the window, click the Add button:
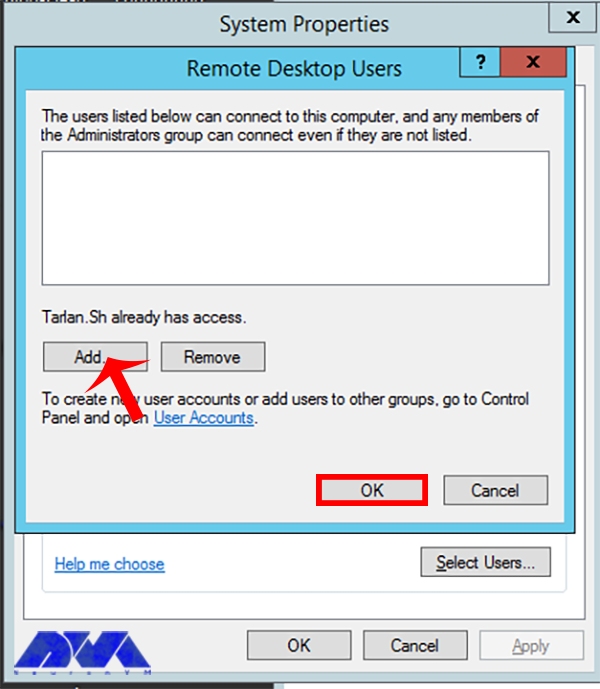
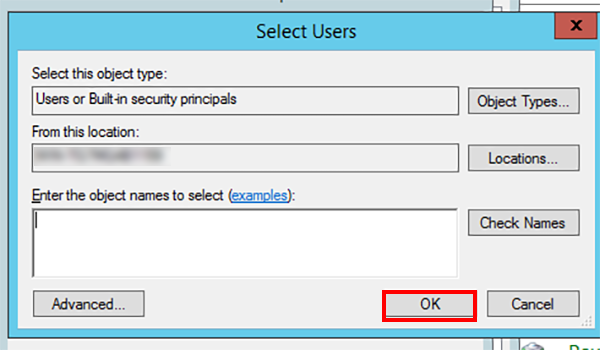
In the “Select Users or Groups” window, you can specify the users who should be allowed to connect remotely. You can add users by typing their names and then clicking Check Names to verify them. Once verified, click OK to add the user(s).
In the Remote Desktop Users window, you can also set the level of permissions for the added users. By default, they will have Remote Desktop Users permissions, which allow them to log in remotely.
If you want to grant administrative rights, you can add the user(s) to the Administrators group by clicking on the Advanced option:

***
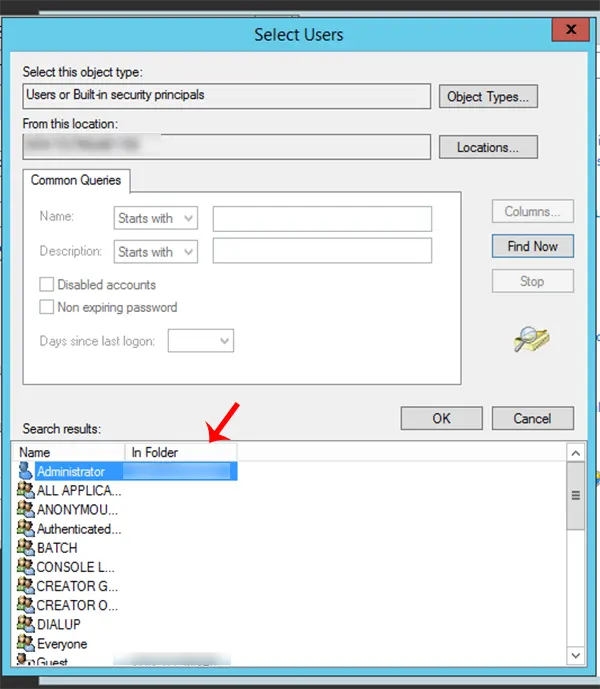
Click OK to close the window. and save the changes.
Sometimes, you may need to restart the computer for the changes to take effect.
That’s it!, the added users should be able to connect to the computer using Remote Desktop.
You may encounter some problems. Let’s analyze some of them and see what can be the related solution:
1- Users are not able to access the system remotely even after being added as remote desktop users.
Solution:
Ensure that the users are members of the “Remote Desktop Users” group. You can add users to this group through the Local Users and Groups management console.
2- Users cannot connect to the remote desktop because the firewall is blocking the RDP port.
Solution:
Open the necessary port (default is 3389) in the Windows Firewall to allow RDP traffic. Make sure any network-level firewalls (e.g., on a router or security software) also allow RDP traffic.
3- Users cannot connect because of network issues.
Solution:
Verify that both the local and remote systems have a stable internet connection. Check for any issues with routers, switches, or other network devices.
4- Remote Desktop service (Term Service) is not running.
Solution:
Start the “Remote Desktop Services” service. You can do this in the Services management console (services.msc) or through PowerShell.
After completing these steps, the specified user(s) should be able to connect to your computer using Remote Desktop. Make sure to also configure any necessary firewall or network settings to allow remote desktop connections if you haven’t already. As you see adding users is so simple and straightforward. We hope this article was useful for you.
How useful was this post?
Click on a star to rate it!
Average rating 0 / 5. Vote count: 0
No votes so far! Be the first to rate this post.
 Tags
Tags

Perfect Money is one of the most used and popular electronic payment methods worldwide. This service...


 Tags
Tags

Have you ever faced a situation where you want to use another system that is not yours but has your ...


 Tags
Tags
What is your opinion about this Blog?


