


In this tutorial, you will learn how to add a new DNS zone with WHM on the dedicated server. To explain this process with an example, we will assume that you have a DNS server with Cpanel permission. In order to be able to display your site on the internet, the only way is to setup the DNS server correctly. So you need to add a DNS zone for your address and run it in the right way.
DNS is the domain name system and it has the role of converting domain names into IP addresses. In this way, allows browsers to access internet resources and websites. IP addresses are actually like site identifiers and other devices can use them to find your system location.
– A Dedicated Server (We recommend you visit the Cheap Dedicated Server plans presented on our website and choose a plan.)
– Install cPanel on Dedicated Server
Buying Cpanel License is easy. Cpanel has a graphical interface and it is like you can manage your server even with little information as a beginner. Of course, you should have some knowledge to control and make changes to this control panel. Because, if you do not master what you are doing, then will disrupt the performance of your server.
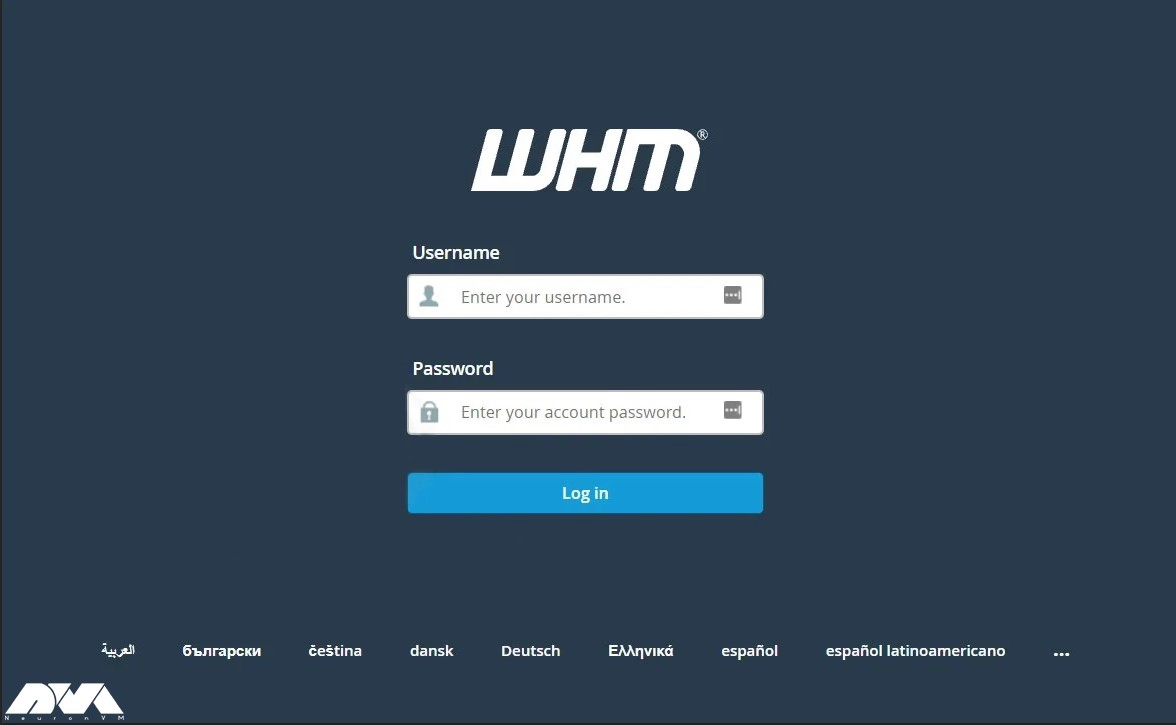
Actually, if you have a least Cpanel license, the process of adding a DNS zone is simple and easy. So as the first step, login WHM and follow the direction below:
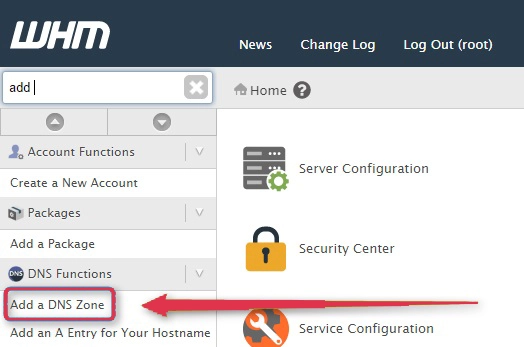
Go to the DNS functions > Add a DNS Zone
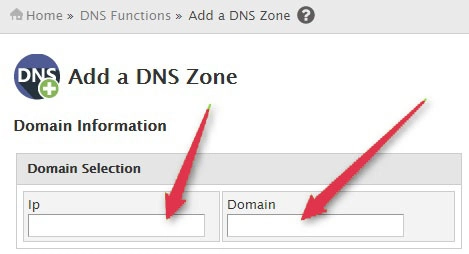
Then go through the following steps to add a new DNS zone:
1- You should go to the Domain selection part and as you see the IP field enter the IP address.
2- Now you see the domain field. Enter your domain name.
3- At last click the add zone Button, and add a new zone on your server.
In this way, again you should log in to WHM and find the Edit DNS Zone option:
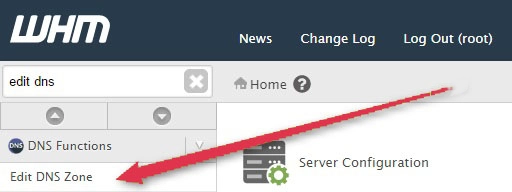
Here, you will see the Choose a zone to edit option. In the box, type the domain name of your DNS zone to edit and then click the Edit button to start:
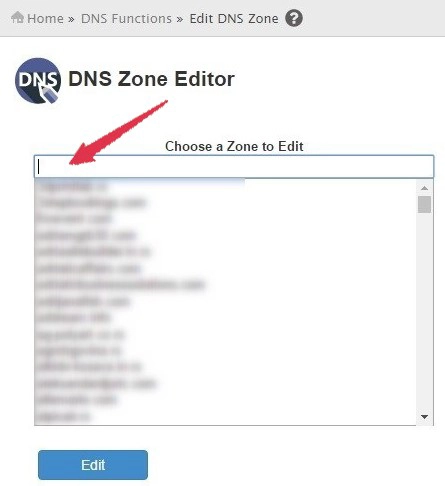
If you want to edit a zone, you should have basic information about your preferred parameters to change. The instructions to apply are from the developers, hosting, and internet service provider. This instruction is based on the model of replacing an entry with the new one.
For any DNS domain, NS and A records are critical. In this way, the nameservers are specific to the IP addresses that the DNS server responds to. Be careful not to change them randomly because if you make a mistake, your site will fail.
Here, we tried to show how you can add a DNS zone with WHM on dedicated server. We did this by using Cpanel. Keep in mind that, if you want to control and manage your WHM server, check to make sure the domain is pointing to your correct server IP.
These files are stored on the DNS server and are used by the authoritative name server to perform DNS lookups for the domain.
Of course. First, select a domain name from the choose zones to delete menu. Then click delete on the next interface to confirm that you wish to delete the selected zone
How useful was this post?
Click on a star to rate it!
Average rating 5 / 5. Vote count: 1
No votes so far! Be the first to rate this post.
 Tags
Tags

MySQL Shell is a powerful command-line tool that provides advanced functionality for managing and in...


 Tags
Tags

Plesk is a popular web hosting control panel that simplifies server management and allows you to eas...


 Tags
Tags
What is your opinion about this Blog?


