


Certainly, one of the important pillars of any network is having a monitoring system to check the structure of the network. Cacti is one of the free network monitoring software. If you want to compare the monitoring tools, Cacti is in a higher position in order to its open-source and availability of resources. If you follow this post until the end, you will learn how to Install and Configure Cacti on AlmaLinux 8 step by step.
Cacti make a connection to your devices using the SNMP protocol and analyze them during the interval. Cacti software is based on PHP/MySQL, which is basically installed on Linux Operating Systems and uses the RRDTool software to present its graphs. It should be noted that Cacti also allows you to provide a monitoring panel to your customers. In this software, you can specify which ports the subscriber will have access to after logging in. Cacti has made the monitoring process powerful by having a web-based management environment and various templates for different operating systems and devices.
– A Linux VPS Server with AlmaLinux OS
– Apache Webserver
– MariaDB Database Server
– PHP and PHP extensions
– SNMP and RRDTool
Follow us in the continuation of this article by teaching how to install and configure Cacti on Almalinux.
Cacti is a web-based tool, so you need to create an Apache web server on which to run Cacti. You can install the Apache web server by entering the following command:
sudo dnf install httpd -y
To start the Apache web server, execute the following command:
sudo systemctl start httpd
Now you should enter the following command to enable the Apache webserver:
sudo systemctl enable --now httpd
At this point, Cacti requires a database to store the collected data, which in this article uses the MariaDB database. To install the MariaDB database, execute the following command:
sudo dnf install -y mariadb-server mariadb
You should enter the following command to start the MariaDB database:
sudo systemctl start mariadb
Then you can use the following command to enable MariaDB to start on boot:
sudo systemctl enable mariadb
Since Cacti is written in PHP, PHP and PHP extensions should be installed. So use this command to add the Remi repository:
sudo dnf install dnf-utils http://rpms.remirepo.net/enterprise/remi-release-8.rpmmi
Then you should enable the DNF module for PHP installation by entering the following command:
sudo dnf module reset php
sudo dnf module enable php:remi-7.4
Now you can install PHP and PHP extensions by executing the following commands:
sudo dnf install @php
sudo dnf install -y php php-{mysqlnd,curl,gd,intl,pear,recode,ldap,xmlrpc,snmp,mbstring,gettext,gmp,json,xml,common}
Use the following command to enable the PHP-fpm service:
sudo systemctl enable --now php-fpm
In this step, you should install SNMP and RRDTool, which are needed to gather and analyze system metrics:
sudo dnf install -y net-snmp net-snmp-utils net-snmp-libs rrdtool
You can start it with the following command:
sudo systemctl start snmpd
Enter the following command to enable snmpd:
sudo systemctl enable snmpd
The next step is to create a database and user for the Cacti and then grant all the necessary privileges to the Cacti user. So, enter the following command:
mysql -u root -p

MariaDB [(none)]> CREATE DATABASE cactidb;
MariaDB [(none)]> GRANT ALL ON cactidb.* TO cacti_user@localhost IDENTIFIED  BY 'passwd123';
MariaDB [(none)]> FLUSH PRIVILEGES;
MariaDB [(none)]> EXIT;
Now you should import the mysql test data timezone.sql file into the MySQL database:
mysql -u root -p mysql < /usr/share/mariadb/mysql_test_data_timezone.sql
Now you should enter the following command to connect to the MySQL database and then provide the Cacti user access to the mysql.time zone name table:
MariaDB [(none)]> GRANT SELECT ON mysql.time_zone_name TO cacti_user@localhost;
MariaDB [(none)]> FLUSH PRIVILEGES;
MariaDB [(none)]> EXIT;
Then you should add the following configuration to the mariadb-server.cnf file under the [ mysqld ] section:
sudo vi /etc/my.cnf.d/mariadb-server.cnf
Remember to paste the following configuration.
collation-server=utf8mb4_unicode_ci
character-set-server=utf8mb4
max_heap_table_size=32M
tmp_table_size=32M
join_buffer_size=64M
# 25% Of Total System Memory
innodb_buffer_pool_size=1GB
# pool_size/128 for less than 1GB of memory
innodb_buffer_pool_instances=10
innodb_flush_log_at_timeout=3
innodb_read_io_threads=32
innodb_write_io_threads=16
innodb_io_capacity=5000
innodb_file_format=Barracuda
innodb_large_prefix=1
innodb_io_capacity_max=10000
You can exit after saving the changes.
Because the Cacti package is available in the EPEL (Extra Packages for Enterprise Linux) repository. First release it with the following command:
sudo dnf install epel-release -y
Now you can install the Cacti monitoring tool by executing the following command:
sudo dnf install cacti -y
Then you should verify the installation of Cacti with the following command:
rpm -qi cacti
Now to determine the default Cacti database path, execute the following command:
rpm -ql cacti | grep cacti.sql
Then you should import the default cacti database tables into the MariaDB cacti database using the following command:
mysql -u root -p cactidb < /usr/share/doc/cacti/cacti.sql
You should modify the cacti configuration file according to the following database details:
sudo vim /usr/share/cacti/include/config.php
Now you should change the database name, username, and password to reflect the name you have already created and then set the timezone in the php.ini file. Remember to change the following parameters:
date.timezone = Africa/Nairobi
memory_limit = 512M
max_execution_style = 60
At this point, you need to set the cron for Cacti. To do this, you should first edit the /etc/cron.d/cacti file:
sudo vim /etc/cron.d/cacti
To have a Cacti poll for data every 5 minutes, you can uncomment the following line:
*/5 * * * * apache /usr/bin/php /usr/share/cacti/poller.php > /dev/null 2>&1
After saving the changes, you can exit the configuration file.
Modifying the Apache configuration file enables remote access to Cacti. To do this, enter the following command:
sudo vim /etc/httpd/conf.d/cacti.conf
Now you should change the following lines in the file:
– Modify Require host localhost to require all grants.
– Change Allow from localhost to Allow from network subnet.
– Specify your network subnet.
To apply the changes, just restart the Apache and PHP-fpm services with the following command:
sudo systemctl restart httpd
sudo systemctl restart php-fpm
Finally, you need to enable HTTP service on your Firewall by executing the following command:
sudo firewall-cmd --permanent --add-service=http
sudo firewall-cmd --reload
First, you should visit your server’s IP with the following command:
http://server-ip/cacti
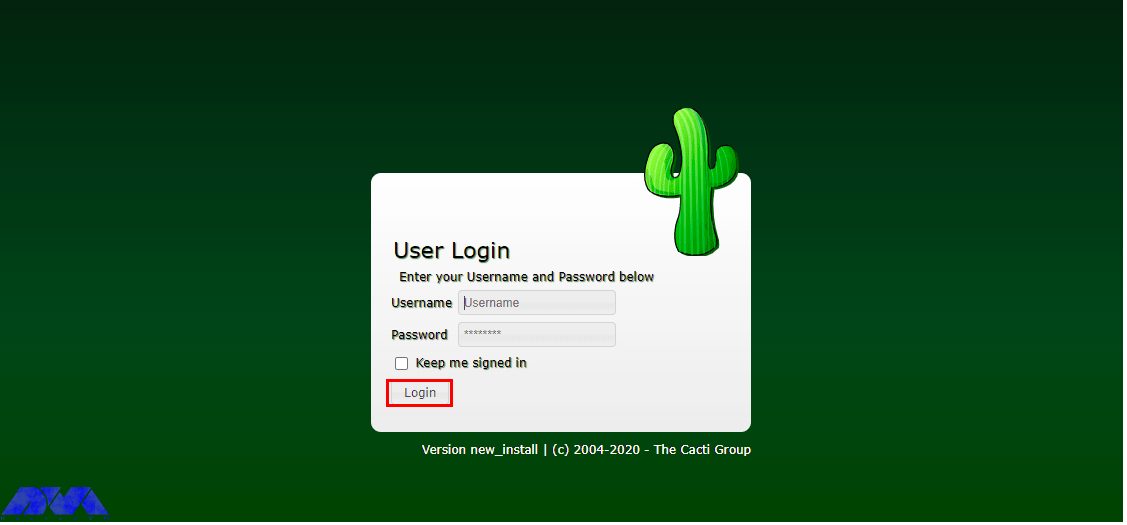
After viewing the login page, you should log in with the default credentials:
Username: admin
Password: admin
Then click on Login:
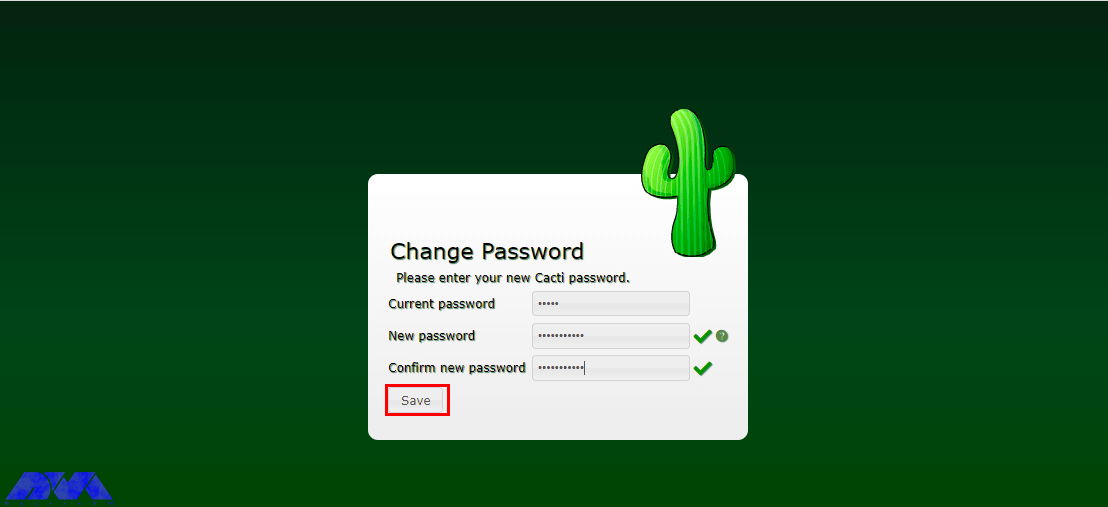
Now you need to set the default Cacti admin login password:
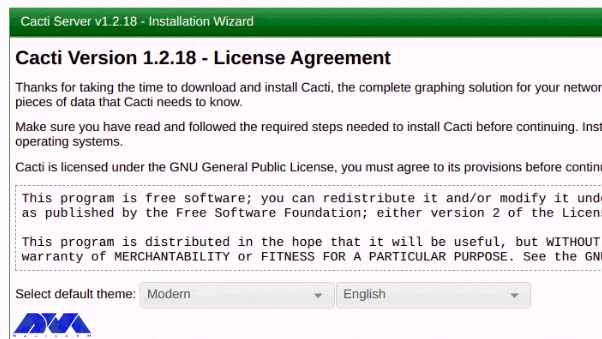
Next, you should accept the GPL license agreement and then click on Begin:
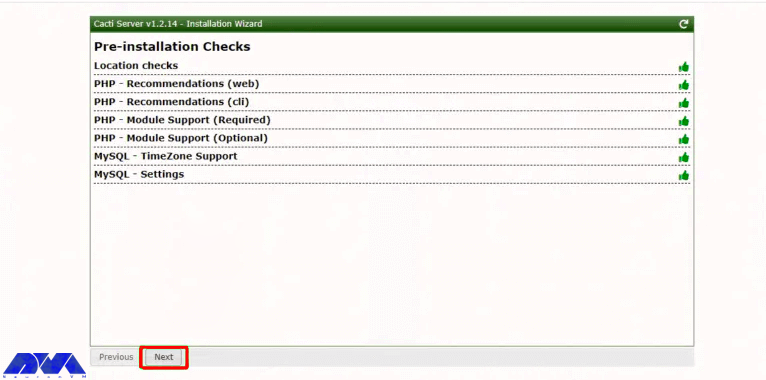
Cacti execute pre-installation tests to ensure that the necessary PHP modules and database settings are installed. Then, click Next to continue:
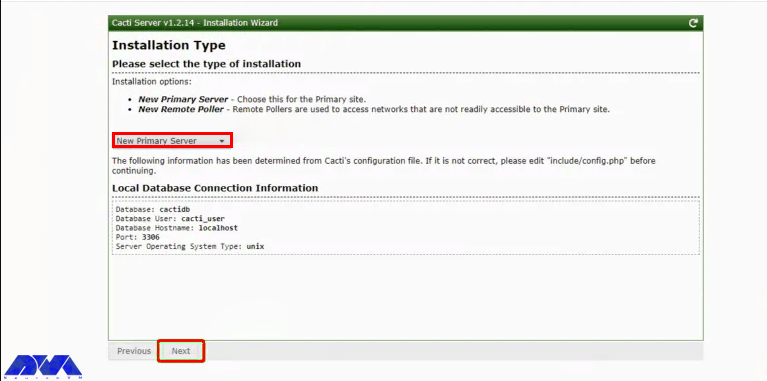
Now you should choose the New Primary Server as the type of installation and then verify the database connection parameters are right:
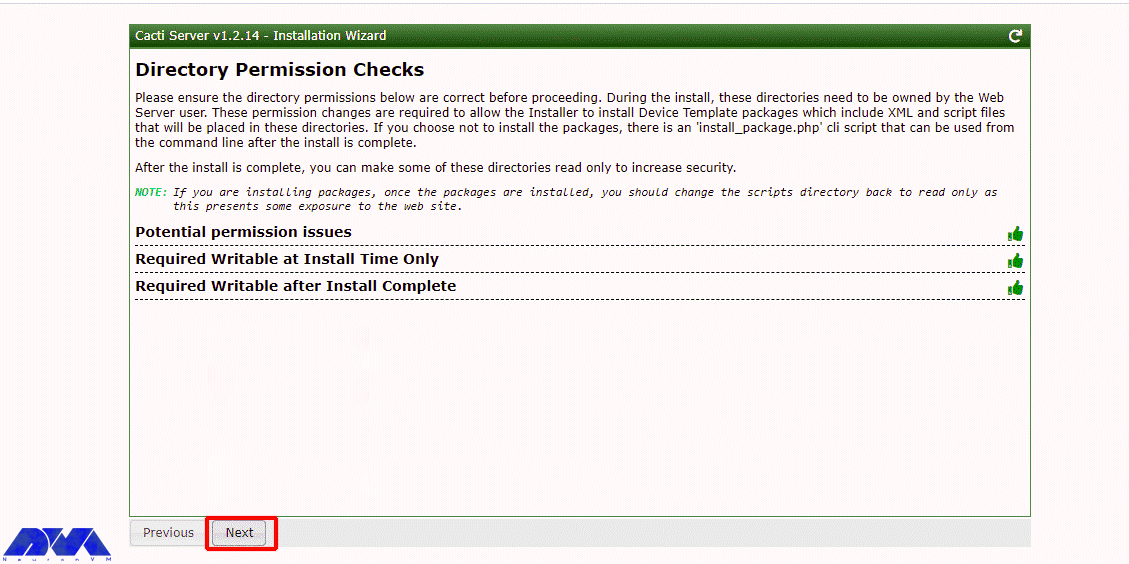
At this point, you can check for directory issues and confirm that there are proper permissions. Then click on Next; but if there is a problem you should click on Previous and correct the problems:
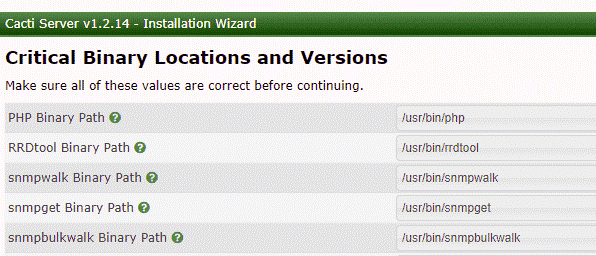
Then the installation of binary paths of the required packages is checked by the installer:
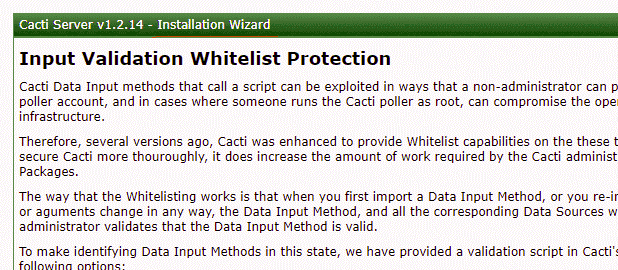
Now you should validate the data input methods and read the instructions; then check the ‘I have read this statement’ box:
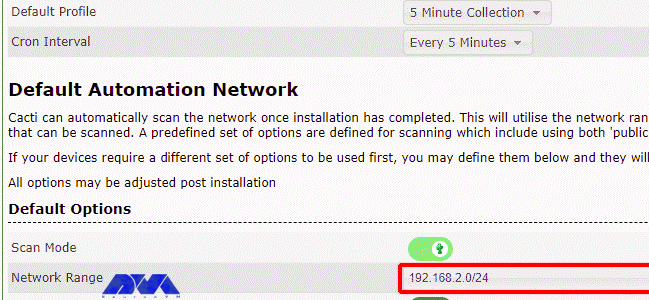
Next, you need to choose the cron interval and input your network subnet. Then click Next:
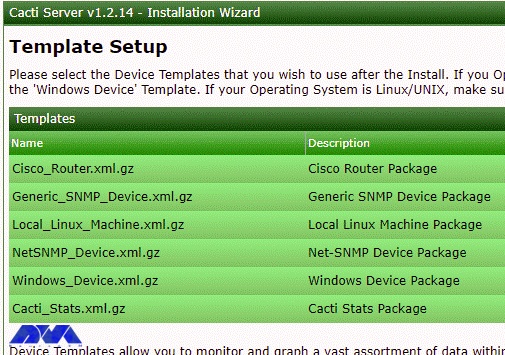
Cacti has templates with which you can monitor and graph a variety of network devices, including Linux and Windows computers. Check all the options to make sure you get all the templates you need. Then click on Next:
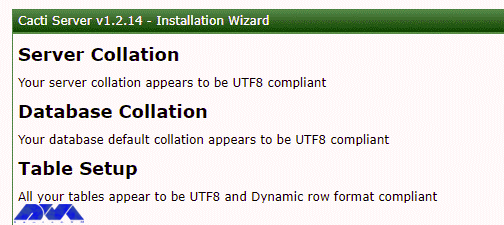
Now it is being checked whether the database/server collation is compatible with UTF8. Then click on Next:
Now you should click on the Confirm Installation checkbox and then click on the Install:

After completing the installation of the necessary packages, you can click on Get Started:

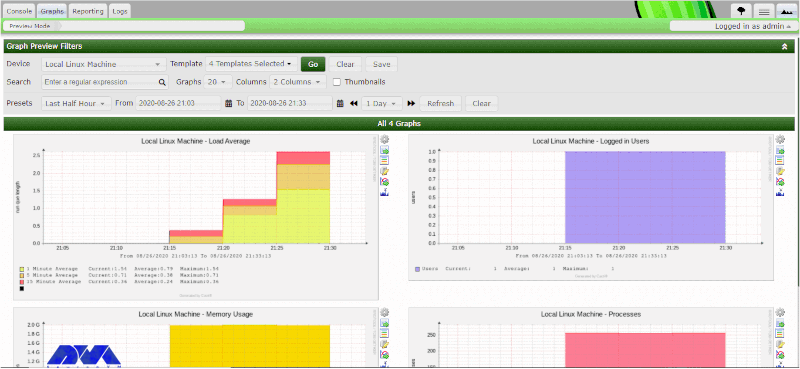
Finally, you can see the Cacti dashboard:
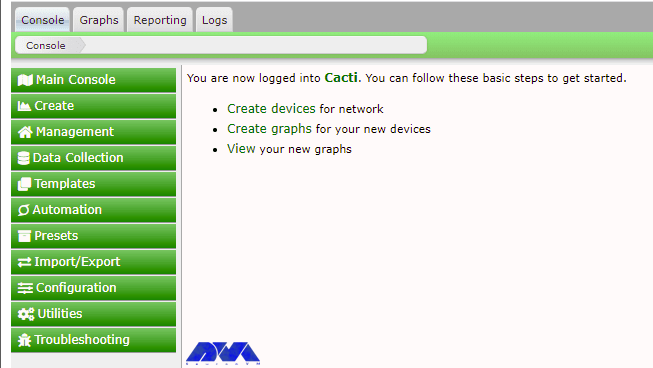
You can navigate through Graph –> Default Tree –> Local –> Choose Your Device to view the graphs:
This article introduced one of the best monitoring tools called Cacti. In the continuation of the article, we taught how to install and configure Cacti on AlmaLinux 8. If you want to install Cacti on your AlmaLinux system, you can get inspired by this tutorial.
Yes, you should setup device polling, configure graphs and you should define devices in cacti monitoring.
Yes, you can install it o various Linux distributions like CentOS, Rocky Linux, Ubuntu, and so on.
How useful was this post?
Click on a star to rate it!
Average rating 0 / 5. Vote count: 0
No votes so far! Be the first to rate this post.
 Tags
Tags

Docker is a free and open-source containerization tool that allows developers to package their appli...


 Tags
Tags

Ansible is known as a free, open-source automation tool that allows system administrators to configu...


 Tags
Tags
What is your opinion about this Blog?


