

Installing Wifi on an Ubuntu Server is a bit different from doing it on the desktop version, as the Ubuntu Server typically doesn’t come with a graphical user interface or Network Manager. You will have to configure your Wifi connection using the command line. In fact, Ubuntu Server is not much different from its desktop and is very powerful. But it works with a terminal with an interactive system. So, if you decide to configure a Wifi on an Ubuntu server, you have to use related commands. Here, we will give a step-by-step guide to Install Ubuntu server Wifi. Keep studing.
One of the advantages of using Ubuntu Server is that you can use it on a virtual machine, laptop, desktop, and even a dedicated server. Most importantly, we must say that this server is offered as an open-source and uses the minimum source of the server. You can even use Ubuntu Server on older systems.
Here we will show how to enable Wifi on Ubuntu which is one of the main actions. But before starting work, we recommend you to buy and use the Linux VPS server plans provided on our website depending on your needs.

In the first step, you need to get the name of your wireless interface. This is necessary to configure Wifi networks. To do this, you can use the ls command to list all your network interfaces:
ls -l /sys/class/net
In the case we are using, the name of the Wifi interface card is wlp0s20f3. Note that Wifi interface cards start with the letter w. Also, each system has its own name.
You can find the network configuration file in Ubuntu in the /etc/netplan directory, which is a YAML file. The default name chosen for it is 00-installer-config.yaml and it is generated by the subiquity server installer during the installation of the operating system.
Be sure to create a backup before making any changes to the configuration file. In general, this practice is recommended when working with Linux configuration files. As long as there is a problem with the file, you can easily restore it to the previous state:
sudo cp /etc/netplan/00-installer-config.yaml /etc/netplan/00-install-config.original.yaml
Now use your desired text editor and open the network configuration file. We have used Vim editor in our article. Note that you must have sudo privileges to modify the file:
sudo vim /etc/netplan/00-installer-config.yaml
Use the following format to replace the contents of the configuration file. Make sure to change the following details:
This is the network config written by 'subiquity'
network:
version: 2
wifis:
wlp0s20f3:
access-points:
Mywifi1:
password: G4XJdbuBVsQeq6Rz
Mywifi2:
password: uRK46vdoA76iCNBY
dhcp4: true
Tip: The YAML format is subject to indentation rules, so you must follow them as well. In other words, use two spaces for indentation.
After changing the above, save them and close the file.
The changes you made have not been saved yet, so you have to do it explicitly using the Netplan tool.
You can execute the command below to apply your changes:
sudo netplan apply
Another way is to reboot your system and as soon as you boot your system, the changes will be applied automatically.
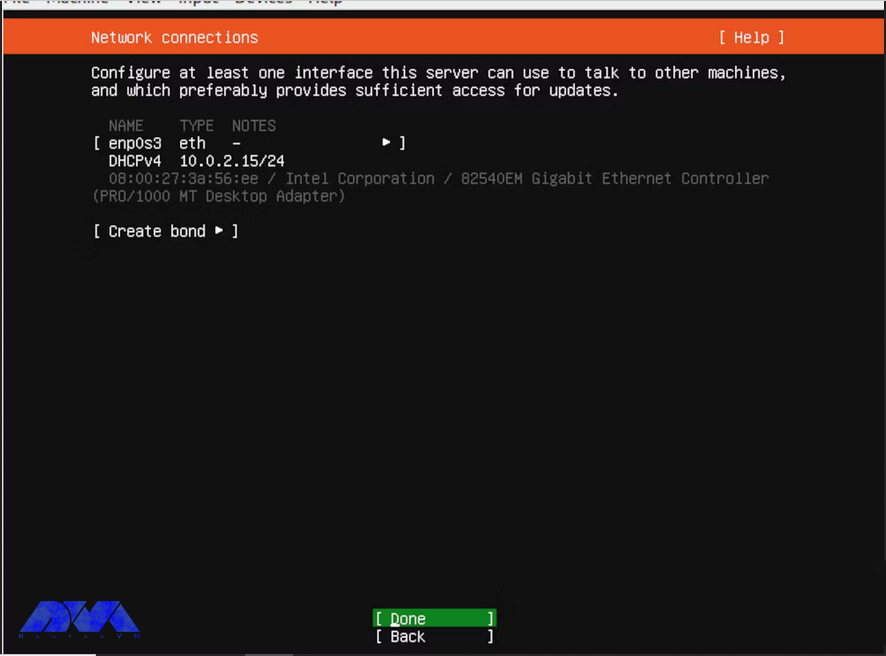
Another convenient way to configure Wifi is through the Netplan configuration file, which is done during server installation.
In this method, when you reach the network connection page during installation, click on the Create Bond button and follow the steps below to configure the Wifi interface.

That’s it! Using these two methods, you can have a Wifi connection on your Ubuntu server.
Here are some common issues and their solutions:
1- If Ubuntu Server doesn’t detect your WiFi hardware, it may not have the necessary drivers.
Solution:
2- WiFi hardware may be present, but it’s not enabled.
Solution:
Use rfkill command to check if Wifi is soft or hard blocked. If it’s soft-blocked, you can use rfkill unblock Wifi to unblock it.
3- Your WiFi adapter may not be recognized.
Solution:
4- Outdated software can sometimes cause WiFi issues.
Solution:
Regularly update and upgrade your system using apt to ensure you have the latest drivers and software.
By reading this article, you can connect to your Wifi network on the Ubuntu server. Please note that the exact steps may vary depending on your version of Ubuntu and the specific Wifi hardware you have, so adapt these instructions as needed. Connecting Wifi on the Ubuntu server is straightforward. If you have any ideas or questions about this issue please share.
How useful was this post?
Click on a star to rate it!
Average rating 1 / 5. Vote count: 1
No votes so far! Be the first to rate this post.

The Java Programming Language was developed on May 23, 1995, by James Gosling. It has been the world...


 Tags
Tags

This article will teach you How to Install Apache OpenOffice on Ubuntu 20.04. Apache OpenOffice is m...


 Tags
Tags
What is your opinion about this Blog?


