

Most likely, you are already familiar with the node.js platform. This platform is provided as an open-source and asynchronous backend JavaScript runtime and is in JavaScript language. One of its features is non-blocking I/O, which has turned node.js into a convenient, powerful, and high-speed environment. This article proposes to teach you the best solution to install Node.js on Linux Mint.
In the introduction, you got acquainted with one of the prominent features of node.js. Now, we want to introduce you to other features of this platform:
– Node.js library is in high-speed in code execution
– It is asynchronous and event-driven
– No buffering
– It is highly scalable but single Threaded
– It is released under the MIT license
Before starting the Install Node.js on Linux Mint training, we recommend you choose and buy the Linux VPS Server plans provided on our website and enjoy its high quality. In this part, you will learn how to install Node.js step-by-step.
You should start the installation process by updating the system repository. Use the command below:
sudo apt update
Now you should install all the dependencies as it is necessary before the installation. Run the following command for this reason:
sudo apt install software-properties-common apt-transport-https ca-certificates gnupg2 curl build-essential
Next, After installing dependencies, you should get the non-source repository in your system by the command below:
curl -sL https://deb.nodesource.com/setup_18.x | sudo -E bash -
Now that you successfully set the node.js source repository, you are ready to install the program on Linux Mint:
sudo apt install nodejs
If you want to check the status and verify the installed version, apply the command below:
node --version
Well done! Now, you can enjoy using this platform.
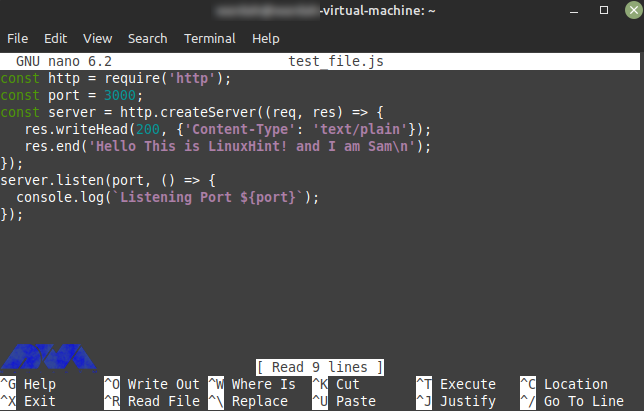
Use a nano editor or any editor you desire to create a simple JavaScript file and type a simple program:
nano test_file.js
The output should be like this:

You should save this program in your editor, and if you want to see the output, open any browser. To do this, execute the following command.
Note that the local port to run a web server is 3000.
node test_file.js
The image below shows the way to verify the installation of Node.js. Type the port in the browser:

If you don’t need Node.js anymore and you want to remove it from your system, use the mentioned command below in the terminal:
sudo apt remove nodejs
Here, you learned how to install Node.js on Linux Mint with an easy method. We also tried to show the way to test the program with an editor and the way to remove Node.js if you don’t need it. Install and enjoy using this Java program. If you need any help, please let us know by leaving a comment.
Ubuntu or Linux Mint are the best matches for Node.js, especially if you are a beginner.
A minimum of 50-100 MB of free disk space and 512 MB RAM is needed to use this program but 1 GB is recommended.
How useful was this post?
Click on a star to rate it!
Average rating 5 / 5. Vote count: 1
No votes so far! Be the first to rate this post.
 Tags
Tags

Kubernetes is a cutting-edge open-source platform for orchestrating containers. It effectively strea...


 Tags
Tags

AlmaLinux, a community-driven fork of the CentOS Linux distribution, has rapidly gained popularity a...


 Tags
Tags
What is your opinion about this Blog?


