

SteamCMD is a command-line tool developed by Valve. This tool is used to download, update, and manage dedicated servers for various games available on the Steam platform. By installing SteamCMD on your VPS, you can easily set up and maintain dedicated game servers for your favorite multiplayer games. This article will take you through the step-by-step process of installing SteamCMD on your VPS. If you are planning to buy VPS, we have an attractive offer for you. You can visit our website to see the various VPS server plans that are offered in various locations and after choosing the plan you want, buy and enjoy it.
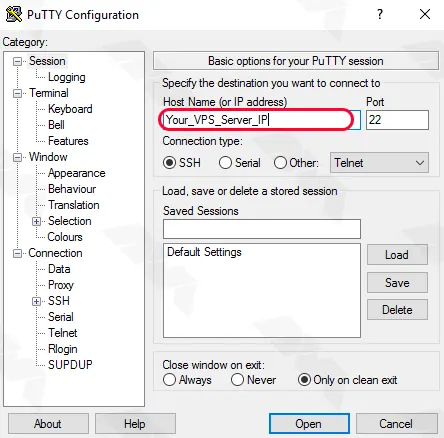
Before proceeding with the installation, make sure you have SSH (Secure Shell) access to your VPS. You can use an SSH client like PuTTY (for Windows) or OpenSSH (for Linux) to establish a secure connection to your VPS:

Once connected to your VPS, it is essential to update the system packages to ensure you have the latest versions installed. Run the following commands to update the packages on your VPS:
For Ubuntu/Debian-based systems:
sudo apt update
sudo apt upgrade
For CentOS/RHEL-based systems:
sudo yum update
sudo yum upgrade
SteamCMD requires a few dependencies to be installed on your VPS before its installation. Use the appropriate commands for your system:
Ubuntu/Debian-based systems:
sudo apt install lib32gcc1 lib32stdc++6 libtcmalloc-minimal4
CentOS/RHEL-based systems:
sudo yum install glibc libstdc++ glibc.i686 libstdc++.i686 libcurl
Now, let’s proceed with the installation of SteamCMD on your VPS. Follow the steps below:
– Create a new directory where you want to install SteamCMD. For example:
mkdir steamcmd
cd steamcmd
– Download the SteamCMD installation package using the following command:
wget https://steamcdn-a.akamaihd.net/client/installer/steamcmd_linux.tar.gz
– Extract the downloaded package using the following command:
tar -xvzf steamcmd_linux.tar.gz
– Run SteamCMD for the first time. This step will download and install additional necessary files:
./steamcmd.sh
1) Verify prerequisites: SteamCMD requires certain dependencies to be installed on your VPS. Make sure you have the required packages, such as lib32gcc1, libc6, lib32stdc++6, lib32z1, and lib32z1-dev installed. You can install them using the package manager specific to your server’s operating system.
2) Check SteamCMD documentation and forums: SteamCMD has an official wiki and a community forum that can be valuable resources for troubleshooting. Search for the error message you encountered to see if it has been discussed before. Browse through the documentation to ensure you are following the correct installation steps.
3) Try alternative installation methods: If the error persists, consider using alternative methods to install SteamCMD. For example, you can try downloading the SteamCMD package manually from the official website and manually installing it on your VPS.
By following this guide, you have successfully installed SteamCMD on your VPS. You can now use SteamCMD to easily download, update, and manage dedicated game servers for a wide range of multiplayer games available on the Steam platform. Enjoy hosting your own game servers with SteamCMD!
How useful was this post?
Click on a star to rate it!
Average rating 3.2 / 5. Vote count: 17
No votes so far! Be the first to rate this post.
 Tags
Tags

In today's digital age, the demand for reliable and affordable administrative Remote Desktop Pr...


 Tags
Tags

RDP Admin is a great service and helpful feature that can bring many features. Fortunately, there ar...


 Tags
Tags
What is your opinion about this Blog?


