


Photoshop is one of the most popular graphic software that is used to edit, reconstruct, and make changes to images within spaces and different color models such as RGB, CMYK, black and white, and so on. This software can run on Windows, Mac, and Linux operating systems through interface software. Activating and installing Photoshop is done in several ways for each of these operating systems. Photoshop software is a graphic software product of Adobe. The features, speed and AI of Photoshop have been greatly improved in the new versions. We will examine this perfect app and teach you how to install Photoshop on Admin RDP.
To install Photoshop on an Admin RDP, the following requirements are recommended:
– Processor: Intel Core i5 or higher
– RAM: 8GB or more
– Storage: At least 10GB of free disk space for installation and additional space for files.
– Graphics card: NVIDIA GeForce GTX 1050 or higher with at least 2GB of VRAM.
If you want to buy Admin RDP Server, we suggest you to test and use different plans with different locations that are presented on our website.
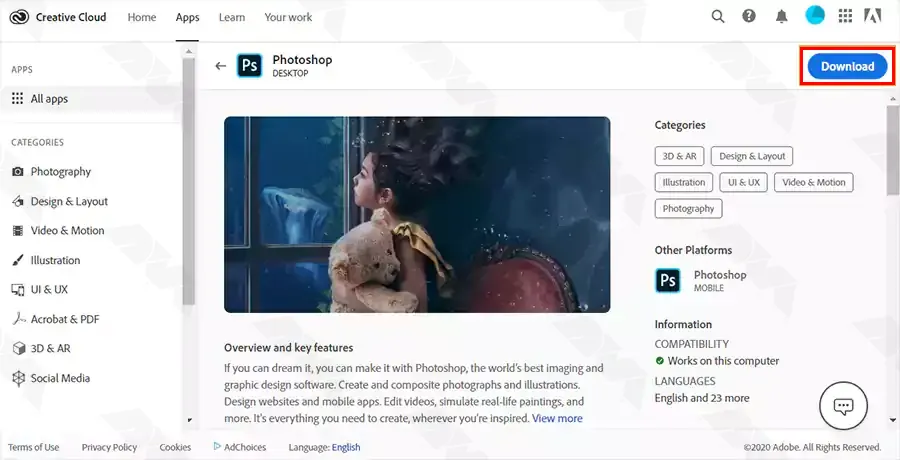
At first, You must log in to your Creative Cloud account, but if you do not have one, sign up.
After logging in to your account, now you can download the Photoshop program from the Creative Cloud website. Just click Download.
Tip: First you have to buy Photoshop, then download it.
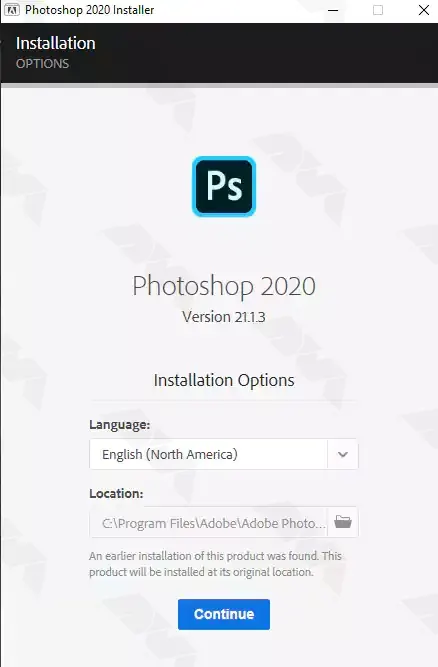
Now you have to double-click on the downloaded file to start the installation progress.
At this point, just follow the onscreen instructions to complete the installation of Photoshop. So in the window that opens, select the language you want and click Continue:
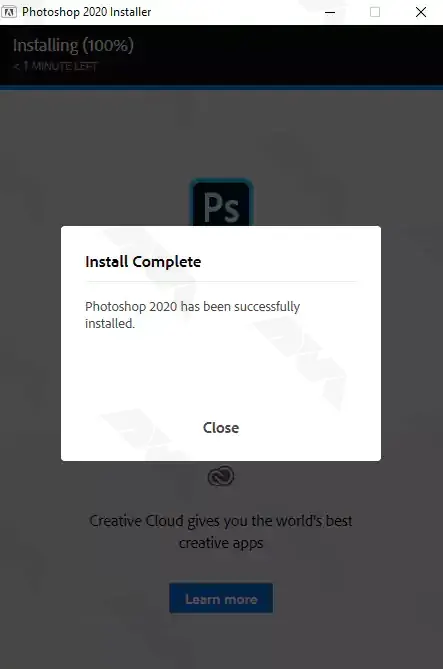
Wait a few moments for Photoshop to finish. Finally, click Close:
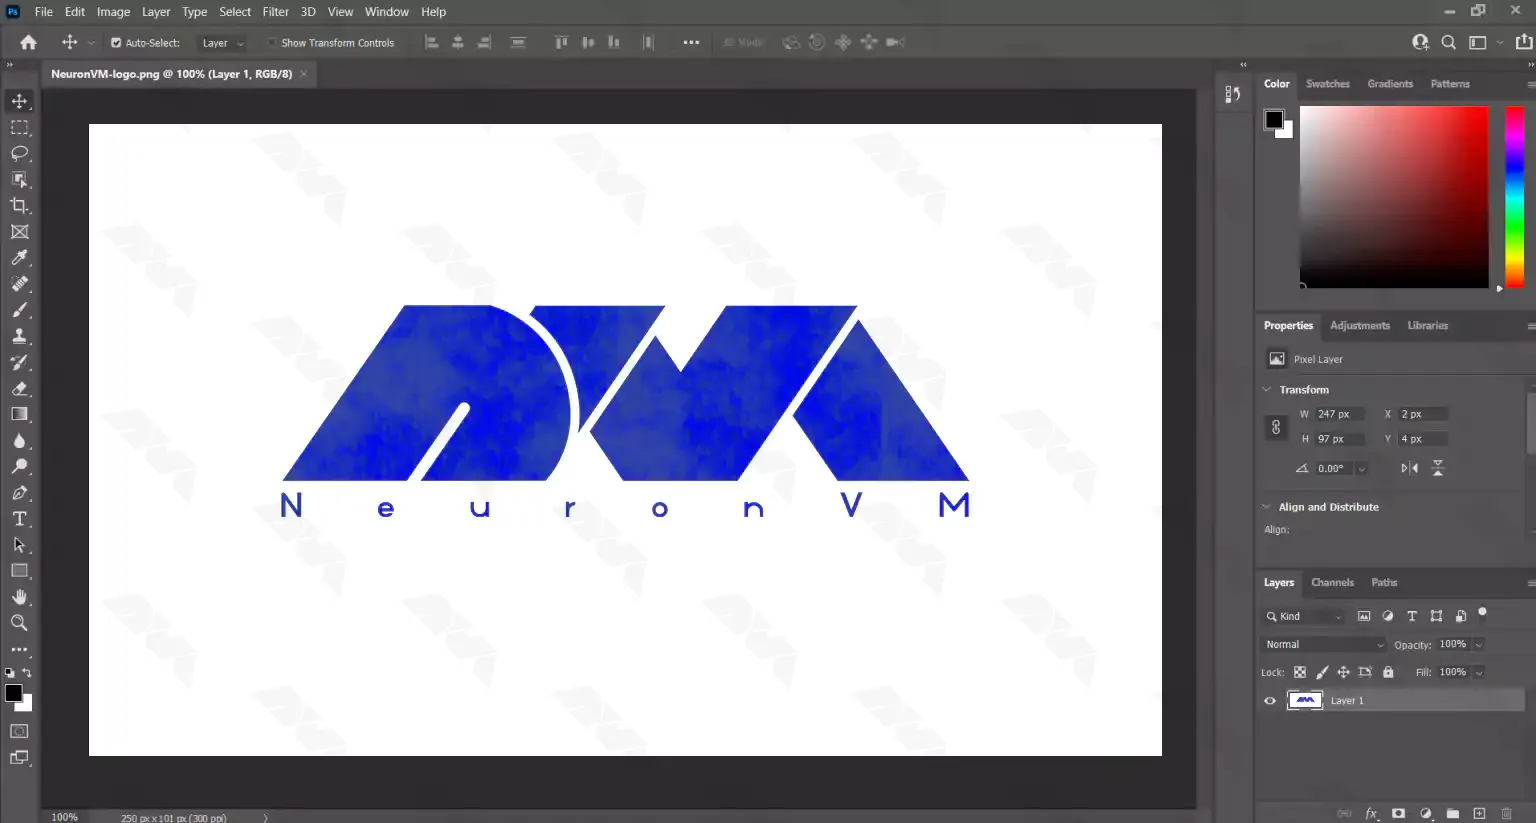
After installing Photoshop, you can run it by clicking on its icon on the desktop or the Start menu. In the image below, you can see the Photoshop environment:
If you are encountering issues while trying to install Photoshop on admin RDP session, there are a few troubleshooting steps you can try:
1) Administrative privileges: Make sure you have administrative privileges on the RDP session. To do this, right-click on the installer file and select “Run as administrator.”
2) Antivirus software: Temporarily disable any antivirus or security software running on the RDP session. Some security applications may interfere with the installation process. Remember to re-enable the antivirus software after installation.
3) Compatibility mode: Right-click on the installer file and select “Properties.” Under the “Compatibility” tab, enable the option to run the program in compatibility mode. Choose a previous version of Windows that you know is compatible with Photoshop.
If you Install Photoshop on Admin RDP, it provides the convenience of accessing and using the software remotely. By following this comprehensive guide, you can successfully install Photoshop on an Admin RDP by setting up the remote desktop connection, downloading and installing the Adobe Creative Cloud application, and then installing and activating Photoshop itself. With Photoshop readily available on your Admin RDP, you can now enjoy all its features and functionalities from anywhere with an internet connection.
How useful was this post?
Click on a star to rate it!
Average rating 3.3 / 5. Vote count: 6
No votes so far! Be the first to rate this post.

Apache is a popular open-source web server software that is widely used to host websites and applica...


 Tags
Tags
The "Kernel Security Check Failure" error is a critical issue that can occur on Windows op...


 Tags
Tags
What is your opinion about this Blog?


