

Mattermost is an open-source platform for software development and engineering that provides secure cross-team communication and easy collaboration between individuals and groups. We are going to teach you How to Install Mattermost on Debian 11.
1- It has an expandable and very safe design.
2- It is adjustable, and this platform runs on Windows, Android, Linux, and Mac operating systems.
3- It makes the deployment of applications very easy and makes collaboration between teams and tools
4- very efficient, such as chat meetings, voice calls, etc.
5- A single interface can connect to multiple servers through playbooks.
– A Linux VPS with Debian (10/11) OS
– Database-server
– Mattermost-server
– Non-root user with sudo privileges
First, before starting the installation, update your packages before installing with the help of the command:
sudo apt update -y
sudo apt upgrade -y
Then after the update, restart it using the following command:
sudo reboot
Now download the MySQL APT repository package from the official MySQL website using the following command:
sudo apt install wget -y
wget https://dev.mysql.com/get/mysql-apt-config_0.8.20-1_all.deb
Then install the downloaded package using the given command:
sudo apt install ./mysql-apt-config_0.8.20-1_all.deb
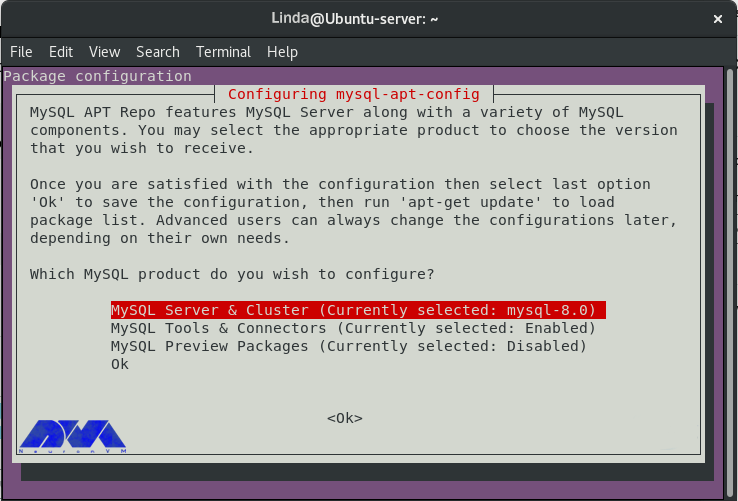
In this step, the desired command will ask you to make your choice and then press OK. as shown below:

Now to continue, run the following command to update the repository list:
sudo apt update -y
Then, in this step, install the MySQL server with the help of the given command:
sudo apt install mysql-server
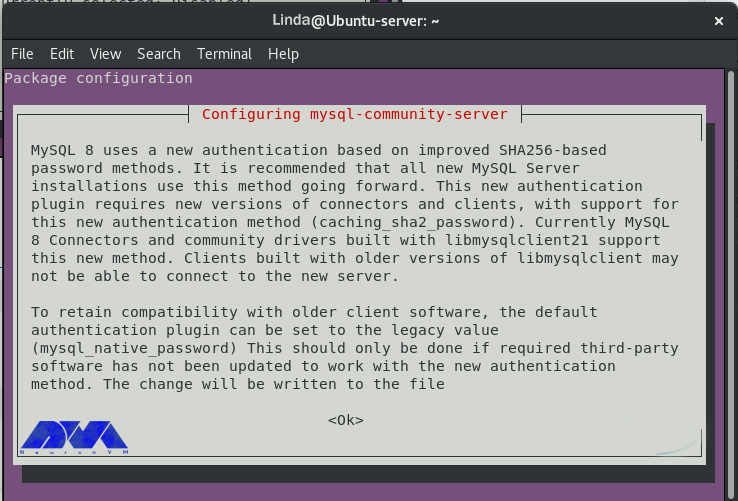
You will also be asked to agree to some commands when the installation starts, as the image below:

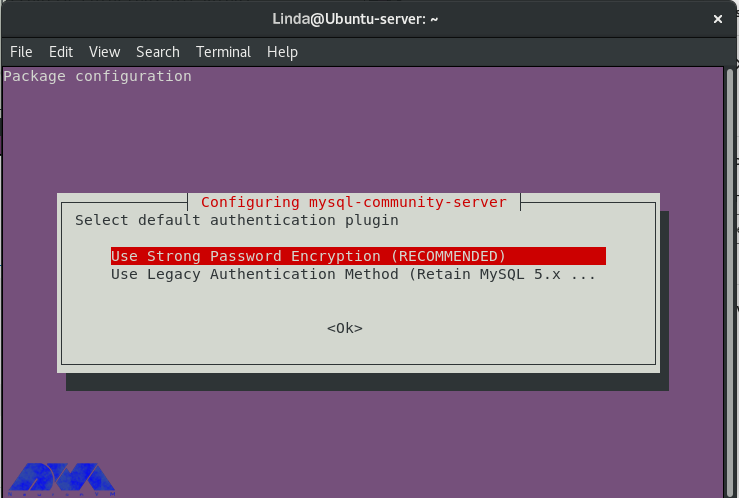
You will now be asked to select an authentication plugin, select the highlighted option and click OK. As you can see in the picture:

Now, at this stage, after the installation is complete, log in to MySQL as the root user using the following commands. Then Enter the password:
mysql -u root -p
Here, after logging in, create the Mattermost user ‘Linda’ using the following command:
mysql> create user 'Linda'@'%' identified by 'P@ssw0rd';
Then create the Mattermost database using the following command and grant all privileges to the user:
mysql> create database mattermost;
mysql> grant all privileges on mattermost.* to 'Linda'@'%';
Now exit MySQL by running the command below:
mysql> QUIT
Bye
Now install Mattermost Server on Debian 11 (the latest version of Mattermost Server) using the below command after configuring MySQL. The latest version in this tutorial is version 6.2.1:
wget https://releases.mattermost.com/6.2.1/mattermost-6.2.1-linux-amd64.tar.gz
Now extract the tarball using the command:
tar -xvzf mattermost*.gz
Then move the extracted file to the /opt/ folder using the command given below:
sudo mv mattermost /opt
At this stage, using the command, create a directory to store all Mattermost files:
sudo mkdir /opt/mattermost/data
Then setup a system user and group called Mattermost here to run the service with its own ownership and permissions:
sudo useradd --system --user-group mattermost
sudo chown -R mattermost:mattermost /opt/mattermost
sudo chmod -R g+w /opt/mattermost
At this point, now configure the database driver in the /opt/mattermost/config/config.json file. Using the text editor of your choice, open the file and make the following changes to SQL Settings, since we are using MySQL in this tutorial:
sudo vim /opt/mattermost/config/config.json
In this step, set DriverName and DataSource in SQL Settings:
Driver's name
Data source
Consider the example given below:
"SqlSettings": {
"DriverName": "mysql",
"DataSource": "Linda:P@ssw0rd@tcp(127.0.0.1:3306)/mattermost?charset=utf8mb4,utf8&writeTimeout=30s",
"DataSourceReplicas": [],
"DataSourceSearchReplicas": [],
"MaxIdleConns": 20,
"ConnMaxLifetimeMilliseconds": 3600000,
"ConnMaxIdleTimeMilliseconds": 300000,
"MaxOpenConns": 300,
"Trace": false,
"AtRestEncryptKey": "",
"QueryTimeout": 30,
"DisableDatabaseSearch": false,
"ReplicaLagSettings": []
},
Then you will see the output below:

At this point, test the Mattermost server with the following command to make sure everything is working properly, then change to the Mattermost directory:
cd /opt/mattermost
Now start the Mattermost server as the Mattermost user using the following command:
sudo -u mattermost bin/mattermost
Now Mattermost server is listening on port 8065 which is the default port then press Ctrl+C to stop the service.
Now in this step, we start systemd service to start and stop the Mattermost service, also you need to press CTRL+C to cancel. First, Run the following command to create the systemd unit file:
sudo vim /etc/systemd/system/mattermost.service
Then paste the code and change it if necessary using the following command:
[Unit]
Description=Mattermost
After=network.target
After=mysql.service
BindsTo=mysql.service

[Service]
Type=notify
ExecStart=/opt/mattermost/bin/mattermost
TimeoutStartSec=3600
KillMode=mixed
Restart=always
RestartSec=10
WorkingDirectory=/opt/mattermost
User=mattermost
Group=mattermost
LimitNOFILE=49152

[Install]
WantedBy=multi-user.target
Now load the systemd new unit using the following command:
sudo systemctl daemon-reload
At this stage, start and activate Mattermost with the help of the service command so that it is available at boot time:
sudo systemctl start mattermost.service
sudo systemctl enable mattermost.service
Then check the status of the service to make sure it is loaded as follows:
sudo systemctl status mattermost.service
Now the systemd service is currently running and uses the command to allow port 8065 through the firewall as it is the default port. This is valid if ufw is enabled:
sudo ufw allow 8065
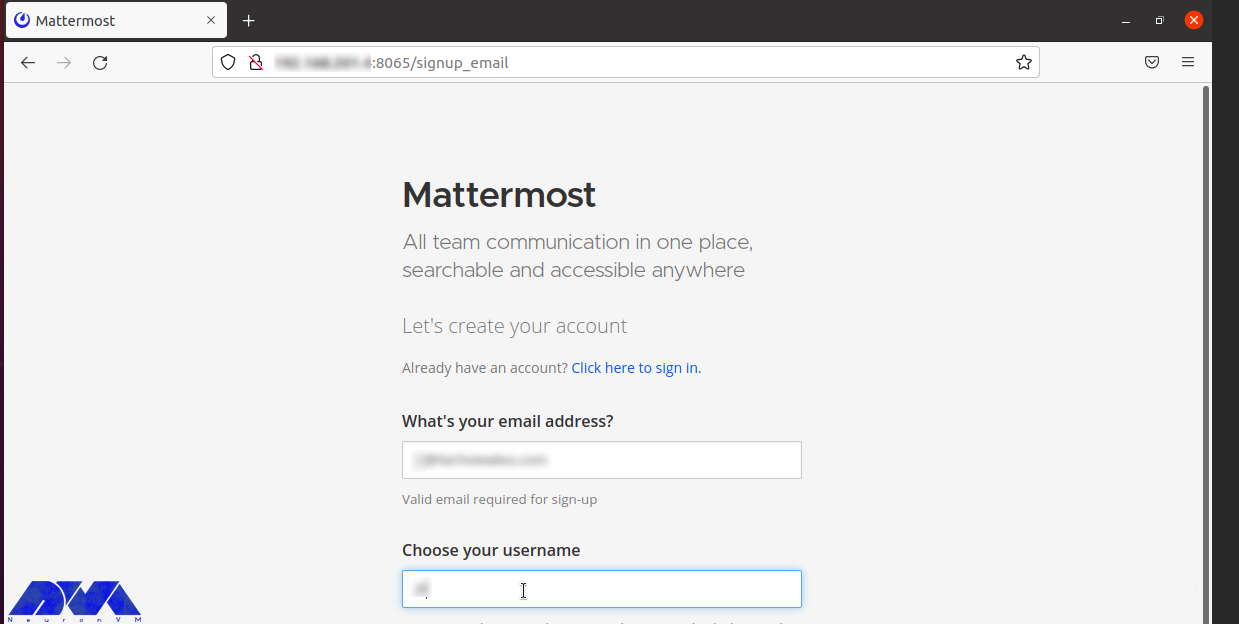
At this point, use http://your_IP_address:8065 to access the Mattermost Server web interface, then continue the configuration steps and start using the Mattermost Server:

Next, choose to Create a team or go directly to the admin console as shown:

Currently, the system console is as follows:

By following the mentioned steps in order, you can easily launch Mattermost successfully in your browser. This tutorial is prepared to show you how to Install Mattermost on Debian 11. After creating your account, the next steps are simple. We hope this educational article was useful for you. Share your comments with us through the form below.
Mattermost is supported on various versions of Debian, including Debian 9 (Stretch), Debian 10 (Buster), and Debian 11 (Bullseye).
A minimum of 4GB of RAM, 2 CPU cores, and 20GB of available disk space.
How useful was this post?
Click on a star to rate it!
Average rating 0 / 5. Vote count: 0
No votes so far! Be the first to rate this post.
 Tags
Tags

In continuation of our tutorials, In this guide, you will learn how to easily install an FTP server ...


 Tags
Tags

Choosing the right Linux distribution can be overwhelming for many users with the vast array of opti...


 Tags
Tags
What is your opinion about this Blog?


