


Helm is a powerful package manager for Kubernetes, allowing users to easily manage and deploy applications. In this guide, we will walk you through the process of how to install Helm on Windows 10. Whether you are a developer, a system administrator, or simply interested in exploring Kubernetes, this guide will provide you with step-by-step instructions to get started with Helm.
Prerequisites
Before Install Helm on Windows 10, make sure your Windows 10 system meets the following requirements:
– A WindowsVPS or a computer running Windows 10 (64-bit version preferred)
– At least 4GB of RAM (8GB or more recommended)
– Adequate disk space (minimum 40GB)
– An active internet connection
Note: If you want to set up and run Helm on a Windows VPS server, we suggest you use the plans provided on our website, which offer a large variety of locations and immediate delivery.
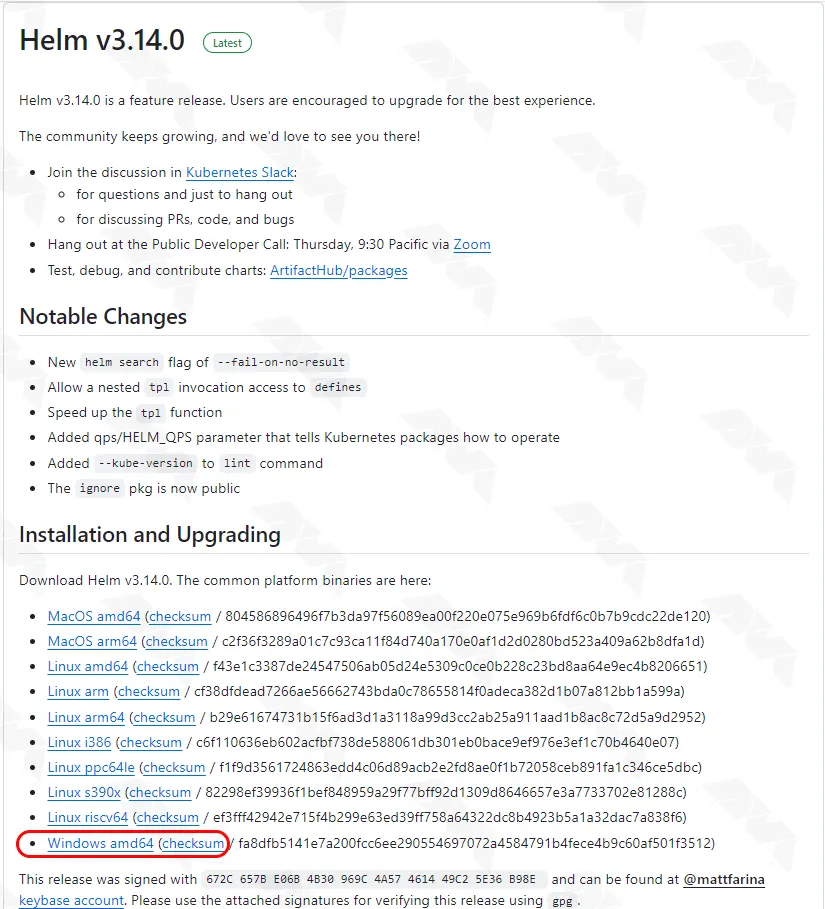
To download Helm on Windows 10, just visit the GitHub website. Then click on the Windows amd64 link as shown in the image below to download the file:
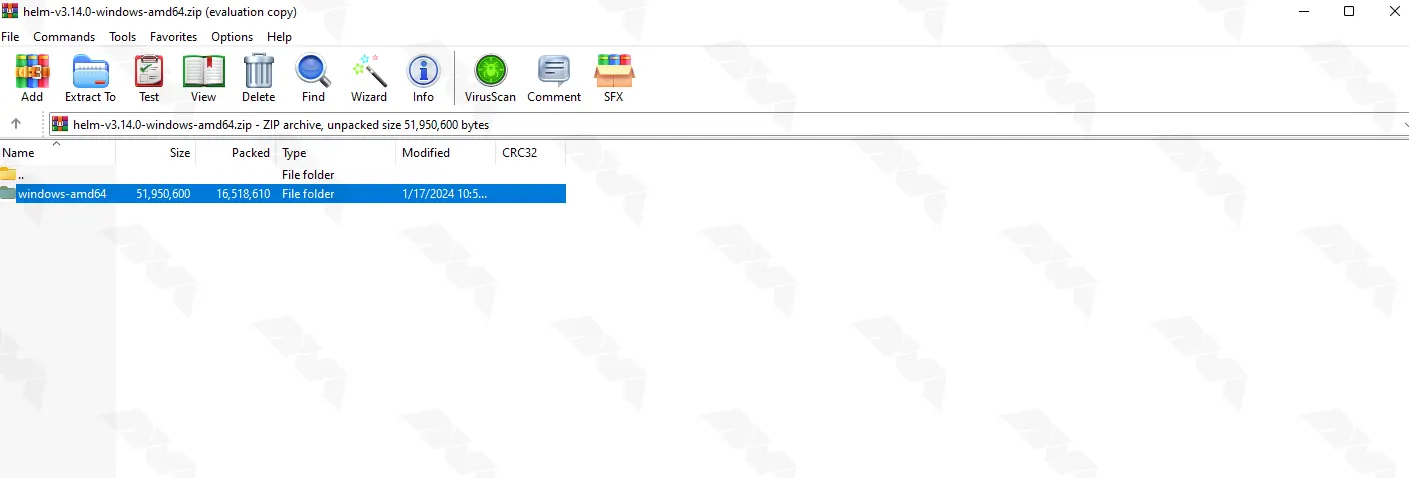
After you download Helm you need to extract the windows-amd64 zip file. You can extract this file in the desired location:
An important thing to note is that for the Helm binary to run properly, it needs to be added to the Path environment variable. Please follow the steps below.
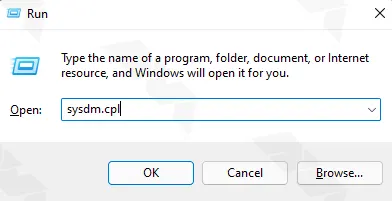
Search and open the Run window from the start menu. Then type sysdm.cpl and click OK:
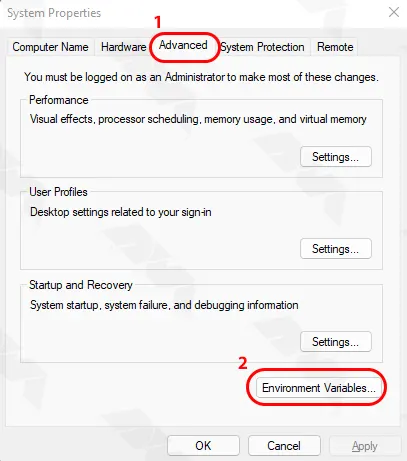
In the window that opens, in the Advanced tab, click on Environment Variables:
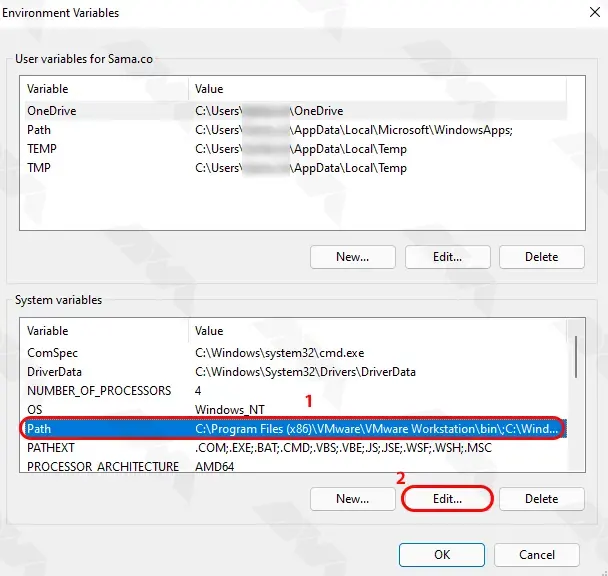
As you can see in the image below, you must click on Path and then click Edit:
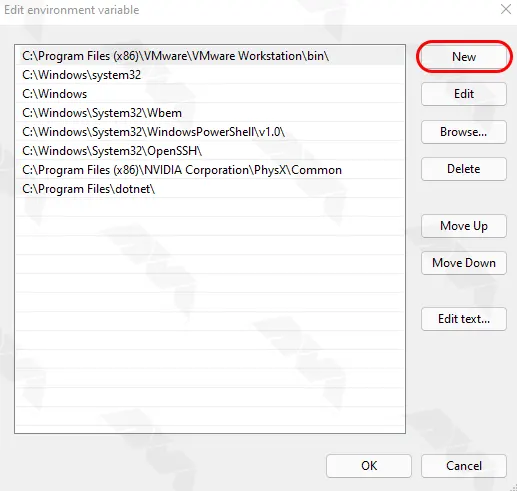
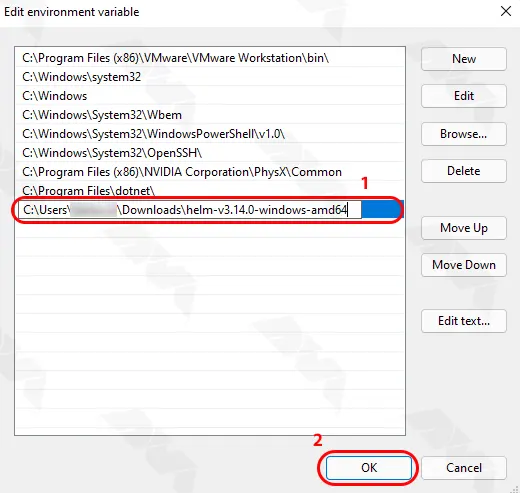
Now it’s time to click the New button and then enter the location of the Helm binary:
Click OK at the end to apply the changes:
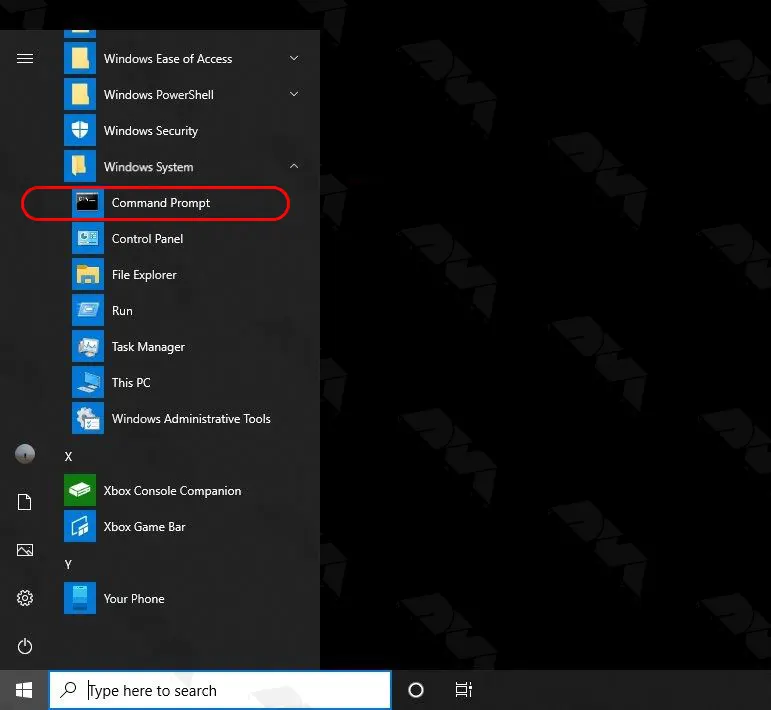
To access Helm, it is enough to search and run Command Prompt in the start menu:
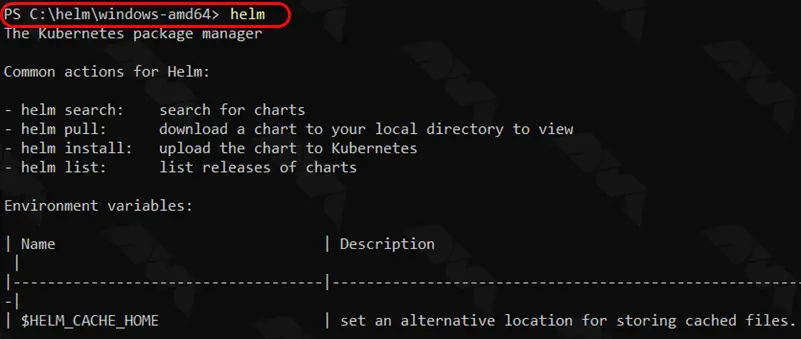
Finally, you can easily run the following command. You can make sure you have access to Helm by running this command:
helm
By following this comprehensive guide, you should now have Helm successfully installed on your Windows 10 system. You can now leverage Helm’s capabilities to simplify and streamline your Kubernetes application deployments. Experiment with different Helm commands and explore the vast library of Helm charts available to extend and enhance your Kubernetes experience.
How useful was this post?
Click on a star to rate it!
Average rating 3.1 / 5. Vote count: 27
No votes so far! Be the first to rate this post.
 Tags
Tags

Have you ever heard about Android emulators? This emulator is a software program that simulates an A...


 Tags
Tags

In today's increasingly digital world, businesses and individuals alike are heavily reliant on ...


 Tags
Tags
What is your opinion about this Blog?


