


The products offered by the big VMware company are used to run virtualization. VMware ESXi is one of the products of VMware company. It is used as a virtualization layer in a virtualized server architecture. VMware ESXi is a type of operating system that is placed directly on the hardware and does not need a host. It is hostless. ESXi is the latest version of the VMware hypervisor and creates virtual machines. This software allocates resources to virtual machines. By installing and configuring VMware ESXi, you can easily create and use the desired virtual machine.
VMware ESXi, formerly known as ESX (Elastic Sky X), is a type 1 enterprise hypervisor software developed by VMware for deploying and servicing virtual computers. As a type-1 hypervisor, ESXi is not a software program that is installed on the operating system (OS), instead, it can be said to include and integrate critical components of the operating system such as the kernel.
After version 4.1 was released in 2010, VMware changed the name of ESX to ESXi (the added “I” at the end is from Integrated). The big change was a fully integrated OS replacing the Services Console (a primitive operating system). ESX/ESXi are both main components in the VMware Infrastructure software suite. This software is an advanced and professional OS that can create public and private clouds.
The first step after creating an account is to download the ESXi ISO file from the VMware website for free. You must have the ESXi installer.
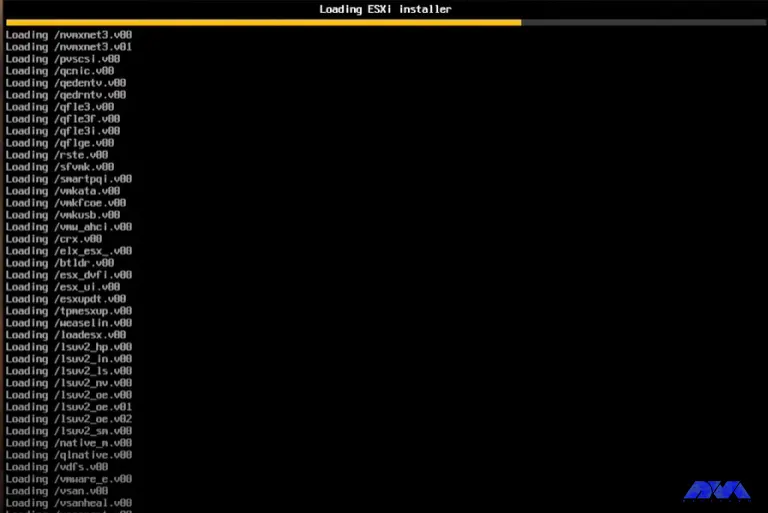
You can use a bootable USB. Then, you need to boot ESXi before installing it. The installer lists the boot and the actual installer starts. All the files needed to build the ESXi environment are loaded:
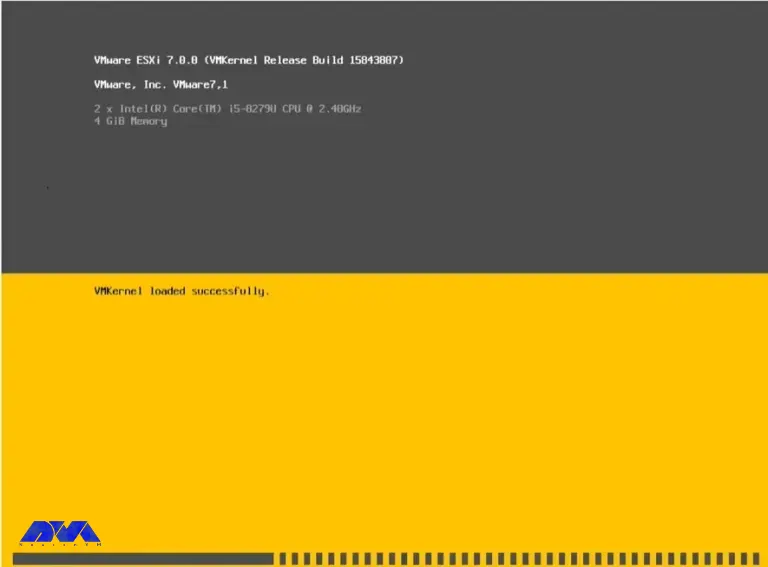
You have ESXi and all the actual resource spaces allocated, including the CPU type and the amount of memory allocated:
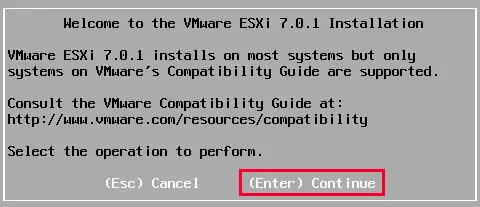
Now you can see the welcome page. You can press Enter to continue:
Next, you will see the VMware End User License Agreement page. So if you accept the terms and conditions, just press F11:
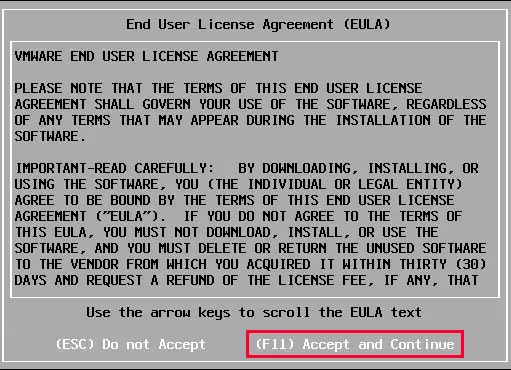
Then it scans the available devices. Now you need to select a disk to install. The hard drive you choose can be any size that was assigned or available when you installed ESXi:
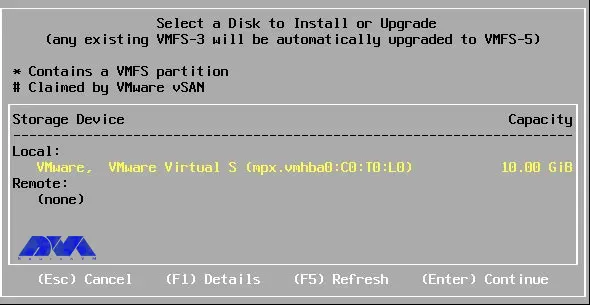
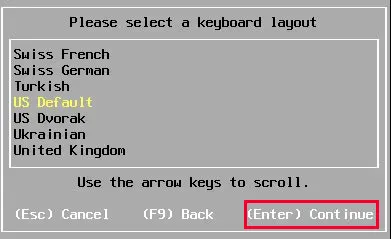
Select your Location and press Enter:
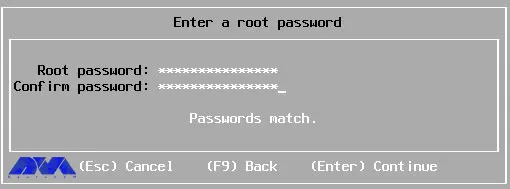
Next, you need to enter your root password, which is your ESXi master password. Remember that when you log in to the ESXi host, it will ask you for your root information:
Press F11 to start the installation:

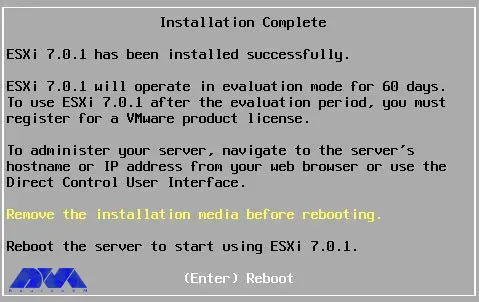
After that, the installation will start. Wait a while for the installation to complete. After the installation is complete, restart your server. You can remove the Installation Media before rebooting:
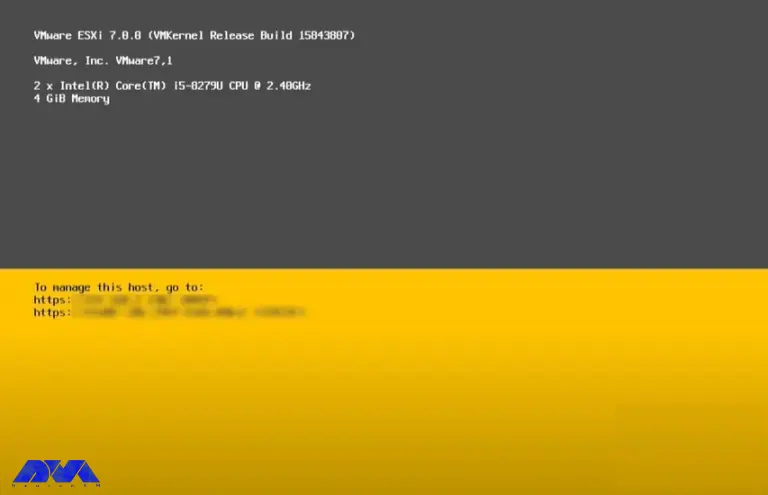
The IP address shown in the image below is automatically assigned to you via DHCP. It is better to set a static IP address for your ESXi host. Press F2 to customize the system and view reports:
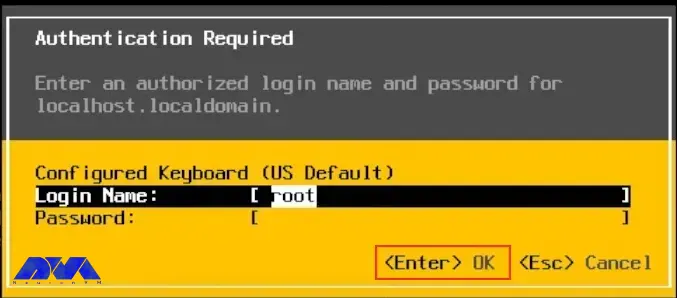
Then you need to re-enter your root password:
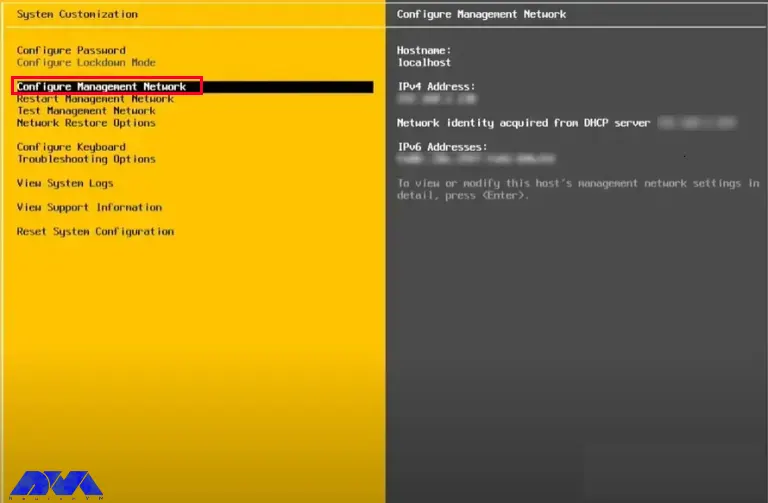
In this step, there are system configurations where you can configure your admin password and network. You can also test your admin settings, configure your keyboard, or if you want, go to the ESXi shell and perform troubleshooting options. Select Configure Management Network and press Enter:
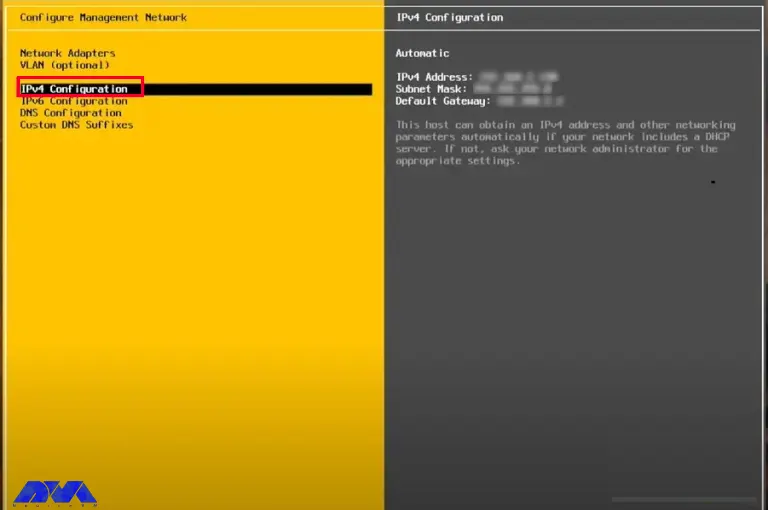
Now you need to select IPv4 Configuration and press Enter again. You can also switch your network adapters if you have more than one, or set up a VLAN if you want to use virtual LANs:
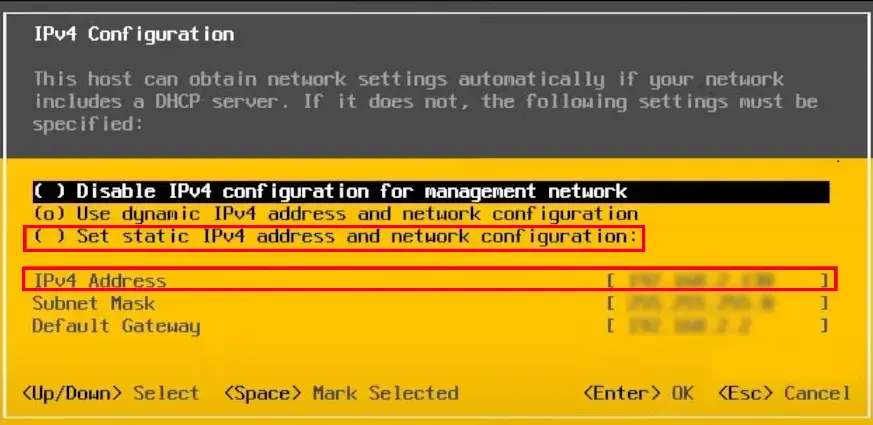
You should select Set static IPv4 address and network configuration and press Spacebar. Then go to the bottom of the page and select IPv4 Address. You are actually creating something that is static, something that is used as part of your environment:
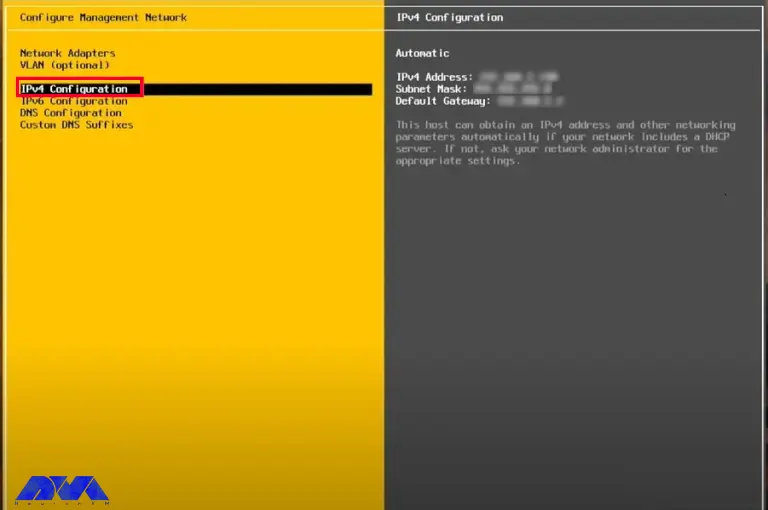
Now go back to the following page and this time select IPv6 Configuration. You can also set your DNS settings in the DNS Configuration section:
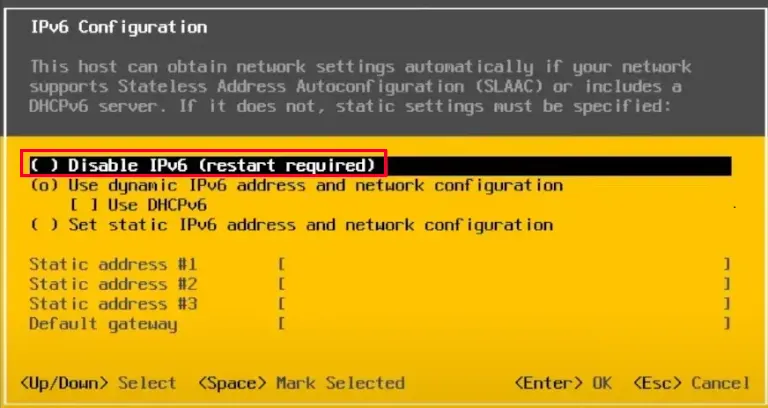
If you are not using IPv6, select Disable IPv6.
Tip: For this, you must restart your system):
Then press Esc to exit. You will be prompted to restart your host for the changes to take effect, so press Y:
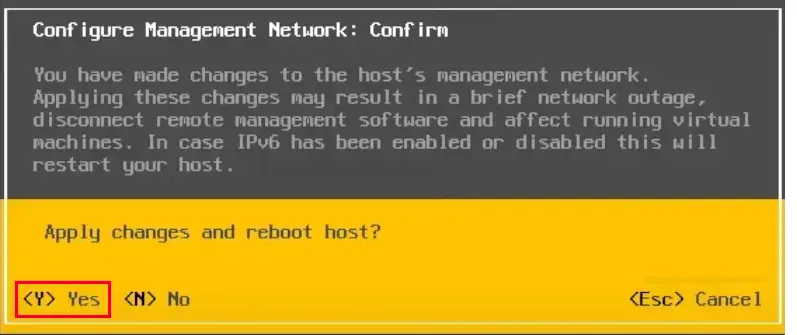
Tip: After the system restarts, you will return to F2 and must re-enter your password.
Open a web browser and navigate to the IP address of the ESXi host. To do this, put your IP in the address bar and then press Enter. After entering the IP address, you will see that this connection is not private. Because it does not have an SSL certificate as the site you are now assigned to. Click on Show Details and visit the site. Once you visit the website, you will see the VM login page. This login page will show you that the computer is successfully connecting to the ESXi host. Now you can log in again with your root information.
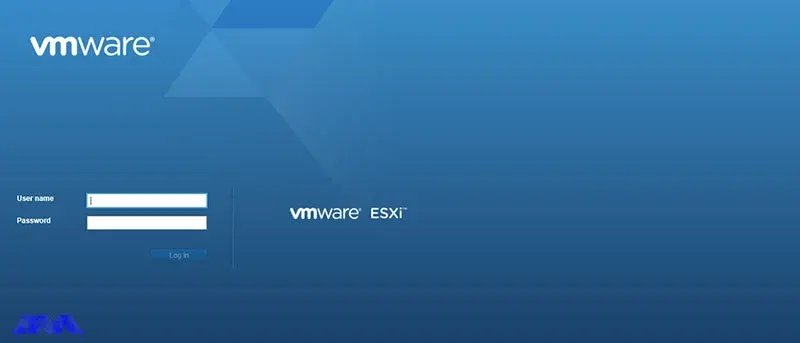
– You can go to Manage and make various customization settings or go to Virtual Machines and create and manage VMs.
– The Storage section is for storing your information.
– You can create data groups of disks together and place your virtual machines in data stores.
– The Networking section is your network configuration or virtual switches that provide network connectivity to your VMware environment:
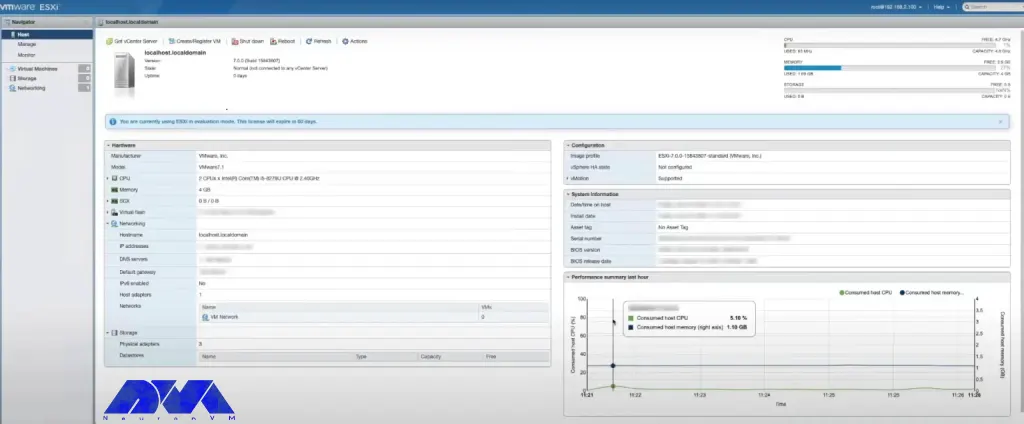
install and configure VMware ESXi
Currently, in companies, we rarely deal with basic network infrastructures that operate physically and separately. Most of the infrastructures are running virtually. Therefore, it is wise to make the most of this system to increase the flexibility of your business in deciding to implement the network and services you need. In this guide, we tried to introduce you to VMware ESXi and teach you How to Install and Configure VMware ESXi comprehensively. Ask your questions in the comments section.
How useful was this post?
Click on a star to rate it!
Average rating 5 / 5. Vote count: 1
No votes so far! Be the first to rate this post.
 Tags
Tags
Businesses are constantly seeking ways to maximize their efficiency and streamline their operations....


 Tags
Tags

Yarn, an embraced package manager, for JavaScript, offers enhanced dependency management that brings...


 Tags
Tags
What is your opinion about this Blog?


