

Did you know that you can have your own DNS server to manage name resolution for domain names instead of using your domain registration’s DNS server? So you should definitely setup an authoritative server. This authoritative server can be used to store DNS records by the owners of the domain. After reading this article, you will learn how to configure DNS Server on Debian 11 completely.
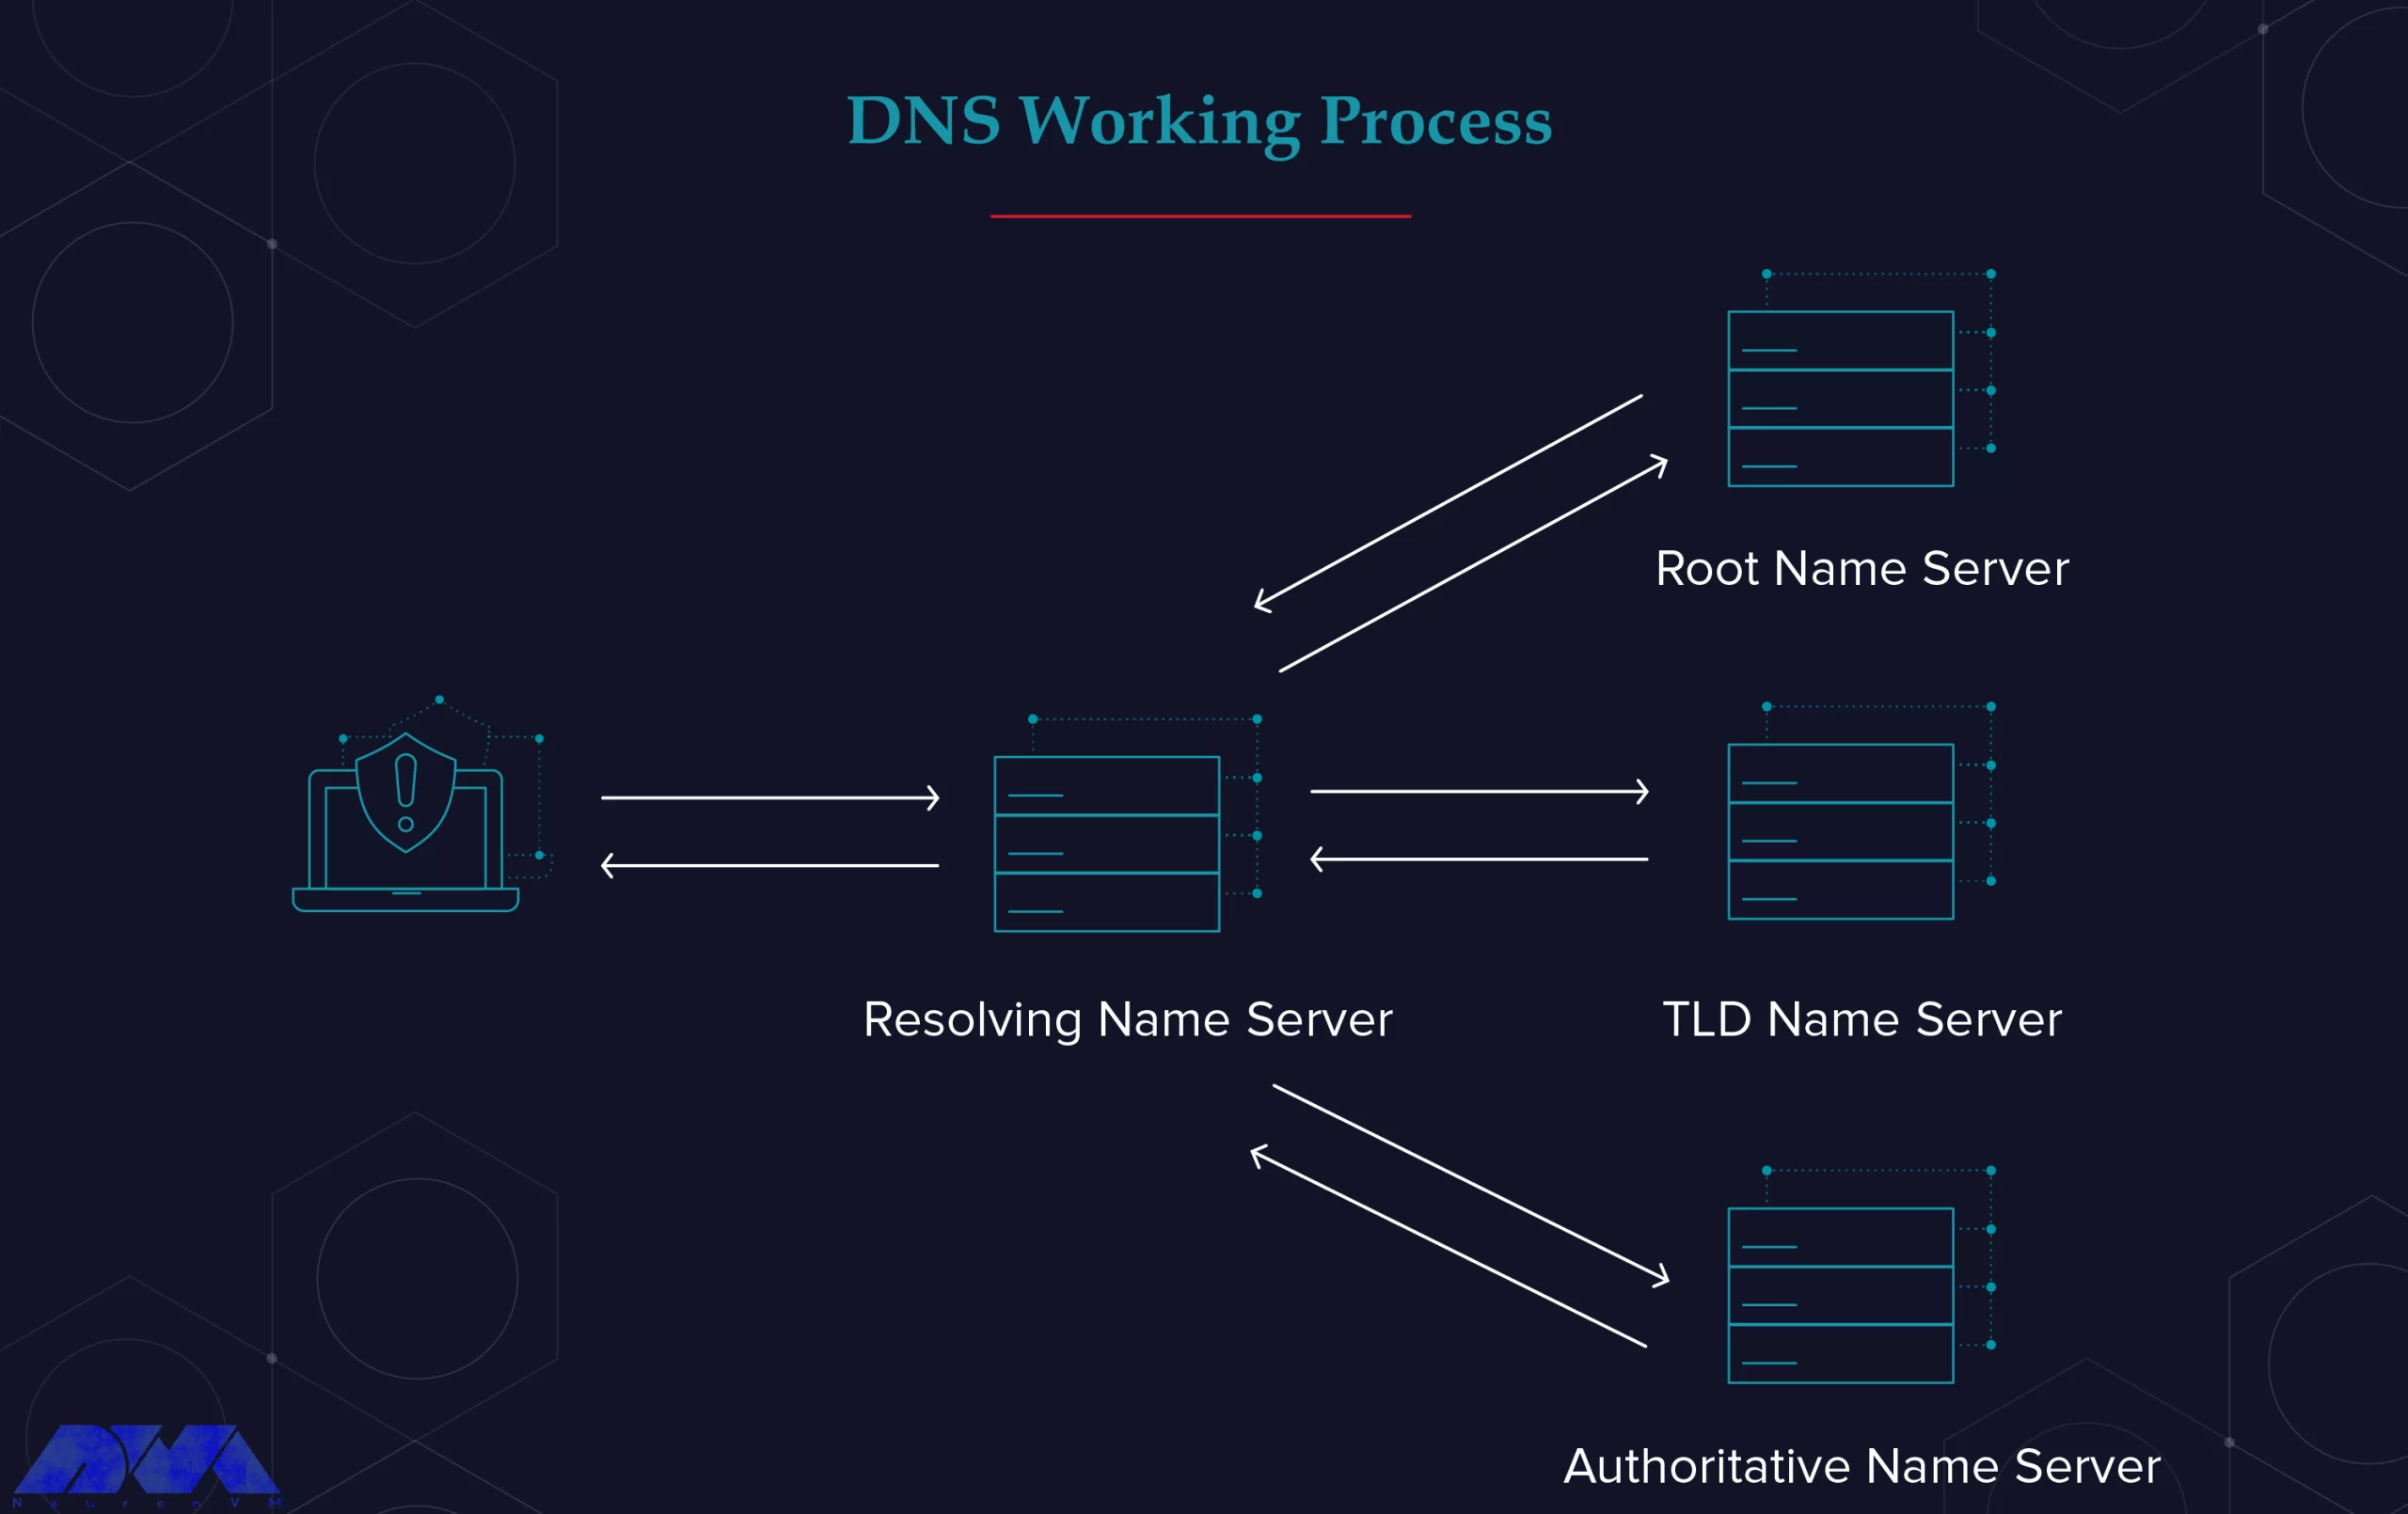
DNS is a type of internet service and its function is in a way that it can be used to assign a domain name to an IP address and vice versa. DNS translates the domain name to a specific IP so that the initiating client can download the requested internet resources. this system actually works like a phone book.

Here we’re going to use Bind as a flexible, open-source, and full-featured DNS software that works as a valid DNS server and is responsible convert domain names to IP addresses.
First, we recommend you choose and purchase a plan from the Linux VPS server plans provided on the NeuronVM website to configure DNS Server on Debian 11. Then install the Debian 11 operating system on it.
Before you start the configuration part, you should install a DNS server which here is Bind, and follow the steps below:
The first step before starting the installation process is to update the Debian 11 system. You can run the following command to update your system:
sudo apt update -y
Now, you are ready to install the DNS server. Here we use the name bind9 for our DNS server and you can find it in the default base repository. To install this server use the APT command:
sudo apt-get install -y bind9 bind9utils bind9-doc dnsutils
/etc/bind/ is the configuration directory for Bind9. This directory is holding both configuration files and Zone lookup files. On the other hand, /etc/bind/named.conf is a global configuration that is not used for local DNS configuration. You can use /etc/bind/named.conf.local instead.
In this section, you can use /etc/bind/named.conf.local file and create zones by editing the content of this file. For this reason, you can choose your favorite editor like Vim. Use the following command to install Vim:
sudo vim /etc/bind/named.conf.local
To create forward and reverse zone. You can create an entry for your forward zone for neuronvm.local domain. Then replace it with your set domain name:
zone "neuronvm.local" IN { // Domain name
type master; // Primary DNS

 file "/etc/bind/forward.neuronvm.local.db"; // Forward lookup file

 allow-update { none; }; // Since this is the primary DNS, it should be none.
};
As you can see, in this file forward.neuronvm.local.db is the name of forward lookup zone.
Here, to create a forward zone for neuronvm.local.db follow the instructions below. In the exciting file, add the lines you see below instead of your parameters such as the front area:
zone "1.168.192.in-addr.arpa" IN { //Reverse lookup name, should match your network in reverse order
type master; // Primary DNS

 file "/etc/bind/reverse.neuronvm.local.db"; //Reverse lookup file
allow-update { none; }; //Since this is the primary DNS, it should be none.
};
The name of the reverse DNS in the file above is 1.168.192.in-addr.arpa. Also, reverse.neuronvm.local.db is the reverse DNS lookup zone.
If you want to keep DNS records for both forward and reverse zone, use lookup zones.
The first step here is to create the front area lookup file, which we copy the sample zone lookup file as below:
sudo cp /etc/bind/db.local /etc/bind/forward.neuronvm.local.db
We have syntax here and all domain names end with a dot (.)
Here are some acronyms that you should understand:
_ MX: To show mail for exchange
_ A: To show A record
_ CN: To show the canonical name
_ SOA: To show starting of authority
_ AS: To show the name server
Here, you can see how to edit the zone file:
sudo vim /etc/bind/forward.neuronvm.local.db
You should change it as per your set domain name:
$TTL 604800
@ IN SOA ns1.neuronvm.local. root.ns1.neuronvm.local. (
3 ; Serial
604800 ; Refresh
86400 ; Retry
2419200 ; Expire
604800 ) ; Negative Cache TTL
;
;@ IN NS localhost.
;@ IN A 127.0.0.1
;@ IN AAAA ::
;Name Server Information
@ IN NS ns1.neuronvm.local.
;IP address of Name Server
ns1 IN A 192.168.1.12
;Mail Exchanger
neuronvm.local. IN MX 10 mail.neuronvm.local.
;A – Record HostName To Ip Address
www IN A 192.168.1.13
mail IN A 192.168.1.14
;CNAME record
ftp IN CNAME www.neuronvm.local.
Here, also we have some acronyms:
_ PTR: To show the pointer
_ SOA: To show starting of authority
Use the /etc/bind directory to copy your sample reverse zone file called reverse.neuronvm.local.db:
sudo cp /etc/bind/db.127 /etc/bind/reverse.neuronvm.local.db
Then, edit the content of your file:
sudo vim /etc/bind/reverse.neuronvm.local.db
Now, in the file, replace your IP and domain name in the proper way:
; BIND reverse data file for local loopback interface
;
$TTL 604800
@ IN SOA neuronvm.local. root.neuronvm.local. (
3 ; Serial
604800 ; Refresh
86400 ; Retry
2419200 ; Expire
604800 ) ; Negative Cache TTL
;
;Name Server Information
@ IN NS ns1.neuronvm.local.
ns1 IN A 192.168.1.12
;Reverse lookup for Name Server
12 IN PTR ns1.neuronvm.local.
;PTR Record IP address to HostName
13 IN PTR www.neuronvm.local.
14 IN PTR mail.neuronvm.local.
Use the instructions below to check the syntax of created config files. We will use named-checkconf to check syntax and if you encounter no error, the command will return to shell:
By doing the following steps, you can check the syntax of forward and reverse zone files:
– For forwarding zone files use:
sudo named-checkzone neuronvm.local /etc/bind/forward.neuronvm.local.db
– For reverse zone files, use:
sudo named-checkzone 1.168.192.in-addr.arpa /etc/bind/reverse.neuronvm.local.db
You should note that the serial output from both checks should be the same. If not, edit the configuration part.
By using the following command, you can restart and enable the Bind DNS server:
sudo systemctl restart bind9
sudo systemctl enable bind9
For checking the status of your service, go through this command:
systemctl status bind9
For testing your DNS you can go to a client machine and add a new DNS IP address in /etc/resolv.conf file:
sudo vim /etc/resolv.conf
Now you can add the DNS IP address:
nameserver ***.***.*.**
Save changes and Exit. Then go on as shown here.
We have two options to use in this section:
nslookup and dig command
dig www.neuronvm.local
Use the command below to confirm your reverse lookup:
you -x ***.***.*.**
In this article, we tried to show how to configure DNS server on Debian 11. After a successful installation, now you know how to configure the DNS server yourself. A DNS server is very useful for admins who have applications to communicate over domain names. We hope you enjoy this tutorial.
It is the resolution of a domain name to an IP address through a DNS server.
Every domain has DNS and this DNS is pointing to servers that redirect different domains.
How useful was this post?
Click on a star to rate it!
Average rating 0 / 5. Vote count: 0
No votes so far! Be the first to rate this post.
 Tags
Tags

phpMyAdmin is a widely-used open-source tool for managing MySQL databases through a web interface. A...


 Tags
Tags

MariaDB is a popular database and enables you to meet all your workload. MariaDB platform contains m...


 Tags
Tags
What is your opinion about this Blog?


