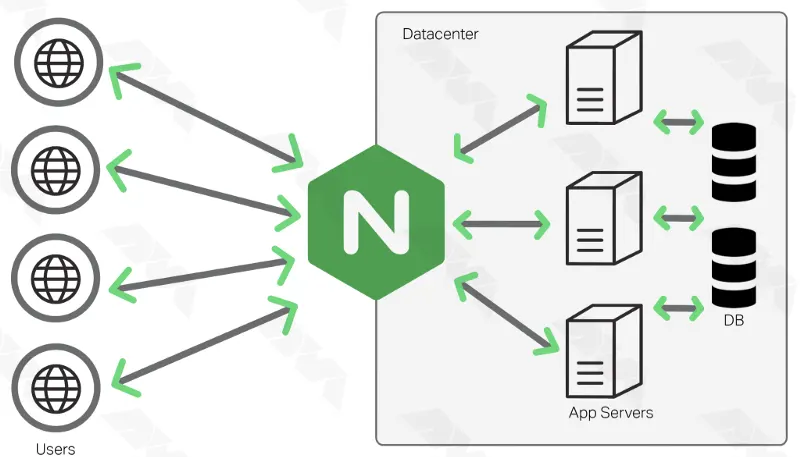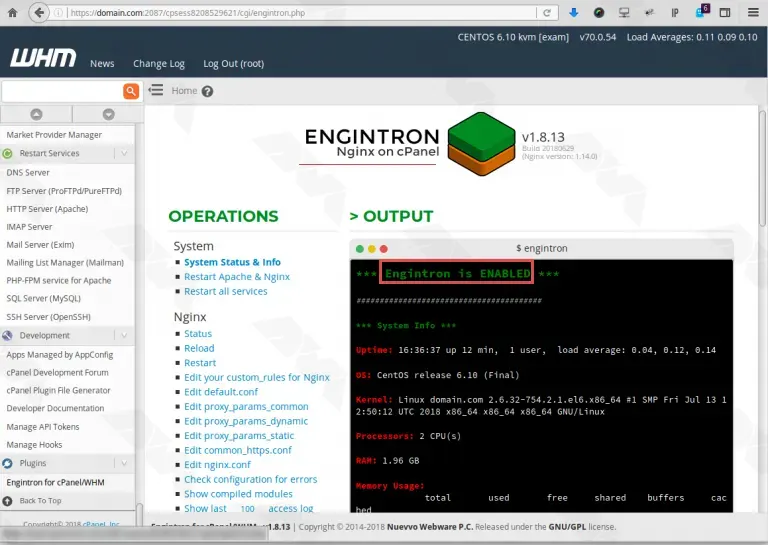


Nginx is a popular web server software widely used for its high performance and scalability. WHM (Web Host Manager) and Cpanel are widely used hosting control panels that provide an intuitive interface for managing web hosting accounts. In this tutorial, we will guide you to Configure Nginx on WHM/Cpanel to enhance the performance and security of your website.
If you install and configure Nginx on your WHM, it will help you perform actions such as installation, removal, and changes with reverse proxy. Suppose Nginx is not installed on your system. In that case, the administration entry page allows you to install this web server on the Cpanel server by clicking the Nginx button, but, if it is preinstalled, the default interface is placed in the system settings tab.
Finally, if the server has already installed a Nginx-Standalone package, it will ask for the installation interface of Nginx with the reverse proxy cache. For this reason, click on the switch to Nginx reverse proxy mode and the package will be installed.

To configure Nginx on WHM/CPanel, you will need:
– Processor: At least 2 cores, but more cores will provide better performance.
– RAM: Minimum of 2GB, but more RAM is recommended for better performance.
– Hard Disk Space: At least 20GB of available disk space for the operating system and Nginx installation.
– Root Access
– WHM/CPanel License
If you want to install cPanel on VPS server, we suggest you use the Linux VPS server plans that are presented on our website with a wide variety of locations.
You can install Nginx on Cpanel in 3 different ways:
_ The first method is to use the easyApache 4 interface in Cpanel.
_ The second one is to use the WHM manager interface by going to the software part in WHM
_ And the last method is to run the bellow command on the command line as the root user:
yum install ea-nginx
The most user-friendly method is to install the Nginx manager on WHM. Now, click on the install button and you will see a new interface appears. Then WHM installs the Nginx web server on your system. This way all Cpanel accounts will be configured to use Nginx and cache feature by default.
After the installation is done, you will see an option with the content “Go to Nginx manager“. Now you can click on it to return to the interface. You should then open the system setting tab:

Here we will analyze the way of configuring Nginx. So follow the rest of the article carefully.
The Nginx installation process, changes the Apache server installation, to use different ports. Then Nginx will proxy all requests to Apache. The Apache ports will only change if the Apache configuration uses the default ports (80, 443).
By installing Nginx, this process will also install the Apache module ea-ruby27-mod_passenger to install and create a Ruby application on Cpanel.
You can use the command below for the default Nginx configuration file:
/etc/nginx/conf.d/ea-nginx.conf
Then for user configuration and customizing every server that the user owns create your own .conf file in the directory:
/etc/nginx/conf.d/users/username
Customize a specific server block for a specific domain and create your .conf file in this directory:
/etc/nginx/conf.d/users/username/domainname/
To add global configuration, go to the following directory:
/etc/nginx/conf.d/
To set every server block on your server, create your .conf file in the directory below:
/etc/nginx/conf.d/server-includes/
If you install Nginx, it will change the Apache port to the first available port under 1024. this will be port 81. Also, Nginx installation will change Apache SSL to the first available port 1024 which is 444.
At last, this installation will add the details below to the directory /etc/nginx/conf.d/ea-nginx.conf.
map $host $CPANEL_APACHE_PROXY_IP {
default 127.0.0.1;
}
map $host $CPANEL_APACHE_PROXY_PORT {
default 81;
}
If you want to customize the server blocks for Nginx, you should create the .conf file in the appropriate location. The server block is the same as the virtual host in Apache, and each block includes .conf file in the /etc/nginx/conf.d/server-includes/ directory.
In Cloudflare configuration, Nginx installation will detect when a domain is using Cloudflare. Then it will configure the system to work properly and the location in which the Cloudflare configuration will be saved is /etc/nginx/conf.d/includes-optional/cloudflare.conf.
1) Check the Nginx configuration file: Make sure that the Nginx configuration file, located typically at /etc/nginx/nginx.conf, is properly configured. Check for any syntax errors or missing directives.
2) Verify Nginx service status: Ensure that the Nginx service is running and active. You can use the following command to check the status:
systemctl status nginx
If it is not running, start the service using the below command:
systemctl start nginx
3) Check Nginx listening ports: Nginx should be listening on the appropriate ports for HTTP (port 80) and HTTPS (port 443). You can use the following command to check the listening ports. If Nginx is not listening on the required ports, check your Nginx configuration:
netstat -tuln
With this article, you can now configure Nginx on WHM/Cpanel. It is really easy to use as you can use Nginx Manager and control Nginx on the Cpanel web server with only a few clicks. If you have any other ideas, please share by leaving a comment.
How useful was this post?
Click on a star to rate it!
Average rating 5 / 5. Vote count: 2
No votes so far! Be the first to rate this post.
 Tags
Tags

A cPanel to cPanel migration refers to the process of moving all data, settings, and configurations ...


 Tags
Tags

Here we are in 2023 and as you are well aware, in today's highly competitive digital landscape,...


 Tags
Tags
What is your opinion about this Blog?


