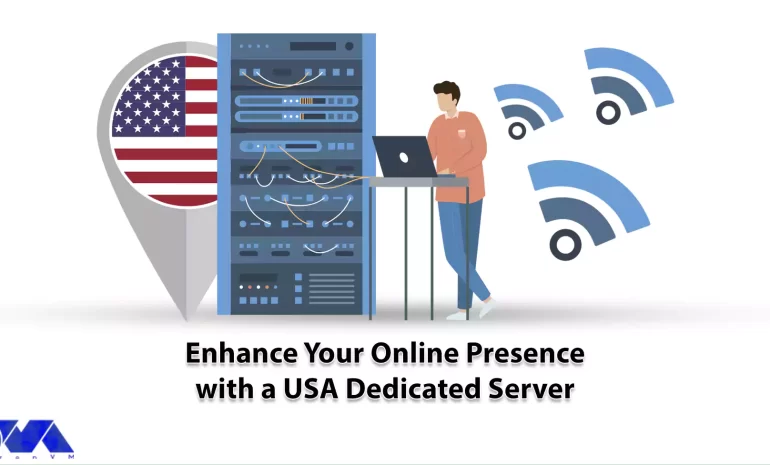
Category: Tutorials

  • A Comprehensive Tutorial on Chrome Remote Desktop

    A Comprehensive Tutorial on Chrome Remote Desktop

    If you are looking for a convenient and easy-to-use solution for remote access and support, we can recommend Chrome remote desktop for you. It’s particularly popular because of its integration with the widely used Google Chrome browser which provides remote access to a computer. It allows you to access your own computer or a remote computer from another location, which can be incredibly useful for various scenarios. So we will focus on this tool and present a comprehensive tutorial on Chrome remote desktop.

    What is Chrome Remote Desktop?

    The Chrome remote desktop tool is a software for management and remote access that was developed for free by Google. With the help of this tool, you can remotely access another computer from devices that run the Google Chrome browser. Monitoring and control as well as remote support are positive points of this software and you can use it with confidence.

    This tool helps you access your workplace system from anywhere in the world and share your screen to guide others. This can be particularly useful for remote technical support, accessing your own computer from a different location, or collaborating with others on a shared computer.

    What Is Chrome Remote Desktop?

    It’s important to note that this tool requires an active internet connection on both the local and remote devices. Also, you can use NeuronVM services like Windows VPS to use the Chrome management tool.

    Benefits of Using Chrome Remote Desktop

    Here are some advantages why users might choose Chrome remote desktop:

    • Security: Chrome Remote Desktop uses secure connections to protect your data during remote access. The optional PIN feature adds an extra layer of security.
    • Convenience: Using this software, users can access their computer from any device with a Chrome browser or app. So you can work from anywhere.
    • Access to Your Own Computer: If you need to access your work or home computer from a different location, you can do so using this tool.
    • Ease of Use: Chrome remote desktop is easy to use and straightforward. It requires minimal setup times and effort.
    • Collaboration: When collaborating on a project, you can use this tool to work on the same computer with others. Your physical location is not important anymore.
    • Cross-Platform Access: Chrome Remote Desktop is cross-platform. In other words, it allows you to access a Windows PC from a Mac, or vice versa. It also supports various operating systems, making it versatile for users with diverse device preferences.
    • Technical Support: It’s commonly used for providing technical support. If you’re tech-savvy, you can help friends or family members troubleshoot computer problems or perform maintenance on their systems from afar.
    • Offline Access: The ability to set up remote access even when the local computer is offline or in sleep mode is a unique feature.

    6 Easy Steps to Access Google Chrome Remote Desktop

    As we mentioned, Google Chrome Remote Desktop is a service that allows you to access and control a remote computer from another device using the Google Chrome web browser. To set up and use this tool, follow these steps:

    1- Open the Chrome browser. Then click on the three lines on the top right and click Extensions. Then search for Chrome Remote Desktop in the search field:

    install chrome desktop

    Tip: If it’s not already installed, download and install Google Chrome from the official website.

    2- Now choose chrome option and press Add to chrome button:

    add-to-chrome

    Tip: It is recommended to install web application too. So, you can have more control.

    Tip: Ensure you are signed in to Google Chrome with the same Google account on both the local and remote computers. This is necessary for synchronization.

    3- Now if you want to remotely access to your desktop after adding chrome extension, click on the blue button to start the download of .msi file and press Accept and Install:

    remote access download

    4- In the next step, press Run on the encountered installation wizard. So, you can open the chrome remote desktop file on Downloads section. You will see the section to choose a name for your device:

    choose a name for chrome device

    6- You should set a PIN code. As soon as you have entered the verification code, you will be connected to the remote computer and control it as if you were physically in front of it:

    Choose a pin for google chrome desktop

    Departments Who Use Chrome Remote Desktop

    As you know, using Chrome Remote Desktop is free and doesn’t cost anything, so many business sectors use it. Let’s analyze various departments that use this tool:

    Departments Who Use Chrome Remote Desktop

    IT Department

    The IT department uses the Chrome remote desktop tool the most and benefits from it. They can help and guide their employees remotely with the help of this software without the need for physical response.

    So, in order to be more productive and save time, they show a great desire to use this tool. It is also possible to support users regardless of location. The only disadvantage of this system is that it is not possible to restart the device.

    Customer Service

    Customer service departments can benefit from using Chrome Remote Desktop (CRD) as a tool to provide remote support to customers. It is free and provided by Google and allows remote support. Among the outstanding options of the support department, we can mention a one-time code that is given to access the desktop and troubleshoot its problems.

    In this way, the customer can continue his work with peace of mind. Also, the user can keep in touch by phone or live chat and always receive expert help.

    Finance

    Since the Chrome remote desktop tool is offered for free, it has attracted the attention of financial sectors. While it may not be as advanced as paid tools, it is good software for small businesses with limited budgets. These departments also take advantage of the screen-sharing function of Chrome desktop in employee-specific situations.

    Marketing

    Marketing departments must constantly work together to achieve the final product. The Chrome remote desktop tool helps users edit documents in real-time or share their home page with each other. Of course, it is not possible to manage multiple sessions with this tool, but it is still ideal for working remotely.

    Best Practices to Use Chrome Remote Desktop

    To ensure a secure and efficient remote desktop experience, here are some best practices to follow:

    – Use strong and unique passwords for your Google account, enable two-factor authentication, and regularly review account security settings.

    – Only share your computer with trusted individuals. Also, When using the service, always require a PIN or a one-time access code for added security.

    – If you encounter connectivity issues, check your firewall settings and ensure that port 443 is open.

    – Make sure you have a strong and unique password. Avoid using easily guessable passwords.

    – Enable session logging for added security and auditing. This feature allows you to review past remote access sessions.

    – For added security, you can configure session time limits, so remote users are automatically disconnected after a specified period.

    – Adjust the quality settings to match your connection speed.

    – Always remember to end your remote sessions when you’re done to prevent unauthorized access.

    – Be aware of the difference between “Guest mode” (where you share your computer) and “Remote Assistance” (where you access another computer). Use the appropriate one.

    – If you’re not actively using Chrome Desktop, it’s a good practice to close your browser.

    By following these best practices, you can make the most of Chrome Remote Desktop while keeping your computer and data secure.

    Conclusion

    Chrome remote desktop is a simple and great remote management software for users to access devices using the Chrome browser. This article was presented to show the way of using Chrome desktop and gave an explanation to make you more familiar with this practical tool and its benefits. If you have any questions or ideas about this issue, please share.

  • JetBackup: An Extensive Backup Solution for Directadmin

    JetBackup: An Extensive Backup Solution for Directadmin

    If you decide to recover your data through Jetbackup, which has become very popular, and your control panel is DirectAdmin, you have come to the right place. Our article aims to introduce you to Jetbackup and how to configure and use it in DirectAdmin. Not long ago, DirectAdmin put this solution on its platform, but note that the interface is entirely different from Cpanel. Keep studying to figure out more about this issue.

    What is JetBackup?

    JetBackup is a commercial backup and recovery solution primarily designed for web hosting providers and server administrators. It is often used in the context of web hosting control panels, such as cPanel, Plesk, and DirectAdmin, to automate and simplify the backup and restore processes for websites, databases, and server configurations.

    JetBackup is a popular choice for web hosting companies and server administrators looking to provide reliable backup services to their clients and ensure data recovery in case of hardware failures, data corruption, or other issues. It helps protect websites, databases, and server configurations, making it a valuable tool in the web hosting industry. Note that you can also purchase our up-to-date and practical Linux VPS services to use this powerful recovery solution on DirectAdmin.

    What are the Features of JetBackup on DirectAdmin?

    There are many features related to Jetbackup in DirectAdmin that we mention in this section:

    • Cron Jobs: The possibility of backing up and restoring Cron Jobs in DirectAdmin.
    • Home Dir: For Backing up and restoring files and folders (location of website source code)
    • Certificates: To backup and recover SSL
    • Email option: To backup and restore email accounts
    • FTP: For backing up and restoring FTP accounts
    • DB: To backup website database
    • DB user: Backup database users

    How to Run JetBackup on DirectAdmin?

    JetBackup is a popular backup solution for cPanel, DirectAdmin, and other web hosting control panels. To install JetBackup on DirectAdmin, you’ll need to follow a few steps. The installation steps may vary slightly based on the version of DirectAdmin and JetBackup you’re using, so always refer to the official documentation for the most up-to-date instructions. Here are the general steps to run JetBackup on DirectAdmin:

    Download JetBackup

    The first step is to visit the JetBackup website and log in to your JetBackup account. Download the DirectAdmin version of JetBackup:

    Jetbackup login page

    Tip: Make sure you have root or administrator access to your DirectAdmin server.

    Run JetBackup Solution on DirectAdmin

    Enter your DirectAdmin, and search for the JetBackup icon to restore your account, then open it. It will look like this:

    running jetbackup on directadmin

    You will encounter a new window. So, click on the Full Backups icon:

    choosing proper icon for backup

    You should enter your username and choose View Backups. Now, In the Created column, select the backup you want to restore from the drop-down menu and click the Show Advanced Settings button.

    The first action will be referring to the Home Directory tab and clicking on the Change Files Selection button in the Select Files column:

    restore and download section on jetbackup

    ***

    restore and download section on jetbackup-2

    Now you have to go to the domains and choose the domain you want to restore from there.

    Then, check the public_html directory. Meanwhile, to restore a specific folder or file, open the public_html option and select the desired items. If you also want to restore files like .htaccess, you must activate the Show Hidden Files check box:

    select file section - jetbackup

    To confirm the changes you should click on the Select Files tab:

    confirm selecting files on jetbackup

    The next step is going to the DB tab, locating and marking the database name that corresponds to the website. The database name refers to whose data you wish to recover. Press the Restore button:

    database section on jetbackup

    The most important components you have to keep, The only components you will need to keep, are Home Dir Files as well as Databases. You can remove the other files by the Remove Items button.

    If you want to confirm the recovery, you should press the Restore Selected items tab:

     restore section on jetbackup - JetBackup solution for directadmin

    If you want to keep track of the restoration of the backup, open the Queue tab. the amount of time for this process depends on the amount of the data you need to record:

    Qeue section on jetbackup - JetBackup solution for directadmin

    When you finish the final process, you will see a message like this:

    final process of backup file on jetbackup

    Tip: It’s essential to test the backup and restore functionality to ensure everything is working correctly.

    Troubleshooting JetBackup Solution on DirectAdmin

    While JetBackup offers many features and benefits, there can still be issues that users might encounter. Here are some common problems with JetBackup on DirectAdmin and potential solutions:

    1- Backups may fail for various reasons, including insufficient disk space, permission issues, or corrupted data.

    Solution:

    • Ensure you have enough free disk space for backups.
    • Check file and directory permissions to make sure JetBackup can access and write to the necessary locations.
    • Validate the data integrity on your server to ensure there are no corrupted files causing backup failures.

    2- JetBackup can put a significant load on your server, leading to performance issues.

    Solution:

    • Schedule backups during non-peak hours to minimize the impact on server performance.
    • Optimize your server’s resources, such as CPU, RAM, and disk speed, to handle the backup process more efficiently.

    3- Restoring backups may fail due to various reasons, such as data corruption or incorrect settings.

    Solution:

    • Verify the integrity of the backup files before attempting to restore them.
    • Double-check your restoration settings to ensure they are correct and compatible with your server environment.

    Conclusion

    Remember that working with server software like JetBackup requires a good understanding of server administration, and it’s essential to take regular backups of your server before making any significant changes. We hope this tutorial was useful for you. If you have any questions please leave a comment.

  • Insider’s Guide: Deleting Your Instagram Account in 3 Easy Steps

    Insider’s Guide: Deleting Your Instagram Account in 3 Easy Steps

    People may want to delete their Instagram accounts for a variety of reasons, such as privacy concerns, the addictive nature of social media, a desire to reduce screen time, or to protect their mental health. Additionally, a change in life circumstances or personal preferences can also make someone decide that deleting their Instagram account is the right choice for them. So this is a personal decision. So we are going to teach you about deleting your Instagram account. Keep reading.

    How to Delete an Instagram Account

    If you need to delete your Instagram account, you should know that it will not be possible to return the account and there is no point in regretting it. So think carefully. Instagram has created another option for you to deactivate your account for as long as you want without deleting it.

    How to Delete an Instagram Account

    But if your decision is final, you can restore your account after deletion within 30 days. Now we want to explain how to delete the Instagram account in 3 easy steps. Follow the steps below carefully. It should be noted that if you want to use Instagram in a desktop environment, use the high-speed Windows VPS server offered on our website.

    Backup Instagram Before Deleting (Optional)

    Before permanently deleting your Instagram account, you may want to backup your data. This includes saving your photos, videos, and other important content. You can do this by requesting to download your data from Instagram. To do this:

    1- Open the Instagram app or visit the Instagram website.

    2- Go to your profile and click the three horizontal lines in the top right corner (or the gear icon on your profile page):

    instagram-desktop-settings-icon-menu

    3- Select Settings. Scroll down and choose the Privacy and Security option:

    instagram-privacy-security-setting

    4- In the Data and History section, select Download Data. Follow the on-screen instructions to request a download of your data:

    request-data-download-instagram-desktop

    3 Easy Steps to Delete Instagram

    If you want to delete your Instagram and you don’t have access to your app or you are an Android user, you can use any browser for this. You can use browsers such as Safari or Chrome. So, follow these steps:

    1- Open a web browser and go to the Instagram official page, then follow the pass below:

    https://www.instagram.com/accounts/remove/request/permanent/

    Tip: If you’re not already signed in, sign in to the account you want to delete.

    2- Instagram will ask you to provide a reason for deleting your account from the drop-down menu. Re-enter your Instagram password to confirm your identity. At last, Click on Permanently delete my account.

    3- Finally, you should confirm the deletion.

    Finally, delete your account permanently by clicking the Delete @username option at the bottom of the screen as indicated.

    delete-instagram-account

    After completing the above steps, Instagram will give you a final warning that your account will be permanently deleted along with all your photos, comments, and other data. If you are sure you want to continue, click OK or Yes to confirm.

    Tip: Make sure that the username matches the account you want to delete. If not, go to logout on the right side of the page and log in with the correct account.

    Troubleshooting Issues About Instagram Account Deleting

    Here are common issues and their solutions when trying to delete an Instagram account:

    1- Deactivation Instead of Deletion

    Solution:

    Instagram offers two options – deactivation temporarily disables your account, while deletion permanently removes it. Make sure you’re choosing the right option.

    2- 30 days waiting period

    Solution:

    After you request to delete your Instagram account, there’s a 30-day grace period during which you can reactivate your account. Be patient; it might take a few days for the deletion process to be initiated.

    3- Third-Party Apps Issues

    Solution:

    Ensure that you’ve revoked access to any third-party apps or services that were linked to your Instagram account. Sometimes, these can interfere with the deletion process.

    Also, If you encounter issues while trying to delete your Instagram account, contacting Instagram’s support through their Help Center or support channels is often the best way to resolve specific problems.

    Conclusion

    Deleting an Instagram account is a serious decision because it will not be possible to return it. So it is necessary to consider all the pros and cons before doing this. Don’t forget to make a backup. Analyze the results and choose the right position for you. We hope this tutorial was helpful for you. If you have any other questions related to this topic, please share.

  • Enhancing Productivity with RDP Server

    Enhancing Productivity with RDP Server

    In today’s fast-paced digital world, businesses are constantly seeking ways to enhance their productivity and efficiency. One such solution that has gained significant popularity is the Remote Desktop Protocol (RDP) server. By leveraging this powerful technology, organizations can streamline their operations, improve collaboration, and boost overall productivity. In this article, we will explore how enhancing productivity with RDP server can help businesses achieve their goals.

    What is a RDP Server?

    A RDP (Remote Desktop Protocol) server is a software application that allows remote access to a computer or a virtual machine. It enables users to connect to a remote computer over the internet or a local network and control it as if they were physically present.

    The Admin RDP server runs on the host machine and allows multiple client devices to establish remote connections simultaneously. It captures the desktop environment of the host machine and streams it to the connected clients. Users can interact with the remote desktop, run applications, transfer files, and perform various tasks as if they were sitting in front of the actual machine.

    The RDP server protocol is primarily utilized in business environments for remote administration, technical support, and collaboration purposes. It provides a secure way to access remote systems and enables efficient management of multiple computers without physical presence at each location.

    Enhancing Productivity with RDP Server

    Enhancing Productivity with RDP Server: Streamlining Remote Workflows

    In an era where remote work is becoming increasingly prevalent, enhancing productivity with an RDP server is crucial. With an RDP server, employees can access their work desktops from any location, eliminating the need for physical presence in the office.

    This flexibility allows for seamless collaboration and empowers teams to work together effectively, regardless of their physical location. Whether on the go or attending virtual meetings, employees can stay productive by accessing critical files and applications through the secure RDP connection.

    By streamlining remote workflows, businesses can optimize productivity and ensure that work continues uninterrupted.

    Enhancing Productivity with RDP Server: Streamlining Remote Workflows

    Centralized Data Management

    Managing data across multiple devices and locations can be a daunting task, often leading to confusion and inefficiency. However, an RDP server offers a centralized approach to data management, enhancing productivity. By hosting all files, documents, and applications on a centralized server, businesses can ensure that everyone is working with the most up-to-date information.

    This eliminates the hassle of manually synchronizing files and reduces the risk of version control issues.

    With a single source of truth, employees can collaborate seamlessly, saving time and effort that would otherwise be wasted on searching for and sharing files. Centralized data management with an RDP server not only enhances productivity but also improves data accuracy and collaboration within the organization.

    Centralized Data Managment

    Enhanced Productivity with RDP Server by Increasing Security and Data Protection

    Data security is a top concern for businesses of all sizes, and an RDP server provides a robust solution for enhancing productivity while ensuring data protection. RDP servers employ strong encryption protocols to secure data transmission, safeguarding it from unauthorized access.

    By hosting applications and data on a centralized server, businesses can implement strict access controls and effectively monitor user activity. This level of control ensures that only authorized individuals can access critical resources, reducing the risk of data breaches and enhancing overall security posture.

    With enhanced security measures provided by an RDP server, businesses can focus on their core activities without compromising sensitive information.

     Increasing Security and Data Protection

    Scalability and Cost-efficiency

    As businesses grow, their IT infrastructure needs to scale accordingly, and an RDP server offers scalability and cost-efficiency to enhance productivity. It provides a cost-effective solution for scaling up without significant investments in additional hardware or software licenses.

    Scalability and Cost-efficiency RDP Server

    Organizations can easily add new users and allocate resources as needed, ensuring that productivity remains unhindered. This scalability also allows businesses to adapt quickly to changing demands, such as seasonal peaks or sudden growth spurts.

    By leveraging the flexibility and cost-efficiency of an RDP server, businesses can optimize their productivity while keeping IT expenses under control, leading to long-term cost savings.

    Conclusion

    In conclusion, using RDP server can be a game-changer for businesses looking to enhance productivity. By streamlining remote workflows, centralizing data management, ensuring data security, and providing scalability, an RDP server empowers organizations to maximize their productivity potential. As businesses continue to navigate the evolving landscape of the digital age, embracing technologies like RDP servers will undoubtedly play a pivotal role in achieving success and staying ahead of the competition.

  • What is Minecraft Server?

    What is Minecraft Server?

    Running a Minecraft server can be a rewarding experience, but it requires time, effort, and possibly some technical know-how. Make sure to stay up to date with the latest developments in the Minecraft server community to provide the best possible experience for your players. It can be said that this game is such that anyone can setup a Minecraft server for themselves, and then invite other players to join this game and advance the game. This article focuses on Minecraft servers to explain what is this gameplay.

    A Comprehensive Guide to Minecraft Server

    A Minecraft server is a dedicated or hosted computer system that allows multiple players to connect and play this popular game from Sandbox, together in a shared world. These servers provide a platform for players to interact, collaborate, and compete in a variety of game modes and environments.

    Minecraft game is a competitive and cooperative game among the participants. This fascinating game can be played online and in real-time. The important thing is that you need a dedicated server to play this game with others, i.e. a shared online computer.

    The game interior is designed in such a way that participants can build construction projects together or create works of art, just like the real world.

    what is Minecraft server

    As we mentioned above, to own and use a Minecraft server you will need a dedicated server. NeuronVM is one of the reliable providers that offers Minecraft on a dedicated server. Yes! you can use the benefits of this provider’s dedicated server for Minecraft.

    That means you can experience complete control, advanced performance, and more confidence. Enjoy this integrated gameplay with the least delay in performance. So don’t waste time and say goodbye to the limitations of shared hosting to continue your adventure with this wonderful game.

    What Are the Plugins and Mods of Minecraft?

    Plugins and mods can greatly enhance and customize your Minecraft server, offering a wide range of new features, gameplay options, and server management tools. Here’s an overview of the difference between plugins and mods, as well as some examples of each:

    Plugins are add-ons or extensions for Minecraft server software. They allow server administrators to modify the server’s behaviour and introduce new features without altering the core game files. Plugins are typically written in Java and are compatible with server software that supports the Bukkit API.

    Examples of Minecraft plugins:

    • Essentials: Adds essential commands and features like /home, /tpa, and /warp for players.
    • WorldEdit: Provides powerful world editing and building tools for server admins.
    • Lockette: Allows players to lock chests, doors, and other containers to prevent unauthorized access.
    • Vault: A permissions API that enables integration with various other plugins.

    Mods, short form of modifications, are custom changes made to the game’s code or assets. They typically require both the server and client to have the same mod installed. While mods can significantly alter the game, they are not officially supported by Mojang (the company behind Minecraft) and can lead to compatibility issues.

    Examples of Minecraft mods:

    • Optifine: A client-side mod that enhances graphics, improves performance, and adds advanced visual features.
    • Biomes O’ Plenty: A mod that introduces new biomes, landscapes, and plants to the game.
    • Tinkers’ Construct: Adds new tools, weapons, and smelting systems for players to use.
    • JourneyMap: Provides a map and minimap for players to explore and mark their surroundings.

    Tip: It’s essential to note that when using mods, both the server and the client must have the same version of the mod installed for compatibility. Using mods can introduce compatibility issues and potential conflicts In contrast, plugins are often easier to manage and maintain, as they work with server software that supports the Bukkit API and doesn’t require players to install anything on their clients.

    What are the Features of a Minecraft Server?

    Minecraft based on providers and its own program, includes various features. These features make players experience a stable and enjoyable game environment. Some of these features include:

    Customization

    The customization option in the Minecraft server allows you to change server settings and gameplay elements based on player preference. These settings include things like server rules, plugins, or existing mods. We can also customize the player experience, security settings, and performance.

    The possibility of Configuration

    Minecraft server configuration means you can choose options and set up the server. In this way, the performance of your server will be optimized. Proper configuration makes your gaming experience enjoyable and continuous.

    There are different settings for Minecraft hosting. The choice depends on things like the number of players, available resources, or the complexity of the game. Also, choosing a VPS or a dedicated server will also be effective.

    Control Panel

    The control panel has the role of an intuitive user interface for the server. Server administrators can make settings this way, add plugins, and monitor user permissions. Several different tools can be used to monitor and increase server performance. cPanel is one of the most widely used control panels.

    Providers like NeuronVM create these custom control panels to meet customer needs. These solutions may offer a unique interface or proprietary features.

    Possibility of Scalability

    Scalability means the server’s ability to manage the number of players. It means that the functionality should be extended without a negative impact on performance and stability. Minecraft servers also include two main scaling options. vertical and horizontal.

    In vertical scaling, by increasing the RAM capacity, the server hardware also increases, and the purpose of this work is to increase performance. The vertical scaling feature is useful for smaller servers with limited resources.

    In contrast, sub-horizontal scaling involves adding more servers. in such a way that it distributes the load and provides more resources for the server. This sustainable solution manages the increase in user demand.

    Great Protection

    The protection feature in Minecraft servers plays an important role and makes the server safe and stable from threats such as hacking, virus infection, or DDoS attacks. The high security of the server includes the privacy of the users and prevents disruption of the game.

    Protecting servers and players includes many defense strategies that hosting companies offer. Among these strategies, it is possible to mention the deployment of a half-firewall and the use of DDoS protection.

    Resource Allocation

    If we want to explain the allocation of resources in Minecraft servers more, it refers to the distribution and management of server resources. These resources include CPU, RAM, or server memory. Allocating resources helps to maintain a fast and responsive server environment. This will attract and retain players. The high processing of the game is related to the power of CPU and RAM.

    Different Types of Minecraft Server

    Minecraft is a versatile game that allows players to create and join various types of servers, each offering a unique gameplay experience. Here are some different types of Minecraft servers:

    what are Minecraft server types

    Creative Servers: In creative mode, players have unlimited resources and can fly, making it easy to build elaborate structures without the need to gather materials.

    Survival Servers: These are the most common types of Minecraft servers. In survival mode, players must gather resources, build structures, and protect themselves from mobs (hostile creatures). The goal is to survive and thrive in the game world.

    PvP Servers: PvP servers are dedicated to combat and competition among players. They can take various forms, such as faction-based PvP, kit PvP, or even custom game modes.

    Mini-Game Servers: Mini-Game servers host a variety of mini-games within Minecraft. These can include games like Spleef, Parkour, Hunger Games, and more. Players compete against each other, and the focus is on quick and fun gameplay.

    Role-Playing Servers (RPG): On RPG servers, players take on roles and immerse themselves in a virtual world. They create characters, follow storylines, and interact with others in a role-playing fashion.

    Economy Servers: These servers focus on a player-driven economy. Players can buy and sell items, create shops, and engage in trade to accumulate wealth and resources.

    Vanilla Servers: These servers aim to maintain a mostly vanilla Minecraft experience with few or no mods or plugins. They provide the classic, unaltered gameplay.

    Educational Servers: Some servers are designed for educational purposes, allowing players to learn and explore topics such as history, science, or architecture within Minecraft.

    We can introduce lots of other Minecraft server types, These are just some of them. The type of server you choose to play on depends on your preferences and the kind of Minecraft experience you’re seeking.

    Best Practices to Use Minecraft Server

    Running a Minecraft server can be a fun and rewarding experience, but it’s important to follow best practices to ensure a smooth and enjoyable gaming environment for your players. Here are some best practices to use when running a Minecraft server:

    – Choose a dedicated server or host on a powerful machine with sufficient CPU, RAM, and storage to handle your player load.

    – Setup automated backups of your server to prevent data loss in case of crashes or errors.

    – Try to back up your world every day. Use automated backups.

    – Protect your server with strong, unique passwords, and use a whitelist to control who can join. Regularly update your server software.

    – Establish clear server rules and enforce them. Consider appointing moderators or administrators to help manage the server and deal with rule-breakers.

    – Use plugins or mods to enhance gameplay, but be cautious about overloading the server with too many, as this can affect performance.

    – Schedule regular server maintenance to perform updates and backups. Also, optimize server performance.

    – Optimize server settings in the server.properties file, such as view distance, tick speed, and max players, to suit your hardware and player needs.

    – Try to install an anti-cheat plugin and kick out malicious players automatically.

    – Before adding new plugins or major changes, test them in a separate environment to ensure they won’t negatively impact the server.

    Conclusion

    In short, you can use the Minecraft server as an optimal solution for creating and managing game experiences that are customized according to your needs. The impressive features of this server improve performance, high security, and round-the-clock support, making it a great choice for gamers and developers. So, by purchasing this attractive server, experience an enjoyable and limitless game with your friends. Happy Minecrafting.

  • Innovative Infrastructure: Investing in VPS with Bitcoin

    Innovative Infrastructure: Investing in VPS with Bitcoin

    Investing in VPS (Virtual Private Server) with Bitcoin allows individuals to enjoy the benefits of both digital currencies and technological advancement. Bitcoin, being a decentralized and secure digital currency, offers a reliable payment method for purchasing VPS services. With its growing acceptance by businesses around the world, Bitcoin ensures an anonymous and fast transaction process. Investing in VPS with Bitcoin provides users with numerous advantages, including enhanced data security, scalability, and improved website performance. Additionally, as Bitcoin gains more value over time, the investment in VPS services with Bitcoin may yield substantial returns, serving as an opportunity for both short-term and long-term investors. Overall, Bitcoin and VPS synergistically combine to provide a futuristic and efficient investment avenue.

    Benefits of VPS with Bitcoin

    With the rise of Bitcoin as a global digital currency, many have realized its potential beyond traditional transactions. VPS hosting allows you to enjoy numerous advantages when paying with Bitcoin.

    Firstly, Bitcoin payments offer enhanced security, as transactions are decentralized and encrypted. Additionally, using Bitcoin allows you to maintain anonymity and privacy, as no personal or financial information is required during the purchase process.

    Furthermore, Bitcoin’s global nature ensures that you can effortlessly invest in VPS services from anywhere in the world, minimizing restrictions and enabling seamless cross-border transactions.

    When you opt for VPS with Bitcoin, you gain access to a plethora of reliable hosting providers with various plans tailored to suit your specific needs. From robust security measures to exceptional customer support, VPS providers offer an all-inclusive experience that fosters growth and stability for your online ventures.

    Benefits of Bitcoin VPS

    Finding the Right VPS Provider

    Investing in VPS with Bitcoin offers flexibility and convenience, but it’s crucial to select the right provider for your needs. Start by researching reputable hosting companies that accept Bitcoin as a payment method. Consider factors such as server locations, uptime guarantees, scalability options, and add-on services like backups and DDoS protection.

    During your search, it is essential to read reviews and customer testimonials to ensure the VPS provider aligns with your desired level of quality and reliability. Engage with their customer support team to clarify any queries you may have and evaluate whether their responsiveness and expertise meet your expectations.

    By investing time in this research, you can find a VPS provider that will be your trusted partner in the digital landscape. You can test the NeuronVM website to buy and invest in the server using Bitcoin.

    Bitcoin with VPS provider

    How to Buy a VPS with Bitcoin

    Well we talked about finding the right VPS provider for your business and what are the most factors to consider when doing so. Here at NeuronVM we provide Bitcoin VPS with a premium quality. Plus, we have 7 days of money back guarantee, so you absolutely don’t have anything to worry about. If you want to buy a VPS, be it Windows VPS or Linux VPS, here are a few steps you can take:

    • Simply go to our website’s main page and on the menu above, select Buy VPS and then click on your preferred VPS or just click on Buy VPS page and proceed.
    Buy VPS
    • Choose the plan you need click on Purchase Plan.
    Choose preferred plan

    Here we choose Windows VPS server plan by clicking on Purchase Plan:

    bitcoin vps server

    It will direct you to the page shown below. Under “Configure Server” section. You can change the options like Operating Server, Location and Additional IP. When you’re done, click on Continue and proceed.

    Configure vps server
    • You’ll be landed on Review and Checkout pay where you can simply review the items in your shopping card and enter a promo code to apply discounts. After you’re done, click on Checkout button and proceed.
    Review & Checkout vps
    • Fill the form if you haven’t signed up before. After that you can choose your All Cryptocurrency and click on Complete Order button down below.
    buy bitcoin vps from neuronvm
    • In the last section, you can choose Bitcoin as your preferred method of payment and finalize the purchase.
    Buy VPS with Bitcoin.

    That’s it! Regardless of which OS you choose, NeuronVM will instantly deliver the VPS and you can start using it right away. Remember we’re here for you 24/7, so if you faced any problems regarding setting up and using your VPS, don’t hesitate do contact us!

    Setting Up Your VPS with Bitcoin

    Once you have chosen the VPS provider that fulfils your requirements, the process of purchasing a VPS with Bitcoin is straightforward. Begin by signing up for an account with the hosting provider or logging into your existing account.

    Setting up the VPS

    Next, you will be presented with a Bitcoin wallet address to which you can send the payment. Launch your preferred Bitcoin wallet application and initiate the transfer to the provided address. After confirmation, the VPS provider will usually generate your server credentials and send them via email. Finally, configure your server settings, access your VPS, and begin leveraging its capabilities to enhance your online presence.

    Conclusion

    Investing in VPS with Bitcoin has many benefits. It provides better security and makes it easier to access globally. When you use Bitcoin to buy VPS hosting, you can keep your personal information private. You can also make transactions across borders smoothly. You also get reliable and convenient service from trusted hosting companies. As cryptocurrency disrupts traditional finance, it’s a good idea for both businesses and individuals to embrace new technology like VPS with Bitcoin. Join the revolution and take advantage of the amazing potential of VPS with Bitcoin now.

  • How to Configure Minecraft on Ubuntu 20.04

    How to Configure Minecraft on Ubuntu 20.04

    Have you ever heard the name of the game Minecraft? This game is one of the well-known and popular sandbox games, which has sold more than 100 million copies. Users can do Minecrafting together in this game world. If you have a public Minecraft server, you can create larger structures with the cooperation of other players. Keep in mind that each player is independent and you do not control others. As a result, buy a Minecraft server to have more management and control in the game. Learn how to configure Minecraft on Ubuntu 20.04.

    A Brief Explanation of Minecraft Server

    A Minecraft server is a computer system or a hosted online service that allows players to connect and play the popular sandbox video game, Minecraft, together in a multiplayer environment. Minecraft servers come in various forms, from small private servers run by individuals or groups of friends to large public servers that can accommodate hundreds or even thousands of players simultaneously.

    Minecraft servers have played a significant role in the game’s enduring popularity, allowing players to create and join diverse communities and experiences within the Minecraft universe. Whether you’re interested in creative building, survival challenges, or unique mini-games, there’s likely a Minecraft server out there that caters to your preferences.

    Prerequisites to Install Minecraft

    You can get Minecraft from various providers. NeuronVM is one of the recommended providers that offers Minecraft servers. But you should prepare some prerequisites to run this amazing gameplay. Here are the requirements to run and configure Minecraft on Ubuntu:

    • 64-Bit architecture
    • Appropriate version of Java
    • strong internet access
    • A license key that you can purchase from the Minecraft website

    How to Configure Minecraft and Run it on Ubuntu

    The first step to run Minecraft server is to install Java because Minecraft is a Java-based gameplay. So follow the command below to install Java:

    apt-get install openjdk-11-jre-headless git build-essential -y

    To check the installed version use the following command:

    java -version

    Installing Minecraft on Ubuntu

    You can use two methods to install Minecraft on Ubuntu. We will show you both of them:

    • Use Debian package
    • Use Snap package

    Installing Minecraft By Debian Package

    First download the Microsoft Debian package using the command below:

    wget -o ~/Minecraft.deb https://launcher.mojang.com/download/Minecraft.deb

    Now, install the downloaded package by the following command:

    sudo apt install ~/Minecraft.deb

    As you run the command successfully, Minecraft will be installed on your Ubuntu system.

    Installing Minecraft By Snap Package

    The second way or snap is an easier method than Debian for Linux packages. Because Ubuntu 20.04 and later versions have a default snap profile configured. In this method, to install the game launcher, create a terminal and type the following:

    sudo snap install mc-installer

    That’s it! Now you have Minecraft on your server and you can start using this great application.

    How to Start Minecraft on Ubuntu

    In this section, you will access the Minecraft launcher icon. So, login to your Ubuntu desktop manager and click on Show Applications then search for Minecraft in the search box:

    launch minecraft server

    As you see the Minecraft icon, click on it and start the application:

    Tip: the application will update automatically during the start.

    update minecraft - Configure Minecraft on ubuntu

    The login screen will appear as soon as you start the game. You should use your Microsoft account to login and run the game:

    Login to the minecraft - Configure Minecraft on ubuntu

    Troubleshooting Common Issues About Minecraft Server

    Minecraft server issues can vary from technical problems to gameplay-related issues. Here are some common Minecraft server issues and their solutions:

    1- Server not starting

    Solution:

    Check that you have the correct version of Java installed, and ensure you are using the correct server JAR file. Review server logs for error messages that can provide more specific clues.

    2- Connection problems

    Solution:

    Verify that the server IP and port are correct. Ensure that your firewall or router is not blocking the server’s port (default is 25565). If hosting locally, use “localhost” as the server address.

    3- Lag and Performance Problems

    Solution:

    Optimize server settings, allocate more RAM if needed, use performance-enhancing server software like PaperMC, and consider upgrading your server hardware or hosting plan if lag persists.

    4- Whitelist and Permissions Problems

    Solution:

    Check your server configuration files for whitelist settings and permissions. Make sure players are added to the whitelist (if required) and have the necessary permissions to join and interact.

    Best Practices to Use Minecraft

    Whether you’re a beginner or an experienced player, here are some best practices to enhance your Minecraft experience:

    1- If you’re new to Minecraft, start with Survival mode. It introduces you to the core mechanics of the game, such as gathering resources, crafting, and surviving against hostile mobs.

    2- Minecraft has a vast and diverse world to explore. Go on adventures, discover new biomes, and look for hidden treasures.

    3- Let your creativity shine by building structures, houses, farms, and more. Download and use mods and resource packs to customize your gameplay and visuals.

    4- During your first nights, prioritize building a basic shelter to protect yourself from hostile mobs like zombies and skeletons. Later, consider building a more substantial base with defensive features.

    5- Establish a reliable source of food through farming. Wheat, carrots, potatoes, and livestock (cows, pigs, chickens) can provide a consistent food supply.

    6- Explore caves and mineshafts for valuable resources like iron, coal, and diamonds.

    7- Enchanting your weapons, armor, and tools can give you powerful advantages. Set up an enchantment table and explore the world for experience points to use in enchanting.

    8- If playing on a multiplayer server, communication and collaboration with other players can be rewarding.

    9- Regularly backup your Minecraft worlds, especially if you’ve invested a lot of time and effort into them.

    Minecraft is a highly customizable game, and you can tailor your experience to suit your preferences. Whether you enjoy building, exploring, farming, or surviving, there’s a place for you in the Minecraft world.

    Conclusion

    In summary, Minecraft servers enhance the game’s experience by enabling multiplayer gameplay, fostering communities, offering customization options, and providing unique game modes and events. Whether you’re looking for a collaborative building experience or competitive challenges, there’s likely a Minecraft server that suits your preferences and interests.

  • The Best Remote Desktop Admin Tools for Admin RDP

    The Best Remote Desktop Admin Tools for Admin RDP

    The great thing about remote desktop admin tools is that you can access everything from your system wherever you are. In this way, you can monitor and control systems without leaving your device to check things in other systems, or a locally saved file. You can help other users and solve their problems with the help of this tool. Now we want to review these remote management tools and check the best remote desktop admin tools for admin RDP.

    5 Best Remote Desktop Admin Tools for Admin RDP

    When it comes to using Admin RDP, you have several options for remote desktop tools, with the most common being Microsoft’s own Remote Desktop Client and third-party alternatives. Here are the best remote desktop admin tools to keep in mind:

    TeamViewer

    You can do everything with TeamViewer. This tool is easy to use and very useful for providing support. TeamViewer is a powerful platform that has no problem accessing devices. Its best features include file transfer, video chat, and remote voice, which make it one of the most complete tools.

    What makes TeamViewer one of the best tools is its personal version, which is offered for free but includes all the features. The only downside is that you can’t use the free version for anything.

    If you are the only person who can access the devices of other members, TeamViewer will be a good option for you. Or if you need to remotely access your home server from time to time, this tool is the best option. But you can also use it in larger organizations. In short, if you have a small business, you can find cheaper alternatives.

    teamviewer

    AnyDesk

    AnyDesk is a versatile and user-friendly remote desktop tool that is suitable for personal, business, and professional use. Its focus on performance, ease of use, and security make it a popular choice for remote desktop access and support scenarios.

    It is another cross-platform remote desktop tool known for its speed and low latency. It’s not RDP-based but is often used as an alternative. While AnyDesk is secure, it’s essential to use it responsibly and follow security best practices. Always protect your AnyDesk address and access permissions to prevent unauthorized access.

    Anydesk_

    Chrome Remote Desktop

    Chrome Remote Desktop is a free remote management software developed by Google. With the help of this tool, users can remotely connect to computers or other devices with Google Chrome or Chrome Remote Desktop and control them. A secure and convenient tool for remote operation, support, and monitoring.

    You can use this tool to connect to your workplace device from anywhere. Also, you can see your screen, share your instructions, and control other computers. chrome remote desktop with its easy-to-use and versatile structure is a useful tool for freelancers and workers.

    Chrome Remote Desktop remote desktop tool

    Splashtop

    The Splashtop tool has a great performance. You will surely be satisfied with its performance. One of the advantages of this remote management tool is to transfer files by dragging and dropping between different operating systems.

    Splashtop is also equipped with voice chat. Its only disadvantages are that it has a complicated setup and its pricing is not reasonable. Instead, it has a very strong support and customer service team that can actively help you and answer your questions.

    This product was created with businesses in mind. Businesses for whom customer service is important. Its competitive price shows that it is reliable, works well, and is useful for large businesses.

    splashtop tool

    Parallels Access

    Another useful and excellent tool for remote access is parallel access. which is a simple and reliable solution with the ability to access your computer from anywhere in the world. For example, if you want to use your mobile phone to access the system remotely, this tool will be very useful.

    parallel access tool

    So as you notice it is a mobile-focused remote desktop solution and designed to make remote control of your computer from mobile devices easy and efficient.

    Conclusion

    When choosing a remote desktop tool for RDP, you should consider factors such as platform compatibility, security features, ease of use, and the specific needs of your remote access tasks. Additionally, ensure that you follow best practices for securing remote desktop connections to protect your data and systems from potential threats because by using unsecured remote management tools, hackers can easily penetrate your important data and even access your camera. Here we tried to introduce the best remote desktop admin tools so that you can make a wise choice and secure your system.

  • The Best Way to Buy Cheap Admin RDP Server With BTC

    The Best Way to Buy Cheap Admin RDP Server With BTC

    In today’s digital age, the demand for reliable and affordable administrative Remote Desktop Protocol (RDP) servers is soaring. With the rise of Bitcoin as a decentralized and secure digital currency, it has become increasingly popular among tech-savvy individuals to buy these servers using Bitcoin. In this article, we will explore the best way to purchase cheap admin RDP server with BTC, providing you with valuable insights and information on this exciting trend.

    Understanding the Benefits of Admin RDP Servers

    Admin RDP servers play a crucial role in the smooth functioning of businesses and organizations, allowing users to access and control remote systems in a secure and efficient manner. These servers offer numerous benefits, such as enhanced productivity, centralized management, and improved data security.

    By integrating Bitcoin as a payment method, users can take advantage of the decentralization and anonymity that this digital currency offers, ensuring their transactions remain confidential and secure.

    When considering the purchase of admin RDP servers with BTC, it is important to choose a reputable provider that guarantees a seamless experience and meets your specific requirements. Look for providers who prioritize customer support, offer competitive pricing, and maintain high levels of security for your sensitive data.

    Cheap Admin RDP Server With BTC

    Finding Reliable Providers Accepting Bitcoin Payments

    As the popularity of Bitcoin continues to rise, an increasing number of providers are accepting BTC as a payment method for admin RDP servers. However, not all providers offer the same level of quality and reliability. It is essential to research and choose a provider that offers a robust infrastructure, high uptime, and strong encryption protocols to ensure your data remains safeguarded.

    To find the best providers, consider reading online reviews, comparing prices and features, and seeking recommendations from trusted sources. Look for providers with a proven track record in the industry, as well as those who offer scalable solutions to accommodate growing business needs.

    By thoroughly vetting potential providers, you can choose the one that fits your budget, technical requirements, and aligns with your overall business strategy.

    You can simply get in touch with us by emailing us or by commenting on this post. We will help you find what you need. Plus, we’ve got all you need! In the next section I will show how you can by an Admin RDP server with BTC the easy way.

    Best Bitcoin Server Provider

    How and Where to Buy an Admin RDP Server with BTC

    Well this is the practical part of the article. I’m going to tell you how you can purchase an Admin RDP server with BTC from NeuronVM. Here we go:

    Buy an Admin RDP Server with BTC
    • Select your preferred plan from the list. I suggest you read the plan features carefully before purchasing the RDP.
    Choose preferred plan
    • Choose OS, Location and the Billing Cycle of your choice and hit Continue.
    admin rdp configuration
    • If you have a promo code, enter it in the box shown on this page. Click on Checkout and proceed.
    admin rdp promo code

    If you haven’t signed up before, you should fill out the form on this page.

    Complete buying server

    Once you’re done, choose all cryptocurrency. This will allow you to use Bitcoin for the payment. Then click on Complete Order and finalize your order.

    • Choose Bitcoin as your preferred currency and finalize the purchase.
    Choose Bitcoin as Preferred Currency

    There you go! The rest is on us. We will instantly deliver your Admin RDP server and you can use it with no limitations. Remember we have 24/7 support team here, so if you had any problems buying or using this service, don’t hesitate to contact us!

    Key Considerations When Purchasing Admin RDP Servers with BTC

    Before finalizing your purchase of admin RDP servers with BTC, there are several key considerations to keep in mind. Firstly, assess your required specifications, such as processing power, storage capacity, and network speed, to ensure the server can handle your anticipated workload effectively. Additionally, verify that the provider offers round-the-clock technical support to address any potential issues promptly.

    Purchasing Admin RDP with BTC

    Furthermore, it is essential to evaluate the provider’s data backup and disaster recovery plans. This ensures that your valuable data remains protected even in the event of unforeseen circumstances. Finally, consider the scalability options offered by the provider, as it is crucial to have the flexibility to adapt your server resources as your business expands.

    Conclusion

    Purchasing a cheap admin RDP server with BTC offers numerous advantages in terms of security, anonymity, and convenience. By understanding the benefits of admin RDP servers, finding reliable providers accepting Bitcoin payments, and considering key factors before making a purchase, you can make an informed decision that meets your business requirements. Take the time to research and choose a provider that aligns with your needs, providing you with a reliable and cost-effective solution for your remote server needs.)