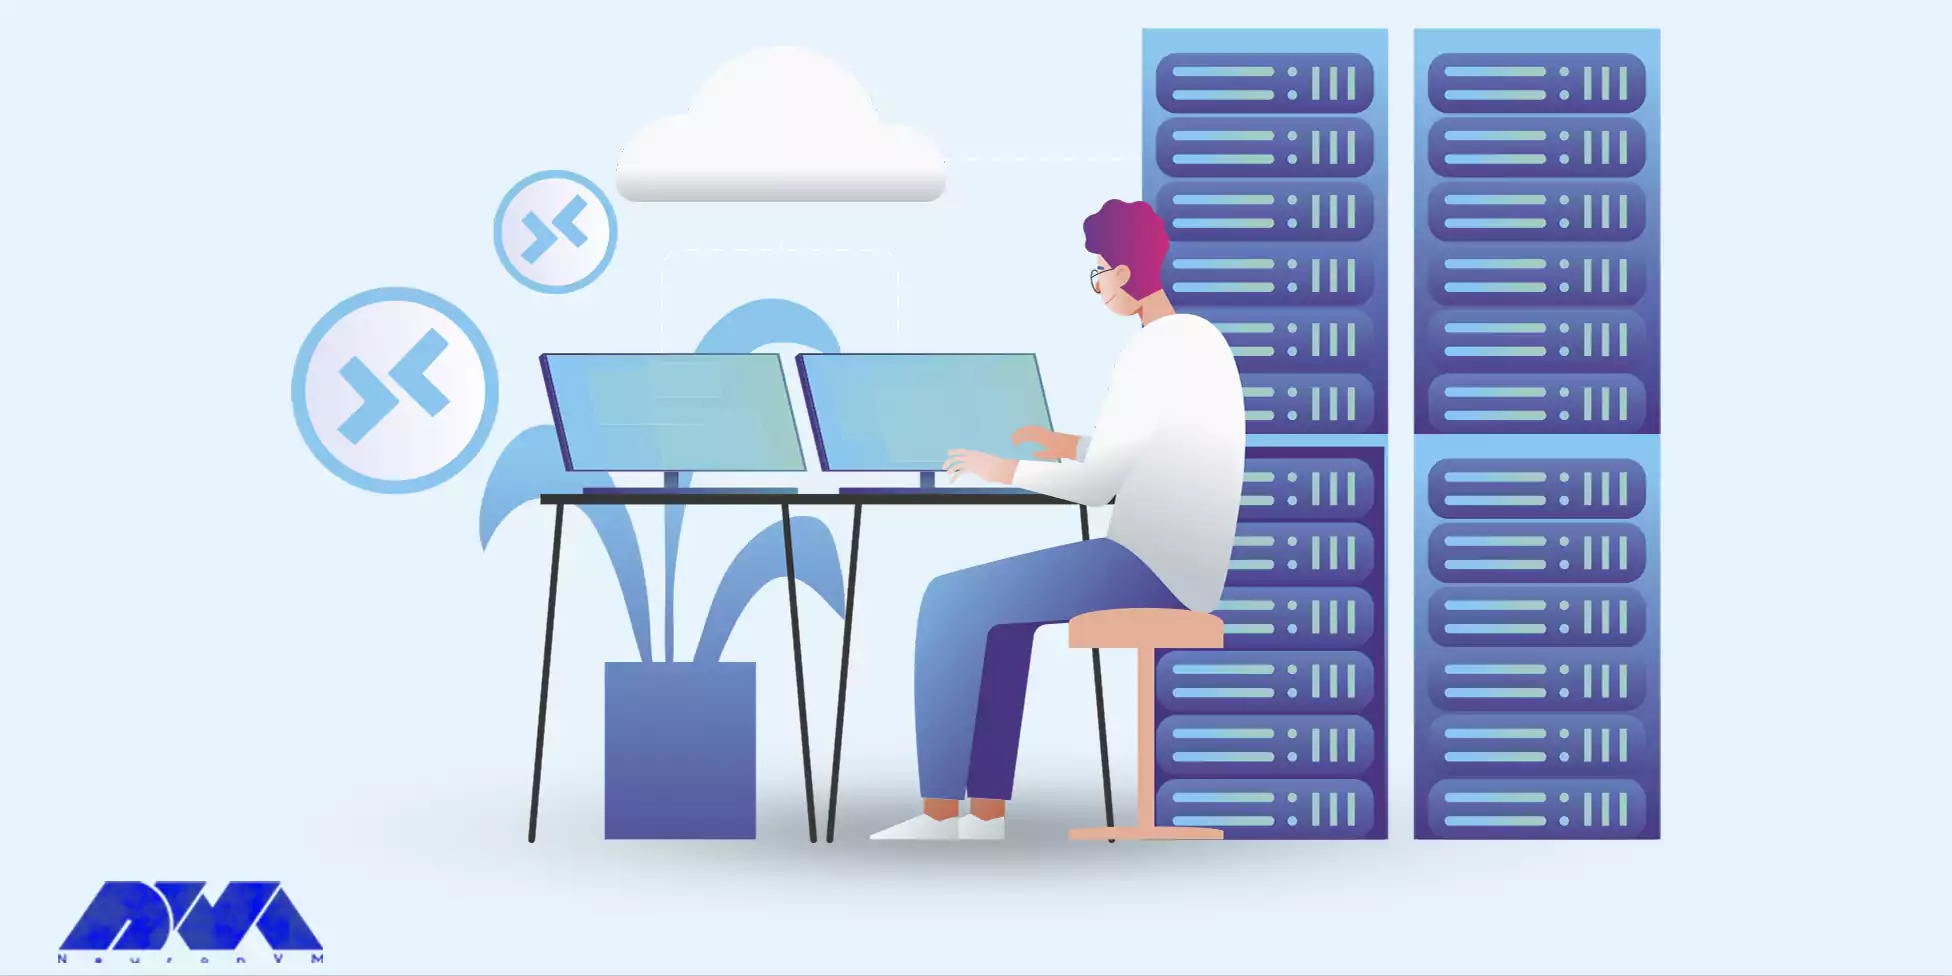
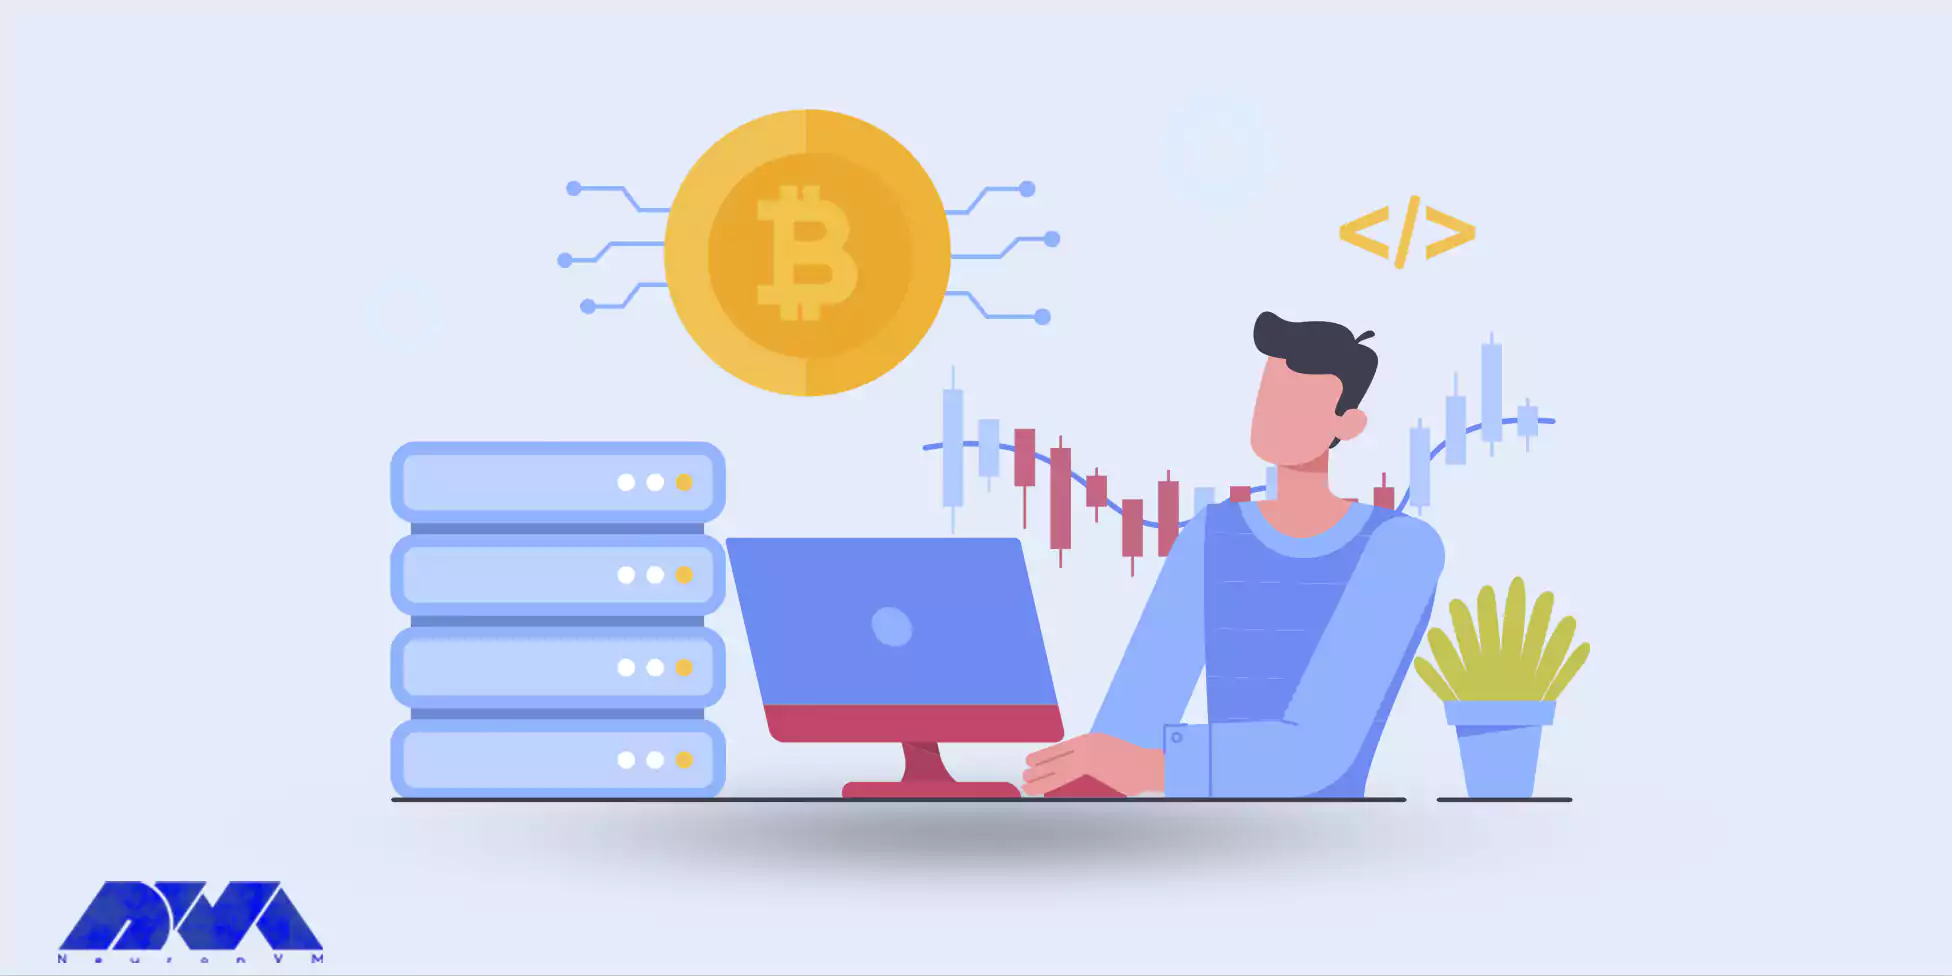
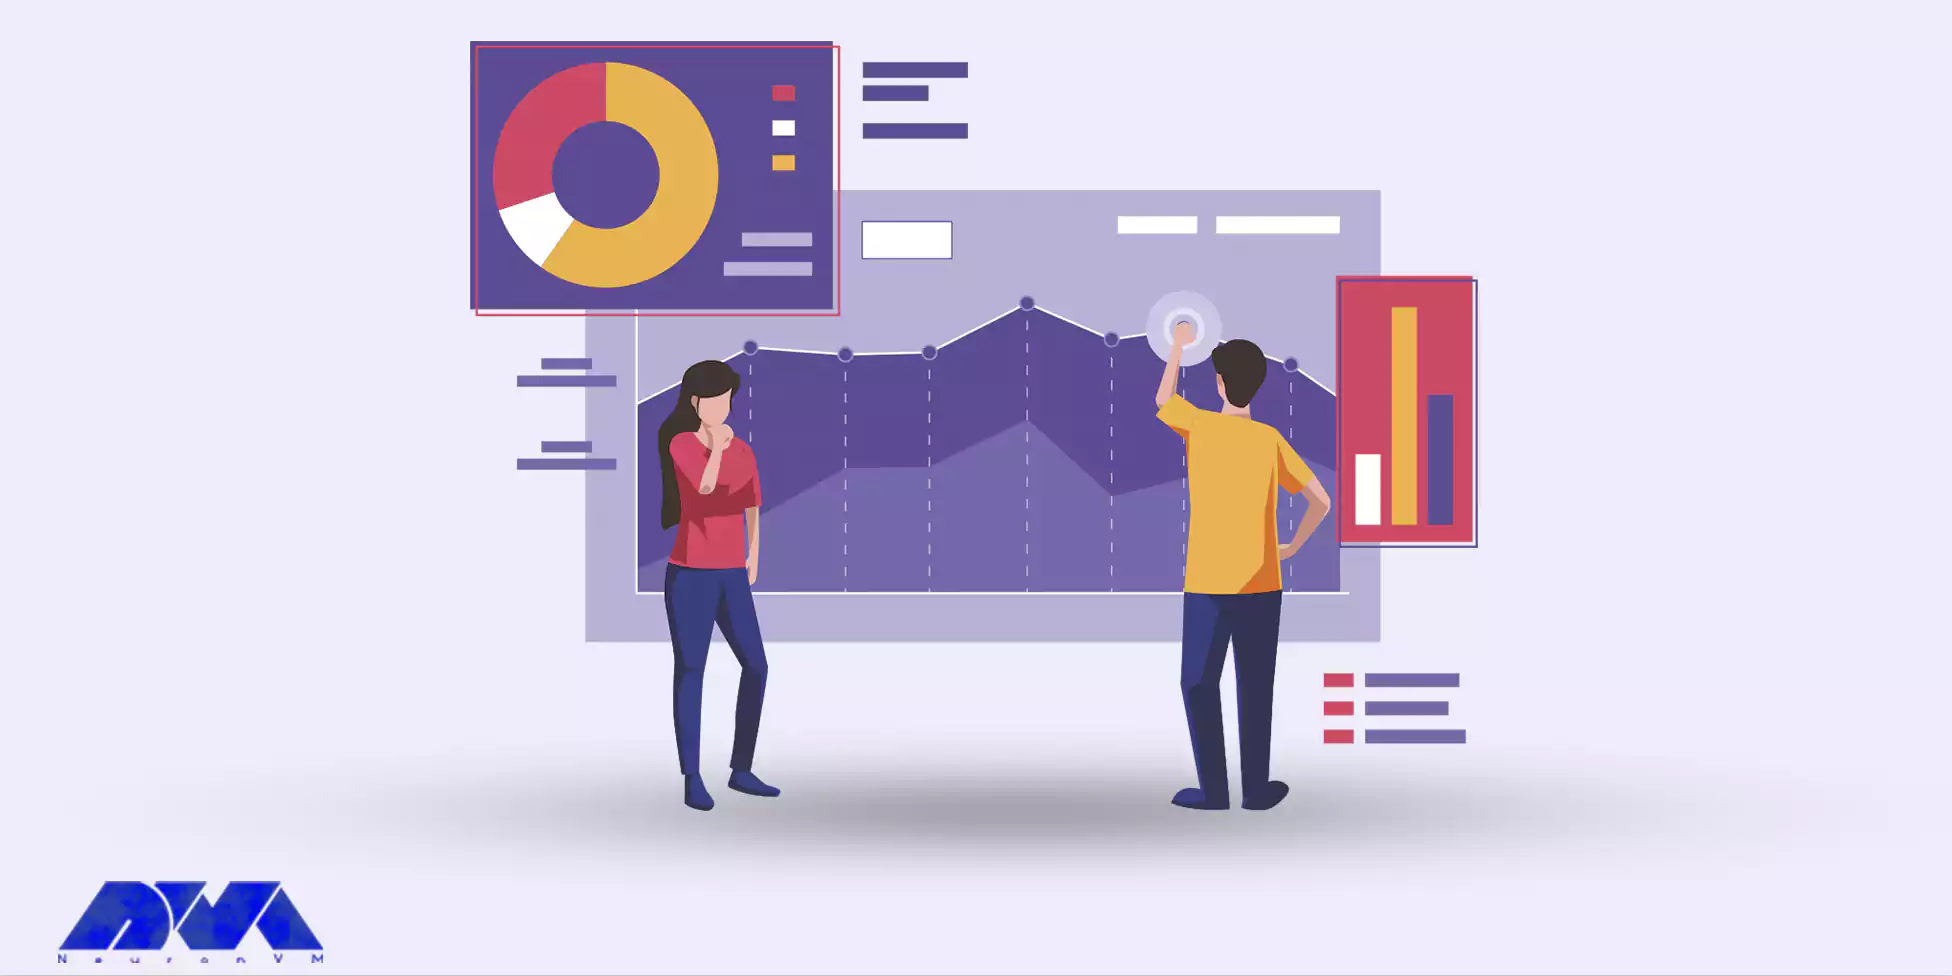
Trading on Windows VPS offers numerous advantages over traditional trading setups. One of the key benefits is the ability to access your trading platform anytime, anywhere. Unlike a physical computer, a VPS is hosted in a data center, allowing you to log in remotely from any device with an internet connection. This means you can monitor and execute trades even when you are away from your home or office, ensuring that you never miss out on profitable opportunities. Additionally, a VPS provides you with a dedicated virtual environment, free from the distractions and limitations of a regular computer. This allows your trading platform to run smoothly and efficiently, without being slowed down by other applications or processes running on your device. In this guide, we will focus on trading on Windows VPS and explore its infinite world as we move along!
Why Windows VPS is an Ideal Solution for Trading?
Trading on Windows VPS is the perfect option for traders due to a variety of reasons. Firstly, it offers reliability by providing a stable environment that eliminates interruptions and downtime typically experienced with shared hosting services. This ensures that traders can carry out their activities without any disruptions.
Secondly, speed is crucial in trading, and Windows VPS delivers high network speeds and low latency. This allows traders to execute trades in real time without any delays, enabling them to take advantage of market opportunities promptly.
In addition, accessibility is simplified with Windows VPS. Traders can access their trading platforms from anywhere and at any time through remote desktop access. Furthermore, Windows VPS provides a high level of customizability, allowing traders to install and run any desired trading software or indicators.
Overall, Windows VPS offers a reliable, fast, secure, customizable, and scalable environment that makes it an ideal hosting platform for traders in need of powerful and dedicated resources for their trading operations.
Choosing the Right Windows VPS Provider: Factors to Consider
When it comes to selecting a Windows VPS provider, there are several crucial factors to consider. The first thing to keep in mind is reliability. Look for a provider that guarantees high uptime and has a proven track record of delivering stable services. Additionally, performance is paramount.
Ensure that the provider you choose offers ample resources, such as CPU, RAM, and storage, to meet your specific needs. Pricing should also be considered, but be cautious of going for the cheapest option as it may compromise on quality. Another important factor is customer support.
Opt for a provider that offers prompt and helpful assistance whenever you need it. Taking all these factors into account, we recommend you take a look at our services. With our reliable services, high-performance resources, competitive pricing, and dedicated customer support, NeuronVM strives to provide an exceptional Windows VPS experience.
Optimizing Resources for Trading on Windows VPS: Best Practices
Optimizing resources for trading on a Windows VPS requires following best practices to ensure optimal performance and efficiency.
Firstly, it is crucial to choose a VPS provider that offers high-speed internet connection and low latency for real-time trading. Additionally, allocating sufficient RAM and CPU resources to run trading software smoothly is essential.
Regularly monitoring and optimizing resource usage by closing unnecessary programs and services, as well as keeping the VPS environment free from malware and unnecessary files, will help maximize performance.
Implementing these best practices will enable traders to execute trades swiftly and efficiently on their Windows VPS.
Top Trading Platforms Compatible with Windows VPS
There are several top trading platforms that are fully compatible with Windows VPS, providing traders with a seamless and efficient trading experience. These platforms combine robust features, advanced charting tools, and lightning-fast order execution capabilities to cater to the needs of both beginner and advanced traders.
Popular examples includeMetaTrader 4 and 5, cTrader, and NinjaTrader. With the compatibility of these platforms with Windows VPS, traders gain the advantage of uninterrupted connectivity, enhanced security, and the ability to trade anytime, anywhere.
Troubleshooting Common Issues
When trading on a Windows VPS, it is not uncommon to encounter certain issues that may disrupt the trading experience.
– One common issue is a slow or unresponsive VPS. This can be due to several reasons, such as insufficient RAM, limited processing power, or high network latency. To troubleshoot this, it is recommended to check the VPS specifications and ensure that they meet the trading platform’s minimum requirements.
Additionally, optimizing the network settings, managing background processes, and ensuring adequate cooling can help improve performance.
– Another issue traders may face is the disconnection of the VPS from the trading platform. This can be caused by unstable internet connections or issues with the VPS provider. Users should check their network stability, ensure all necessary ports are open, and contact the VPS provider for any potential server-side problems.
Regularly monitoring and addressing these common issues will help ensure a seamless trading experience on a Windows VPS.
Conclusion
In conclusion, trading on a Windows VPS offers a multitude of advantages for traders seeking efficient, reliable, and secure solutions. With the ability to remotely access the VPS from any location and operate uninterrupted 24/7, traders can seize market opportunities swiftly and effectively. Windows VPS also provides a stable environment with high processing power, low latency, and optimal network connectivity, ensuring lightning-fast trade executions. Remember if you need a VPS, NeuronVM is here for you!
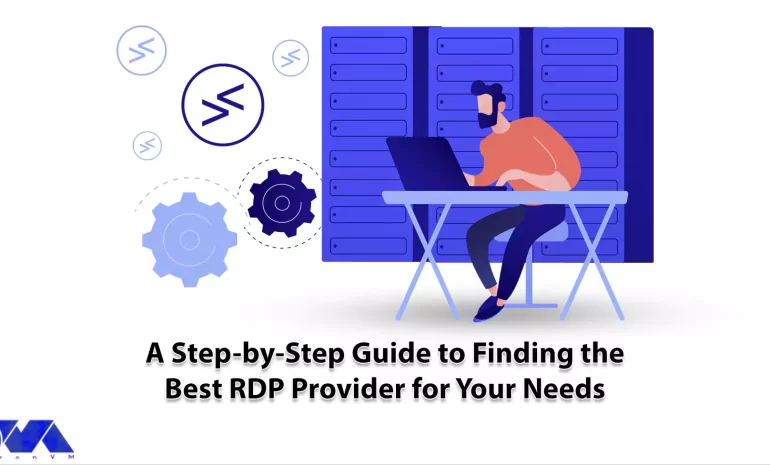
In our previous articles, we introduced you to RDP servers and explained how to use them. RDP servers with the advantage of remote control and monitoring provide you with more access and save you money and time. Now we want to make this article wider for you and introduce you to the advantages and other key factors by presenting a step-by-step guide to find the best RDP provider for your needs.
How to Find A Good RDP Provider?
Finding the best Remote Desktop Protocol (RDP) provider for your needs and buying RDP services involves evaluating several factors to ensure you select a service that meets your requirements in terms of performance, security, Reputation, and cost. Here’s a step-by-step guide to help you find the right RDP provider.
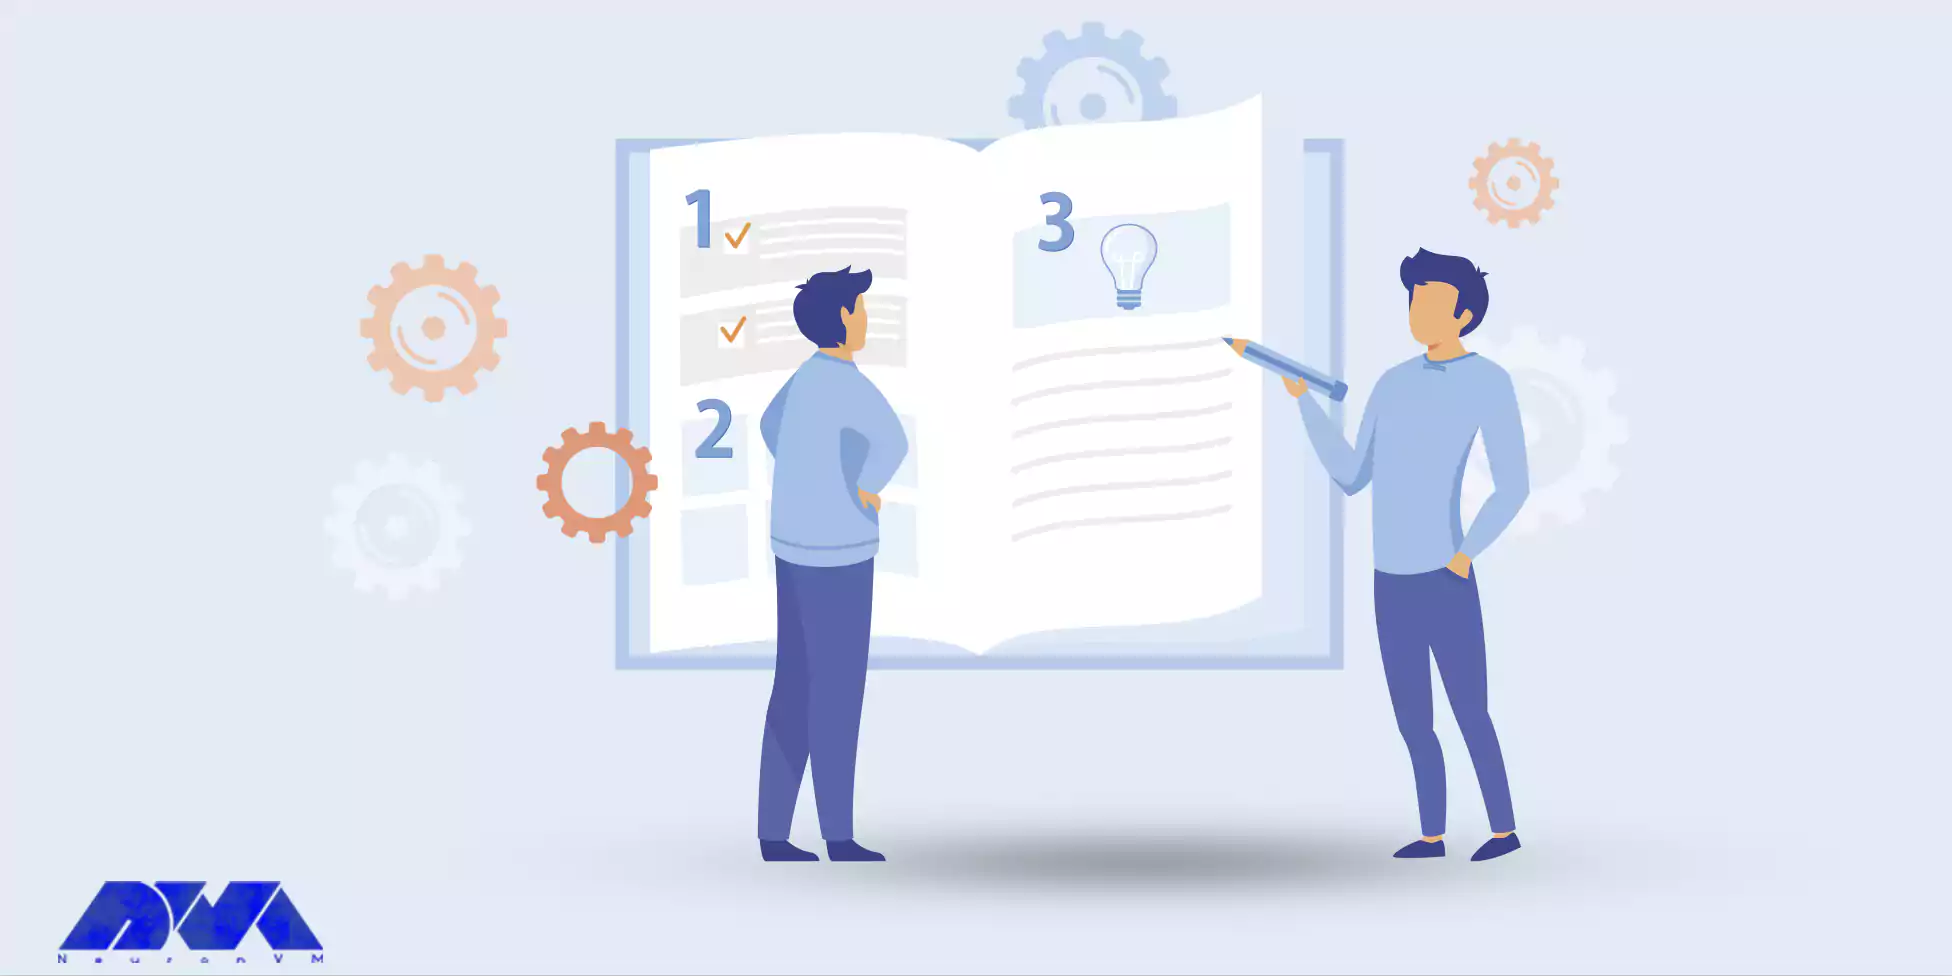
Define Your Needs Before Any Action
Before you start looking for an RDP provider, determine your specific needs. Ask yourself questions like:
How much budget can you spend on this?
How many simultaneous connections do you need?
What is the proper operating system to run your RDP on, (Windows or Linux)?
What level of performance and resources do you need?
Is security a priority?
Will you need strong support?
Detailed Research to Find the Best RDP Provider
Start by researching RDP service providers. Look for reviews, testimonials, and recommendations from trusted sources and users’ comments. Some popular RDP providers include Microsoft Azure, AWS, NeuronVM, Google Cloud, and specialized RDP hosting providers. Here are steps to conduct comprehensive research on RDP providers:
Start by compiling a list of potential RDP providers. You can do this through internet searches, online forums, and recommendations from colleagues. Then Determine your budget and Clearly outline your specific needs and objectives. You should look for reviews and testimonials from current or former customers. Now you can review the features and services offered by each provider.
You should consider factors such as the operating systems supported, performance, security features, and scalability. Pay attention to security, it is very critical when it comes to remote access. Do research to compare the prices of plans and so many other researches to get the right decision.
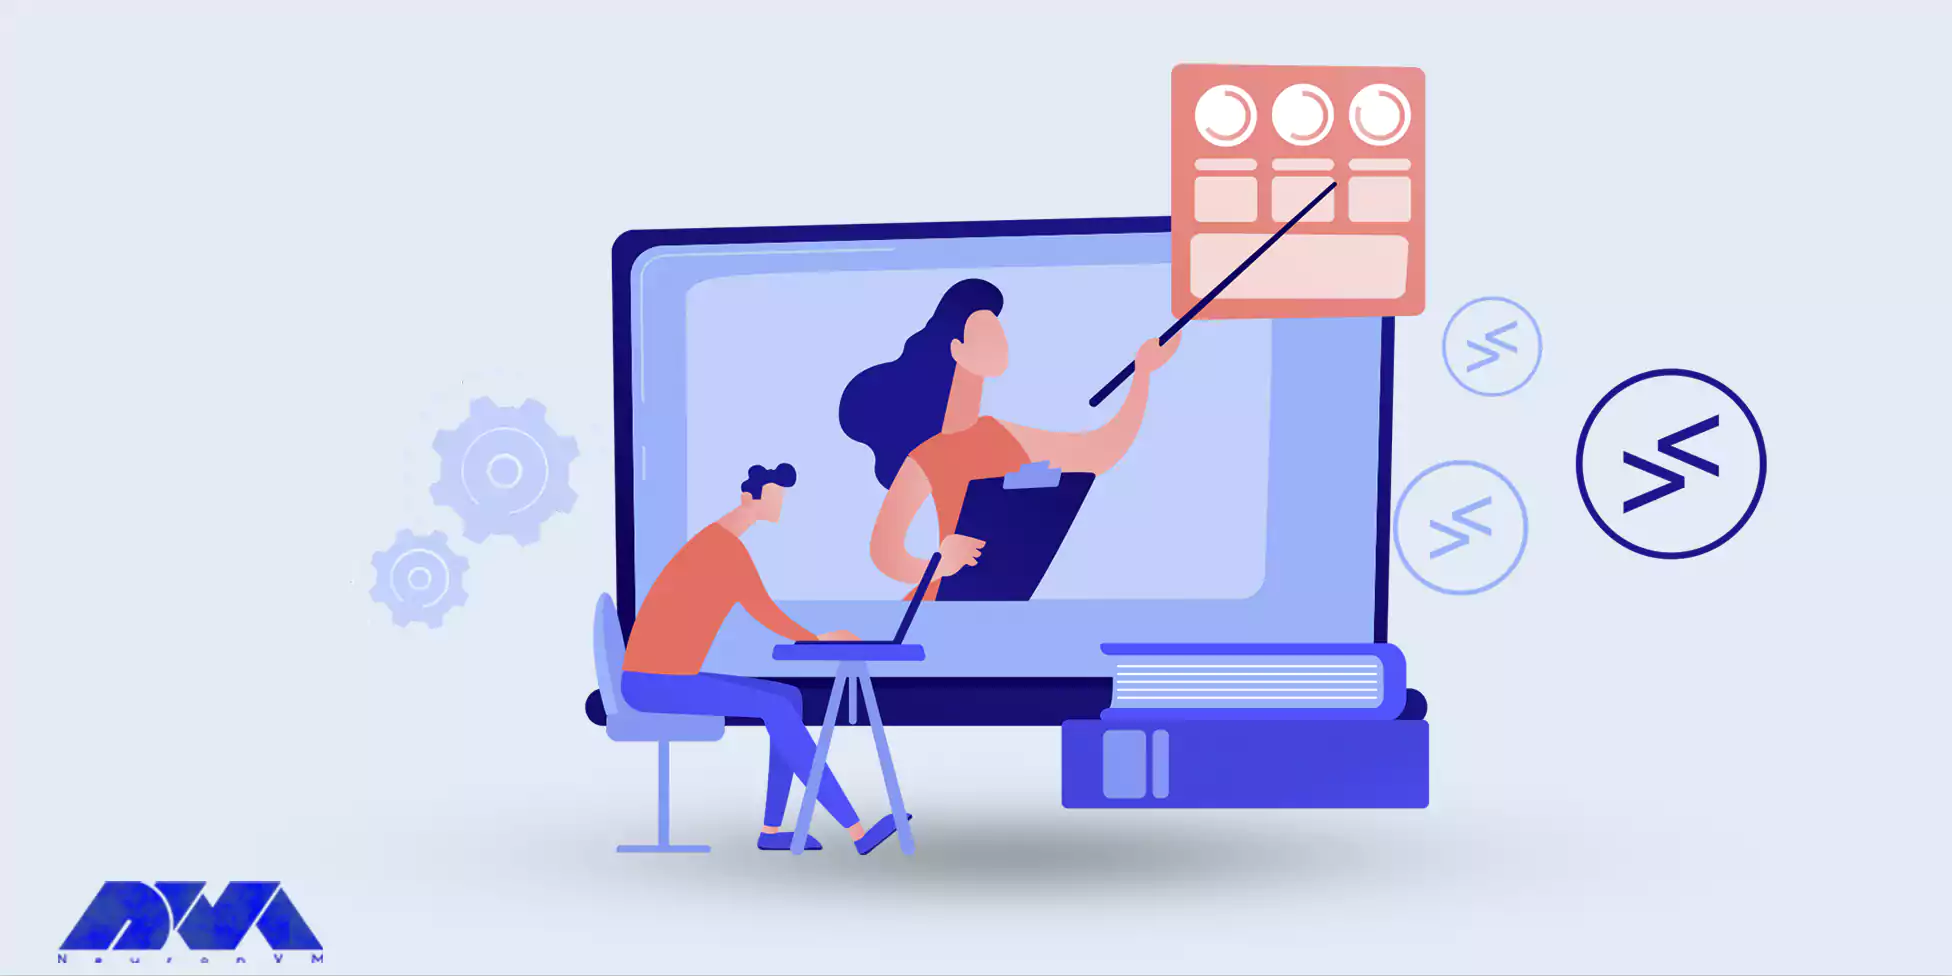
Checking the Reputation of RDP Providers
Investigate the reputation of each provider. Analyze and keep tracking the comments and descriptions from customers to measure providers’ performance, reliability, and customer satisfaction. Pay attention to recent reviews to ensure accuracy. Note that the reputation of an RDP provider can impact the quality of service, security, and overall user experience.
Research the provider’s history and background and assess the security measures. Don’t forget that a positive reputation will attract lots of users and is a measure of trust. When you’re dealing with RDP providers, you often need to entrust them with sensitive data and access to your systems. A provider with a good reputation is more likely to be trustworthy and less likely to misuse your data or breach your security.
Assessing Features and Services of the RDP Providers
This is another crucial point in finding a suitable RDP provider and you should pay attention and examine the features and various services that are offered by RDP providers. Consider factors like supported operating systems, performance metrics (e.g., CPU, RAM, bandwidth), scalability options, security features, and any additional services or add-ons to assess the value of these providers.
Some of the RDP providers may offer additional features like file sharing, collaboration tools, or integration with other services. Assessing these extras can help you choose a provider that enhances your remote work capabilities.
Also, assessing the features of RDP providers is essential to selecting the right solution for your remote access needs while prioritizing security, performance, compatibility, reliability, and user experience. It ensures that you choose a provider that aligns with your specific requirements and enhances your remote work capabilities.
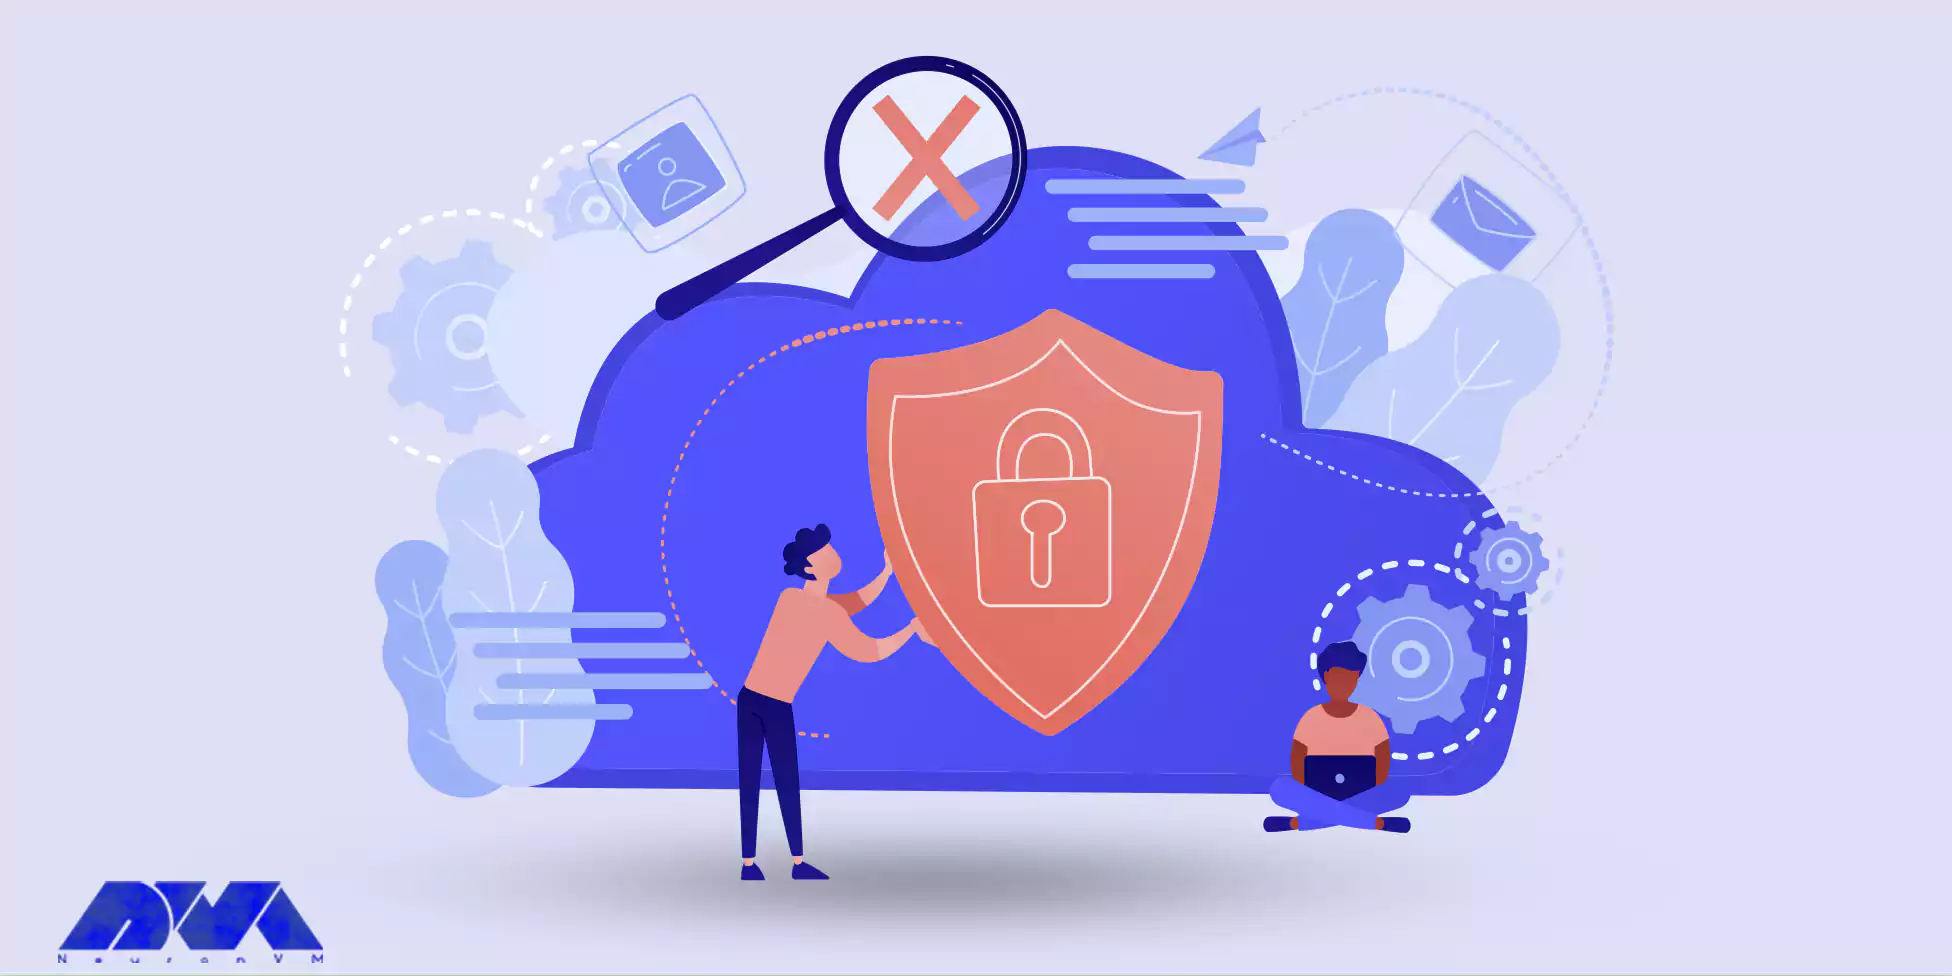
Evaluating the Security Measures of RDP Providers
Security is critical when dealing with remote access. Investigate the security measures implemented by the provider, including encryption protocols, two-factor authentication, firewall protection, and data center security. RDP allows users to access remote systems and data.
If security measures are not in place, unauthorized users could potentially gain access to sensitive information, leading to data breaches and privacy violations. You should know that RDP is a common target for cyberattacks. Without robust security measures, attackers can exploit vulnerabilities to deliver malware, ransomware, or conduct other malicious activities on remote systems.
Overall, security is essential for RDP providers to protect both the providers themselves and their customers from a wide range of threats, including data breaches, cyberattacks, and regulatory violations. Implementing robust security measures helps maintain the confidentiality, integrity, and availability of remote desktop services.
Comparing the Prices of Different Providers
Compare the pricing plans of different RDP providers. Pay attention to any hidden costs, additional fees, or discounts for longer-term commitments. Make sure the pricing aligns with your budget.
Look at the different plans or tiers offered by the RDP provider. They may offer varying levels of resources, such as CPU, RAM, and storage. Consider the pricing model, whether it’s subscription-based, pay-as-you-go, or a one-time payment. Choose the one that aligns with your budget and usage patterns.
Also, you can evaluate the amount of CPU, RAM, and storage provided in each plan. Ensure that the resources meet your performance requirements without overpaying for excess capacity you won’t use.
By carefully considering these points, you can make an informed decision when comparing the prices of RDP providers and select the one that best suits your business or personal requirements.
Testing the Performance of RDP Providers
The performance of an RDP provider can significantly impact your remote working or server management experience. Here are several factors to consider when testing the performance of RDP providers:
Latency: Latency measures the delay between a user’s input and the corresponding action on the remote desktop.
Bandwidth: Adequate bandwidth is essential for transmitting data between the client and the remote desktop.
Connection Stability: A stable connection is crucial for uninterrupted work.
Image Quality: RDP should provide clear and crisp display quality. Test different resolutions, color depths, and multimedia content to evaluate image quality.
Performance under Load: Test how the RDP provider handles multiple concurrent users or heavy workloads. Assess performance degradation.
File Transfer: Assess the speed and reliability of file transfers between the local and remote systems.
Session Management: Evaluate features like session disconnect and reconnection, session sharing, and resource allocation for different users.
Scalability: Consider how well the RDP provider scales with your organization’s growth. Ensure it can handle an increasing number of users and resources.
Updates and Maintenance: Consider the ease of updating and maintaining the RDP solution, including patch management and software updates.
Assessing the Customer Support
The quality of customer support provided by RDP service providers can vary widely depending on the company and its specific offerings. When evaluating RDP providers for customer support, there are a number of things to consider, including communication channels, response time, documentation and resources, the level of knowledge and expertise, user reviews, trial period, and accessibility of the support team.
It’s important to remember that customer support can be a crucial aspect of your decision when choosing an RDP provider, as technical issues or downtime can impact your business operations. Therefore, conducting thorough research and possibly reaching out to the provider’s support team with pre-sales questions can give you a sense of their level of commitment to customer service.
Reading the Terms of Services of the RDP Provider
Thoroughly review the terms of service to avoid any misunderstandings or contractual issues in the future. After conducting extensive research, carefully weigh the pros and cons of each provider. Choose the one that best aligns with your requirements, budget, and overall objectives.
What Is the Impact of A Good RDP Provider For You?
The great thing about reputable and qualified RDP providers is that they automatically create an account for you. As a result, you don’t need to worry about managing servers. All you have to do is choose a plan that gives you full control over the server and hardware and software components.
Another thing is to choose a service that has good customer support and a good guide to help you solve any problems you may have. Therefore, the right choice will make you expand your business soon and enjoy a quality and hassle-free service.
Conclusion
Once you’ve considered all these factors, you should have a clearer vision of which RDP provider aligns best with your needs. Remember that the “best” provider can vary greatly depending on your unique requirements, so prioritize those aspects that are most crucial for your specific use case.
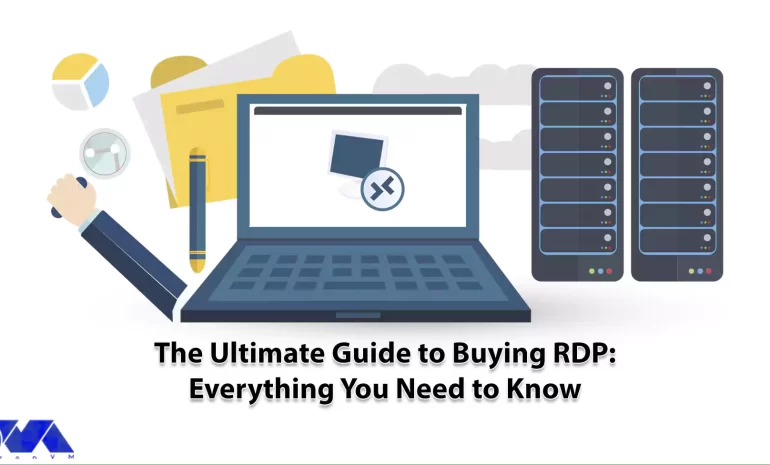
If you have read our previous articles, you must be familiar with the RDP server and know what advantages it brings to you. Here, we will try to provide an ultimate guide to buy RDP and introduce you to everything you need to know. Buying RDP is not a difficult task, but you should be careful to make your purchase at affordable prices. Some providers offer premium RDP servers at cheap prices. Choosing high-quality but low-cost servers is one of the priorities of users. You should know important things about servers and key points in choosing and buying RDP in order to make your purchase easily and confidently. Go ahead and enjoy an easy process to buy RDP!
A Comprehensive Explanation of RDP
RDP stands for Remote Desktop Protocol, and it is a proprietary protocol developed by Microsoft. RDP allows a user to remotely connect to and control another computer or server over a network connection. It is commonly used for remote administration, technical support, and accessing virtual desktops.
This platform is a network communication tool that enables a user to connect to and interact with a remote computer or server from a different location over a network, typically the Internet. It facilitates the remote control of the host system’s desktop, applications, and resources as if the user were physically present at the remote machine. Its security features, multi-platform support, and resource-sharing capabilities make it a valuable tool for professionals. Now, keep studying to get more!
Why Buy RDP?
You can provide remote input and display through network connections by using RDP and running it on the server. Now read on to find out why you should use RDP:
– With the help of RDP, you will be able to save time. In other words, you can do things like download, update programs, or even backup and maintain any desktop program from just one system. So, time is saved, and you can focus on your other business matters.
– With RDP, users will only wait for changes to be applied to their device page as resources are done for each application on the server. This makes RDP a popular hosting for applications with high amounts of bandwidth and processing power.
– Everything is encrypted in RDP, so remote desktop connections are safe from hackers. So, if you buy an RDP server, don’t worry about your security.
– If you have an RDP host, you can access your system from home or anywhere using a web browser. You can also access your device from any other system. This allows you to have complete monitoring and control of other devices remotely.
– If you want to provide a reliable solution for your business, it will probably be expensive. But this is not true for RDP servers. Because you don’t have to invest in virtual servers hosting your own programs or pay to maintain your servers. On the other hand, employees can also access their desktop computers from their devices and save on hardware costs.
– By using RDP there is no need to carry flash drives, and there is no need to install any software. Since everything is in one place, accessing your data and files is easy, as long as you have an internet connection.
– You don’t need to worry about any configuration on your desktop or network. You just need to connect to your server.
Types of RDP Available in the Market
There are several types of RDP available in the market, and all are provided in NeuronVM, each with its own features and capabilities. Here are some of the most common types:
Windows RDP 10
Windows RDP 2012
Windows RDP 2016
Windows RDP 2019
Windows RDP 2022
Factors to Consider Before Buying RDP
When looking to buy Admin RDP, it’s essential to consider several key features to ensure that you choose the right server for your specific needs. RDP servers allow you to remotely access and manage a computer or server, making them a valuable tool for various purposes. Here are some key features to consider when you want to buy RDP servers:
Choose an RDP server that runs your preferred operating system, whether it’s Windows, Linux, or another OS. The choice of OS should align with your specific use case and software requirements.
Look for RDP servers that offer robust security features, including encryption, firewalls, and authentication mechanisms, such as multi-factor authentication (MFA).
The performance of the RDP server is critical. Look for servers with powerful CPUs, sufficient RAM, and fast storage (SSD recommended) to ensure smooth operation.
Evaluate the availability of remote management tools that come with the RDP server. These tools should simplify server administration and troubleshooting tasks.
Ensure the server has a reliable network connection with sufficient bandwidth for your needs.
Ensure compatibility with the devices and software you plan to use for remote access. RDP should be compatible with various client devices and operating systems.
Data protection is crucial. Check if the RDP server offers backup and recovery options, which can help you safeguard your data in case of unexpected issues.
Evaluate the total cost of ownership, including upfront costs, ongoing maintenance expenses, and any licensing fees for the RDP server software or operating system.
There are a lot of other features that you have to consider when buying RDP or Admin RDP; here, we mentioned the most important ones.
Choosing the Right RDP Provider
Choosing the right Remote Desktop Protocol provider is essential to ensure secure and efficient remote access to your computers or servers. In this section, we will discuss three factors that should be prioritized when choosing a professional provider.
The RDP service provider should include various payment methods. You can access all these payment methods from our website and have a safe and comfortable purchase. Of course, another important issue is to pay attention to the amount of services provided and their prices in an agency. Is the received service worth the money paid or not?
Buying RDP online is not a challenging task, and you can go through this process successfully by following a few simple steps. We have previously presented articles in this regard, for example, How to buy Admin RDP with Perfect Money.
Setting up and Configuring your RDP
After you have prepared the RDP server you want, it is time to implement it on your system and make the relevant settings to run this platform.
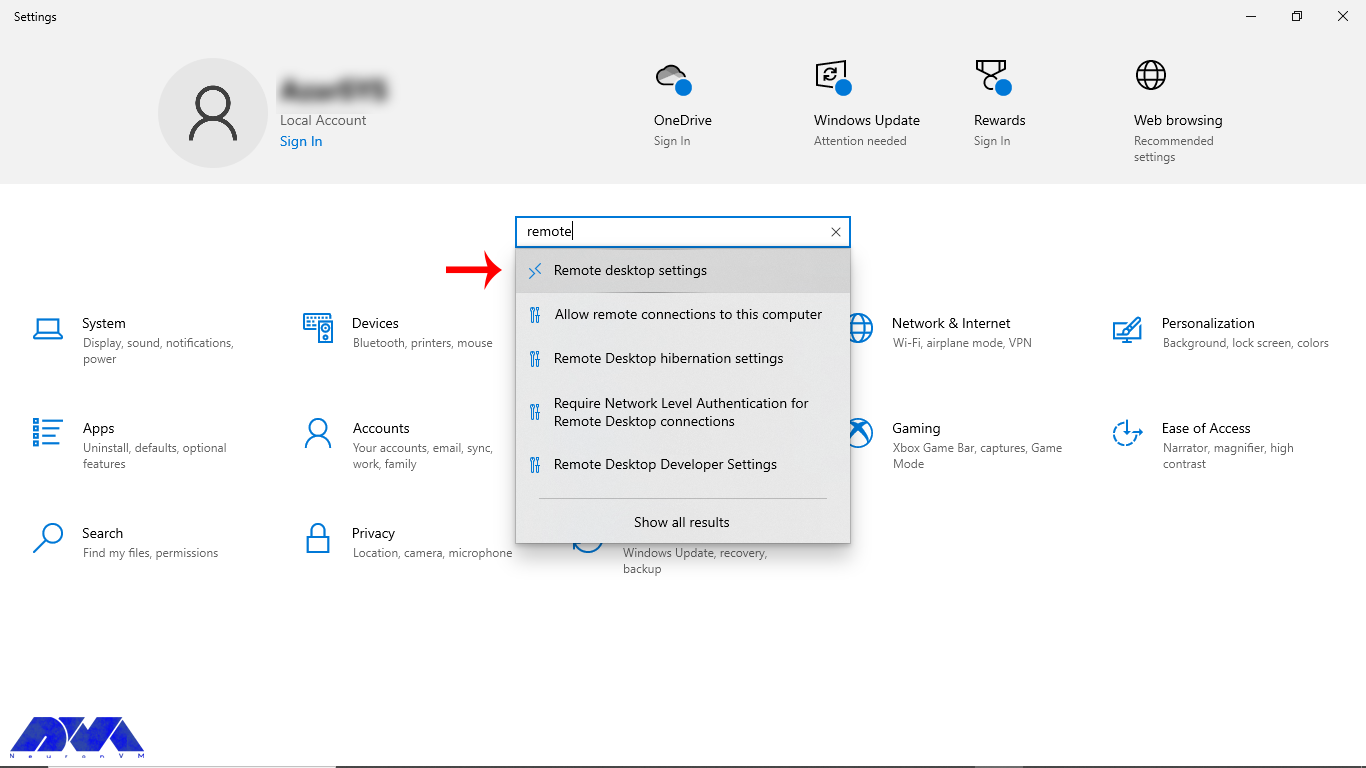
To setup RDP on your system, follow the steps below:
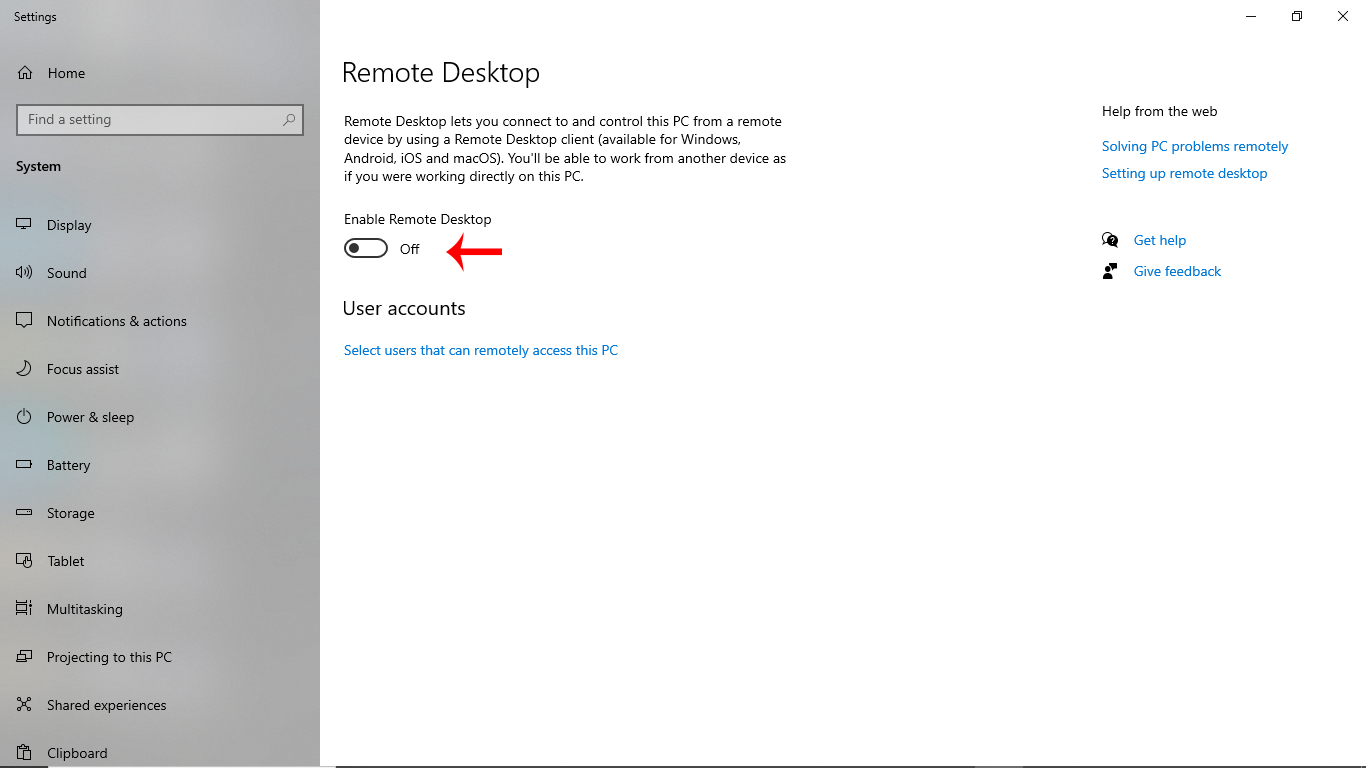
1- Press Start on your desktop environment and click on the Setting icon on the left.
2- Choose the System group followed by the Remote Desktop item.
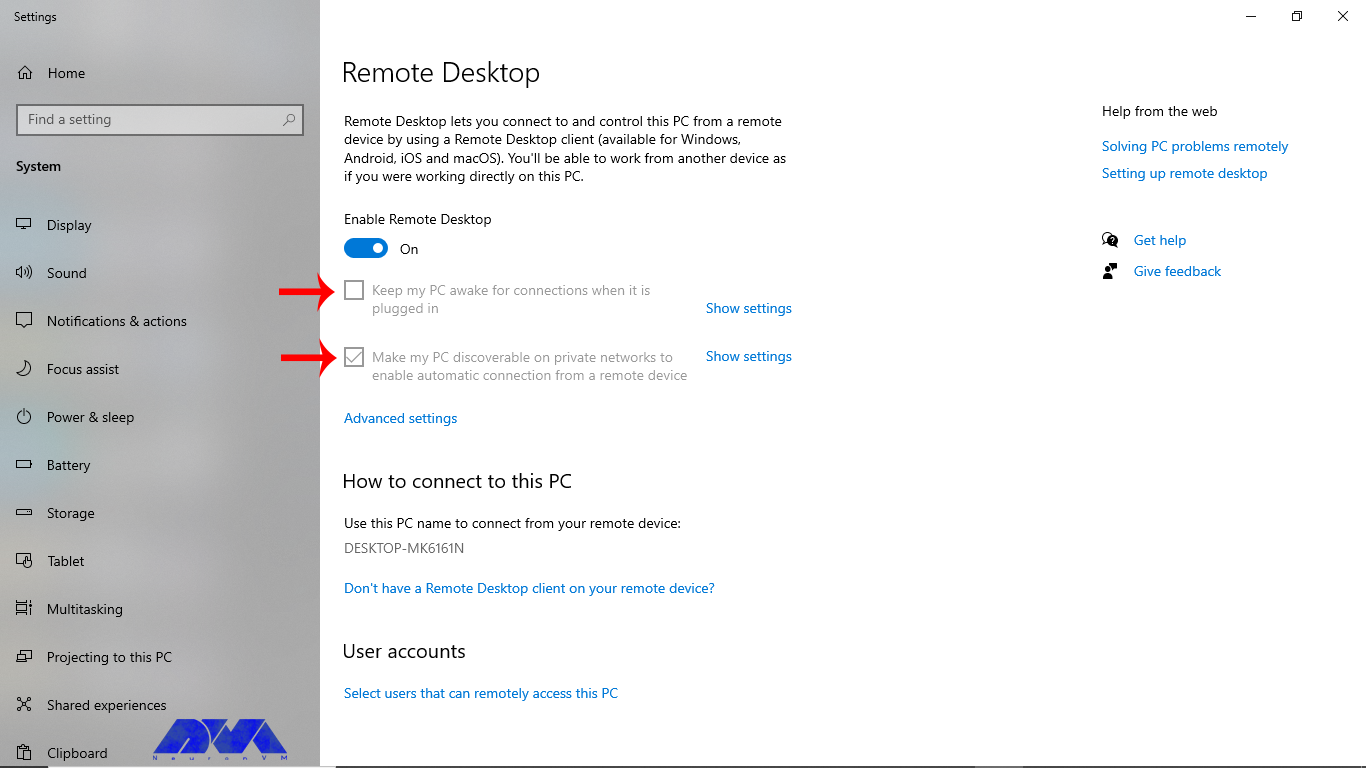
3- You can choose the slide button to enable Remote Desktop.
4- Keep your device awake and discoverable to ease the connection, and then press Show Setting.
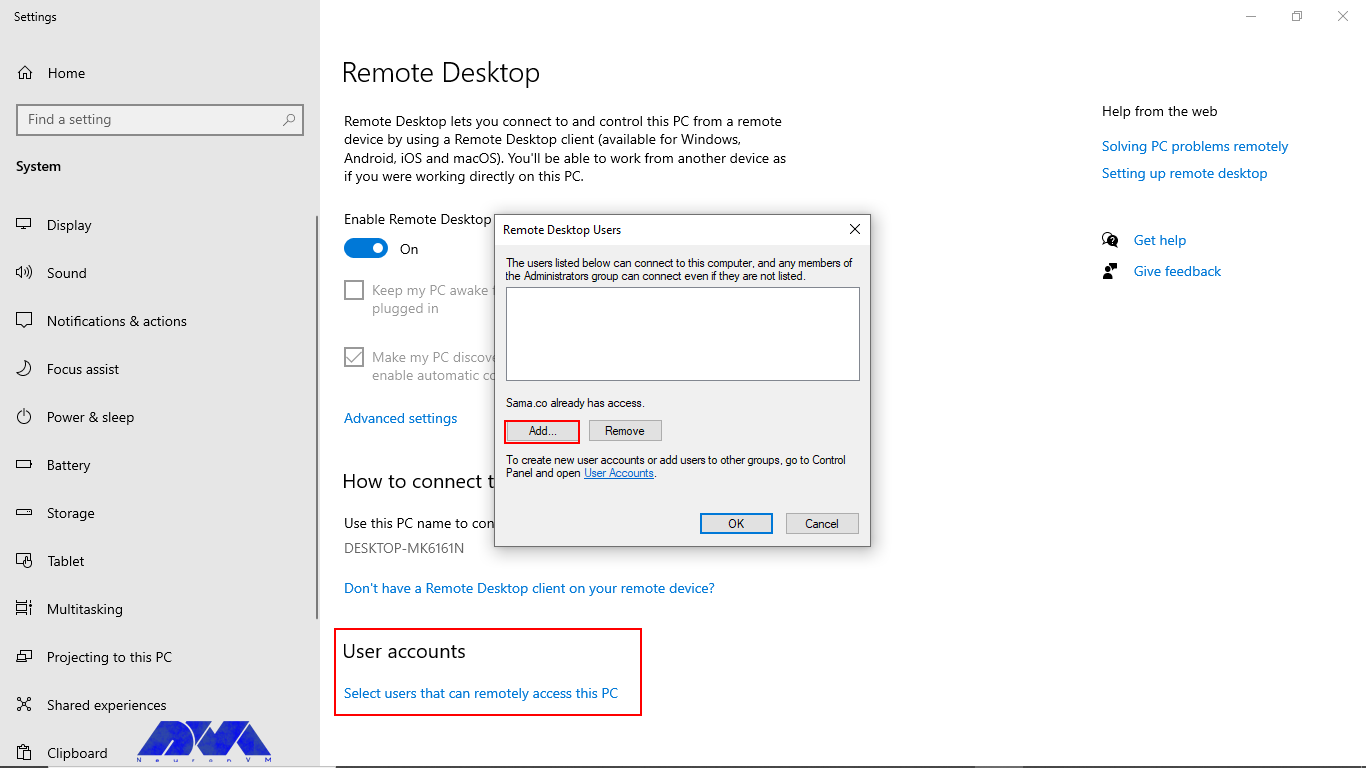
5- Now, you can add the number of users you want to allow to connect remotely.
Tip: The administrator group can access it automatically.
6- Save and make note of the PC name under the part of How to connect to this PC.
That’s it! Now you can use Your RDP server easily.
Tips for Maximizing the Benefits of RDP
Remote Desktop Protocol is a valuable tool for remotely accessing and managing Windows-based computers. To maximize the benefits of RDP, consider the following tips:
– Security: Always use strong, complex passwords for RDP access. Also, you can enable Network Level Authentication (NLA) to add an extra layer of security. Use a VPN or firewall to restrict RDP access to trusted IP addresses.
– Change Default Port: Consider changing the default RDP port (3389) to a custom port to reduce the risk of automated attacks.
– Keep Software Updated: Keep both the local and remote computers updated with the latest security patches and RDP updates.
– Limit Access Permissions: Only grant RDP access to users who need it. Or Assign the least privilege necessary to perform required tasks.
– Use Network Level Authentication (NLA): NLA requires users to authenticate before establishing an RDP session, adding an extra layer of security.
– Enable RDP Logging: Enable RDP logging to monitor who is accessing the server and for troubleshooting purposes.
– Set Session Time Limits: Configure session timeout settings to automatically log out idle sessions to free up resources.
– Optimize Network Connection: Ensure a stable and high-speed internet connection for smooth RDP performance.
– Monitor RDP Sessions: Use monitoring tools to keep track of RDP sessions, including login/logout times and activities.
– Backup and Recovery: Regularly back up critical data and system configurations to ensure you can recover in case of issues.
– Disable Copy-Paste and Drive Redirection: In sensitive environments, consider disabling features like clipboard sharing and drive redirection to prevent data leaks.
– Test and Document: Conduct thorough testing of RDP connections before deploying them in production.
– Monitor for Anomalies: Setup alerting and monitoring for unusual or suspicious RDP activities.
– Regularly Audit and Review: Periodically review and audit your RDP setup to identify and address any potential security weaknesses.
What Are the Main Advantages to Buy RDP from NeuronVM?
NeuronVM is one of the main providers that offer great and up-to-date services like RDP or Admin RDP, Cheap VPS, and so on. So, if you are looking for a secure and worry-free service provider with full support, NeuronVM is a wise choice. Let’s see what can be the significant advantages of buying RDP from NeuronVM:
– You will have 24/7 professional support.
– You can be sure about the security of your information because a lot of sensitivity has been spent on this matter.
– There is a wide range of locations to choose from. (60+ Locations)
– You will have the ability to pay with digital currencies likeBitcoin.
– Unlimited bandwidth is another amazing advantage of RDP servers in NeuronVM
– High-quality and affordable RDP prices
– The ability to expand RAM and storage
In What Cases Can RDP Be Used?
RDP can be used in various scenarios and for different purposes, depending on the needs of users. These cases can be:
Remote administration by IT administrators to remotely manage and troubleshoot servers and workstations.
Telecommuting and Remote Work to help employees access their work computers from home or other remote locations.
Server Hosting and Data Centers in which providers use RDP to manage and maintain servers and virtual machines hosted in remote locations.
Remote Training and Collaboration for remote training sessions and collaborative work.
Software Development and Testing in which Developers can use RDP to access remote development and testing environments.
Security Monitoring to remotely access security cameras.
Monitoring systems and security appliances to observe and manage security incidents.
And Remote Access for Personal Use and personal computers and devices.
Common Issues and Troubleshooting to Buy RDP
Buying RDP services can raise various legal, security, and ethical concerns. Here are some issues you may encounter when buying RDP and potential solutions:
1- RDP can be vulnerable to security threats if not properly configured or if you are purchasing services from untrustworthy sources.
Solution:
– Choose reputable RDP service providers with a track record of security.
– Use strong, unique passwords and enable multi-factor authentication.
– Regularly update and patch the RDP software and underlying operating system.
– Restrict access to only trusted IPs.
– Employ security software to detect and prevent unauthorized access.
2- Using RDP means your data and potentially sensitive information are transmitted over the Internet. This could be intercepted or accessed by unauthorized parties.
Solution:
– Use secure, encrypted RDP connections.
– Consider using a Virtual Private Network (VPN) in conjunction with RDP for an additional layer of security.
– Be cautious about sharing sensitive information while using RDP.
3- Some RDP service providers may not offer reliable uptime, customer support, or adequate resources.
Solution:
– Research and choose RDP providers with a good reputation and reliable service.
– Look for customer reviews and testimonials.
– Consider a trial period before making a long-term commitment.
4- RDP services can have associated costs, which can add up over time.
Solution:
– Budget for RDP expenses.
– Consider free or open-source alternatives if cost is a concern.
Conclusion
The specific features and requirements for an RDP server will vary depending on your use case and business needs. It’s important to thoroughly assess your requirements and choose an RDP server solution that is compatible with your goals and budget. Notice that while RDP is a versatile tool, security considerations are paramount when using it. At last, We tried to present ideal content to help you choose the proper RDP service and enjoy a perfect and secure connection to control and manage users’ devices.
We have discussed RDP servers in detail in our previous articles. RDP is a remote desktop protocol. This technology has enabled users to access and control other devices remotely through the Internet. People with different jobs can use this platform and access files, run programs, or manage servers. In this section, we will examine the benefits of buying RDP for your business.
An Introduction RDP Servers
RDP servers are software applications or services running on a computer that enables remote access to that computer’s desktop and resources. Besides, it is a valuable tool for remote administration, technical support, and remote work scenarios, but you should configure and use it with security in mind to protect the remote computer and its data from unauthorized access.
If you want to have a better understanding of Admin RDP, it is like mouse movements and user keystrokes are transmitted to other people’s systems remotely, but this work is done by the Internet instead of radio waves. Then, you will see the user’s desktop screen on the main computer.
What Are the Benefits of Buying RDP Servers?
Using Admin RDP Server in a business environment can offer several significant benefits:
– Cost Savings
– Enhanced Security
– Centralized Data
– Disaster Recovery
– Scalability
– Remote Access
– Easy Collaboration
– Support and Maintenance
– Improved Productivity
– Client Compatibility
Now, let’s analyze each of these factors separately.
Buying RDP Can Save Money
Businesses can save money on hardware and maintenance costs by centralizing resources on a server and providing remote access via RDP. This reduces the need for expensive workstations or laptops and can extend the lifespan of existing hardware.
Using Remote Desktop Protocol servers can potentially lead to cost savings in certain scenarios. It can reduce hardware costs, Centralized RDP servers are typically more power-efficient than individual PCs or workstations. This can lead to significant savings on electricity bills, and managing and maintaining a central RDP server environment can be more cost-effective than maintaining multiple individual workstations.
Lastly, You can implement robust security measures at the server level and ensure that data is regularly backed up, reducing the risk of data loss and associated recovery costs.
RDP Can Help to Secure Your Connection
Remote Desktop Protocol (RDP) can help secure your connection when used properly, but it can also pose security risks if not configured and managed correctly. This protocol is a proprietary protocol developed by Microsoft that allows users to connect to and control a remote computer over a network. RDP typically offers robust security features. These features include encryption and multi-factor authentication, to protect data during remote connections. In addition, centralizing resources on a server allows for better control over security policies and access permissions.
Here are some ways RDP can help secure your connection, along with considerations for maintaining security like using strong encryption to protect the data transmitted between the local and remote computers, authentication before granting access to a remote computer, having an additional layer of security that ensures the user is authenticated before a remote desktop session is established, or configure your firewall to allow RDP traffic only from trusted IP addresses or networks. Also, You can enforce strong password policies for RDP accounts to prevent brute-force attacks.
The Effect of Centralized Data in RDP Servers
Centralized data in RDP servers can have several advantages and considerations. RDP is a proprietary protocol developed by Microsoft that allows users to connect to a remote computer over a network connection. Centralized data refers to the practice of storing and managing data on a central server rather than on individual client devices.
Storing data and applications on a central server through RDP ensures that all users have access to the latest files and software versions. This reduces data silos and version control issues.
Disaster Recovery Plan on RDP Servers
Creating a Disaster Recovery Plan (DRP) for Remote Desktop Protocol servers is crucial to ensure business continuity in the event of unexpected disasters or disruptions. RDP servers are often critical components of an organization’s infrastructure, and any downtime can lead to significant financial and operational losses.
RDP can be part of a disaster recovery plan. In the event of a hardware failure or other disaster, employees can quickly access their work environment from an alternate location, minimizing downtime.
Remember that a well-structured Disaster Recovery Plan is a dynamic document that should evolve with your organization’s needs and the changing threat landscape. Regularly test, update, and improve your plan to ensure that it remains effective in protecting your RDP servers and the critical data they contain.
Scalability Option on RDP Servers
RDP can easily scale to accommodate growing business needs. Adding new users or expanding server resources can be done relatively quickly and without significant disruption. Scalability options for Remote Desktop Protocol (RDP) involve strategies and configurations to ensure that your RDP server infrastructure can efficiently handle an increasing number of remote desktop users.
Some scalability options for RDP are listed here: Load balancing, creating Terminal Services Farms, virtualization technologies like VMware, resource allocation, network configuration, and security consideration in a way that Implement Quality of Service (QoS) policies to prioritize RDP traffic and ensure a smooth user experience, especially when bandwidth is limited.
The choice of scalability option depends on your organization’s specific requirements, budget, and existing infrastructure. It’s essential to balance performance, scalability, and security when implementing RDP scalability solutions to ensure a seamless remote desktop experience for your users while maintaining the integrity of your network and data.
Buy RDP for full Remote Access
RDP enables employees to access their work computers or servers from anywhere using an internet connection. This is especially valuable in today’s increasingly mobile and remote work environments, as it allows for flexibility in work locations. The primary purpose of Full Remote Access Using RDP is to allow individuals or administrators to manage and use a computer located in a different physical location.
This is incredibly useful for scenarios such as IT support, remote work, server management, or accessing a home computer while traveling. For security reasons, it’s crucial to use strong, unique passwords for RDP access.
Note that before you can use RDP, you need to enable it on the target (remote) computer. This is typically done by going into the computer’s settings and allowing it to accept remote connections.
The Possibility of Easy Collaboration With Buying RDP
Nowadays, remote work has become a common thing and companies are looking for remote technologies with increasing advancements and expansion across borders. However, this process is associated with various challenges. RDP servers are powerful tools that can help improve teamwork in an environment and control activities remotely.
In this way, team members can access similar files and programs from all over the world. These members can collaborate and share their ideas in real-time on a project regardless of location or distance. Also, buying RDP provides a secure environment for members. You can access various files and programs without worrying about data breaches.
In summary, collaboration with RDP enables multiple users to work together on a remote computer or server, and share resources. It’s a versatile technology widely used for remote work, technical support, and collaborative tasks where remote access and control are essential.
Support and Maintenance in RDP Services
Support and maintenance in Remote Desktop Protocol (RDP) services refer to the ongoing activities and services provided. So you can be sure of the smooth functioning, security, and availability of RDP-based remote desktop solutions. As you know, RDP is a protocol developed by Microsoft that allows users to connect to and control remote computers over a network.
IT teams can more easily support and maintain remote servers and workstations through RDP. Software updates, troubleshooting, and system maintenance can be performed remotely, reducing the need for on-site visits.
Technical support involves offering assistance to end-users and IT personnel who use RDP services. It includes addressing user issues, troubleshooting problems, and providing guidance on how to use RDP effectively. Technical support can be provided through various channels like email, phone, or live chat.
Support and maintenance in RDP services are critical for ensuring that remote desktop solutions remain secure, reliable, and efficient. These activities help organizations provide remote access to resources while minimizing downtime and addressing any issues that may arise.
How Does Buying RDP Improve Productivity?
One of the characteristics of a good remote desktop tool is that it increases productivity by adding advantages such as flexibility, improving access to important data, and adding efficiency. You can also automate important tasks such as connecting devices and editing meetings, as well as speed up work monitoring and increase productivity.
RDP can boost productivity by eliminating the need for employees to be physically present in the office. It enables employees to work from home, travel, or any location with internet access. They can reduce commute times and improve work-life balance.
The Impact of Client Compatibility on RDP Servers
Client compatibility in a Remote Desktop Protocol (RDP) server refers to the ability of different RDP clients to connect and work effectively with a specific RDP server. RDP is a proprietary protocol developed by Microsoft for remote desktop access and management of Windows-based systems.
A wide range of devices and operating systems support RDP, making it accessible to users with various hardware and software preferences. Ensuring client compatibility is crucial for a smooth and secure remote desktop experience.
Different versions of Windows and other operating systems come with their own RDP client implementations. Compatibility can be affected by the specific version of the RDP client running on the user’s device and the version supported by the RDP server. For example, Windows 10 includes an RDP client that is compatible with Windows Server 2016 and other versions.
To ensure client compatibility in an RDP server environment, it’s important to carefully assess the specific client requirements, server capabilities, and network configurations. Regularly updating and maintaining both clients and servers can help mitigate compatibility issues and enhance the overall remote desktop experience.
What Are The Best Practices When Buying RDP?
When buying RDP for remote access, it’s crucial to follow best practices. This way you can ensure the security and reliability of your connections. Here are some key best practices for using RDP:
– Implement multi-factor authentication (MFA) whenever possible to add an extra layer of security.
– Ensure that both the RDP client and server software are regularly updated with the latest security patches and updates.
– Implement the principle of least privilege (PoLP) to restrict access to only the resources necessary for the user’s tasks.
– Implement network-level security measures such as intrusion detection/prevention systems (IDS/IPS) to monitor and block suspicious traffic.
– Configure RDP to limit the number of concurrent sessions to prevent abuse and resource exhaustion.
– Keep both the client and server endpoints secure by using up-to-date antivirus software and regularly patching operating systems and applications.
– NLA requires users to authenticate before establishing an RDP session, adding an additional layer of security.
– Configure RDP to automatically disconnect idle sessions to reduce the risk of unauthorized access.
– For security reasons, consider disabling the clipboard and drive redirection in RDP sessions to prevent data leakage.
– Periodically review and update your RDP access policies to adapt to evolving security threats and business requirements.
– Implement regular data backups and disaster recovery plans to ensure business continuity in case of a security incident.
Other Alternative Programs for RDP
As we covered in this article, RDP is a popular choice for remote desktop access to Windows systems, there are alternatives available for cross-platform use, such as:
Virtual Network Computing (VNC)
TeamViewer,
AnyDesk
SSH for command-line access to Unix/Linux systems.
Conclusion
While RDP offers many benefits, it’s essential to implement it securely to reduce potential risks such as unauthorized access or data breaches. RDP server includes using strong authentication methods, keeping software up-to-date, and following best practices for network security. With the information mentioned above, we conclude that if you want to have access to all users in your business and control or monitor them, using RDP services will be a wise action.
In recent years, virtual private servers (VPS) have become increasingly popular among traders in the financial markets. A VPS offers many advantages for traders, including high-speed and reliable internet connectivity, uninterrupted trading operations, and the ability to run automated trading strategies 24/7. However, to make the most of trading on VPS, it is essential to follow certain best practices. Let’s discuss the best practices for trading on VPS.
Trading on VPS
Trading is a dynamic and ever-evolving practice that involves buying and selling financial instruments to capitalize on market movements. It is a fundamental activity in the financial markets, attracting individuals, institutions, and algorithmic trading systems alike.
Trading on VPS refers to conducting trading activities using a VPS. A VPS is a virtual machine that runs its own copy of an operating system, allowing users to have full control over the server’s resources. We advise you to use Windows VPS servers offered on our website for trading and tell us your opinion about the high quality of our servers.
Exploring the Powerful Features of Trading on a VPS
Trading on a VPS can provide traders with several powerful features that can enhance their trading experience. Here are some of the key benefits and features of trading on a VPS:
Enhanced Reliability and Uptime
One of the most significant advantages of trading on VPS is the enhanced reliability it provides. VPS servers are hosted in state-of-the-art data centers with redundant power supply and internet connectivity, ensuring maximum uptime. NeuronVM VPS servers are built on cutting-edge technology, ensuring maximum uptime and seamless trading operations.
With redundant power supply, high-speed internet connectivity, and state-of-the-art infrastructure, you can trade with confidence, knowing that your trading platform will remain online 24/7.
Enhanced Execution Speed
In the world of trading, speed is crucial. VPS hosting enables traders to achieve ultra-low latency and lightning-fast execution speeds. By leveraging high-speed internet connections and powerful server infrastructure, NeuronVM VPS allows for quick order placement and execution.
This is particularly advantageous for high-frequency traders and those who rely on split-second decisions. With faster execution speeds, traders can capitalize on market opportunities and potentially increase their profitability.
Robust Security Measures
Security is a paramount concern for traders, given the sensitive nature of financial transactions. NeuronVM VPS servers prioritize the security of your trading operations, employing advanced security measures to safeguard your data and transactions.
With NeuronVM’s secure infrastructure, you can trade with peace of mind, knowing that your confidential information is protected from unauthorized access.
Flexibility and Scalability
NeuronVM VPS servers offer traders unmatched flexibility and scalability. Whether you are an individual trader or a financial institution, NeuronVM provides customizable VPS hosting plans to meet your specific requirements.
You can easily scale up or down your resources based on your trading needs, ensuring optimal performance and cost-effectiveness.
Remote Accessibility
Trading on VPS eliminates the constraints of being tied to a specific location. With NeuronVM’s VPS servers, you can access your trading platform from anywhere in the world, as long as you have an internet connection.
Whether at home, in the office, or on the go, you can monitor your trades, execute orders, and adjust strategies in real-time.
Choose a Reliable VPS Provider
The first and most crucial step in trading on a VPS is to select a reliable VPS provider. Look for a provider that offers low latency connections, high uptime, and excellent customer support. Ensure that the VPS provider has data centers located in regions close to the financial markets you trade in, as this reduces latency and improves trade execution speed.
NeuronVM offers VPS hosting specifically designed for trading purposes. They provide low-latency servers located in major financial hubs around the world, ensuring fast and reliable connection speeds. Also, our website offers high uptime guarantees and robust security measures to protect your trading activities.
Optimize Network Connectivity
Network connectivity plays a crucial role in trading. To ensure a smooth trading experience, we recommend you optimize your VPS’s network connectivity. Here are a few different ways to do this:
Choose a Reliable Internet Service Provider (ISP): To ensure smooth trading operations, start by selecting a reliable Internet Service Provider (ISP) that offers low latency and high-speed internet connections. A stable and fast internet connection is essential for real-time data transmission and rapid execution of trades.
Optimize Router Placement: The placement of your router plays a significant role in network performance. To maximize connectivity, position your router in a central location, away from obstructions such as walls or furniture. This allows for better signal distribution throughout your trading area.
Use a Wired Connection for VPS: Wired connections offer lower latency and higher speeds, reducing the chances of data packet loss during transmission. By directly connecting your computer to the router via an Ethernet cable, you can ensure a stable and reliable network connection for trading on your VPS.
Regularly Monitor and Optimize Network Settings: Ensure that your VPS is configured to prioritize trading applications, allocating sufficient bandwidth to them. You can also consider implementing Quality of Service (QoS) settings on your router to prioritize trading data over other internet activities, preventing potential delays or interruptions.
Install Reliable Trading Software
When trading on a VPS, it is essential to install reliable and trusted trading software. Choose a platform compatible with your trading strategy that provides features like real-time market data, advanced charting tools, and order execution capabilities.
1) Research and Choose Trusted Trading Software: Look for software that is specifically designed for trading and has a proven track record of reliability and performance.
Read reviews, seek recommendations from fellow traders, and consider the software’s features, user interface, and compatibility with your trading strategy. Some of the best trading software out there areMetaTrader 4 & 5, cTrader, NinjaTrader, TradeStation, and Interactive Brokers Trader Workstation.
2) Ensure Compatibility and Optimal Configuration: Check the software’s system requirements and ensure that your VPS meets or exceeds them. Additionally, consider the optimal configuration settings recommended by the software provider.
Adjusting settings such as memory allocation, CPU usage, and network protocols can enhance the performance and stability of the trading software on your VPS.
3) Regularly Update and Maintain Your Trading Software: Keep track of software updates provided by the vendor and install them promptly. Updates often include bug fixes, feature enhancements, and security patches that can improve the trading experience and protect your VPS from potential vulnerabilities.
It’s important to note that the best trading software for you will depend on your specific trading goals, strategies, and preferences. It’s recommended to explore and evaluate different platforms, considering factors such as ease of use, available features, reliability, and customer support before deciding.
Maintain Proper Security Measures
Security is paramount when trading on a VPS. Implement robust security measures to protect your trading activities and sensitive information. Use strong and unique passwords for your VPS login and trading platform accounts. Regularly update your antivirus software, firewall, and operating system to prevent any potential security breaches.
Backup Trading Data
It is crucial to regularly backup your trading data to avoid any loss in the event of hardware or software failures. Setup automated backups of your trading platform settings, indicators, templates, and trade history. Consider storing the backups on external storage devices or cloud-based solutions for added security.
Monitor System Performance
Keep a close eye on your VPS’s performance to ensure optimal trading conditions. Monitor the CPU and memory usage, network latency, and disk space utilization. If you notice any performance issues, investigate the cause and take the necessary steps to resolve them.
Regularly restart your VPS to clear any accumulated resources and maintain optimal performance.
Final Thoughts
Trading on a VPS can greatly enhance your trading experience by providing high-speed and reliable connectivity, uninterrupted trading operations, and the ability to run automated strategies. By following the best practices mentioned in this guide, you can maximize the benefits of trading on a VPS and improve your overall trading performance.
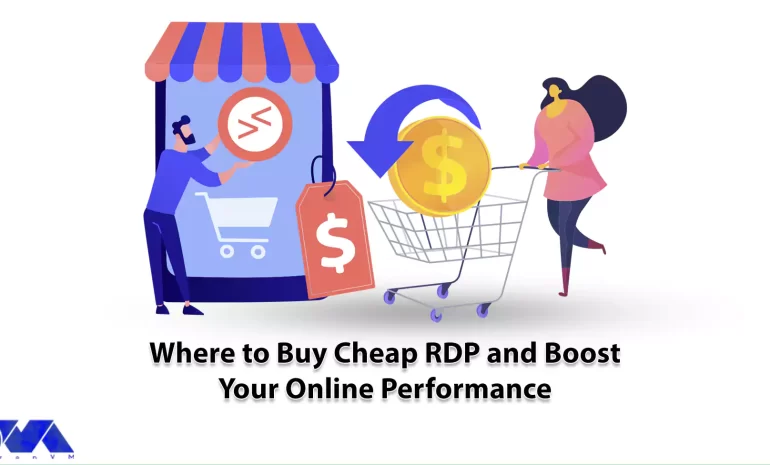
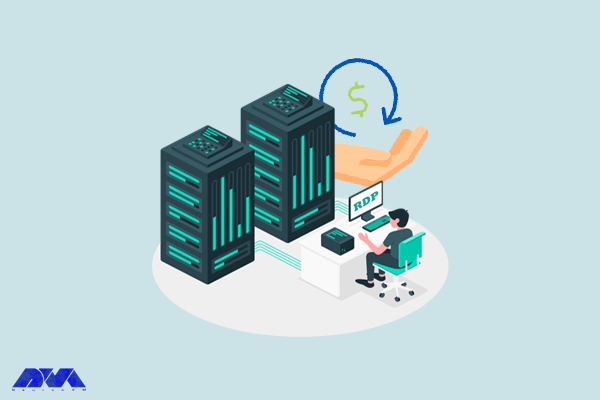
Have you ever used RDP services? Do you know that you can make your work easier by using RDP servers and easily manage devices or other systems that are far from you with main access? Don’t waste time and take action to get these widely used servers. RDP servers have many advantages. These servers are provided to users by different providers. These companies offer cheap RDP servers to increase their sales and credibility. But the word cheap should not create a bad mentality for you because sites like NeuronVM offer their RDP services while maintaining quality and optimal services at affordable prices. Here, we will focus on the issue of where to buy cheap RDP and Boost your online performance.
Why RDP? Important Advantages of Cheap RDP Servers
Now we want to introduce you to the advantages of using cheap RDP services. So keep reading and stay Tuned!
1- You will have remote access: RDP servers enable users to access and control a remote computer from virtually anywhere with an internet connection. It is valuable for IT support and management.
2- Multi-user support is available: RDP servers can handle multiple concurrent connections, this is beneficial for collaborative tasks and remote support scenarios.
3- You can find sufficient resources: RDP is known for its efficient use of system resources. It uses compression and other optimizations to minimize bandwidth usage, ensuring a responsive user experience even over slower network connections.
4- High security: RDP servers provide robust security features, including encryption of data transmission, and strong authentication. This helps protect sensitive information and prevents unauthorized access.
5- There is the possibility of resource sharing: RDP facilitates resource sharing between the local and remote computers. Users can easily copy and paste text and files, share printers, etc.
7- This RDP service is cost-effective: RDP is often included as part of the Windows operating system, making it a cost-effective solution for remote access compared to third-party alternatives.
8- It is customizable: Administrators can customize RDP settings and policies to align with their organization’s specific needs, ensuring security and compliance.
What Are the Requirements for a RDP Access?
If your goal is to find a cheap admin RDP solution, you can consider the following options. Keep in mind that while these options may be budget-friendly, they might have limitations in terms of performance, features, or security:
Low-End Hardware: If you’re setting up your own RDP server, you can save costs by using low-end hardware. However, keep in mind that performance may be limited. It may not handle multiple simultaneous connections or resource-intensive tasks well.
Operating System: Choose a cost-effective operating system for your RDP server.
Limit Concurrent Users: If you’re using Windows Server for RDP access, choose a version that allows a limited number of simultaneous RDP connections.
Dynamic DNS: Instead of purchasing a static IP address, use Dynamic DNS (DDNS) services to map a dynamic IP address to your RDP server. This can save on IP address costs.
No-Frills Hosting Providers: Look for budget-friendly hosting providers. They offer RDP access but may not provide advanced features or extensive customer support.
Trial Periods: Take advantage of free trial periods offered by some RDP service providers to evaluate their suitability for your needs before committing to a paid plan.
Bundled Services: Some hosting providers bundle RDP access with other services like web hosting or virtual private servers (VPS), which can result in cost savings.
Self-Hosted Solutions: Consider self-hosting RDP services if you have the technical expertise. Tools like FreeRDP and XRDP can help set up RDP on your own server.
How You Can Boost Your Performance By Cheap RDP?
Improving the performance of a Remote Desktop Protocol (RDP) connection can be challenging if you’re working with limited resources, such as a low-cost RDP service.
However, there are several steps you can take to optimize your RDP experience without spending a lot of money:
1. Be careful to select the right RDP service. Choose RDP services with high performance within your budget.
2. It is better to choose a location close to your physical location. This can reduce the latency and improve connection speed.
3. Ensure that your local network is not congested. Avoid heavy downloads or streaming while using RDP.
4. Close any unnecessary applications running on the remote server to free up system resources for your tasks.
5. Opt for lightweight software on the remote server. Heavy applications can strain the server’s resources and slow down performance.
6. Ensure that hardware acceleration is enabled on both your local and remote machines if available.
7. Consider upgrading your local hardware. A faster computer with more RAM and a better graphics card can make a noticeable difference in your RDP experience.
8. Sometimes, using a VPN can improve the connection speed and security of your RDP session. However, this may not always be the case, so test it to see if it helps.
Where You Can Buy a Cheap RDP Server?
Pay attention to the points above and enjoy easy and fast remote access to your system from anywhere. If you are willing to have Cheap RDP with Administrative or full admin access, Instant delivery, and so many other options, we recommend you buy RDP services from NeuronVM and enjoy a qualified connection.
To buy a Cheap Admin RDP server from NeuronVM, you can refer to the official website and go through the steps after signing in to the page.
Conclusion
Remember that the performance of your RDP connection can be influenced by various factors. These factors can be the performance of the RDP service, your network conditions, and the capabilities of the remote server. While these tips can help, there may be limitations to how much you can boost performance with a low-cost RDP service. Consider investing in a higher-tier service if you require consistently better performance.
RDP is an acronym for Remote Desktop Protocol, which is specific to Windows servers. You can use RDP as a graphical user interface (GUI) to connect to other computers and monitor or control hosted servers. The noteworthy point is that RDP is specific to Windows systems, but it is also compatible with other operating systems such as Linux and Mac.
In the meantime, there are companies that provide RDP servers for users. These providers include services like RDP VPS that are provided for personal users and businesses. Here we will try to introduce some of these providers and give you a list of the best affordable RDP providers in 2023. Stay tuned!
An Introduction to RDP Servers
As mentioned above, Remote Desktop Protocol (RDP) orAdmin RDPservers are software or systems that enable remote access and control of a computer or server over a network. RDP is a proprietary protocol developed by Microsoft that allows users to connect to a remote Windows-based computer or server from another device, usually a client computer.
This technology is widely used in corporate and personal settings for a variety of purposes, including remote management, technical support, and telecommuting.
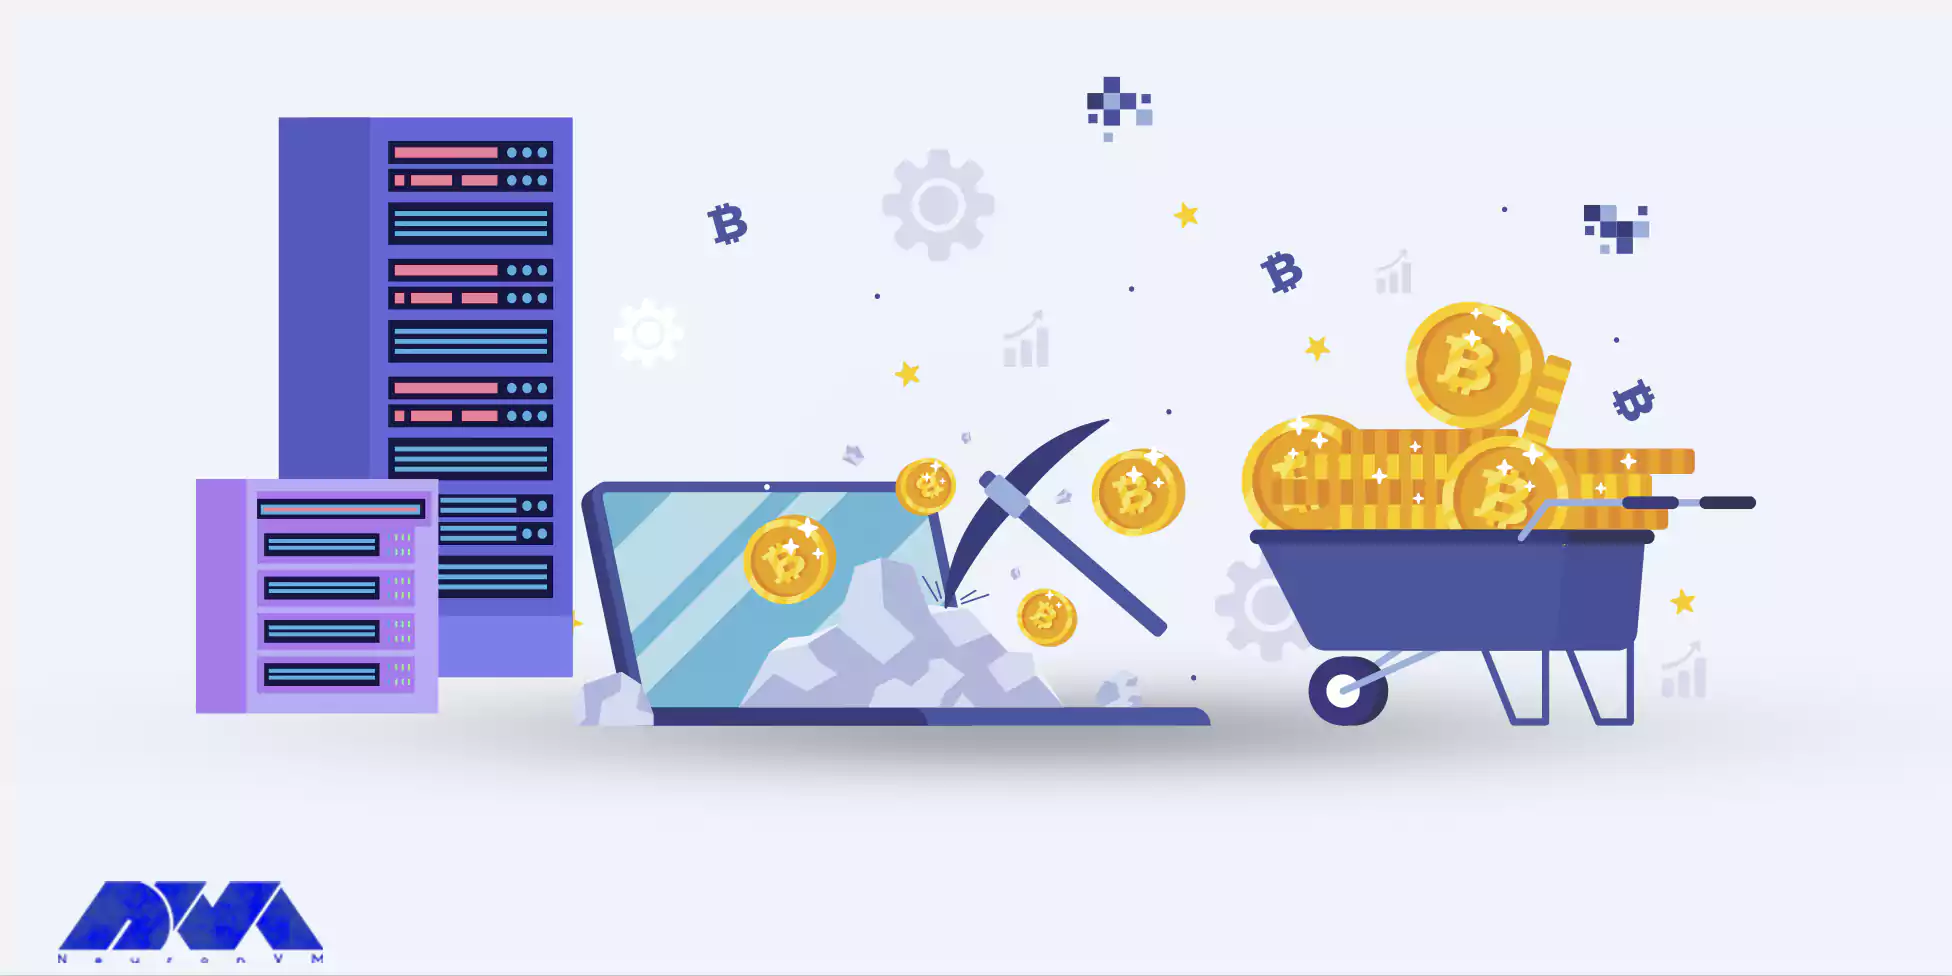
The main advantage of RDP servers is that they perform tasks that usually do not require close contact with the user and run 24/7. To name a few, the most common uses to buy Admin RDP servers include running BOTS (automated scripts/programs), Bitcoin mining, SEO tools, online video streaming, Forex trading software, etc.
What Are the Important Factors in Choosing a Good Provider to Buy RDP Servers?
RDP hosting providers are service companies that maintain high-performance servers in data centers, divide these servers into multiple virtual servers, and then rent these virtual servers or VPS to their customers. The magic of this service is remote access. Here we introduce you to key factors in choosing a good RDP provider:
Uptime and Reliability: You need a provider with a high uptime percentage to ensure that your RDP servers are accessible when you need them.
Performance: Ensure that the provider offers high-performance servers with sufficient resources (CPU, RAM, and storage) to handle your workload without lag or bottlenecks.
Server Location: Choose a provider with servers strategically located to minimize latency for your target users or clients.
Cost: Compare pricing plans and make sure they align with your budget. Be cautious of providers offering extremely cheap Admin RDP servers, as they may compromise on quality or security. NeuronVM is one of these affordable providers.
Scalability: Look for a provider that allows you to easily scale your RDP infrastructure up or down as your needs change.
Support: Responsive customer support can be crucial when dealing with technical issues or downtime.
Security: The provider should offer robust security measures, including firewalls, encryption, and regular security updates to protect against unauthorized access and data breaches.
Bandwidth: Consider the amount of bandwidth and data transfer included in your plan. Make sure it meets your needs, especially if you have high data transfer requirements.
User interface: Evaluate the provider’s control panel or user interface. It should be user-friendly and provide you with the necessary tools to manage your RDP servers effectively.
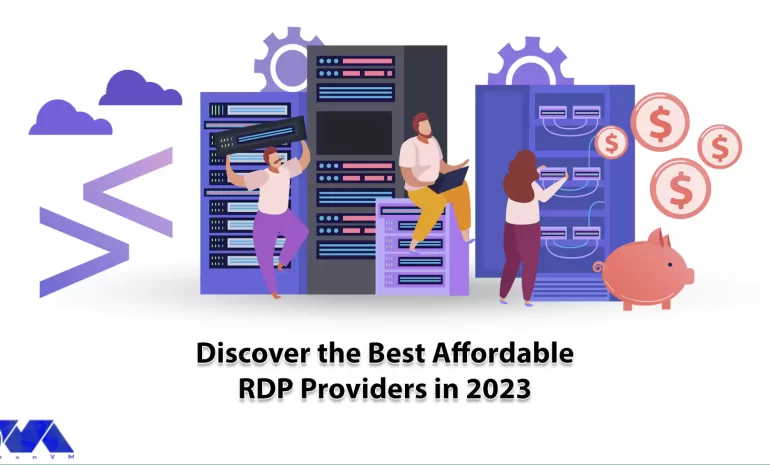
Top 5 Most Affordable RDP Providers in 2023
According to the reviews, in this section, we will list some affordable RDP providers in 2023 for you and explain their specifications:
1- NeuronVM
NeuronVM is one of the great affordable RDP providers that offers cheap and high-performance RDP servers. You can get rid of complicated installations and costly licenses. This provider contains cheap Admin RDP plans that are proper and suit your needs. If you are looking for cheap, fast, and reliable RDP connections, it is recommended to visit NeuronVM. At last, we can mention a significant feature of the services of this site, it will definitely be administrative access.
Advantages of NeuronVM Admin RDP:
– Having instant delivery
– 60+ locations worldwide
– 24/7 support system
– 7 days money back guarantee
– Having 100% uptime
2- 99RDP
You can use 99rdp as a great alternative for your business. One of the main advantages is not needing an administrator or specialist and it is a high-performance solution with various features. This provider easily covers your remote desktop needs. 99RDP provides private RDP, affordable RDP, and a dedicated server that has a 100% clean IP and full root admin access. Also, it offers an unlimited amount of bandwidth.
Advantages of 99rdp:
– Affordable plans
– 15 high-demand locations
– 24 hour money-back guarantee
– Great 24/7 support system
3- AmazingRDP
The goal of AmazingRDP is to provide the best service for its customers. One of the highlights of this company is that they try to provide cheap RDP servers. Different services that this company provides include Dedicated RDP, GPU, GPU RDP, and Residential VPS. You can get RDP servers through AmazingRDP and enjoy the services.
Advantages of AmazingRDP:
– High-performance hardware
– Root administrator access
– Offering bespoke OS like Windows server
– Configuration option depends on your needs with affordable price
4- HomeRDP
If you are looking for flawless websites and game-changing online programs or profitable trading bots, homeRDP is a good choice provided by KVM. Full root access, raw computing capacity, and access to fully dedicated server resources from homeRDP with a variety of customization options provide unlimited control over servers.
You can also have free operating systems and high-level control panels. The cost-effectiveness of VPS is also one of its significant advantages. Features such as IDM and SSD storage, backup, and usage control are also possible in this cheap solution.
Advantages of HomeRDP:
– Simple integration of devices.
– Risk-free service with a money-back guarantee
– 24/7 live chat and email support
– 24/7 proactive real-time professional service helps to improve stability and efficiency
– Round-the-clock help to provide the best customer services
5- QuickRDP
For more than six years, quickRDP has been the leading provider of hosting RDP, private RDP, RDP, and finally dedicated servers. This team consists of experts who work in the hosting department. The privacy of users is also their priority, and they have taken this issue very seriously among the other affordable RDP providers. In such a way that all information is strictly controlled regardless of the importance of the information.
Advantages of QuickRDP:
– 99.9% uptime
– 24/7 support in all plans and unrestricted bandwidth
– Providing installed application
– Powerful servers and great resources ensuring maximum performance
What Is the Role of RDP Providers?
RDP providers play a crucial role in enabling remote access to computers and servers. Here are the key roles and responsibilities of RDP providers:
RDP providers facilitate remote access to computers and servers. They allow users to connect to a remote desktop session and give them control over the remote machine’s graphical user interface (GUI).
IT professionals and support teams use RDP to remotely troubleshoot and maintain servers and workstations. This allows them to diagnose and fix issues without physically being on-site.
In some cases, RDP providers support multi-user environments, where multiple users can connect to a single remote server simultaneously.
RDP providers often offer features to manage and allocate resources efficiently. This includes options to limit the amount of CPU, memory, and network bandwidth that a remote session can consume, ensuring fair usage and system stability.
RDP providers implement security measures such as two-factor authentication, firewall rules, and user access controls to protect against unauthorized access and security breaches.
They often provide logging and monitoring capabilities, allowing administrators to track and audit remote sessions for security and compliance purposes.
RDP providers must ensure compatibility with different operating systems and devices.
RDP providers are responsible for ensuring secure connections between the client and the host. They implement encryption and authentication protocols to protect data transmitted over the network.
For organizations with a high number of remote users, RDP providers may offer load balancing and scalability features.
What Are the Different Cases of Using Admin RDP?
Admin RDP includes various programs. These programs can be web hosting or running other complex programs. Here we will discuss the practical uses of these applicable servers:
– They can host websites and online applications.
– These servers perform tasks automatically and execute scripts easily.
– You can host game servers using RDP.
– Data can be saved and backed up using RDP.
Conclusion
In short, RDP servers enable remote access and control of Windows-based computers and servers over a network. They play an important role in various scenarios, from IT management to remote work, and provide features to ensure security and access control. Now that you have a clear vision of RDP and find out the factors to choose the right provider, you can choose wisely and get the most affordable RDP provider.
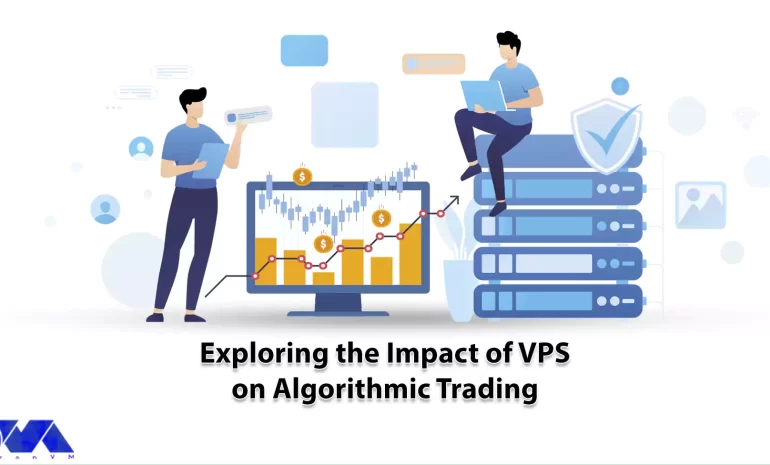
Using Virtual Private Servers (VPS) allows you to protect your system and reduce the risk percentage, so you can safely focus on creating a path to becoming a successful trader. The usage of VPS is also a simple and affordable task in trading. Indeed, VPS has had a significant impact on algorithmic trading due to its ability to provide reliable and low-latency computing environments. Algorithmic trading involves the use of complex mathematical models and algorithms to make trading decisions in financial markets. So, This article will focus on exploring the impact of VPS on algorithmic trading.
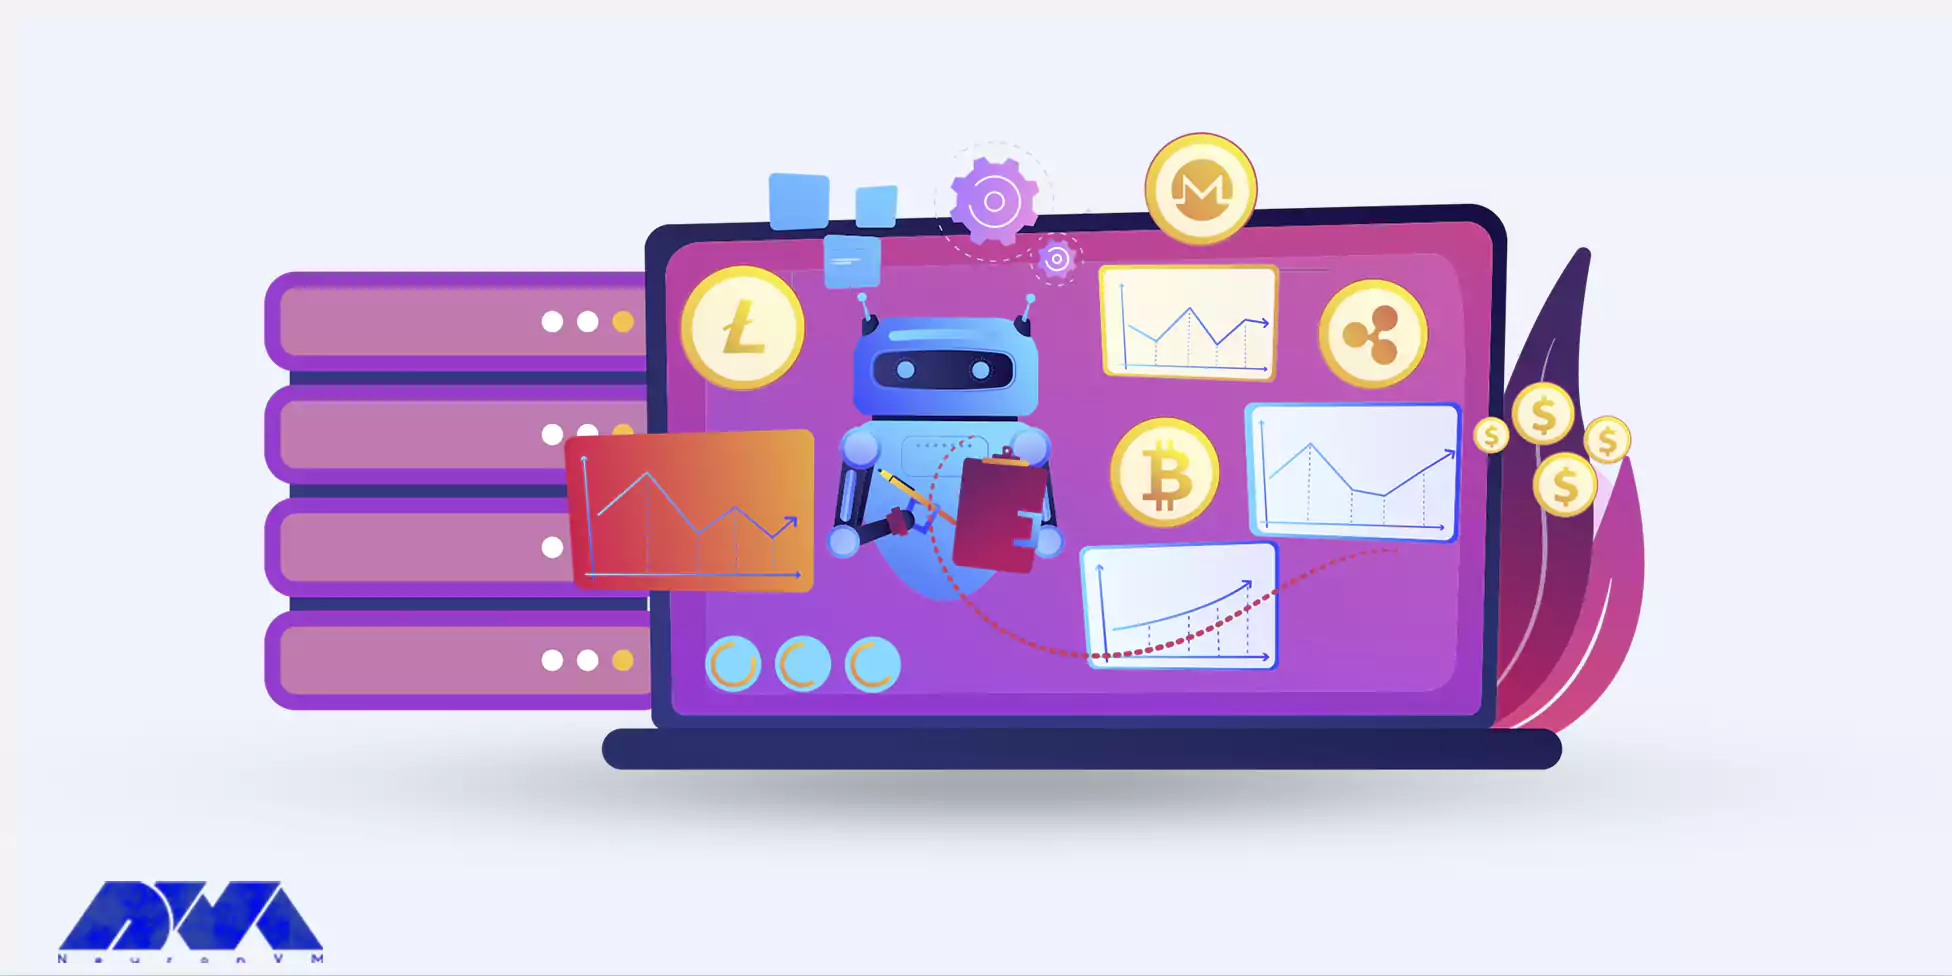
What Is Algorithmic Trading?
Algorithmic trading is a process in the field of business to execute orders with the help of automatic and pre-programmed trading instructions to calculate elements such as time, price, and volume. If we want to explain the meaning of algorithm to you more clearly, it means a set of directions to solve a problem. These computer algorithms send part of the complete orders to the market over time.
In general, algorithmic transactions use a series of mathematical equations along with human supervision to buy and sell financial securities in the stock market. This allows companies to perform tens of thousands of transactions per second. These transactions can be used in different situations such as order execution, trend trading strategies, or arbitrage. You can use our Cheep Windows VPSservices to robot your algorithmic trading.
These algorithms are designed to follow predefined sets of rules and instructions to make trading decisions. Algorithmic trading aims to execute trades at the best possible prices and speeds, taking advantage of market inefficiencies, price discrepancies, or other opportunities that may arise.
Benefits of Using VPS for Algorithmic Trading
The benefits of VPS on algorithmic trading can be understood through the following points:
– Security: VPS providers often implement robust security measures, including firewalls, encryption, and regular updates, to protect trading algorithms and sensitive financial data. This can enhance the overall security of algorithmic trading operations.
– Lower Latency and slippage: Usage of VPS for algorithmic trading reduces the latency. VPS providers often host their servers in data centers close to major financial exchanges, which minimizes the time it takes for trading orders to be transmitted. In algorithmic trading, even milliseconds can make a significant difference. So low latency can lead to better execution of trades.
– Reliability and Stability: The VPS hosting service is a reliable and stable environment for all business activities. Unlike shared hosting, VPS servers are designed for stable performance and complete downtime. They also ensure uninterrupted access to trading platforms.
– Remote Access: VPS allows traders to access their trading algorithms remotely from various devices. This is especially useful for traders who need to make adjustments or monitor their strategies while on the go.
– Reduced Infrastructure Costs: VPS eliminates the need for traders to invest in costly hardware and IT infrastructure, as they can simply rent the necessary computing resources from the VPS provider.
– Isolation from Local Factors: Algorithmic traders may face issues related to their local internet connectivity, power outages, and other factors that could impact their trading performance. Using VPS can isolate trading operations from such local disruptions.
– 24/7 Availability: Algorithmic trading often requires continuous monitoring and execution of trades, even outside regular trading hours. VPS allows traders to keep their algorithms running 24/7 without the need to keep their personal computers on all the time.
What Are the Components of Algorithmic Trading?
In this section, we will define the main elements of developing a trading algorithm system:
Identifying a strategy: You have to choose which markets you want to trade, then develop your trading logic and define the necessary parameters for your trading logic.
Backtesting your strategy: You should backtest your strategy, that is, analyze your performance based on historical data and eliminate other biases.
Executing the strategy: In this case, you should link to a brokerage and underestimate transaction costs like trading fees.
Managing Risks: Make pre and post-trade checks to avoid losses.
Is Algorithmic Trading Easy to Do?
Whether algorithm trading is easy or not depends on various factors, including your background, experience, resources, and the complexity of the strategies you want to implement. Here are some considerations:
Financial Markets Knowledge: You need to understand how markets operate to create effective trading strategies. A solid understanding of financial markets, trading mechanisms, and asset classes (stocks, commodities, forex, etc.) is essential for you.
Strategy Development: Designing trading strategies that are profitable and can adapt to changing market conditions is a challenge. It requires a deep understanding of quantitative, technical, and fundamental analysis.
Data Analysis: Successful algorithm trading relies heavily on data analysis. You need historical and real-time market data to backtest and validate your strategies.
Technical Skills: Algorithmic trading requires a good understanding of programming languages, such as Python or R, as well as knowledge of data analysis, statistics, and financial markets.
Risk Management: Implementing robust risk management protocols is crucial to avoid significant financial setbacks.
Backtesting and Optimization: Before deploying a trading strategy in real markets, it’s important to thoroughly backtest it using historical data to see how it would have performed in the past.
Regulations and Compliance: Depending on your location and the markets you’re trading in, there might be legal and regulatory considerations to take into account.
Technology and Infrastructure: Setting up the necessary technological infrastructure, including reliable and fast data feeds, execution platforms, and server hosting, requires technical knowledge and resources.
Which VPS Platform Is Suitable for Algorithmic Trading?
Algorithms can analyze market data, identify trends, and execute trades without human intervention. Algorithmic trading has also gained popularity due to its potential for high-speed and high-frequency trading, allowing traders to take advantage of market inefficiencies and opportunities.
But if we are asked to introduce a suitable platform for doing these transactions, our suggestion is aWindows VPS is one of the most practical services of our website. A Windows Virtual Private Server can play an important role in algorithmic trading for several reasons:
– Algorithmic trading often requires round-the-clock monitoring and execution of trades. Windows VPS offers 24/7 availability.
– Windows VPS providers usually offer high uptime rates and reliable internet connections and minimize the risk of downtime.
– You can access your VPS remotely from anywhere with an internet connection.
– A Windows VPS hosted in a data center with proximity to the exchange servers can help reduce latency, ensuring faster order execution.
– Running the algorithmic trading software on a VPS can isolate it from your personal computer’s environment, reducing the risk of interference from other applications or activities.
How Can You Boost the Performance of Algorithmic Trading By VPS?
Virtual Private Servers (VPS) have had a significant impact on enhancing the performance of algorithmic trading in the financial markets. Here we will give a summary of the factors that affect trading by VPS:
You should choose a VPS plan that provides sufficient computing resources (CPU, RAM, storage) to handle your algorithmic trading strategies efficiently. In other words, a plan with dedicated resources ensures consistent performance.
The other factor is reviewing and optimizing your trading algorithms to reduce computational complexity. Efficient algorithms require less processing time, enabling faster order execution.
Focus on order types that offer faster execution, such as market orders or limit orders with a high likelihood of being filled quickly.
You can regularly monitor your VPS for performance issues, network stability, and potential bottlenecks.
Also, it is good to Implement backup and redundancy measures to ensure continuity in case of hardware or network failures. Redundant setups can help minimize downtime.
Keep your trading platform and algorithms up to date with the latest software releases and bug fixes. This can improve stability and performance.
Use latency monitoring tools to track the time it takes for your orders to be executed. This can help you identify any latency issues and optimize accordingly.
Utilize smart order routing algorithms to automatically route orders to the exchange with the best execution conditions at any given moment.
In the end, Before deploying a new algorithm or strategy, thoroughly test it in a simulated environment to ensure it performs as expected. This can help avoid costly errors in a live trading scenario.
Conclusion
It’s important to note that while VPS offers many benefits, it’s not a one-size-fits-all solution. Relying solely on VPS doesn’t guarantee success in algorithmic trading. Effective strategy development, risk management, and market knowledge remain crucial components of a successful algorithmic trading operation. By the way, we tried to give beneficial information and guide you to understand algorithmic trading and the way VPS servers can help to robot your trading.
BlackArch Linux is a powerful and comprehensive penetration testing and security research operating system. It is designed to provide a wide range of tools and applications for ethical hackers, cyber security professionals, and enthusiasts. In this article, we will explore the features, applications, and benefits of BlackArch Linux.
Introduction to BlackArch Linux
BlackArch Linux is built on Arch Linux, a lightweight and flexible Linux distribution known for its simplicity and user-centric approach. It takes the solid foundation of Arch Linux and extends it with a vast collection of specialized tools and packages tailored explicitly for penetration testing, vulnerability assessment, and digital forensics. This distribution primarily focuses on security professionals and individuals with knowledge and experience in penetration testing and security auditing. We recommend you buy and use the cheap Linux VPS server plans provided on our website.
Key Features of BlackArch Linux
BlackArch Linux offers several key features that make it a popular choice among security professionals and enthusiasts. Here are some of its notable features:
Extensive Tool Repository
BlackArch Linux offers a massive repository of over 2,500 tools categorized into different groups, including information gathering, network analysis, web application analysis, exploitation, password attacks, and more. So, these tools cover various aspects of cyber security and provide users with a diverse arsenal to perform comprehensive security assessments.
Rolling Release Model
BlackArch Linux follows a rolling release model. This means that users can receive regular updates without reinstalling the entire operating system. In fact, it ensures that users always have access to the latest versions of tools and packages, keeping their systems up-to-date with the ever-evolving cybersecurity landscape.
Easy Installation and Configuration
Installing BlackArch Linux is straightforward, thanks to the provided installation scripts. These scripts automate the installation process and guide users through the necessary steps. Additionally, BlackArch Linux provides detailed documentation and a helpful community that can assist users in configuring their system and resolving any issues they may encounter.
Lightweight and Minimalistic
BlackArch Linux is designed to be lightweight and minimalistic, allowing users to run it on resource-constrained systems without sacrificing performance or functionality. In fact, the minimal installation footprint ensures efficient resource utilization, making it suitable for both physical machines and virtual environments.
Customizable and Flexible
BlackArch Linux provides users with the flexibility to customize their environment according to their specific needs. Users can choose from various desktop environments, window managers, and themes to create a personalized working environment. Additionally, BlackArch Linux supports the Arch User Repository (AUR). This allows users to access a vast collection of additional packages to enhance their system.
Documentation and Community Support
BlackArch Linux offers extensive documentation that covers installation, configuration, usage guides, and troubleshooting. Also, the documentation is regularly updated and provides detailed information about each tool and its usage. Moreover, it has an active and friendly community where users can seek support, share knowledge, and collaborate on security-related topics.
Top BlackArch Linux Tools for Penetration Testing and Security Auditing
Here are the top BlackArch Linux tools for penetration testing and security auditing:
Nmap
Nmap is a powerful network scanning tool that allows users to discover hosts, services, and open ports on a network. It provides various scanning techniques and advanced features such as OS detection, version detection, and scriptable interaction with the target systems. However, this tool is widely used for network mapping, vulnerability assessment, and penetration testing.
Metasploit Framework
Metasploit Framework is a well-known tool for exploiting vulnerabilities in systems and applications. It provides a comprehensive set of exploits, payloads, and auxiliary modules that can be used to test the security of target systems. This Framework also offers a user-friendly interface and automation capabilities, making it a preferred choice among security professionals.
Wireshark
Wireshark is a popular network protocol analyzer that allows users to capture and analyze network traffic in real time. Also, it supports a wide range of protocols and provides powerful filtering and analysis capabilities. This protocol is an essential tool for network troubleshooting, packet analysis, and identifying potential security issues.
John the Ripper
John the Ripper is a password-cracking tool that can be used to test the strength of passwords on various systems and applications. It supports multiple password hash types and employs different cracking techniques, including dictionary attacks and brute-force attacks. John the Ripper is a valuable tool for assessing the security of password-based authentication systems.
Aircrack-ng
Aircrack-ng is a complete suite of Wi-Fi security tools that enables users to assess the security of wireless networks. It includes tools for packet capturing, network monitoring, WEP and WPA/WPA2-PSK key cracking, and wireless network discovery. You can use this tool for auditing the security of Wi-Fi networks and identifying potential vulnerabilities.
Burp Suite
Burp Suite is a powerful web application security testing tool that provides a range of features for assessing the security of web applications. It includes tools for capturing and manipulating HTTP requests and responses, scanning for vulnerabilities, and performing automated attacks. Generally, this tool is widely used for web application penetration testing and security auditing.
Hydra
Hydra is a popular password-cracking tool that specializes in online attacks, including brute-force and dictionary attacks, against various network services. It supports multiple protocols, including HTTP, FTP, SSH, and more. Also, this tool is a versatile tool for testing the security of systems with weak or easily guessable passwords.
Maltego
Maltego is a unique tool that focuses on open-source intelligence gathering and footprinting. It allows users to gather information from various sources and visualize the relationships between different entities, such as domains, IP addresses, and social media profiles. You can use Maltego for reconnaissance and gathering intelligence in the early stages of a security assessment.
Sqlmap
Sqlmap is a specialized tool for detecting and exploiting SQL injection vulnerabilities in web applications. It automates the process of identifying vulnerable parameters, extracting data from databases, and even gaining remote command execution on the underlying server. This tool is a valuable tool for assessing the security of web applications that interact with SQL databases.
OpenVAS
OpenVAS is a comprehensive vulnerability scanning and management tool. It allows users to scan networks and systems for known vulnerabilities and provides detailed reports with remediation suggestions. Also, remember that you can use OpenVAS for vulnerability management and periodic security assessments.
Who Can Benefit from Using BlackArch Linux?
BlackArch Linux can be used by various individuals and groups involved in cyber security and related fields. Here are some examples of who can benefit from using BlackArch Linux:
Security Professionals
BlackArch Linux is a valuable resource for security professionals and ethical hackers. It provides a comprehensive collection of tools for conducting thorough security assessments, vulnerability scanning, and penetration testing. Also, security professionals can leverage BlackArch Linux to identify and fix potential security vulnerabilities within systems and networks, ensuring robust protection against cyber threats.
IT Administrators
IT administrators responsible for managing and securing networks can greatly benefit from BlackArch Linux. With its extensive toolset, they can assess the security posture of their networks, identify potential weaknesses, and implement appropriate security measures. Also, BlackArch Linux enables IT administrators to stay one step ahead of potential attackers by proactively addressing vulnerabilities and strengthening the overall security infrastructure.
System Administrators
System administrators can utilize BlackArch Linux to enhance the security of their systems. Generally, by exploring the tools available in the distribution, they can identify any weaknesses in their system configurations, conduct security audits, and take necessary actions to mitigate risks. Also, BlackArch Linux empowers system administrators with the ability to fortify their systems against unauthorized access and potential threats.
Cybersecurity Students and Enthusiasts
BlackArch Linux serves as an excellent learning tool for cybersecurity students and enthusiasts. It provides a hands-on platform to develop practical skills in penetration testing and security auditing. By working with the diverse range of tools available in BlackArch Linux, students can gain real-world experience in identifying vulnerabilities, exploiting weaknesses, and implementing effective security measures.
Understanding the Security of BlackArch Linux
BlackArch Linux offers a wide range of security tools and software to support ethical hacking and vulnerability assessment. The security of BlackArch Linux is maintained through several measures. Firstly, the distribution follows a rolling release model, receiving regular updates to ensure that the included software and tools are up to date with the latest security patches and bug fixes. This helps to keep the system secure and protected against potential vulnerabilities.
Secondly, BlackArch Linux maintains its own repository of packages, which undergo thorough testing for security and compatibility before being included. The maintainers of BlackArch Linux prioritize the reliability and security of the software in the distribution. However, users need to regularly update their systems and apply security patches to maintain a secure environment.
Finally, users have a responsibility to practice good security habits, such as using strong passwords, keeping software up to date, and being cautious with third-party software installations or external repositories. While BlackArch Linux strives to provide a secure environment, users play a crucial role in ensuring the security of their own systems.
Final Thoughts
BlackArch Linux is a powerful and versatile operating system that empowers cyber security professionals and enthusiasts with a comprehensive suite of tools for various security tasks. Its extensive tool repository, rolling release model, ease of installation, customization options, and active community support make it a preferred choice for penetration testing, digital forensics, malware analysis, and other security-related activities.