Author: Terri person

  • The Key to Safeguarding Your Digital Assets from Potential Attacks

    The Key to Safeguarding Your Digital Assets from Potential Attacks

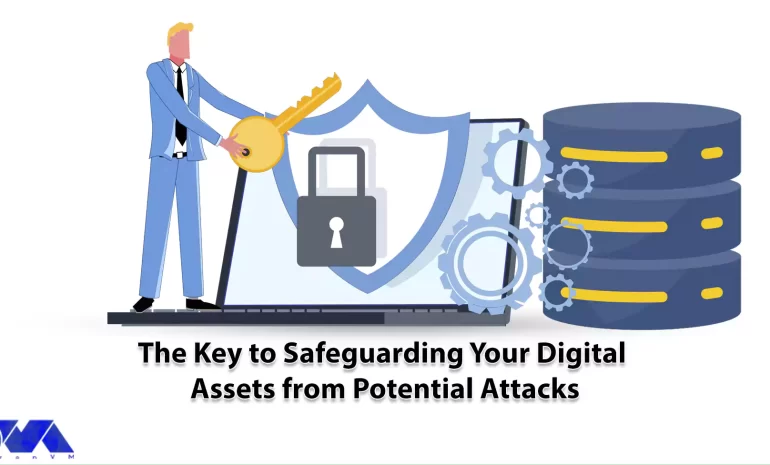
    In today’s evolving digital landscape, Safeguarding digital assets from potential attacks is more important than ever. With cyber threats increasing alarmingly, businesses and individuals need a reliable and effective solution to protect their sensitive information. Enter Nessus, the key to fortifying your digital fortress against potential vulnerabilities. As a powerful vulnerability scanning tool, Nessus provides comprehensive insights into your network’s security posture, allowing you to identify and fix potential vulnerabilities before malicious actors exploit them. With its advanced features and user-friendly interface, Nessus empowers organizations of all sizes to proactively defend their digital assets, ensuring peace of mind and maintaining the trust of customers and stakeholders. In this article, we’ll look at the incredible capabilities of Nessus and explore how this essential tool can revolutionize your cybersecurity strategy. Get ready to unlock a more secure digital future with Nessus.

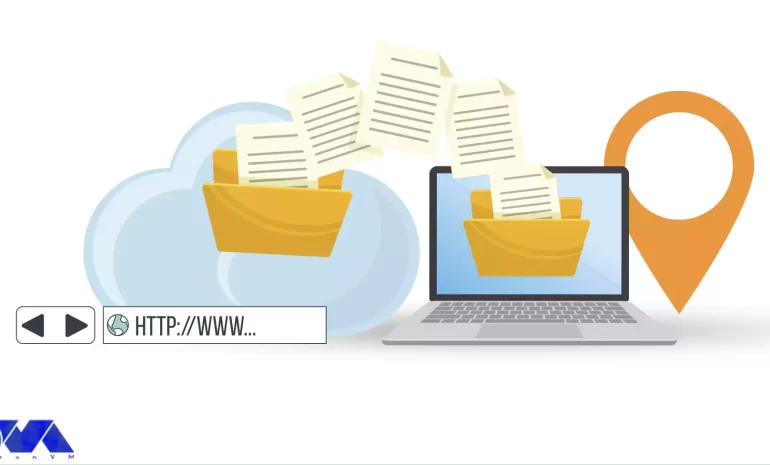
    Understanding the Importance of Safeguarding Digital Assets

    Protecting digital assets is of great importance in today’s world, which is completely dependent on virtual and digital technologies. In this regard, the users of these technologies have obtained assets that are offered digitally. These assets are information, data, and valuable resources such as personal information, material data intellectual property, and sometimes business strategies. Here we will mention some cases of safeguarding digital assets:

    – Financial security especially for businesses.

    – National security at the level of government and public institutions

    – Customer loyalty in businesses and organizations.

    – Safeguarding digital assets to manage the reputation of organizations.

    – Respect data privacy and protection for sensitive personal and financial information.

    We suggest you use the high-speed Windows VPS servers provided on our website for investing and trading in digital markets.

    Common Types of Cyber Attacks

    Cyber attack is the attempt of cyber criminals and hackers to gain access to computer systems. The purpose of this attack is to change, steal, disclose information, or destroy systems. This action is very dangerous and may target a wide range of users of organizations and companies. The purpose of hackers is to gain access to sensitive and valuable company resources for profit and abuse. Let’s examine some of these attacks in the digital world:

    1- Phishing: This is a kind of cyberattack that uses email, SMS, social media, phone, and social engineering techniques to encourage victims to share sensitive information like passwords.

    2- Malware: This is a kind of malicious software like a code or program that is created to harm a computer or system. This one is the most common type of attack.

    3- Dos and DDoS attacks: This malicious and targeted attack, floods a network with false requests to ruin business operations. The significant difference between Dos and DDos is that Dos originates from just one system while DDos starts from multiple systems.

    4- Spoofing: This attack is a technique that is used by a cybercriminal to disguise himself as a trusted and known source.

    5- Code injection attacks: An injection attack includes injecting malicious code in a vulnerable computer or network to change the course of action.

    6- DNS Tunneling: This type of cyber attack works in such a way that it uses DNS questions and answers to bypass security operations and transfer code data in the network.

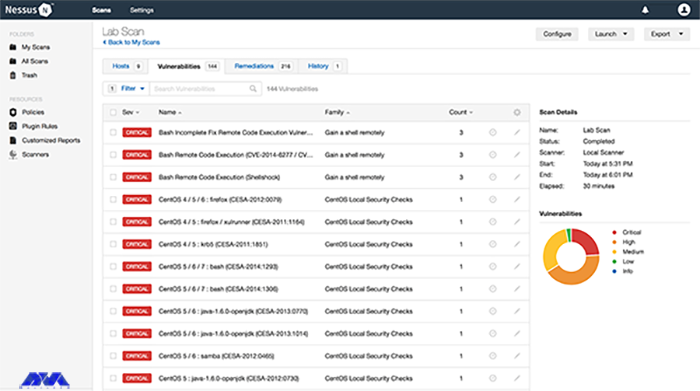
    How Nessus Works as a Vulnerability Scanner

    Nessus is a scanning tool that performs its scans through several plugins that run on every host on the network to detect vulnerabilities. These plugins are considered separate pieces of code that Nessus uses to perform individual scans. These plugins have extensive features. For example, a plugin can be launched and placed on a specific host to do the following:

    • Operating system identification and services run on ports.
    • Identifying vulnerable software components.
    • Determining whether compliance requirements are met on different hosts.
    nessus-vulnerability-scanner

    Safeguarding Digital Assets

    Benefits of Using Nessus for Vulnerability Assessment

    – A valuable benefit of Nessus is the creation of a fast and user-friendly method to find and fix vulnerabilities in many IT assets, containing cloud-based and virtualized resources.

    – Over 450 pre-configured templates are provided for standard vulnerability scans and configuration audits to simplify platform usage.

    – Another benefit of Nessus is its low false positive rate of 0.32 defects in every 1 million scans. If there is too many false positive, it can suppress security teams cause alert fatigue, and ignore legitimate threats.

    – It is beneficial for security professionals because it is a highly portable, and helpful tool.

    Key Features of Nessus

    Nessus has great features like:

    1) Ability to discover assets at high speed

    2) The capability of listening to the configuration

    3) Ability to detect and detect malware

    4) The feature of discovering sensitive data

    Steps to Implement Nessus for Digital Asset Protection

    Nessus is a vulnerability scanner and assessment tool that can help protect digital assets by identifying and prioritizing security vulnerabilities. The implementation of Nessus for the protection of digital assets has several steps, which are as follows:

    1- It is time to download and install Nessus, so go to the Nessus Home landing page, enter your name and email address, and then click on the register button. Since you want to install it on your system, Click download.

    2- As you downloaded Nessus, run the installation package and follow the given instructions to complete the installation.

    Tip: Nessus will create a local server on your computer and run from there.

    3- Now go to your browser and insert https://localhost:8834/ to complete the sign-up and activate your Nessus copy. You will encounter the message “Your connection is not secure“. Go to “advanced” and then “proceed to localhost” to bypass the warning.

    4- Create an account and leave the registration as “Home, Professional, or Manager,” then enter the activation code and press continue. At last, Nessus will download several plugins to scan your network.

    5- Now you have a Nessus scanner and you can test it on your network. go through the instructions below:

    – Click on New Scan.

    – Then click on Network Basic Scan.

    – Choose a name for your scan and add a description.

    – In the “Targets” field, enter IP scanning details about your network, and Nessus will scan all the devices on your network.

    – Click the Save button and on the next part, click on the Play icon to start the scan.

    Best Practices for Using Nessus Effectively

    You can use Nessus to identify security weaknesses in networks, systems, and applications. These are the best practices for Nessus:

    – Try to keep Nessus up-to-date.

    – Configure scan policies.

    – You should scan segmented networks.

    – It is recommended to schedule the scan appropriately. 

    – You should review and validate the results.

    –  It is better to prioritize vulnerabilities, you can use the CVSS score or Common Vulnerability Scoring System.

    Case Studies of Successful Vulnerability Assessments Using Nessus

    To demonstrate the effectiveness of Nessus as a vulnerability scanning tool, let’s explore some real-world case studies:

    1. **XYZ Corporation**: XYZ Corporation, a global financial institution, implemented Nessus as part of its vulnerability management strategy. By conducting regular scans and prioritizing remediation efforts, the company significantly reduced its vulnerability. This proactive approach resulted in a 50% reduction in successful cyber attacks and increased customer trust.

    2. **ABC Healthcare**: ABC Healthcare, a leading healthcare provider, used Nessus to assess the security posture of its network infrastructure and medical devices. By identifying vulnerabilities and implementing appropriate controls, the organization improved patient data protection and achieved compliance with regulatory frameworks such as HIPAA.

    3. **DEF Manufacturing**: DEF Manufacturing, a large-scale manufacturing company, integrated Nessus with its SIEM system to enhance threat detection capabilities. By leveraging the real-time data provided by Nessus, the organization was able to quickly identify and respond to potential vulnerabilities, minimizing the impact of cyber-attacks and ensuring uninterrupted operations.

    Comparing Nessus with Other Vulnerability Scanners

    In this section, we will try to compare Nessus with some other vulnerability scanners like Openvas, Openscap, and Rapid7nexpose.

    Openvas: OpenVAS is open-source and is often compared to Nessus due to its similar feature set. Both tools have a plugin-based architecture to identify vulnerabilities in systems. Since OpenVAS is free to use, it is suitable for budget-conscious organizations. However, Nessus is better known for its performance, user interface, and support.

    Rapid7nexpose: Nexpose or InsightVM is another popular vulnerability management tool that can be compared to Nessus. This tool provides real-time vulnerability assessment and risk analysis. Rapid7expose offers additional features such as usability evaluation and integration with other Rapid7 products. Nessus, on the other hand, has a wider user base and may have a wider library of vulnerability checks.

    Openscape: Openscape is also an open-source, compliance-friendly scanner that focuses entirely on security standards. Assessing compliance with security standards and policies is the main task of this scanner, so it is an excellent choice for organizations with compliance requirements. But Nesus provides a more comprehensive vulnerability scan.

    Conclusion: Importance of Proactive Vulnerability Management with Nessus

    With cyber threats becoming increasingly sophisticated, organizations and individuals need a reliable and effective solution to protect their sensitive information. As a powerful vulnerability scanning tool, Nessus provides the key to fortifying your digital fortress against potential vulnerabilities.

    By implementing Nessus as part of your vulnerability management strategy, you can proactively identify and address potential weaknesses in your network infrastructure and applications. The comprehensive insights provided by Nessus enable you to prioritize remediation efforts and reduce the risk of exploitation. With its cutting-edge features, scalability, and ease of use, Nessus empowers organizations of all sizes to defend their digital assets effectively.

    In an era where the consequences of a successful cyber attack can be devastating, Nessus offers peace of mind and ensures the continuity of your operations. By investing in proactive vulnerability management with Nessus, you can unlock the door to a safer digital future and maintain the trust of both customers and stakeholders. Safeguard your digital assets today with Nessus and fortify your defenses against potential attacks.

    FAQ

    What are the reasons that make Nessus the best scanner?

    It is a fast and user-friendly tool to find and fix vulnerabilities in most IT assets like cloud-based and virtualized resources.

    Are there any limitations to the Nessus scanner?

    Nessus is free to use and scan any environment but it is limited to 16 IP addresses per scanner.

  • DNS or FTP: Which One is the Backbone of Your Website’s Functionality?

    DNS or FTP: Which One is the Backbone of Your Website’s Functionality?

    DNS servers or Domain Name Server is responsible for converting URLs and domain names into IP addresses so that computers can understand and use them. On the other hand, we have FTP or File Transfer Protocol which is a standard network protocol used for transferring files from one host to another over a TCP-based network. We will present this tutorial to give a full explanation of DNS and FTP and also find out which one is the backbone of your website’s functionality.

    Understanding DNS (Domain Name System)

    It is very important to know the concept of DNS and its functionality. If a user tries to enter a website from a personal computer, laptop, or tablet using the internet, the user should use DNS. So, understanding the usage of DNS is very important:

    DNS role

    Browsers and other Internet activities rely on DNS to provide the information needed to connect users to remote hosts as quickly as possible. DNS mapping is distributed across the Internet in a chain of authorities. ISPs, access companies, as well as governments, universities, and other organizations typically have dedicated ranges of IP addresses and an assigned domain name. They also run DNS servers to manage the mapping of those names to those addresses. Most URLs are built around the domain name of the web server responsible for receiving client requests. Before we start and deal with the main issue, we recommend you use the cheap dedicated server plans of our website to setup DNS.

    Importance of DNS in Website Functionality

    DNS is a critical component of website functionality. Without DNS, users would have to remember the IP address of every website they want to visit, which would be impractical. DNS allows users to access websites using user-friendly domain names, making it easier to navigate the internet. In addition, DNS helps to distribute traffic to different servers, ensuring that the load is evenly balanced and the website remains accessible even under heavy traffic.

    DNS Configuration Process

    Configuring DNS can be a complex process, but most web hosting providers offer tools and guides to make it easier. The first step is to choose a DNS provider. It can be either your web hosting provider or a third-party provider like Cloudflare or Google DNS. Once you’ve chosen a provider, you’ll need to set up your DNS records. These records include information about your domain name, IP address, and other settings. This process can vary depending on your web hosting provider and the type of DNS records you need to setup.

    One common issue with DNS configuration is DNS propagation, which refers to the time it takes for DNS changes to take effect. This can be frustrating for website owners who need to make changes quickly. Note that it’s important to be patient and allow time for the changes to propagate. Another common issue is DNS caching, which can cause outdated information to be displayed. Clearing your DNS cache can help resolve this issue.

    Common DNS Problems and How to Troubleshoot Them

    Even with proper configuration, DNS issues can still occur. One common issue is DNS resolution failure, which occurs when a DNS server is unable to resolve a domain name. The reason may be a variety of factors, including incorrect DNS records, network connectivity issues, or DNS server errors. To troubleshoot this issue, start by checking your DNS records to ensure they are correct. You can also try using a different DNS server or contacting your web hosting provider for assistance.

    Another common issue is DNS hijacking. This problem occurs when a malicious actor redirects traffic from a legitimate website to a fake website. This can be difficult to detect, but there are tools available to help identify and prevent DNS hijacking. It’s also important to keep your DNS records secure and to use strong passwords to prevent unauthorized access.

    Understanding FTP (File Transfer Protocol)

    Understanding FTP (File Transfer Protocol)

    FTP, or File Transfer Protocol, is another critical component of website functionality. It is used to transfer files between computers and servers, allowing website owners to upload and manage their website files. FTP works by using a client-server model, where the client (usually a web developer or website owner) connects to the server using a username and password and then transfers files between the two computers. The importance of FTP in website functionality cannot be overstated. Without FTP, website owners would need to manually upload and manage their website files, which would be a time-consuming and error-prone process. FTP also allows website owners to easily make changes to their website files, ensuring that their website stays up-to-date and secure.

    Importance of FTP in Website Functionality

    FTP is an essential component of website functionality, as it allows website owners to upload and update content on websites. Without FTP, website owners would need to manually upload files to their servers, which would be time-consuming and prone to errors. FTP makes it easy to update content and ensure that the website is always up-to-date.

    FTP Configuration Process

    Configuring FTP is typically done through a web hosting control panel or FTP client software. The first step is to create an FTP account, which includes a username and password that the client will use to connect to the server. Once the account is created, the client can then connect to the server using an FTP client like FileZilla or Cyberduck. From there, they can transfer files between their computer and the server.

    One common issue with FTP configuration is connection errors, which can be caused by incorrect login credentials or firewall settings. To troubleshoot this issue, double-check your login credentials and ensure that your firewall is not blocking FTP traffic. Another common issue is file transfer errors. It can be caused by file permissions or file size limits. To troubleshoot this issue, ensure that your file permissions are properly configured and your FTP client is set up to handle large file transfers.

    Common FTP Issues and How to Troubleshoot Them

    Even with proper configuration, FTP issues can still occur. One common issue is FTP connection timeouts, which occur when the client is unable to connect to the server. This can be caused by network connectivity issues or server errors. To troubleshoot this issue, try connecting to the server from a different network or contacting your web hosting provider for assistance.

    Another common issue is FTP data transfer errors, which occur when files are transferred incompletely or with errors. This can be caused by a variety of factors, including file size limits, file permissions, or network connectivity issues. To troubleshoot this issue, ensure that your file permissions are properly configured and that your FTP client is set up to handle large file transfers.

    DNS vs FTP: Which one is the backbone of your website’s functionality?

    Both DNS and FTP are critical components of website functionality, but they serve different purposes. DNS is responsible for translating domain names into IP addresses, allowing users to access websites using human-readable names. FTP, on the other hand, is used to transfer files between computers and servers, allowing website owners to upload and manage their website files.

    While both DNS and FTP are important, DNS is arguably the more critical component. Without DNS, users would be unable to access your website, regardless of how well it’s configured. FTP, on the other hand, is important for website management but does not directly impact user experience. That being said, both DNS and FTP are essential to ensuring that your website runs smoothly and efficiently.

    Conclusion

    In conclusion, DNS and FTP are both critical components of website functionality. DNS is responsible for translating domain names into IP addresses. While FTP is used to transfer files between your computer and your website’s server. Both are essential for ensuring that your website runs smoothly and remains accessible to users. While configuring DNS and FTP can be a complex process, website owners need to understand how they work and how to troubleshoot common issues. Whether you’re a seasoned webmaster or a newbie to the world of website management, understanding DNS and FTP is essential for the success of your website.

    FAQ

    What is the exact role of DNS?

    It turns domain names into IP addresses and allows browsers to find websites and other resources.

    Is there any need for IP in FTP?

    FTP client and internet connection are needed for using FTP. Aso you will need to know the FTP server’s IP addresses or hostname.

  • How Netdata is Revolutionizing Monitoring on Rocky Linux

    How Netdata is Revolutionizing Monitoring on Rocky Linux

    If you are looking for an open-source and real-time server monitoring tool, Netdata is definitely a good choice that offers hundreds of tools to monitor servers, CPU, system processes, memory usage, disk usage, IPv4 and IPv6 networks, a firewall, and more. Netdata works in such a way that it uses collectors to help you collect metrics from your favorite programs and services, and you can view them in interactive and simultaneous graphs. Here we will examine how Netdata is revolutionizing monitoring on Rocky Linux.

    Traditional Monitoring vs. Netdata Monitoring

    Traditional system monitoring involves collecting performance data from servers and network devices and analyzing that data to identify issues. This process can be time-consuming and prone to errors, and it often fails to provide the level of real-time insight that businesses need to stay ahead of potential problems. Netdata, on the other hand, provides real-time monitoring of system metrics, with dashboards and alerts that allow organizations to quickly detect and respond to issues as they arise.

    Netdata’s approach to monitoring is significantly different from traditional methods. Rather than collecting data at set intervals, Netdata continuously monitors system metrics, providing real-time insights into system performance. This approach allows businesses to detect and address issues faster than ever before, minimizing downtime and improving overall system performance.

    Benefits of Using Netdata on Rocky Linux

    Here we will show you some benefits of using the Netdata monitoring tool on Rocky Linux:

    Scalability

    Storing distributed data as close to the edge as possible has made Netdata incredibly scalable. Whether in bare-metal servers or containers, cloud deployments, and IoT devices, Netdata offers lightweight operations, high fidelity, protected privacy, and even good scalability at a fraction of the cost.

    Open-Source

    Netdata is provided as an open-source program. This means that the entire software and the main building block of the ecosystem (the Netdata agent) is distributed as open-source under the GPL-v3+ license. This tool collects thousands of hardware and software metrics from physical and virtual systems that we call nodes. Also, these criteria are organized in an easy-to-use interface.

    Enjoyable Monitoring

    Monitoring with Netdata is fun because it doesn’t force you to have a deep understanding of each metric and spend a lot of time configuring monitoring. The tool itself collects, stores, queries, sets alerts, visualizes, and even trains machine learning models for everything. This makes it easier to understand the metrics when you are reviewing your infrastructure and applications or trying to troubleshoot application problems.

    Cost Effective

    The database you install on your system is the Netdata agent. Cloud Netdata is also such that it integrates all agents into a large distributed database. It uses memory, CPU, and disk resources that can be stored and accessed in your production systems in the current state. Each Netdata installation can scale to millions of benchmarks per second, even when you need centralized points to provide higher data access. These things make this tool affordable.

    Features of Netdata Monitoring

    Netdata includes lots of significant features which you can not ignore. These features are:

    – Netdata is an easy-to-use and easy and fast setup with full automation.

    – It has more than 1000 Plugins and Integrations.

    – Real-time and high-fidelity and low latency are other features of Netdata.

    – It is equipped with powerful visualizations and dashboards.

    – There are powerful notifications and alerts.

    – It is flexible and scalable.

    – Netdata provides high Security and Privacy.

    How to install Netdata on Rocky Linux

    As mentioned, Netdata is a real-time server monitoring tool that collects real-time data such as CPU, RAM, SWAP usage, bandwidth, etc. We suggest you choose from the Linux VPS servers offered on our website to use the Rocky Linux operating system. Now we will show how to install this applicable tool on Rocky Linux:

    The first step is to update your system to the latest version, so use the following command:

    dnf update

    Then you should run this command to install EPEL repositories:

    dnf install epel-release -y

    The next step is to install the necessary packages for Netdata. Here is the related command:

    wget -O /tmp/netdata-kickstart.sh https://my-netdata.io/kickstart.sh && sh /tmp/netdata-kickstart.sh

    Tip: If the script prompts you to enter before installing each package, you must type y or yes and accept the package being installed.

    As you finished the installation, start and enable Netdata to boot or reboot automatically and verify the status of the application:

    systemctl start netdata
    systemctl enable netdata
    systemctl status netdata

    It is time to configure the firewall on Netdata. The default port for Netdata is 19999. Enable ports in the firewall to use Netdata from your browser:

    firewall-cmd --permanent --add-port=19999/tcp
    firewall-cmd --reload

    Use the URL below on the browser to access the Netdata dashboard:

    http://<your IP address>:19999/
    netdata dashboard

    Configuring Netdata for optimal performance

    Use the configuration file to configure and modify Netdata. This configuration file is located at the at /etc/netdata/netdata.conf directory. You can find this setting by referring to the following URL in your browser:

    https://netdata.example.com/netdata.conf

    The default configuration will be enough to get started. You can use the desired text editor like Nano to make changes to the configuration options based on your requirements. At last, you have to restart the Netdata service using the following command to apply the changes:

    sudo systemctl restart netdata

    Real-time monitoring with Netdata

    Netdata agent searches hundreds of standard applications and groups them by purpose. These applications are supported through aggregators. Now for better understanding suppose you want to monitor MySQL database using Netdata. The NetData agent knows that it should look for processes with the string MYSQL along with a few others and put them in the SQL group. After this process, the SQL group is changed to one dimension in all process-specific graphs. Process and group settings are done by two special and powerful collectors.

    apps.plugin: This plugin monitors the Linux process tree every moment, like fax top or ps, and collects resource usage information on each running process. Then adds a layer of meaningful visualization automatically on top of these metrics and makes charts for each application.

    ebpf.plugin: This plugin collects Berkeley Packet Filter or ebpf in Netdata which monitors Linux kernel-level metrics for file descriptors, process management, or virtual file system IO and then passes processes-specific metrics to apps.plugin in order to monitor. This aggregator aggregates metrics at event frequency. This is more accurate than the standard Netdata detail per second.

    Advanced monitoring with Netdata plugins

    Netdata includes a comprehensive set of built-in plugins, but there are also several advanced monitoring plugins to improve its performance, here we will mention some of the best ones:

    – Redis: Monitor status by reading the server response to the INFO ALL command from any number of database instances.

    – Elasticsearch: With this plugin, you can collect dozens of search engine performance metrics from local nodes and local indexes, including cluster health and statistics.

    – Solr: This plugin helps to collect application search requests, search errors, update requests, and error statistics.

    – Apache: Apache web server performance metrics can be collected with this plugin through an automated server health endpoint.

    – MongoDB: This can be used to collect server, database, replication and sharing performance, and health metrics.

    – Nginx: Monitor web server status information by collecting metrics via the ngx_http_stub_status_module.

    – MySQL: This widely used plugin collects global database, replication, and statistics for each user.

    Netdata vs. other monitoring tools

    Netdata is not the only monitoring tool available, but it is one of the most powerful and feature-rich. Here are some of the key differences between Netdata and other monitoring tools:

    – Real-time monitoring: Netdata provides real-time monitoring of system metrics, allowing businesses to quickly detect and address issues as they arise.

    – Highly customizable dashboard: Netdata’s dashboard is highly customizable, allowing businesses to track the metrics that matter most to them. This can help businesses stay on top of potential problems and improve overall system performance.

    – Advanced analytics and troubleshooting tools: Netdata provides a range of advanced analytics and troubleshooting tools, including the ability to analyze historical data and identify trends over time.

    – Plugin architecture: Netdata’s plugin architecture allows businesses to extend its monitoring capabilities beyond the built-in metrics, providing a more comprehensive view of their systems and applications.

    Conclusion

    If you are interested in Monitoring tools, you should know that Netdata is one of the best. So we focused on this amazing tool to give a clear understanding of Netdata and give a full explanation about its benefits, features and also show how you can install and configure it on Rocky Linux. You can also figure out some differences between Netdata and other monitoring tools. We hope this tutorial was helpful enough for you.

    FAQ

    What is the related command to uninstall Netdata?

    Use the following commands:

    wget -O /tmp/netdata-kickstart.sh https://my-netdata.io/kickstart.sh && sh /tmp/netdata-kickstart.sh –uninstall.

    curl https://my-netdata.io/kickstart.sh > /tmp/netdata-kickstart.sh && sh /tmp/netdata-kickstart.sh –uninstall.

    Is it possible to extend Netdata’s functionality with plugins?

    Yes, you can use plugins because Netdata architecture supports plugins and allows you to extend functionality.

  • Why Linux VPS Hosting is Perfect for Developers

    Why Linux VPS Hosting is Perfect for Developers

    If your website traffic is high or you expect to experience high traffic on the website in the future, then be sure to get information about Linux VPS and learn about its benefits. Also, if you want to have more control over your web hosting server, Linux virtual server will be the best option for you. We will examine why Linux VPS hosting is perfect for developers.

    What is Linux VPS Hosting?

    When it comes to Linux hosting, it means using a Linux operating system as the base server for your web hosting. The most important functional component in running programs on any device, especially servers, is the operating system. A host is a link that allows all hardware on a server to communicate with and respond to application requests.

    An operating system is so essential even for single-user systems and more importantly web servers. Because web servers need to manage all the hardware for multiple users.

    Benefits of Linux VPS Hosting for Developers

    One of the most affordable web solutions on the market is Linux VPS. Here, we will try to introduce some benefits of Linux VPS hosting that can be significant and effective in your choice. Let’s consider some of them:

    Benefits of Linux VPS Hosting for Developers

    Flexibility and Customization Options

    Linux offers web hosting administrators unprecedented flexibility because of the design philosophy with which it was built. The highly adaptable nature of this server means that it can fit into almost any environment imaginable. The concept of building blocks in Linux is what makes it so powerful in this regard. Linux is made up of several distinct areas that generally work together.

    The related areas in Linux VPS are Kernal, Bootloader, Daemons, Shell, Package Managers and Packages, and Desktop Environment. These items are working together to make a Linux distribution. This is the point that flexibility in Linux comes from.

    Cost-Effective Solution

    In general, Linux virtual servers or VPS are more expensive than shared hosting, but their cost is cheaper than dedicated hosting. On our website, a high-performance VPS is not significantly more expensive than shared hosting plans. If we want to mention the advantages of VPS over shared hosting, you will understand why VPS is worth a lot. Especially if you want managed VPS hosting.

    Regarding Linux virtual servers, we should mention that since their operating system is open source and free, as a result, there is no need to pay a monthly license fee. The virtual server means that the prices are adjusted according to the needs of the customers.

    Enhanced Security Measures

    Whatever server you use, Linux or Windows, your server is only as secure as you configure it to be. Fortunately, Linux leads the way in this regard and offers many options that you can work with to make it much harder to break into. Of course, this goes back to how Linux is designed. Of course, you must have managers who are professional enough and give you the necessary knowledge to secure the server.

    The ability of Linux allows users to activate only the services they need and helps to reduce possible vulnerabilities. Any program, service, or open port is a potential weakness through which attackers can use it to infiltrate or attack the server. If you configure Linux properly and tightly enough, attacks have no chance of success. These items are accompanied by the usual defense of most web servers such as scanning and detection of malware.

    Reliable Performance and Scalability

    When your website has high traffic, it means that the server has to do more work and use more resources. Another advantage of Linux VPS servers is that they are scalable so that you can meet the needs of your server and consider a significant amount of resources if needed to ensure stability. This type of fluctuation generally stops a shared server. Linux provides a significant amount of utilities to perform various tasks, one of the most powerful of which is the shell. Finally, if your site suddenly needs more resources, Linux VPS hosts can increase these resources quickly and easily.

    Access to a Wide Range of Development Tools and Technologies

    Shared hosting offers limited control to website owners, so they can’t install whatever tools or technology they want on their environment. But VPS hosts are not like that. Users who use Linux VPS hosting use a wider range of services. For example, if you do not want to use the email functionality on your server, you can turn off or remove programs such as BIND or the webmail program. The Neuronvm website provides root access to VPS for its users, and in this way, you can make any changes, access tools, or delete them.

    Conclusion

    By using virtual private servers, you can manage your website without slowing down and causing damage. Note that the use of VPS hosting is increasing day by day and the demand for it has increased too. So, this article tried to be a helpful guide to introduce you to Linux VPS hosting and some benefits of that for developers.

    FAQ

    What can be the difference between Linux VPS and Windows VPS?

    The flexibility in Linux VPS hosting is more than Windows VPS. The reason is that it is cheaper and easier to add processing resources on Linux. In selecting CMS Linux supports more choices.

  • The Benefits of Using VMware ESXi for Virtualization

    The Benefits of Using VMware ESXi for Virtualization

    The purpose of this article is to familiarize you with the benefits of using VMware ESXi for virtualization. If you need to install a virtualizer on your system, we can introduce you to VMware, which is one of the most reliable and well-known virtualizations. With this security virtualizer, you can provide virtual machine management and reliability on physical servers and use ERP and CRM systems to run applications with intensive resources.

    What is VMware ESXi?

    VMware ESXi, also known as VMware ESXi Server, was developed by VMware for VSphere and is a bare metal hypervisor. ESXi is a core component of VMware’s infrastructure software suite. This is a type 1 hypervisor. That is, it runs directly on system hardware without the need for an OS and can run directly on hardware. Hypervisors are very applicable because they run multiple virtual machines on a single physical server.

    vmware esxi virtualization

    ESXi virtualizer is aimed at small organizations and individuals. Administrators can also use the Vsphere client to configure ESXi and update it with the help of the lifecycle manager plugin. The installation location of this virtualizer is directly on a local disk in the host device. After the VMkernal receives a resource request, it forwards the request to the kernel on the host’s physical hardware.

    What are the Benefits of VMware ESXi?

    After a short description of VMware ESXi, we will now examine the benefits of this efficient virtualizer to give a clearer vision.

    1) Enhanced Security

    VMware ESXi includes a strong encryption system to protect sensitive data with virtual machines. It also restricts access for a streamlined administration, expands auditing and logging capabilities to create more transparent reporting, and simplifies the retrospective analysis.

    2) Stable Operation and Performance

    Applications with the ability to deploy powerful virtual machines of any size (it can be up to 128 vCPU, 6 TB RAM, and 120 different devices) are supported by this hypervisor to meet the needs of various applications.

    3) Comfortable Working Conditions

    VMware ESXi includes a modern and integrated interface based on html5 standards to support daily management. But VMware uses CLI Vsphere and rest-based APIs suitable for developers to automate processes. Also, you can run basic administrative commands from any computer with network access by having the Vsphere CLI command interface available.

    advantages of vmware esxi - vsphere

    4) Quick Installation Process

    Installing VMware ESXi in a data center is very easy and quick because it has a lightweight footprint. You can experience the high quality of servers by viewing and purchasing one of the cheap dedicated server plans from our website and installing and running VMware ESXi on it.

    5) Simple and User-friendly GUI

    VMware ESXi provides a direct console user interface, a web client, and a Vsphere client to manage the Vsphere environment. If we want to give an example in this field, we can say that the web client allows an administrator to manage virtual infrastructures without installing Vsphere.

    6) Ability to use Virtual Graphics Processors

    VMware ESXi can used repeatedly in virtual graphics processor technology or vGPU. This technology is where users can run heavy programs remotely. For example Autocat, Maya, or 3Ds max.

    What is Meant by Vsphere in VMware?

    According to the definition provided by VMware itself, Vsphere is a virtualization platform in an enterprise format. It is worth noting that Vsphere is the brand name of VMware virtualization products and features. One of the advantages of this solution is that it allows you to build a flexible and reliable infrastructure that meets every business need while saving money.

    The solution also enables existing data centers to shift to cloud computing and provides a means to increase hardware utilization from 15 percent to 80 percent or more without compromising performance. Vsphere reduces unplanned downtime.

    Conclusion

    As mentioned above, VMware is a virtualization system that contains many features. This hypervisor has a light structure and allows you to allocate resources in a more efficient way. You can use a single physical machine and create multiple VMs, each running different operating systems and applications. Here, we tried to define VMware for you and introduce some benefits of using this technology for virtualization. If you have any questions, please leave a comment.

  • Protecting Your Ubuntu Server: A Comprehensive Guide to Firewalls

    Protecting Your Ubuntu Server: A Comprehensive Guide to Firewalls

    If you want to secure your Ubuntu system, you should configure a firewall. If you want to setup and manage a firewall, various flexible utilities are designed by Linux. One of these tools is called iptables. But, it should note that new users in network security may be a little afraid of iptables, so it is better to start with UFW first. This article proposes to give a comprehensive guide to firewalls.

    What is UFW on Ubuntu?

    UFW or Uncomplicated Firewall is a default firewall configuration tool. This user-friendly tool has been developed to facilitate the configuration of iptables firewalls and is provided for creating ipv4 or ipv6 host-based firewalls. It is initially disabled by default from the UFW man page. Also, UFW gives an easy way to add or remove simple rules, but it is not intended to provide complete firewall functionality.

    How to Configure a Firewall on Ubuntu Server?

    Here, we are going to show how you can setup a firewall on Ubuntu servers using UFW with a Comprehensive Guide to Firewalls. Follow the steps to protect your Ubuntu system. But, first of all, you should prepare the necessary requirements.

    setup firewall on ubuntu

    A Comprehensive Guide to Firewalls

    Prerequisites

    – A Linux VPS Server with Ubuntu operating system

    – A user account with sudo privileges

    – accessing a Windows command line

    Installing UFW on Ubuntu

    UFW is disabled by default. So, the first thing to do is to enable it from the terminal prompt:

    sudo ufw enable

    Note that UFW is installed by your Ubuntu server as default, if not, you can check the status and install it using the commands below and then enable it:

    sudo ufw status
    sudo apt install ufw

    Wait to complete the installation process. Now you have UFW enabled on your server.

    Configuring UFW on Ubuntu

    Now that you enabled UFW, you can configure UFW using both IPv4 and IPv6. To support both protocols you should modify the UFW configuration file, so go through these instructions.

    First, you can use Nano or any text editor to open the default settings file:

    sudo nano /etc/default/ufw

    In your output, you will see the IPv6. If this value is set as no, change the value to yes and enable your IP. Then save and close the file.

    Setting up Default UFW Policy

    By default, UFW is set to allow all outgoing connections and deny all incoming connections. These rules are typical for PCs that do not need to respond to incoming requests. So, if you have changed the default settings and want to return to the default settings, run the following command:

    sudo ufw default deny incoming

    To allow outgoing connections use the following command:

    sudo ufw default allow outgoing

    So return the statute to the default settings by these comments.

    Allowing SSH Connections

    If your connection is from remote locations, you should setup UFW to allow incoming SSH connections.

    Use the command below to configure UFW to allow the SSH connections:

    sudo ufw allow ssh

    To add a rule for IPv4 (or IPv6 if enabled) use this command and allow incoming and outcoming traffic from SSH connections.

    Enabling UFW

    After the configuration, to apply changes, disable and enable the UFW firewall again:

    sudo ufw disable
    sudo ufw enable

    With these actions, you succeeded in setting up and activating the firewall.

    Checking the Status of UFW

    If you need to check the status and get detailed information, execute the following command:

    sudo ufw status verbose

    How to Work with UFW Rules?

    UFW determines the rules for how the server communicates with other devices. Now you need to specify which connections are allowed to control firewall settings and which are prohibited.

    Allowing Incoming Connections on Other Ports

    You should allow specific incoming connections to control additional connections, depending on the purpose of the server. Now create UFW rules to add connections. Below is a list of commands requiring for configuration:

    1- Apply the command below to set the server and listen to HTTP:

    sudo ufw allow http

    You can use port 80 as an alternative for HTTP connection:

    sudo ufw allow 80

    You can see the rule in UFW status:

    sudo ufw status verbose

    2- Run the following command to enable HTTPS connections:

    sudo ufw allow https

    You can use port number 443 as an alternative for HTTPS connection:

    sudo ufw allow 443

    Now to check the status run this command:

    sudo ufw status verbose

    3- Apply the command below to modify a rule that allows access to all ports from a specific IP:

    sudo ufw allow from to any port

    This allows all traffic from a remote server to a local machine or local server.

    4- Apply this command to allow access from a particular machine to a specific port. This rule will limit access to the specific port:

    sudo ufw allow from to any port

    5- Determine the range values and the protocol type to allow access to a range of sports. The following is using to allow connections from 2000 to 2004 for TCP:

    sudo ufw allow 2000:2004/tcp

    To change the protocol for UDP use the following command:

    sudo ufw allow 2000:2004/udp

    Denying Incoming Connections on the Other Ports

    If you want to forbid connection from a specific IP address create a deny rule:

    sudo ufw deny from

    Or, you can use the following command to deny access to particular ports:

    sudo ufw deny from to any port

    How to Delete UFW Ports

    It is possible to delete UFW rules. You can use two ways for this reason:

    1- You can disable the list of all rules and find the determined number of the rule. Now you can see the list in your output:

    sudo ufw status numbered

    Choose the related rule number and use the command below to delete the rule, so the rule will be removed from the list:

    sudo ufw delete

    2- The second way is to specify it word for word:

    sudo ufw delete

    For Example:

     sudo ufw delete allow 2000

    Checking Application Profiles

    Since you use the apt command to install UFW, each package has an application profile in the /etc/ufw/applications.d directory. This profile includes information about the software and its UFW settings. So to see the list of the application profiles use this command:

    sudo ufw app list

    To see more detailed information about a specific package run this command:

    sudo ufw app info 'package name'

    To give an example, put Apache full to see all the information about this application profile:

    sudo ufw app info 'Apache Full'

    Conclusion

    Security is one of the most important parts of servers and to provide this security, you should set a firewall for your server. Here, we taught how to setup a firewall using UFW on the Ubuntu server after a Comprehensive Guide to Firewalls. We also gave some extra commands and instructions to show the way it works. We hope you enjoyed this article.

  • The Benefits of Using Admin RDP for Remote Administration

    The Benefits of Using Admin RDP for Remote Administration

    One of the beauties that the world of technology has brought to us is remote access to systems. It is a convenient phenomenon for IT personnel of companies to remotely connect to devices so that they can Install, configure, remove, or troubleshoot software. This technology is popular due to its ease of use. We have decided to focus on rdp systems and examine the benefits of using admin rdp for remote administration.

    What is Admin RDP?

    RDP is provided by Microsoft as a secure network communication protocol. This protocol is a great help for network administrators because it allows them to check and diagnose user problems remotely. Users can also access their physical systems remotely.

    RDP is mostly used by people who are traveling or working from home and need to access their main system remotely. This system is a great help for support technicians who need to troubleshoot and repair other systems. There are various providers of Admin RDP and NeuronVM is one of them. You can buy cheap and applicable Admin RDP by referring to our website.

    What Is Admin RDP

    What is Remote Administration?

    Remote administration allows you to use technologies such as RDP to monitor and manage computer programs from a remote location without a physical location, and even diagnose and fix their problems. It can work on any computer with a local area network, internet connection, or IP.

    What are the Benefits of Admin RDP for Remote Administration?

    Now we want to take a closer look at this issue and examine the benefits of choosing Admin RDP for remote administration.

    Using a Remote Desktop Connection Ensures an Easy Access

    There may be a situation where you don’t have access to your system or devices, remote access can make your job easier. This allows IT managers to monitor and control devices located in remote areas. Also, employees who are always on the move are monitored and issues on their devices can be easily fixed remotely. This feature also ensures the safety of employees while dealing with device-related issues.

    RDP Admin Eases the Challenge of Device Management

    Troubleshooting technical problems is the responsibility of IT managers and this work should be done with remote access of administrators. They must be vigilant to ensure that all systems are compliant with the principles. For example, the appropriate software versions have been assigned. admin RDP allows administrators to provide a remote desktop connection and thus edit permissions, change settings or perform other tasks without physical access to the system.

    Remote Access Helps in Saving Money

    The use of remote access means that technicians do not have to visit the site for repairs and troubleshooting, and users do not need to take their systems to them. Therefore, companies can avoid high travel costs and save money. Also, there is no waste of time. These items increase productivity. AdminRDP software also optimizes ROI.

    Ensure the Security of the Remote Desktop Connection

    Advanced security features are among the prominent benefits of remote desktop software. This software protects business information, so its security must be very strong. The security process in these systems is that they encrypt data and access to user’s information becomes very difficult. Remote service providers have a team of professionals who maintain the servers and always have the latest security measures.

    How Does Admin RDP Work?

    How RDP works is that a user or executive uses RDP client software to connect to a remote Windows PC or server running rdp. Also, a graphical user interface helps the admin or user to open programs and edit files directly. Admin RDP also has an open-source version.

    To use Admin RDP, you need to have a compatible device, such as a Windows PC, an Android phone, or an iOS tablet. You also need to have an internet connection and the Admin RDP software installed on both your device and the remote computer. Once you have installed the software, you need to set up the remote computer to allow remote connections and provide you with an ID and a password. Then, you need to enter the ID and password of the remote computer on your device and click Connect. After that, you will see the screen of the remote computer on your device and be able to control it as if you were sitting in front of it.

    Conclusion

    Admin RDP is a great way to take control of devices from different locations. It is a helpful solution and protocol for administrators to ease their work in controlling and monitoring other computers. So this software is not an option, it’s a must. Here, we gave a short explanation of Admin RDP and tried to show the benefits of this protocol for remote administration.

  • Exploring the Features of Kali Linux: A Comprehensive Overview

    Exploring the Features of Kali Linux: A Comprehensive Overview

    If you are looking for a popular operating system that is useful in security positions and for computer forensic experts, you should turn your attention to Kali Linux. This operating system has many features that are very important in the field of cyber security. This article is presented for exploring the features of Kali Linux and will try to give a comprehensive overview of that.

    What is Kali Linux?

    Kali Linux is an open-source Linux distribution that is based on Debian and introduced in 2013. The Kali Linux operating system is a powerful tool developed to perform tasks such as ethical hacking and manipulation of network tools. The most important advantage of this system is that it is free. To install and run Kali Linux, we recommend you use our high-speed and high-quality Linux VPS servers.

    What are the Most Significant Features of Kali Linux?

    The perception of penetration testing has changed over the years. Kali Linux is also a penetration testing tool and is one of the systems that comes with many features. These features are as follows:

    features of Kali Linux

    – Kali Linux contains more than 600 penetration testing tools like Burn Suite, Nmap, Wireshark, Air crack-ng, Metasploit framework, John the Ripper, and so on. These are practical tools for penetration testing and hacking.

    – Kali Linux is provided free and open-source.

    – It is capable of supporting various USB and wireless devices and interfaces.

    – Packages and repositories in Kali Linux are GPG signed.

    – Filesystem Hierarchy Standard (FHS) is maintained in Kali Linux.

    – It supports multiple languages.

    – The users can customize Kali Linux appearance as their choice cause it is completely customizable.

    – It supports MRMEL and ARMHF which makes it available on a wide range of ARM devices like Raspberry Pi.

    – Another prominent feature of Kali is that it supports accessibility features for visually impaired users with voice feedback and braille hardware support.

    – There is regular customization and patching of the kernel for any vulnerability in Kali Linux.

    What are Some Other Special Features of Kali Linux?

    – Live Boot system is supported by Kali Linux using a USB device without any touching of the host operating system.

    – ISOs are customizable on Kali Linux. Every security researcher has their own needs. Users can produce a custom-optimized ISO file with a selected set of meta-packages.

    – Kali is equipped with an encryption mechanism for persistent volume(s). This way, The saved files are able to be secured using Luks Nuck containers.

    – You can use Kali from the Windows Subsystem for Linux or WSL. Use Win-Kex for this reason.

    – Kali NetHunther is a free, open-source Android application and is useful for common attacks such as Bluetooth attacks or USB HID attacks, and so on.

    – Another feature is Kali Undercover. You can blend the appearance of Kali with Windows OS. So, if you activate the Kali Undercover feature, the menu and your desktop will look like Windows OS.

    – Kali is able to support any platform. You can run Kali on ARM, Bare Metal, Cloud, Containers like Ducker and Alsovirtual box, and VMware.

    What are the Negative Points Of Kali Linux?

    – This operating system is a little bit complicated and is not beginners friendly.

    – If you run this system from a virtual machine, It’s possible that all the hacking tools do not work properly.

    – A lot of junk space is taken by Kali.

    Conclusion

    Kali Linux is one of the most advanced operating systems for penetration testing and as mentioned in this article, it contains more than 600 tools such as Nmap and Wireshark. It is mainly used for advanced penetration testing and security auditing. we recommended this platform to professionals and advanced users because it is not beginners friendly. Read this content to get more familiar with the greater features of Kali Linux. If you have any questions, leave a comment here.

    FAQ

    Is Kali a good choice for gaming?

    Game developers don’t focus on Linux because it contains just 2% of the users. As a result, It is not designed for hardcore gaming and Kali is not either.

    How much RAM is needed for Kali Linux?

    You can setup Kali as your basic secure shell server with no desktop with 128 MB RAM but note that 512 is recommended. Also, 2 GB of disk space is needed.

  • The Role of DNS Servers in Website Performance and Speed

    The Role of DNS Servers in Website Performance and Speed

    You probably heard about Domain Name Servers (DNS) before. DNS servers are used to translate human-readable domain names to machine IP addresses. Using DNS you don’t need to insert long numbers when you are going to enter a website. Instead, you can use domain names like example.com and be directed straight to your destination website. Now, this article considers analyzing the role of DNS servers in website performance and speed, so keep reading to get more.

    What is DNS Server?

    DNS works like a kind of internet phone book and is an identifier for your website. This means that users can quickly access their desired online information and website through a domain name like neuronvm.com. The role of DNS is to translate domain names to IP addresses so that browsers can load Internet resources correctly. A unique IP address is allocated to every device connected to the internet and is the identification of the device. We recommend you use the cheap dedicated server plans offered on our website to set up your own DNS server.

    Explanation of IP Address

    An IP address is a set of numbers that characterize devices connected to the Internet. All internet devices from smartphones to tablets and routers have a dedicated IP. These IP addresses allow computers to communicate with other computers. The structure of the IP address can be expressed with an example: 192.168.1.1 is an example of an IP address. This code contains information about your computer’s location and provider information.

    The Effect of DNS Servers on the Speed and Performance of the Website

    DNS servers affect your website in various aspects. If we want to mention two of them, we can mention the speed and performance of the website.

    The Role of DNS Servers on Website Speed

    DNS is not directly related to your internet speed, but since it causes identification and direct connection with the target website, it can affect the speed of displaying a web page on your computer. Also, modifying the router’s DNS servers can help improve your overall speed. There are many programs and machines available to help you find the best server for your router.

    One of the most effective tools for finding IP addresses is DNS Lookup. The process is that the browser must first find the appropriate IP address to display the relevant website. For example, if you type the domain name neuronvm.com and press enter, it will operate to find the IP address associated with the domain name and connect to the website:

    The Role of DNS Servers on Website Speed

    DNS servers are provided in different types such as recursive DNS servers, TLD name servers, Root DNS servers, and authoritative DNS servers. These servers work together to fix domain names into IP addresses.

    Ways to Decrease the Effect of DNS Servers on Website Speed

    DNS servers are responsible for domain name resolution and the speed of this process affects the loading time, so to speed up this task you can choose a reliable high-performing authoritative DNS server provider. These servers are the only type of server that you have the option to go with your preferred provider. But the root and TLD servers do not give you this possibility. So, to increase the speed of website DNS resolution, you should choose a reliable and fast authoritative server provider. Note that a valid DNS Server provider is different from a web hosting provider. In web hosting, you store the contents or data of your website, but in DNS hosting, domain DNS records are stored.

    Another way to reduce the effect of DNS servers is to use DNS cache. Of course, if the IP is already stored, the effect of the DNS servers will not matter, because the browser does not have to wait for the IP address to be delivered by the valid server. So always go with a reliable server to ensure fast DNS resolution speed. Of course, if the IP is already stored, the effect of the DNS servers will not matter, because the browser does not have to wait for the IP address to be delivered by the valid server. So always go with a reliable authoritative server to ensure fast DNS resolution speed.

    In using authoritative DNS servers, you can use different providers. But this choice will be different according to your circumstances. For example, if convenience is important to you and you don’t want to deal with record keeping, you can use your web hosting provider. But if you focus on DNS resolution speed, Cloudflare will be a good choice.

    The Role of DNS Server on Website Performance

    Regarding the performance of the website, suppose you have a website that works slowly, and you have no idea about the reason because the hardware and CPU configuration of the system is suitable and you have high-speed RAM. Also, all code and programs are optimized but website pages still take time to load.

    After a lot of searching and debugging, you realize that the problem is with the website’s TTFP. Another reason for this problem can be your DNS resolution time, i.e. it takes time to convert the domain name to IP address. During the process of website performance testing, your business may suffer and a lot of time will be spent to find the reason for this slowness. So we must know what the domain name system is and what its role is:

    The Role of DNS Server on Website Performance

    DNS servers in website performance

    Important Factors to Improve Website Performance

    Here are some factors to consider if you want to improve your website performance:

    Not using low TTL

    A shorter TTL makes the user’s machine request again for the domain faster. You can use the high TTLs to make sure that the information is stored locally in the DNS ISP and the user’s computer and affects multiple users.

    Backup plan

    It is good to have a backup plan, even if you use a big DNS management company.

    Unreliable Registered

    If you want to build the next page with 100K hits in a second, you have to be sure that your DNS server can handle the load or assign your NS record to anyone with reliability.

    Capacity

    You need to make sure of the capacity of your servers because if you want to receive a lot of requests, you need to have a lot of capacity or let someone else handle your DNS.

    Conclusion

    DNS is an important issue in the field of websites. These servers have an important role in identifying websites and as told before they act as a phonebook. This article tried to focus on DNS servers and their impact on the website’s performance and speed. Also, we tried to analyze each of them and explain how they can affect the website. We hope you enjoy this article.

    FAQ

    Are DNS servers effective in search speed?

    You can improve internet search speed by changing your DNS to something other than what your ISP Provides.

    What is the way of increasing web performance using DNS?

    By caching the A records or IP addresses they receive from DNS queries for a set amount of time.