The purpose of this article is to show how to install PhpStorm on Admin RDP. PhpStorm is a functional and powerful integrated development environment (IDE) that is used to work on large-scale development projects. Many features can be considered for this platform. Also, if you learn how to work with PhpStorm, you can strengthen your programming skills and develop your career in this field.
How to Install PhpStorm on Admin RDP
Now that you know what is PhpStorm, it’s time to learn how you can install it on Admin RDP. But first, you need to prepare some requirements:
Prerequisites
– An Admin RDP Server
– Minimum of 2 GB free RAM (8 GB is recommended)
– Multicore CPU is the ideal
– 3.5 GB disk space
Use the ToolBox App
You can use the JetBrains Toolbox program to install the products. So, you can use Jetbrains to install multiple products or multiple versions of the same product containing early access program (EAP), remove easily any tools or nightly release of products, and so on. This program keeps the list of all your projects and allows you to open your project in the appropriate IDE.
Installing The ToolBox App
Follow the steps below to install the ToolBox app:
First, you should download the installer .exe. You can get it from the official web page of the toolbox app.
Then, it is time to execute the installer wizard and follow the related steps.
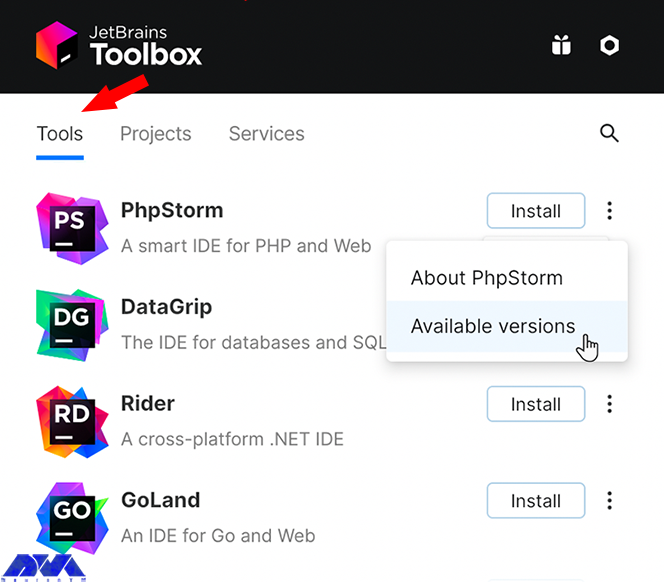
Here you can see the toolbox app. Choose the toolbox icon and select the product you want to install.
If you are looking for a specific one, click the option which is shown in the below image and select Available versions.
Login to your Jetbrain account through the toolbox app to install the necessary permissions automatically.
Note that if you used the toolbox app, you can find the installation directory there.
Standalone Installing process
In a standalone installation, you can do it manually and manage the location, also you can configure files. To figure out this method, follow the instructions below:
You should start by downloading the installer .exe.
The next step is to execute the installer and go through the wizard steps.
Do the actions below on the installation options:
– To Setup PhpStorm create a desktop shortcut.
– Use the PhpStorm command-line launchers to add the directory to the PATH environment variable to work with them from any directory in the command prompt.
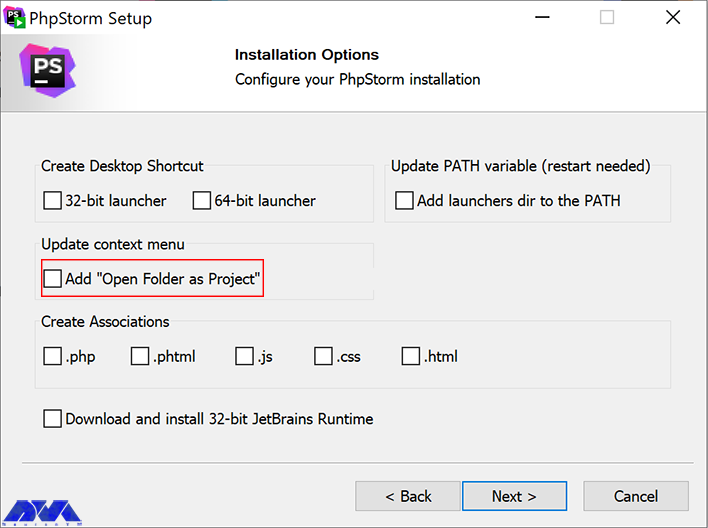
– In setup section select Add the open folder as a project option under the context menu:
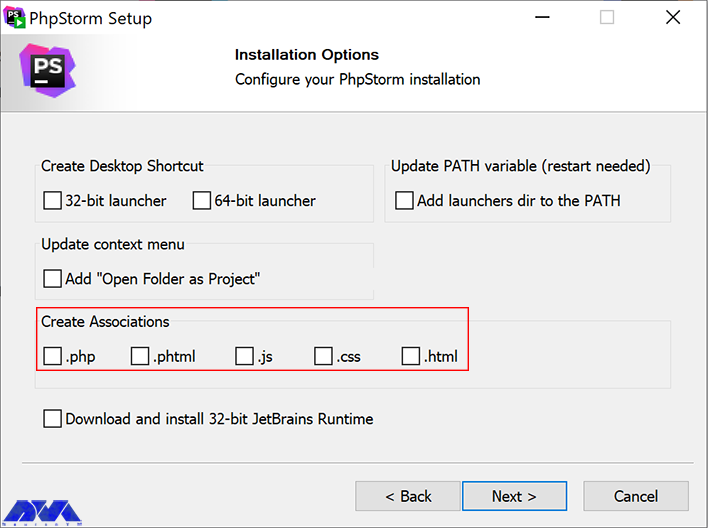
– Then you should associate file extensions that you need. This way you can open them by double-clicking:
Tip: To find and start PhpStorm, go to the start menu or use the desktop shortcut.
For extra and detailed information about PhpStorm usage, go running PhpStorm for the first time.
Silent Installing Process on Windows
If you choose the silent installation method, you should know that there is no user interface. This method is suitable for network administrators, which is performed on a number of machines and prevents disruption to other users.
Use the switches below to do the silent installation:
–/S: To enabling silent installation
– /CONFIG: To clarify the path to silent configuration file
– /D: To lead to the installation directory
Tip: This parameter should not contain any quotes. For instance:
PhpStorm-*.exe /S /CONFIG=d:\temp\silent.config /D=d:\IDE\PhpStorm You can add the /LOG switch file to the LOG path and put a name between /S and /D parameters. To check for problems during the installation process. For instance:
PhpStorm-*.exe /S /CONFIG=d:\temp\silent.config /LOG=d:\JetBrains\PhpStorm\install.log /D=d:\IDE\PhpStormInstructions for silent configuring file
Go to https://download.jetbrains.com/webide/silent.config to download the default configuration file. This file unifies the installation option for you. This setting is for the current user. That is you should set the mode to user. If you want to consider all users set the mode on admin and run the installer.
Note that the configuration file settings are specific to each JetBrains product. But you can enable or disable this option. Also, you can perform the silent installation without the configuration file.
How to Run PhpStorm
In the previous part, you learned how to install PhpStorm. Here, we will explain how to run this platform on your system, So follow the instructions.
Using the toolbox app is easy for running process Cause you can use it for any product, But if you desire to use a standalone installation, you should go through some steps depending on your operating system.
First, go to the start menu or use the desktop shortcut. Another way is the launcher batch script or running the installation directory under Bin.
To run the PhpStorm from the command line go to the command-line interface.
Configuring the Default settings
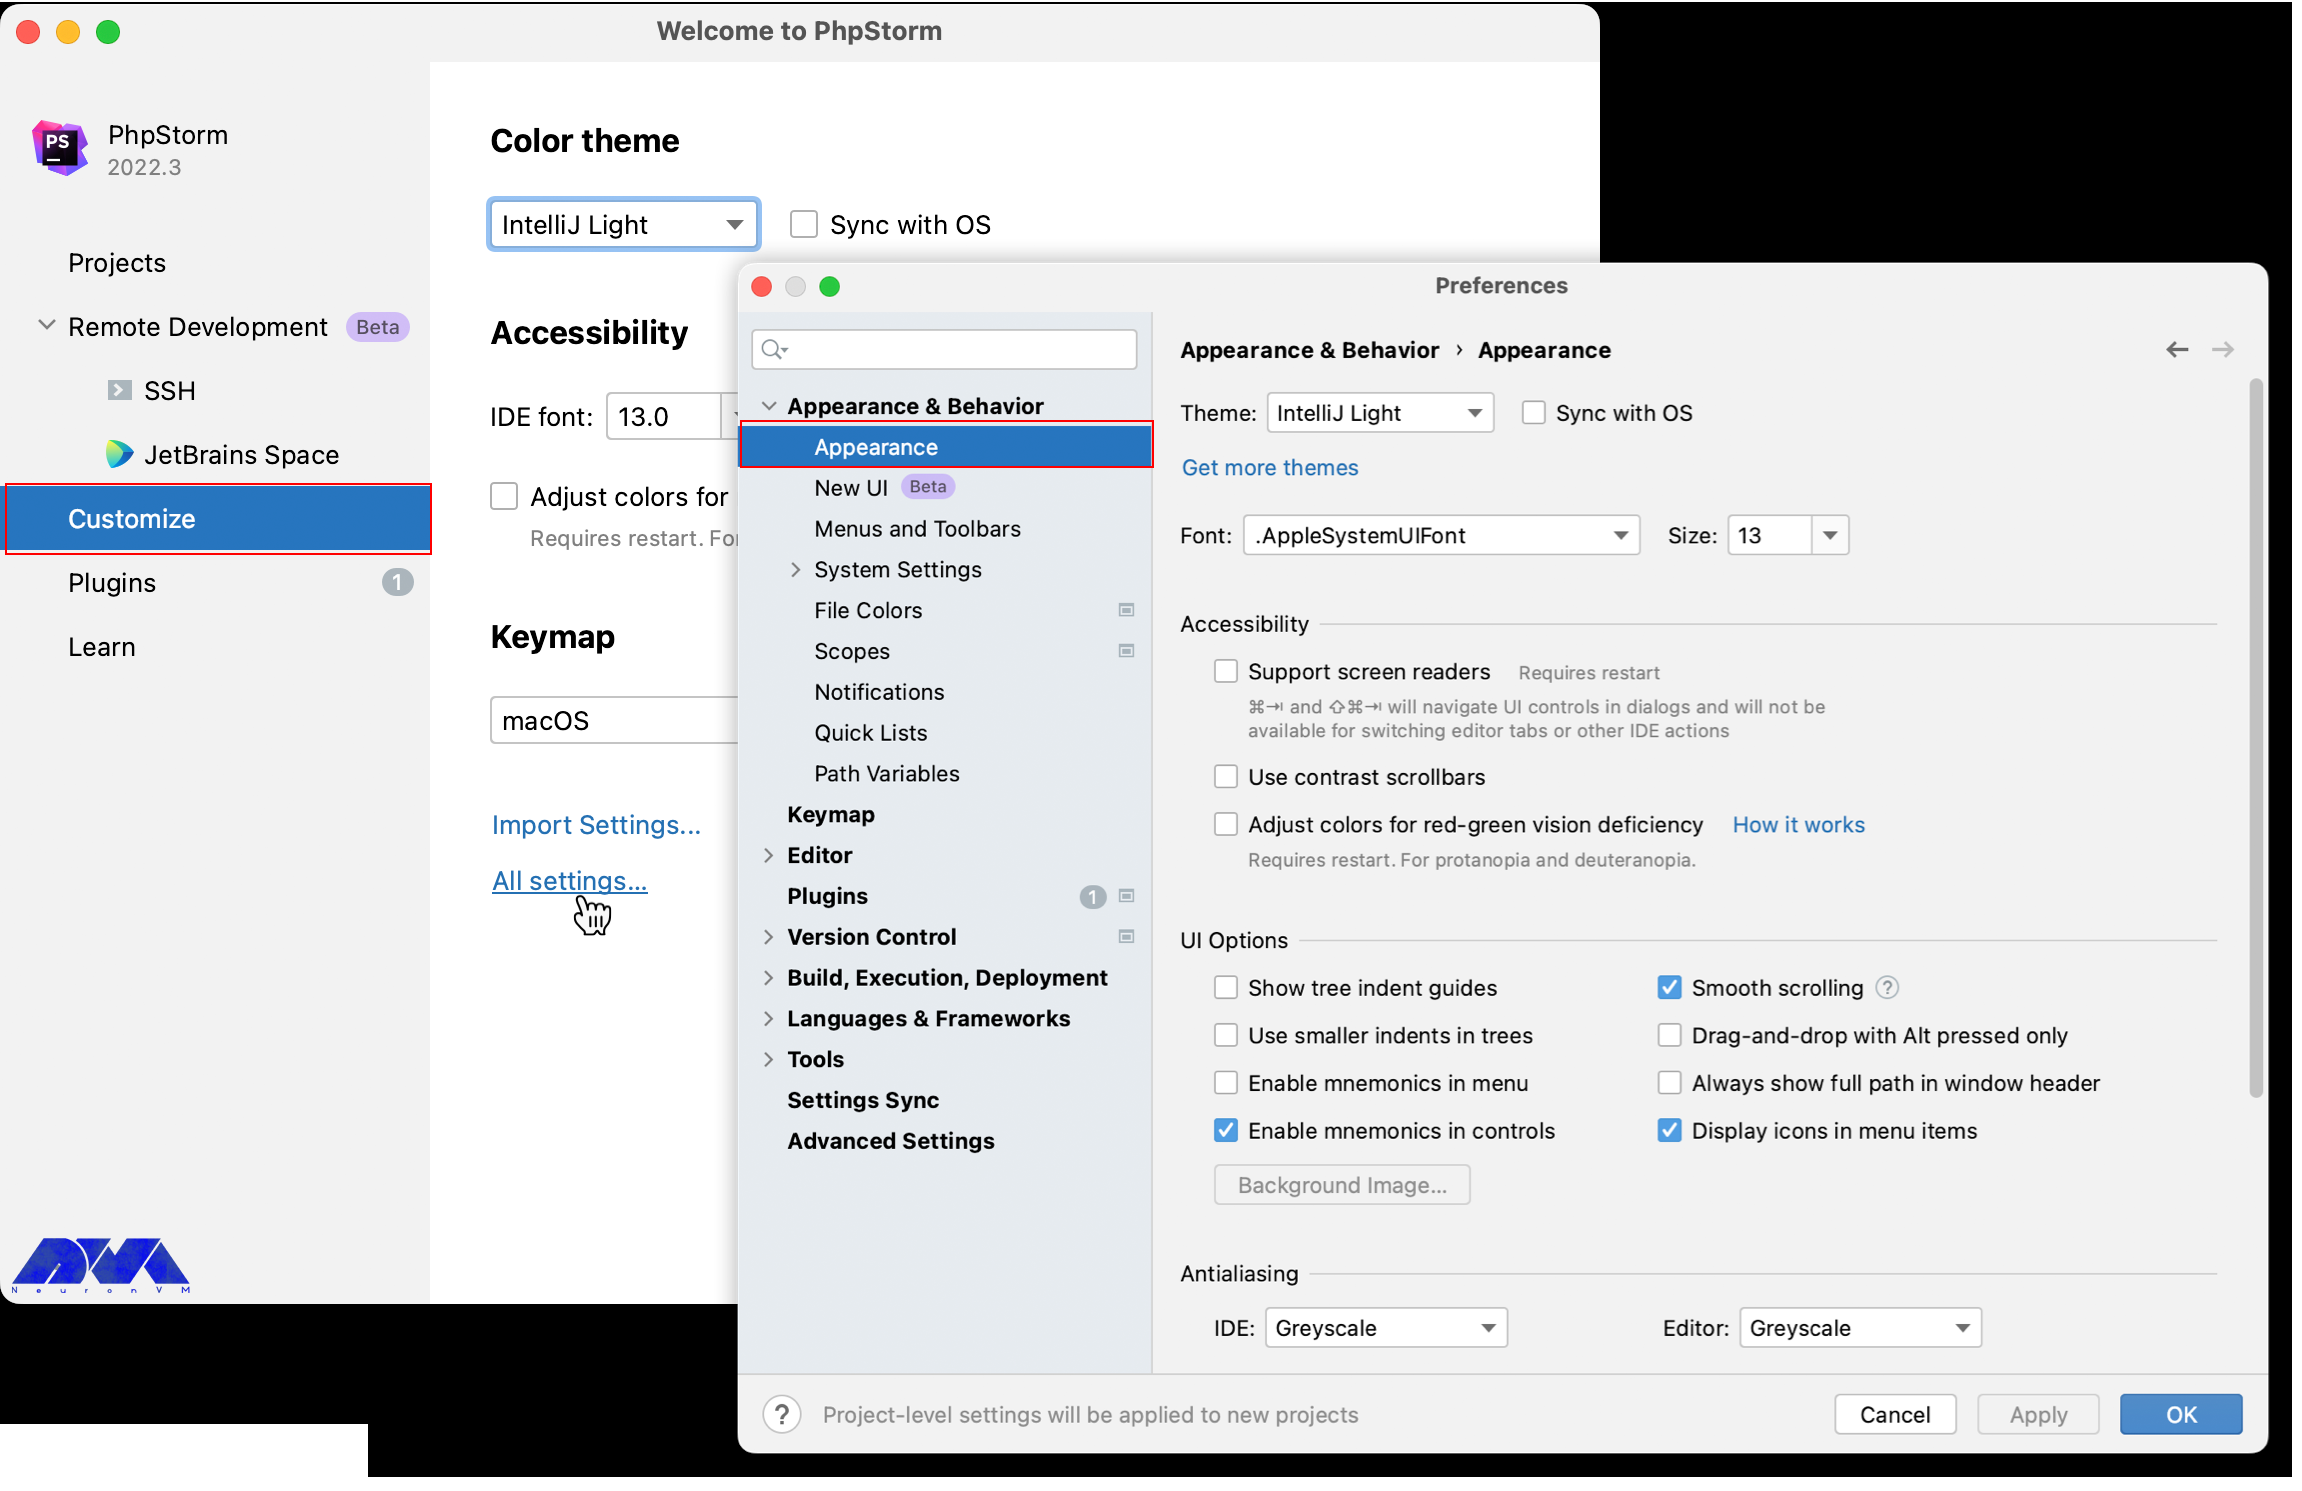
Go to Customize > import settings. Also, you can click all settings options and open setting dialogs to modify this part:
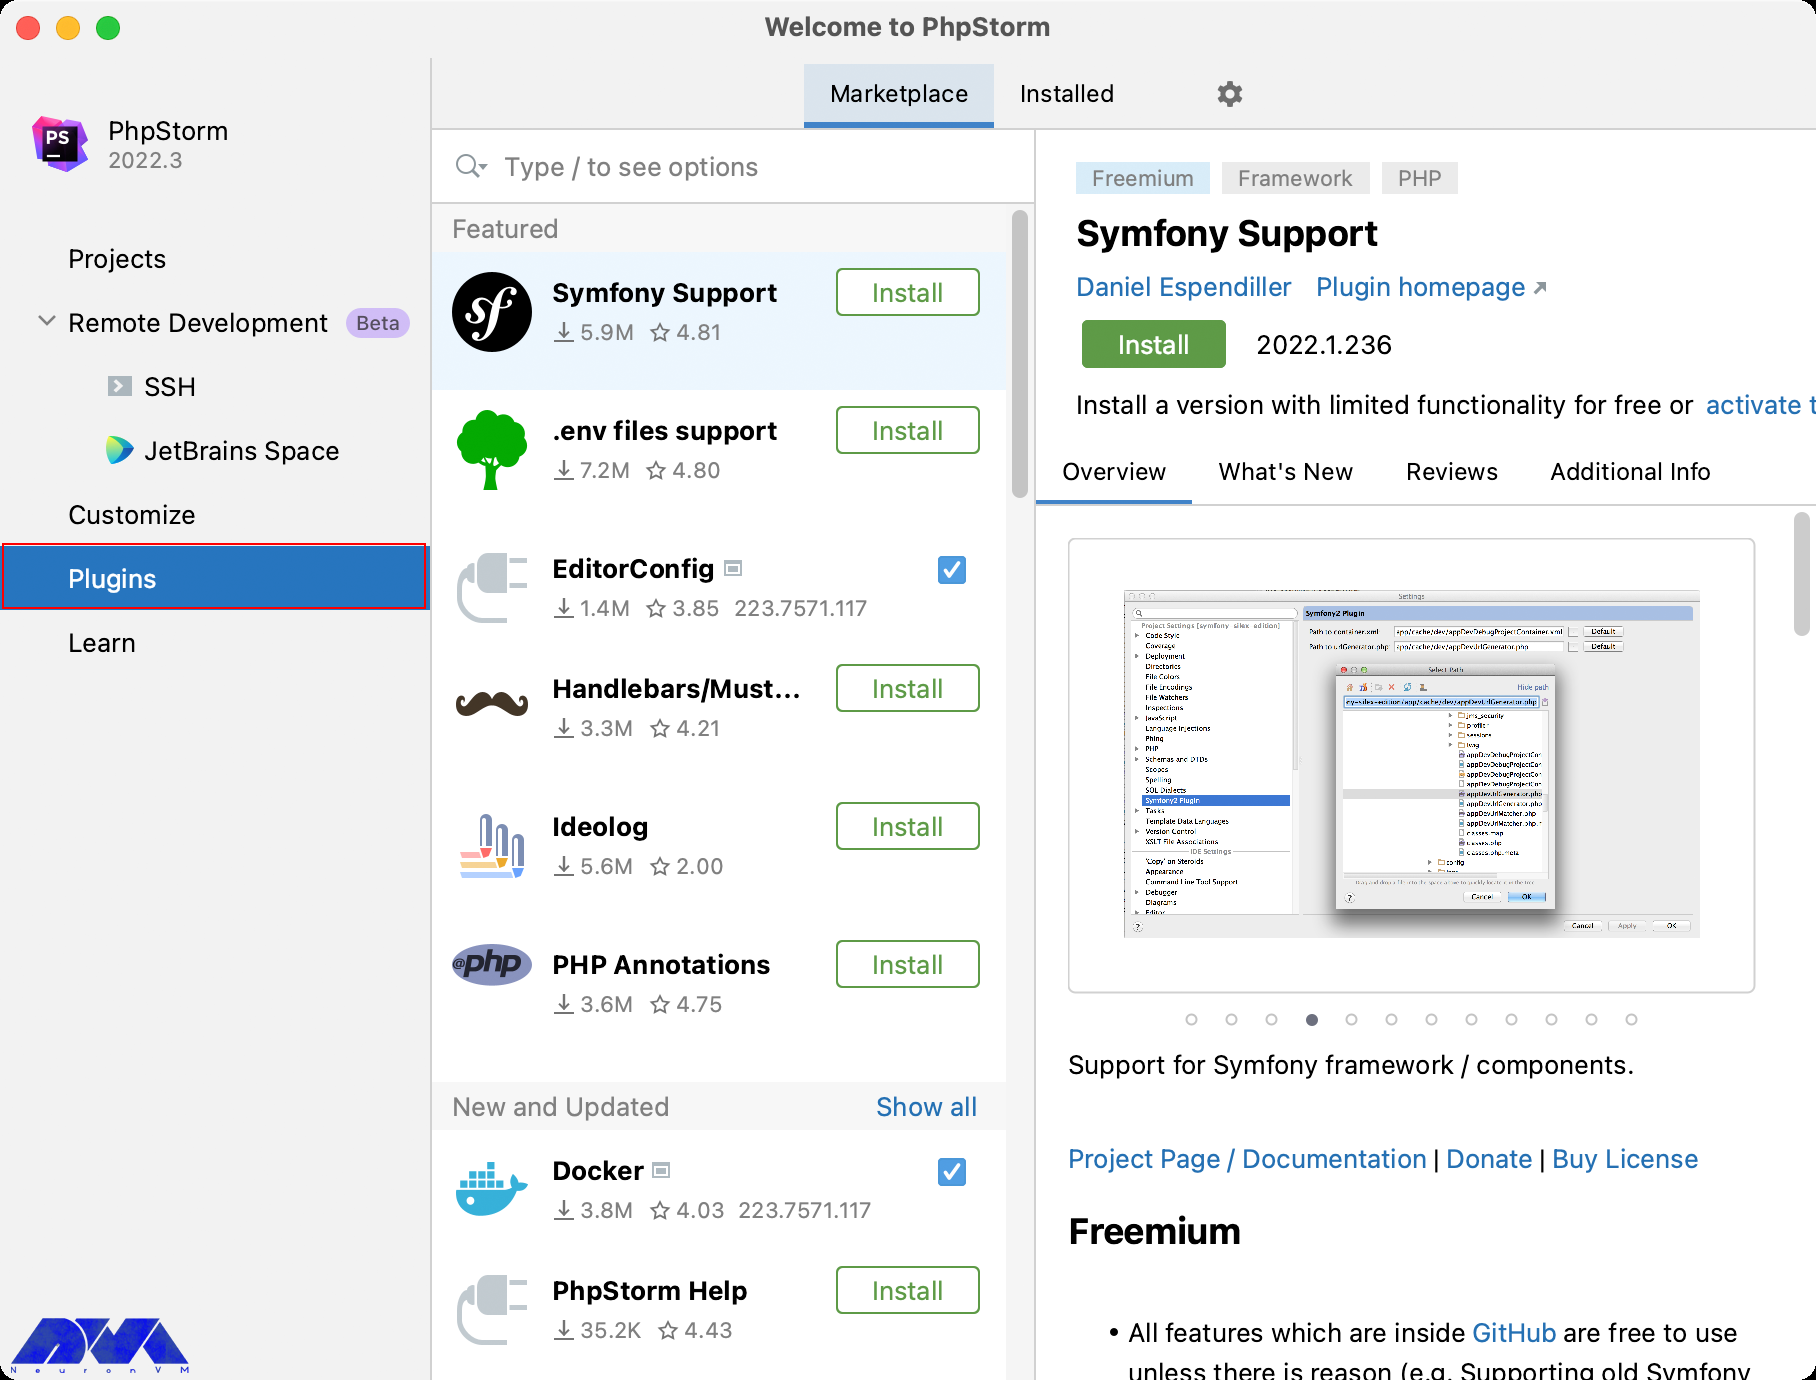
Installing Additional Plugins
You can see the plugins in the left side pane. Then you can install additional plugins from the PhpStorm plugins repository:
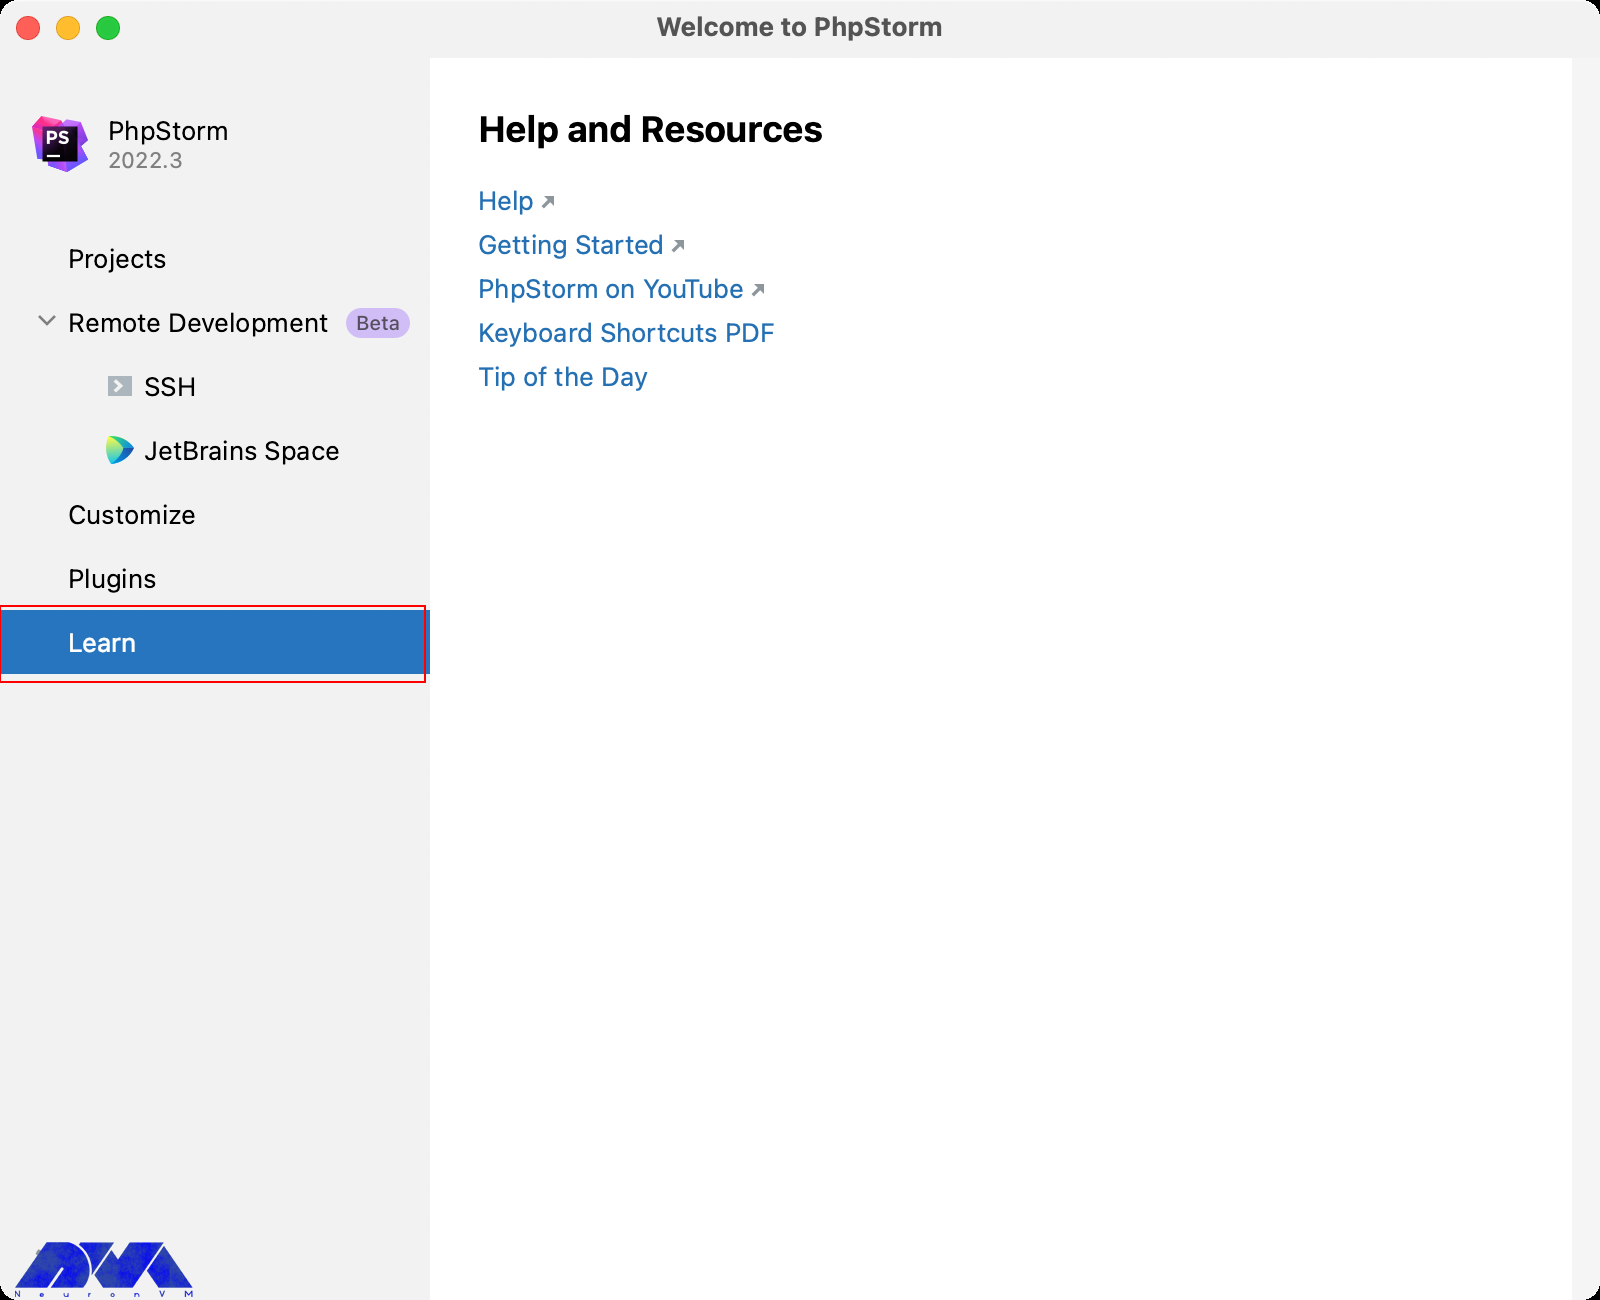
There is another part which you can refer to get more information about shortcuts, features, and IDE workflows:
You can click on the remote development option so that you can create a remote connection and handle other system issues.
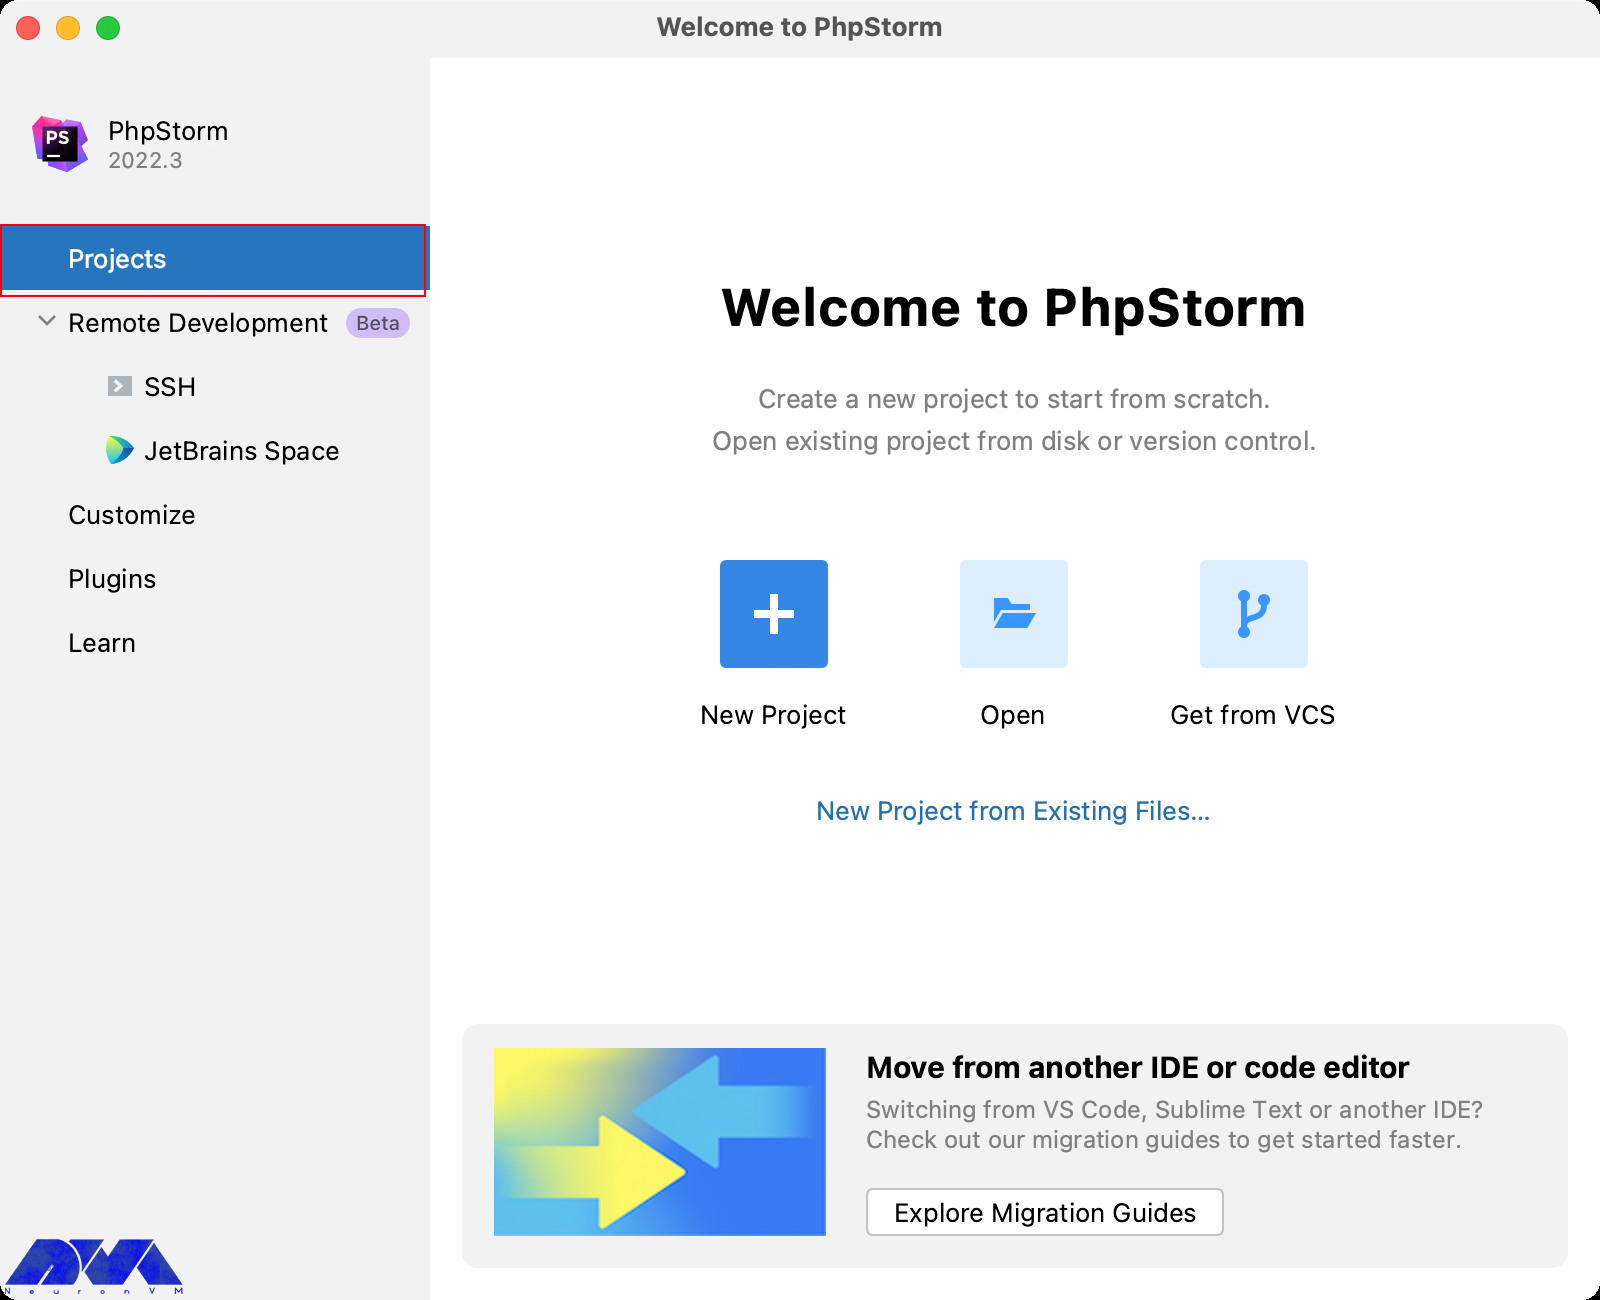
Starting A Project in PhpStorm
To start your task follow the instructions below:
– On your welcome page, go to the Project section and open a new project. Then receive your project from a version control system:
Registration Section of PhpStorm
You have 30 days to test PhpStorm. So go to your JetBrains account to start using the PhpStorm trial version. (logging will be done automatically )
Go through the following instruction:
1- Start your journey by license dialog. Select the start trail tab and click on log in to JetBrains account. As a result, you will see JetBrains website:
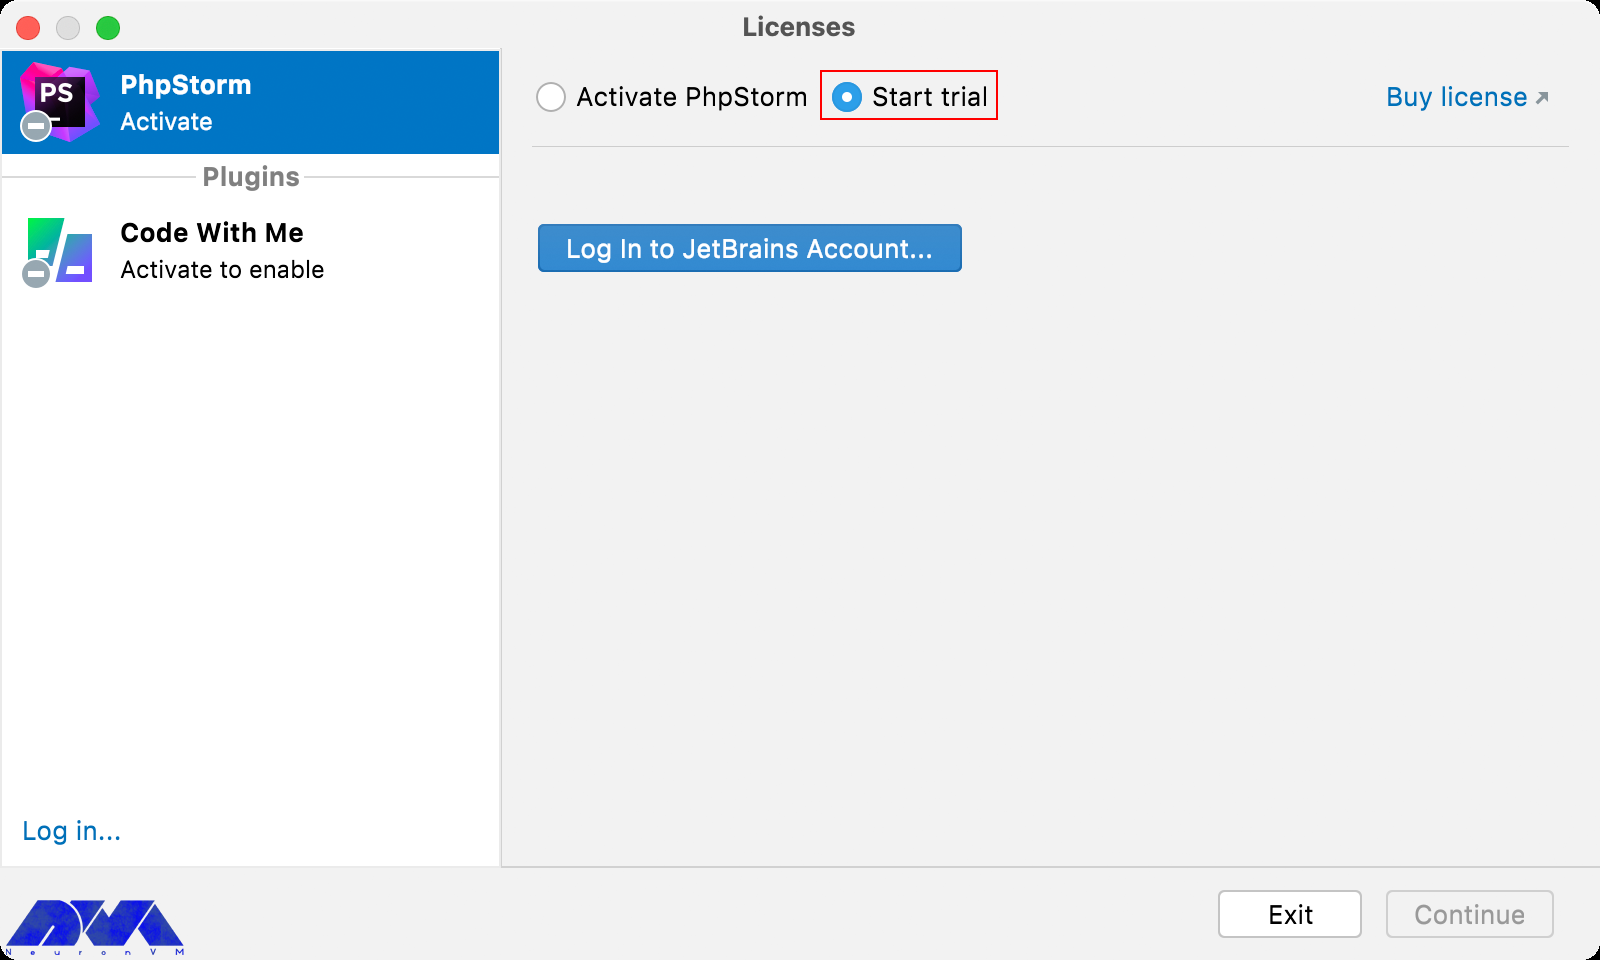
2- Here, you should choose the Start Trial button in the license dialog to start the period:
Tip: After the expiration, you should buy the license to continue using PhpStorm.
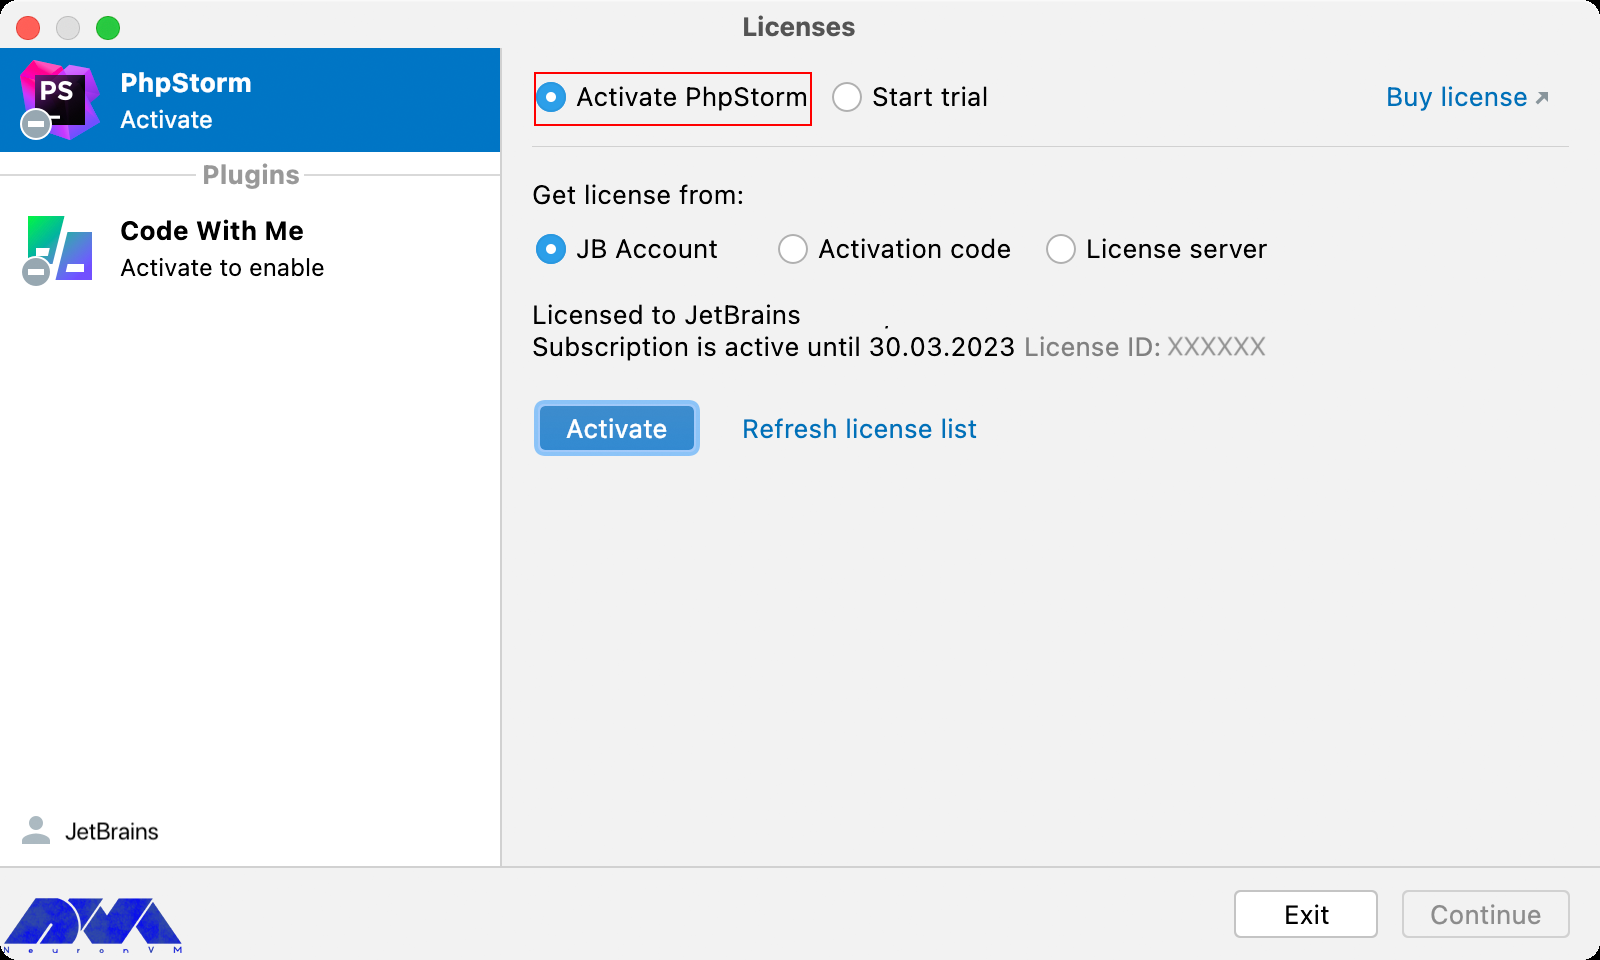
Activating PhpStorm License
Go to the main menu and select help>register part. Then click manage license on the welcome screen and open the licenses dialog.
2- Select the registration type or a plugin that requires a license (PhpStorm shows the list of licenses automatically, so click activate to start using your license).
Tip: If you don’t see the related list, click refresh license list.
Changing the Active User
As we mentioned before, You should click the welcome screen to open the licenses dialog.
Now, you should click the name on the down left corner of the dialog and choose to log out:
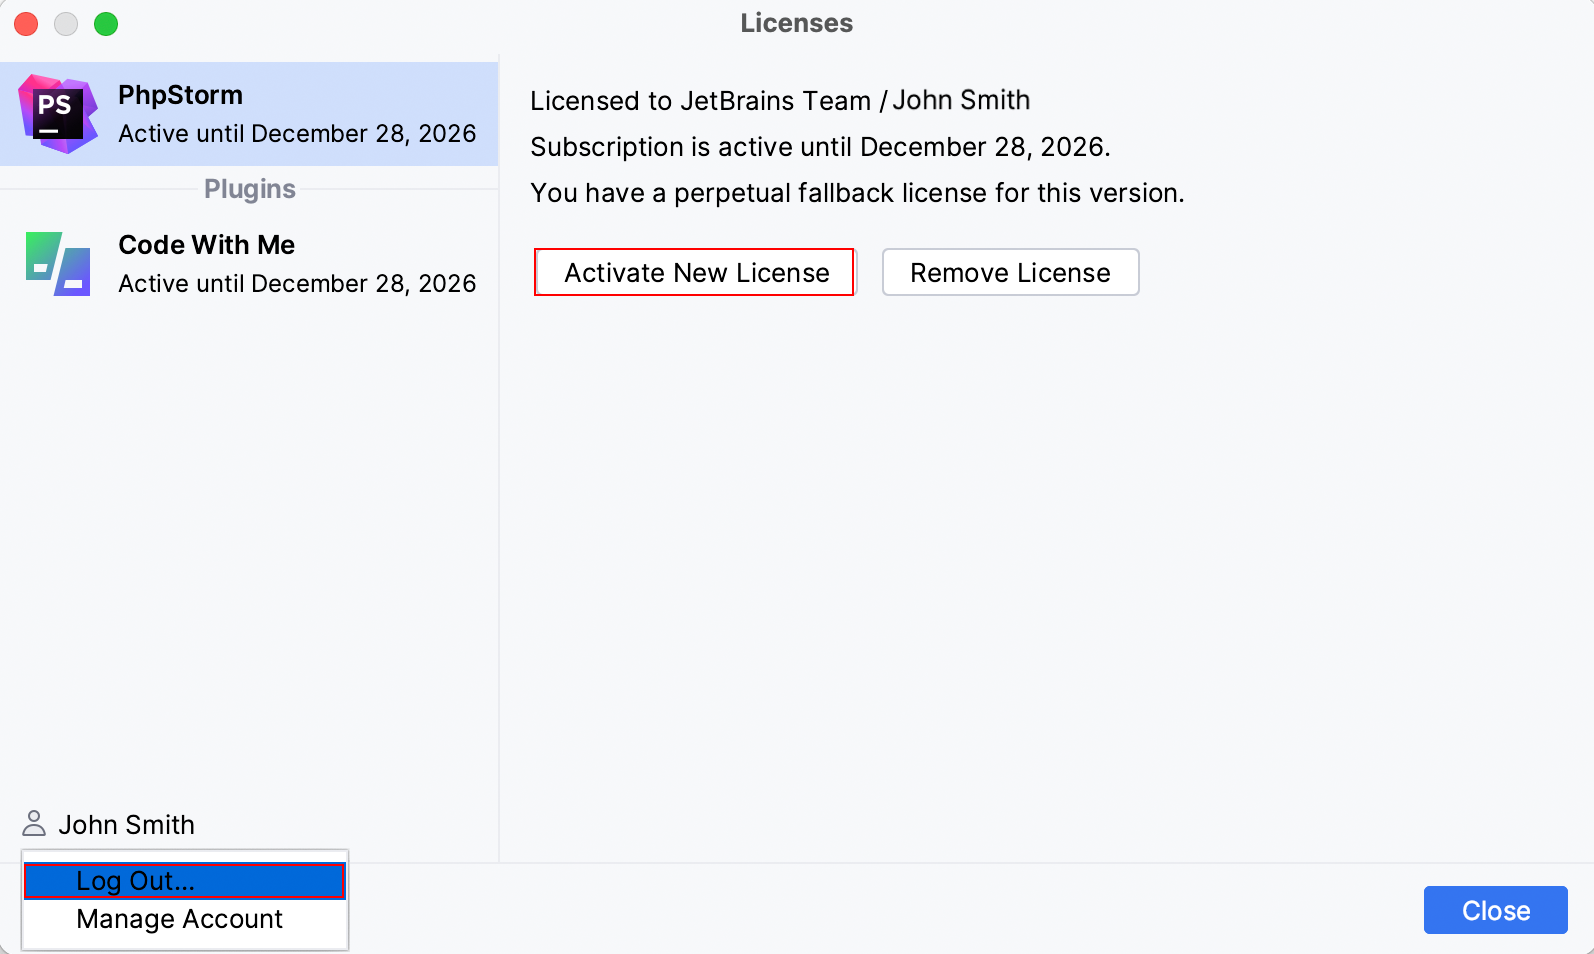
As you logged out, you are able to register using another JetBrains account.
Updating PhpStorm
Generally, you can follow the instruction in this part to update PhpStorm:
If your operating system is Windows go through this way: file > settings > appearance and behavior > system settings > updates
But if your system is MacOS: PhpStorms > settings > appearance and behavior > system settings > updates
Also, you can use the Ctrl+Alt+S keys.
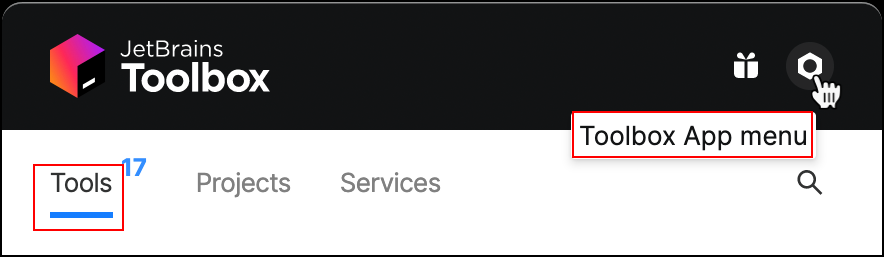
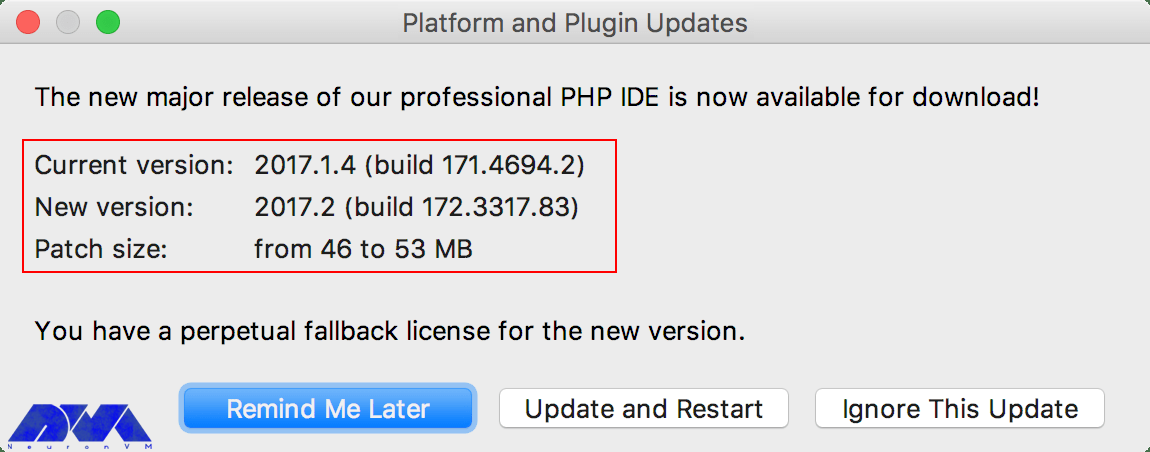
Notice that if you installed PhpStorm using the ToolBox app, This tool will inform you and advise you to update the IDE when a new version is released.
– In the toolbox app, click on the menu icon. Then on the setting dialog, open the tools option and select update tools automatically:
Also, you can update every managed IDE instance separately. This way, follow the steps below:
1- Open your toolbox app and choose the relevant IDE instance then select settings.
2- Here you have two update channels: Release and Early Access Program.
The first one updates only stable releases and the second one is for updating candidates, beta releases or EAP builds.
If you are using a manual update, you should know that a standalone instance will manage to update the process itself. You will be informed if there is a new update.
Now to configure the updated policy go through this way: settings > appearance and behavior > system settings > updates.
Uninstalling PhpStorm
As we have different ways to install PhpStorm, we will show you how to uninstall this tool in every method:
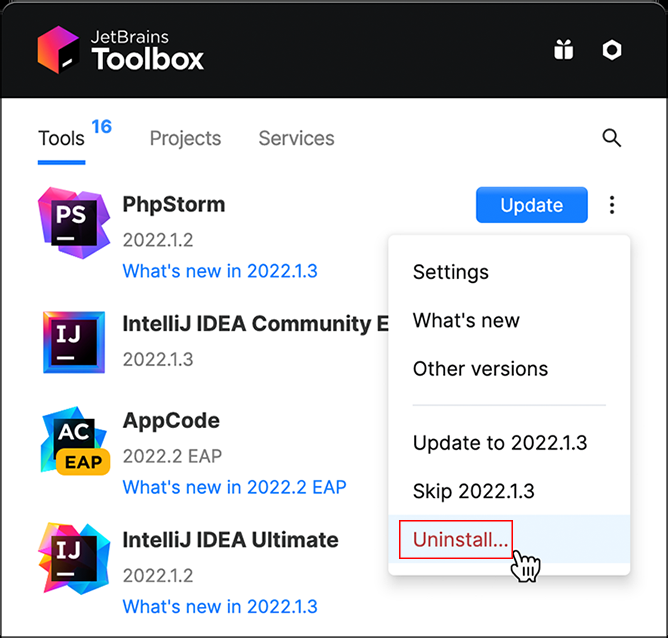
Uninstalling in ToolBox App Method
Follow the instruction below:
In the toolbox app go to the setting icon and click on the icon which is showing on the image below, then select uninstall:
Uninstalling in Standalone Instance Method
Go through this instruction: settings > apps & features > PhpStorm app > uninstall.
Depending on your Windows version uninstalling is different. For manually uninstalling process:
1- run the Uninstall.exe command under /bin.
2- Then remove the directories below:
Syntax
%APPDATA%\JetBrains\
%LOCALAPPDATA%\JetBrains\
Example:
C:\Users\JohnS\AppData\Roaming\JetBrains\PhpStorm2023.1
C:\Users\JohnS\AppData\Local\JetBrains\PhpStorm2023.1
Uninstalling Silently on Windows
In this way, you can run the process with the /S uninstaller switch as an administrator. This uninstaller is in the installation directory under /bin.
On the Windows command prompt, run cmd and change to the PhpStorm installation directory and run the following command:
bin\uninstall.exe /S
Conclusion
Here, we tried to provide a full guide to teach the way to install PhpStorm on admin RDP. This article is made of different parts to show the installation process, ways to install PhpStorm, running part, registration guide, and at last the way to uninstall this functional tool. We hope this content was useful for you. If you have any questions, just leave a comment.
FAQ
This tool is a paid Java-based IDE developed by JetBrains.
You need at least 200 GB of free space and 8 GB RAM and 4 CPUs.