Author: Terri person

  • The Best Way to Configure Cron Jobs on Dedicated Server

    The Best Way to Configure Cron Jobs on Dedicated Server

    After reading this post, you will learn how to configure cron jobs on a Dedicated server by using your shell user. This process includes entering the server through SSH to execute commands. Also, you can use these commands to edit an existing cron job that you created in the panel and continue editing it from the panel.

    What is Cron Jobs?

    Cron is a useful tool for users and can be used on any Unix-like operating system. The cron program is dedicated to scheduling commands at a specific time, and these commands and activities are known as cron jobs. This program is used to run monitor disk space, schedule backups and periodically deleted files that you don’t need anymore and etc.

    Important Points Before Configuring Cron Jobs

    There are some points you should be aware of before setting up. Crontab files are files that hold job lists and other instructions for cron daemons there. Each of the users is accessible by executing the commands here under the shell user:

    crontab -e

    Crontab files include simple text files that have a specific format. Every line of crontab files has five time and date fields which are followed by a command and then followed by a new line character (‘\n’). But you can’t add a newline so push enter/return at the end of your command.

    Automatic word-wrap breaking up of the long line into multiple lines is another problem of Crontab, so make sure your text editor doesn’t do this.

    Tip: In our example, the username is your shell user and the website is example.com.

    How to Configure Cron Jobs on Dedicated Server

    Here, we will show how to configure and use the Cron job on a dedicated server. We recommend you to visit the Cheap Dedicated Server plans offered by NeuronVM. By following our commands you can add a custom cron job in the user shell. These commands assume that you have not yet added a cron job to the panel, so the cron job file will be empty. Follow the instructions below.

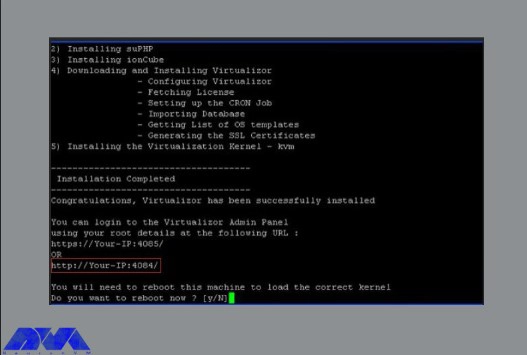
    First, You should enter your server using your shell user through ssh. Then after login, to open your crontab file you should use the following command:

    crontab -e
    
    It looks like you don't have a MAILTO line in your crontab file
    For performance reasons we ask that you specify an address where
    cronjob output will be delivered. If you do not wish to receive
    cronjob output, simply press enter and cronjob output will not be
    mailed to you.
    For more information regarding this, please visit:
    https://help.***.com/hc/en-us/articles/215088608
    Where would you like cronjob output delivered? (leave blank to disable)
    : [email protected]
    cronjob output will be emailed to [email protected]
    confirm? (y/N): y

    Now you should add your email or leave it blank and after that, you should choose the proper text editor:

    Select an editor. To change later, run ‘select-editor’.

    1. /usr/bin/joe
    
    2. /usr/bin/jstar
    
    3. /usr/bin/jpico
    
    4. /usr/bin/jmacs
    
    5. /usr/bin/jed
    
    6. /bin/nano <---- easiest
    
    7. /usr/bin/vim.basic
    
    8. /usr/bin/rjoe
    
    9. /usr/bin/mcedit
    
    10. /usr/bin/vim.tiny
    
    11. /bin/elvis-tiny
    
    12. /usr/bin/emacs25
    
    13. /bin/ed
    Choose 1-13 [3]: 6

    As you see above, file number 6 is selected which is referred to as nano editor. Using a nano text editor is the easiest one.

    Or you will see the following list:

    Select an editor. To change later, run ‘select-editor’.

    /bin/ed
    
    /bin/nano <---- easiest
    
    /usr/bin/emacs24
    
    /usr/bin/vim.basic
    
    /usr/bin/vim.tiny

    Then you will have an empty crontab file. Now add the code to the cron job. In this example, we run a file named mail.php under the username of “username”. you should choose the name same as the one you logged in with, currently:

    Custom cron job
    MAILTO="[email protected]"
    13 20 * * * php /home/username/mail.php

    At last, save the file. you will see the final response below:

    crontab: installing new crontab

    The mission is completed now and your cron job should run every day at 8:13 pm.

    Some Crontab Commands

    For replacing your existing crontab with a custom crontab file:

    crontab /home/username/filename

    For editing your server’s crontab:

    crontab -e

    To view your crontab:

    crontab -l

    To remove your crontab:

    crontab -r

    An Explanation for The Date & Time Files

    The five fields that you see at the beginning are the time and date fields which specify how much and when a command should be executed.

    An Explanation for The Date & Time Files in cronjobs

    We have another graphical way, as you can see here:

    An Explanation for The Date & Time Files

    You can use several ways of specifying multiple values in these fields:

    _ The comma (,) specifies a list of values.

    _ The dash (-) specifies a range of values and is equivalent to a comma (,)

    _ The asterisk (*) or wildcard specifies all of the possible values for a field.

    _ The slash (/) is used in conjunction with an asterisk, to skip a given number of values.

    _ And at last, (/3) means you can skip to every third value, and in the hour field is equivalent to (0،3،6،9،12،15،18،21). you have to mention that (*) specifies every hour but /3 cause only 1,4,7 value are used.

    One of these specific strings can be used in place of the date & time:

    An Explanation for The Date & Time Files

    Some Examples of Custom Cron Scripts

    Here you can find some examples showing what to add to a new file in order to create a cron job:

    1: This example runs a command at 5:10 pm PDT/PST, then will emails you the regular and error output to the destination specified by Mailto:

    10 17 * * * perl /home/username/bin/yourscript.pl

    2: This one runs a command at 1:00 am PDT/PST on Saturday and the only output is errors:

    0 1 * * 6 sh /home/username/weekly/weekly-pruning.sh > /dev/null

    3: This runs a PHP script which is calling cron.php at the top of every hour:

    0 * * * * php /home/username/cron.php

    Edit Dedicated Server

    If you log in as a dedicated server admin user, you will be able to edit the crontab file directly. Follow the command below:

    /var/spool/cron/crontabs/username

    Then if you want to access that file, you will need to use sudo on your dedicated server.

    Tip: If you are asking for sudo or admin access, you must upgrade to a dedicated server.

    Here we have an example for opening the file with a vi text editor:

    sudo vi /var/spool/cron/crontabs/username

    Conclusion

    Now you know how to configure and use cron jobs on a dedicated server. This tool is a useful assistant for you. It also makes the system recover automatically and work around the clock without human intervention. We hope you enjoy this article. If you have any suggestions, just leave a comment.

    FAQ

    What is the meaning of ***** in cron?

    A cron schedule expression wildcard. It means your cron job should run every minute of every hour of every day of every month each day.

  • How to Install Virtualizor on Dedicated Server

    How to Install Virtualizor on Dedicated Server

    One of the most famous virtualization platforms is virtulizor, which helps you to create and manage VPS with all kinds of virtualization through a graphical user interface. Here, we will review the steps of setting up vietualizor with KMV on a dedicated server. After reading this post, you will learn about how to install virtualizor on Dedicated Server.

    Some Good Features of KVM on Dedicated Server

    1- Capability of migration from one node to another one

    2- Backup and restores of VMs (local, FTP, SSH backup servers)

    3- Capability of cloning the VM

    4- Having multiple storage support

    5- Configuring internal IP supported with virtual domain forwarding

    6- Storage overcommit option

    Prerequisites

    – A Cheap Dedicated Server with Centos 7, 8, or RedHat Enterprise Linux 7 or Ubuntu 18.04, 20.04, or AlmaLinux 8

    Storage types that are supported: LVM – File – Thin LVM – ZFS – ZFS Thin – ZFS Compressed – ZFS Thin Compressed – Ceph Block Device

    Steps of Installing Virtulizor on Dedicated Server

    Now, let’s analyze the steps of installing Virtualizor by KVM.

    _ The first step, is to log in to the server as a root user via the terminal.

    _ In the second step, you have to be sure that wget command is already installing on your system.

    _ Now you should download the script and install it with the commands shown here:

    wget -N http://files.virtualizor.com/install.sh
    chmod 0755 install.sh
    ./install.sh [email protected] kernel=kvm

    _ You have to be sure that you are providing the correct email ID and then you should wait for the installation:

    Steps of Installing Virtulizor

    _ You have to be patient cause it will take some time to complete this process. Once the installation is done carefully, you should reboot your system:

    Install Virtulizor on dedicated server

    _ When you finished all these parts and reboot the system, you will be able to access the panel with the link below:

    https://Your-Server-IP:4085/

    how to login to the Virtulizor

    Done! Now you can use your virtualizor on a dedicated server and enjoy using the simple interface of that.

    Conclusion

    Here we showed how you can install virtualizor on your dedicated server and the prerequisites you need before installation. Virtualizor makes it easier for you to control systems. Have any ideas or problems, leave a comment.

    FAQ

    Is Virtualizor free?

    If you want to test this tool, it contains a one-month free trial license for all users.

    What is the default port for Virtualizor?

    You can use ports from 4081 – 4085. If there is any firewall restriction, you will need to allow these ports.

  • Top Way to Configure a Backup Server on a Dedicated Server (JetBackup)

    Top Way to Configure a Backup Server on a Dedicated Server (JetBackup)

    Backup is a vital part of a server and a helpful action to save data and important information about your system. So read this guide and follow the instruction to backup your system in the best way. After reading this article, you will learn a superior method to Configure a backup Server on a dedicated Server using JetBackup, just follow us until the end of this article.

    What Is Backup Server?

    A great way to store important files is to save them in a zip file using a backup server. This server is affordable and can be zipped into the system of the hard drive. of course, some of these servers are also available for free but some good options are only accessible in paid version. If you are computer savvy, you can upload the backup file to your server safely and easily using the built-in FTP function. Note that to track supporting files the log for supported and unsupported ones.

    Installing a Backup Server on a Dedicated server

    You can use a backup server to backup your data, applications, and databases. That is, you can rent a cheap dedicated server from a host and then lunch your backup solution. Now to learn the configuration of this backup server follow the steps below:

    Tip: We will use the JetBackup server for this process.

    Prerequisites

    you should prepare the minimum system requirements to use Jetbackup on your server:

    – Centos 7/ Cloudlinux 7/ Redhat 7

    – 64-bit OS

    – cPanel version 68 and above

    – WHM Tweak Settings, Max CPanel process memory, require at least 2 GB

    You should follow to steps to install Jetbackup:

    Step1. Login as a root user

    You should enter to server as a root user and then run the following commands on the CLI to start the processes of installation of the JetApps repository and plugin manager on the cpanel server:

    yum install http://repo.jetlicense.com/centOS/jetapps-repo-latest.rpm
    yum clean all --enablerepo=jetapps*
    yum install jetapps-cpanel --disablerepo=* --enablerepo=jetapps

    Tip: If LFD is enabled on your cPanel. You have to be sure to restart LFD before passing to the next step and making changes in csf.pignore.

    Step2. Start Installation with Command-line / GUI

    As you have finished the installation of the repo and plugin manager, you can proceed to install Jetbackup for cpanel using one of the two options here:

    The first option (using the command line): Run the following command with your chosen tier on the same console.

    jetapps --install jetbackup stable

    Now JetBackup will start the installation and then specifies the version and will inform you that the installation is complete.

    The second option (using GUI): Use your root account to access the cPanel WHM server GUI. Then go to the plugin menu and click on JetApps > JetBackup (More Details). Choose your favorite tier and confirm the installation.

    After a complete and successful installation, go to the WHM interface and go to the plugin section to access JetBackup. You can spend a little time reviewing the Getting Started guide to setup and run JetBackup.

    Configure Backup Server on Dedicated Server

    Now it’s time to configure JetBackup. Login to cPanel/WHM by using https:://{hostname/ip}:2087 address on your browser:

    Configure Backup Server on Dedicated Server

    As you open JetBackup you will encounter JetBackup End User License Agreement. After you have read and agreed to the terms included in the EULA, select the “I agree to those terms” option:

    Configure Backup Server on Dedicated Server

    If you already have an exciting JetBackup configuration on your server, then just click the Exit Wizard tab.

    Or click on the “Reset JB Configs” tab to login to your panel and start with a new installation and default configuration:

    Disaster recovery wizard

    As you entered the dashboard area, start your task by adding a backup destination Which will be saved as your storage location.

    In the next part, we recommend you enable Export JB Config on a destination to backup your JetBackup settings and configurations. This action will allow more seamless Disaster Recovery. Now you can start the backup process.

    Here you can see some backup types:

    _ Local to Local: Used to copy cPanel accounts to a specific local folder

    _ Local to Remote: Used to copy cPanel accounts to remote folder

    _ General Files Backup: Used to only backup files

    _ MySQL Backups: Used to backup cPanel accounts database

    By default, JetBackup creates backup copies using its internal backup engine. If you select the cPanel backup engine, you can restore backups created in the cPanel backup system.

    Conclusion

    As we mentioned here, you can backup your files and important data on your dedicated server using a system like backup server. So the purpose of this tutorial is to show how to configure a backup on a dedicated server. We hope you enjoyed the article.

    FAQ

    How often should we run a full backup?

    Important data should be backed up at least once a week, but we recommended this action once every twenty-four hours.

  • How to Configure a Mail Server on Linux VPS

    How to Configure a Mail Server on Linux VPS

    It is useful to have a mail server on your system. Setting up a mail server on a Linux system is a useful tool that is used by many users, You can host your email account, also many services send their reports and messages to your email. You can do this with Postfix which is a post-transfer agent for Linux. So follow the instructions here to configure a Mail Server on Linux VPS.

    Configure a Mail Server on Linux VPS

    Now, you can learn how to do configure the mail server step-by-step on Linux.

    Prerequisites

    Here, you can find some requirements before setting up the mail server:

    _ Operating System: Any Linux distro

    _ Software: Postfix and Mailx

    _ Root access or access via sudo command

    Configuring a Mail Server

    As mentioned here, to start the mail server, you need to install the Postfix and Mailx server, which are sometimes installed by default. Now, go through the following instructions carefully.

    Step1)

    Use your system package manager to install Postfix and Mailx by running the commands below:

    1- command to use for Ubuntu, Debian, and Linux mint:

    sudo apt install postfix mailutils

    2- command to use for Fedora, CentOS, AlmaLinux, and RedHat:

    sudo dnf install postfix mailx

    3- Command to use for Arch Linux and Manjaro:

    sudo pacman -S postfix mailx

    Step2)

    During the installation process, you must select the type of email to configure. In this case, you will have two options: ‘Internet site‘ and ‘Local only

    If your domain name is fully qualified, you can choose an internet site, otherwise choose the Local mode:

    Configuring a Mail Server on linux vps

    Step3)

    Here as you see in this image, you can set your fully qualified domain name or local domain name:

    Configuring a Mail Server

    Step4)

    At this point, you can start and enable the postfix server to start automatically on the next boot:

    sudo systemctl start postfix
    sudo systemctl enable postfix

    Step 5)

    Here, you can add your user and any other users who need to use mail service to the mail group:

    sudo usermod -aG mail $(whoami)

    Test your Mail Server

    Now, you can test your mail server by sending an email to a root user account:

    $ mail root
    Cc:
    Subject: Testing email
    This is an email from NeuronVM.com

    Then, press Ctrl+D to send an email, then you can return to your terminal prompt.

    In this section, you can use the command below to check the root inbox and see that you have received the test email:

    $ sudo mail
    "/var/mail/root": 1 message 1 new
    >N 1 NeuronVMNeuronVM.com Sun Mar 12 00:54 15/489 Testing email
    ?

    In this example, N means new email and 1 shows the ID of the massage. As you see, [email protected] (username@hostname) is the sender. Also delivery time and the subject. If you want to check your local mail, you can type massage ID and hit enter to confirm.

    Conclusion

    This article thought you how to configure a mail server on a Linux system. This server is important and useful cause, it allows you to control your email service privately and receive system alerts from various services.

    FAQ

    What is Postfix?

    It is an open-source mail transfer agent which routes and delivers mail.

  • Tutorial Install WHM/Cpanel on Rocky Linux

    Tutorial Install WHM/Cpanel on Rocky Linux

    One of the most popular web hosting control panels in Linux is Cpanel, Which uses a graphical interface to manage and host websites on a server. So you can easily control your website. Follow the instructions to have this useful web server. After reading this post, if you follow all the mentioned steps carefully, you will learn how to Install WHM/Cpanel on Rocky Linux.

    Installing WHM/Cpanel on Rocky Linux

    Let’s see how you can do the installation step by step to have WHM then access to management part and manage your website.

    Prerequisites

    _ A Linux VPS with Rocky Linux OS

    _1.1 GHz processor and 2 GB RAM (1 is also fine)

    _ Having a license for the cpanel web server (go to the Cpanel Store to provide a license)

    _ A valid static IP address

    _ Configuration of your Ethernet device with a static IP address and fully qualified hostname

    _ Disabling the Linux OS firewall before the installation process

    How to Install WHM/Cpanel

    Follow the commands to have a successful installation process for Cpanel.

    1- Update your exciting package to the latest version:

    yum update 
    yum upgrade

    2- As Cpanel is written in Perl, install the Perl command and install curl to download Cpanel installation script:

    yum install perl curl

    3- use the command below to start the automatic installation of WHM/cpanel:

    cd /home && curl -o latest -L https://securedownloads.cpanel.net/latest && sh latest

    4- Now you should log into WHM. So enter (https://Server_IP:2087) in your browser’s address bar. Then enter your Rocky Linux root user and password to access data and confirm the terms and conditions:

    how to install whm/cpanel on rocky linux

    5- Here, you can get the license on Cpanel Store or use the free 15-day trial to create an account with the WHM service by clicking the Log in button:

    cpanel license from Cpanel Store

    After visiting the Cpanel store, you can buy the license you want. You can also activate it for free testing and use it for 15 days. Here we use a free license.

    activate license

    WHM Dashboard and Directories

    In case you need to access different parts of Cpanel, you can go through the directories for Cpanel installed stuff, here are some of the directories:

    WHM dashboard

    _ The pass for Cpanel directories: /usr/local/cpanel

    _ Cpanel binaries: /usr/local/cpanel/bin/

    _ Third-party tools: /usr/local/cpanel/3rdparty/

    _ Cpanel add-ones or directories: /usr/local/cpanel/addons/

    _ WHM files: /usr/local/cpanel/whostmgr/

    _ CGI files: /usr/local/cpanel/cgi-sys/

    _ Basic files and themes: /usr/local/cpanel/base/

    _ The configuration part for Apache: /etc/httpd/conf/httpd.conf

    _ The configuration directory for Exim mail server: /etc/exim.conf

    _ Configuration files for named: /etc/named.conf/

    _ Cpanel user files: /var/cpanel/users/username

    _ Cpanel configuration files: /var/cpanel/cpanel.config

    _ Directory for configuration files Proftp and pure ftpd: /etc/proftpd.conf and /etc/pure-ftpd.conf

    _ Cpanel update files: /etc/cpupdate.conf

    _ Configuration files for MySQL: /etc/my.cnf

    _ Configuration files for PHP.ini: /usr/local/lib/php.ini

    Conclusion

    Here, we tried to show how you can install WHM/Cpanel on Rocky Linux. Then we showed you some directories to access different parts of Cpanel. Also, you can find out what is needed before installation. We hope you enjoy this article. For any questions or ideas, just leave a comment.

    FAQ

    What is the proper disk space for Cpanel?

    20-40 GB of disk space is suitable for cpanel.

    Does Cpanel support Rocky Linux?

    Yes, it does. Cpanel supports all of the official product release kernels for the Rocky Linux.

  • The Top Way to Setup Thumbor on Ubuntu 20.04

    The Top Way to Setup Thumbor on Ubuntu 20.04

    Have you ever heard of Thumbor? This practical application has many features such as resizing, applying various features, and flipping images. The advantage of this tool is its ease of use because users only need to access the URL of the Thumbor service to make changes to images. In this article, we decided to introduce you to a Top Way to Setup Thumbor on Ubuntu 20.04.

    What is Thumbor?

    As we mentioned in the introduction, Thumbor is a smart imaging service that cuts, resizes, and flips images based on your taste and desire. This tool uses advanced face recognition algorithms to determine the important points of images for better cropping and resizing. In fact, Thumbor is an Http service and is provided as a free and open-source service.

    What is Thumbor? - Setup Thumbor on Ubuntu

    Install and Setup Thumbor on Ubuntu 20.04

    Now that you are somewhat familiar with the Thumbor service, let’s learn how to install and configure it, which is explained step-by-step in this section.

    Prerequisites

    To install Thumbor you have to prepare some requirements:

    – A Linux VPS with Ubuntu 20.04 OS

    – Update the operating system

    – A non-root user with sudo privileges and login with ssh

    How to Install Thumbor on Ubuntu

    We have to mention that Thumbor is a Python service but you can use it for Ubuntu. So, use the apt command to install Thumbor on Ubuntu 20.04 and follow the instructions below to start the process:

    – The first step is Updating the package information:

    sudo apt update

    – Use the following command to do the installation of Python virtual environment library:

    sudo apt install python3-venv -y

    – Then you should install the Thumbor dependencies:

    sudo apt install build-essential libssl-dev libffi-dev python3-dev libcurl4-openssl-dev libcairo2-dev libjpeg-progs gifsicle ffmpeg -y

    – To create a virtual environment use the below command:

    python3 -m venv thumbor-venv

    – Run the command below for activating the virtual command:

    source thumbor-venv/bin/activate

    – Now, you can use this command to install Thumbor:

    (thumbor-venv) $ pip install thumbor[all]

    If you want to check the status of dependencies, follow the command below:

    (thumbor-venv) $ thumbor-Doctor

    After the installation of Thumbor, you will see that all plugins and compiled libraries support this service.

    How to Start Thumbor

    In the Thumbor launch section, you should run the related command in the virtual environment:

    (thumbor-venv) $ thumbor

    Now, the application will run in your system’s foreground, on port 8888.

    Using Thumbor is very easy through URL. So that, if you have an image and you want to resize or apply a filter, the location will be like this:

    https://upload.wikimedia.org/wikipedia/commons/3/37/Acorus_calamus1.jpg

    This is how you can pass an image to Thumbor through a URL.

    If you want to open another ssh session on your server, you can access the image through the URL:

    $ wget http://localhost:8888/unsafe/300x200/https://upload.wikimedia.org/wikipedia/commons/3/37/Acorus_calamus1.jpg -O small_pic.jpg

    If you close the SSL session, the Thumbor command will die, and if you want to prevent that, run it in the background with screen or tmux.

    The common way to run Thumbor is to run this service with supervisors or systems.

    You can use another port for Thumbor. Run it on port 80 using sudo permission. The point is that this solution runs Thumbor outside of the Python virtual environment.

    To deactivate the Thumbor command use Ctrl+C and deactivate Python virtual environment:

    (thumbor-venv) $ deactivate

    Now, run Thumbor with the full pass:

    sudo thumbor-venv/bin/thumbor -p 80

    Then use the command below to make sure that port 80 has been opened to the public:

    sudo /sbin/iptables -I INPUT -p tcp -m tcp --dport 80 -j ACCEPT 

    Use a browser to insert the URL and access Thumbor:

    http://your_server_ip_address/unsafe/300x200/https://upload.wikimedia.org/wikipedia/commons/3/37/Acorus_calamus1.jpg.

    Then, make sure you access the server with the HTTP protocol, and as the final step replace your_server_ip_address with your real IP address or domain.

    An Example of Thumbor Usage

    For example, if you want to flip an image using a URL, you would do it like this:

    http://your_server_ip_address/unsafe/-300x-200/https://upload.wikimedia.org/wikipedia/commons/3/37/Acorus_calamus1.jpg.

    The -300 part will make the image flip horizontally and the -200 part means you flipped vertically.

    If you want to configure and launch Thumbor, then you should kill it and start with the configuration file.

    Configure Thumbor on Ubuntu

    Use a configuration file to configure the behaviors of the Thumbor. The first step is creating a sample configuration file:

    thumbor-venv/bin/thumbor-config > thumbor_sample.conf

    The configuration file is full of comments:

    ################################### Logging ####################################
    
    ## Logging configuration as json
    
    ## Defaults to: None
    
    #THUMBOR_LOG_CONFIG = None
    
    
    ## Log Format to be used by thumbor when writing log messages.
    
    ## Defaults to: '%(asctime)s %(name)s:%(levelname)s %(message)s'
    
    #THUMBOR_LOG_FORMAT = '%(asctime)s %(name)s:%(levelname)s %(message)s'


    ## Date Format to be used by thumbor when writing log messages.
    
    ## Defaults to: '%Y-%m-%d %H:%M:%S'
    
    #THUMBOR_LOG_DATE_FORMAT = '%Y-%m-%d %H:%M:%S'
    
    ################################################################################
    
    ################################### Imaging ####################################
    
    ## Max width in pixels for images read or generated by thumbor
    
    ## Defaults to: 0
    
    #MAX_WIDTH = 0
    ...
    ## Result Storage that will be used with the compatibility layer, instead of the
    
    ## compatibility result storage. Please only use this if you can't use up-to-
    
    ## date result storages.
    
    ## Defaults to: None
    
    #COMPATIBILITY_LEGACY_RESULT_STORAGE = None

    Using the command below, you can edit the setting. Here, uncomment MAX_WIDTH set it like this:

    MAX_WIDTH = 100

    This action will show that you set the maximum width of the image that is allowed to be read.

    Use the configuration file to run the Thumbor command:

    sudo thumbor-venv/bin/thumbor -p 80 -c thumbor_sample.conf

    In the following URL, you will see that the width of your image is much smaller than the height:

    Open this URL, http://your_server_ip_address/unsafe/400x400/https://upload.wikimedia.org/wikipedia/commons/3/37/Acorus_calamus1.jpg.

    To edit the configuration file, kill the Thumbor again. Now, you should uncomment FILE_STORAGE_ROOT_PATH and set it like this:

    FILE_STORAGE_ROOT_PATH = '/tmp/storage'

    Then use the configuration file and run Thumbor again and open the related URL:

    http://your_server_ip_address/unsafe/400x400/https://upload.wikimedia.org/wikipedia/commons/3/37/Acorus_calamus1.jpg.

    Here, do the same action again and kill the Thumbor. Thumbor will save your image in the /tmp/storage directory:

    ls /tmp/storage

    Now that you installed and configured Thumbor successfully, you can edit your images so easily. Enjoy the service.

    Conclusion

    By reading this content, you learned how to install and Setup Thumbor on Ubuntu 20.04. Thumbor is created for Python environments but you can use it on old Ubuntu versions. We hope you enjoyed this article. For any questions, just leave a comment below.

    FAQ

    What is the default port in Thumbor?

    The default port is 8888, but if the virtual machine IP address is 12.123.12.123. Then you will be able to access Thumbor from the web browser at http://12.123.12.123:8888/…/

    What is a qualified and good image size?

    Image size of 1280*720 is large enough to be HD standards and is commonly used in photography and films.

  • How to Configure DNS Server on Ubuntu 22.04

    How to Configure DNS Server on Ubuntu 22.04

    DNS or Domain Name System is a type of network service that every Linux administrator should be familiar with. This internet service acts like a phone book that resolves IP addresses like 192.168.1.1 to FQDNs (Fully Qualified Domain Names). Read the following article carefully to find out how to configure the DNS server on Ubuntu 22.04.

    Steps to Configure DNS Server on Ubuntu

    In order to make the configuration of the DNS server on Ubuntu 22.04, the first action is to install this server. Therefore, we recommend you choose the plan you need with the Ubuntu operating system from our Linux VPS server plans. We will use Bind DNS for this reason. Bind is a software that is open-source, scalable, and full-featured software suited for DNS services.

    how to configure dns server on ubuntu 22.04

    The desired Environment

    First of all, you should create a DNS domain for your site. (e.g. neuronvm.local)

    – Neuronvm.local is the domain name

    – ns.neuronvm.local is the DNS server name

    – The IP address is 192.168.1.1

    Tip 1: Here, the used IP address is just an example.

    Tip 2: Make sure that your DNS server has a static IP address.

    Installing DNS Server on Ubuntu 22.04

    In this part, you will learn how to install a DNS server using Bind software. But first, you need to update your system using the following command:

    sudo apt update

    In this example, the package name is Bind9 and it is accessible in your base OS repository. Now, to update your system use the apt command below:

    sudo apt install -y bind9 bind9-utils

    The installation part was easy and simple.

    Configuring the DNS Server

    The next part of your process is to make the configuration part. For this reason, you can use the /etc/bind/ directory that will hold configuration files and zone files. Also, /etc/bind/named.conf is the global configuration file for the DNS server.

    Creating Zones

    You can apply the /etc/bind/named.conf.local directory and replace it with the global configuration file to create zones.

    Here, we will show with the related command, how you can do this process:

    sudo nano /etc/bind/named.conf.local

    Create Forward Zone

    We will use the domain neuronvm.local for forward zone entry in the file named.conf.local. The role of this forward zone is to translate a fully qualified domain name into an IP address:

    zone "neuronvm.local" IN { // Domain name
    type master;
    file "/etc/bind/neuronvm.local.db"; // Forward Zone file
    allow-update { none; }; // Since this is the primary DNS, it should be none.
    };

    Create Reverse Zone

    For the creation of a reverse name resolution zone in the named.conf.local file, you should go through the command below:

    zone "0.168.192.in-addr.arpa" IN { // Reverse lookup name, should match your network in reverse order
    type master;
    file "/etc/bind/r.neuronvm.local.db"; // Reverse lookup file
    allow-update { none; }; // Since this is the primary DNS, it should be none.
    };

    Create Zone Files

    Now you should create zone files for your forward and reverse DNS zones.

    – To create a forward DNS zone file /etc/bind/neuronvm.local.db, use the following command:

    sudo nano /etc/bind/neuronvm.local.db

    The record types :

    SOA is the start of authority.

    NS is the name server.

    A is A record.

    MX is mail for exchange.

    CN is a canonical name.

    Tip 1: Pay attention that domain names have to be ended with a dot (.).

    Tip 2: As you want to change any record in your zone file, you should update the serial number of +1with the current number.

    $TTL 86400
    @ IN SOA ns.neuronvm.local.root.neuronvm.local.
    200101 ; Serial
    21600 ; Refresh
    3600 ;
    604800 ; Expire
    86400 ) ; Negative Cache TTL
    ;
    ;Name Server Information
    @ IN NS ns.neuronvm.local.
    ;IP address of Name Server
    ns IN A 192.168.0.10
    ;Mail Exchanger
    @ IN MX 10 mail.neuronvm.local.
    ;A – Record HostName To IP Address
    www IN A 192.168.0.101
    mail IN A 192.168.0.102
    ;CNAME record
    ftp IN CNAME www.neuronvm.local.

    – Now, for the creation of reverse DNS zone file /etc/bind/r.neuronvm.local.db, run this command:

    sudo nano /etc/bind/r.neuronvm.local.db

    Update the parts which are shown below:

    PTR is the pointer.

    SOA is the start of authority.

    Tip 3: As you want to change any records in the lookup file, you should update the serial number +1 with the current number.

    $TTL 86400
    @ IN SOA ns.neuronvm.local.root.neuronvm.local.
    200101 ; Serial
    21600 ; Refresh
    3600 ;
    604800 ; Expire
    86400 ) ; Negative Cache TTL
    ;
    ;Name Server Information
    @ IN NS ns.neuronvm.local.
    ;Reverse lookup for Name Server
    10 IN PTR ns.neuronvm.local.
    ;PTR Record IP address to HostName
    101 IN PTR www.neuronvm.local.
    102 IN PTR mail.neuronvm.local.

    DNS Server Validation

    For checking any errors in the syntax of the DNS configuration file, apply this command:

    sudo named-checkconf

    If no error occurred, the command will return to the shell.

    Validation of Forward Zone

    Use the command below to check the validation of the forward zone:

    sudo named-checkzone neuronvm.local /etc/bind/neuronvm.local.db

    Validation of Reverse Zone

    Use the following command, to check the validation of the reverse zone:

    sudo named-checkzone 0.168.192.in-addr.arpa /etc/bind/r.neuronvm.local.db

    As the final step, you can reload both of the file zones. Also, you can use this command when you are willing to change the zone and zone file.

    sudo rndc reload

    Verifying DNS Server

    If you want to verify the DNS server, you should run the dig command by looking up records.

    dig www.neuronvm.local @192.168.1.1

    For confirmation go through this way:

    dig -x 192.168.1.11 @192.168.1.1

    And at the end, you will be able to confirm that both lookup and reverse zones are working well.

    Conclusion

    By reading this article, you learned how you can install a DNS server on the Ubuntu operating system. Also, you learned how to create DNS and file zones and the way to confirm and verify both lookup and reverse zones. We hope you enjoy this tutorial.

    FAQ

    How safe is private DNS?

    Once you enabled private DNS, all of the DNS queries will be encrypted and will provide good safety for users.

    Is it possible to increase speed by DNS?

    Actually, DNS does not affect internet speed directly, but it can influence how fast a webpage appears on your system.

  • How to Setup Xubuntu on Vmware

    How to Setup Xubuntu on Vmware

    This article will help you to install Xubuntu on Vmware workstation. We recommend Xubuntu because of its impressive benefits. This beautiful operating system can be used as a free distribution and is fast. Also, using the Xfce desktop environment is a significant advantage for Xubuntu. So, follow this article to find out how you can setup Xubuntu on Vmware.

    What Is Xubuntu?

    Xubuntu is a derivation of the Ubuntu operating system provided by Canonical Ltd company. The name Xubuntu is a combination of Xfce and Ubuntu. This distribution tries to provide a stable, customizable, and lightweight desktop environment using Xfce and also, is intended for both beginners and professional users.

    Steps to Setup Xubuntu on Vmware

    After a short explanation about Xubuntu distribution, let’s see how we can set it up on Vmware workstation through a step-by-step guide prepared for you. After purchasing a Linux VPS server from NeuronVM, you can test this training on it and enjoy it.

    1- Downloading Xubuntu

    This step is straightforward. Just go to the official page and download Xubuntu. It is recommended to use a torrent file because it’s flexible or uses the iso image file under the Mirror Downloads section. you should choose the closest location:

     Downloading Xubuntu

    – Then go to the downloads folder and find the image file. Probably, the file name starts with Xubuntu and is an iso file

    – Now you can start the installation process. open the Vmware workstation but if you don’t have it on your system you can download it from the official page.

    2- Creating a Virtual Machine on Vmware

    – To start the process of installing Xubuntu, Open the Vmware workstation and click on Create a new virtual machine on your home screen or you can go through this pass: File > New Virtual Machine. Also, use the keyboard shortcut Ctrl+N.

     Creating Virtual Machine on Vmware

    – In this section, you will start the Vmware virtual machine Wizard. As soon as you see the welcome window of the wizard, you can do the configuration. Custom is a more advanced setting, so, the only thing you have to do is select the Typical option which is checked in default mode. Enter Next to continue:

    Creating Virtual Machine on Vmware

    – In the next step, you should browse the downloaded iso image file and click Next:

    Creating Virtual Machine on Vmware

    – Here, you should enter your virtual machines Name, Username, and Password:

    Creating Virtual Machine on Vmware

    – Then, specify your VMs name in the dialog box or leave it as the default. Also, you can accept the default location. Your folders name will be the same as your VM file name:

    Creating Virtual Machine on Vmware

    – It is time to determine the Disk Space capacity. The default amount is 20 GB. We should mention that if you are not using heavy applications like Photoshop, this amount will be enough. Mark the Split Virtual Disk into Multiple Files option and go to the next part:

    Creating Virtual Machine-specify disk space

    – This is the final dialog box. Here, you can see the details of your setup. The only thing to do is click on the Finish button:

    Creating Virtual Machine on Vmware

    – Now power on a virtual machine to start and Vmware will start automatically:

    Creating Virtual Machine on Vmware

    3- Setting up Xubuntu

    – After an automatic reboot, you should enter the Username and Password:

    Setting up Xubuntu

    ###

    Setting up Xubuntu

    – Vmware tools will install automatically. If you see the VM > Reinstall Vmware tools then You have already installed them. To check the status, use the command below:

    vmware-toolbox-cmd -v

    If you notice the version number, you have installed the Vmware tools. If not, go through this pass VM > Install VMware tools and restart the system:

    Setting up Xubuntu

    Now, you can see the Xubuntu desktop on full scream. If you can not see the full-screen mode, then you should restart your system:

    Xubuntu desktop environment

    Conclusion

    Xubuntu is an easy-to-use, great operating system that is derived from Ubuntu. This article can be a helpful guide to show the way to setup Xubuntu on Vmware. We tried to teach how you can download and install it on Vmware and how you can create a virtual machine to start your task. Hope you enjoyed the content. If you have any questions or ideas, just leave a comment.

    FAQ

    What file systems are suitable for Xubuntu?

    Xubuntu can use Xfce file manager Thunar.

    How much RAM is needed for Xubuntu?

    You should allocate at least 1 GB RAM and Intel or AMD 64 Bit processor for your Xubuntu distribution.

  • How to Configure DNS Server on Debian 11

    How to Configure DNS Server on Debian 11

    Did you know that you can have your own DNS server to manage name resolution for domain names instead of using your domain registration’s DNS server? So you should definitely setup an authoritative server. This authoritative server can be used to store DNS records by the owners of the domain. After reading this article, you will learn how to configure DNS Server on Debian 11 completely.

    What Is DNS Server?

    DNS is a type of internet service and its function is in a way that it can be used to assign a domain name to an IP address and vice versa. DNS translates the domain name to a specific IP so that the initiating client can download the requested internet resources. this system actually works like a phone book.

    what is dns server

    Here we’re going to use Bind as a flexible, open-source, and full-featured DNS software that works as a valid DNS server and is responsible convert domain names to IP addresses.

    Configure DNS Server on Debian 11

    First, we recommend you choose and purchase a plan from the Linux VPS server plans provided on the NeuronVM website to configure DNS Server on Debian 11. Then install the Debian 11 operating system on it.

    Before you start the configuration part, you should install a DNS server which here is Bind, and follow the steps below:

    1. Installing Bind DNS Server

    The first step before starting the installation process is to update the Debian 11 system. You can run the following command to update your system:

    sudo apt update -y

    Now, you are ready to install the DNS server. Here we use the name bind9 for our DNS server and you can find it in the default base repository. To install this server use the APT command:

    sudo apt-get install -y bind9 bind9utils bind9-doc dnsutils

    2. Configuring Bind Master DNS Server

    /etc/bind/ is the configuration directory for Bind9. This directory is holding both configuration files and Zone lookup files. On the other hand, /etc/bind/named.conf is a global configuration that is not used for local DNS configuration. You can use /etc/bind/named.conf.local instead.

    Creating Zone

    In this section, you can use /etc/bind/named.conf.local file and create zones by editing the content of this file. For this reason, you can choose your favorite editor like Vim. Use the following command to install Vim:

    sudo vim /etc/bind/named.conf.local

    To create forward and reverse zone. You can create an entry for your forward zone for neuronvm.local domain. Then replace it with your set domain name:

    zone "neuronvm.local" IN { // Domain name
    type master; // Primary DNS
    
     file "/etc/bind/forward.neuronvm.local.db"; // Forward lookup file
    
     allow-update { none; }; // Since this is the primary DNS, it should be none.
    };

    As you can see, in this file forward.neuronvm.local.db is the name of forward lookup zone.

    Here, to create a forward zone for neuronvm.local.db follow the instructions below. In the exciting file, add the lines you see below instead of your parameters such as the front area:

    zone "1.168.192.in-addr.arpa" IN { //Reverse lookup name, should match your network in reverse order
    type master; // Primary DNS
    
     file "/etc/bind/reverse.neuronvm.local.db"; //Reverse lookup file
    allow-update { none; }; //Since this is the primary DNS, it should be none.
    };

    The name of the reverse DNS in the file above is 1.168.192.in-addr.arpa. Also, reverse.neuronvm.local.db is the reverse DNS lookup zone.

    3. Configuring Bind DNS Lookup Files

    If you want to keep DNS records for both forward and reverse zone, use lookup zones.

    The first step here is to create the front area lookup file, which we copy the sample zone lookup file as below:

    sudo cp /etc/bind/db.local /etc/bind/forward.neuronvm.local.db

    We have syntax here and all domain names end with a dot (.)

    Here are some acronyms that you should understand:

    _ MX: To show mail for exchange

    _ A: To show A record

    _ CN: To show the canonical name

    _ SOA: To show starting of authority

    _ AS: To show the name server

    Here, you can see how to edit the zone file:

    sudo vim /etc/bind/forward.neuronvm.local.db

    You should change it as per your set domain name:

    $TTL 604800
    @ IN SOA ns1.neuronvm.local. root.ns1.neuronvm.local. (
    3 ; Serial
    604800 ; Refresh
    86400 ; Retry
    2419200 ; Expire
    604800 ) ; Negative Cache TTL
    ;
    ;@ IN NS localhost.
    ;@ IN A 127.0.0.1
    ;@ IN AAAA ::
    ;Name Server Information
    @ IN NS ns1.neuronvm.local.
    ;IP address of Name Server
    ns1 IN A 192.168.1.12
    ;Mail Exchanger
    neuronvm.local. IN MX 10 mail.neuronvm.local.
    ;A – Record HostName To Ip Address
    www IN A 192.168.1.13
    mail IN A 192.168.1.14
    ;CNAME record
    ftp IN CNAME www.neuronvm.local.

    Here, also we have some acronyms:

    _ PTR: To show the pointer

    _ SOA: To show starting of authority

    Use the /etc/bind directory to copy your sample reverse zone file called reverse.neuronvm.local.db:

    sudo cp /etc/bind/db.127 /etc/bind/reverse.neuronvm.local.db

    Then, edit the content of your file:

    sudo vim /etc/bind/reverse.neuronvm.local.db

    Now, in the file, replace your IP and domain name in the proper way:

    ; BIND reverse data file for local loopback interface
    ;
    $TTL 604800
    @ IN SOA neuronvm.local. root.neuronvm.local. (
    3 ; Serial
    604800 ; Refresh
    86400 ; Retry
    2419200 ; Expire
    604800 ) ; Negative Cache TTL
    ;
    ;Name Server Information
    @ IN NS ns1.neuronvm.local.
    ns1 IN A 192.168.1.12
    ;Reverse lookup for Name Server
    12 IN PTR ns1.neuronvm.local.
    ;PTR Record IP address to HostName
    13 IN PTR www.neuronvm.local.
    14 IN PTR mail.neuronvm.local.

    4. Checking Bind DNS Syntax

    Use the instructions below to check the syntax of created config files. We will use named-checkconf to check syntax and if you encounter no error, the command will return to shell:

    By doing the following steps, you can check the syntax of forward and reverse zone files:

    – For forwarding zone files use:

    sudo named-checkzone neuronvm.local /etc/bind/forward.neuronvm.local.db

    – For reverse zone files, use:

    sudo named-checkzone 1.168.192.in-addr.arpa /etc/bind/reverse.neuronvm.local.db

    You should note that the serial output from both checks should be the same. If not, edit the configuration part.

    By using the following command, you can restart and enable the Bind DNS server:

    sudo systemctl restart bind9
    sudo systemctl enable bind9

    For checking the status of your service, go through this command:

    systemctl status bind9

    5. Testing Bind DNS Server

    For testing your DNS you can go to a client machine and add a new DNS IP address in /etc/resolv.conf file:

    sudo vim /etc/resolv.conf

    Now you can add the DNS IP address:

    nameserver ***.***.*.**

    Save changes and Exit. Then go on as shown here.

    We have two options to use in this section:

    nslookup and dig command

    dig www.neuronvm.local

    Use the command below to confirm your reverse lookup:

    you -x ***.***.*.**

    Conclusion

    In this article, we tried to show how to configure DNS server on Debian 11. After a successful installation, now you know how to configure the DNS server yourself. A DNS server is very useful for admins who have applications to communicate over domain names. We hope you enjoy this tutorial.

    FAQ

    Is DNS the same as address IP?

    It is the resolution of a domain name to an IP address through a DNS server.

    Do we have a DNS for every IP address?

    Every domain has DNS and this DNS is pointing to servers that redirect different domains.