

PhpMyAdmin is the most popular program for managing MySQL databases, which you can use to execute any SQL statement. The best part about this tool is that you can access it directly from cPanel. After reading this post you will fully learn How to Install and Secure phpMyAdmin on Fedora. We suggest that you stay with us until the end of this article and comment on your opinion at the end.
PhpMyAdmin is a free and open-source management tool for MySQL and MariaDB written in PHP and has become one of the most popular MySQL management tools. PhpMyAdmin supports a wide range of operations in MySQL and MariaDB. You can perform a variety of actions on the database with phpMyAdmin, such as modifying or deleting databases, tables, fields, or rows, executing SQL statements, or managing users and accesses. PhpMyAdmin is translated into 72 languages and supports RTL and LTR languages, so many people can it easily. You need to create a Database to use and manage phpMyAdmin in cPanel.
In this section, we want to teach you installing phpMyAdmin on Fedora. First, you need to install Apache HTTP and PHP servers by entering the following command:
sudo dnf -y install httpd php php-cli php-php-gettext php-mbstring php-mcrypt php-mysqlnd php-pear php-curl php-gd php-xml php-bcmath php-zip
Now you should edit and set the configuration file /etc/httpd/conf/httpd.conf:
ServerAdmin [email protected]
ServerName example.com
ServerTokens Prod
You can start the httpd service with the following command:
sudo systemctl start httpd
Next, you should enable the httpd service by executing the following command:
sudo systemctl enable httpd
In this step, you need to enable both http and https services with the help of the following command. Note that the firewalld should be running before doing this:
sudo firewall-cmd --add-service={http,https} --permanent
Remember to reload the firewalld with the following command:
sudo firewall-cmd --reload
You can check PHP installed version by running the following command:
php -v
You can see loaded extensions by entering the following command:
php -m
Before installing phpMyAdmin, you should set the PHP timezone on the file /etc/php.ini:
date.timezone = AmericaNow it’s time to install phpMyAdmin. To do this, run the following command:
sudo dnf -y install phpMyAdminEnter the following command to check the installed version of phpMyAdmin:
rpm -qi phpMyAdminAlso, you can limit access to phpMyAdmin to trusted networks by running the following command:
sudo vim /etc/httpd/conf.d/phpMyAdmin.confAfter saving the changes, you should restart httpd service with the help of the following command:
sudo systemctl restart httpd
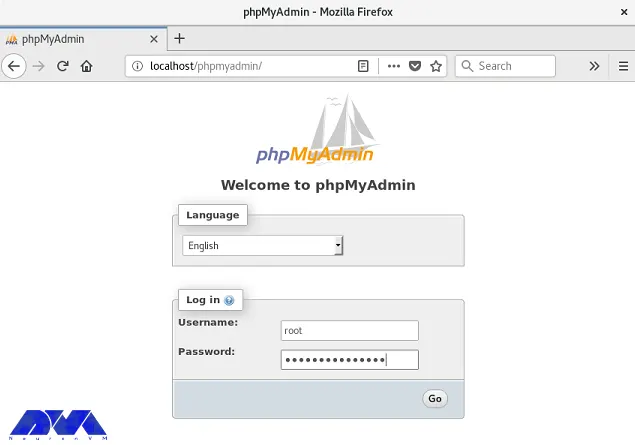
http://localhost/phpMyAdmin

mysql -u root -p
vim /etc/httpd/conf.d/phpMyAdmin.confFinally, you can change the alias access name such following: From
Alias /phpMyAdmin /usr/share/phpMyAdmin
Alias /phpmyadmin /usr/share/phpMyAdminTo
Alias /neurondbadmin /usr/share/phpMyAdmin
Alias /neurondbadmin /usr/share/phpMyAdmin
How useful was this post?
Click on a star to rate it!
Average rating 0 / 5. Vote count: 0
No votes so far! Be the first to rate this post.
 Tags
Tags

This article will teach you How to Install Cacti on Fedora 34. Among the monitoring tools, Cacti is ...


 Tags
Tags

Gradle is a useful build tool that supports several popular programming languages and technologies. ...


 Tags
Tags
What is your opinion about this Blog?


