

Gnome is a desktop environment written for open-source applications and stands for GNU Network Object Model Environment. Gnome is written specifically for Linux but also supports other operating systems such as BSD derivatives. This tool was developed by the GNOME Project and supported by other companies including RedHat. It should be noted that Gnome is an international project aimed at developing software frameworks and is part of the GNU Project. Ubuntu, Fedora, and openSUSE are three of the most popular Linux VPS server distributions. Each Distribution has a desktop environment. Some have only one, and some give you several choices. GNOME is one of those choices. Let’s see how we can Setup Gnome 40 on Ubuntu 20.10 step by step.
Some of the features of Gnome are listed below:
– Uses Metacity as the default window manager
– Uses Nautilus as the default file manager
– Support for desktop notifications using a convenient messaging system
– Ability to turn on/off desktop notifications and many other features
– Has horizontal workspaces that show the app icon when the app running.
– Has a favorites-bar-come-dock that separates favorite apps and those running but not pinned.
– App launcher supports horizontal paging.
GNOME is an ideal desktop environment for beginners. This desktop environment is unique, you will soon get used to its procedures. All programs have direct names. For example, Files are used to manage files, and Music is used to play music. GNOME users benefit from a large suite of software. Users can do basic tasks such as web browser, file management, listening to music, and manipulating images using only their GNOME applications. This reduces the extra programs required to install on the system. As most of these programs have the same user interface, once you learn how to use one, you can easily use the other.
First of all, you should prepare a good environment for installation. After installing Ubuntu 20.10 from Linux VPS distributions on your system, now you need to open the terminal and add the unofficial PPA according to the following commands:
sudo add-apt-repository ppa:shemgp/gnome-40
sudo apt update

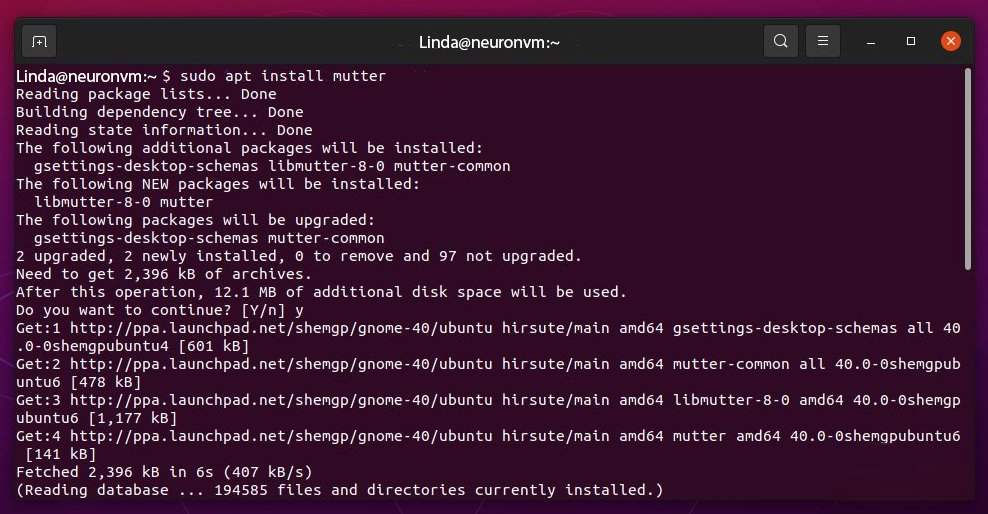
Now you should install the Gnome window manager mutter from the repo by entering the following command:
sudo apt install mutter

At this point, you should get the latest GNOME 40 changes by installing Gnome-shell separately from the PPA:
sudo apt install gnome-shell
The Ubuntu Yaru theme has not yet been properly transferred to GNOME 40, so the Ubuntu session is not working, you need to install the latest gnome-session:
sudo apt install gnome-session
Then you should upgrade your system to make sure you get all the GNOME 40 applications via PPA. The following command upgrades packages:
sudo apt upgrade
You can check the GNOME version by entering the following command:
gnome-shell --version
Eventually, you need to restart the system by entering the following command:
reboot
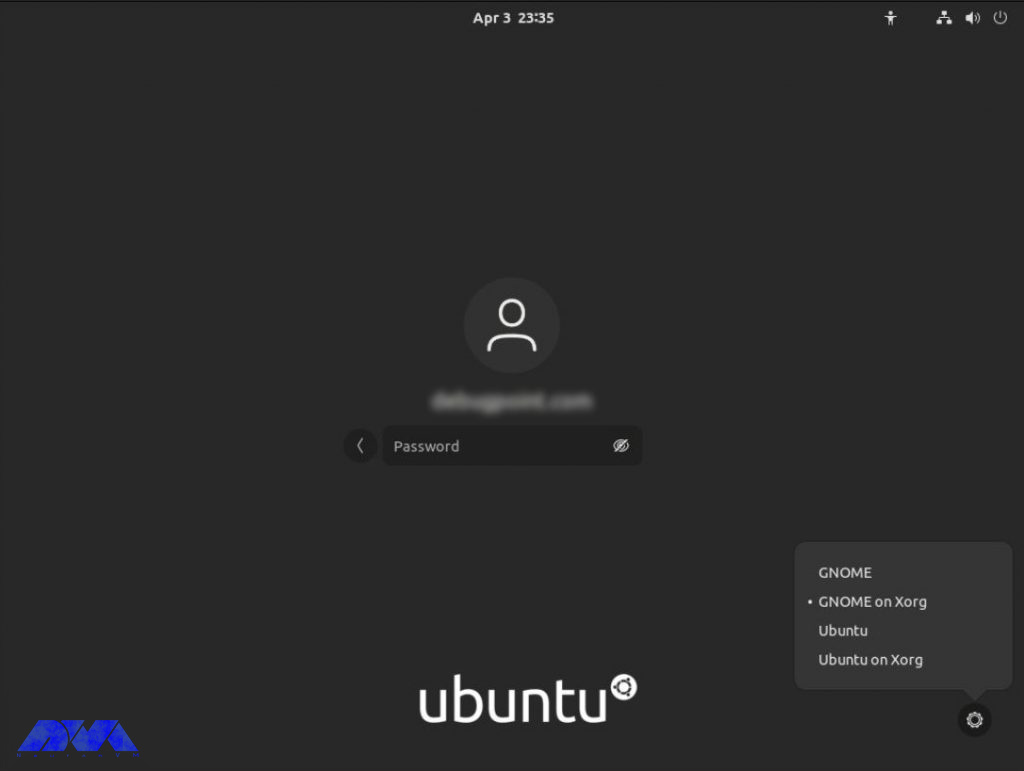
In the login screen, select Gnome or Gnome on Xorg instead of Ubuntu.

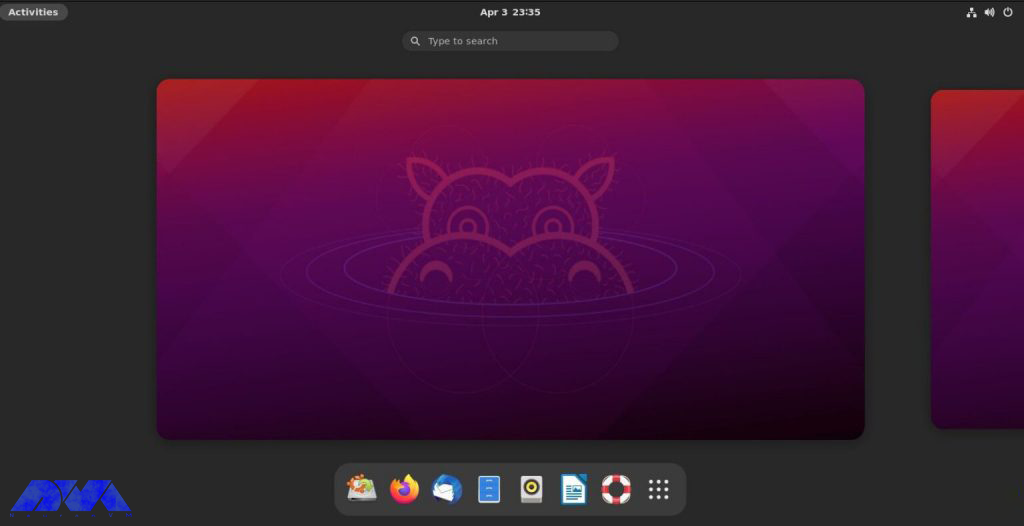
Now you must get the latest GNOME 40 at Ubuntu 20.10.

This article was presented to introduce you to Gnome and list its features. You can use this method when you don’t have access to a GUI system, or when you are using a different desktop environment such as KDE Plasma. So follow these instructions to have a clear installation process of Gnome and enjoy using this great desktop environment. We will be pleased if you share your ideas with a comment.
How useful was this post?
Click on a star to rate it!
Average rating 0 / 5. Vote count: 0
No votes so far! Be the first to rate this post.
 Tags
Tags

Robert Lemke launched the Neos project in 2006. Then a group of software engineers joined in to get ...


 Tags
Tags

Metasploit is an open-source penetration testing framework designed to help cybersecurity profession...


 Tags
Tags
What is your opinion about this Blog?


