In today’s developing world and big data ecosystem, MySQL has become one of the most well-known technologies and is one of the most popular databases in many industries. If you want to master this database, you only need a basic understanding. MYSQL can be used on various Linux distributions and one of these distros is Ubuntu. Here, we will be going to show the best way to install MYSQL on Ubuntu 22.04. Keep studying carefully.
How to Install MySQL on Ubuntu 22.04
MySQL is an open-source database management system that is usually installed as a part of the popular LAMP stack. As you learn how to install MySQL, you will have a working relational database to build your next website or application. Now, follow the instructions step-by-step to install MySQL on Ubuntu Linux VPS.
Prerequisites to Install MySQL
To install MySQL you will need the following requirements:
To start the installation process, first of all, you should update the system repository. Press CTRL+ALT+T to open a terminal on Ubuntu. Now run the command below to update the system repository:
sudo apt update
Now you can run the following command to install MySQL on your system:
sudo apt-get install mysql-server
You need a few minutes to complete the installation and continue.
Note that you can verify MySQL status using the following command:
systemctl is-active MySQL
The installation was straightforward and simple. So you can configure it on your system.
Configuring MySQL on Ubuntu
If you want to perform an initial and interactive configuration of your MySQL server, you can execute the command line below:
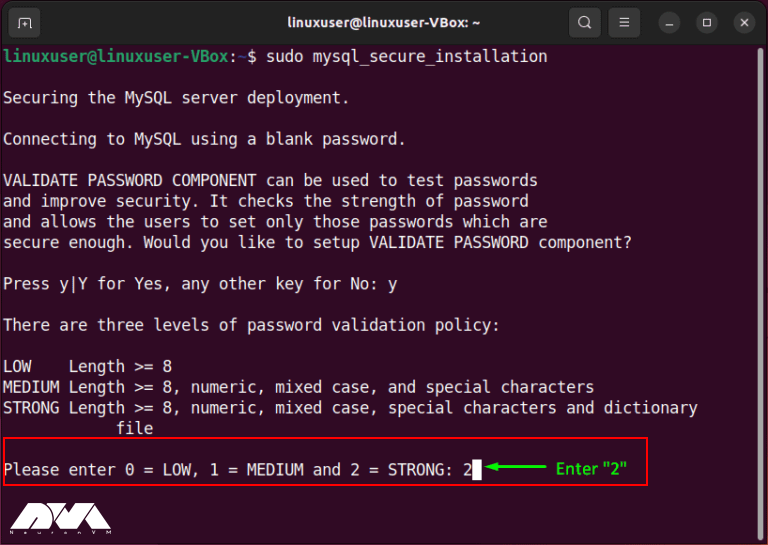
sudo mysql_secure_installation
At the beginning of the configuration step, you will be asked to set the level for the password validation policy. So, according to your validation requirements, choose a number from the menu in front of you.
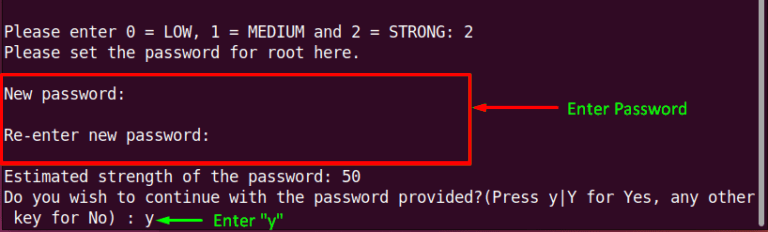
Now enter the new password for root and press Y to continue the process with your new password:
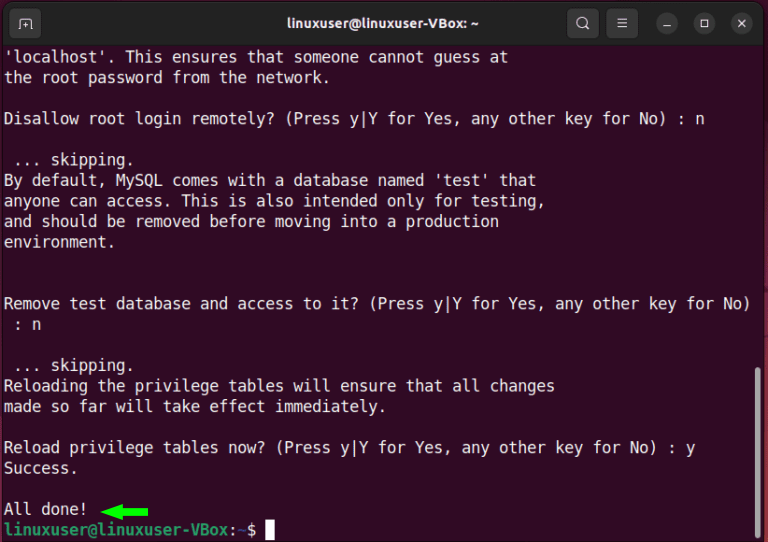
Finally, do the rest of the configuration section accordingly:
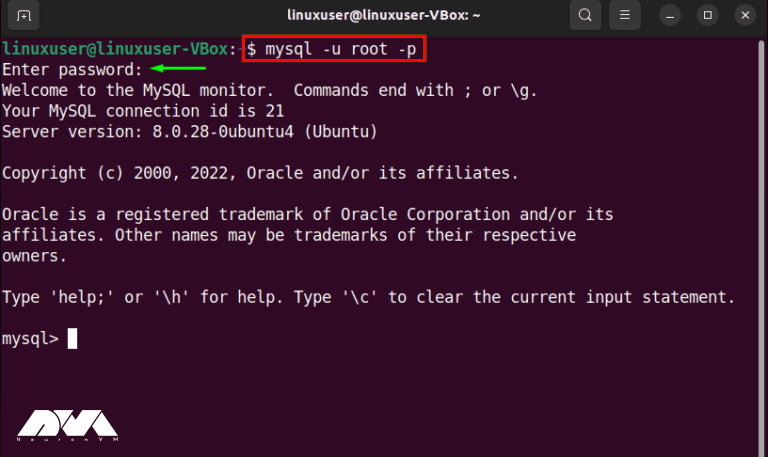
Login to MySQL on Ubuntu
Now, create a native password for the root by logging into the MySQL server and setting the default authentication method to “mysql_native_password”:
sudo MySQL
Now you will see a query that sets the root password to “Password123#@!” and determines the authentication method to “mysql_native_password“:
ALTER USER 'root'@'localhost'
IDENTIFIED WITH mysql_native_password BY 'Password123#@!';
To be able to apply the changes without restarting the MySQL service, you can reload the grant table in the MySQL database:
FLUSH PRIVILEGES;
Now, you can login to the MySQL server with your new password and enjoy the server.
Now that you have installed MySQL successfully, you can ensure MySQL service is active and running with the following command:
systemctl status mysql.service
That’s it! Login to MySQL and use this great database as you wish.
Troubleshooting Some Common Issues of MySQL on Ubuntu
Like any software, it can encounter various issues. Here are some common issues with MySQL on Ubuntu and their potential solutions:
1- You cannot connect to the MySQL server.
Solutions:
Ensure that MySQL is running: sudo service mysql status.
Check if MySQL is bound to the correct IP address and port.
Check for firewall rules blocking MySQL connections.
2- You’ve forgotten the MySQL root password.
Solutions:
Stop MySQL:
sudo service mysql stop.
Start MySQL in safe mode:
sudo mysqld_safe --skip-grant-tables.
Connect to MySQL:
mysql -u root.
Change the root password:
UPDATE mysql.user SET authentication_string = PASSWORD('new_password') WHERE User = 'root'; FLUSH PRIVILEGES;.
Stop MySQL safe mode:
sudo service mysql stop.
3- Your MySQL database is corrupted.
Solutions:
Create a backup of your data.
Try repairing the database: mysqlcheck -r -u username -p dbname.
If the repair fails, restore from the backup.
4- Running out of disk space can cause MySQL to stop working.
Solutions:
Identify and delete unnecessary data or log files.
Resize your server or storage volume.
5- MySQL fails to start
Solutions:
Check the MySQL error log for the cause of the failure.
Ensure no other services are using the MySQL port.
Repair or reinstall MySQL if necessary.
Conclusion
As mentioned, MySQL is a popular database. In this article, we examined how to install it in Ubuntu and explained to you from updating the repositories to configuring and running it. So that you can enter the MySQL server by setting a new password and using it. We hope that the above information is useful for you. Happy coding!
V2Ray is a powerful and flexible open-source network proxy that allows you to bypass internet censorship and enhance your online privacy. In this article, we will walk you through the step-by-step process of installing and configuring V2Ray on a CentOS server. All you need is a computer with CentOS or a Linux VPS on it so you can follow the steps mentioned below. Whether you’re a seasoned Linux user or just starting out, this guide will provide you with all the information you need to install V2Ray on CentOS. So let’s dive in and get started with the setup process!
What is V2Ray?
V2Ray is a software tool that helps you maintain your online privacy and security while browsing the internet. It acts as a “middleman” between your device and the websites you visit. When you use V2Ray, it encrypts your internet connection, making it difficult for others to spy on your online activities or steal your personal information. It also allows you to bypass internet restrictions and access blocked websites or services. In simple terms, V2Ray is like a protective shield that keeps you safe and allows you to explore the internet freely and privately.
Requirements to Install V2Ray on CentOS
Although setting up V2Ray on your CentOS server is not a hard job, there are a few prerequisites that you need to ensure are met:
Linux VPS Server with CentOS OS: Make sure you have a CentOS server or a Linux VPS. They should have root access or a user with sudo privileges.
Internet connection: Ensure that your server has a stable internet connection to download the necessary files.
Basic command-line knowledge: Familiarize yourself with basic command-line operations as you will need to execute commands to install and configure V2Ray.
Firewall configuration: If you have a firewall enabled on your CentOS server, you may need to configure it to allow V2Ray traffic.
By ensuring these requirements are met, you will be ready to proceed with the setup of V2Ray on CentOS.
Setup V2Ray on CentOS
First, you should update your CentOS system. Open a terminal or SSH into your CentOS server and run the following command to update the system:
sudo yum update
Download the latest release of V2Ray by visiting the official GitHub repository. Identify the appropriate package for your CentOS system (e.g., 64-bit or 32-bit). Copy the download link of the package. In the terminal, use the `wget` command followed by the download link to download the package. For example:
wget <download_link>
Once the download is complete, extract the package using the following command:
Copy and paste the sample configuration provided by V2Ray into the `config.json` file. Customize the configuration according to your needs, such as changing the listening port or adding inbound and outbound proxies, then save and exit the configuration file.
Create a new systemd service file for V2Ray:
sudo nano /etc/systemd/system/v2ray.service
Copy and paste the following content into the `v2ray.service` file:
Check the status of the V2Ray service to ensure it is running without any errors:
sudo systemctl status v2ray
That’s it! You have now successfully set up V2Ray on CentOS. You can proceed to configure your client devices to connect to the V2Ray server using the specified settings in the `config.json` file.
Troubleshoot Common Issues
While setting up V2Ray on CentOS, you might face some problems. We’ve listed them for you and we have a short solution for each.
Firewall blocking connections: Check if the firewall is blocking the required ports (e.g., 80, 443). Temporarily disable the firewall or allow incoming connections on the necessary ports using the firewall-cmd command.
Port conflicts: Ensure that the ports specified in the V2Ray configuration file are not being used by other services. Use the netstat command to check if any other processes are using the specified ports.
SELinux blocking V2Ray: If SELinux is enforced, it might stop V2Ray from functioning correctly. Temporarily set SELinux to permissive mode using the setenforce command (e.g., setenforce 0) and check if the issue persists. If it does, consider properly configuring SELinux policies.
Incorrect V2Ray configuration: Verify the V2Ray configuration file (/etc/v2ray/config.json) for any syntax errors or missing/wrong settings. Use the v2ray -test -config command to validate the configuration file.
Network connectivity issues: Test the connectivity by pinging external servers or performing a traceroute. Verify DNS configuration in /etc/resolv.conf and ensure it is resolving domain names correctly.
These are just a few problems you might face during setting up V2Ray on CentOS. If you faced any other problems you can comment under this post and we will get back to you in no time!
Conclusion
V2Ray can be a handy tool to bypass censorship and protect your privacy online. It uses a mixture of methods to help users access the websites that may be blocked on their area. If you need this service on CentOS, all you have to do is to follow the steps mentioned above. If you faced any problems in the process of setting up V2Ray on your CentOS server, you can comment down below. We will get to you in no time!
You can use SkipFish for web application security scanning, which helps identify vulnerabilities and security issues in web applications. This open-source tool was developed by Google and is designed to evaluate the security status of web applications by performing various tests and scans. We will focus on SkipFish and will try to help you figure out how to install SkipFish on Kali Linux. So read this article carefully to get the best scanner for scanning web applications.
A full Introduction to SkipFish
SkipFish is a type of penetration testing tool that works automatically. It is open-source and was created on GitHub for security researchers. You can use this tool to collect information and test the security of websites, VPS, Admin RDP, and dedicated servers.
SkipFish has a simple structure and is one of the best penetration testing tools. This tool can target many integrated tools for testing in the target system. SkipFish can also be used to detect the security of active web applications. It can be used by security professionals, developers, and system administrators to identify potential weaknesses in web applications before they are exploited by attackers.
In the next section, you will find out some significant and practical features of SkipFish:
What Are the Significant Features of SkipFish?
SkipFish is a perfect tool for tracking enumeration.
You can use SkipFish for scanning all websites and webpages.
It is an open-source intelligence tool.
It contains a wide range of modules such as wananga, metagoofil, etc.
SkipFish is able to detect vulnerabilities in CMS such as WordPress, Joomla, and others.
SkipFish contains more than 15 modules that can be used in penetration testing.
This scanning tool is capable of detecting a wide range of subtle detects, and different security checks that involve blind injection vectors. In other words, it has Cutting-edge security logic.
SkipFish supports a wide range of odd web frameworks and mixed-technology sites like on-the-fly wordlist creation.
Another SkipFish feature is high-speed this feature contains highly optimized HTTP handling, minimal CPU footprint, and pure C code.
How to Install SkipFish on Kali Linux
Let’s start the installation process using the step-by-step instructions here:
The first step to installing the SkipFish tool is moving to the desktop and then typing the command below:
Now SkipFish will be installed in your Kalli Linux system.
As the second step, you should move SkipFish into the tool directory with the following command:
cd skipfish
ls
skipfish -h
At last, you will be able to see the tool’s help menu that is now active. You can use all of the flags with the tool. As soon as you download the tool, you can learn how to utilize it.
Tip: Most of the time you don’t need to install SkipFish because it comes pre-installed in Kali Linux.
What Is the Usage of SkipFish?
After the installation part, You can type the command below in the terminal to check its option:
sudo skipfish -h
We will show the usage of SkipFish with some examples.
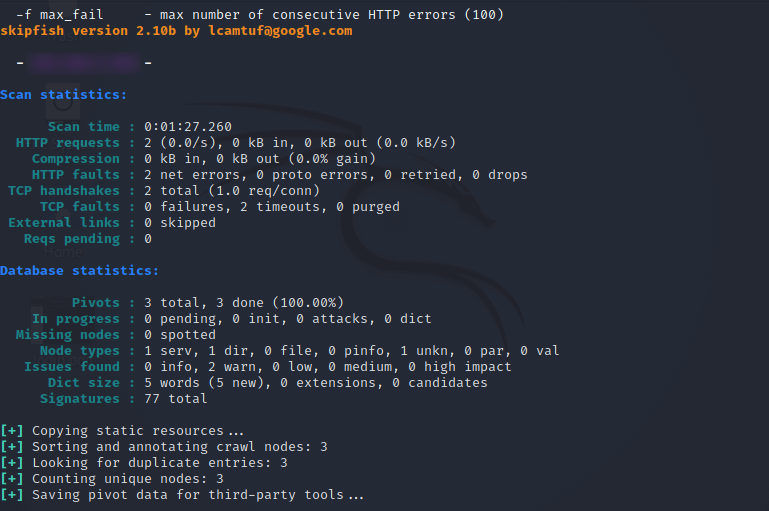
Example 1: Use the SkipFish tool for scanning a WordPress website with the help of an IP address:
skipfish -o 202 http://192.168.1.***/wordpress
You can see the tool’s report here:
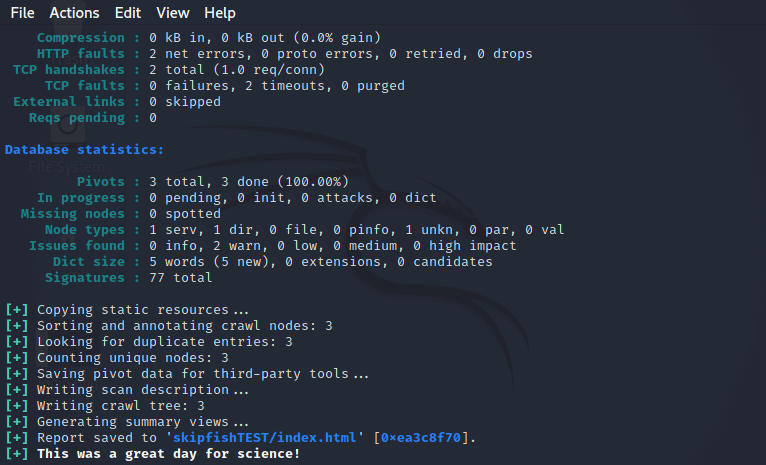
Example 2: You can scan bodegeit with the following command:
As a result, you can view all relevant data such as data, scan time, HTTP requests to hosts, HTTP errors, etc.
What Is the functionality of SkipFish?
SkipFish is a command line tool that can be run on different operating systems. To configure the scanning process, it needs to specify the target URL and various options. The generated report can be viewed in the browser to understand the security findings. The way this tool works is that it works using dictionary-based crawlers and recursive crawling and creates a map in the console of the site in question.
With the help of this tool, you can have all active security checks in the domain. Finally, SkipFish produces a report that can be further used for security assessments.
Note that security scanning tools like SkipFish are only part of a comprehensive security strategy. Regular manual security tests, code reviews, and other security measures are necessary to ensure the overall security of web applications.
Conclusion
SkipFish is now installed on your Kali Linux system and ready to be used. As we mentioned above, SkipFish is a web application security scanner, so make sure to use it responsibly and only on systems and applications you have permission to scan. Please note that software and repositories may change over time, so it’s best to refer to the official SkipFish repository or documentation for any updates or changes. Happy coding!
BlackArch Linux is a powerful and comprehensive penetration testing and security research operating system. It is designed to provide a wide range of tools and applications for ethical hackers, cyber security professionals, and enthusiasts. In this article, we will explore the features, applications, and benefits of BlackArch Linux.
Introduction to BlackArch Linux
BlackArch Linux is built on Arch Linux, a lightweight and flexible Linux distribution known for its simplicity and user-centric approach. It takes the solid foundation of Arch Linux and extends it with a vast collection of specialized tools and packages tailored explicitly for penetration testing, vulnerability assessment, and digital forensics. This distribution primarily focuses on security professionals and individuals with knowledge and experience in penetration testing and security auditing. We recommend you buy and use the cheap Linux VPS server plans provided on our website.
Key Features of BlackArch Linux
BlackArch Linux offers several key features that make it a popular choice among security professionals and enthusiasts. Here are some of its notable features:
Extensive Tool Repository
BlackArch Linux offers a massive repository of over 2,500 tools categorized into different groups, including information gathering, network analysis, web application analysis, exploitation, password attacks, and more. So, these tools cover various aspects of cyber security and provide users with a diverse arsenal to perform comprehensive security assessments.
Rolling Release Model
BlackArch Linux follows a rolling release model. This means that users can receive regular updates without reinstalling the entire operating system. In fact, it ensures that users always have access to the latest versions of tools and packages, keeping their systems up-to-date with the ever-evolving cybersecurity landscape.
Easy Installation and Configuration
Installing BlackArch Linux is straightforward, thanks to the provided installation scripts. These scripts automate the installation process and guide users through the necessary steps. Additionally, BlackArch Linux provides detailed documentation and a helpful community that can assist users in configuring their system and resolving any issues they may encounter.
Lightweight and Minimalistic
BlackArch Linux is designed to be lightweight and minimalistic, allowing users to run it on resource-constrained systems without sacrificing performance or functionality. In fact, the minimal installation footprint ensures efficient resource utilization, making it suitable for both physical machines and virtual environments.
Customizable and Flexible
BlackArch Linux provides users with the flexibility to customize their environment according to their specific needs. Users can choose from various desktop environments, window managers, and themes to create a personalized working environment. Additionally, BlackArch Linux supports the Arch User Repository (AUR). This allows users to access a vast collection of additional packages to enhance their system.
Documentation and Community Support
BlackArch Linux offers extensive documentation that covers installation, configuration, usage guides, and troubleshooting. Also, the documentation is regularly updated and provides detailed information about each tool and its usage. Moreover, it has an active and friendly community where users can seek support, share knowledge, and collaborate on security-related topics.
Top BlackArch Linux Tools for Penetration Testing and Security Auditing
Here are the top BlackArch Linux tools for penetration testing and security auditing:
Nmap
Nmap is a powerful network scanning tool that allows users to discover hosts, services, and open ports on a network. It provides various scanning techniques and advanced features such as OS detection, version detection, and scriptable interaction with the target systems. However, this tool is widely used for network mapping, vulnerability assessment, and penetration testing.
Metasploit Framework
Metasploit Framework is a well-known tool for exploiting vulnerabilities in systems and applications. It provides a comprehensive set of exploits, payloads, and auxiliary modules that can be used to test the security of target systems. This Framework also offers a user-friendly interface and automation capabilities, making it a preferred choice among security professionals.
Wireshark
Wireshark is a popular network protocol analyzer that allows users to capture and analyze network traffic in real time. Also, it supports a wide range of protocols and provides powerful filtering and analysis capabilities. This protocol is an essential tool for network troubleshooting, packet analysis, and identifying potential security issues.
John the Ripper
John the Ripper is a password-cracking tool that can be used to test the strength of passwords on various systems and applications. It supports multiple password hash types and employs different cracking techniques, including dictionary attacks and brute-force attacks. John the Ripper is a valuable tool for assessing the security of password-based authentication systems.
Aircrack-ng
Aircrack-ng is a complete suite of Wi-Fi security tools that enables users to assess the security of wireless networks. It includes tools for packet capturing, network monitoring, WEP and WPA/WPA2-PSK key cracking, and wireless network discovery. You can use this tool for auditing the security of Wi-Fi networks and identifying potential vulnerabilities.
Burp Suite
Burp Suite is a powerful web application security testing tool that provides a range of features for assessing the security of web applications. It includes tools for capturing and manipulating HTTP requests and responses, scanning for vulnerabilities, and performing automated attacks. Generally, this tool is widely used for web application penetration testing and security auditing.
Hydra
Hydra is a popular password-cracking tool that specializes in online attacks, including brute-force and dictionary attacks, against various network services. It supports multiple protocols, including HTTP, FTP, SSH, and more. Also, this tool is a versatile tool for testing the security of systems with weak or easily guessable passwords.
Maltego
Maltego is a unique tool that focuses on open-source intelligence gathering and footprinting. It allows users to gather information from various sources and visualize the relationships between different entities, such as domains, IP addresses, and social media profiles. You can use Maltego for reconnaissance and gathering intelligence in the early stages of a security assessment.
Sqlmap
Sqlmap is a specialized tool for detecting and exploiting SQL injection vulnerabilities in web applications. It automates the process of identifying vulnerable parameters, extracting data from databases, and even gaining remote command execution on the underlying server. This tool is a valuable tool for assessing the security of web applications that interact with SQL databases.
OpenVAS
OpenVAS is a comprehensive vulnerability scanning and management tool. It allows users to scan networks and systems for known vulnerabilities and provides detailed reports with remediation suggestions. Also, remember that you can use OpenVAS for vulnerability management and periodic security assessments.
Who Can Benefit from Using BlackArch Linux?
BlackArch Linux can be used by various individuals and groups involved in cyber security and related fields. Here are some examples of who can benefit from using BlackArch Linux:
Security Professionals
BlackArch Linux is a valuable resource for security professionals and ethical hackers. It provides a comprehensive collection of tools for conducting thorough security assessments, vulnerability scanning, and penetration testing. Also, security professionals can leverage BlackArch Linux to identify and fix potential security vulnerabilities within systems and networks, ensuring robust protection against cyber threats.
IT Administrators
IT administrators responsible for managing and securing networks can greatly benefit from BlackArch Linux. With its extensive toolset, they can assess the security posture of their networks, identify potential weaknesses, and implement appropriate security measures. Also, BlackArch Linux enables IT administrators to stay one step ahead of potential attackers by proactively addressing vulnerabilities and strengthening the overall security infrastructure.
System Administrators
System administrators can utilize BlackArch Linux to enhance the security of their systems. Generally, by exploring the tools available in the distribution, they can identify any weaknesses in their system configurations, conduct security audits, and take necessary actions to mitigate risks. Also, BlackArch Linux empowers system administrators with the ability to fortify their systems against unauthorized access and potential threats.
Cybersecurity Students and Enthusiasts
BlackArch Linux serves as an excellent learning tool for cybersecurity students and enthusiasts. It provides a hands-on platform to develop practical skills in penetration testing and security auditing. By working with the diverse range of tools available in BlackArch Linux, students can gain real-world experience in identifying vulnerabilities, exploiting weaknesses, and implementing effective security measures.
Understanding the Security of BlackArch Linux
BlackArch Linux offers a wide range of security tools and software to support ethical hacking and vulnerability assessment. The security of BlackArch Linux is maintained through several measures. Firstly, the distribution follows a rolling release model, receiving regular updates to ensure that the included software and tools are up to date with the latest security patches and bug fixes. This helps to keep the system secure and protected against potential vulnerabilities.
Secondly, BlackArch Linux maintains its own repository of packages, which undergo thorough testing for security and compatibility before being included. The maintainers of BlackArch Linux prioritize the reliability and security of the software in the distribution. However, users need to regularly update their systems and apply security patches to maintain a secure environment.
Finally, users have a responsibility to practice good security habits, such as using strong passwords, keeping software up to date, and being cautious with third-party software installations or external repositories. While BlackArch Linux strives to provide a secure environment, users play a crucial role in ensuring the security of their own systems.
Final Thoughts
BlackArch Linux is a powerful and versatile operating system that empowers cyber security professionals and enthusiasts with a comprehensive suite of tools for various security tasks. Its extensive tool repository, rolling release model, ease of installation, customization options, and active community support make it a preferred choice for penetration testing, digital forensics, malware analysis, and other security-related activities.
What is your suggestion to boost the performance of your server? This article has been prepared to examine how to optimize MongoDB on your Debian server and boost your performance. This database’s work depends on how it uses the underlying resources, and its task is to store data on disk and memory. MongoDB uses a CPU for its performance and a network for communication with users or clients. So, let’s go deeper and examine this issue from different aspects.
Understanding the performance bottlenecks in MongoDB
When performance issues appear, it indicates that the database is running at full capacity, so it’s time to add extra capacity to the system database. Especially, since the working program of the system must be located in the physical memory. Of course, performance problems may be temporary and related to high traffic load. Here, are some common issues with the performance of MongoDB:
– It is possible that the high network delay between applications and MongoDB servers will cause a delay in data recovery and updating.
– If the profiles are misused, it can severely affect the performance of the query, so you need to create the appropriate profiles for administrators.
– As mentioned before, the performance of MongoDB completely depends on the underlying hardware. So if the RAM is insufficient or the disks are slow or the processor is weak, they will cause problems.
– Poorly designed queries that do not use indexes effectively can cause significant performance degradation.
– If the replication is done slowly, it may affect the data access among the members of the replica set and lead to an increase in the read latency.
– The mechanism that MongoDB uses to maintain data integrity is the locking mechanism. Excessive lock contention may reduce concurrency and cause performance problems.
– In sharding, the wrong choice of shard key or unbalanced distribution of data among shards may cause uneven distribution of queries and performance loss.
Analyzing Server Hardware Requirements for MongoDB
Note that the following requirements are crucial before you start to use MongoDB on your server:
– A minimum of 10 GB of free disk space and also extra necessary space to hold MongoDB data.
– A minimum of 4 GB RAM
– A proper network connection
– 64-bit architecture
Optimizing MongoDB configuration parameters
If you need to optimize MongoDB configuration parameters, you can follow the following settings:
Optimize MongoDB on Your Debian Server
Locking Performance
Databases receive different data from users and these operations are not sequentially. In a way, one user may access data while the other is in the middle of updating. these may cause conflict. To solve this problem, the concept of locks for locking documents and collections was introduced by databases. By initiation of the lock, no other user can read or modify your data until the lock is released.
MongoDB provides valuable metrics to help you check whether the lock is degrading your database performance. the related commands are:
db.serverStatus().globalLock
db.serverStatus().locks
Using these parameters, you can examine the request that created the lock and take the necessary action to improve MongoDB performance.
MongoDB Logging
Mongodb entry is in the log path settings and is located in the /var/log/mongodb/mongod.log directory. You can also find the MongoDB configuration file in /etc/mongod.conf.
In order to change the verbosity of a component, the following query is helpful:
db.setLogLevel(2, "query")
Run the following command to clear the log file before doing profiling:
db.runCommand({ logRotate : 1 });
WieredTiger Cache
Wieredtiger is the storage engine that was created after mmapv1 and you need to replace this storage engine with mmapv1 which is deprecated. Also, when it comes to concurrent management and performance, the second option is a better choice.
Note that the cache size is important to ensure the correct performance of Wiredtiger. So you should check if you need to change its default size or not. In order to store the entire working set of the application in the cache, it must be large enough.
Now, to check the cache usage status, apply the following command:
db.serverStatus().wiredTiger.cache
You will encounter a large amount of data but you should consider three of them:
– For the maximum size of the cache => wiredTiger.cache.maximum bytes configured
– For the size of the data currently stored in the cache => wiredTiger.cache.bytes currently in the cache
– And for the size of the dirty data => wiredTiger.cache.tracked dirty bytes in the cache
By finding out the size of the parameters used, you will know whether you should increase the size of the cache or not. If the applications are read-heavy, you can use wiredTiger.cache.bytes read into cache parameter.
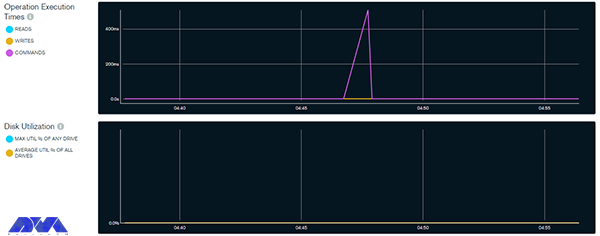
Free Performance Monitoring
MongoDB has a free performance monitoring feature for parallel collections and standalone instances in the cloud. When you enable this feature by configuration, the data that has been checked will be sent to the cloud service. There is only one command for this configuration and then you are provided with a web address so that you can access the performance statistics. To enable free monitoring, run the following command:
db.enableFreeMonitoring()
As you get the URL in your output, paste it on the web browser and monitor performance statistics after a single MongoDB command. As a result, the dashboard will show the necessary metrics:
Optimize MongoDB on Your Debian Server
Use the command below to disable this feature:
db.disableFreeMonitoring()
Indexing strategies for improved query performance
One of the crucial aspects of database management systems that can significantly impact query performance is indexing. By creating appropriate indexes on the columns frequently used in queries, you can speed up data retrieval and improve overall system efficiency. Here are some indexing strategies for improved query performance:
– Using the ESR rule which means Equility, Sort, and Range
– Creating indexes for supporting queries:
– Sorting query results by using indexes:
– Using component indexing
– Avoiding over-indexing
– Ensuring indexes fit in RAM
– Creating queries to ensure selectivity
– And etc.
Utilizing replica sets and sharding for scalability
If we want to understand the concept of sharding more, it should be said that it is a form of scaling known as horizontal scaling or downscaling. The reason is that additional nodes are introduced for load sharing. Limitless scalability is provided with this horizontal scaling to manage large data volumes and excessive workloads. You can access infinite scalability using sharding, but in practice, you will scale proportionally to the number of servers you add. The possibility of having each additional piece increases storage and operational space, so the server can store more data.
A replica set in a MongoDB database refers to a group of MongoDB instances or servers that store the same data. Here the instance acts as the master node that handles all write operations. This is while other nodes act as secondary nodes and repeat the data from the primary node. In the meantime, if the primary node is unreachable, it will automatically go to one of the secondary nodes.
When you combine replica sets and sharding in MongoDB, you create a highly available and horizontally scalable database architecture.
Monitoring and troubleshooting MongoDB performance issues
Monitoring and troubleshooting MongoDB performance issues are crucial to maintaining a healthy and efficient database. MongoDB is a famous database, but like all platforms, it may contain some problems. Here are troubleshooting and how to do monitoring MongoDB issues:
– You can use monitoring tools to obtain information about the performance of the MongoDB instance. One of these tools is (MMS) or MongoDB cloud manager, which can be used to track and analyze various performance metrics. Also, you can use third-party monitoring solutions.
– Establish baseline performance metrics during normal operations. This will help you identify deviations when problems occur.
– Pay attention to server-level metrics such as CPU usage, memory usage, disk I/O, and network activity. Resource bottlenecks can affect database performance.
– Monitor the lock percentage to identify potential contention issues. Long-running or blocked operations can lead to performance bottlenecks.
– Review your MongoDB configuration settings and adjust them based on your hardware capabilities and workload needs.
– If your database grows and reaches its hardware limits, consider sharding to distribute data across multiple servers.
– Keep your MongoDB version up to date to take advantage of performance improvements and bug fixes.
– Monitor the health of your server’s hardware components (such as disks, and RAID controllers) to identify potential problems.
– Regularly run benchmark tests to measure database performance under simulated real-world conditions.
Note that troubleshooting the performance problems of this database may require a combination of the above steps or some trial and error. So before applying changes to production systems, test the changes in a controlled environment and be sure to make a backup before making changes.
Best practices for backing up and restoring MongoDB databases
Back up and restoring MongoDB databases is important to ensure data integrity and disaster recovery. In this part, we will try to show some best practices to follow:
– Use automation tools or scripts to perform backups automatically. This helps avoid human errors and ensures consistency in the backup process.
– Maintain multiple copies of backups in different locations, such as on different servers or in cloud storage. This ensures that if one backup fails, you have another copy available for restoration.
– Versioning Backups: Consider versioning your backups to track changes over time. This can be helpful if you need to restore a specific point-in-time snapshot.
– MongoDB provides built-in tools like Mongodump and mongorestore for backing up and restoring data. These tools are efficient and straightforward to use.
– Set up monitoring and alerts for backup jobs to ensure they run as expected. Monitoring can also help you identify any anomalies in the backup process.
– Back up the system databases like admin, local, and config. These databases contain essential metadata and configuration information for the MongoDB cluster.
– Keep your backup files secure and restricted to authorized personnel only. Encryption of backup files is recommended, especially if they are stored in external storage or cloud services.
– Schedule regular backups of your MongoDB databases. The frequency of backups may depend on the volume of data and how frequently it changes. Daily backups are generally recommended for most scenarios.
When taking backups, ensure that data is in a consistent state by using the–oplog option with mongodump. This includes the database and any related data.
Performance optimization tools and techniques for MongoDB
You can use different tools and techniques to improve performance in MongoDB we will mention some of them for you:
– Sharding
– Replica set
– Avoiding a huge number of indexes
– Using projections
– Journaling
– Batch operations
-Using appropriate data types
Conclusion and final thoughts
MongoDB is one of the most well-known and practical databases used to gather and store data. It is a flexible and non-relational documentation database. This article was prepared to give a full and comprehensive guide about MongoDB and tried to examine some aspects to boost performance and optimize MongoDB on the Debian operating system. We will be pleased if you share your ideas and questions on this field.
FAQ
Is MongoDB suitable for large data?
Definitely. This database is great for large-data
Which one is slower; MongoDB or SQL?
Regarding storing unstructured data, it should be said that MongoDB works much faster than SQL. So depending on the type of data you collect, you may benefit significantly from this.
Kali Linux is a Debian distribution operating system that comes with many installed tools. This operating system is provided to help with security checks and penetration testing. In this post, we decided to introduce a powerful password-generation tool in Kali Linux (Crunch).
What is Kali Linux?
When we use the word Linux, we mean the entire Linux operating system. All Linux operating systems have different distributions, each of which has its name and is privately distributed and supported by a company. One of the types of Linux distribution is Kali Linux.
Kali Linux is a security version of the Linux operating system that is mostly designed for security penetration testing. With the variety of plugins and security applications that come with it, this operating system makes it a suitable tool for penetration testing, reverse engineering, and security research.
Kali Linux is actually a unique operating system that is using by everyone, both good and bad. It can be used to discover and fix security vulnerabilities. One of the applications of Kali Linux is hacking with Kali Linux and penetration testing with Kali Linux, which both security experts and hackers do. In other words, Kali is like a sharp knife in the toolbox.
What is Crunch and how does it work?
The crunch tool is a tool in the field of creating a password list and is one of the most powerful in this field. In other words, the Crunch tool is a word list generator where you can use a standard or any character set to generate word lists. Word lists are creating by combining and permuting a set of characters. You can select the number of characters and the size of the list.
This program supports numbers and symbols, uppercase and lowercase letters separately, and Unicode. Among the important features of this tool, the following capabilities can be mentioned:
The possibility of generating a password list with 2 different combinations and replacement methods
Support letters, numbers, symbols
Ability to combine letters, numbers, symbols
Ability to be case-sensitive
The ability to stop and resume the password list creation process
How to install Crunch in Kali Linux
Before starting the installation, we recommend that you use the Linux VPS server plans provided on our website and benefit from the high quality and speed of these servers. After getting familiar with Crunch and its capabilities in the previous sections, now it’s time to learn how to install it. Installing Crunch on Kali Linux is very easy, just run the following command:
sudo apt install crunch
This will download and install the crunch package from the official Kali Linux repository. You may need to enter your password and confirm the installation.
To check if Crunch is installed correctly, you can run the following command:
crunch -h
This will display the help page of Crunch, which shows the usage, syntax, and options of the tool. You can also see some examples of how to use Crunch to generate wordlists.
Generating passwords with Crunch
After installing Crunch, at this stage, we want to teach you how to generate passwords with Crunch. To do this, you must follow the steps below.
To create a word list of specific numbers, you can run the following command. Note that this command produces a list of 110 one- and two-digit number words with all combinations of the numbers 0, 1, 2, 3, 4, 5, 6, 7, 8, 9. It is interesting to know that you can use the alphabet.
crunch 1 2 0123456789
Now you can save the created word list in a file by running the following command. The command you see creates a list, and then it copies the same into a text file called wordlist.txt:
crunch 1 2 0123456789 >wordlist.txt
Now you can use the following command to save the list of words in a file with the -o option:
crunch 1 2 0123456789 -o wordlist.txt
Another way to create a password list is to use the rainbow charset file that you can see below:
You can use the pattern to create a list of words. In the following command, you can use 4 characters, @ % and ^:
crunch 10 10 -t manav^%%%%
,: used for all capital letters.
@: Used for all lowercase letters.
%: Used for all numeric characters.
^: Used for all special characters.
Finally, to create a list of words by changing strings or characters, you can use the following command:
crunch 1 10 -p Hello Manav
Tips for creating strong and secure passwords
As you read in this article, Crunch is a password-generation tool in Kali Linux. But it is interesting to know some tips about generating strong passwords. A good and secure password is one that cannot be guessed and is not exposed by the methods used by hackers. Hackers use Kali Linux OS to find your password by combining numbers, letters, and symbols. They can easily find short passwords in seconds.
As such, strong passwords consist of a combination of upper and lower case letters, numbers, and special symbols such as punctuation. A good password should be at least 12 characters long, although we recommend using a longer password. In general, the following are the necessary parameters for a good and secure password:
1) A good password has at least 12 characters; The longer your password is, the better.
2) It has uppercase and lowercase letters, numbers, and symbols; A password that is a combination of these is harder for hackers to find.
3) It’s not made of a memorable keyboard track.
4) It is not made according to your personal information.
We live in a data-driven world and these data should be organized and easily accessible information. This leads to the need for a database. The database is the structured data or information that is organized and stored in a computer for fast searching and retrieval. The purpose of this guide is to introduce MongoDB and examine why MongoDB is the best NoSQL database for Ubuntu. Read the article carefully to understand the benefits of this great database.
What is MongoDB?
We can use two main types of databases: SQL (relational) and NoSQL (non-relational). MongoDB is a non-relational database system. It is a non-relational database system. This database is flexible and is now used as backup information storage for many prominent businesses and organizations such as Forbes and Facebook. If we want to compare two databases, it should be said that relational databases store data in columns and rows. Organizations such as Oracle use a relational database management system (RDBMS). However, NoSQL databases store schema-less and unstructured data inside multiple collections and nodes. Non-relational databases do not require static tables, scale horizontally, and support bounded join queries. If you need to set up a virtual server, we recommend you use theLinux VPS server plans provided on our website.
MongoDB Database for Ubuntu
Benefits of using MongoDB
MongoDB has lots of features that we will introduce most important ones:
– It is easier and cheaper to maintain the Nosql database. Also, NoSQL databases have features such as easier data distribution, automatic repair, and simpler data models. All these benefits require lower administrative costs and thus lower costs.
– This database is open-source, so include lower server costs. NoSQL databases like MongoDB use cheaper servers, which means that the price of storing and processing data per gig is significantly lower.
– MongoDB is highly scalable and easy to use. Because NoSQL databases like MongoDB scale horizontally, you are able to scale by adding more machines to your resources.
– MongoDB has an integrated cache system. System cache improves data output performance.
– There are no scheme problems for MongoDB. It means you can put data into a NoSQL database without a predefined schema, so you are able to change data models and formats without any disruption in applications.
– MongoDB offers many useful features (Ad-hoc queries, aggregates, bounded aggregates, file storage, indexing, load balancing, replication, and server-side JavaScript execution), so we can say it is user-friendly.
Features of MongoDB
In this section, you can find out 5 most important features of the MongoDB database:
– Scalability: vertical and horizontal scaling is supported by MongoDB.
– MongoDB keeps and stores data in documents using key-value pairs instead of rows and columns, which makes the data more flexible.
– MongoDB performs load balancing through vertical or horizontal scaling, without a separate or dedicated load balancer.
– There is no need for a blueprint for managing data cause MongoDB is a schema-less database.
– High availability is provided in MongoDB because two or more MongoDB instances are used, so it is replicable.
MongoDB vs. other NoSQL databases
We mentioned before that MongoDB is a type of NoSQL. It is an open-source and user-friendly software written in C++ that makes it fast and flexible. The main difference between NoSQL and MongoDB is that NoSQL is a tool that you can store and retrieve data in a non-relational database while MongoDB is actually document-oriented and belongs to NoSQL.
NoSQL is the abbreviation of “not only SQL” or “no SQL”. which is called We have different types of NoSQL databases like documents, key-value, graphs, etc. and MongoDB is a type of NoSQL. As a result, MongoDB is easy to use and free. It is scalable and has high performance. On the other hand, NoSQL databases have distributed architecture and help increase data consistency.
MongoDB and Ubuntu compatibility
MongoDB and Ubuntu have been widely compatible, which seems to continue in later versions. It is a popular NoSQL database, and Ubuntu is a widely used Linux distribution. Both are well-supported platforms with active communities, making it relatively straightforward to run MongoDB on Ubuntu.
To check the compatibility with the latest versions available in 2023, I recommend consulting the official documentation and release notes for MongoDB and Ubuntu. The official websites for MongoDB and Ubuntu will provide you with the most up-to-date information on system requirements and compatibility.
Setting up MongoDB on Ubuntu
MongoDB and Ubuntu have been widely compatible, which seems to continue in later versions. MongoDB is a popular NoSQL database, and Ubuntu is a widely used Linux distribution. Both are well-supported platforms with active communities, making it relatively straightforward to run MongoDB on Ubuntu. To check the compatibility with the latest versions available in 2023, it is recommended to consult the official documentation and release notes for MongoDB and Ubuntu. The official websites for MongoDB and Ubuntu will provide you with the most up-to-date information on system requirements and compatibility.
Key features of MongoDB for Ubuntu users
As told before, MongoDB is a popular NoSQL database that provides a flexible and great platform to manage and process large amounts of unstructured data. Here you will figure out some other features of MongoDB for Ubuntu users:
1- There is no need for predefined schema. MongoDB can store any type of data so users have flexibility to create fields in a document.
2- A good feature of using documents is that they map to native data types in various programming languages. Also, embedded documents reduce the need for database joins.
3- Mongodb is a useful database for companies with big data applications because horizontal scalability is its main function.
4- Various storage engines are supported by MongoDB and it provides pluggable storage engine APIs to let third parties develop their own storage engines.
5- One of the most impressive features of DBMS is the built-in aggregation that allows the user to run MapReduce code directly on the database. MongoDB also has its own file system called GridFS. The advantage of using a file system is to save files larger than the limit of 16 MB per document.
Best practices for using MongoDB on Ubuntu
Here, we will show some of the best practices for using MariaDB on Ubuntu:
– By default, MongoDB allows access without authentication, which can be a security risk. Always enable authentication and create strong passwords for users with appropriate privileges. This can help protect your data from unauthorized access.
– Configure your firewall to restrict access to the MongoDB server. Limit access to only the necessary IP addresses or ranges, and block public access if not required.
– Keep an eye on your MongoDB server’s performance. Use tools like MongoDB’s built-in profiler and third-party monitoring tools to identify performance bottlenecks and optimize your queries and indexes accordingly.
– Implement a backup strategy to prevent data loss. MongoDB provides various backup methods, such as mongodump or replica sets. Choose the one that suits your needs and schedule regular backups.
– Query performance can be improved by properly designed indexes. Analyze your queries and create lists of frequently used fields in queries to speed up data retrieval.
– High availability and data redundancy is provided by replica sets. They ensure that your data is replicated across multiple servers and prevent data loss in case of hardware failure.
– Journaling helps ensure data consistency in the event of a system failure. It is recommended to enable journaling in the MongoDB configuration.
– Updating large documents in MongoDB, can lead to fragmentation. Instead, consider using the “$set” operator to change specific fields in the document.
– Connection pooling helps manage the number of open connections to the MongoDB server, optimizing resource usage and improving performance.
– It is recommended to use the official MongoDB repository. This ensures that you get the latest stable version and updates.
Conclusion
Many organizations use MongoDB for their customer service applications. This applicable database is an open-source and document-oriented tool to save your data. Our tutorial is a good guide to give a brilliant comprehension of MongoDB structure and helps you get more information about its benefits and features on the Ubuntu operating system. Also, some points to compare this database and its relation to NoSQL were examined for a better result. Finally, if you have any questions, leave a comment here.
FAQ
What makes MongoDB prominent among others?
MongoDB offers many advantages. A full cloud-based developer data platform is the significant one. Also, flexible document schema and code native data access are other good features of this tool.
How many spaces are needed for MongoDB?
1 GB of RAM per 100,000 assets is required for MongoDB.
Every year, breaches of users’ information and privacy cause huge financial and credit losses to organizations, half of which are caused by cyber-attacks. By conducting a penetration test, companies can prevent data breaches caused by cyber-attacks. Because penetration testing projects include attack simulation along with other techniques. Penetration testing allows businesses to identify vulnerabilities in their IT infrastructure. In the rest of this article, we will tell you how to become a Metasploit Expert on Kali Linux.
Understanding the basics of penetration testing
Penetration testing, also known as Pen Test, is one of the most common and standard methods of security and penetration testing of web applications. Pen Test runs simulated attacks on the website from inside and outside to find out which parts of our website have security weaknesses. It is recommended that all websites in the world use Pen Test so that they can find out the security weakness of their site before hackers and correct it quickly.
The main issue here is that many web applications request sensitive user data and store it in their database. This makes web applications a mine of valuable information. Therefore, hackers have shown great interest in databases. The situation becomes dire when we consider the generality of web applications!
By performing pen test, we pursue the following goals:
Detecting system vulnerabilities that were previously unknown
Checking the effectiveness of the current website security rules
Testing active security components on a site such as a firewall and DNS
Identifying the weakest parts of the program
Identifying the appropriate parts of the site for data leakage
Getting started with Kali Linux
Kali Linux is a security distribution of Linux derived from Debian and used specifically for computer crime prevention and advanced penetration testing. This version was developed through the BackTrack rewrite by Mati Aharoni and Devon Kearns of Offensive Security.
Kali Linux includes several hundred tools that have been assembled to perform various tasks in the field of information security, such as penetration testing, security research, computer crimes, and reverse engineering.
Kali Linux has more than 600 penetration testing applications installed on it, each of which you need to discover. Each program has its own flexibilities and uses. Kali Linux has done a great job of separating these useful tools into the following categories:
Information gathering
Vulnerability analysis
Wireless attacks
Web applications
Exploit tools
stress test
Criminological tools
wiretapping and forgery
Password attacks
Maintenance accesses
Reverse Engineering
Reporting tools
Hardware hacking
In the rest of this article, we will teach how to install and set up Metasploit on Kali Linux.
Installing and setting up Metasploit on Kali Linux
Before starting the installation and configuration process, we recommend you use the Linux VPS server plans provided on our website. In this section, we want to teach you how to install and run Metasploit. To do this, simply run the following command in the Kali terminal:
sudo apt install metasploit-framework
One thing to note is that the Metasploit Service Framework requires the PostgreSQL database service to run. Therefore, you can activate the PostgreSQL service using the following command:
sudo systemctl enable --now postgresql
Now you can start PostgreSQL by running the following command:
sudo /etc/init.d/postgresql start
Confirm PostgreSQL using the following command:
systemctl status postgresql@*-main.service
or
sudo /etc/init.d/postgresql status
Considering that PostgreSQL’s default port is 5432, it is necessary to confirm that the service is active:
sudo ss -ant | grep 5432
In the next step, it is necessary to enter the Rapid7 signature key with the following command:
Start the Metasploit PostgreSQL database by running the following command:
sudo msfdb init
or
sudo msfdb run
sudo msfdb init && msfconsole
You can now configure the Metasploit Framework Service and launch the Metasploit Service Framework (msf) console on your system. Therefore, in the first step, you need to check the database connection:
sudo msfconsole -q
msf5 > db_status
Metasploit modules and functionalities
Metasploit modules are the main components of the Metasploit framework. A module is a piece of software that can perform a specific action such as scanning or exploiting. Every task you can do with Metasploit is defined in a module.
There are four main types of Metasploit modules:
1) Exploit modules: These modules execute code on a target using a vulnerability. Exploit modules can be used to gain access, elevate privileges, or execute commands on a target system.
2) Auxiliary modules: These modules perform various support tasks such as scanning, fingerprinting, sniffing, or brute-forcing. Auxiliary modules can be used to gather information, test for vulnerabilities, or launch denial-of-service attacks.
3) Payload modules: These modules define the code that is executed on a target after a successful exploit. Payload modules can be used to create a shell, execute commands, upload or download files, or create processes on a target system.
4) Post-exploitation modules: These modules are executed after the successful implementation of the exploit and payload. Post-exploitation modules can be used to maintain access, collect data, rotate to other targets, or cover routes to a target system.
To use Metasploit modules you must search for them using the search command and appropriate search operators such as name, platform, type, program, author, etc. You can also use the show command to view a list of all available modules of a specific type.
For example, to search for an exploit module for Windows that has the name “ms08-067”, you can use the following command:
To view all the payload modules, you can use the following command:
show payloads
Exploitation techniques using Metasploit
Exploitation techniques using Metasploit are the methods and steps that you can use to exploit vulnerabilities in systems or applications with the help of Metasploit modules and tools.
These are some of the exploitation techniques using Metasploit that you can use to test or compromise systems or applications:
1)Automated exploitation: Metasploit Pro can build an attack plan based on the service, operating system, and vulnerability information it has for the target system and use it to execute an automated exploit. An attack plan defines the exploit modules that Metasploit Pro will use to attack target systems. To run an automated exploit, you need to specify the hosts you want to exploit and the minimum reliability settings that Metasploit Pro should use.
2) Autopwn: Autopwn is a tool that can be used to automatically execute all exploits against open ports of a target system. This is a feature of Metasploit Express and Metasploit Pro, but can also be used with the Metasploit framework using the db_autopwn command. Autopwn requires a database to store scan results and exploit options.
3) AutoSploit: AutoSploit is a Python-based tool that uses Shodan and Metasploit modules to automate mass exploitation of remote hosts. This allows you to search for targets based on keywords or filters in Shodan and then launch Metasploit exploits against them. You can also customize exploit options and load-outs or use random ones. Scan and/or exploit results appear in the Metasploit console and in the output file(s).
4) Manual Exploitation: Manual Exploitation is the process of selecting and configuring an Exploit Module according to the target system or application, setting required options such as RHOSTS, RPORT, LHOST, LPORT, etc. Manual exploitation gives you more control and flexibility over the exploitation process, but it also requires more knowledge and skill.
Post-exploitation and gaining control
Post-exploitation and gaining control are the processes of performing actions on a target system or network after successful exploitation. It can include collecting information, maintaining access, escalating privileges, pivoting to other targets, or covering tracks. Gaining control can involve creating shells, executing commands, uploading or downloading files, or spawning processes on a target system.
Some of the tools and techniques you can use to post-exploit and gain control include:
1) Meterpreter: Meterpreter is a powerful payload that runs in memory and provides an interactive shell for the target system. It supports various commands and modules that can perform post-exploitation tasks, such as collecting system information, removing passwords, taking screenshots, recording keystrokes, migrating processes, etc.
2) Post-Exploitation Modules: Metasploit has a class of modules called post-exploitation modules that are executed after the successful execution of the exploit and payload. These modules can perform various actions on the target system or network, such as collecting data, maintaining access, routing to other targets, or masking routes. For example, the post/windows/gather/hashdump module dumps password hashes from the SAM database on a Windows system.
3) C2 frameworks: C2 frameworks are tools that allow you to remotely control vulnerable machines through a command and control (C&C) infrastructure. C2 frameworks can help you manage multiple sessions, execute commands, transfer files, or perform further attacks on the target network. Some popular C2 frameworks include Cobalt Strike, Covenant, Empire, etc.
4) Privilege escalation techniques: Privilege escalation is the process of obtaining higher privileges or access rights on a target system or network. The increase in score can be vertical (from a lower score to a higher score) or horizontal (from one user account to another with the same score level). Elevation can be achieved by exploiting vulnerabilities in the system or application, misconfiguration, weak passwords, etc.
Advanced Metasploit techniques and tools
Advanced Metasploit techniques and tools are methods and features that you can use to perform more complex and sophisticated penetration testing tasks with Metasploit. Some advanced Metasploit techniques and tools include:
1) Database Support: Metasploit can integrate with a database to store and manage scan results, hosts, services, vulnerabilities, credentials, loot, etc. It can help you organize and analyze data and share it with other users or tools. Metasploit supports PostgreSQL, MySQL, and SQLite databases.
2) Evading anti-virus: Metasploit can help you evade antivirus detection by using various techniques such as encoding, encryption, obfuscation, or polymorphism. You can use the msfvenom tool to generate payloads with different codecs or formats or use escape modules to create executables that can bypass standard antivirus solutions.
3) Exploit ranking: Metasploit assigns a ranking to each exploit module based on its reliability, stability, and side effects. The ranking can help you choose the best exploit for your target system or application. The ranking levels are excellent, great, good, normal, average, low, and manual.
4) Hashes and password cracking: Metasploit can help you collect and crack password hashes from various sources such as Windows SAM database, Linux shadow files, or network protocols.
5) Metasploit plugins: Metasploit plugins are Ruby scripts that extend the functionality of Metasploit by adding new features or commands. You can use the load command to load a plugin or the show plugins command to view the available plugins. Some useful plugins are auto_add_route, sounds, wmap, etc.
6) Payload UUID: Payload UUID is a feature that allows you to track and identify your shipments by assigning an identifier (UUID). This can help you manage loads and multiple meetings more easily and also avoid conflicts or collisions. You can use msfvenom tool to generate payload with UUID.
Metasploit best practices and ethical considerations
Regarding Metasploit’s best practices, you should know that you need to use a VPS or VPN server or a proxy to hide your real IP address and protect your anonymity. In other words, it is recommended not to expose your identity or location to the target or third parties. The next thing is to watch out for payloads that can cause damage to the target system or network. Do not use payloads that can delete files, corrupt data, or disrupt services unless you have a specific reason and permission to do so.
Keep your Metasploit up to date with the latest exploits and patches. Do not use outdated or unreliable exploits that may fail or cause unintended consequences.
In the following, we will explain some ethical considerations that you should keep in mind when using Metasploit.
Do not harm the target system or network beyond the scope of penetration testing or exploitation. In other words, don’t use Metasploit to harm, disrupt, or steal data or resources. We recommend that you do not violate the laws or regulations of the country or region where you are conducting penetration testing or exploitation. Do not use Metasploit to attack systems or networks protected by law or owned by government, military, or critical infrastructure entities.
One of the most important ethical issues when using Metasploit tools is not to disclose vulnerabilities or exploits you discover or use to anyone who might exploit them. Do not share or sell information or tools you obtain from Metasploit to hackers, criminals, or competitors. Do not impersonate the owner or administrator of the target system or network. We also recommend that you do not use Metasploit to gain unauthorized access to accounts, credentials, or privileges that do not belong to you.
Becoming a certified Metasploit expert
If you want to become a certified Metasploit expert, you have a few options to learn. You must learn how to:
Perform network discovery and vulnerability scanning
Exploit and validate vulnerabilities
Conduct phishing campaigns and test web applications
Use post-exploitation modules and pivot techniques
Report production and project management
Master the Metasploit console and command line interface
Use Metasploit modules, exploits, payloads, and utilities
Avoid antivirus detection and bypass security controls
Conduct spear-phishing attacks and social engineering campaigns
Use Meterpreter for post-exploitation detection and manipulation
These are some of the options you can consider if you want to become a certified Metasploit expert.
Conclusion
Today, the Metasploit framework has more than 1,677 Metasploit applications organized on more than 25 platforms and operating systems, including Java, Android, Python, PHP, Cisco, and more. Static payloads that enable port forwarding and communication between networks and shell worker payloads that allow users to execute random scripts or commands against the host and target are among Metasploit payloads. In this article, we tried to explain Metasploit Zero to Hero to you to become a Metasploit Expert on Kali Linux.
Today we want to talk about one of the relational applications, the RabbitMQ message broker, which plays an important role in providing reliable and stable communication. The task of these programs is to store received requests in a queue and provide them one by one to receive services. So, make your services more scalable by decoupling them. Let’s figure out how to install RabbitMQ server on Ubuntu.
Understanding the Ubuntu Operating System
Ubuntu is a well-known Linux-based distribution. It is free and open-source and can be widely used on a computer and system or virtual private server (VPS). One of the significant features of Ubuntu is the use of Gnome, which is a graphical user interface. The Ubuntu Canonical maintenance center is a community of developers. It is updated every six months and its support is two years. This operating system contains most of the applications like LibreOffice, Thunderbird, and some other simple games.
If you want to add additional applications, you can install them using the APT package management system or Ubuntu software. This package is the default app store for Ubuntu.
Preparing the Ubuntu Environment for RabbitMQ Installation
Here are the requirements before you start the installation:
Tip: Make a new file at /etc/apt/sources.list.d/rabbitmq.list directory and add the repositories for ErLang and RabbitMQ that are proper for Ubuntu 22.04 jammy release:
deb [signed-by=/usr/share/keyrings/net.launchpad.ppa.rabbitmq.erlang.gpg] http://ppa.launchpad.net/rabbitmq/rabbitmq-erlang/ubuntu jammy main

deb-src [signed-by=/usr/share/keyrings/net.launchpad.ppa.rabbitmq.erlang.gpg] http://ppa.launchpad.net/rabbitmq/rabbitmq-erlang/ubuntu jammy main

deb [signed-by=/usr/share/keyrings/io.packagecloud.rabbitmq.gpg] https://packagecloud.io/rabbitmq/rabbitmq-server/ubuntu/ jammy main

deb-src [signed-by=/usr/share/keyrings/io.packagecloud.rabbitmq.gpg] https://packagecloud.io/rabbitmq/rabbitmq-server/ubuntu/ jammy main
Now update the package list for the second time after saving the file:
apt-get update -y
Go on installing ErLang packages:
apt-get install -y erlang-base \
As the final part, you can install the RabbitMQ server and other dependencies:
apt-get install rabbitmq-server -y --fix-missing
As you passed all of the levels well, you can see the RabbitMQ server process is working correctly:
systemctl status rabbitmq-server
That’s it. You finished the installation part.
Configuring RabbitMQ for optimal performance
A Management Console plugin has been implemented in RabbitMQ that allows you to perform various management and monitoring tasks through a web-based interface. So if you need to check the list of all RabbitMQ plugins, run the following command:
rabbitmq-plugins list
You will see that all the plugins are disabled. Use the command below to enable them:
rabbitmq-plugins enable rabbitmq_management
Managing RabbitMQ Server on Ubuntu
Now it is time to setup and manage RbbitMQ on your system.
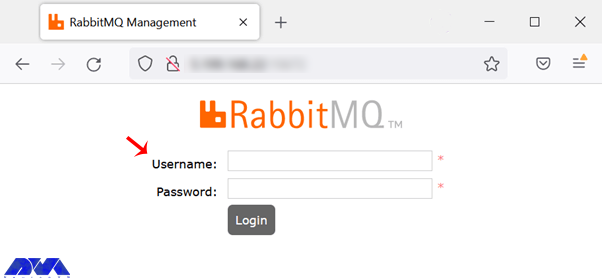
The first step is connecting to the RabbitMQ web interface. You should open the web browser and type the related URL which is http://your-server-ip:15672:
Install RabbitMQ Server on Ubuntu
The default username and password are guest, but you are allowed to choose any other user. If you forget or don’t know your IP address, type the following command:
hostname -I
The next step is to setup an administrative user. It would be beneficial if you create a new user and assign administrative permissions to it as you want to setup a RabbitMQ server. Choose a unique username and set a reliable password:
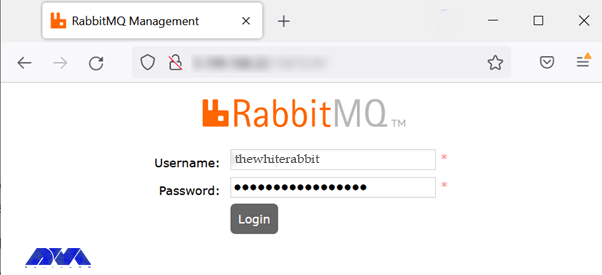
Tip: Our preferred administrator username is Thewhiterabbit.
It is good to delete the default user because of security reasons:
rabbitmqctl delete_user guest
To check the list of users, you can also this command:
rabbitmqctl list_users
In the next part, you should create RabbitMQ virtual host. A virtual host is suitable for providing logical grouping and separating different resources. These resources include connections, exchanges, user permissions, and other objects. So run the command below to add a new virtual host:
rabbitmqctl add_vhost neuronvm_broker
You can do many configuration settings on a virtual host. These settings can be the maximum number of queues or the maximum number of concurrent client connections. Run the command below to list the available virtual hosts:
rabbitmqctl list_vhosts
It is good to delete the default virtual host:
rabbitmqctl delete_vhost /
To assign user permissions on your virtual host, you should adjust specific user permissions for the administrative user on the virtual host. Use the following command:
After all these instructions, it is time to setup RabbitMQ by web management console. To connect to the management console and insert your newly created username and password:
Install RabbitMQ Server on Ubuntu
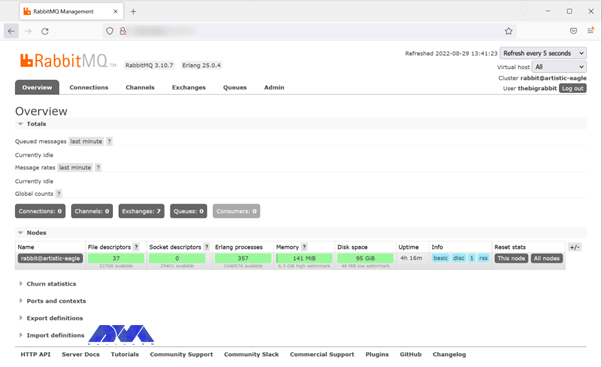
After the authentication process, you can see the dashboard:
Install RabbitMQ Server on Ubuntu
Integrating RabbitMQ with Other Applications
If you want to add messaging functionality to your system, the best way is to integrate RabbitMQ with other applications in Ubuntu. This allows different programs to communicate with each other in a scalable and flexible way. Note that to make this action possible you need a library that supports AMQP and the most common one is Pika for Python applications. So to install Pika go through this command:
You have to be sure that you have the appropriate package manager:
sudo apt-get install python-pip git-core
Now install Pika:
pip install pika
You should find the appropriate library or client for the other programming languages.
Troubleshooting Common RabbitMQ Installation Issues
When you decide to install the RabbitMQ server, you may encounter some problems. In this section, we will mention some of them for you:
– Connection Problems:
If you have any trouble connecting to RabbitMQ from clients, you should ensure that the client application uses the correct credentials, port, hostname, and virtual host settings.
By checking the listener configuration in the RabbitMQ configuration file, note that the RabbitMQ server is listening on the correct interface and port.
– Your plugins are not loading:
Use sudo rabbitmq-plugins enable <plugin_name>. to verify that you have enabled the plugins correctly.
If you have problems with plugin loading, Check the RabbitMQ Logs.
Best Practices for RabbitMQ Server Management on Ubuntu
Here are the best practices to ensure optimized performance, reliability, and security:
– Regularly back up your RabbitMQ data, including configurations and message data, to facilitate recovery in case of data loss or system failure.
– Configure the firewall to allow only necessary ports to be accessible from external sources. By default, RabbitMQ listens on port 5672 for AMQP and 15672 for the management interface. Restrict access to these ports as needed.
– Always keep your Ubuntu system up to date with the latest security patches and updates. Run sudo apt update followed by sudo apt upgrade to update all packages, including RabbitMQ.
– For high availability and fault tolerance, consider setting up RabbitMQ clustering with multiple nodes. This way, if one node goes down, the others can continue to handle messages.
– Instead of using the Ubuntu default repositories, use the official RabbitMQ repository for the latest stable versions. This ensures you get the most recent updates and features.
– Change default credentials for the RabbitMQ management interface. Create a new administrative user with a strong password and configure RabbitMQ to use it. Remove or disable the default guest user to minimize security risks.
– RabbitMQ can be resource-intensive, especially when handling large amounts of data. Ensure your server has enough CPU, memory, and disk space to handle the expected workload.
– Configure resource and connection limits in RabbitMQ configuration files to prevent resource exhaustion and potential denial-of-service attacks.
– Implement monitoring tools to keep track of RabbitMQ performance and identify potential issues proactively. Enable logging to record important events for troubleshooting purposes
Conclusion
This tutorial presented to introduces RabbitMQ and presents a comprehensive guide about this message broker and the installation process, configuration, and management of RabbitMQ on the Ubuntu operating system. Also, you learned what can be useful practices to optimize the performance of this tool. For any additional information, you can refer to the RabbitMQ official page.
FAQ
Is it necessary to change the default admin name?
Yes, it is recommended to change the administrator’s name and choose a unique one.
Is it possible to access the RabbitMQ server remotely?
Yes, you can create a new RabbitMQ user and set permissions for that. So open the browser and use the http://localhost:15672/ URL.


