If you work in the fields of data science and machine learning, you have heard the Anaconda distribution. The most important languages in the field of data science are Python and R, and Python is the leader in machine learning. You know Python is at the top with a variety of powerful packages, Anaconda released an open-source package called Anaconda in 2012, which was well-received by researchers and developers for the three major operating systems Windows, Linux, and Mac. This article will teach you How to Install Anaconda on RDP 2019.
What is Anaconda?
Anaconda is a free data science platform. Anaconda includes Python and R distributors and a packaging manager named Conda. This platform provides a collection of pre-installed libraries and packages. Some of them are NumPy, SciPy, Pandas, Scikit Learn, nltk, and client. Anaconda Enterprise is Anaconda’s commercial product. This program allows business organizations to develop scalable and secure applications.
Important Features of Anaconda
These are the significant features of Anaconda data science:
Anaconda Navigator: This feature is a simple user interface and helps you to directly access various tools like VS code, Spyder, etc. by clicking the launch button. You can use the environment tab in the left panel to maintain the environment and packages.
Anaconda Repository: Anaconda repository is one of its obvious advantages in that it works like a closed marketplace where there is a possibility of free access to installers, tools, and packages. These repositories offer more than 100 installers and 8000 packages for data science, according to official statistics.
Conda: Anaconda’s command-line utility is called Conda. This tool helps you control Anaconda and Python packages through CLI.
How to Install Anaconda on RDP 2019
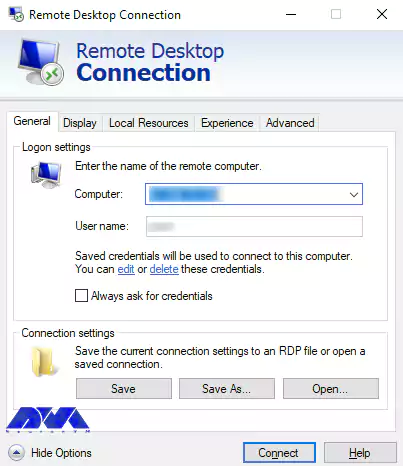
In the first step, you need to type the phrase Remote Desktop from the search section of your Admin RDP Start menu and run it.
Then you have to enter the IP and password you want to enter the RDP environment.
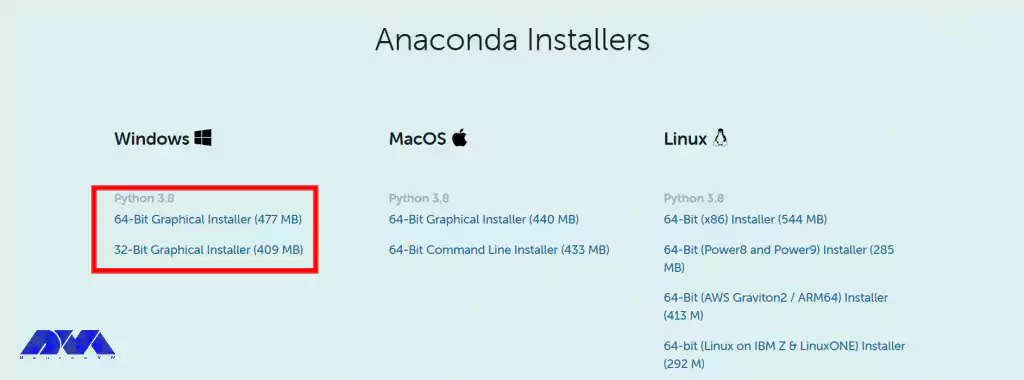
Once you have entered the RDP environment, you should now open one of your favorite browsers. Then you must first download the Anaconda Installer.
Be sure to download the Windows file on the appropriate site.
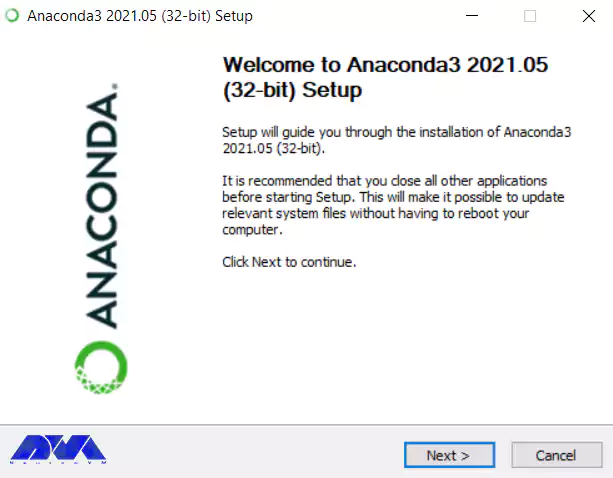
Then go to the folder where the file was downloaded and double-click on the installer.
It is better to disable antivirus software when installing and re-enable it after installation. Also, to prevent possible problems, install the software only for your user.
In this step, just click Next to start the installation progress.
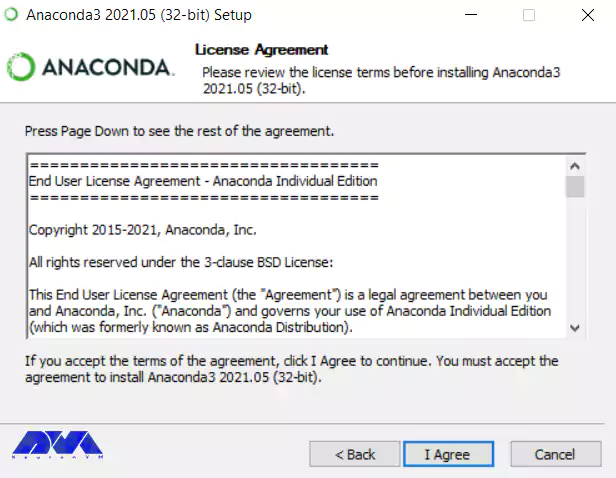
Now after reading the licensing terms, click on “I Agree”.
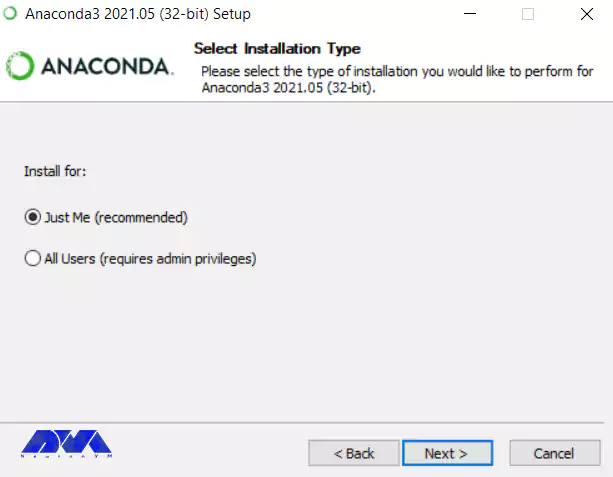
On the Select Installation Type page, select “Just Me” and click Next again.
Note that if you are installing the software for all users, you should not select “Just Me”. In this case, you need the privileges of Windows Administrator.
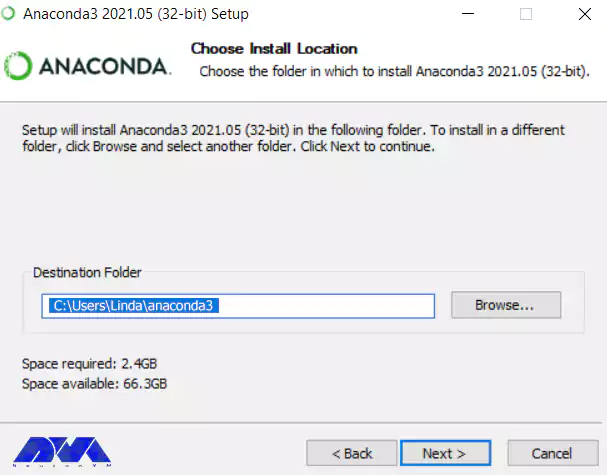
Now on the following page, click on “Browse” to select the destination folder to install Anaconda and then click Next.
Note that if you do not need administrator permissions, do not install the software as an administrator.
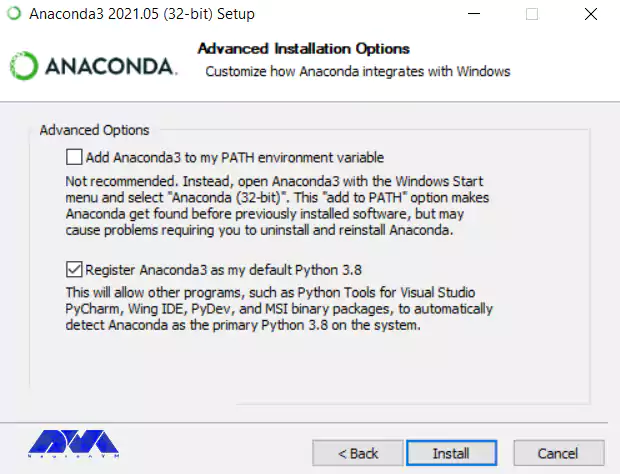
In this step, On the following page, if you choose to Add Anaconda to the PATH environment variable, it may interfere with other software. You can open Anaconda Prompt or Anaconda Navigator from the start menu and use it.
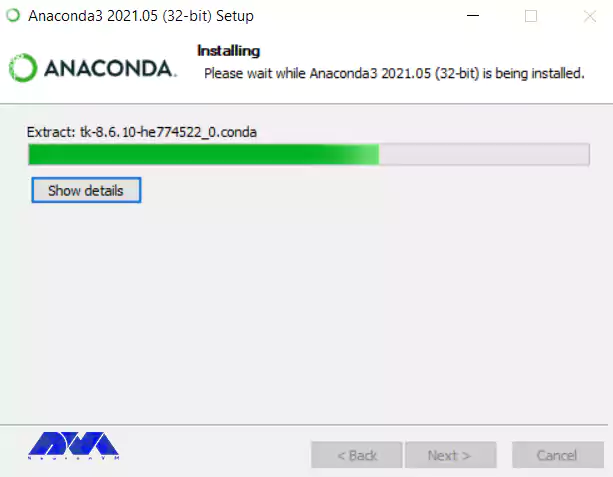
If you want to install and run multiple versions of Anaconda or multiple versions of Python, select Anaconda as your default Python and check the box. Finally, click on Install. To view the packages that Anaconda is installing, you have to click on Show Details.
Click Next again.
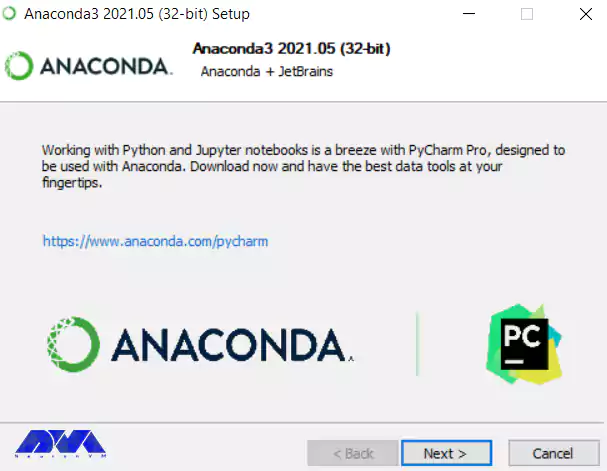
In this step, if you want to install PyCharm for Anaconda, click on the link on the page. If you do not want to install PyCharm, click Next.
Now you have to wait a while for the Anaconda installation to finish.
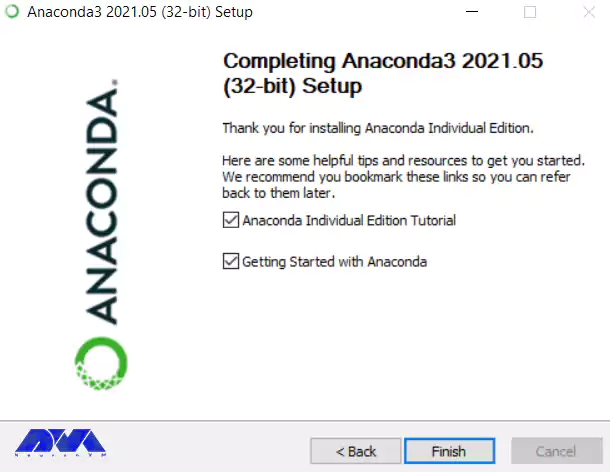
Check the “Anaconda Individual Edition Tutorial” and “Learn more about Anaconda” boxes on the following page if you want to know how to get started with Anaconda. Eventually, click Finish.
How to Run Anaconda on RDP 2019
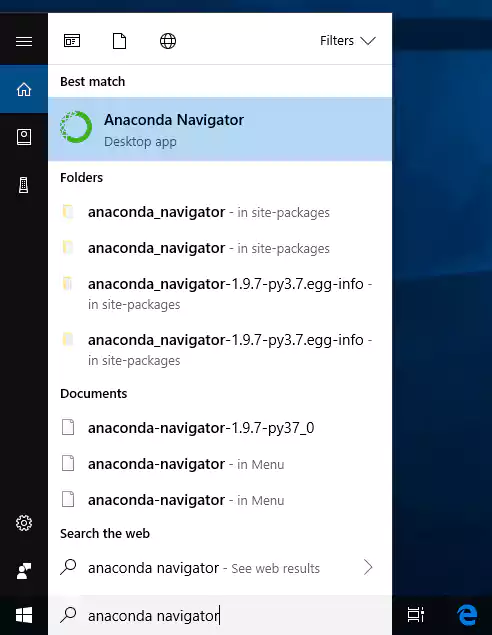
After you were able to install Anaconda according to the tutorial we gave in the previous section, now we want to teach you how to run it on RDP 2019. To do this, simply type and run the phrase anaconda navigator in the search menu of the Start menu.
In the image below you can see the Anaconda management dashboard.
Conclusion
We tried to teach you how to install Anaconda on RDP 2019. A comprehensive guide was introduced at the beginning of this article. You can easily install Anaconda for your Windows RDP by following this step-by-step tutorial. Now you can implement what we have discussed in this project. You can always refer to the official documentation page of Anaconda for the most up-to-date information.
Regarding using Remote Desktop Protocol (RDP) for administrative tasks, the importance of having both an antivirus and a firewall cannot be overstated. RDP allows you to remotely access and manage a computer, which introduces specific security risks that need to be addressed. Your organization may require to enable Windows Defender and other Windows security features to ensure that your device is secure. This tutorial will represent the way for activating Windows Defender security and explain some points to show the importance of antivirus and firewall in admin RDP.
A Short Definition of Windows Defender Security
Windows Defender Security, commonly known as Windows Defender, is a built-in antivirus and security software solution developed by Microsoft for the Windows operating system. It is designed to protect users’ computers from various types of malware, including viruses, spyware, ransomware, and other malicious software threats. Windows Defender provides real-time scanning, automatic updates, and a range of security features. This security option helps ensure the safety and privacy of a user’s data and activities while using a Windows-based device like Windows VPS. You can achieve services likeWindows VPS from our site.
What Are Important Features of Windows Defender?
Windows Defender offers a range of important features aimed at providing comprehensive security for Windows-based devices. Some of the key features are as follows:
Windows Defender constantly monitors your system in real-time, scanning files, programs, and downloads as they are accessed.
It offers browser extensions and features that help protect you from phishing websites and malicious downloads while browsing the internet.
Windows Defender integrates with the Windows Firewall to provide network protection. It monitors incoming and outgoing network traffic to identify and block potentially malicious connections
It detects and removes various types of malware, such as viruses, worms, trojans, spyware, adware, and potentially unwanted programs.
Windows Defender integrates with the Windows Security Center, providing a centralized location to manage various security settings and features on your device.
Windows Defender operates with minimal impact on system performance. It uses resource-efficient scanning techniques to avoid slowing down your computer.
Windows Defender includes parental control features. These features allow you to manage and monitor your children’s online activities, ensuring they are safe while using the computer.
Windows Defender SmartScreen helps protect you from phishing attacks and malicious websites by analyzing the URLs you visit and warning you about potential risks.
Windows Defender includes features to safeguard against ransomware attacks, which encrypt your files and demand a ransom for their release.
Windows Defender is regularly updated to stay up-to-date with the latest threats and security measures
How Can We Activate Windows Defender Security?
To activate Windows Defender security on your Microsoft systems like Windows VPS, you should follow the instructions below:
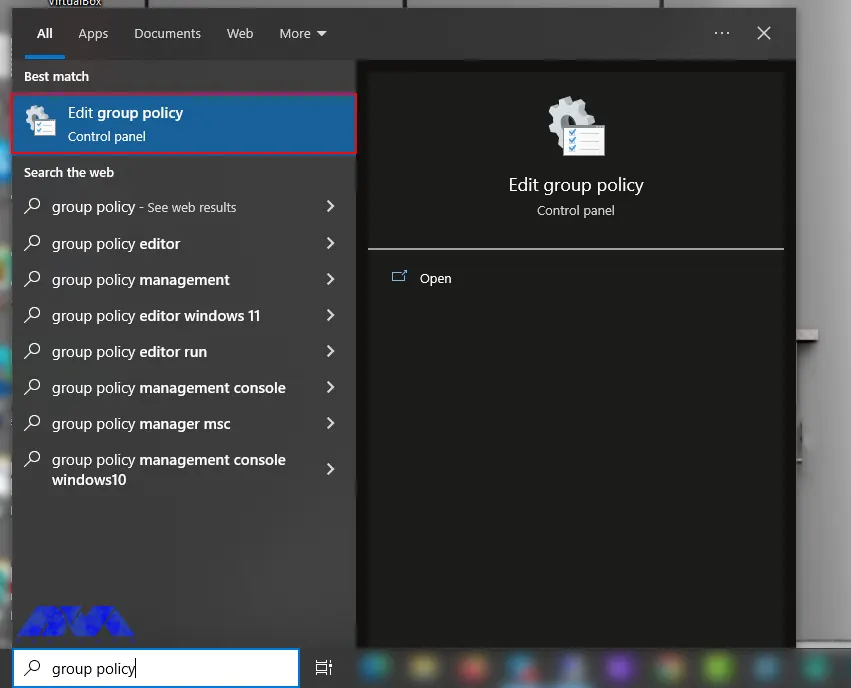
– Go to the Start menu.
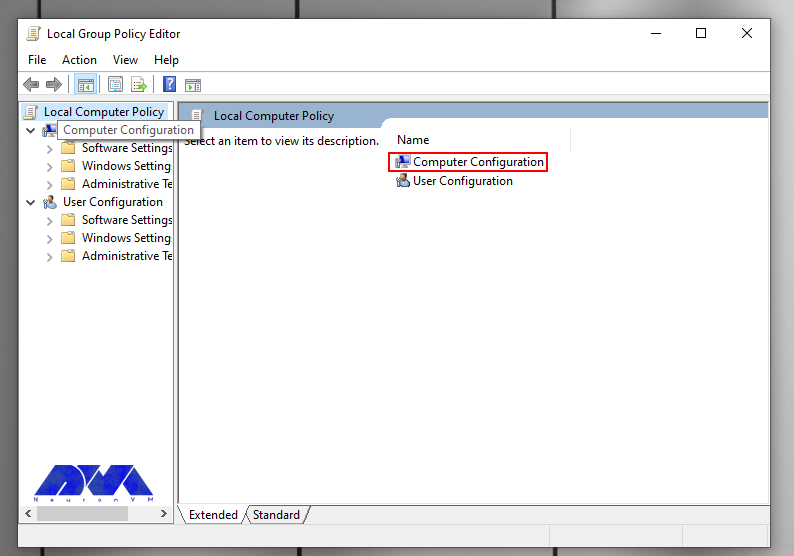
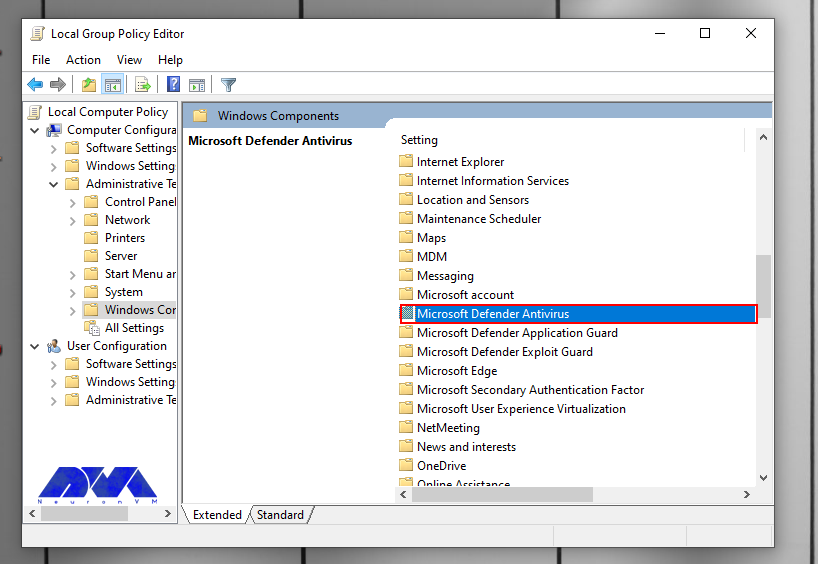
– Type Group Policy on your Search bar and Select Edit Group Policy from the list. Now you will see Local Group Policy Editor opens:
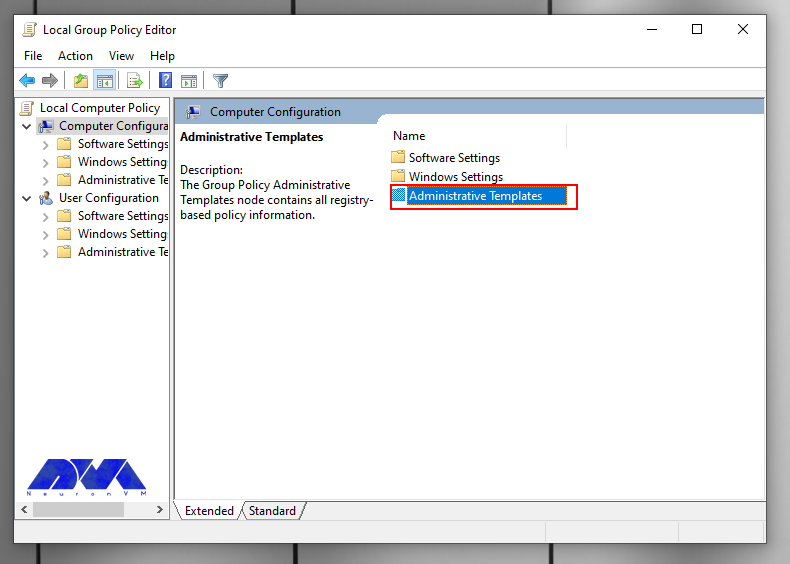
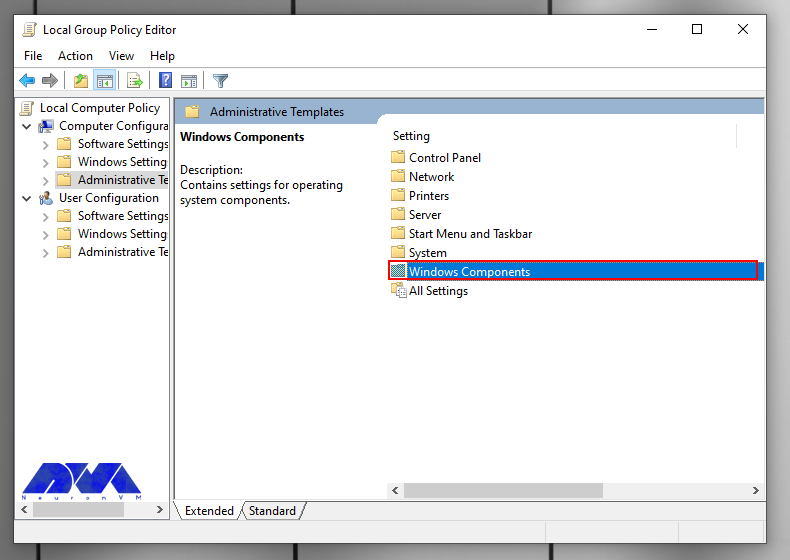
– Then you should go through this path: Computer Configuration => Administrative Templates => Windows Components => Microsoft Defender Antivirus.
—
—
—
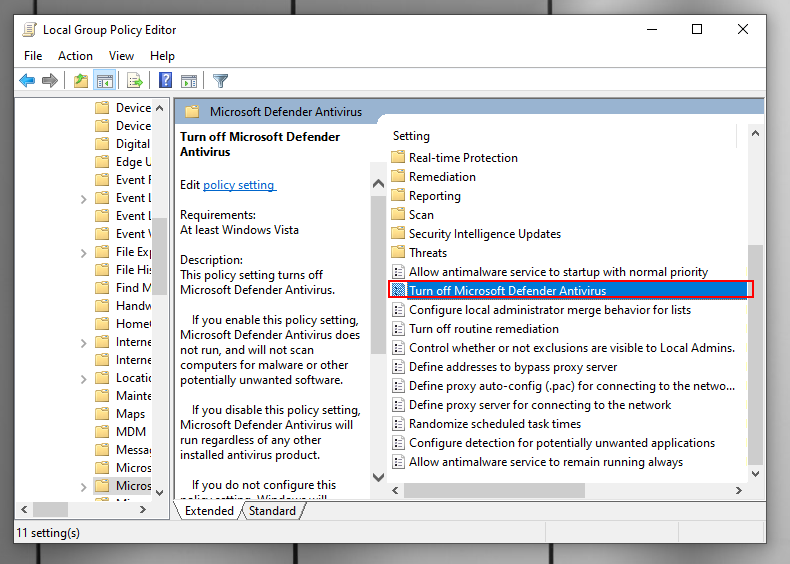
– In the list that appears, scroll down and select the option Turn off Microsoft Defender Antivirus:
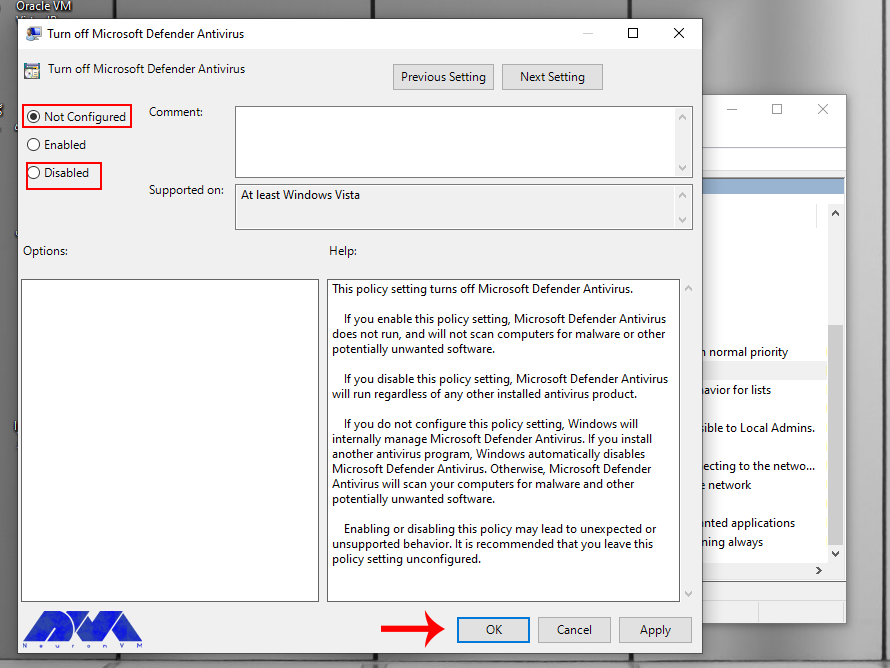
– In this part, you have to do an unusual thing, and that is to click the Disable option or not configured because the names indicate disabling Windows Defender. Don’t worry because these options indicate that it is turn on:
As the last step, click on Apply and then OK.
Tip: Windows Defender offers real-time protection that monitors your computer for threats as they occur. This feature is typically enabling by default, but you can verify its status in the Windows Security Center.
Conclusion
Notice that Windows Defender is a basic level of security and while it provides a good baseline protection. It’s also recommending to practice safe browsing habits, regularly update your software, and consider additional security measures if you’re looking for more advanced protection. So we concentrated on this security action and gave simple guidance about activating Windows Defender Security to ease your mind about your Windows system. We hope this content was helpful to you.
Remote Desktop Protocol is a technology developed by Microsoft that allows users to remotely connect to and control a computer or server over a network connection. Windows Server 2016 is a server operating system released by Microsoft. Admin RDP refers to the use of RDP by administrators to manage and control servers. Here we are going to present a comprehensive overview of Admin RDP 2016 and its features.
An Introduction to Admin RDP 2016
Admin RDP, also known as Administrative Remote Desktop Protocol, refers to the practice of using the Remote Desktop Protocol (RDP) technology for administrative purposes. RDP is a dedicated protocol developed by Microsoft that allows users to connect to and control another computer or server over a network connection.
Admin RDP involves using RDP to remotely manage and administer servers, systems, or computers. It’s a common practice in IT and system administration, where administrators need to maintain and troubleshoot remote machines without physically being present at the location of the servers. With Admin RDP, administrators can access the graphical user interface (GUI) of the remote system, just as if they were sitting in front of it. We recommend using the Cheap Admin RDP plans prepared on our website.
Features of Admin RDP 2016
Windows Server 2016, introduced several new features and improvements in the realm of remote desktop administration (RDP). Here are some key features of Admin RDP in Windows Server 2016:
– Improved computing: With higher security, better resource use, fewer updates, and faster reboots servers like Nano can manage remotely. Also, containers in this server allow users to isolate apps, and make it easy to administer and provide better virtualization. capabilities.
– Administration (Powershell feature): This way with improved usability and security, users can have more control over the management of a Windows-based environment. You can run Powershell on a nano server.
– User Profile Disks: This feature simplifies the management of user profiles in remote desktop environments. User Profile Disks allow user profiles to be stored as virtual hard disks, making them easier to manage and back up.
– Credential Security Support Provider (CredSSP): CredSSP is a security support provider that enhances security for RDP connections by providing an additional layer of protection during the authentication process. It helps prevent man-in-the-middle attacks and provides more secure authentication.
– Remote Desktop Web Access: This feature enables users to access remote desktops and applications using a web browser. It provides a web-based interface for launching remote sessions without requiring the installation of a dedicated client.
– Security: Windows Server 2016 introduced improved security measures for RDP, including support for Remote Credential Guard. These measures help protect user credentials by preventing the storage of sensitive information in the remote session.
– Remote Desktop Gateway: The Remote Desktop Gateway role allows authorized users to connect to remote desktops and resources over the internet using the Remote Desktop Protocol (RDP) while maintaining security through SSL encryption.
What are the Use Cases of Admin RDP?
In this section, we will introduce you to the main use cases for admin rdp:
1- Remote troubleshooting: This can be done by the company’s help desk or by a person trying to help someone else.
2- The possibility of remote system management: In this way, remote configuration changes can be made in network servers.
What are the Best Practices for Admin RDP 2016
Here, are the best practices for Admin RDP 2016:
– Use Strong Passwords: Ensure that strong, unique passwords are used for accounts with remote access privileges.
– Network Security: Implement firewalls, network segmentation, and VPNs to enhance the security of remote connections.
– Two-Factor Authentication: Consider implementing two-factor authentication for an added layer of security.
– Regular Auditing: Monitor and log remote access activities for security and compliance purposes.
– Regular Updates: Keep the server’s operating system, RDP software, and security tools up to date to address potential vulnerabilities.
Troubleshooting Issues to Admin RDP 2016
Now let’s analyze some common problems of RDP on Windows Server 2016 and their solutions;
1: Unable to Connect to RDP Server
Solution: Verify that the Remote Desktop service is running on the server. Try to reboot it by following these steps:
– Open the “Services” management console (run services.msc).
– Find “Remote Desktop Services” or “TermService,” right-click, and select Restart.
2: RDP Port Blocked
Solution: Check if the default RDP port (3389) is blocking by a firewall. If so, you can change the RDP listening port: Open the Registry Editor (run regedit).
Navigate to HKEY_LOCAL_MACHINE\SYSTEM\CurrentControlSet\Control\Terminal Server\WinStations\RDP-Tcp. Then, Find the PortNumber DWORD and change its value to the desired port. Restart the Remote Desktop Services.
3: Network Connectivity Problems
Solution: Verify network connectivity using ping and tracert commands to ensure the server is reachable from the client. Examine if there is high latency or packet loss.
4: Licensing Problems
Solution: Ensure Remote Desktop Licensing is configuring correctly:
– Set up a Remote Desktop Licensing server.
– Install and activate the required Client Access Licenses (CALs).
Conclusion and End Point
Admin RDP is a good way for someone who needs to check and have control of systems remotely. Using this server makes it easy and enjoyable to control, manage, or configure other systems so it is going to be a well-known and useful assistant for you. As a result, we gave you a comprehensive and helpful guide to make you more familiar with Admin RDP and its features. We hope this guide was helpful for you.
In the fast-paced world of online business, ensuring the security and reliability of websites and services is paramount. Enter load balancing, a game-changing solution that not only enhances performance but also safeguards against potential threats. In this article, we delve into the powerful world of load balancing, exploring how it revolutionizes the way we secure and protect our digital assets. Get ready to discover the best way to fortify your websites and services for a seamless and secure online experience.
What is Load Balancing?
In an Orchestra the conductor ensures that every instrument is perfectly synchronized to create a harmonious melody. In the IT world, Load Balancing plays a similar role. It distributes incoming traffic across multiple servers to optimize performance and prevent any single server from becoming overwhelmed. Like a highway with multiple lanes, each lane dynamically adjusts its speed to accommodate the flow of vehicles, ensuring a smooth and efficient journey for all. This method not only enhances the speed and reliability of websites and applications but also acts as a guardian against downtime, unleashing a symphony of seamless user experiences. Let us advise you to use the cheap dedicated server plans prepared on our website to enjoy their optimality and excellent performance.
What are the benefits of Load Balancing?
Load balancing swoops in to save the day by distributing the workload efficiently among multiple servers, ensuring optimal performance and preventing any single server from feeling overwhelmed. With load balancing, you can kiss those dreaded downtime moments goodbye and say hello to lightning-fast response times. It’s like having a secret weapon against crashes and bottlenecks, ensuring your users always have a smooth and seamless experience. Plus, it’s not just about speed and reliability; load balancing also enhances scalability. This allows your website or application to handle increasing traffic with ease.
Different ways of securing the website
Securing a website and its services is of utmost importance in today’s digital landscape. There are several ways to fortify your online presence, and one effective method is through load balancing. This method involves distributing incoming network traffic across multiple servers, ensuring that no single server becomes overwhelmed and susceptible to attacks. This not only enhances the website’s performance and availability but also adds an extra layer of security.
Another way to secure your website and services is through the use of SSL/TLS certificates. These certificates encrypt the communication between the user’s browser and the website, safeguarding sensitive information from potential eavesdroppers. SSL/TLS certificates establish a secure connection by verifying the website’s identity and ensuring the integrity of the transmitted data. By implementing SSL/TLS certificates, you not only protect your users’ privacy but also gain their trust, as they can easily identify your website as a safe and secure platform.
Combining load balancing with SSL/TLS certificates provides a comprehensive security solution for your website and services. Load balancing ensures that your servers can handle high volumes of traffic. It prevents any single server from becoming overwhelmed and vulnerable to cyber threats. Additionally, SSL/TLS certificates encrypt the data transmitted between the user and the website, providing an extra layer of protection against potential attacks. This powerful combination enhances the performance and availability of your website and instills confidence in your users, knowing that their information is secure. With load balancing and SSL/TLS certificates in place, you can rest assured that your website and services are fortified against potential security breaches.
Securing Website and Services using Load Balancing
Securing a website and its services is crucial in today’s digital landscape. Cyber threats are becoming increasingly sophisticated. One effective strategy is implementing load balancing. This method, distributes traffic across multiple servers, preventing overload and vulnerability. It improves performance, and availability, and adds an extra layer of security. It also ensures that even if one server is compromised, others remain intact, preventing breaches or disruptions.
Moreover, load balancing plays a significant role in safeguarding against Distributed Denial of Service (DDoS) attacks. These malicious attacks aim to overload your website with an overwhelming amount of traffic, rendering it inaccessible to legitimate users. By distributing the traffic across multiple servers, this method can effectively mitigate the impact of such attacks. It acts as a shield, absorbing and filtering out malicious traffic, preventing it from overwhelming any single server. This ensures that your website remains up and running, providing uninterrupted service to your users. In summary, the method we talked about, not only improves the performance and availability of your website but also defends it against cyber threats and ensures a secure online experience for your users.
Conclusion
In conclusion, load balancing is an essential strategy for securing websites and services. Distributing the workload across multiple servers enhances performance and scalability and also improves the overall security posture. By implementing a robust load-balancing solution, organizations can achieve better performance, increased availability, and ultimately, a more secure online presence.
Have you ever heard about Android emulators? This emulator is a software program that simulates an Android device on your computer. It enables you to run and test Android applications (apps) and games on your PC or Mac without needing an actual physical Android device. When using Android emulators on remote desktop environments like Admin RDP, it’s essential to consider the specifications of the remote machine and ensure that it meets the emulator’s system requirements for optimal performance. Here, you will find the top 5 Android emulators with excellent performance on Admin RDP.
What Is the Role of Android Emulator?
The role of an Android emulator is to simulate the behavior of an Android device on a different platform, typically a computer. Emulators play a crucial role in various scenarios, catering to both developers and regular users. Here are some of the key roles of Android emulators:
1) You can use this emulator by app developers to create, test, and debug Android applications.
2) Emulators help developers by allowing them to quickly test their Android apps on a non-Android environment, such as a Windows or macOS computer.
3) Emulators enable developers to rapidly prototype and iterate on their app ideas without the need for physical Android devices.
4) Many users use Android emulators to play mobile games on their computers.
5) Emulators offer a way for users to run Android apps on their computers, bringing mobile apps to a larger screen.
6) Android emulators are used in educational settings to teach Android app development and mobile computing concepts.
7) Users can explore and review Android apps without needing a physical Android device.
8) Emulators can provide a way to run older Android apps that might not be compatible with the latest Android versions or devices.
What Are the Advantages of Android Emulator on Admin RDP?
In the beginning, we recommend you use the cheap Admin RDP services that are prepared in various plans on our site. Here are some advantages of Android Emulator on Admin RDP:
– Transferring files in virtual machines is faster because here you can transfer the file by drag and drop.
– This simulator enables the programmer to work with physical sensors such as accelerometer, gyroscope, etc.
– You can play games, search the internet, or change settings with the help of these emulators.
– An Android emulator helps you to choose any desired version so that a developer can build an app.
– If you need a case test, the developer can do it through the Android simulator.
What Are the Best Android Emulators for Admin RDP?
According to the report of a number of users, Android virtualizations may not work on VPS due to their nature. Therefore, it is difficult to find powerful and efficient simulations. In this section, we tried to collect the top 5 Android virtualizations for you, which are used in Admin RDP:
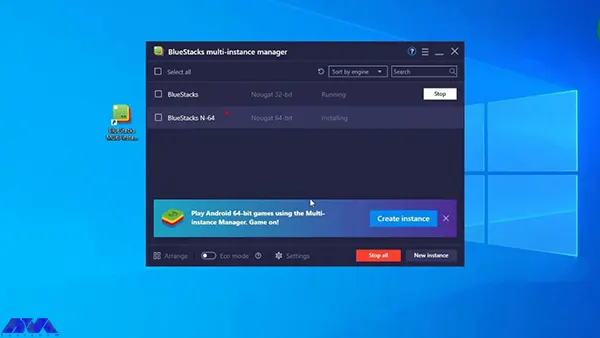
1) Bluestacks
Bluestacks is a popular Android emulator that allows users to run Android applications and games on their Windows PC or Mac. As an important action, it creates a virtualized environment in which Android apps can be installed and used. Also, it offers a way to enjoy mobile experiences on a larger screen with the convenience of keyboard and mouse controls.
2) Android Studio
The Android Studio emulator is a software tool that was developed by Google as part of the Android Studio IDE (Integrated Development Environment). This emulator is used by developers to simulate and test Android applications on their computers before deploying them to actual Android devices. The emulator helps developers ensure that their apps work correctly on various device configurations, screen sizes, and Android versions.
3) LDplayer
LDplayer emulator is an Android emulator designed for playing mobile games and running Android applications on a Windows PC. Emulators like LDPlayer allow users to experience Android apps and games on a larger screen and with the potential for better performance, making it especially useful for gaming enthusiasts.
4) Memu
MEmu is another popular Android emulator. It allows users to run Android applications and games on a Windows PC. Like LDPlayer and other similar emulators, MEmu provides an environment for users to experience Android apps and games on a larger screen and with potential performance enhancements.
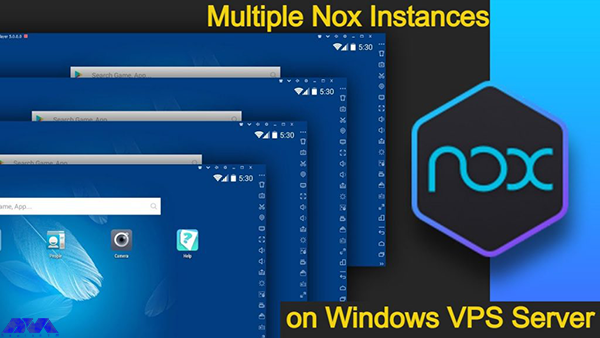
5) Noxplayer
NoxPlayer is another popular Android emulator designed to run Android applications and games on a Windows PC or Mac. It provides users with the ability to experience mobile apps and games on a larger screen and with potential performance improvements.
Common Issues of Using Android Emulator on Admin RDP
You can use Android emulators and top emulators easily to utilize different apps on RDP systems. Now let’s analyze some troubles that you may encounter during the usage of these emulators:
Low Volumeas an audio problem:
Solution: Check both software and hardware volume controls. Adjust the volume in your media player, operating system settings, and on your external speakers or headphones.
No Sound or Audio Playback:
Solution: Check if your speakers or headphones are properly connected. Ensure the volume is turned up and not muted. Also, make sure the correct audio output device is selected in your computer’s settings.
Emulator Performance is Poor Due to Inadequate Resources
Solution: Allocate Adequate Resources. It requires a significant amount of resources, including CPU, RAM, and GPU power. Make sure your computer meets the emulator’s system requirements and allocates enough resources to the emulator in its settings.
Emulator Can’t Connect to the Internet
Solution: Troubleshoot Network Connectivity. You can check the emulator network setting, check the host’s system internet connection, you can disable VPN or Proxy, also you can try disabling the firewall and antivirus software.
Conclusion and Final Thoughts
If you are looking for good resources to find out a list of applicable Android emulators to use in Admin RDP and use various applications or test different platforms on your RDP server. Note that some of the emulators are useless as we mentioned above, so we tried to represent useful ones. Also, here we mentioned some problems and their solution that you may encounter while working with these emulators. we will be pleased if you share your comments with us.
FAQ
What are the prerequisites before using an Android emulator?
For the best performance, use 16 GB RAM, 64-bit Windows, and also, 16 GB disk space.
With the increase in users’ embrace of the digital world and its developments, the use of advanced technologies has become a critical factor in the success of their business. Among these technologies, dedicated servers are the most essential tools. These servers are robust, separate platforms organizations use to host applications, websites, and databases with high security and performance. The point that should be paid attention to is choosing the right dedicated server provider. This tutorial is aimed at analyzing how to choose a perfect dedicated server for business success.
Advantages of using Dedicated Servers
A dedicated server is a perfect platform to manage your website and business especially when you have higher traffic and high profile clients. Here we recommend you to buy and use the Cheap Dedicated Server plans provided on our website. Let’s analyze some of the advantages of this platform:
Perfect Dedicated Server
Dedicated Hardware
The most significant advantage of this server is that it offers dedicated hardware, and you don’t have to share it with anyone. Also, all of the resources belong to you.
Higher Level of Security
As your server is completely private and dedicated, there is no risk of penetration risk from other sites. Also, you are able to install various security software that is proper for your needs and modify them to the website.
No Purchase or maintenance cost
Another advantage that you will have with a dedicated server is that there is no cost to buy or maintain hardware equipment.
Dedicated IP Address
Each dedicated server comes with its own unique IP address, which is important for certain applications and SSL certificate implementations.
Full Administrative Control
With a dedicated server, you have root access or full administrative control. This level of control allows you to install and configure software and applications according to your preferences.
Performance and Reliability
Dedicated servers provide exclusive access to all server resources, like CPU, RAM, and storage. This translates to better performance and reliability, as there are no competing users or applications that can impact server performance.
Quick Customization
You have complete control over the server’s configuration using a dedicated server. You can choose the hardware specifications, operating system, software, and security settings to meet your specific needs.
Factors to consider when choosing a dedicated server
There are factors to consider when you want to choose a dedicated server:
– You have to consider the performance requirements of your website. For example, the number of users expected for the website or the type of service you want to provide with your server are some of these factors.
– Potential downtime is another factor to consider. You should keep in mind that most visitors do not stay on your site for more than 3 seconds. So, be careful in choosing your dedicated server because your server must have excellent uptime and stability.
– When choosing a dedicated server, you should consider scalability, as your website traffic may increase steadily over the next few years. That is, you should choose a host that does not have to change its provider with increasing activities. So scalability of your server is important.
– Try to consider the final monthly prices for the dedicated server over the anticipated time of use. When choosing a hosting provider your budget should include the setup fees.
– Make sure your dedicated server is capable of providing 24/7 support.
– Server backup is among the most critical points to consider when you want to choose a dedicated server. Be careful about available options for backing up your data.
Types of Dedicated Servers
You can choose your server from different types of dedicated servers. the following are 7 main types of them:
– Standard dedicated server
– Cheap dedicated server
– Enterprise dedicated server
– High-performance dedicated server
– Unmetered dedicated server
– Managed dedicated server
– High bandwidth dedicated server
Server specifications and performance
According to your needs, the specific requirements of your dedicated server vary. The most important requirements are as follows:
Storage: The choice of storage depends on your performance and capacity needs. For optimal performance, consider using Solid State Drives (SSDs) as they offer much faster read/write speeds compared to traditional Hard Disk Drives (HDDs).
RAM: The amount of RAM you need will depend on the applications and services you plan to run. For most general-purpose servers, a minimum of 8GB RAM is recommended. However, for more resource-intensive tasks like virtualization or large databases, you may need 16GB or more.
Processor or CPU: Choose a server with a modern and powerful CPU. Multi-core processors like Intel Xeon or AMD EPYC are commonly used for dedicated servers. The number of cores and clock speed will determine the server’s processing capabilities.
Operating System: Choose an operating system that suits your applications and expertise. Popular choices for dedicated servers include various Linux distributions (e.g., CentOS, Ubuntu Server) and Windows Server.
Data Center Location: Select a data center location that is geographically close to your target audience to reduce latency and improve the overall user experience.
Scalability and future growth
Scalability and future growth are essential considerations when choosing a dedicated server for your business or project. A dedicated server is a powerful hosting solution that provides exclusive resources and full control over the server’s configuration, making it an ideal option for high-traffic websites, resource-intensive applications, and large-scale projects.
Security features and protocols
Dedicated servers are equipped with robust security features and protocols to protect both the server and data. Here, we will introduce some of the security features:
– Firewalls
– Encryption
– Access Control
– Two-factor Autentication
– Regular updates and Patching
– Monitoring and Logging
– Backups and Disaster Recovery
– Denial-of-service Protection
– Antivirus Softwares
Managed vs. Unmanaged Dedicated Servers
Managed and unmanaged dedicated servers refer to two different types of hosting services for websites or applications. Here we will analyze the differences between these two:
Managed Dedicated Server: A type of hosting service is managed dedicated server where the hosting provider considers all the technical aspects and maintenance of the server on behalf of the client. That is, the hosting company manages server setup, security updates, configuration, troubleshooting, monitoring, and regular maintenance tasks.
Unmanaged Dedicated Server: An unmanaged dedicated server, on the other hand, is a hosting service where the client is responsible for all server-related tasks, including server setup, software installation, security, monitoring, and maintenance. The hosting provider only ensures that the server is connected to the network and functional.
Choosing the right Hosting Provider
There are some factors to consider if you are going to choose a dedicated server hosting provider. These factors can be hardware specifications, security features, network performance, customer support, or price. So check and evaluate these factors to choose a provider that meets your needs and can effectively support your website needs.
Perfect Dedicated Server
Budgeting and pricing considerations
In this section, we will discuss the things that should be considered when considering the budget and prices of a dedicated server for businesses:
– Server specifications: The hardware configuration of a dedicated server will have a significant impact on its price. Key components to consider include a processor (CPU), RAM, storage type (HDD or SSD), storage capacity, and network bandwidth.
– Server Location: The physical location of the server can affect pricing due to differences in data center costs and regional demand. Servers located in popular data center locations or high-demand areas may be more expensive.
– Billing cycle: The frequency of billing can affect the total cost. Most providers offer options such as monthly, quarterly, or annual billing. Choosing longer billing cycles often comes with a discount.
– Bandwidth and data transfer: Some providers may have data transfer limits or charge additional fees for exceeding bandwidth limits. Make sure you understand the data transfer terms to avoid unexpected charges.
– Server Scalability: If your resource needs increase in the future, look for providers that offer scalable solutions. In this way, you can upgrade your server without having to migrate.
– Credibility and Support: Evaluate the credibility and customer support of the dedicated server provider. Look for reviews and testimonials to ensure you choose a reliable company that offers excellent customer service.
– Long-term planning: Consider your long-term hosting needs when setting your budget. A server that meets your current needs may not be sufficient for future growth.
– Special Offers and Discounts: Be on the lookout for promotions, discounts, and special offers from dedicated server providers. These can save money, especially if you commit to long-term contracts.
Case studies and success stories
Some general success stories and benefits of using a perfect dedicated server are mentioned here. So you can take a look and get more information about them:
– Resource-Intensive Applications: Certain applications, such as machine learning algorithms, simulations, and rendering tasks, require significant computational power and memory. Dedicated servers with powerful CPUs and ample RAM can efficiently handle these resource-intensive workloads.
– Gaming Servers: Online gaming companies often utilize dedicated servers to host multiplayer games. Dedicated servers offer low latency and high performance, providing a seamless gaming experience for players around the world.
– Large-scale Web Applications: High-traffic web applications and websites, like social media platforms and content-sharing sites, benefit from dedicated servers to manage vast user databases and deliver real-time content updates to a global audience.
– Big Data and Analytics: Organizations dealing with big data and complex analytics tasks often employ dedicated servers to handle data processing and storage requirements efficiently. Dedicated servers can be optimized for specific data-intensive tasks, providing faster data analysis.
– High-Performance Databases: Large-scale databases that require fast read and write operations, like in banking or logistics, benefit from dedicated servers with high-speed storage solutions, such as NVMe SSDs.
– Software Development and Testing: Software development companies often use dedicated servers to host development environments and testing platforms. This approach allows them to create isolated and stable environments for testing without impacting production systems.
– E-commerce Websites: Many successful e-commerce websites have relied on dedicated servers to handle their growing traffic and ensure fast loading times. These websites often experience spikes in traffic during sales events, and dedicated servers offer the necessary resources and reliability to handle such surges without compromising performance.
Conclusion and final thoughts
This tutorial was presented to give you a clear understanding of choosing a perfect dedicated server for business success. Here, you figured out the advantages of a dedicated server, factors you should consider when choosing a server, and different types of dedicated servers. Also, we tried to compare managed and unmanaged servers, some points about budgeting, and other noticeable factors you need to know before choosing the proper server. we hope you enjoyed this article.
FAQ
Is it possible to use a dedicated server for small businesses?
If you are a small business owner with needs such as high resources, sensitive security requirements, or features such as customization and server control, you can use dedicated servers. But if your budget is limited, a dedicated server will not be affordable.
Is it possible to upgrade or downgrade the dedicated server?
You have the possibility to upgrade or downgrade server resources such as CPU or RAM and memory according to your needs. Of course, the related costs may change according to the providers.
What is your suggestion to boost the performance of your server? This article has been prepared to examine how to optimize MongoDB on your Debian server and boost your performance. This database’s work depends on how it uses the underlying resources, and its task is to store data on disk and memory. MongoDB uses a CPU for its performance and a network for communication with users or clients. So, let’s go deeper and examine this issue from different aspects.
Understanding the performance bottlenecks in MongoDB
When performance issues appear, it indicates that the database is running at full capacity, so it’s time to add extra capacity to the system database. Especially, since the working program of the system must be located in the physical memory. Of course, performance problems may be temporary and related to high traffic load. Here, are some common issues with the performance of MongoDB:
– It is possible that the high network delay between applications and MongoDB servers will cause a delay in data recovery and updating.
– If the profiles are misused, it can severely affect the performance of the query, so you need to create the appropriate profiles for administrators.
– As mentioned before, the performance of MongoDB completely depends on the underlying hardware. So if the RAM is insufficient or the disks are slow or the processor is weak, they will cause problems.
– Poorly designed queries that do not use indexes effectively can cause significant performance degradation.
– If the replication is done slowly, it may affect the data access among the members of the replica set and lead to an increase in the read latency.
– The mechanism that MongoDB uses to maintain data integrity is the locking mechanism. Excessive lock contention may reduce concurrency and cause performance problems.
– In sharding, the wrong choice of shard key or unbalanced distribution of data among shards may cause uneven distribution of queries and performance loss.
Analyzing Server Hardware Requirements for MongoDB
Note that the following requirements are crucial before you start to use MongoDB on your server:
– A minimum of 10 GB of free disk space and also extra necessary space to hold MongoDB data.
– A minimum of 4 GB RAM
– A proper network connection
– 64-bit architecture
Optimizing MongoDB configuration parameters
If you need to optimize MongoDB configuration parameters, you can follow the following settings:
Optimize MongoDB on Your Debian Server
Locking Performance
Databases receive different data from users and these operations are not sequentially. In a way, one user may access data while the other is in the middle of updating. these may cause conflict. To solve this problem, the concept of locks for locking documents and collections was introduced by databases. By initiation of the lock, no other user can read or modify your data until the lock is released.
MongoDB provides valuable metrics to help you check whether the lock is degrading your database performance. the related commands are:
db.serverStatus().globalLock
db.serverStatus().locks
Using these parameters, you can examine the request that created the lock and take the necessary action to improve MongoDB performance.
MongoDB Logging
Mongodb entry is in the log path settings and is located in the /var/log/mongodb/mongod.log directory. You can also find the MongoDB configuration file in /etc/mongod.conf.
In order to change the verbosity of a component, the following query is helpful:
db.setLogLevel(2, "query")
Run the following command to clear the log file before doing profiling:
db.runCommand({ logRotate : 1 });
WieredTiger Cache
Wieredtiger is the storage engine that was created after mmapv1 and you need to replace this storage engine with mmapv1 which is deprecated. Also, when it comes to concurrent management and performance, the second option is a better choice.
Note that the cache size is important to ensure the correct performance of Wiredtiger. So you should check if you need to change its default size or not. In order to store the entire working set of the application in the cache, it must be large enough.
Now, to check the cache usage status, apply the following command:
db.serverStatus().wiredTiger.cache
You will encounter a large amount of data but you should consider three of them:
– For the maximum size of the cache => wiredTiger.cache.maximum bytes configured
– For the size of the data currently stored in the cache => wiredTiger.cache.bytes currently in the cache
– And for the size of the dirty data => wiredTiger.cache.tracked dirty bytes in the cache
By finding out the size of the parameters used, you will know whether you should increase the size of the cache or not. If the applications are read-heavy, you can use wiredTiger.cache.bytes read into cache parameter.
Free Performance Monitoring
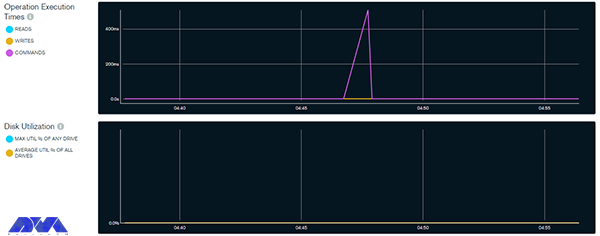
MongoDB has a free performance monitoring feature for parallel collections and standalone instances in the cloud. When you enable this feature by configuration, the data that has been checked will be sent to the cloud service. There is only one command for this configuration and then you are provided with a web address so that you can access the performance statistics. To enable free monitoring, run the following command:
db.enableFreeMonitoring()
As you get the URL in your output, paste it on the web browser and monitor performance statistics after a single MongoDB command. As a result, the dashboard will show the necessary metrics:
Optimize MongoDB on Your Debian Server
Use the command below to disable this feature:
db.disableFreeMonitoring()
Indexing strategies for improved query performance
One of the crucial aspects of database management systems that can significantly impact query performance is indexing. By creating appropriate indexes on the columns frequently used in queries, you can speed up data retrieval and improve overall system efficiency. Here are some indexing strategies for improved query performance:
– Using the ESR rule which means Equility, Sort, and Range
– Creating indexes for supporting queries:
– Sorting query results by using indexes:
– Using component indexing
– Avoiding over-indexing
– Ensuring indexes fit in RAM
– Creating queries to ensure selectivity
– And etc.
Utilizing replica sets and sharding for scalability
If we want to understand the concept of sharding more, it should be said that it is a form of scaling known as horizontal scaling or downscaling. The reason is that additional nodes are introduced for load sharing. Limitless scalability is provided with this horizontal scaling to manage large data volumes and excessive workloads. You can access infinite scalability using sharding, but in practice, you will scale proportionally to the number of servers you add. The possibility of having each additional piece increases storage and operational space, so the server can store more data.
A replica set in a MongoDB database refers to a group of MongoDB instances or servers that store the same data. Here the instance acts as the master node that handles all write operations. This is while other nodes act as secondary nodes and repeat the data from the primary node. In the meantime, if the primary node is unreachable, it will automatically go to one of the secondary nodes.
When you combine replica sets and sharding in MongoDB, you create a highly available and horizontally scalable database architecture.
Monitoring and troubleshooting MongoDB performance issues
Monitoring and troubleshooting MongoDB performance issues are crucial to maintaining a healthy and efficient database. MongoDB is a famous database, but like all platforms, it may contain some problems. Here are troubleshooting and how to do monitoring MongoDB issues:
– You can use monitoring tools to obtain information about the performance of the MongoDB instance. One of these tools is (MMS) or MongoDB cloud manager, which can be used to track and analyze various performance metrics. Also, you can use third-party monitoring solutions.
– Establish baseline performance metrics during normal operations. This will help you identify deviations when problems occur.
– Pay attention to server-level metrics such as CPU usage, memory usage, disk I/O, and network activity. Resource bottlenecks can affect database performance.
– Monitor the lock percentage to identify potential contention issues. Long-running or blocked operations can lead to performance bottlenecks.
– Review your MongoDB configuration settings and adjust them based on your hardware capabilities and workload needs.
– If your database grows and reaches its hardware limits, consider sharding to distribute data across multiple servers.
– Keep your MongoDB version up to date to take advantage of performance improvements and bug fixes.
– Monitor the health of your server’s hardware components (such as disks, and RAID controllers) to identify potential problems.
– Regularly run benchmark tests to measure database performance under simulated real-world conditions.
Note that troubleshooting the performance problems of this database may require a combination of the above steps or some trial and error. So before applying changes to production systems, test the changes in a controlled environment and be sure to make a backup before making changes.
Best practices for backing up and restoring MongoDB databases
Back up and restoring MongoDB databases is important to ensure data integrity and disaster recovery. In this part, we will try to show some best practices to follow:
– Use automation tools or scripts to perform backups automatically. This helps avoid human errors and ensures consistency in the backup process.
– Maintain multiple copies of backups in different locations, such as on different servers or in cloud storage. This ensures that if one backup fails, you have another copy available for restoration.
– Versioning Backups: Consider versioning your backups to track changes over time. This can be helpful if you need to restore a specific point-in-time snapshot.
– MongoDB provides built-in tools like Mongodump and mongorestore for backing up and restoring data. These tools are efficient and straightforward to use.
– Set up monitoring and alerts for backup jobs to ensure they run as expected. Monitoring can also help you identify any anomalies in the backup process.
– Back up the system databases like admin, local, and config. These databases contain essential metadata and configuration information for the MongoDB cluster.
– Keep your backup files secure and restricted to authorized personnel only. Encryption of backup files is recommended, especially if they are stored in external storage or cloud services.
– Schedule regular backups of your MongoDB databases. The frequency of backups may depend on the volume of data and how frequently it changes. Daily backups are generally recommended for most scenarios.
When taking backups, ensure that data is in a consistent state by using the–oplog option with mongodump. This includes the database and any related data.
Performance optimization tools and techniques for MongoDB
You can use different tools and techniques to improve performance in MongoDB we will mention some of them for you:
– Sharding
– Replica set
– Avoiding a huge number of indexes
– Using projections
– Journaling
– Batch operations
-Using appropriate data types
Conclusion and final thoughts
MongoDB is one of the most well-known and practical databases used to gather and store data. It is a flexible and non-relational documentation database. This article was prepared to give a full and comprehensive guide about MongoDB and tried to examine some aspects to boost performance and optimize MongoDB on the Debian operating system. We will be pleased if you share your ideas and questions on this field.
FAQ
Is MongoDB suitable for large data?
Definitely. This database is great for large-data
Which one is slower; MongoDB or SQL?
Regarding storing unstructured data, it should be said that MongoDB works much faster than SQL. So depending on the type of data you collect, you may benefit significantly from this.
When you request a website page in a web browser, it involves some steps. The browser sends the request to the server, the server returns the assets, and the browser finally provides a response. But in reality, the performance is not that simple. Varnish cache is one of the technologies that web servers use to provide content faster. This technology is a reverse proxy. We prepared this article and discussed the benefits of using Varnish Cache on website speed and performance.
What is Varnish Cache?
As mentioned in the introduction, Varnish is a reverse proxy and works by storing a copy of the page in memory and serving it when you want to revisit the page. The basis for choosing this copy is based on request headers such as URL and request method, which is also calling page cache.
With the help of Varnish cache, you no longer need to reload the pages of your online store, and this is very beneficial for you because you will have a lightning-fast online store. We suggest that you use theWindows VPS server plans provided on our website to launch your website and run Varnish Cache on it. When you request a web page, you’ll see the cached version instead of waiting for the original web server to generate it from scratch. This reduces loading and makes websites more responsive, thus improving the user experience. It should also be noted that Varnish helps you control how pages are cached using HTTP cache control headers.
What are the Benefits of Varnish Cache on Website Speed and Performance?
Varnish Cache is used for both static and dynamic content. This applicable solution is an excellent way to increase not only your website speed but also your performance:
Benefits of Varnish Cache on Website Speed
One of the most impressive advantages that varnish provides is a speed boost for your website. The reason for this effect is due to the following:
– When delivering objects, the cache server acts faster than the origin server because the workload is less intensive and varied on the first one.
– The Cache server provides assets that don’t change frequently. These can be files like CSS and Javascript. So, it causes a reduction in the burden on the origin server.
– The processing time for the backend server database is lower and it causes a decrease in the TTFB (Time to First Byte).
– When the server is experiencing downtime, the varnish can act as part of a highly available environment that serves cache content.
– When the original server becomes unavailable, Varnish cache can continue to serve cached content and provide users with some access to the site instead of a complete outage.
– Varnish Cache can accelerate HTTP requests by handling tasks such as compression, SSL termination, and connection pooling. This frees up your web server to focus on generating dynamic content.
– Varnish Cache can reduce network latency by serving content from servers that are physically closer to the user.
– Search engines, like Google, consider website speed as a factor when ranking search results. websites with faster loading shows higher rank in search engine results pages, leading to increased organic traffic.
Benefits of Varnish Cache on Website Performance
The level of performance which is associated with Varnish cache, is one of the prime advantages of using this app. Let’s see what can be the benefits of Varnish for your website performance:
– Varnish Cache can be deployed on multiple servers or instances, distributing the caching load and enhancing the overall scalability of your web infrastructure. This is particularly useful for handling traffic spikes and high loads.
– Varnish allows you to set rules for cache expiration and cache invalidation. This ensures that when content changes on your website, the old cached versions are automatically removed, and users receive the most up-to-date content.
– Varnish can act as an SSL/TLS termination point, offloading the encryption and decryption workload from your web servers. This can improve performance by allowing your web servers to focus on serving content rather than handling encryption.
– Varnish allows you to proactively load certain content into the cache before it’s even requested. This can be especially useful for anticipating traffic spikes or for ensuring that critical content is readily available.
– Varnish Cache offers extensive configuration options that allow you to fine-tune caching behavior to match your specific website’s needs. This includes setting cache lifetimes and defining cache variations based on headers, cookies, and so on.
– Varnish is capable of caching both static and dynamic content. It can intelligently cache dynamic content by respecting certain rules or parameters, enabling you to serve frequently requested dynamic pages faster without constantly hitting your application server.
– By serving cached content directly from memory, Varnish Cache offloads a significant portion of the requests from your web server.
Conclusion
As we mentioned in this article, you can use Varnish Cache to boost your website’s speed and performance. The benefits of Varnish Cache on your website can be more than what we presented here, but these two are significant. Varnish configuration is complicated and needs specialist knowledge but it is worthwhile because, with the right parameters, a great performance boost will be achieved. we hope you enjoyed this content.
FAQ
Is varnish still using on websites?
Yes, many providers use Varnish as part of their technology stack and make it a vital part of the modern web infrastructure.
Is it possible to cache dynamic contents by Varnish?
Varnish caches all the server responses and refreshes every two minutes. So, yes, it helps with caching dynamic content.
Kali Linux is a Debian distribution operating system that comes with many installed tools. This operating system is provided to help with security checks and penetration testing. In this post, we decided to introduce a powerful password-generation tool in Kali Linux (Crunch).
What is Kali Linux?
When we use the word Linux, we mean the entire Linux operating system. All Linux operating systems have different distributions, each of which has its name and is privately distributed and supported by a company. One of the types of Linux distribution is Kali Linux.
Kali Linux is a security version of the Linux operating system that is mostly designed for security penetration testing. With the variety of plugins and security applications that come with it, this operating system makes it a suitable tool for penetration testing, reverse engineering, and security research.
Kali Linux is actually a unique operating system that is using by everyone, both good and bad. It can be used to discover and fix security vulnerabilities. One of the applications of Kali Linux is hacking with Kali Linux and penetration testing with Kali Linux, which both security experts and hackers do. In other words, Kali is like a sharp knife in the toolbox.
What is Crunch and how does it work?
The crunch tool is a tool in the field of creating a password list and is one of the most powerful in this field. In other words, the Crunch tool is a word list generator where you can use a standard or any character set to generate word lists. Word lists are creating by combining and permuting a set of characters. You can select the number of characters and the size of the list.
This program supports numbers and symbols, uppercase and lowercase letters separately, and Unicode. Among the important features of this tool, the following capabilities can be mentioned:
The possibility of generating a password list with 2 different combinations and replacement methods
Support letters, numbers, symbols
Ability to combine letters, numbers, symbols
Ability to be case-sensitive
The ability to stop and resume the password list creation process
How to install Crunch in Kali Linux
Before starting the installation, we recommend that you use the Linux VPS server plans provided on our website and benefit from the high quality and speed of these servers. After getting familiar with Crunch and its capabilities in the previous sections, now it’s time to learn how to install it. Installing Crunch on Kali Linux is very easy, just run the following command:
sudo apt install crunch
This will download and install the crunch package from the official Kali Linux repository. You may need to enter your password and confirm the installation.
To check if Crunch is installed correctly, you can run the following command:
crunch -h
This will display the help page of Crunch, which shows the usage, syntax, and options of the tool. You can also see some examples of how to use Crunch to generate wordlists.
Generating passwords with Crunch
After installing Crunch, at this stage, we want to teach you how to generate passwords with Crunch. To do this, you must follow the steps below.
To create a word list of specific numbers, you can run the following command. Note that this command produces a list of 110 one- and two-digit number words with all combinations of the numbers 0, 1, 2, 3, 4, 5, 6, 7, 8, 9. It is interesting to know that you can use the alphabet.
crunch 1 2 0123456789
Now you can save the created word list in a file by running the following command. The command you see creates a list, and then it copies the same into a text file called wordlist.txt:
crunch 1 2 0123456789 >wordlist.txt
Now you can use the following command to save the list of words in a file with the -o option:
crunch 1 2 0123456789 -o wordlist.txt
Another way to create a password list is to use the rainbow charset file that you can see below:
You can use the pattern to create a list of words. In the following command, you can use 4 characters, @ % and ^:
crunch 10 10 -t manav^%%%%
,: used for all capital letters.
@: Used for all lowercase letters.
%: Used for all numeric characters.
^: Used for all special characters.
Finally, to create a list of words by changing strings or characters, you can use the following command:
crunch 1 10 -p Hello Manav
Tips for creating strong and secure passwords
As you read in this article, Crunch is a password-generation tool in Kali Linux. But it is interesting to know some tips about generating strong passwords. A good and secure password is one that cannot be guessed and is not exposed by the methods used by hackers. Hackers use Kali Linux OS to find your password by combining numbers, letters, and symbols. They can easily find short passwords in seconds.
As such, strong passwords consist of a combination of upper and lower case letters, numbers, and special symbols such as punctuation. A good password should be at least 12 characters long, although we recommend using a longer password. In general, the following are the necessary parameters for a good and secure password:
1) A good password has at least 12 characters; The longer your password is, the better.
2) It has uppercase and lowercase letters, numbers, and symbols; A password that is a combination of these is harder for hackers to find.
3) It’s not made of a memorable keyboard track.
4) It is not made according to your personal information.


