


If you are a fan of online games or care about your internet service’s stability and quality, you have probably heard the term “ping”. You may also know that a lower ping means better quality of your internet service. The ping command is one of the cmd environment commands that you can use for network testing and troubleshooting the server. It is one of the most widely used and important commands in the computer networking world that uses the ICMP protocol alongside IP. This article will teach you How to Disable and Enable Ping on RDP 2012, 2016, 2019, and 2022 step by step.
Ping stands for Packet InterNet Groper. Pinging in a network means sending a signal to the host in order to receive a response. This action serves two main purposes. First, it helps to verify the availability of hosts, determining whether they are connected to the network and visible to other devices. Second, pinging allows for the measurement of response times, providing insight into the speed at which information is transmitted and received. In fact, ping is a measure of the connection time between two devices on a network.
From the ping rate of an Internet service, you can see how long it will take for a packet of data to travel from a smart device, such as a computer, to the server and back. The internet service provider, the internet connection speed, the sufficiency of bandwidth, and geographical location can affect the ping rate. If you need low ping, be sure to pay attention to the dedicated bandwidth of the internet service you’re buying. In the rest of this article, you will learn how to Disable and Enable Ping on RDP.
If you want to buy a Cheap Admin RDP, we recommend you test the various plans with a large variety of locations offered on our website. Here you can read Why NeuronVM is the Best Place to Buy USA Admin RDP?
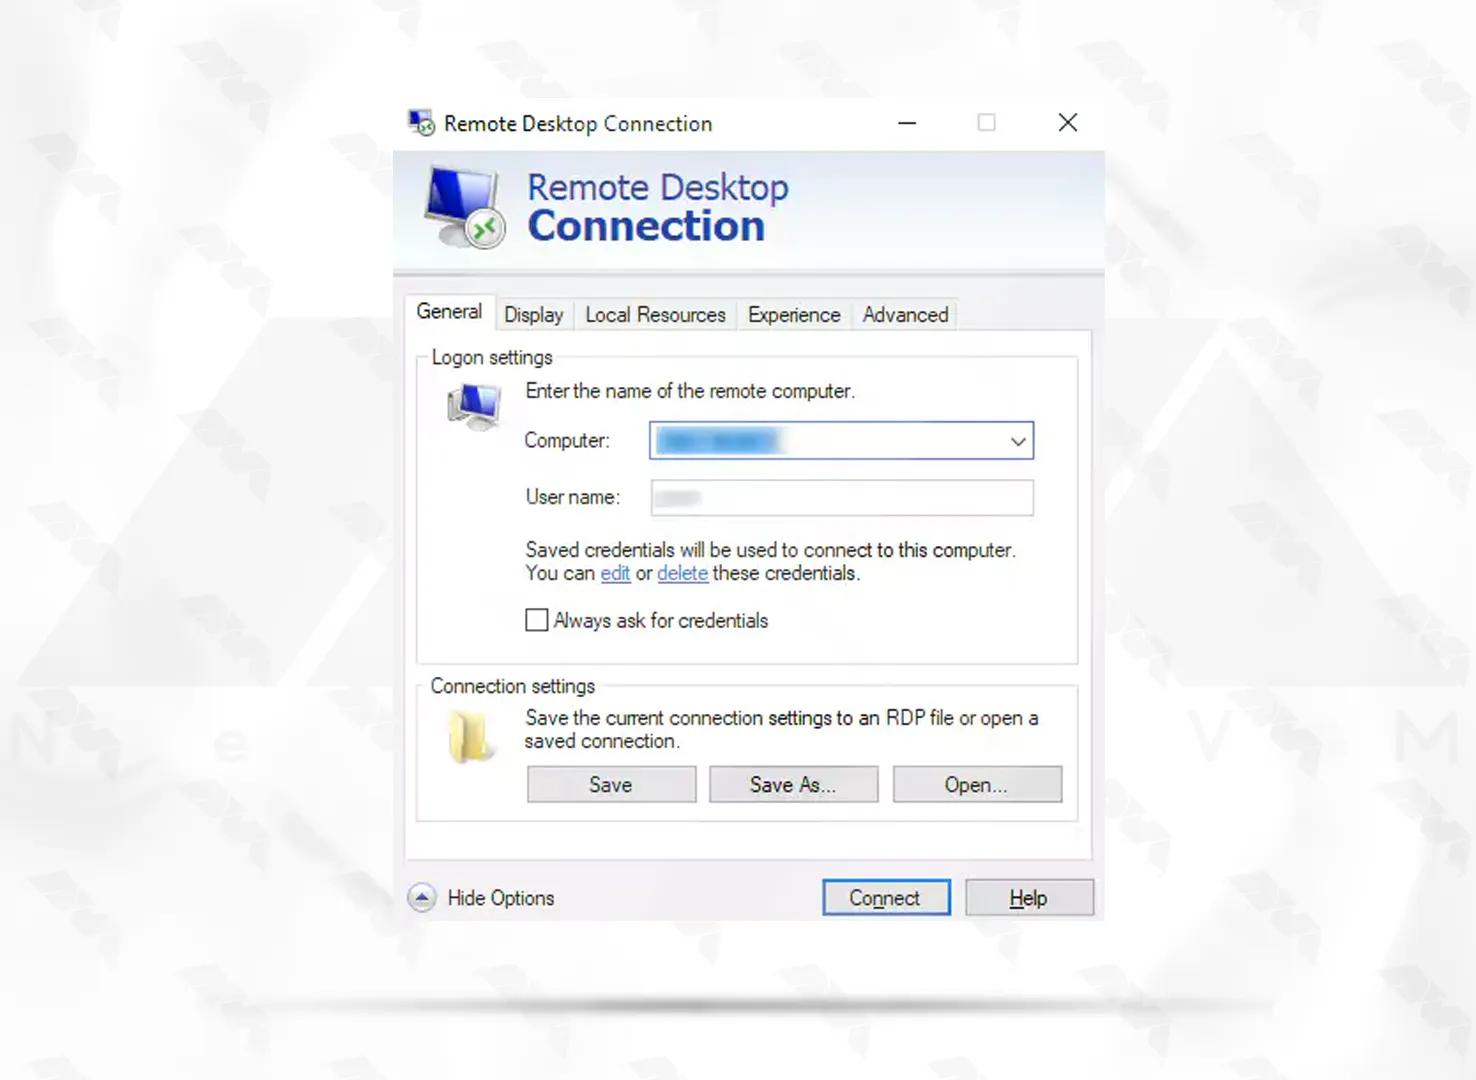
This section will help you understand how to Enable ping via Windows firewall. Now, you need to run Remote Desktop on your Windows. After entering the IP and password you want, you can enter the RDP environment.
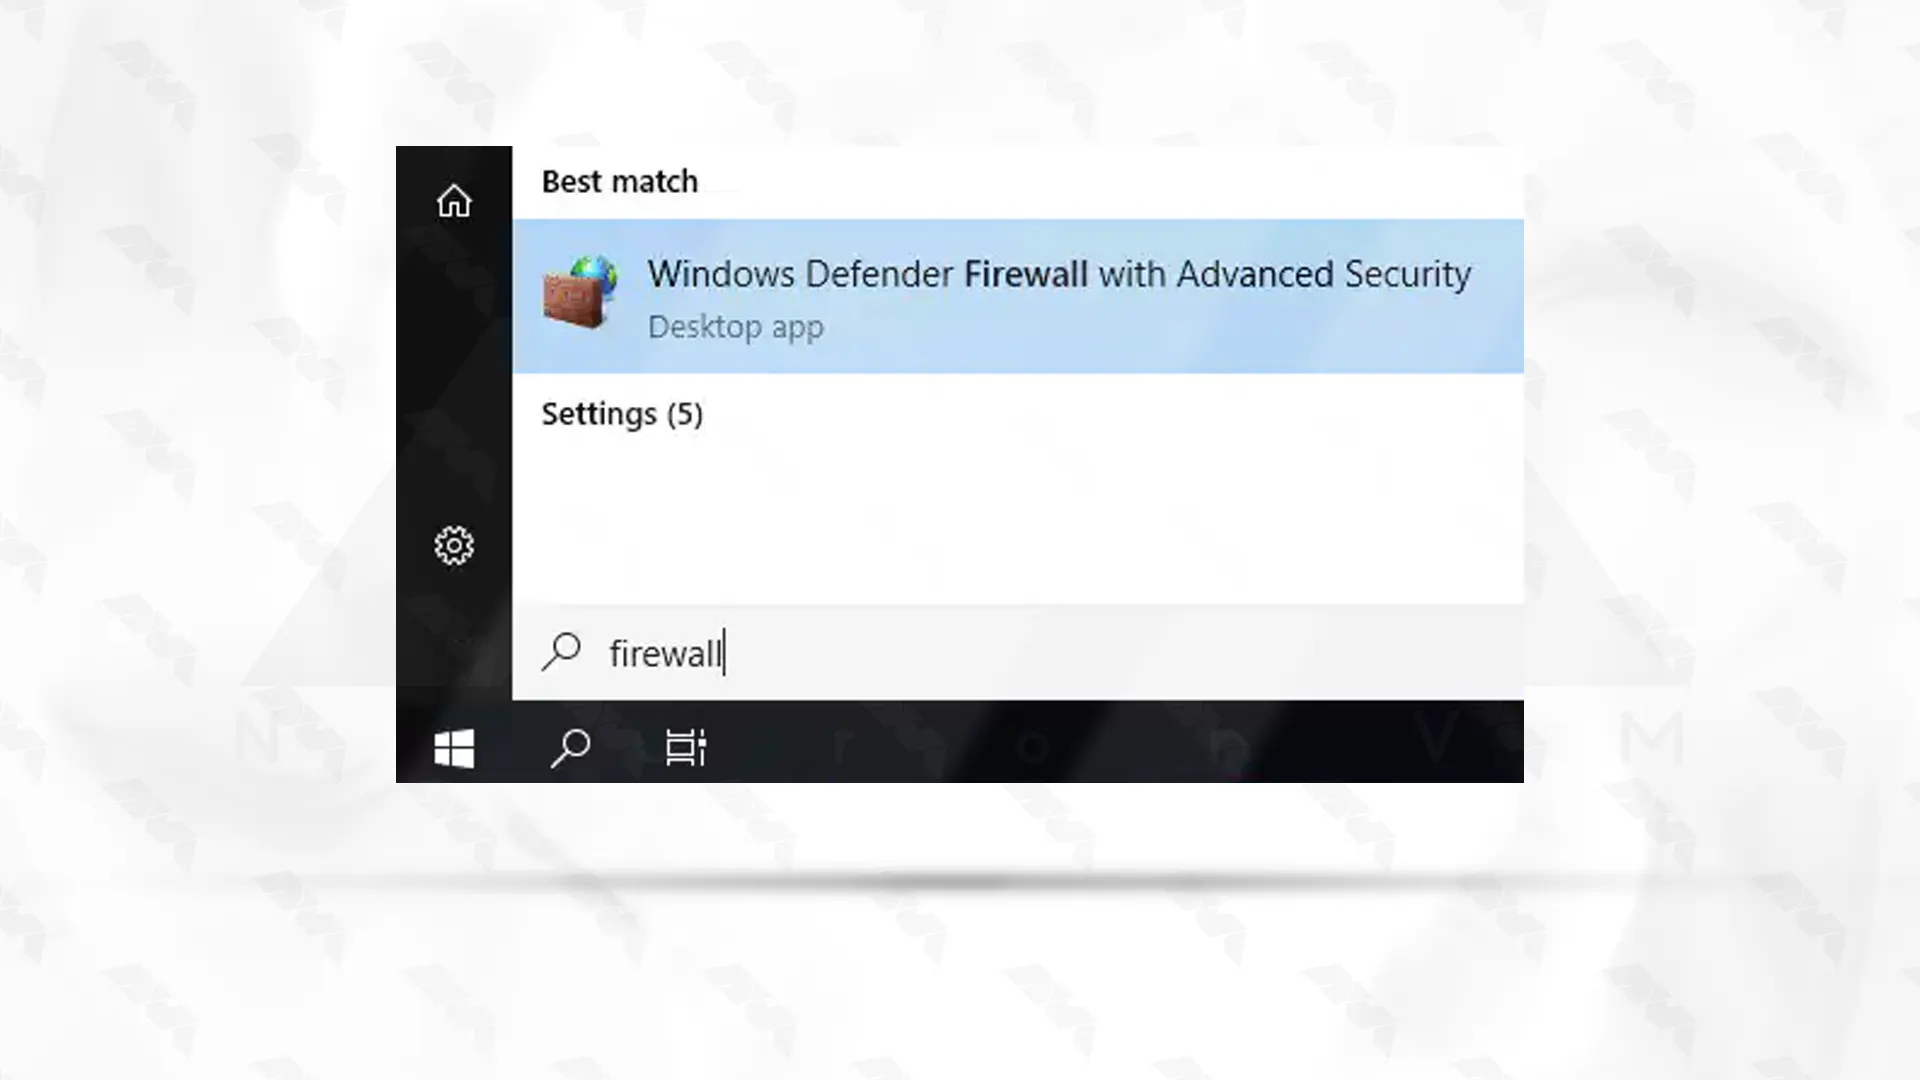
Then, type Firewall in the Start menu. Windows Defender Firewall with Advanced Security will show up as below. Click on it. In PowerShell, you can also type Firewall and press Enter.
Then the basic firewall interface opens. Click Advanced Settings on the left side of the page.
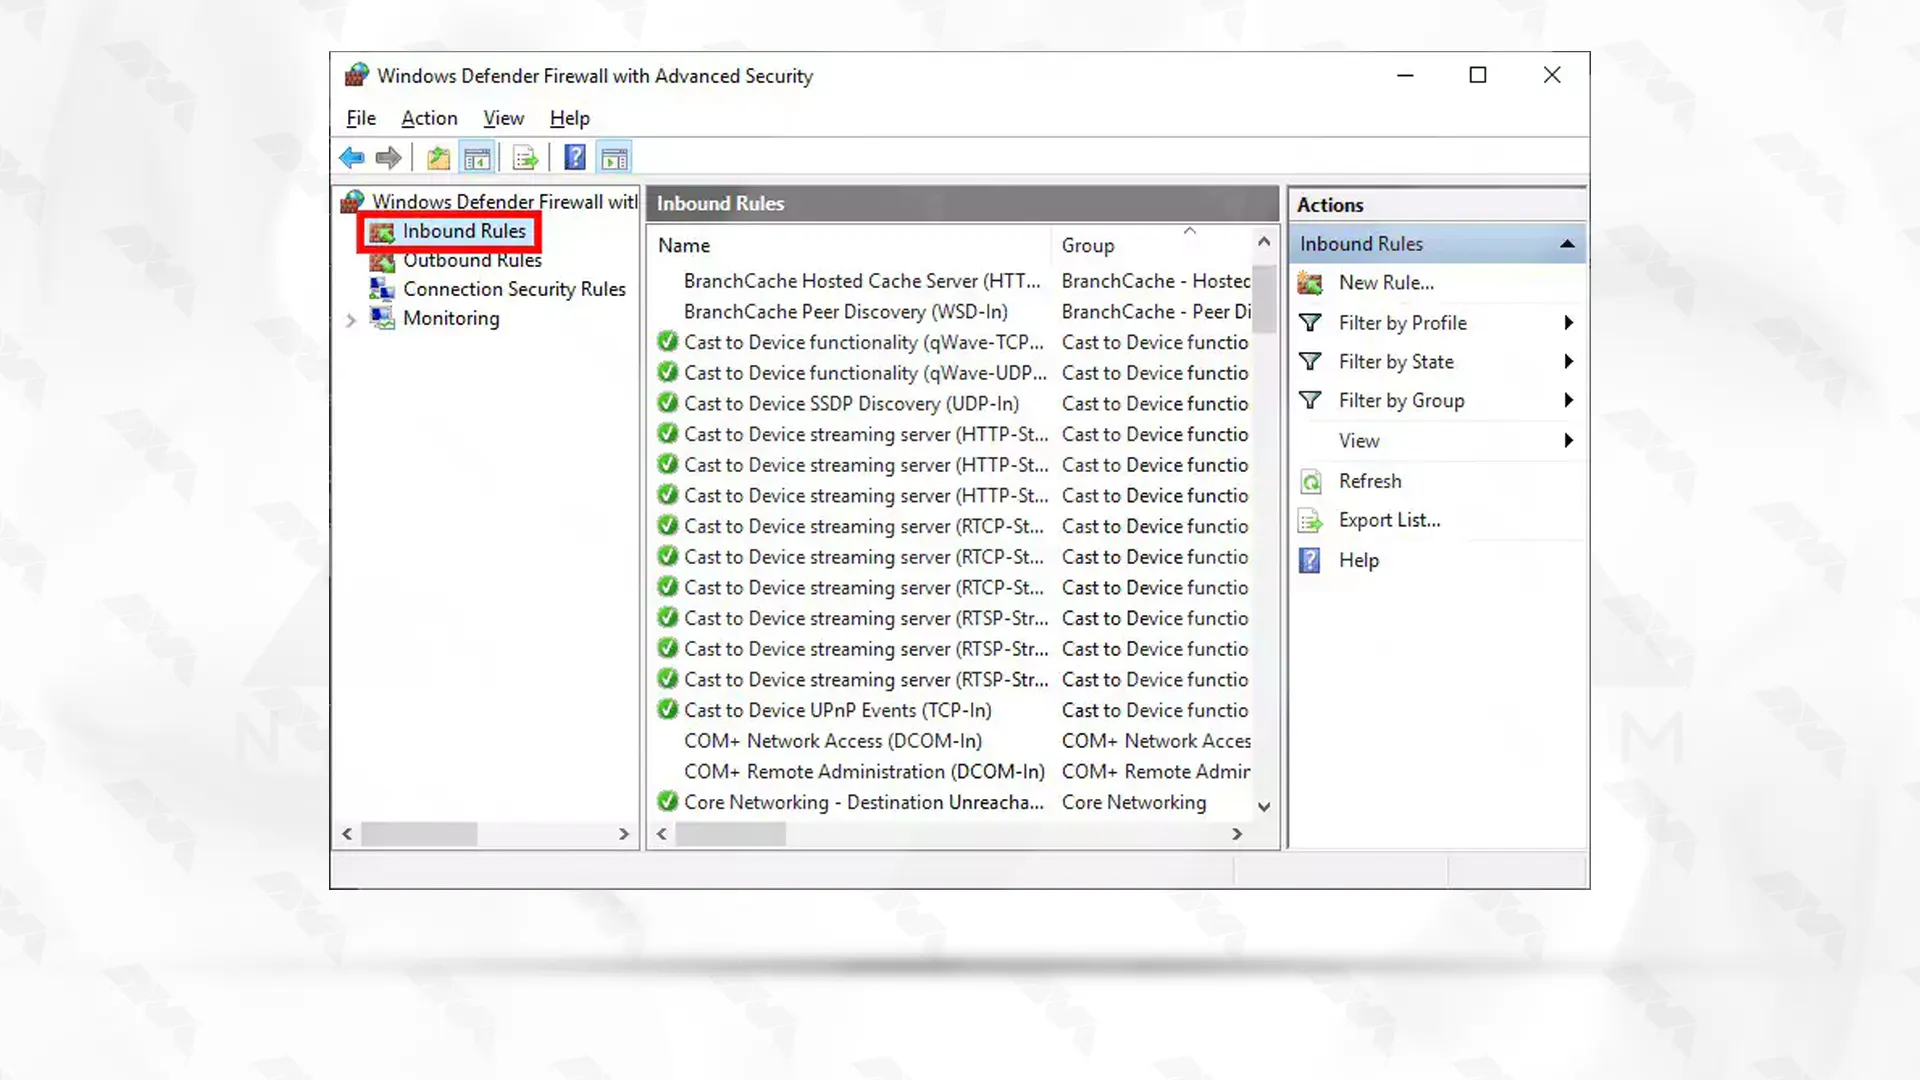
In the window that opens, select Inbound Rules on the left.
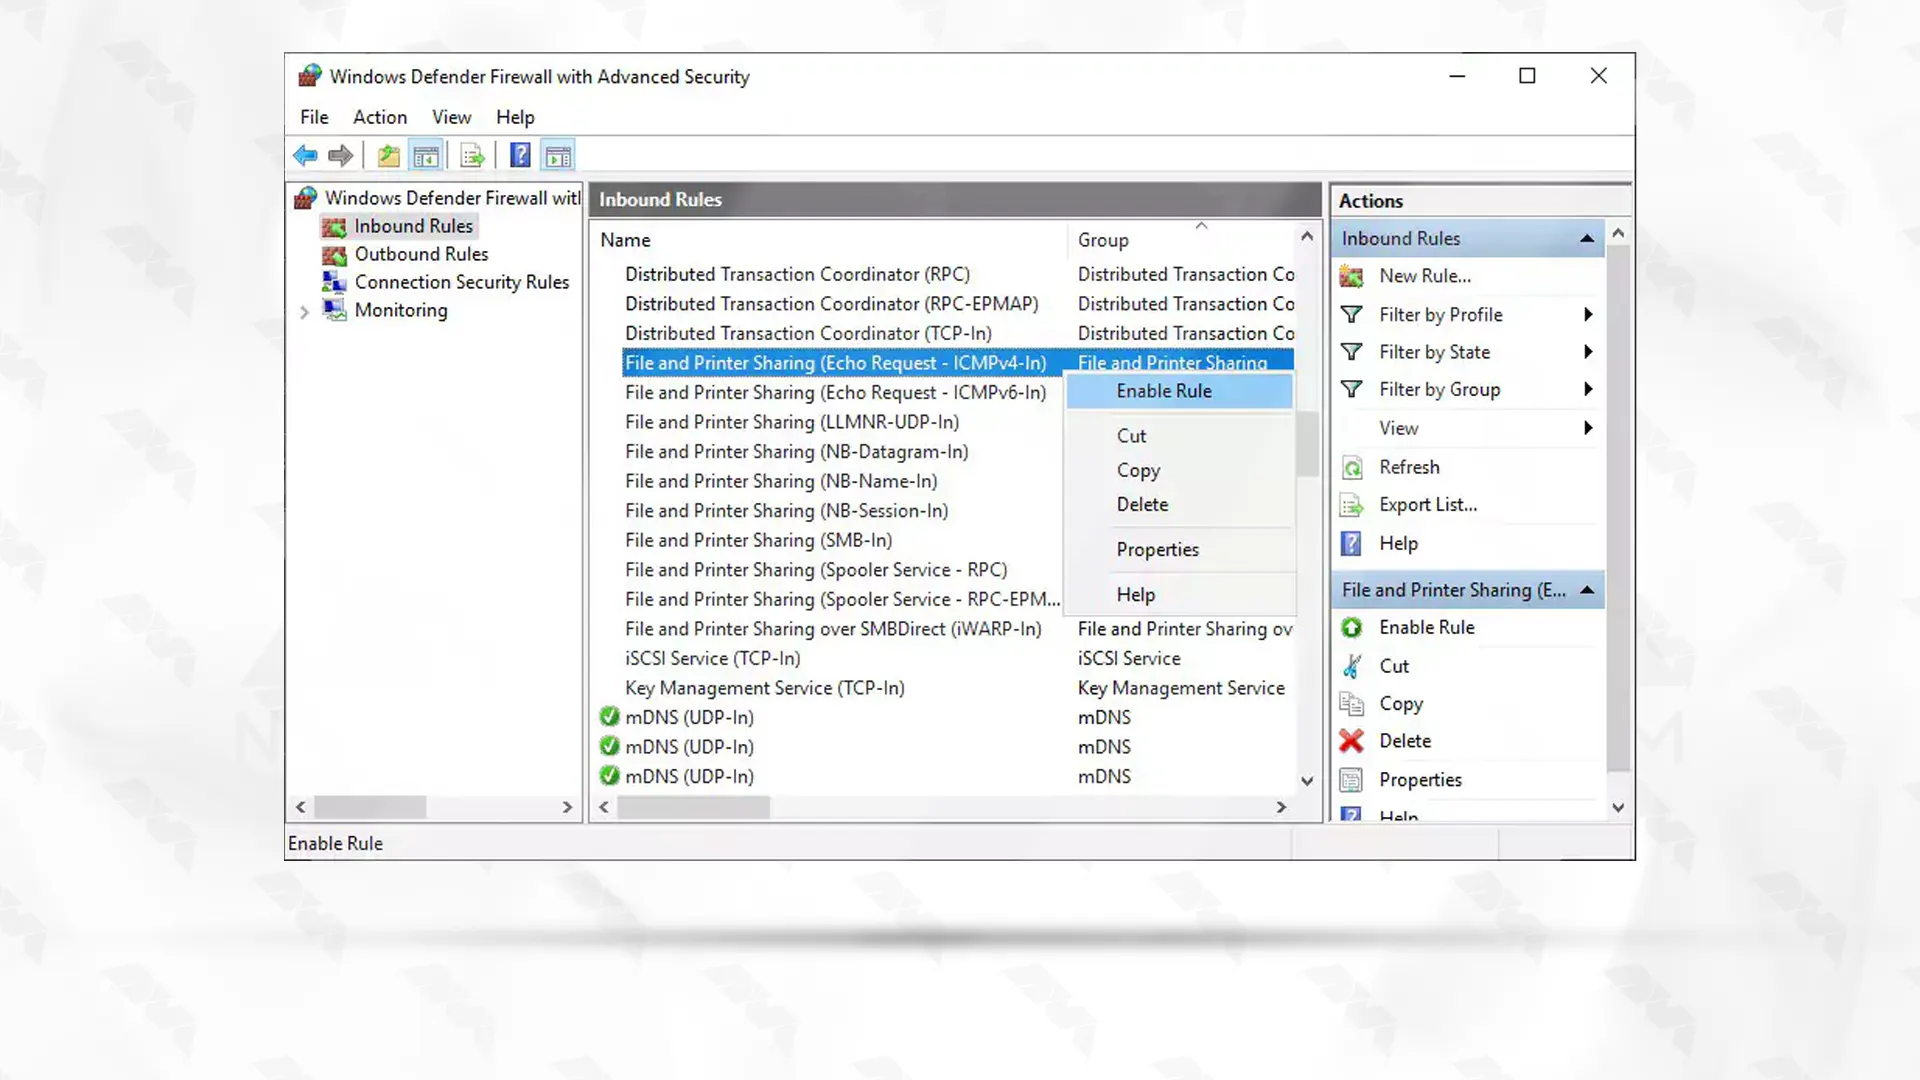
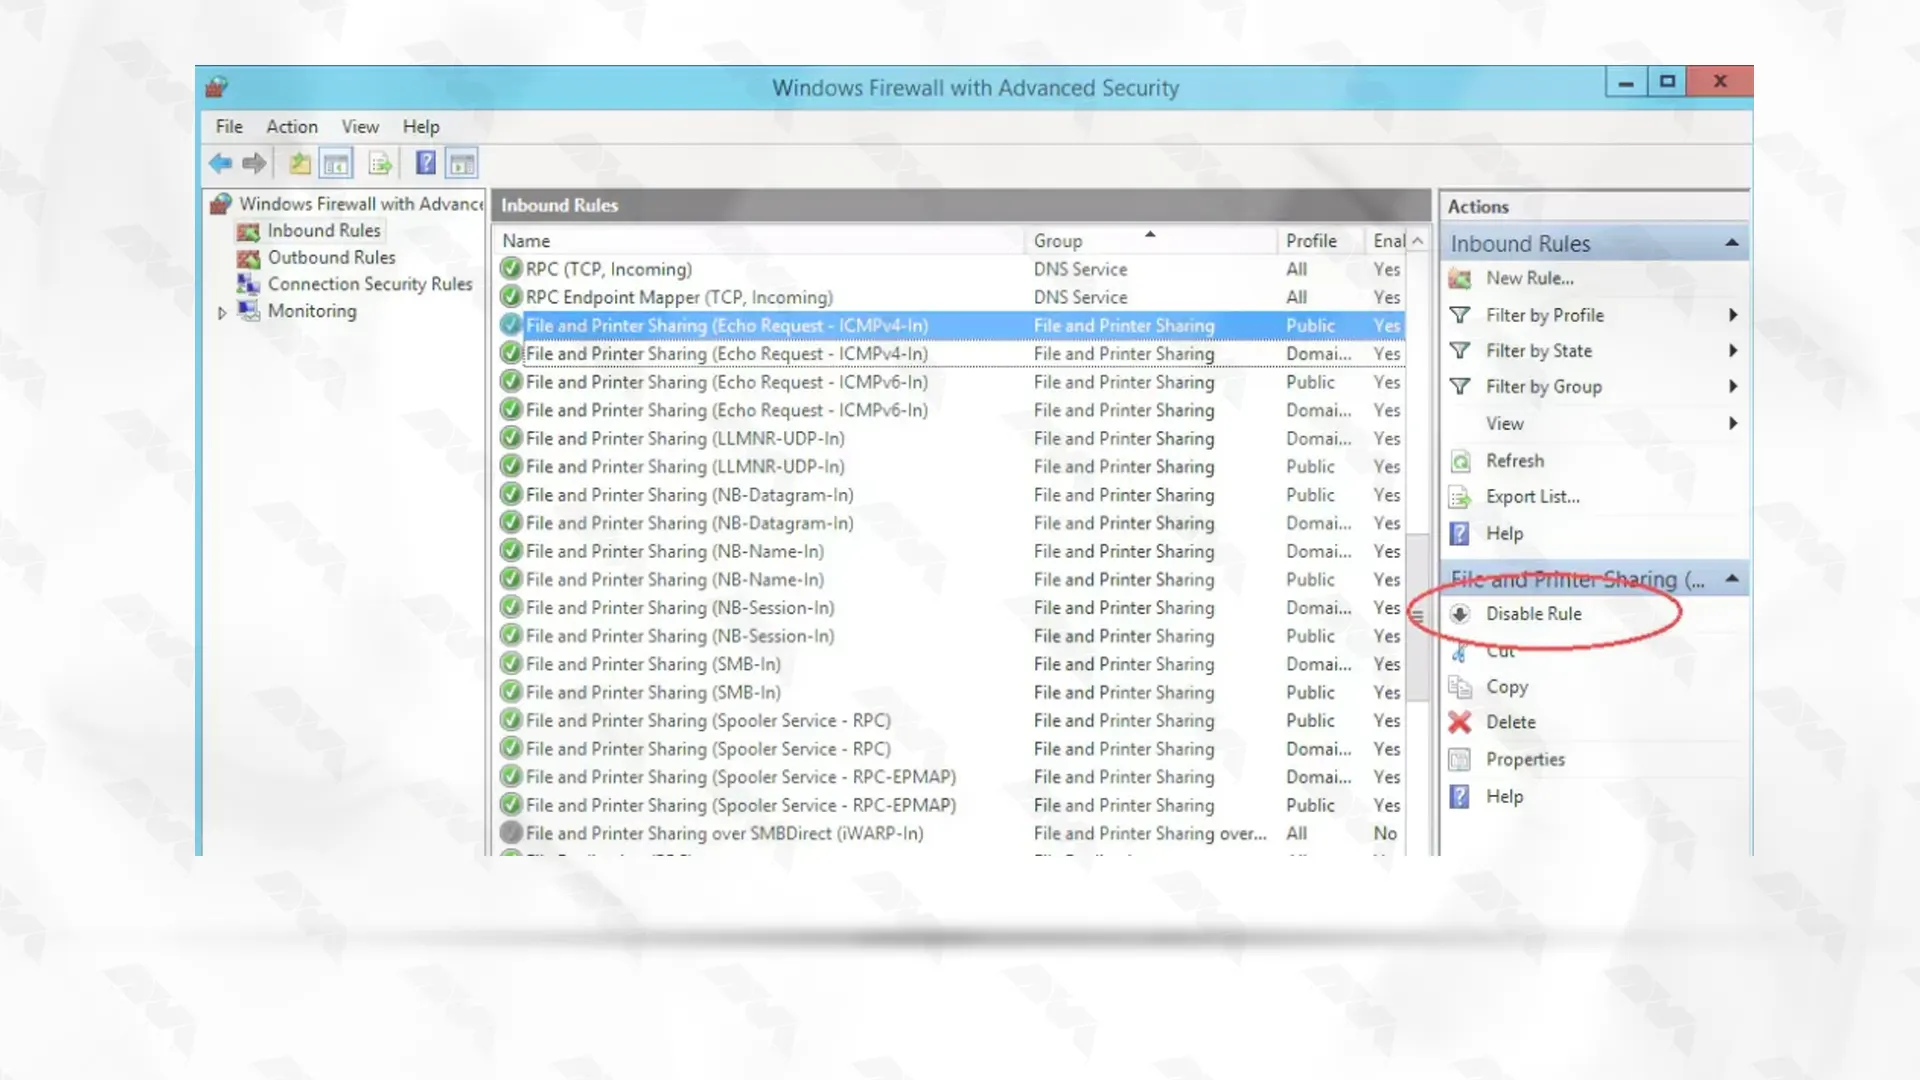
Then, you must select “File and Printer Sharing (Echo Request – ICMPv4-In)” from the rules and enable it.
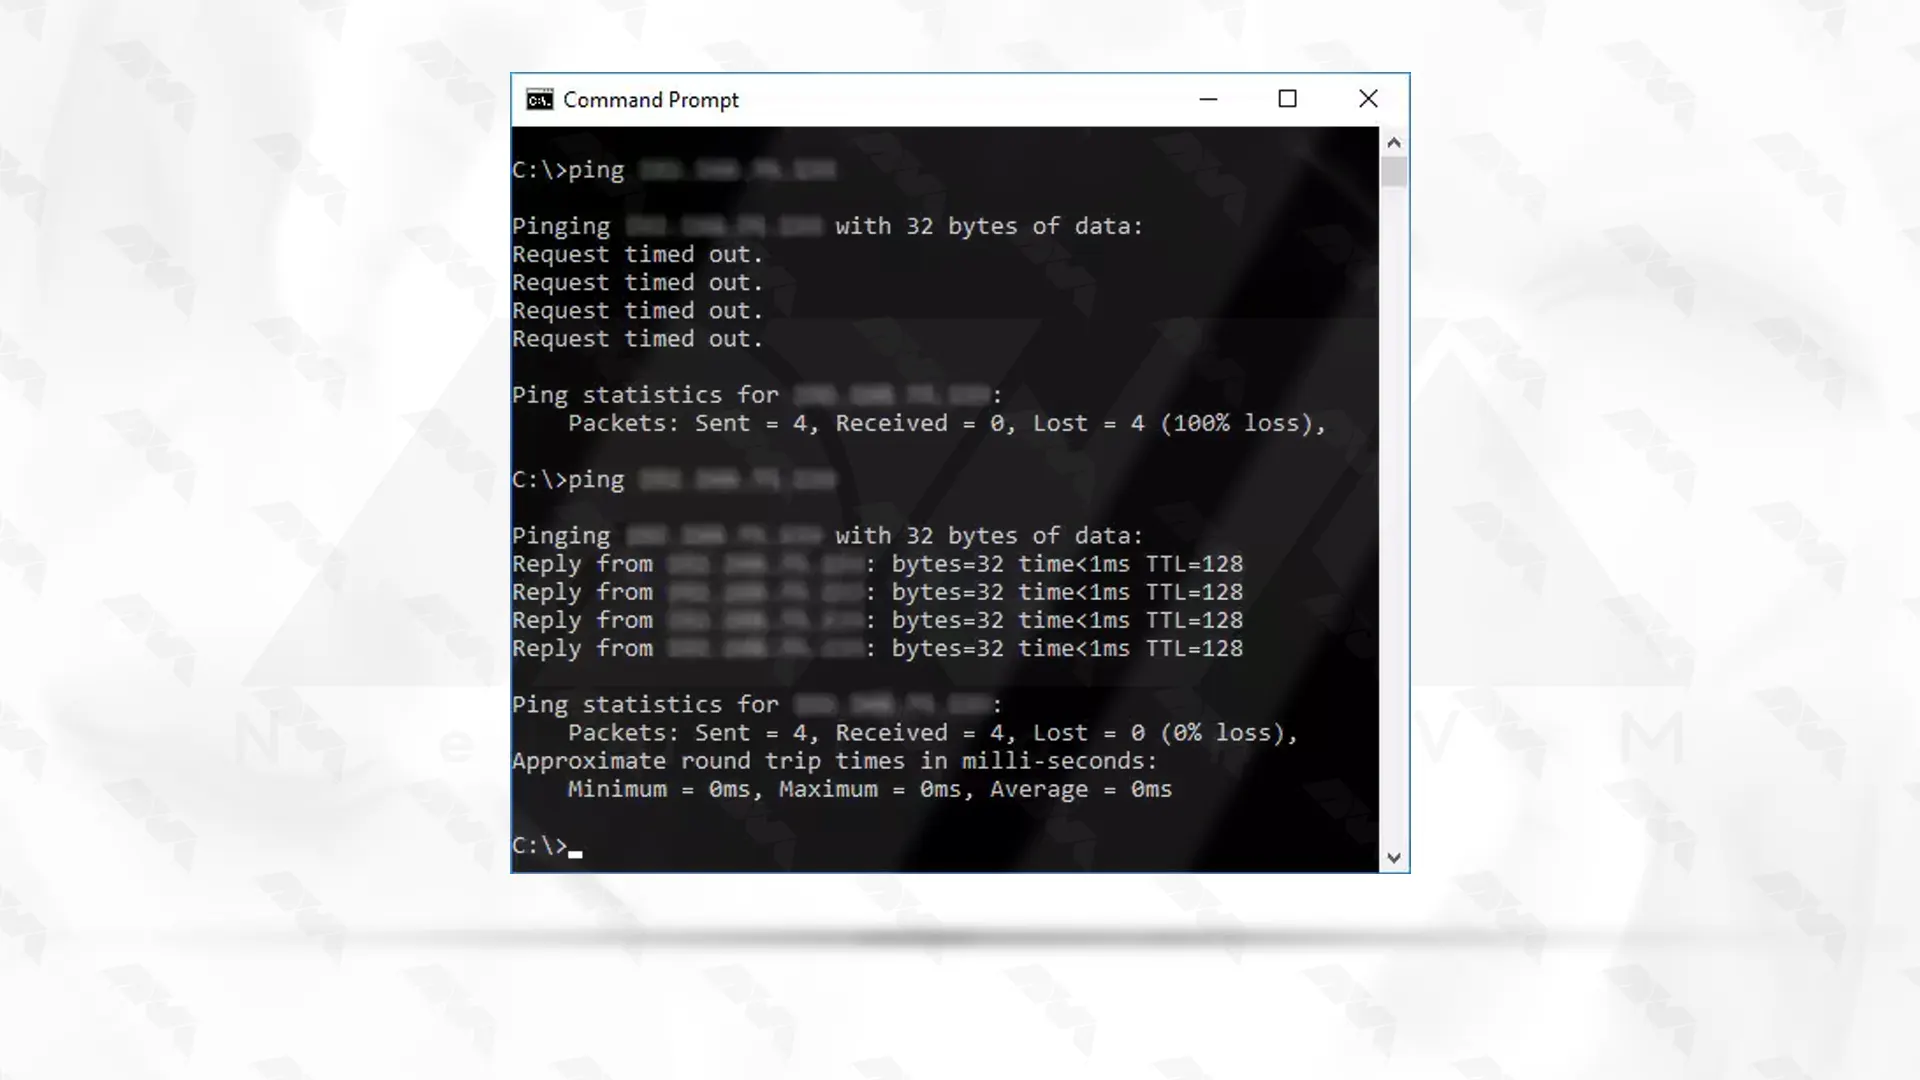
After enabling the server, it must respond to ping requests. Since Windows Server 2019 disables inbound ICMP incoming requests by default, the first requests time out. Now ping requests confirm that it works as expected.
To turn off the rule, you must select it and click on Disable Rule on the right.
Overall, by understanding the process of disabling ping requests, you can access it whenever you want. Enabling ping can ease the process of troubleshooting and network diagnostics. This tutorial offers practical guidance on managing ping requests to maintain a secure and efficient RDP environment. If you have any questions about ping and the process of enabling/disabling it, we are waiting for you in the comment section!
How useful was this post?
Click on a star to rate it!
Average rating 3.6 / 5. Vote count: 7
No votes so far! Be the first to rate this post.
 Tags
Tags

IPv6, known as IPng (Internet Protocol Next Generation), is a set of specifications set by the IETF ...


 Tags
Tags

OpenSSH is a tool that allows you to securely connect to a remote server using the SSH protocol. Thi...


 Tags
Tags
What is your opinion about this Blog?


