


Content Management Systems are a group of software that allows users to produce, publish, organize, and organize content; Without the need to get involved in the complexities of programming. Web content management systems are built specifically for creating web pages, and you can use them to create your favorite web pages without even a single line of code. The most famous and popular web content management system is WordPress. So keep studying to learn how to install WordPress on LAMP on Ubuntu 21.04.
Prerequisites
To install WordPress on LAMP on Ubuntu you must first provide the prerequisites, which are:
– A Linux VPS server with Ubuntu 21.04 operating server.
– A non-root Sudo user
– Install a LAMP stack
– Secure your site with TLS/SSL technology.
After providing all the prerequisites, you should now create a MySQL database. Because WordPress uses MySQL to manage and store site and user information.
To install WordPress on LAMP on Ubuntu, first, you should create a MySQL Database and user for WordPress.
Use the following command to log in to a MySQL root account:
mysql -u root -p
In this step, you will be asked for the password that you set when installing MySQL root.
If you do not have access to the MySQL database via root, you should update the root user password by logging in as a Sudo user:
sudo mysql -u root
After you receive the MySQL prompt, you should Put a strong password instead of new_password in the following command:
ALTER USER 'root'@'localhost' IDENTIFIED WITH mysql_native_password BY 'new_password';
Now you need to enter “EXIT” and exit the database.
Then log back into the database by entering your new password:
mysql -u root -p
In this step, you need to create an exclusive database to control WordPress. To do this, enter the following command:
CREATE DATABASE wordpress DEFAULT CHARACTER SET utf8 COLLATE utf8_unicode_ci;
Note: there is a semi-colon (;) at the end of each MySQL statement.
Now you should create a separate account for the MySQL database to support you in terms of management and security. You will use this account to operate with your new database.
By typing the following command, you can create an account, set a password, and access the created database.
CREATE USER 'wordpressuser'@'%' IDENTIFIED WITH mysql_native_password BY 'password';
In this step, to inform a database that the WordPress user has full access to the setup database, run the following command:
GRANT ALL ON wordpress.* TO 'wordpressuser'@'%';
Now you should flush the privileges so that the current MySQL instance is aware of recent changes. To do this, enter the following command:
FLUSH PRIVILEGES;
To exit MySQL, run the following command:
EXIT;
Keep in mind that when setting up the LAMP stack, PHP needs a minimum set of extensions to communicate with MySQL, and WordPress uses the additional PHP extension.
In this stage, you should Install additional PHP plugins. Before downloading PHP, you must update the system with the following command:
sudo apt update
You must download and install some PHP extensions by entering the following command:
sudo apt install php-curl php-gd php-mbstring php-xml php-xmlrpc php-soap php-intl php-zip
Remember to check your plugin documentation to discover its PHP requirements. If they are available, you must install them.
In this step, you have to restart Apache again with the help of the following command. Because you make more configurations on Apache to download new extensions:
sudo systemctl restart apache2
Then you should configure Apache to allow overriding and rewriting .htaccess.
Now you should create a configuration file for your site in the /etc/apache2/sites-available/ directory.
In this tutorial, you should put the configuration file path instead of /etc/apache2/sites-available/WordPress.conf. Also, use the webroot specified in your configuration instead of /var/www/ WordPress as the WordPress installation root directory.
Note that you may use the 000-default.conf configuration (with /var/www /html as your webroot). If you are just hosting a website on this virtual server, it would be fine. Otherwise, it is best to split the required configuration into logical sections, in one file per site.
By identifying your paths, you can start working with .htaccess so that Apache can make configuration changes based on any directory.
Now to Enable .htaccess overrides you should do the following methods. the use of .htaccess files is disabled. WordPress and many WordPress plugins use these files extensively for in-directory tricks on virtual web server behavior.
You can open the Apache configuration file for your website by entering the following command:
sudo nano /etc/apache2/sites-available/wordpress.conf
You should allow .htaccess files, to do this you need to put the AllowOverride instruction in a directory block that points to the root of our document. To make sure you are using the correct web root directory, add the following text block inside the VirtualHost block:
<Directory /var/www/wordpress/>
AllowOverride All
</Directory>
When done, you should save and close the file. To do this in nano, press CTRL and X together, then Y, and ENTER.
At this point, you should enable the rewrite module so you can use the permalink WordPress feature. To do this enter the following command. After doing this you will have more human-readable permalinks to your posts.
sudo a2enmod rewrite
The above command activates the specified module in the Apache configuration by calling the script. Now Enable changes. Before making the changes, check that you have not made any syntax errors by entering the following command:
sudo apache2ctl configtest
If you want to override the above line, just add a ServerName instruction to your main (global) Apache configuration file in /etc/apache2/apache2.conf. The server name can be the domain or IP address of your virtual server. However, this is only a message and does not affect the performance of your site. You can continue as long as the output contains Syntax OK.
Now to make changes you need to restart Apache with the following command:
sudo systemctl restart apache2
After completing the above steps, you can now install WordPress.
In this stage, you should Navigate to a writable directory and download the compressed version.
cd /tmp
curl -O https://wordpress.org/latest.tar.gz
You should run the following command to extract the compressed file:
tar xzvf latest.tar.gz
You should add a bogus .htaccess file to make it available for later use in WordPress. To do this enter the following command:
touch /tmp/wordpress/.htaccess
Then you need to copy the sample configuration file with the name of the file that WordPress reads. To do this, enter the following command:
cp /tmp/wordpress/wp-config-sample.php /tmp/wordpress/wp-config.php
You can create an updated directory with the following command. By doing this, WordPress will not be licensed automatically after updating the software:
mkdir /tmp/wordpress/wp-content/upgrade
In this step, copy all the contents of the directory to the root of your document. The dot used at the end of the source directory indicates that everything in the directory, even hidden files, should be copied:
sudo cp -a /tmp/wordpress/. /var/www/wordpress
Remember to replace the /var/www/wordpress folder with the directory set on the virtual server.
You must first give ownership of all files to the user and the www-data group. This is the user as the Apache virtual web server runs, and Apache must be able to read and write WordPress files to serve the website and perform automatic updates.
Now you should update ownership with the following command that allows you to change file ownership. Then you should refer to the relevant directory of your virtual server:
sudo chown -R www-data:www-data /var/www/wordpress
You can set the correct permissions in WordPress directories and files with the following commands:
sudo find /var/www/wordpress/ -type d -exec chmod 750 {} \;
sudo find /var/www/wordpress/ -type f -exec chmod 640 {} \;
By opening the file, our first task will be to set some secret keys to provide a security level for your installation. WordPress provides a reliable generator for these values so there is no need to try to achieve the right values alone. These are only used indoors, so using sophisticated and safe amounts here will not be a problem.
With the following command, you can get safe values from the WordPress secret key generator. You can add the output of the following command to the configuration file:
curl -s https://api.wordpress.org/secret-key/1.1/salt/
Now you need to open the WordPress configuration file. To do this, enter the following command:
sudo nano /var/www/wordpress/wp-config.php
Then you need to look for the section that has example values for those settings:
define('AUTH_KEY', 'put your unique phrase here');
define('SECURE_AUTH_KEY', 'put your unique phrase here');
define('LOGGED_IN_KEY', 'put your unique phrase here');
define('NONCE_KEY', 'put your unique phrase here');
define('AUTH_SALT', 'put your unique phrase here');
define('SECURE_AUTH_SALT', 'put your unique phrase here');
define('LOGGED_IN_SALT', 'put your unique phrase here');
define('NONCE_SALT', 'put your unique phrase here');
After deleting those lines, you need to paste in the copied values from the command line:
define('AUTH_KEY', 'VALUES COPIED FROM THE COMMAND LINE');
define('SECURE_AUTH_KEY', 'VALUES COPIED FROM THE COMMAND LINE');
define('LOGGED_IN_KEY', 'VALUES COPIED FROM THE COMMAND LINE');
define('NONCE_KEY', 'VALUES COPIED FROM THE COMMAND LINE');
define('AUTH_SALT', 'VALUES COPIED FROM THE COMMAND LINE');
define('SECURE_AUTH_SALT', 'VALUES COPIED FROM THE COMMAND LINE');
define('LOGGED_IN_SALT', 'VALUES COPIED FROM THE COMMAND LINE');
define('NONCE_SALT', 'VALUES COPIED FROM THE COMMAND LINE');
In this step, you must set the database name, database user, and associated password in MySQL to change some of the database connection settings at the beginning of the file.
Then you need to setup a method that WordPress uses to write to the file system. Set the file system method to “Direct” because the webserver is allowed to write wherever needed. Failure to do so with your current settings will result in WordPress requesting FTP credentials when performing certain actions.
You should add the above settings below the database connection settings. Note that you can add the file anywhere else:
// ** MySQL settings - You can get this info from your web host ** //
/** The name of the database for WordPress */
define( 'DB_NAME', 'wordpress' );

/** MySQL database username */
define( 'DB_USER', 'wordpressuser' );

/** MySQL database password */
define( 'DB_PASSWORD', 'password' );

/** MySQL hostname */
define( 'DB_HOST', 'localhost' );

/** Database Charset to use in creating database tables. */
define( 'DB_CHARSET', 'utf8' );

/** The Database Collate type. Don't change this if in doubt. */
define( 'DB_COLLATE', '' );

. . .

define('FS_METHOD', 'direct');
Finally, save it before closing the file.
Once the server configuration is complete, install it via the web interface. To do this first go to the public IP address or domain name of your server from the web browser using the following command:
https://server_domain_or_IP
Then choose your language.
At this stage, you will enter the main setup page.
Then you need to choose a unique name for the WordPress site and a username. Then a strong password is automatically generated that you must save. Now you need to enter your email address and check the box of discouraging search engines from indexing this site.
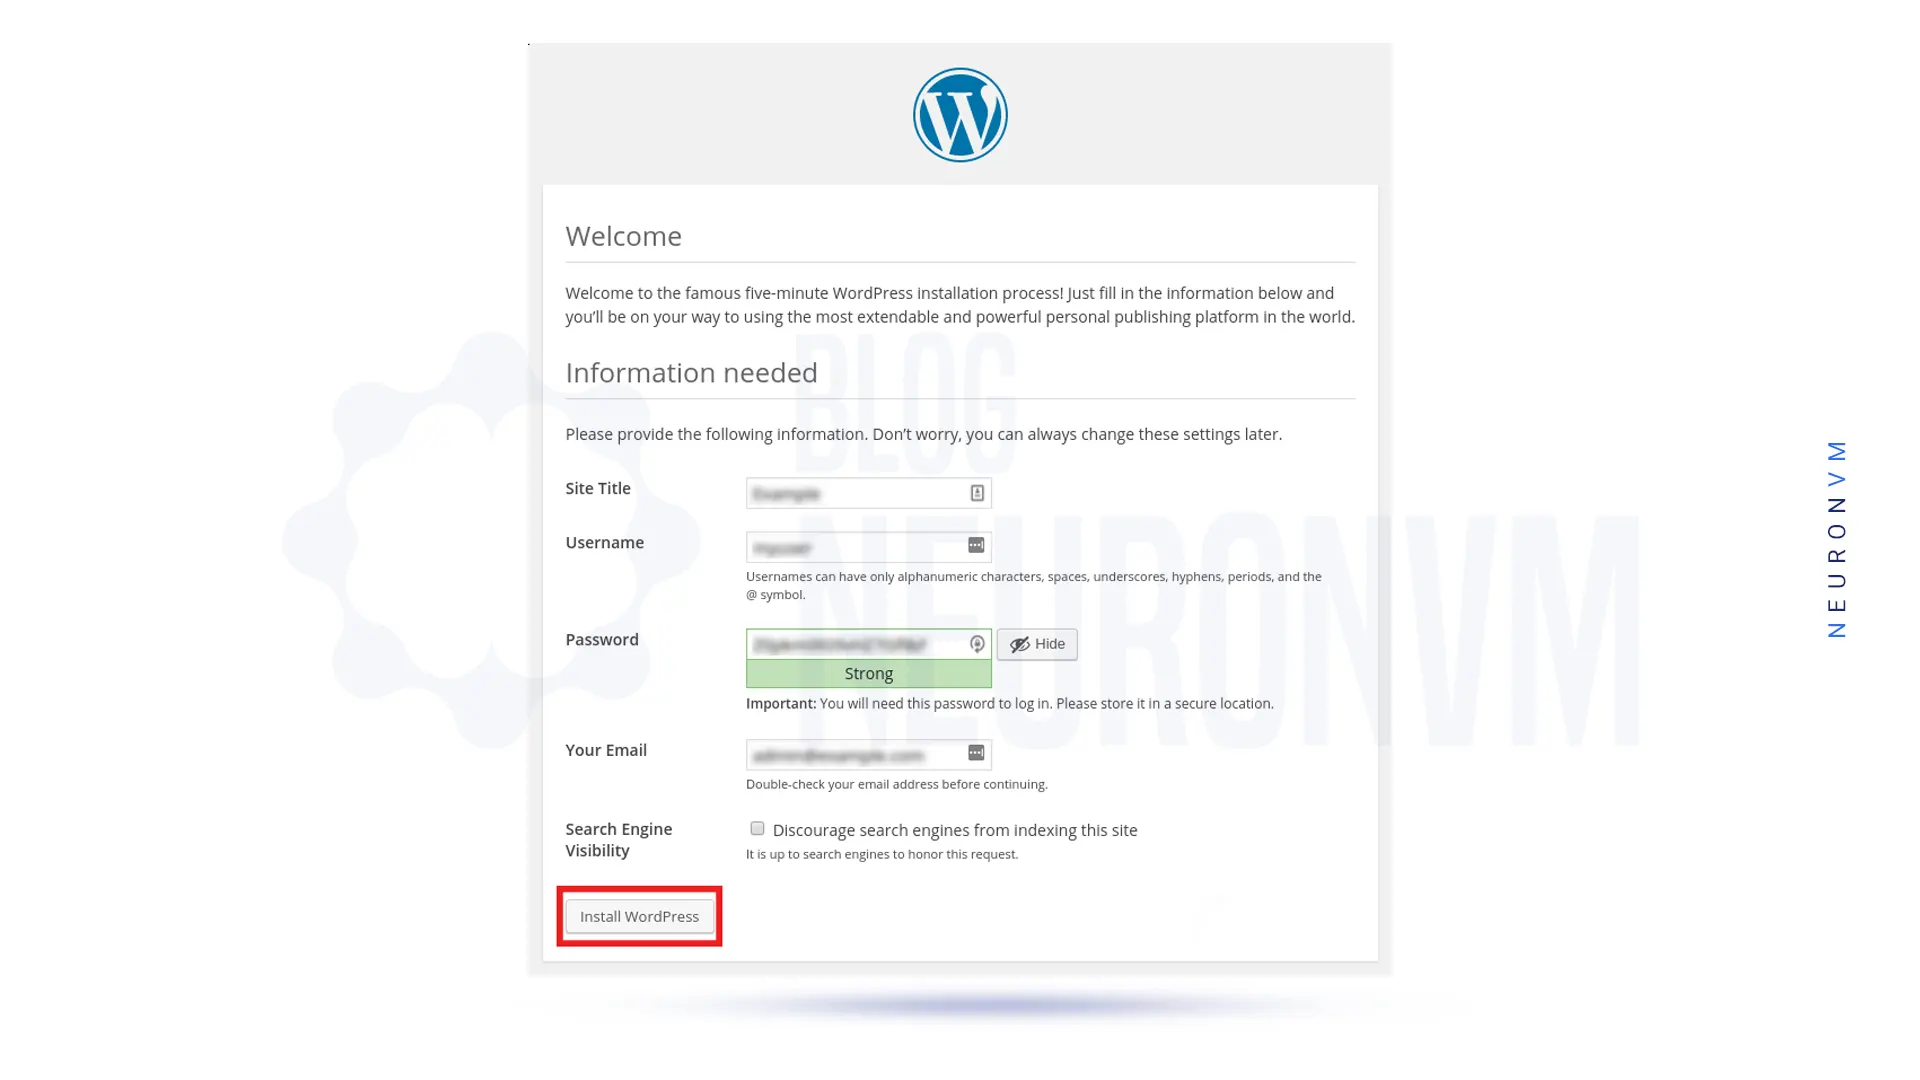
After clicking on Install WordPress, you will be redirected to the following page that asks you to Log In:
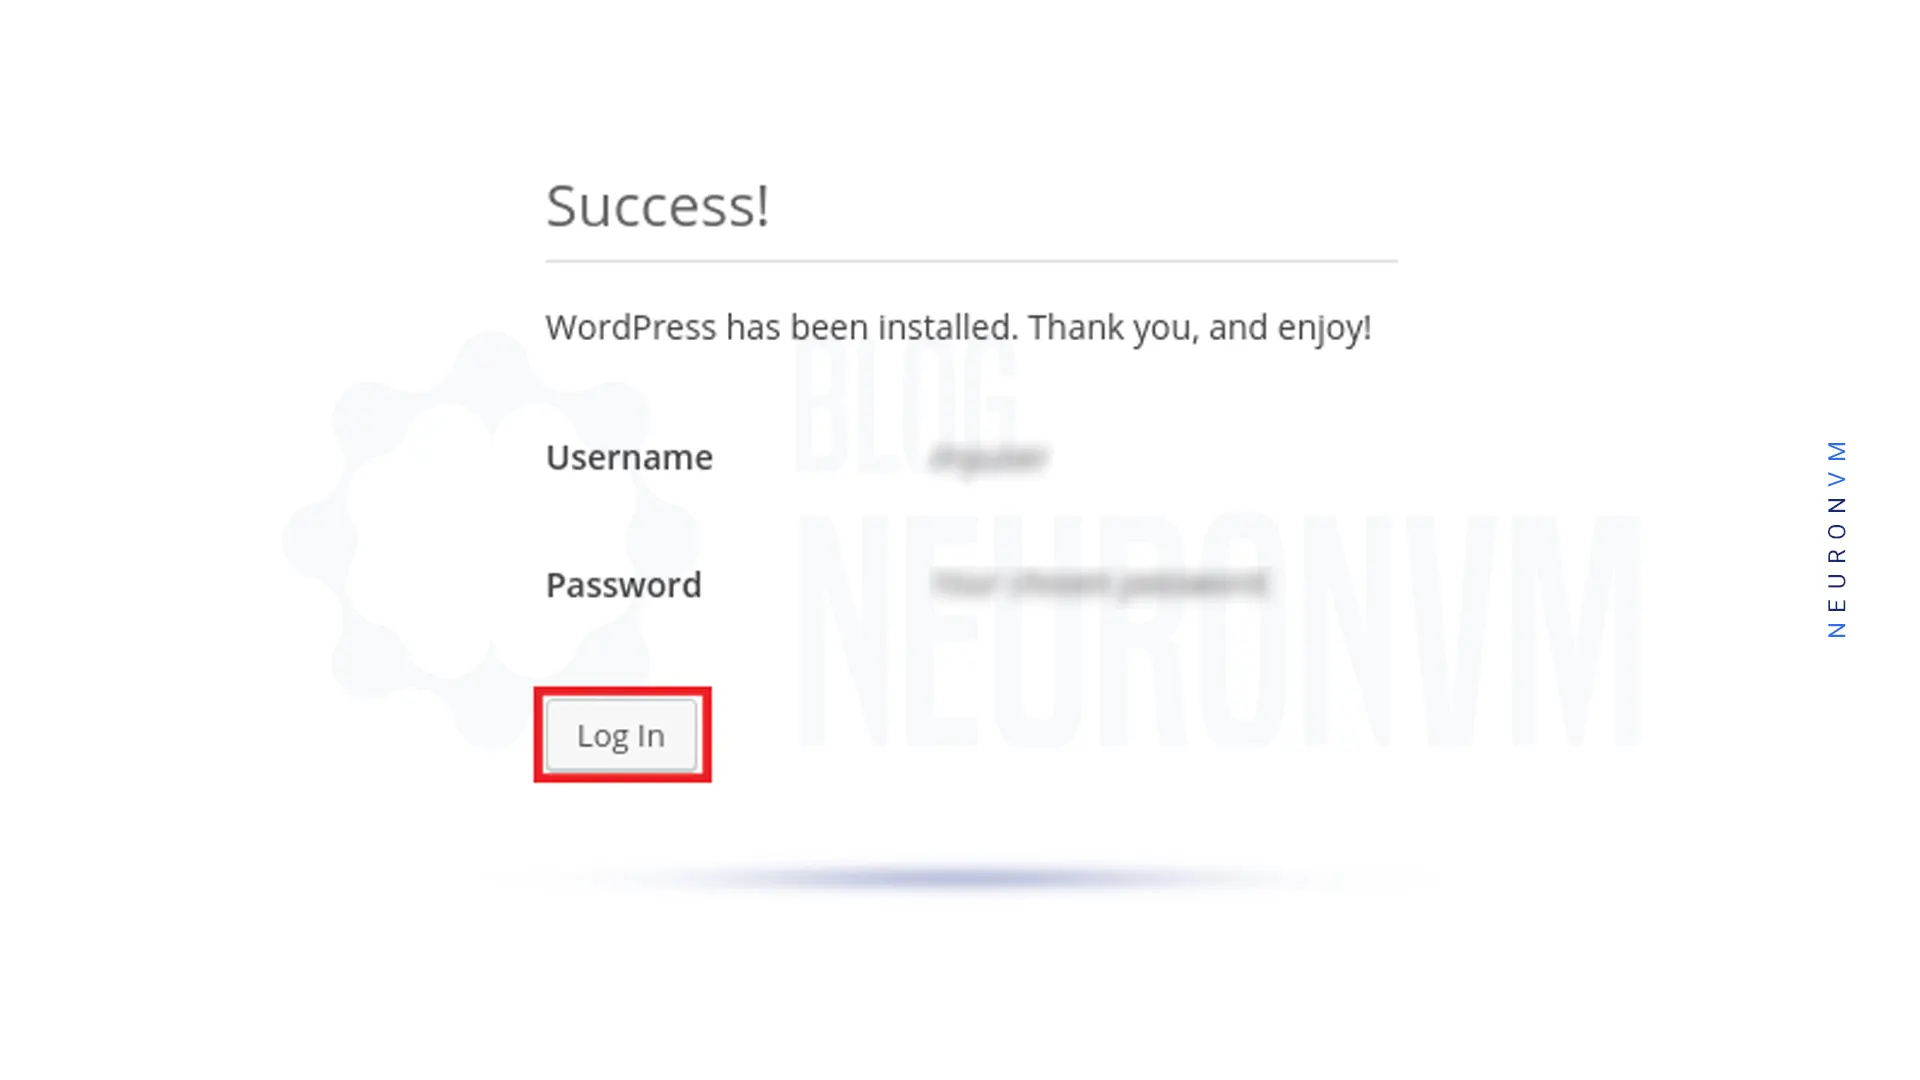
After clicking on login, you will enter the WordPress admin dashboard:
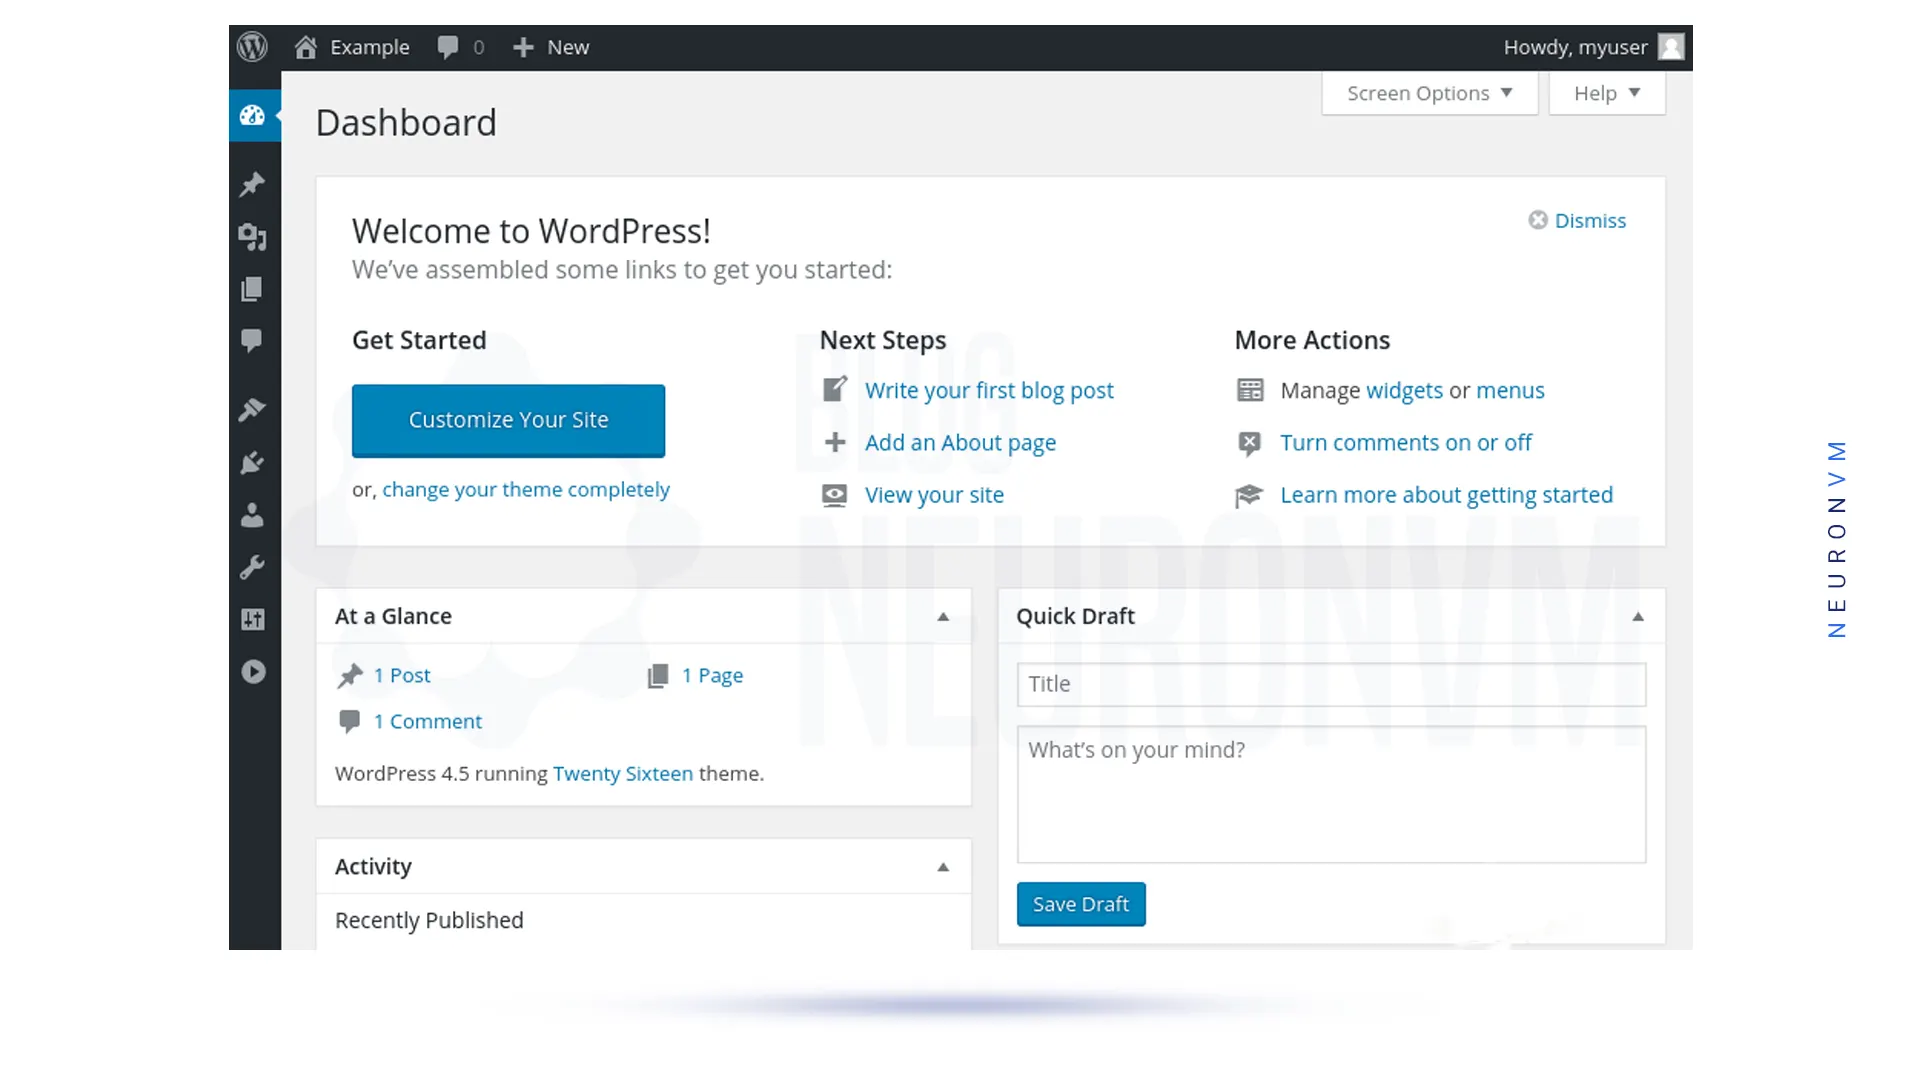
Finally, you can start designing your WordPress website.
The WordPress platform is one of the most popular and widely used content management tools for creating great websites. In this tutorial, you have learned all the necessary things related to installing WordPress on Ubuntu. But note that you must have a MySQL database and install PHP for WordPress. After a successful installation, now you can log in to your WordPress admin dashboard and start customizing your website. We hope this guide was helpful enough.
How useful was this post?
Click on a star to rate it!
Average rating 5 / 5. Vote count: 1
No votes so far! Be the first to rate this post.
 Tags
Tags

If you want to secure your Ubuntu system, you should configure a firewall. If you want to setup and ...


OpenSSH is the premier connection tool for remote login with SSH protocol. If you follow us until th...


 Tags
Tags
What is your opinion about this Blog?


