



CWP, or CentOS Web Panel, is a control panel for web hosting on Linux and is a free alternative to Cpanel. This tutorial has been prepared to introduce you to the Tutorial Install CWP on CentOS 8. Its easy-to-use interface and several other features make it a good choice for beginners. The reason for the ease of using this control panel is that you don’t need to access the server with SSH for every task.
As we mentioned in the introduction, Control Web Panel is a management tool that is generally created on unmanaged VPS for users who are interested in working with the command line. If you need to get more information about CWP you can refer to A Full Introduction to CWP.
There are some critical points that you should consider before the installation process of CWP:
– It is not possible to remove it after the installation.
– If you want to remove CWP from your Linux VPS, you should reinstall the server.
– Your hostname should be different from the other names on any domain on your server.
– The installation should be on the newly installed operating system without any configuration changes.
– The dynamic, Sticky, or internal IP addresses are not supported.
Now let’s find out how we can install CWP on CentOS 8. Follow the instructions below to have a successful installation process.
The first step is to prepare the server by installing the EPEL repository on CentOS 8:
sudo dnf install epel-release
Use the command below to install the required packages like wget to install CWP:
sudo dnf install wget -y
The next step is to update your server using the following command:
sudo dnf update -y
You should reboot your system to make the changes applied:
reboot
Now the system is completely ready to install CWP. So, use the cd command to change the directory /usr/local/src by this command:
sudo wget http://dl1.centos-webpanel.com/files/cwp-el8-latest
Here, you should run the command below to install the downloaded shell script:
sudo sh cwp-el8-latest
Now you have successfully installed CWP on your CentOS system. Reboot the server again to apply changes:
reboot
Also, you can use the command below to automatically reboot the system after the installation:
sudo sh cwp-el8-latest -r yes
In the configuration section, your first step is to access the web panel user interface by giving the IP address and port number 2030.
http://server_IP_address:2030/You can check the server’s IP by opening the terminal of your system on which you installed CWP. Use the following command:
ip a
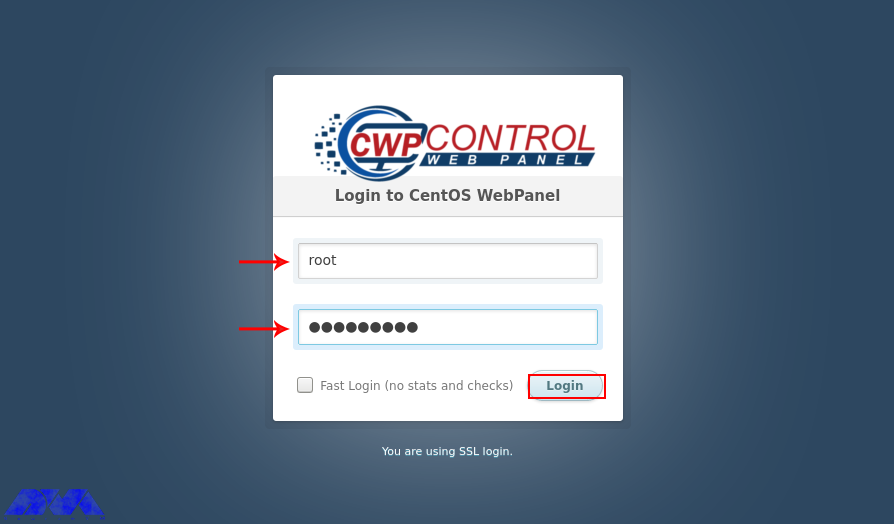
Her, you can access the admin control panel using your IP address. Use the root username and password to login to the CWP:
You can see the dashboard here:
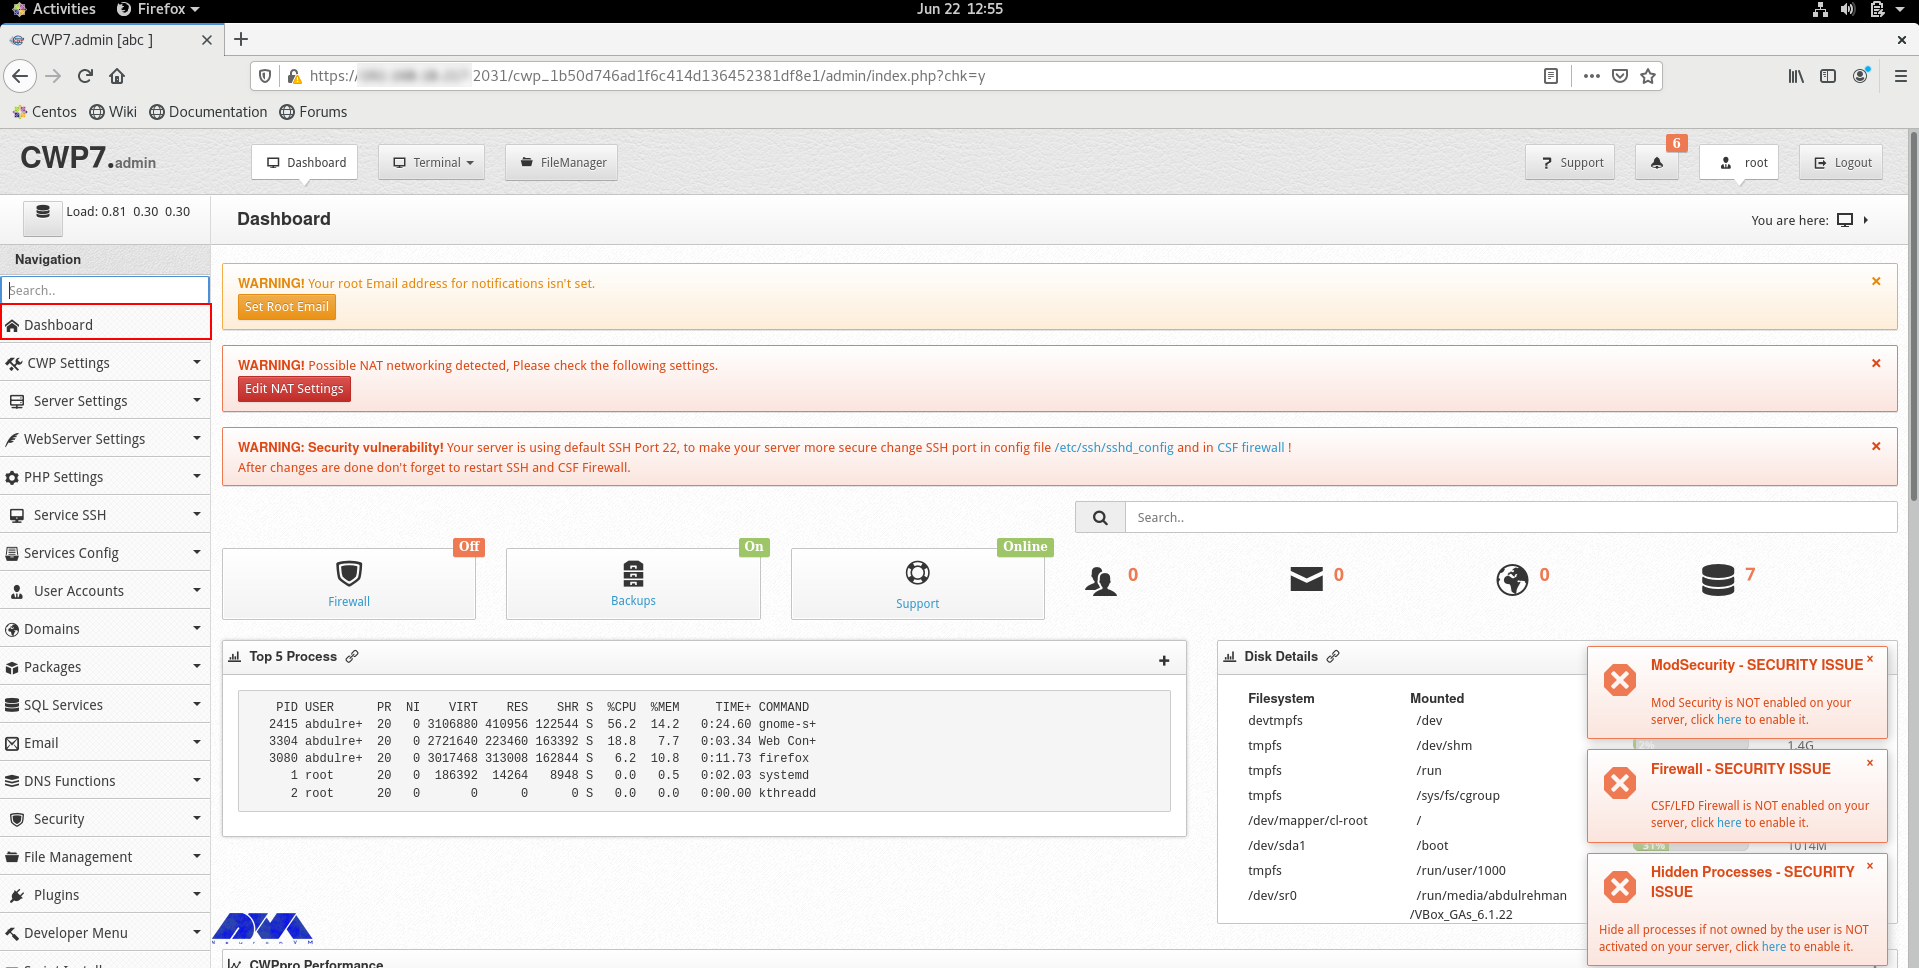
If you can log in to the dashboard easily, it shows that your installation is successful.
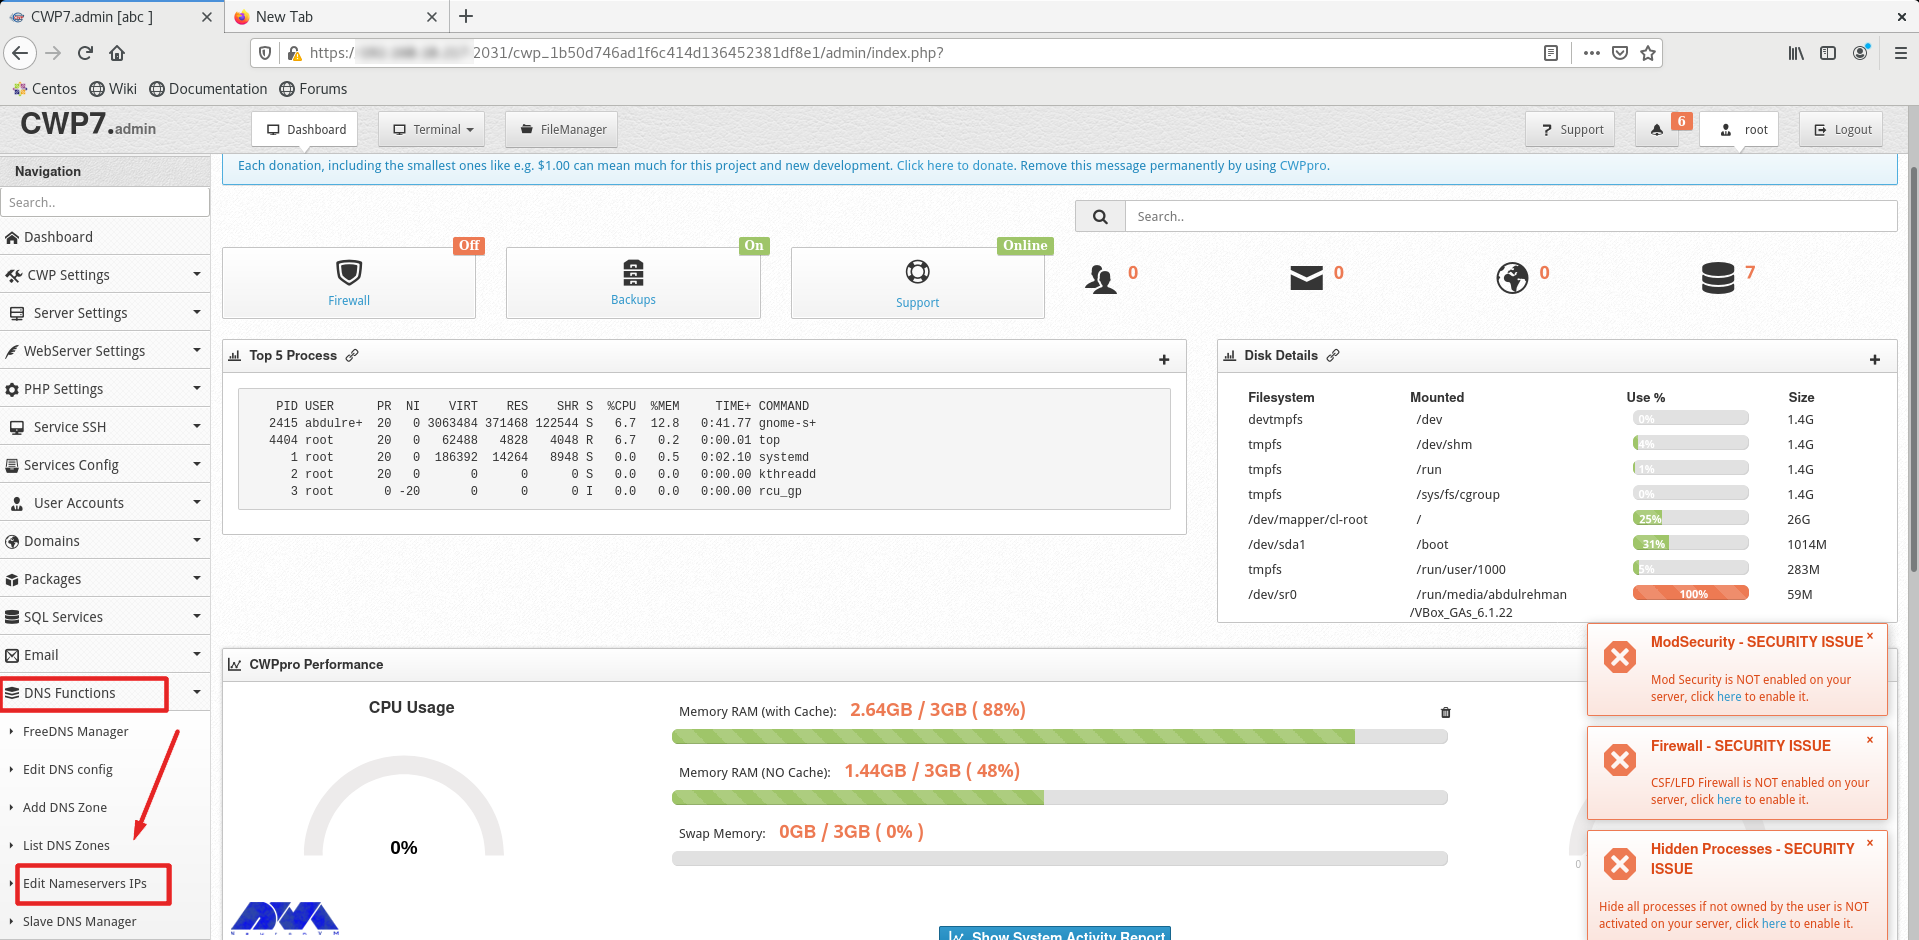
You should do a couple of instructions, to prepare the domain for domain hosting. On the dashboard, you should refer to DNS Functions part and choose Edit Name Server IPs:
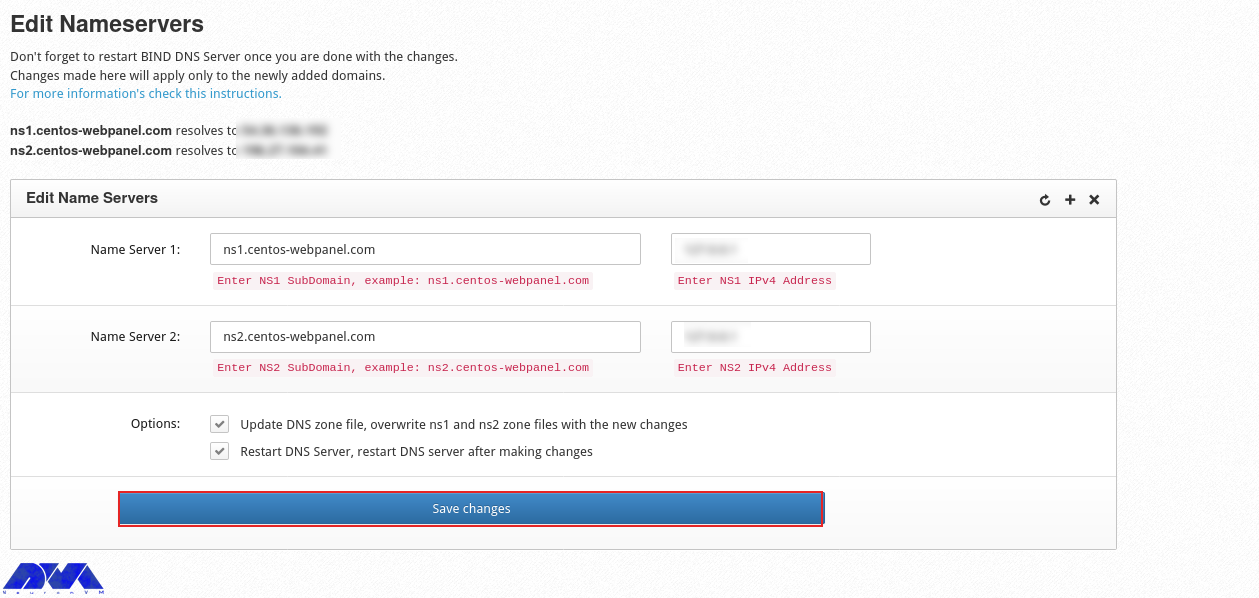
You should add nameserver 1 and 2 with related IP addresses and click on Save Changes Button:
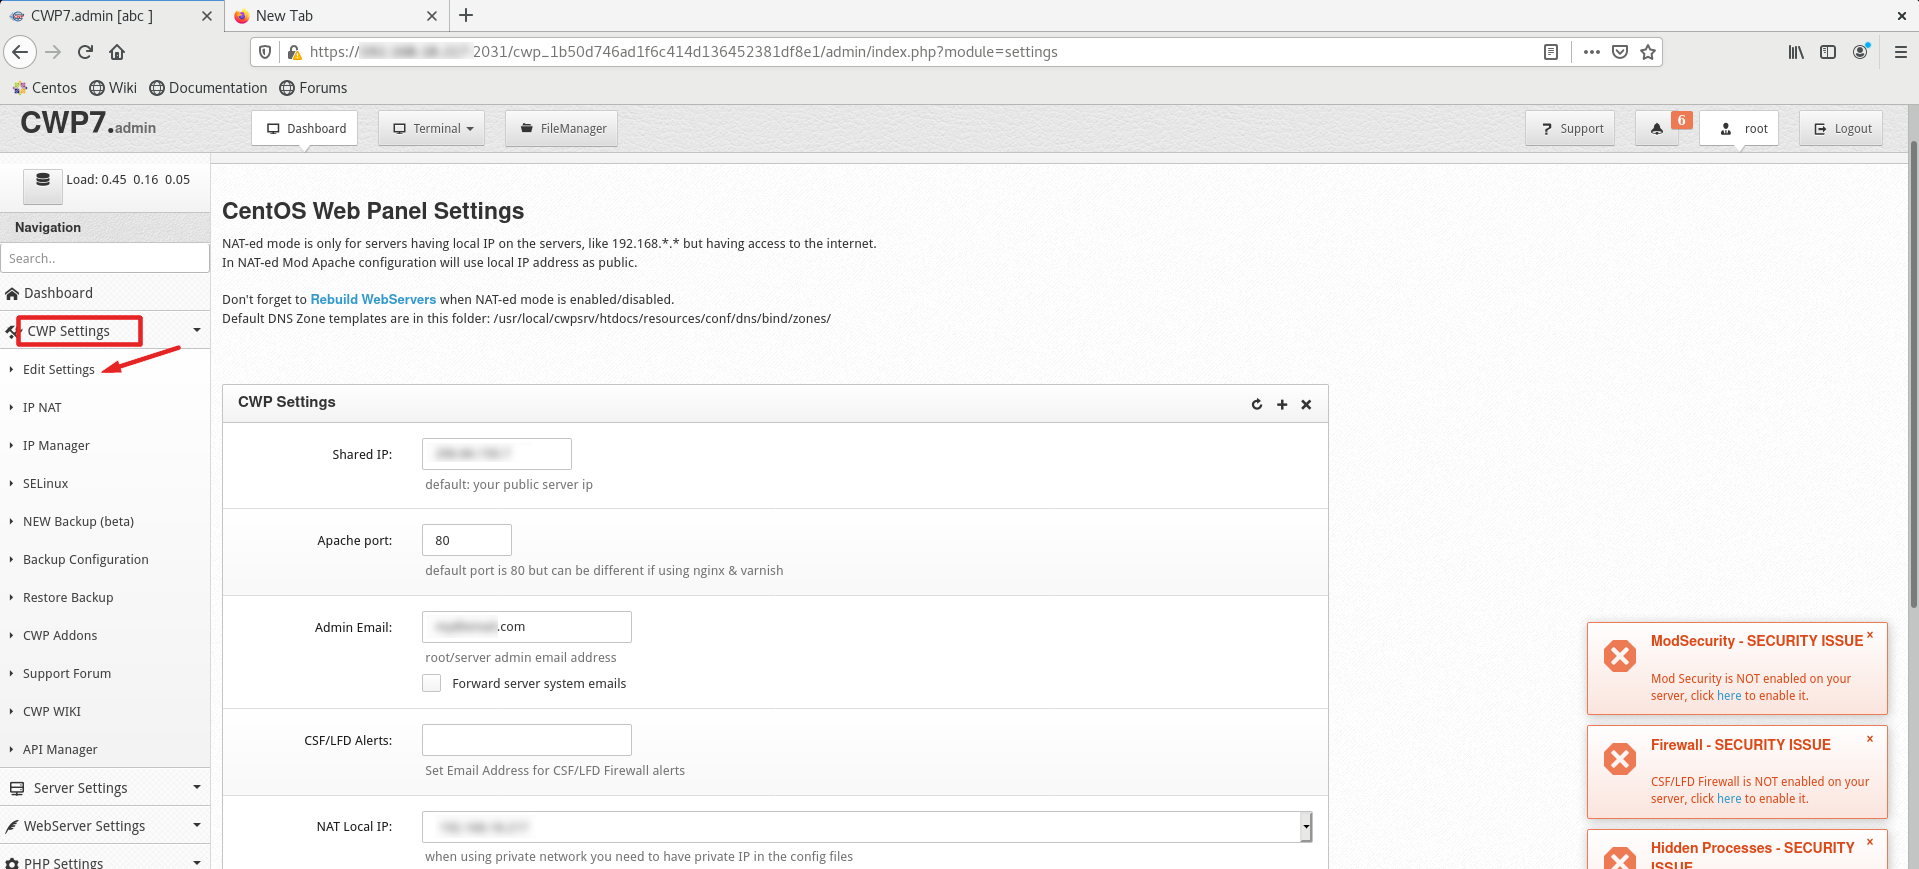
Then go to the CWP Settings and select Edit Settings to determine the shared IP address:
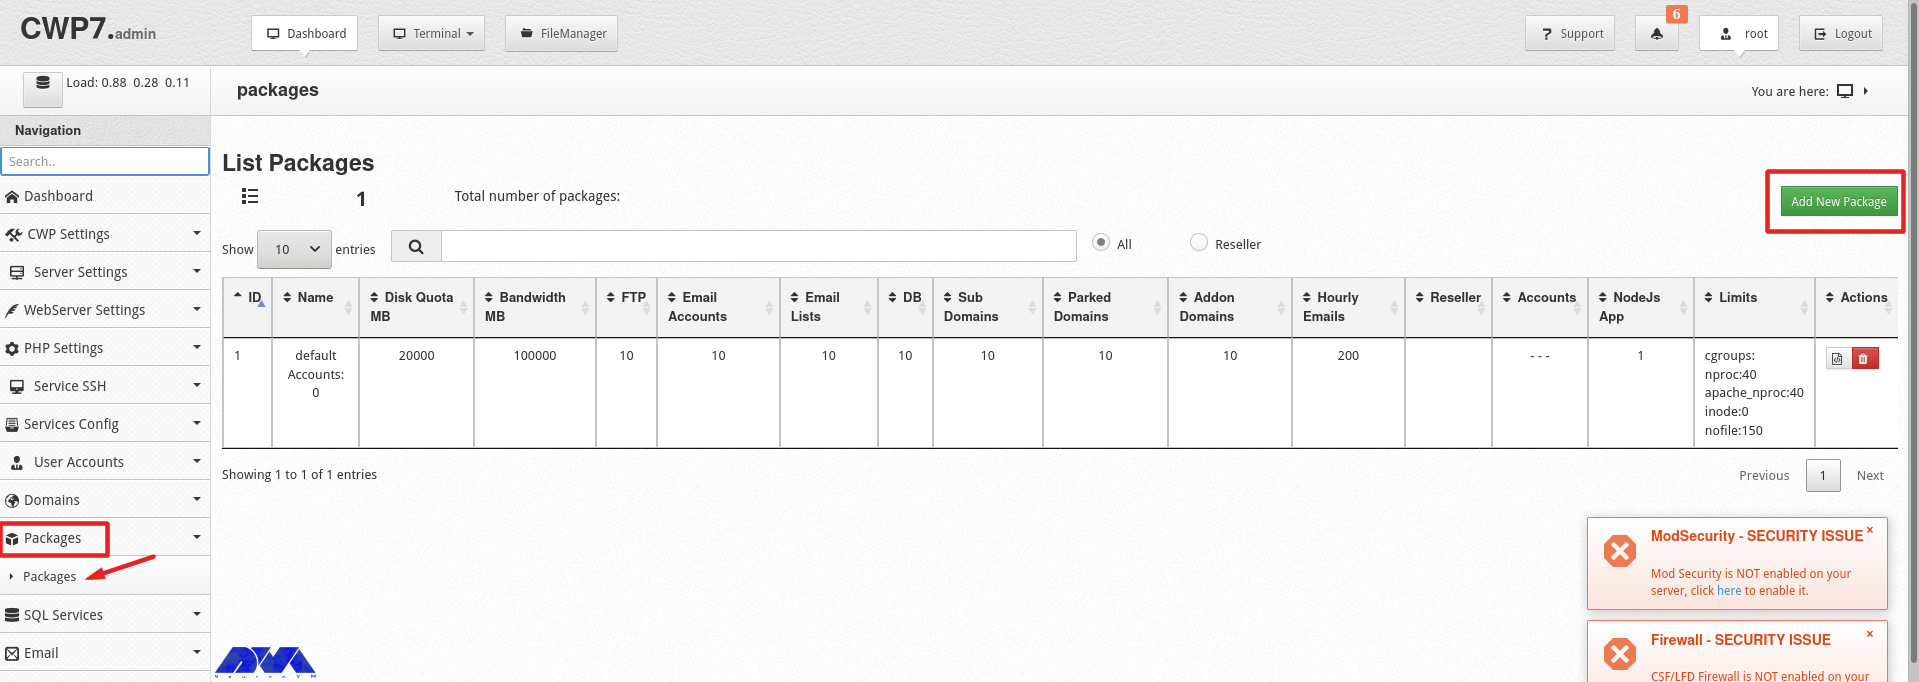
Go to the Packages part and choose to Add a Package:
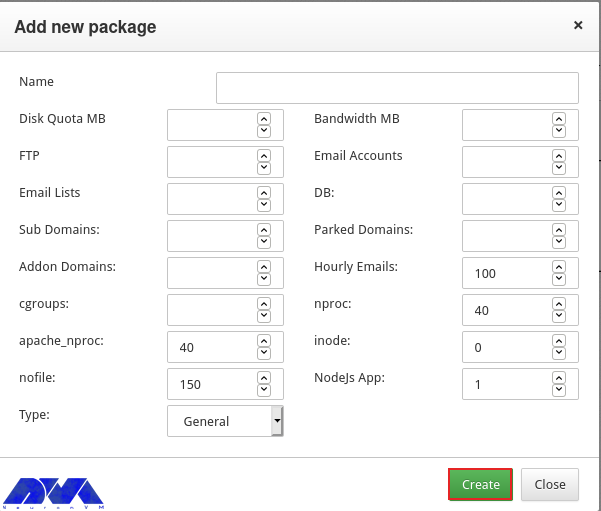
In the end, you will see a pop-up window to add a package, insert the needed values and click on Create button:
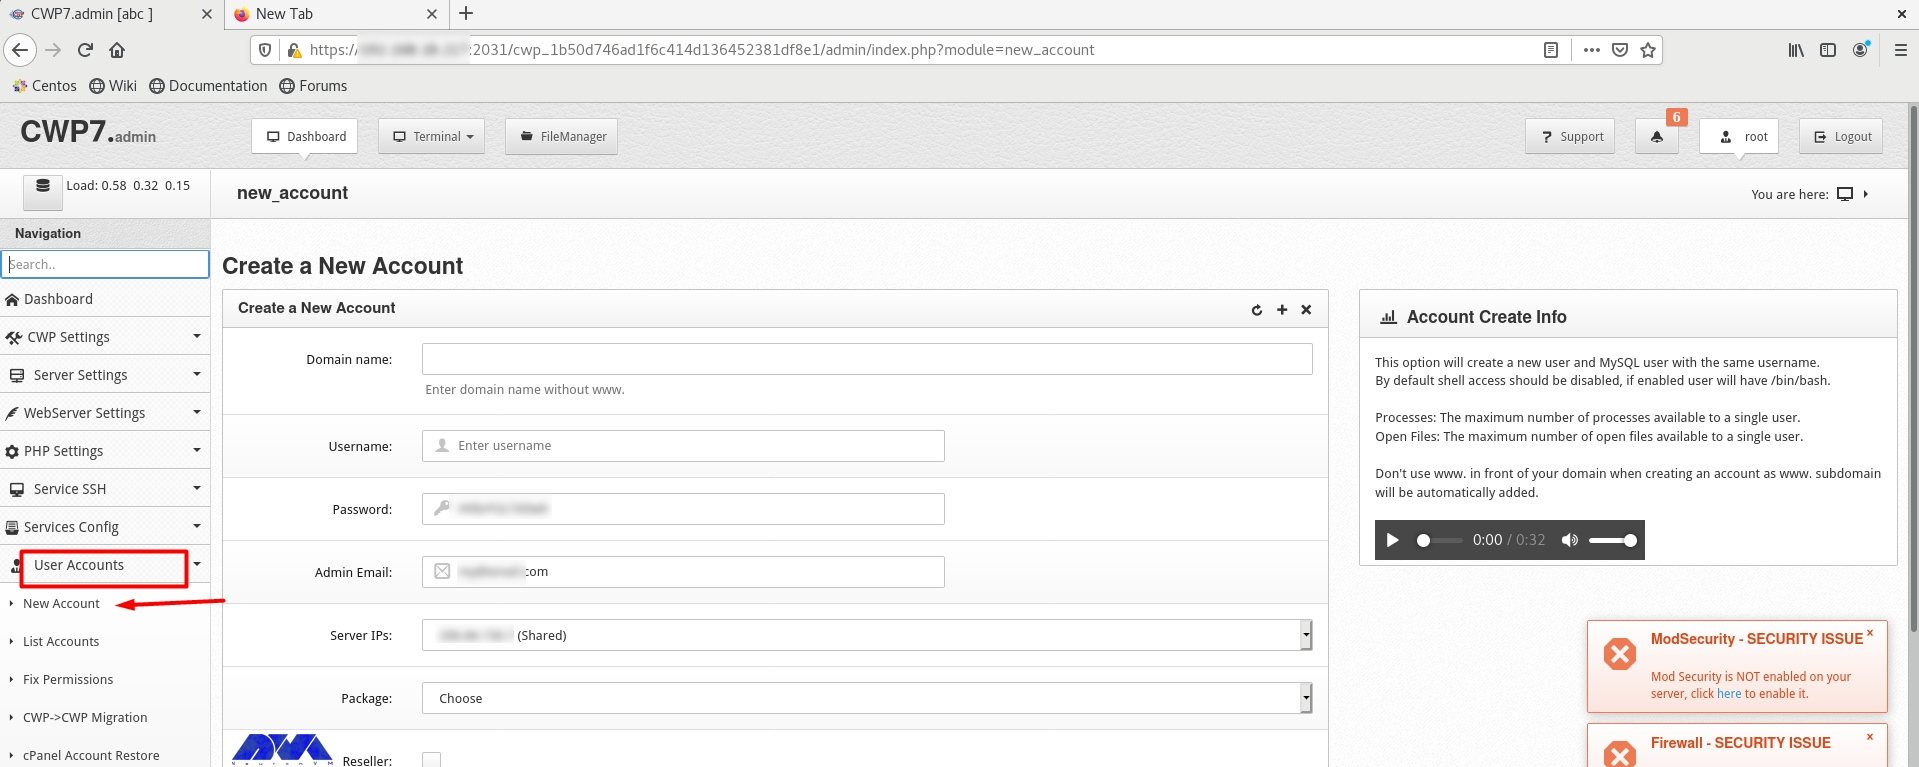
Go to the User Accounts and click on the New Account, to create an account and fill in the necessary information:
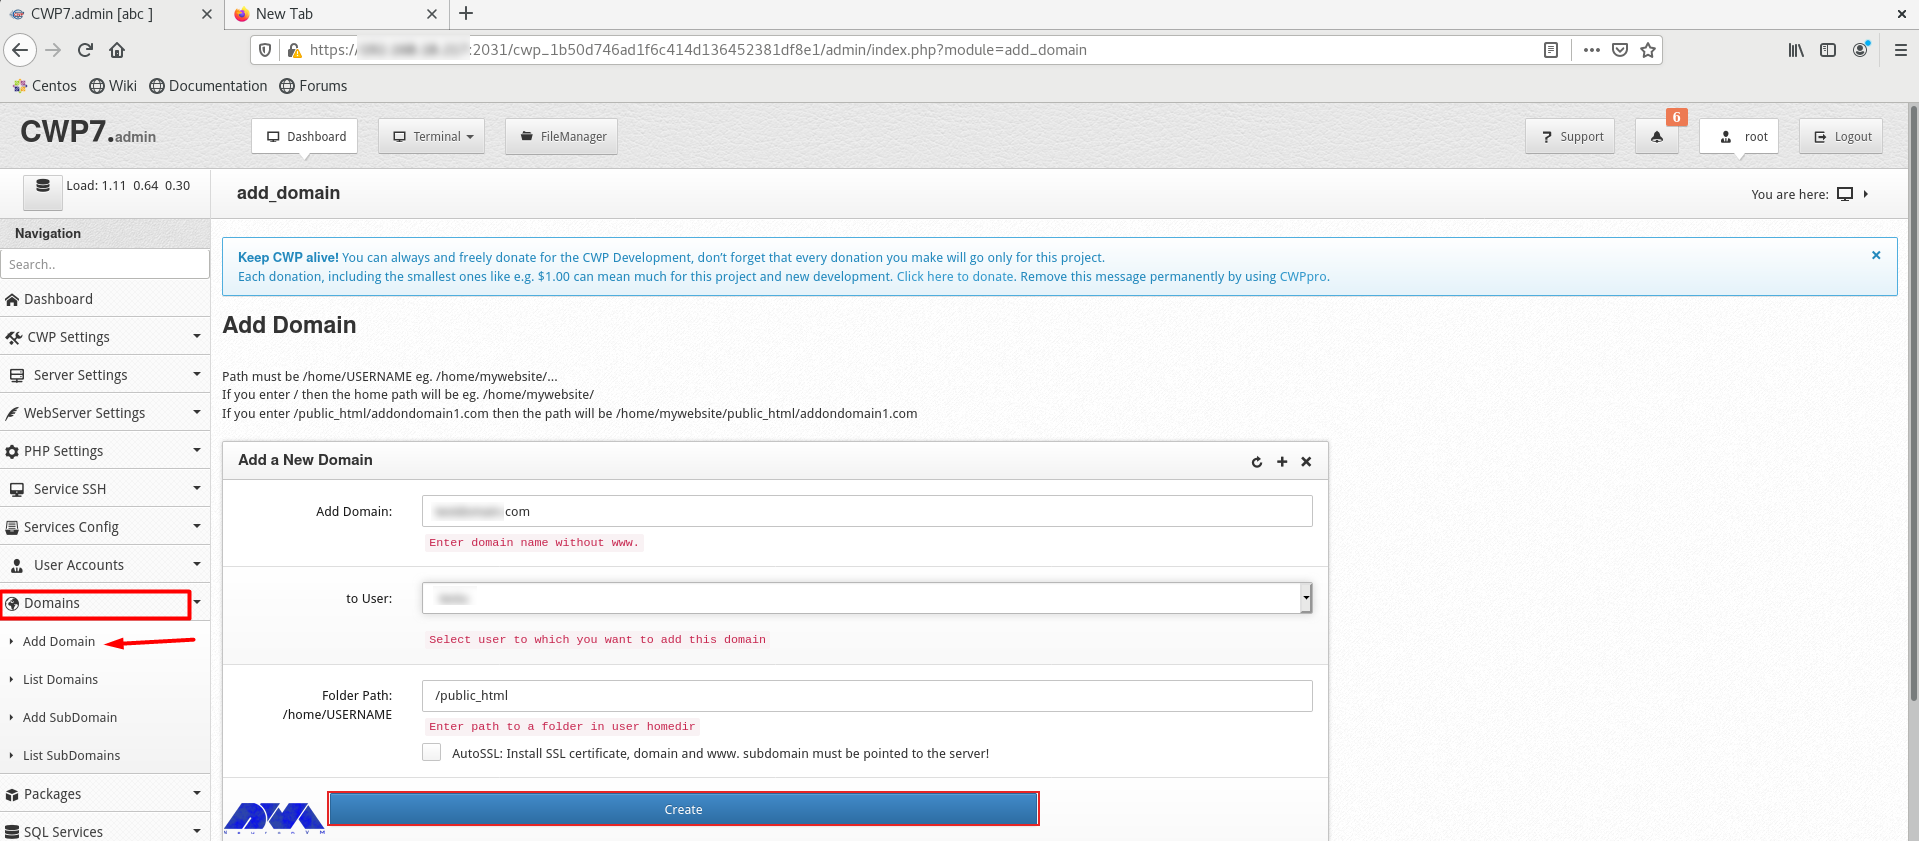
As the final step, add a domain. Click on Domains and then Add Domain by providing the name of the domain and pressing Create button:
CWP is a practical control panel for web hosting with an intuitive interface and great features to manage servers. So, we decided to analyze it and show the way to install CWP on CentOS 8. We also presented all the instructions to configure this management tool.
A minimum of 2 GB RAM and a 64-bit operating system. Although we recommend using 4 GB RAM.
The console access ports are 2030 (without SSL) and 2031 (with SSL).
How useful was this post?
Click on a star to rate it!
Average rating 5 / 5. Vote count: 1
No votes so far! Be the first to rate this post.
 Tags
Tags

V2Ray is a powerful and flexible open-source network proxy that allows you to bypass internet censor...


 Tags
Tags

If you are one of the online businesses that provide hosting services to your customers, you may enc...


 Tags
Tags
What is your opinion about this Blog?


