In today’s technologically advanced world, ensuring cybersecurity is of utmost importance. Firewalls play a crucial role in protecting networks and systems from potential threats. However, a common dilemma faced by organizations is whether to opt for hardware or software firewalls. This comprehensive guide will provide an in-depth analysis of both approaches. Outlining their advantages, and disadvantages, and concluding with a comparison to assist in making an informed decision.
If you are looking for a quality VPS, we suggest you use the Windows VPS plans provided on our website.
A. Hardware Firewalls
Hardware firewalls are dedicated devices that act as a barrier between an organization’s internal network and the external internet. Here are their key features:
Advantages of Hardware Firewalls
– Enhanced Security: Hardware firewalls offer robust security capabilities, inspecting incoming and outgoing traffic at the network level, and protecting against various threats. Such as malware, DoS attacks, and unauthorized access.
– Ease of Management: Hardware firewalls are relatively simpler to set up and manage. They provide a centralized control point for network security, making it convenient to implement and enforce security policies across multiple devices.
– Performance: Hardware firewalls are designing to handle high volumes of network traffic. Their dedicated hardware allows for efficient packet filtering, resulting in minimal impact on network performance.
Disadvantages of Hardware Firewalls
– Cost: Hardware firewalls may require a significant initial investment, making them less affordable for small-scale organizations.
– Limited Scalability: Upgrading or expanding hardware firewalls can be challenging, especially if the network architecture undergoes changes.
– Maintenance and Updates: Often require firmware updates and periodic maintenance checks which could involve additional costs and time investment.
B. Software Firewalls
Software firewalls are applications that installing on individual devices, providing protection at the operating system or individual software level. Let’s explore their characteristics:
Advantages of Software Firewalls
– Cost-effectiveness: Software firewalls are generally more affordable, as they can installed on existing devices without the need for dedicated hardware.
– Flexibility and Customization: Software firewalls allow users to configure security settings based on individual needs, providing a higher degree of customization.
– Mobility: Software firewalls can protect devices on the go, making them suitable for remote workers or individuals operating outside a typical network environment.
– Performance Impact: As software firewalls operate on the device itself, they can potentially consume system resources and impact overall performance, especially on older or low-powered devices.
– Device-Specific Protection: Software firewalls primarily safeguard the device they are installing on, leaving the network susceptible to threats from other devices.
– Managing Multiple Instances: Organizations with numerous devices require manual installation and monitoring of software firewalls on each device, resulting in more administrative effort.
Comparison of Hardware and Software Firewalls
Here is a comparison between hardware and software firewalls:
Aspect
Hardware Firewall
Software Firewall
Installation
Installed as a physical device or integrated into network devices
Installed on individual computers or servers
Performance
Higher performance and throughput due to dedicated hardware resources
May consume system resources and impact overall performance
Scalability
Can handle a higher number of simultaneous connections
Suitable for smaller networks or individual computers
Configuration
Configuration through a web-based interface or command line interface
Configuration through a graphical user interface
Cost
Higher upfront cost due to dedicated hardware
Generally lower cost as it does not require dedicated hardware
Maintenance
Minimal maintenance required
Software updates and maintenance required
Security
Offers strong network-wide protection
Protects individual computers or servers
Network Coverage
Protects the entire network
Limited to protecting individual devices
Hardware Firewalls vs. Software Firewalls
Conclusion
Choosing between hardware and software firewalls depends on the specific needs and resources of an organization. Hardware firewalls provide robust security, centralized management, and better performance at the cost of initial investment. Software firewalls offer greater flexibility, customization, and cost-effectiveness, but may burden individual devices and require manual management. It is crucial to carefully weigh the advantages and disadvantages outlined in this guide while considering factors such as budget, network architecture, and scalability requirements to make an informed decision about the most suitable firewall solution for an organization’s cybersecurity needs.
In the ever-evolving world of gaming, Minecraft has emerged as a popular and immersive universe where players can create, explore, and collaborate. As the game continues to captivate individuals of all ages, the demand for dedicated Minecraft servers has skyrocketed. To cater to the growing needs of Minecraft enthusiasts, this article presents the easiest and most convenient method to buy a Minecraft server with Bitcoin. As cryptocurrencies gain traction in various industries, the intersection of Minecraft and Bitcoin offers a seamless solution for gamers seeking an efficient means of accessing their own dedicated server. We delve into the benefits and steps required to acquire a Minecraft server with Bitcoin, revolutionizing the way enthusiasts indulge in the endless possibilities of Minecraft’s virtual realm.
Introduction to Bitcoin and Minecraft Servers
Bitcoin is a digital currency that has gained immense popularity over the years. It is a decentralized form of currency that allows users to make transactions directly without the need for intermediaries such as banks. Minecraft, on the other hand, is a popular sandbox video game that allows players to build and explore virtual worlds. These two seemingly different entities have found a unique connection in the form of Bitcoin payments for Minecraft servers.
Minecraft servers are private multiplayer networks that allow players from all over the world to connect and play together. These servers require hosting and maintenance costs, which are typically paid for with real-world currency.
However, with the introduction of Bitcoin payments, players now have the option to purchase Minecraft servers using their Bitcoin funds. This not only provides a convenient and secure mode of payment but also opens up new opportunities for players who may have limited access to traditional payment methods.
Benefits of Purchasing a Minecraft Server with Bitcoin
There are several benefits to purchasing a Minecraft server with Bitcoin. Firstly, Bitcoin payments offer a higher level of privacy and security compared to traditional payment methods. When using Bitcoin, users can make transactions without revealing any personal information, ensuring their financial details remain anonymous. This added layer of security can be particularly appealing to Minecraft players, who may be concerned about their online privacy.
Secondly, Bitcoin transactions are generally faster and more efficient than traditional payment methods. With Bitcoin, payments can be processed in a matter of minutes, eliminating the need for lengthy verification processes or waiting periods. This means that players can quickly set up and enjoy their Minecraft servers without any unnecessary delays.
Additionally, Bitcoin transactions are not subject to geographical boundaries or financial institutions, so that players from any part of the world have equal access to purchase Minecraft servers.
Choosing the Right Minecraft Server Hosting Provider
Choosing the right Minecraft server hosting provider is crucial for an optimal gaming experience. There are several factors to consider when making this decision.
Firstly, the server provider should offer reliable and high-performance servers that can handle the demands of Minecraft gameplay. It should have a strong infrastructure that minimizes lag and ensures smooth gameplay for all players.
Additionally, the provider should offer good customer support, so that any issues or concerns can be addressed promptly. It is also important to consider the pricing plans and packages offered by the provider, ensuring that they align with your budget and gaming requirements.
By carefully considering these factors, players can find a server hosting provider that enhances their Minecraft experience.
At NeuronVM, we pride ourselves on being a leading Minecraft server hosting provider that offers top-quality servers at a competitive price.
Our servers are equipped with the latest hardware and high-speed connections, ensuring excellent performance and minimal lag. Additionally, we offer a wide range of plugins that cater to various gaming preferences, providing an immersive and customizable experience.
Our team of dedicated professionals is available round the clock to provide reliable customer support. With our affordable pricing plans, we strive to make Minecraft server hosting accessible to all gamers, without compromising on quality or performance.
Choose NeuronVM for the best Minecraft servers and take your gaming experience to the next level.
How to Buy Minecraft server with Bitcoin?
I’m sure there are many of you out there who may need a fast and strong Minecraft dedicated server. I’m sure because I was in a need of the same thing a few months back. After scrolling through a lot of websites who claimed that their servers are the best. Bought one, used it for a short while and wasn’t really happy with the results.
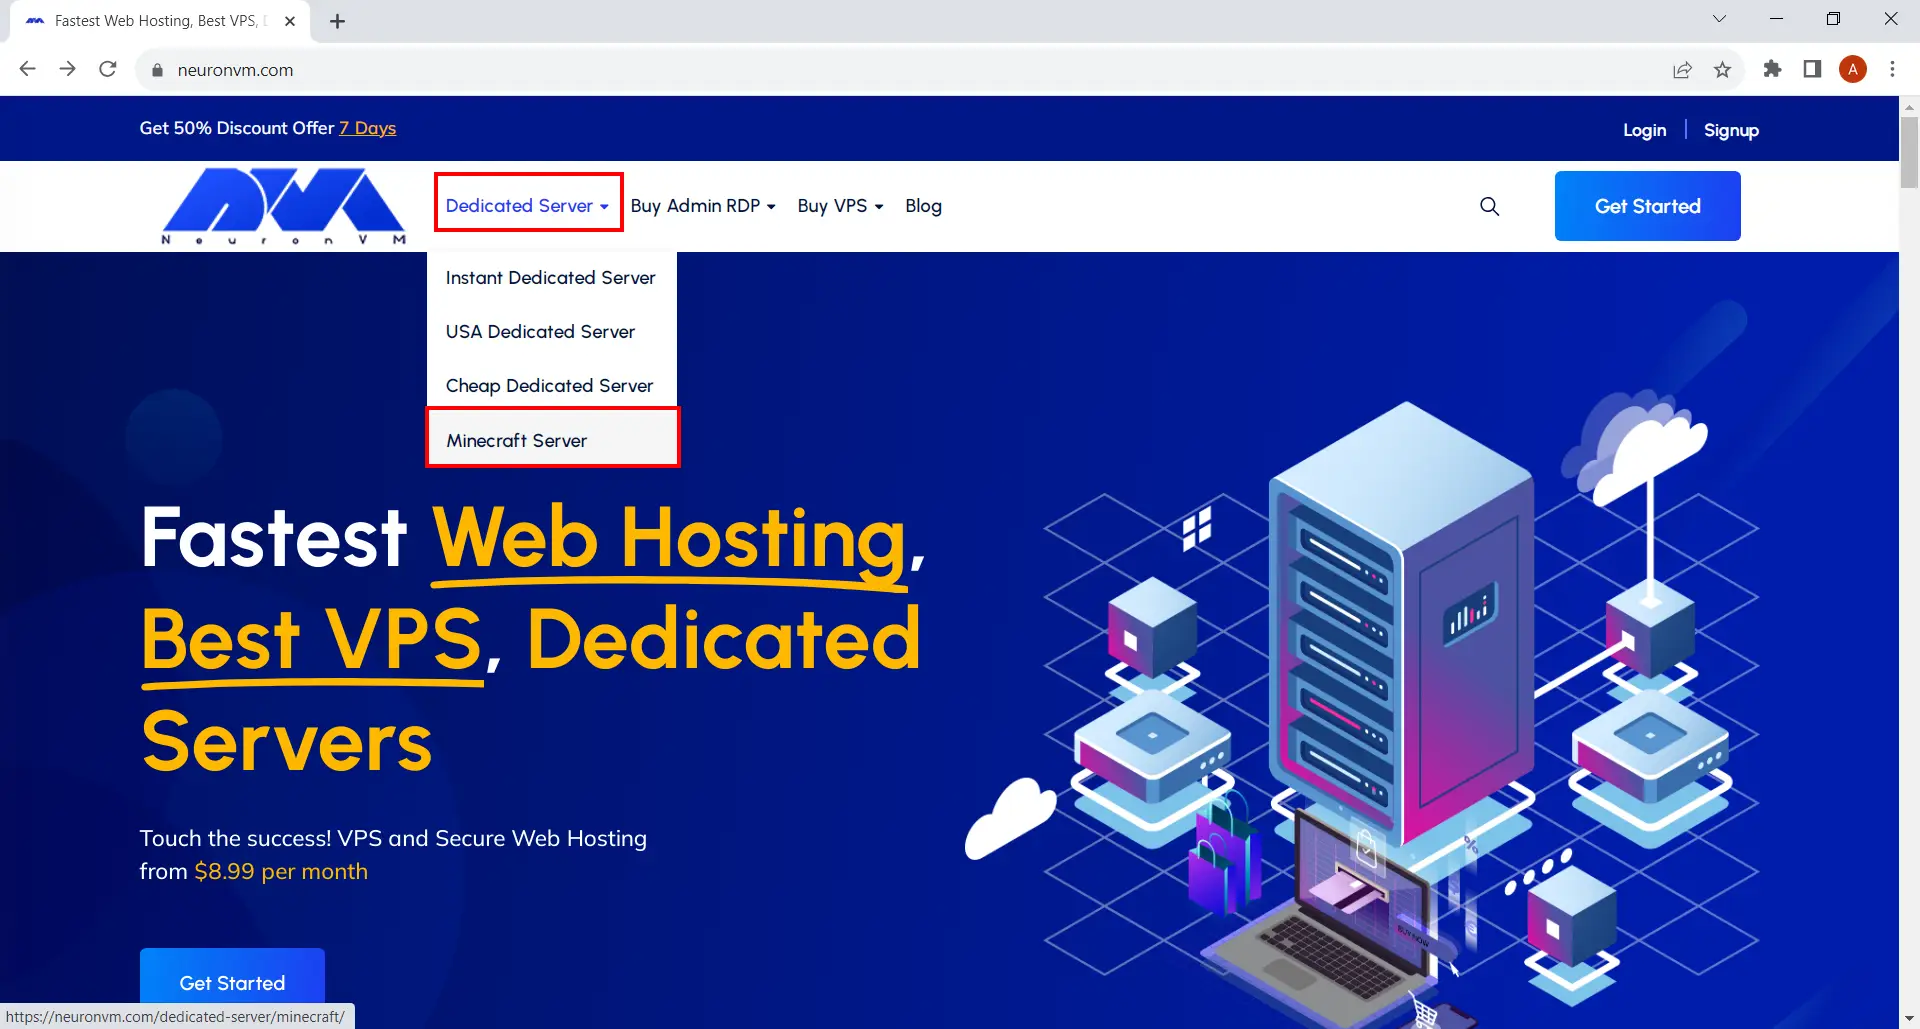
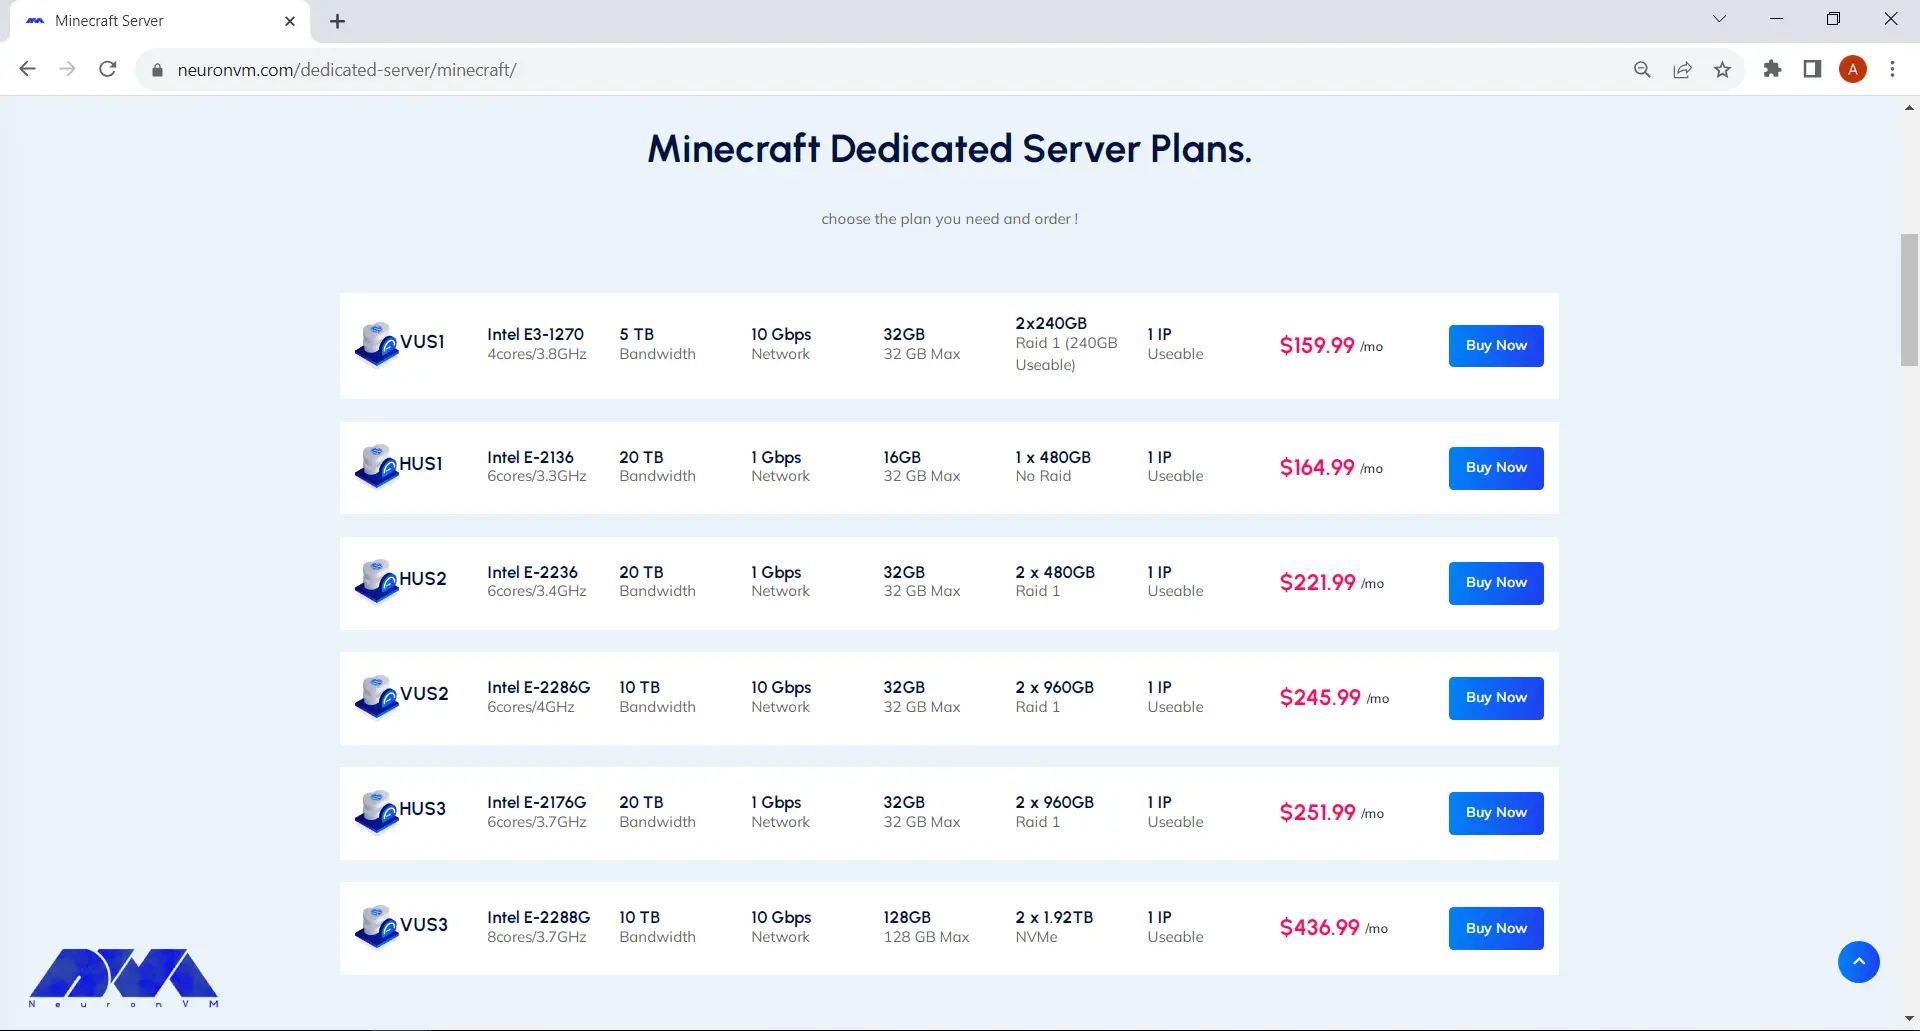
At NeuronVM, we started to provide Minecraft servers and so far the feedback has been great! You buy it and you use it for one week and if it didn’t fulfil your requirements (which is unlikely), you can get your money back, no question asked. So here’s a small guideline on how to buy Minecraft server with Bitcoin to make things easier for you:
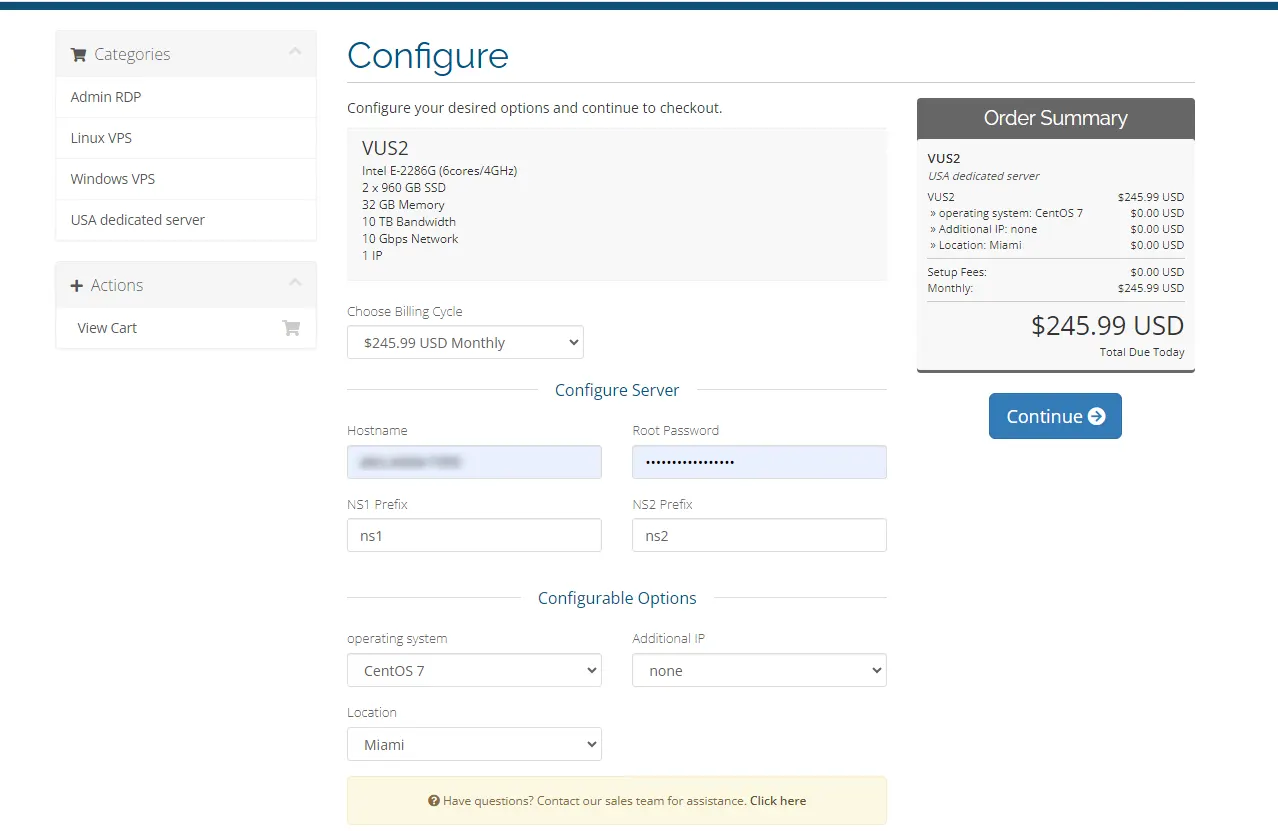
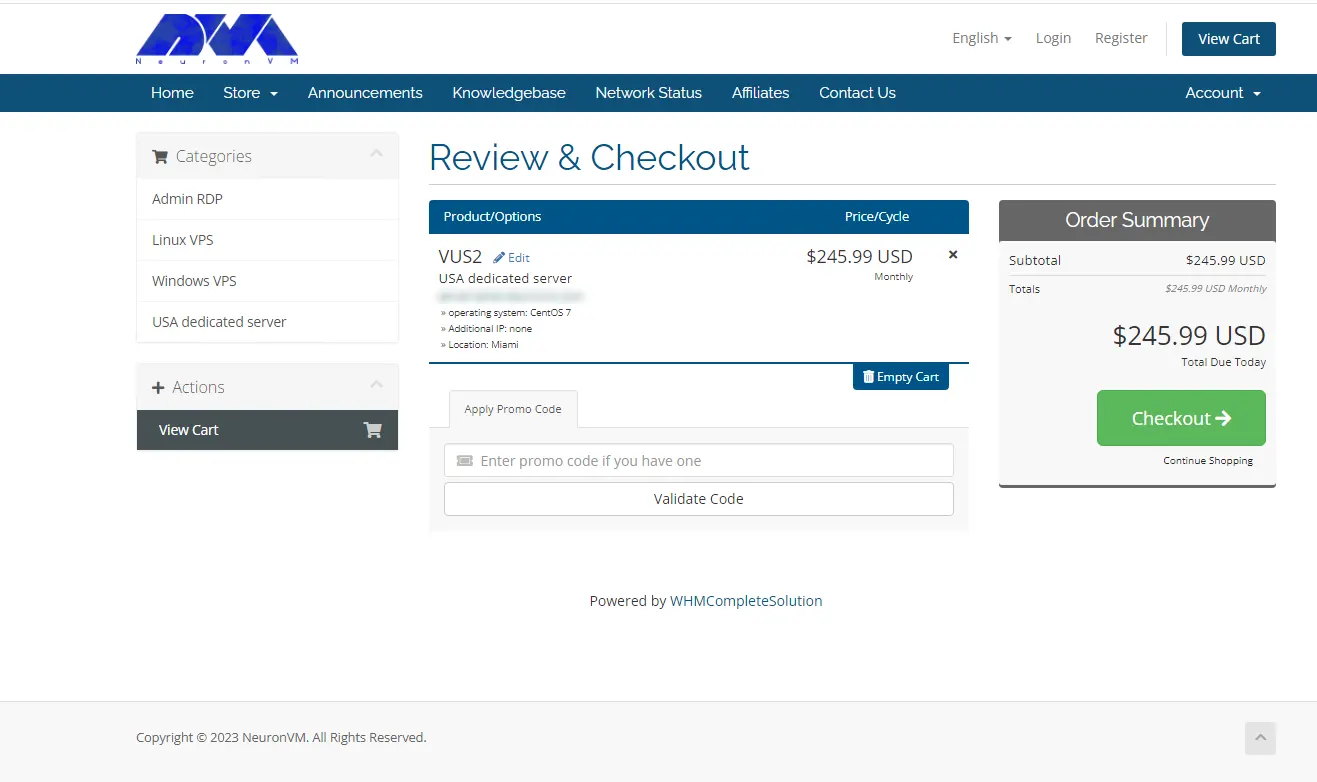
It will direct you to the page shown below. There’s a small form to fill under the “Configure Server” section. You can also change the options like Operating System, Location and Additional IP.
You’ll be landed on Review and Checkout pay where you can simply review the items in your shopping card and enter a promo code to apply discounts. After you’re done, click on Checkout button and proceed.
Fill the form if you haven’t signed up before. After that you can choose your preferred method on payment and click on Complete Order button down below.
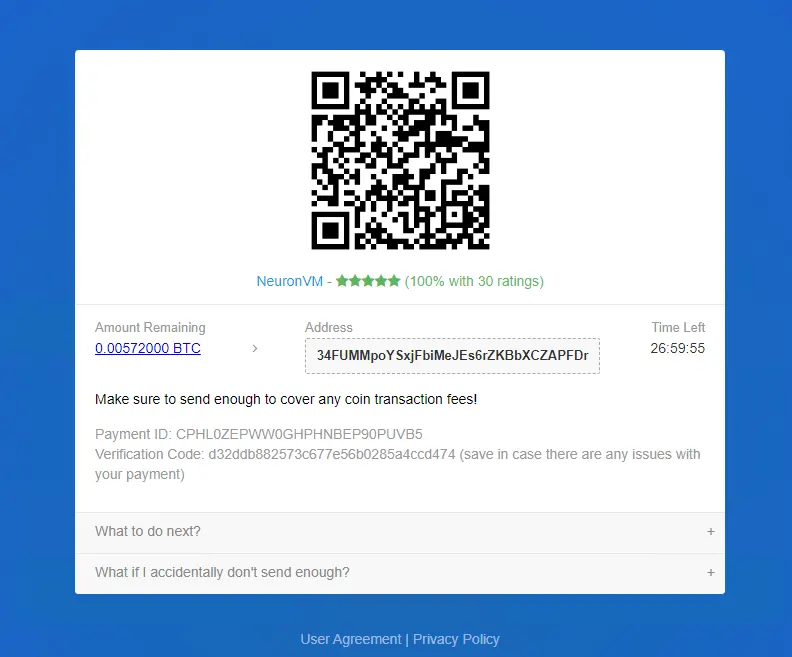
Now select Bitcoin from the Select Coin section and then click on Complete Checkout.
Copy your bitcoin wallet information and pay easily.
That’s it! Our specialists will deliver your server to you in no time and you’ll be able to run your Minecraft server without worrying about anything! Remember if you had any questions you can contact us through different ways, or you can comment under this post and I will answer any related question to this topic!
Final Words
Playing Minecraft is so fun and engaging, but it’s most enjoyable when there’s no obstacle slowing you down. Having a strong dedicated server can really boost your experience and all the other players that you host! Plus, you don’t have to worry about paying high commissions to online payment gateways. At NeuronVM you can simply get a Minecraft server with Perfect Money, Bitcoin or any other cryptocurrency!
PowerShell is a powerful scripting language and command-line shell that allows automation and management of Windows operating systems. One of the essential commands in PowerShell is the “Echo” command, which is using to display text or variables on the console. Mastering the PowerShell Echo command is crucial for effectively managing and troubleshooting PowerShell scripts and commands. Echo is using to display information or messages on the console or output stream. In this comprehensive guide, we will delve into the various ways to utilize Echo and explore examples of its usage.
We recommend you to use our Windows VPS plans to better understand the high speed, great performance and 24/7 support.
Understanding the Echo Command
The Echo command is a command using in scripting languages and command-line interfaces to print text or variables back to the user or output device. It is commonly using to display messages, prompt for user input, or debug code. The Echo command is useful for displaying information or manipulating data in a script. It is a simple and versatile command that can help automate various tasks and provide feedback to the user.
Basics of the PowerShell Echo Command
The Echo command in PowerShell is primarily using for displaying text messages on the console or output stream. It serves as a tool for communication between the script and the user, enabling feedback, information display, or user interaction. To utilize the Echo command, the following syntax is using:
Write-Host <Message>
Here, <Message> represents the text or information that needs to be displayed. The Write-Host command is an alias for the Echo command, making them interchangeable.
Echo Command Syntax
The basic syntax of the echo command is:
echo [options] [string]
Here are some examples of how to use the echo command:
1. Echo a string:
echo "Hello, World!"
Output: Hello, World!
2. Redirect the output to a file:
echo "This is a message" > output.txt
This will create a file named “output.txt” and write the string “This is a message” into it.
3. Append the output to an existing file
echo "This is another message" >> output.txt
This will add the string “This is another message” to the end of the existing “output.txt” file.
Note: The behavior of the echo command may vary slightly depending on the operating system and shell being use.
Basic Echo Command Usage
The basic usage of the echo command in PowerShell is to display text on the console. Here’s how you can use it:
1. To display the contents of a variable:
$myVar = "This is a variable"
echo $myVar
Output:
This is a variable
2. To concatenate multiple variables or strings:
$firstName = "Jannson"
$lastName = "Miller"
echo "My name is " + $firstName + " " + $lastName
Output:
My name is Jannson Miller
Note: In PowerShell, the “echo” command is equivalent to “Write-Host”. If you want to write to the console without using the “echo” command, you can simply use:
Write-Host "Hello, world!"
Concatenating Strings with Echo
In PowerShell, you can concatenate strings using the “+” operator or by using the ‘”Jannson-Miller” cmdlet.
Both methods allow you to concatenate strings in PowerShell. Choose the one that best suits your needs.
Advanced Techniques with Echo
– Changing the Foreground and Background Colors of the Echo Output:
You can use the “-ForegroundColo” and “-BackgroundColor” parameters with the “Write-Host” cmdlet to change the colors of the echo output. For example, to display a message in yellow on a blue background, you can use:
Write-Host "This is a message" -ForegroundColor Yellow -BackgroundColor Blue
– Using Formatting Options:
You can use formatting options to control the appearance of the echoed output. For example, you can use the “-f” operator to format a string and include variables. Here’s an example:
$name = "Jannson"
$age = 30
$formattedString = "My name is {0} and I am {1} years old" -f $name, $age
Write-Host $formattedString
Output: “My name is Jannson and I am 30 years old”
– Displaying Progress Bars:
You can use the “Write-Progress” cmdlet to display progress bars during lengthy operations. This can be helpful to keep users informed about the progress of a script. For example:
– Displaying Colored Text with ASCII Escape Codes:
You can use ASCII escape codes to customize the appearance of the echoed output, including colors and text effects like bold or underline. Here’s an example:
$escape = [char]27
$reset = "${escape}[0m"
$red = "${escape}[31m"
Write-Host "${red}This is a red message${reset}"
Note: The ASCII escape codes might not work in all console applications or environments.
These are just a few examples of advanced techniques you can use with echo in PowerShell. Experiment and explore the various options and functionalities available to customize and enhance your scripts.
Conclusion
In this comprehensive guide, we explored the PowerShell Echo command and learned its various applications. By now, you should be equipped with the knowledge to effectively utilize Echo for outputting text and manipulating strings in your PowerShell scripts. Remember, the Echo command is a powerful tool that can enhance your PowerShell experience, and practice will help you master it.
VPS (Virtual Private Server) has become an essential tool for forex traders looking to optimize their trading strategies and achieve better performance. By utilizing a VPS, traders can ensure uninterrupted trading activity, increased speed, and enhanced security. In this comprehensive guide, we will delve into the world of VPS for forex trading, providing an in-depth analysis of its benefits, practical tips, and a step-by-step guide to mastering its use.
Understanding VPS for Forex Trading
Forex trading requires real-time access to the markets, 24/7. However, individual traders often face challenges such as unstable internet connections, power outages, and system crashes, which can impede their trading activities. This is where VPS comes in.
A VPS is a virtual machine that is hosted on a remote server, providing traders with a stable and secure environment to run their trading platforms and expert advisors (EAs). By leveraging VPS technology, traders can eliminate downtime and technical disruptions, ensuring seamless execution of trades.
Advantages of Using VPS for Forex Trading
1. Uninterrupted Trading
VPS operates independently of a trader’s local computer and internet connection. This means trades can be executed even if the trader’s computer is turned off or experiencing connectivity issues.
2. Reduced Latency
VPS servers are often located near major financial institutions and data centers, enabling traders to benefit from fast and low-latency connections, which are crucial for timely trade execution.
3. Enhanced Security
With VPS, traders can keep their trading platforms and EAs running in a secure, isolated environment. This protects them from potential malware, viruses, and hacking attempts, ensuring the safety of their trades and account information.
Choosing the Right VPS Provider
Selecting a reliable VPS provider is paramount for successful forex trading. Consider the following factors when making your decision:
– Uptime Guarantee: Ensure the provider offers a high uptime guarantee, ideally 99.9% or more, to minimize the risk of downtime and potential missed trading opportunities.
– Location: Opt for a VPS provider with server locations close to major financial hubs to reduce latency and achieve faster trade execution.
– Scalability: Look for a provider that allows for easy scalability, enabling you to upgrade your VPS resources if needed as your trading volume increases.
– Customer Support: Ensure the provider offers 24/7 customer support, especially during critical trading hours when prompt assistance is vital.
You can buy the plan you need from the various VPS plans offered on the NeuronVM website and enjoy maximum speed, performance and support.
Mastering the Use of VPS for Forex Trading
1. Choosing the Right VPS Plan: When choosing a VPS plan for forex trading, it is important to consider your specific needs. Look for a plan that offers low latency, high uptime, and reliable performance. Consider the amount of RAM, CPU power, and storage space provided to ensure optimal trading conditions.
Taking these factors into account will help you choose the right VPS plan for forex trading.
2. Configuring the VPS: Install your preferred trading platform and any necessary EAs on the VPS. Configuring the VPS for forex involves setting up the virtual private server to optimize trading performance. Key steps include installing the appropriate forex trading platform, configuring the server to run the platform smoothly, and ensuring a stable internet connection for uninterrupted trading.
Additionally, security measures like setting up firewalls and encryption are crucial to protect trading data and ensure privacy. Proper configuration helps traders access their forex accounts and execute trades efficiently.
3. Backup and Recovery: Backup and recovery in forex refers to the process of creating copies of important data, such as trading strategies, transaction histories, and customer information, and implementing systems to restore that data in the event of a system failure or data loss.
These measures are put in place to ensure the continuity of forex trading operations, protect against potential cyber threats, and minimize financial losses.
4. Monitoring and Maintenance: Monitoring and Maintenance for forex VPS involves continuously monitoring the VPS server for any issues or performance disruptions. This includes checking server resources, optimizing network connectivity, and addressing any technical glitches promptly.
Regular maintenance tasks such as software updates and security patches are performed to ensure the VPS remains stable and secure. Additionally, proactive monitoring of the trading platform is conducted to ensure uninterrupted trading operations and maximum uptime for forex traders.
Conclusion
Mastering the use of VPS for forex trading can greatly enhance your trading experience. By leveraging VPS technology, you can enjoy uninterrupted trading, low-latency connections, and enhanced security. Selecting the right VPS provider and configuring your VPS correctly are fundamental steps in maximizing its benefits. Always prioritize stability, security, and scalability when choosing a VPS plan. With proper monitoring and maintenance, you can optimize your forex trading activities and achieve better results in the dynamic world of forex trading.
In the world of digital storage, the terms “mebibyte” (MiB) and “megabyte” (MB) are often used interchangeably. However, there is a subtle difference between the two that can have a significant impact on how data is measured and understood. This guide aims to provide a comprehensive explanation of MIB vs. MB, the differences between mebibytes and megabytes, their origins, and their applications.
The megabyte is a term commonly using in the field of computing and digital storage. It is a unit of measurement that represents a large amount of data. In the International System of Units (SI), one megabyte is equal to 1,000,000 bytes, where a byte consists of 8 bits. Traditionally, the megabyte has been the standard unit of measurement for storage capacity, file size, and data transfer rates.
Introducing the Mebibyte (MIB)
In contrast to the megabyte, the mebibyte is a unit of measurement based on binary rather than decimal values. The mebibyte was introduced by the International Electrotechnical Commission (IEC) in 1998 to clarify issues arising from the use of decimal-based prefixes for binary-based measurements. One mebibyte is equal to 1,048,576 bytes, where a byte consists of 8 bits.
Hence, the mebibyte provides a more accurate representation of data capacity in binary systems.
The Confusion and Conflict
The confusion between mebibytes and megabytes arises from the inconsistent use of prefixes in the computing industry. Many storage devices and software manufacturers use the SI prefixes (based on decimal values) when referring to storage capacities, resulting in discrepancies between the actual storage capacity and the amount reported by the operating system.
This discrepancy can cause frustration among users and lead to misunderstandings.
Applications and Usage
The division between mebibytes and megabytes is primarily relevant in computing, particularly when dealing with digital storage, memory, and data transfer rates. It is essential to consider this distinction when working with operating systems, storage devices, and software that rely on accurate measurements of data.
Generally, if you are discussing storage devices, file sizes, or data transfer rates, it is crucial to use the appropriate unit of measurement to avoid any confusion or misinterpretation.
MIB vs. MB
Here is a comparison table between Mebibyte (MIB) and Megabyte (MB):
Mebibyte (MiB)
Megabyte (MB)
Equal to 1,048,576 bytes
Equal to 1,000,000 bytes
Used in computers and digital storage
Used in computers and digital storage
Based on binary calculation
Based on decimal calculation
Commonly used for memory measurements
Commonly used for file sizes
Often used in software and operating
Frequently used in industries like
Systems
Telecommunications and data storage
MIB vs. MB
Conclusion
While mebibytes (MiB) and megabytes (MB) both represent units of digital storage, their fundamental difference lies in the base of their measurements. Understanding the distinction between these units is crucial when dealing with digital storage, memory, and data transfer rates, as it ensures accurate measurements and avoids potential misunderstandings. By being aware of the differences between mebibytes and megabytes, users can make informed decisions and have a clearer understanding of their digital storage requirements.
Say Goodbye to Shared Hosting! Shared hosting may not provide the speed, security, and customization options that a dedicated server can offer. With a dedicated server, you have full control over your resources, improved performance, and enhanced security. It’s a reliable and scalable solution for businesses looking to optimize their online presence. In this comprehensive article, we will tell you why you should buy a dedicated server.
Understanding the Limitations of Shared Hosting
Shared hosting is a popular web hosting option where multiple websites are hosted on a single server. While it has its advantages, it also comes with limitations that website owners should consider. Here are some of the limitations associated with shared hosting:
– Resource limitations: Shared hosting plans often have limited resources like CPU, memory, and disk space. Since these resources are shared among multiple websites, your website’s performance may be affected if another site on the server experiences high traffic or resource usage.
– Security vulnerabilities: Because multiple websites share the same server, there is an increased risk of security breaches. If one website on the server gets compromised, it can potentially impact the security of other websites as well. Shared hosting providers take security measures, but the risk is higher compared to dedicated or VPS hosting.
– Limited customization options: Shared hosting plans usually have limited customization capabilities as they cater to a diverse range of users. There may be restrictions on software installations, server configurations, and access to server settings. This can limit your ability to customize your hosting environment to suit your specific needs.
– Performance concerns: Since multiple websites share server resources, performance issues can occur during peak traffic periods. If any website on the server receives a sudden surge in traffic, it can impact the performance of other websites hosted on the same server.
– Dependency on other websites: The behavior and traffic of other websites on the same server can affect the performance and availability of your website. If another website on the server has high traffic or technical issues, it can impact the overall performance of the server and subsequently affect your website.
Exploring the Advantages of a Dedicated Server
Having or buy a dedicated server for your business or website offers several benefits. Here are some key advantages to consider:
1. Enhanced Performance and Reliability: Unlike shared hosting or virtual private servers (VPS), a dedicated server delivers superior performance and reliability. By having exclusive access to server resources, you can enjoy faster loading times and minimal downtime.
2. Unmatched Customization and Flexibility: With a dedicated server, you have complete control over hardware and software configurations. This allows you to customize the server according to your specific requirements and tailor it to your business needs. Install and configure critical software applications or services hassle-free.
3. Heightened Security: Dedicated servers provide superior security compared to shared hosting or VPS. Since you have exclusive use of server resources, you don’t have to worry about other websites or users affecting your server’s security or performance. Take full control over security measures and implement stringent protocols to safeguard your data and prevent unauthorized access.
4. Seamless Scalability: A dedicated server offers scalability, allowing you to easily upgrade or downgrade resources as your business evolves. From expanding RAM to increasing storage or processing power, accommodating higher traffic or storage demands becomes hassle-free.
5. Optimized Website Performance: With a dedicated server, you can optimize your website’s performance by customizing server settings specifically for its needs. This leads to faster load times and a smoother user experience. Ultimately, it boosts customer satisfaction and engagement.
6. Enhanced SEO Rankings: Website speed and performance play a crucial role in search engine rankings. A dedicated server can significantly improve your website’s load times, ultimately enhancing your search engine optimization (SEO) efforts and boosting rankings.
Comparison Criteria between Shared Hosting and Dedicated Server
Some of the main comparison criteria between shared hosting and dedicated server are as follows: server performance, optimization, customization, security and technical skill requirements. In the rest of this article, we will examine each of these cases.
Server Performance
Often, when you visit a website and encounter slow page speeds or encounter error messages while making a purchase, it is an indication that the website is undergoing a decline in server performance.
The functionality of a shared hosting is distributed among all the websites linked to it, which is different from a dedicated server. A dedicated server guarantees consistent response time and reliability, unaffected by the performance of other websites.
Optimization
Having a dedicated server offers much greater optimization compared to shared hosting. By having complete control over your company’s server, you can enjoy enhanced speed and efficiency options.
Personalization
Limiting software installed by multiple users is crucial for a shared hosting service to prevent the potential upload of malicious files that could compromise server security. Additionally, broken scripts have the capability to bring down any website from its server.
Opting for a dedicated server provides greater flexibility for customization. This allows you to install specialized software specific to your company and customer requirements without concerns of limitations or impacting the websites of other companies.
Security
Dedicated server easily surpasses shared hosting in terms of security, making any comparison between the two futile! Shared hosting, in fact, poses a significant risk to security. If your server is hacked, not only will its performance suffer but the security of your website will also be compromised. This is particularly concerning if your website handles financial transactions or maintains sensitive financial information.
On the other hand, with a dedicated server, you have the ability to enhance your security. You can benefit from your hosting service’s integrated security measures, which provide an additional layer of protection for your company, customers, and online reputation against malicious content.
Technical Skill Requirements
Shared hosting provides a restricted range of resources and choices, making it accessible to beginners with minimal technical know-how. However, it is important to note that shared hosting primarily caters to businesses and small enterprises.
On the other hand, a dedicated server gives you full control and allows for customization based on your specific requirements. This option is highly suitable for individuals with technical expertise or those working alongside a dedicated team of system administrators.
Shared Hosting vs. Dedicated Server
In the table below, we have shown you a general comparison between shared hosting and a dedicated server:
*******
Shared Hosting
Dedicated Server
Resources
Shared among multiple users
Dedicated to a single user
Cost
Less expensive
More expensive
Performance
Limited by shared resources
High performance as resources are dedicated
Scalability
Limited scalability as resources are shared
Scalable to accommodate increased traffic and resource needs
Security
Shared security measures
Enhanced security measures and control
Customization
Limited customization options
Complete control over server configuration and software
Maintenance
Managed by the hosting provider
Requires technical expertise for maintenance
Traffic Handling
Shared bandwidth and server load
Dedicated bandwidth and server load management
Control
Limited control over server settings
Full administrative access and control
Suitable For
Small to medium-sized websites
Large websites, e-commerce platforms, and resource-intensive applications
Shared Hosting vs. Dedicated Server
Choosing the Right Provider
Choosing the best provider to buy a dedicated server involves considering several important parameters. Here are some essential factors to consider:
– Reliability and Uptime
– Performance
– Scalability
– Network and Data Center
– Support and Customer Service
– Control Panel and Management
– Pricing and Billing
– Security
– Reputation and Reviews
– Compliance and Legal Considerations
By considering these parameters, you can make an informed decision and select a dedicated server provider that best aligns with your business needs. We recommend you to use the NeuronVM website to buy a dedicated server with the various plans you want. For a guide to buying a dedicated server, you can refer to the article The Ultimate Guide to Buying Dedicated Server with Perfect Money.
Conclusion
In conclusion, say goodbye to the limitations and drawbacks of shared hosting by investing in a dedicated server. With enhanced performance, reliability, and security, a dedicated server offers the ultimate hosting solution for businesses and individuals who require maximum control and customization of their online presence. It’s a worthwhile investment that allows for scalability and meets the demands of growing online businesses.
This article aims to provide a comprehensive guide on the top USA RDP Providers you need to know about. RDP, also known as Terminal Services, enables users to remotely access and control a computer or server over a network connection. The paper will analyze and compare the features, pricing and performance of each provider, offering valuable insights for individuals and businesses seeking reliable RDP services.
Evaluation criteria for USA RDP providers
The evaluation criteria for USA RDP providers include pricing, customer support, bandwidth, security features, uptime, user reviews, and compatibility with different operating systems and devices. In the following, we will explain some of these criteria.
Security Measures and Encryption Protocols
Here are some key factors to consider about security measures and encryption protocols when selecting USA RDP providers:
– Transport Layer Security (TLS)/Secure Sockets Layer (SSL):
Look for RDP providers that use TLS/SSL encryption protocols to secure data transmission between the client and the RDP server. This helps to prevent eavesdropping and data interception.
– Two-Factor Authentication (2FA):
Choose providers that offer 2FA as an additional layer of security. This requires users to provide two forms of authentication, such as a password and a unique code sent via SMS or generated by an authentication app.
– Secure Network Infrastructure:
Ensure that the providers have robust network infrastructure with firewalls, intrusion detection systems, and other security measures in place to protect against unauthorized access or attacks.
– Encryption Algorithms:
Check if the RDP providers support strong encryption algorithms, such as Advanced Encryption Standard (AES) with a minimum of 256-bit encryption. This provides cryptographic security for data privacy.
– Regular Software Updates:
Verify if the providers regularly update and patch their RDP software to address any security vulnerabilities. Keeping software up to date is crucial for protecting against known exploits.
– Data Privacy Policies:
Review the providers’ data privacy policies to ensure they comply with applicable laws, such as the General Data Protection Regulation (GDPR) if you handle personal data.
– User Access Controls:
Look for RDP providers that offer granular user access controls, allowing you to define user permissions, restrict access to specific resources, and enable logging and auditing capabilities.
Connection Speed and Reliability
When selecting USA RDP providers, it is important to consider both the connection speed and reliability of the providers.
A. Connection Speed:
The speed of the RDP provider’s network is crucial for a smooth and efficient remote desktop experience. Look for providers that offer fast and stable connections, preferably with high bandwidth capabilities. This ensures that you can access and work on your remote desktop without any noticeable lag or delays.
B. Reliability:
Reliability refers to the consistency and uptime of the RDP provider’s services. It is crucial to choose a provider that has a reliable infrastructure and a proven track record of minimal downtime. Unreliable or frequently interrupted connections can disrupt your work, cause data loss, and result in frustration.
To determine the connection speed and reliability of a USA RDP provider, consider the following:
1. Request a trial or demo: Some providers offer trial periods or demos, allowing you to test their RDP services before making a commitment. Use this opportunity to evaluate the connection speed and reliability for yourself.
2. Network infrastructure: Research the provider’s network infrastructure, including the quality of their data centers, the technology they use, and their partnerships with internet service providers. Providers with robust infrastructure are more likely to offer fast and reliable connections.
3. SLA (Service Level Agreement): Check if the provider offers an SLA that guarantees a certain level of uptime and performance. This can give you peace of mind knowing that the provider is committed to maintaining a reliable service.
Customer Support and Technical Assistance
Here are some factors to consider:
– 24/7 Availability: Look for providers that offer round-the-clock customer support. This ensures that assistance is readily available whenever you encounter any issues or have questions.
– Communication Channels: Check the available communication channels through which you can contact customer support, such as live chat, email, or phone. A provider that offers multiple channels gives you flexibility in reaching out.
– Response Time: Research the average response time for customer support queries. Providers that respond promptly to inquiries demonstrate their dedication to customer service and can address your concerns promptly.
– Technical Expertise: Evaluate the technical expertise of the customer support team. Providers with knowledgeable and skilled technicians can assist you effectively, especially with any technical configuration or troubleshooting requirements.
– Support Documentation: Check if the provider offers comprehensive documentation, tutorials, or knowledge bases to assist you in setting up and using the RDP service. Clear instructions and guides can be invaluable resources when you encounter issues or need assistance.
Pricing Plans and Flexibility
Look for providers that offer different pricing plans to meet your specific needs. This could include plans based on the duration of usage (hourly, monthly, or yearly) or different tiers of features and performance.
When selecting USA RDP providers, it is important to consider the money-back guarantees offered by the providers. Here are some considerations regarding money-back guarantees:
– Read the provider’s terms and conditions: Carefully read the provider’s refund policy to understand the terms and conditions of their money-back guarantee. Look for any limitations or conditions that may apply, such as a time frame for refund requests or specific criteria for eligibility.
– Duration of the guarantee: Check how long the money-back guarantee is valid for. Ideally, you should look for providers that offer a reasonable period for testing the service, typically 7 to 30 days. This allows you to evaluate the service thoroughly before making a final decision.
– Full or partial refund: Determine whether the provider offers a full or partial refund. Some providers may deduct certain fees or charges from the refund amount, so it’s important to know the terms regarding refund amounts.
By taking these factors into account, you can select a USA RDP provider that offers a robust money-back guarantee, ensuring that you have peace of mind and protection in case the service does not meet your expectations.
The USA RDP plans offered on the NeuronVM website include the following:
1. Instant Delivery:
Get your admin RDP instantly upon purchase, and start managing your virtual server in no time.
2. 24/7 Support:
Our dedicated support team is available 24/7 to address any issues or questions you may have, ensuring uninterrupted productivity.
3. VPS Control Panel:
Take full control of your admin RDP with our user-friendly control panel, empowering you to customize and optimize your virtual server effortlessly.
4. 7-Day Money Back Guarantee:
We stand behind our services. If you’re not fully satisfied within the first 7 days, we’ll refund your payment, no questions asked.
5. 100% Uptime Guarantee:
Experience uninterrupted access with our rock-solid infrastructure, ensuring your admin RDP is always up and running, maximizing productivity.
6. Global Presence:
With 60+ locations worldwide, from USA to Netherlands and Singapore, Neuron VM offers you the flexibility to choose the server location.
USA RDP offered on NeuronVM website includes 5 plans. The cost of these plans is as follows. The first plan is $16.99/month, the second plan is $32.99/month, the third plan is $49.99/month, the fourth plan is $64.99/month and the fifth plan is $96.99/month.
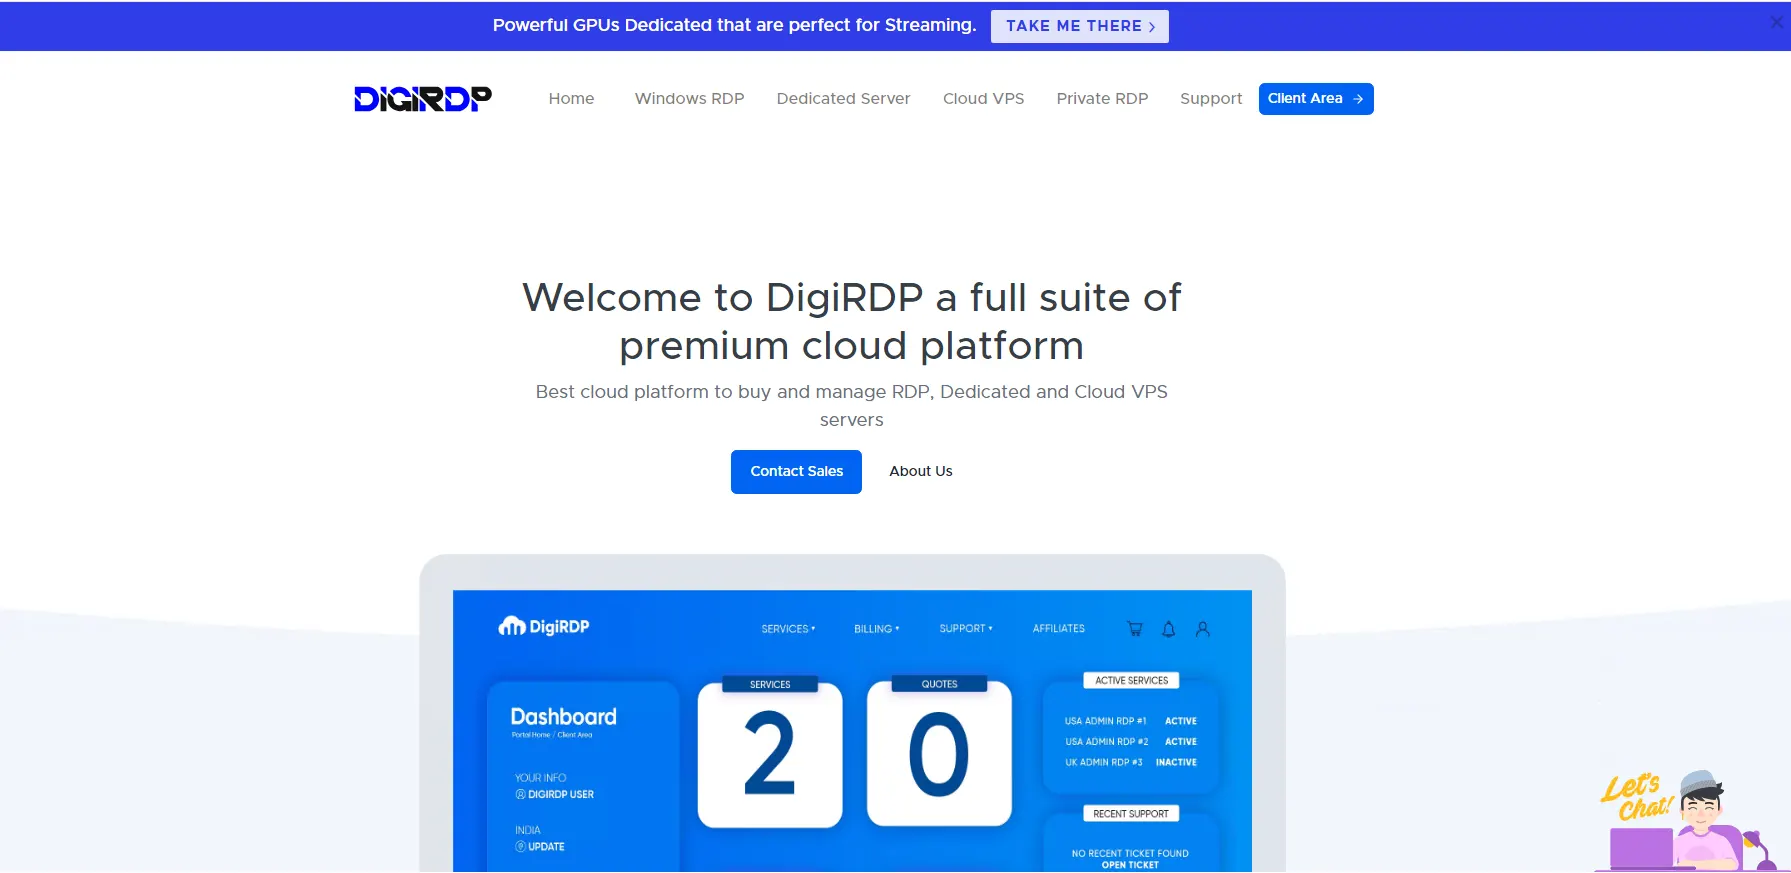
B. DIGIRDP
The USA RDP plans offered on the DIGIRDP website include the following:
1. Powerful AMD EPYC and Intel Xeon Processors:
With a choice between powerful AMD EPYC or Intel Xeon Processors, along with a complimentary NVMe disk and Windows OS, you’ll have all the necessary tools to excel.
2. Guaranteed 99.99% Uptime, Affordable Prices:
At DigiRDP, focus is on enhancing work efficiency for individuals and businesses. Count on DIGIRDP lightning-fast and dependable service, backed by a rock-solid 99.99% uptime guarantee. Moreover, DIGIRDP prices are affordable, ensuring that service is accessible to all budgets.
3. Unlimited Bandwidth:
Bid farewell to bandwidth concerns with DigiRDP. All windows RDP and remote desktop accounts offer unlimited bandwidth, allowing you to utilize DIGIRDP services without restrictions.
4. Cross-Platform Compatibility:
No matter the operating system or device, DigiRDP has you covered. DIGIRDP services are compatible with Windows, Mac, Linux, and mobile devices, making it effortless to access your computer from any platform.
5. High-Definition Remote Display:
Enjoy a seamless remote working experience with DigiRDP’s support for high-definition video and audio. Immerse yourself in crystal-clear visuals and pristine sound quality, even when working remotely.
6. Enhanced Security:
Rest easy knowing that DigiRDP employs state-of-the-art encryption and security protocols to safeguard your remote access. Your privacy and protection against unauthorized access are top priorities.
USA RDP offered on DIGIRDP website includes 9 plans. The cost of 4 of these plans is as follows. The first plan is $7.99/month, the second plan is $11.99/month, the third plan is $14.99/month and the fourth plan is $17.99/month.
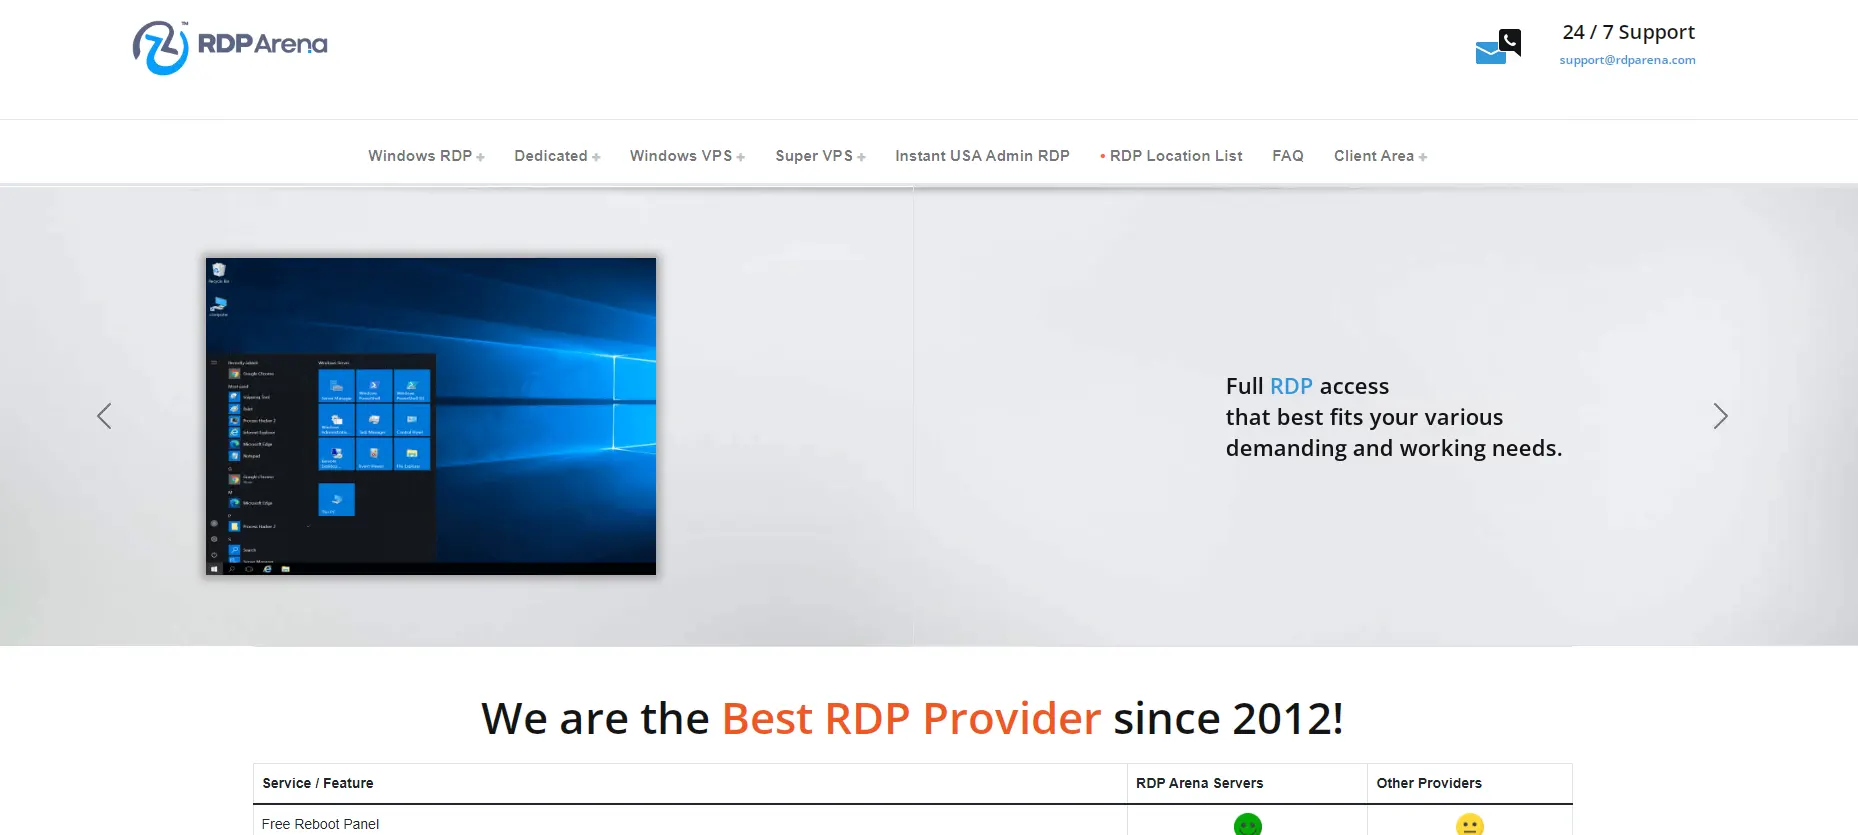
C. RDPArena
The USA RDP plans offered on the RDPArena website include the following:
1. Over 10 Years of Experience:
With over a decade of experience in the USA RDP market, RDPArena has successfully served more than 50,000 satisfied clients. RDPArena highly experienced team is dedicated to optimizing the performance of your VPS, ensuring the stability and reliability you deserve.
2. Money-Back Guarantee:
RDPArena offer a 48-hour, no-questions-asked money-back guarantee on all its USA RDP plans. If you’re not completely satisfied with RDPArena service, you can easily request a refund.
3. Limited Users on Each Server:
To maximize performance for your remote work, RDPArena have implemented a strict limit of only 12 users per server. This ensures that resources like CPU, RAM, and disk space are not overcrowded, resulting in faster load times and an enhanced user experience for you.
4. Multiple Locations Available:
RDPArena services are available in 20 different locations across the United States. If you plan to use RDP for Forex trading, you can choose the location nearest to your broker’s server, enabling faster trade execution.
5. Full Administrative Access:
All USA RDP plans come pre-enabled with full administrative access. This means you have the freedom to install any software and customize your RDP as per your preferences, without any limitations. Additionally, you have the convenience of troubleshooting any issues quickly and independently without relying on support.
6. Complimentary Data Retention:
Unlike many other providers, RDPArena goes the extra mile by retaining your data for an entire month even after your RDP slot expires. This ensures a seamless experience when you decide to restore your purchase, saving you valuable time by eliminating the need to transfer your data and settings.
The cost of the USA RDP plans offered on the RDPArena website are as follows. The first plan is $17/month, the second plan is $22/month, the third plan is $27/month and the fourth plan is $32/month.
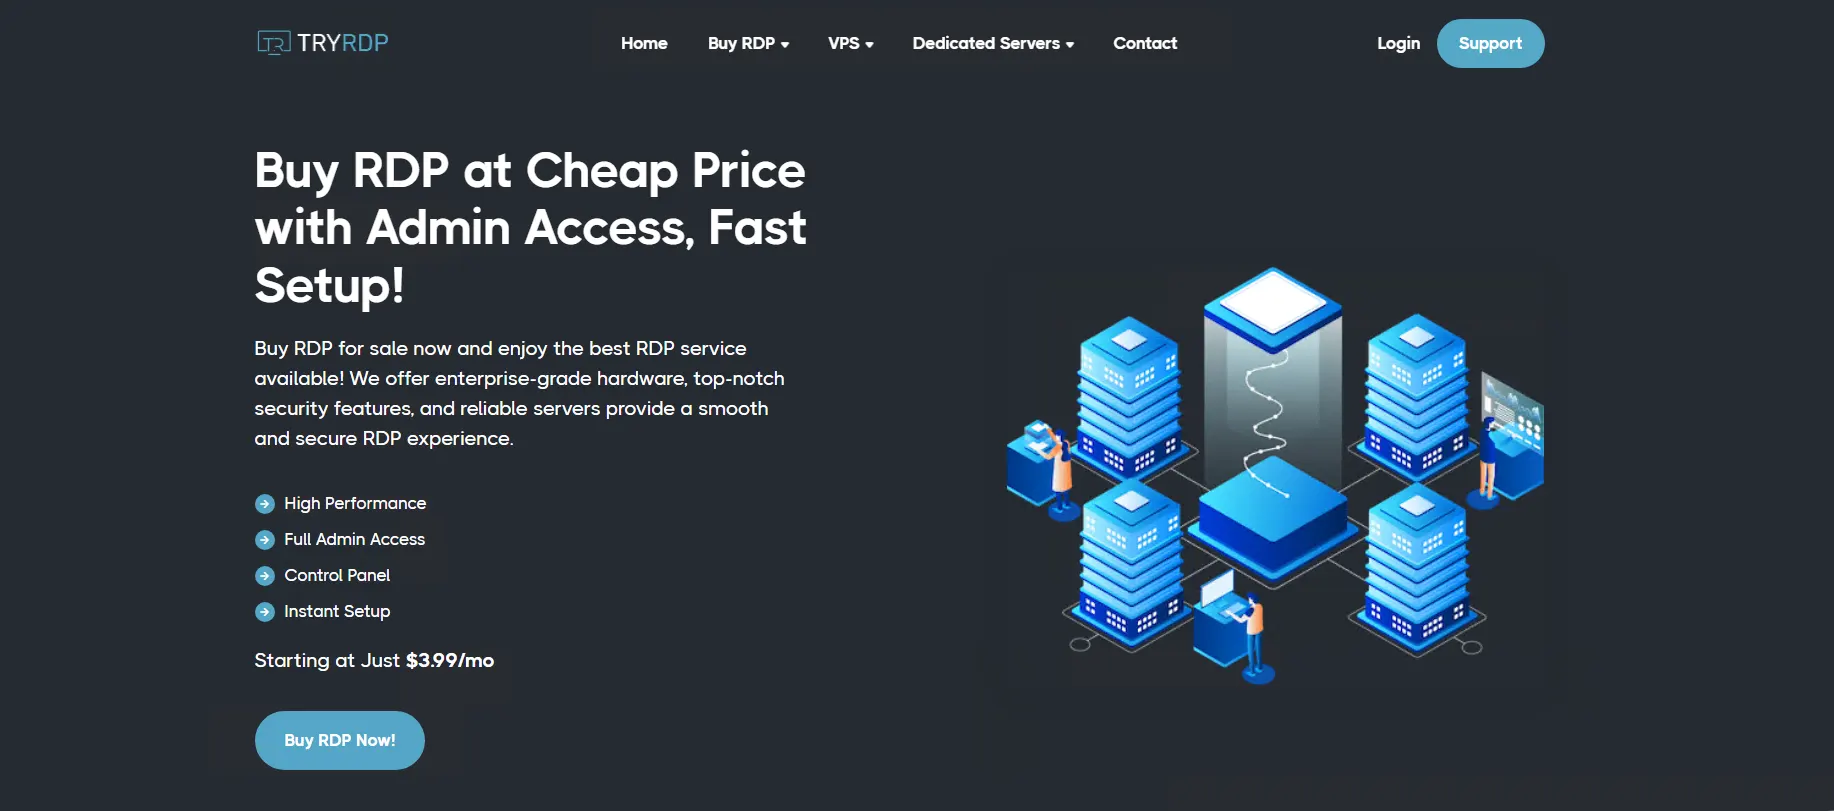
D. TryRDP
The USA RDP plans offered on the TryRDP website include the following:
1. High Performance RDP:
TryRDP strive to provide seamless results to all their clients by integrating the most advanced hardware types and generations. TryRDP softwares and hardwares are superior in quality, and they source their servers from reputable and approved sellers.
2. Affordable RDP:
TryRDP believes in honest pricing for all clients, charging only what is necessary. They offer the most affordable rates, allowing you to enjoy quality services within your budget. Why spend more when you can get the same at the best price?
3. Secure and Admin-only RDP:
TryRDP servers are equipped with the most secure firewalls, ensuring ultimate protection for their infrastructure. This creates a highly secure environment for using their servers, with access limited to administrators for the highest level of security.
4. 24/7 Support:
TryRDP teams are available round the clock to assist you, even at midnight!
5. High-Speed RDP:
TryRDP plans offer tempting benefits, including 1 GBPS bandwidth and unlimited access.
6. Customer Satisfaction:
Delivering customer satisfaction has always been top priority. TryRDP plans, pricing, services, and products are designed to ensure 100% satisfaction at every step of the way.
The cost of the USA RDP plans offered on the TryRDP website are as follows. The first plan is $9.99/month, the second plan is $14.99/month, the third plan is $19.99/month, the fourth plan is $29.99/month, the fifth plan is $39.99/month and the sixth plan is $59.99/month.
E. HomeRDP
The USA RDP plans offered on the HomeRDP website include the following:
1. Dedicated Resources
With HomeRDP, all resources are exclusively allocated to you, including CPU, RAM, and disk space. Your site’s performance will not be affected by other users’ website traffic. HomeRDP offers stability and cost-effectiveness, making it a preferred choice for hosting websites and online applications.
2. Complete Control and Flexibility
Experience the freedom of virtual server hosting and have complete control over your operating system. With full admin/root access, you can configure your server environment and allocate resources according to your needs, whether you have one large website or multiple smaller ones.
3. Simple Scalability
If you require more resources and need to upgrade your server environment, simply submit a ticket to HomeRDP.
4. Multiple Geographically Diverse Data Centers
HomeRDP data centers are strategically located in Texas, Colorado, and Missouri, ensuring maximum reliability and minimal latency across different states. Choose the data center closest to your target audience’s location.
5. Enhanced Security with DDoS Protection
Your USA RDP comes equipped with advanced built-in DDoS protection. Additionally, automated backups and live snapshots enable immediate site restoration in the event of downtime. For further security, each RDP server is provided with a dedicated IP.
6. Effortless Management
All RDP servers for sale include a user-friendly control panel that simplifies server management. Monitor your resources in real-time through the intuitive dashboard and make necessary adjustments as required.
The cost of the USA RDP plans offered on the homerdp website is that the first plan is $22.99/month, the second plan is $39.99/month, the third plan is $59.99/month and the fourth plan is $89.99/month.
Conclusion
In conclusion, the USA RDP provider landscape in 2024 is expected to be highly competitive, with improved security measures and advanced customer support. As technology continues to evolve, these providers will likely offer faster and more efficient solutions, tailored to meet the needs of businesses and individuals in an increasingly digital world.
In today’s increasingly digital world, businesses and individuals alike are heavily reliant on online infrastructure to establish an online presence, run business operations, or host content. A dedicated server is a vital component that provides enhanced performance, security, and control, making it a popular choice for those seeking optimal server resources. However, selecting the right dedicated server can be a daunting task given the myriad of options available in the market. This article aims to provide a comprehensive guide to help you make an informed decision when purchasing a dedicated server.
Understanding the Basics
Before we discuss the important points that you need to know when purchasing a dedicated server, we first intend to define and introduce the goals of a dedicated server in the next section. Then we will explain the types of dedicated servers. Please stay with us.
Definition and Purpose of a Dedicated Server
A dedicated server is a type of hosting service where an entire physical server is leased to a single user or organization without sharing resources with any other users. The user has full control over the server’s resources, including processing power, memory, storage, and bandwidth.
The purpose of a dedicated server is to provide high-performance and reliable hosting for websites, applications, or any other online services that require a significant amount of resources. It is commonly used by large businesses, e-commerce websites, gaming servers, and organizations with high traffic or specific requirements that cannot be met by shared hosting or virtual private servers.
By having exclusive access to the server, dedicated hosting offers several advantages over other hosting options, such as improved security, flexibility to customize server configurations, better scalability, and the ability to handle high traffic loads. It also allows for faster response times and optimized performance, as the resources are not shared with other users.
Types of Dedicated Servers
– Managed dedicated server: This is a type of dedicated server that is fully managed by the hosting provider. They take care of all server maintenance and management tasks, including security updates, backups, and performance optimization.
– Unmanaged dedicated server: In contrast to managed dedicated servers, unmanaged servers put the responsibility of server management entirely on the client. The hosting provider only provides the physical server and network connectivity, leaving all server administration tasks up to the client.
– Bare metal server: This is a physical server that is dedicated solely to one client and does not share resources with other clients. It offers full control, customization options, and superior performance compared to virtualized servers.
– High-performance computing (HPC) server: These dedicated servers are designed specifically for high-performance computing tasks, which require massive processing power, low-latency networking, and large memory capacity. HPC servers are commonly used in scientific research, engineering simulations, and financial modeling.
– Game server: Dedicated game servers provide optimized performance, low-latency network connections, and high-capacity storage for hosting multiplayer online games. These servers are specifically designed to handle the high demands of gaming applications.
– Storage server: Storage servers are dedicated machines optimized for storing large amounts of data. They usually have multiple hard drives or solid-state drives (SSDs) configured in RAID arrays for data redundancy and better performance.
– Backup server: These dedicated servers are used to store and manage backup copies of important data and files. They are designed to provide high storage capacity, data protection, and easy retrieval of backed-up data.
These are just a few examples of the various types of dedicated servers available. The choice of a dedicated server largely depends on the specific needs and requirements of the client or organization.
Key Considerations in Selecting a Dedicated Server
When selecting a dedicated server, it is important to consider several key factors.
First, evaluate your specific requirements such as processing power, storage capacity, and bandwidth. Consider the server’s reliability, security measures, and technical support provided by the hosting company. Look for flexibility in customization and scalability options. Pricing should also be taken into account, weighing the features and benefits offered against the cost. Lastly, assess the server’s compatibility with your operating system and applications.
In the following sections, we will explain each of the mentioned items.
Performance and Scalability
Performance refers to the ability of a server to handle and process tasks efficiently and effectively. The performance of a dedicated server depends on several factors, including the hardware specifications of the server, such as the processor, RAM, storage capacity, and network connectivity. It is important to choose a dedicated server with sufficient resources to meet your specific needs. For example, if you are running resource-intensive applications or websites, you may need a server with a powerful processor and ample RAM to handle the workload without slowing down or crashing.
Scalability, on the other hand, refers to the ability of a server to easily accommodate increased demands or workload in the future. If your business grows or experiences a surge in traffic, you may need to scale up your server resources to ensure optimal performance. It is essential to choose a dedicated server that allows for easy scalability, such as the ability to upgrade CPU, RAM, or storage capacity without significant downtime or data migration.
Here are some important considerations for performance and scalability when buying a dedicated server:
1. Hardware Specifications
2. Bandwidth and Network Connectivity
3. RAID Configuration
4. Managed Services and Support
5. Scalability Options
6. Monitoring and Analytics
Security and Reliability
Here are some key points to keep in mind:
– Physical Security: Choose a data center facility that has robust physical security measures in place, such as 24/7 security monitoring, video surveillance, and access control systems. This ensures that only authorized personnel can access the server.
– Network Security: Look for a dedicated server provider that offers firewall protection, intrusion detection systems, and DDoS mitigation techniques. These measures will help safeguard your server from external threats.
– Redundancy: Ensure that the data center has redundancy in power supply, network connectivity, and cooling systems. This redundancy helps eliminate single points of failure and ensures that your server remains operational even in the event of a power outage or network disruption.
– Uptime SLA: Check whether the provider offers a Service Level Agreement (SLA) guaranteeing a certain level of uptime. A higher uptime guarantee (e.g., 99.99%) indicates the provider’s commitment to providing reliable service.
– Backup and Disaster Recovery: Inquire about the backup and disaster recovery options offered by the server provider. Regular backups and a solid disaster recovery plan are crucial for data protection and continuity in case of unforeseen events.
– Support and Monitoring: Assess the level of support provided by the server provider. Round-the-clock technical support ensures that any issues or concerns can be addressed promptly. Additionally, proactive monitoring of server health and performance helps identify and resolve potential issues before they affect the server’s reliability.
– Reputation and Reviews: Research the reputation and customer reviews of the dedicated server provider. Look for feedback regarding security breaches, downtime incidents, or overall customer satisfaction to gauge their reliability.
– Scalability: Consider your future growth plans and check if the dedicated server provider offers options to easily scale your server resources as needed.
Server Management
There are several server management aspects that should be considered. These include:
– Operating System (OS): Consider the OS options available for your dedicated server. Choose an OS that is compatible with your applications and offers robust security features.
– Server management control panel: Determine if the server comes with a control panel, such as cPanel or Plesk. These control panels simplify server management tasks like creating email accounts, managing DNS settings, and installing applications.
– Security measures: Ensure that the dedicated server has appropriate security measures in place, such as firewalls, intrusion detection systems, and DDoS protection. Additional security features like SSL certificates and regular backups can also be beneficial.
– Server maintenance: Understand the maintenance policies and procedures for the dedicated server. Check if the provider offers regular updates, security patches, and hardware maintenance to keep your server up-to-date and secure.
Hardware and Network Infrastructure
When purchasing a dedicated server, it is essential to consider the hardware and network infrastructure aspects. These factors directly impact the performance, reliability, and scalability of your server. Here are some key aspects to consider:
1. Processor: Look for server-grade processors from reputable brands like Intel or AMD, with multiple cores and high clock speeds to handle demanding workloads efficiently.
2. RAM: Determine the amount of RAM required based on your server’s intended usage. More RAM allows for better multitasking and the ability to handle concurrent user requests and applications efficiently.
3. Storage: Consider the type and capacity of storage required. SSDs (Solid State Drives) and NVMe are faster and more reliable than traditional HDDs (Hard Disk Drives). Opt for storage configurations like RAID (Redundant Array of Independent Disks) for enhanced data redundancy and performance.
4. Bandwidth: Assess the available network bandwidth provided by the hosting provider. Ensure it meets your requirements for transferring data to and from the server, especially if you anticipate high traffic or resource-intensive applications.
5. Location: Consider the physical location of the dedicated server. Opting for a server located closer to your target audience can reduce latency and improve the user experience.
Pricing and Service Agreements
Considering the budget is essential when selecting a dedicated server. This section discusses the various pricing models, such as upfront costs, monthly rentals, and additional fees. Additionally, it advises readers to carefully review service-level agreements (SLAs) to understand the scope of services provided, response times for support, and any service guarantees offered.
So, aspects of pricing and service agreements will help you make an informed decision when purchasing a dedicated server, ensuring that you choose a provider that meets your requirements and provides value for money.
Conclusion
In conclusion, when purchasing a dedicated server, it is crucial to evaluate factors such as your specific needs, scalability, security measures, reliability of the provider, and cost. By considering these aspects, individuals and businesses can make an informed decision that aligns with their requirements for optimal performance and seamless operations.
Setting up and managing a Linux VPS involves various tasks, including server administration, software installation, and system configuration. To simplify and streamline these processes, many VPS providers offer control panels that provide a graphical interface to perform these tasks. However, different control panels have different features and capabilities, making it crucial to choose the right one for your needs. In this guide, we will discuss the key factors to consider when choosing the right control panel for your Linux VPS.
Understanding Your Requirements
In order to choose the right control panel for your Linux VPS, you need to understand your requirements. Consider factors such as the level of expertise needed to operate the control panel, the features and functionalities required, the scalability and flexibility offered, and the compatibility with your operating system and software.
It’s important to choose a control panel that suits your specific needs and enhances your VPS management experience.
Types of Control Panels
There are several control panels available for Linux VPS, each offering different functionalities. Let’s take a look at some popular options:
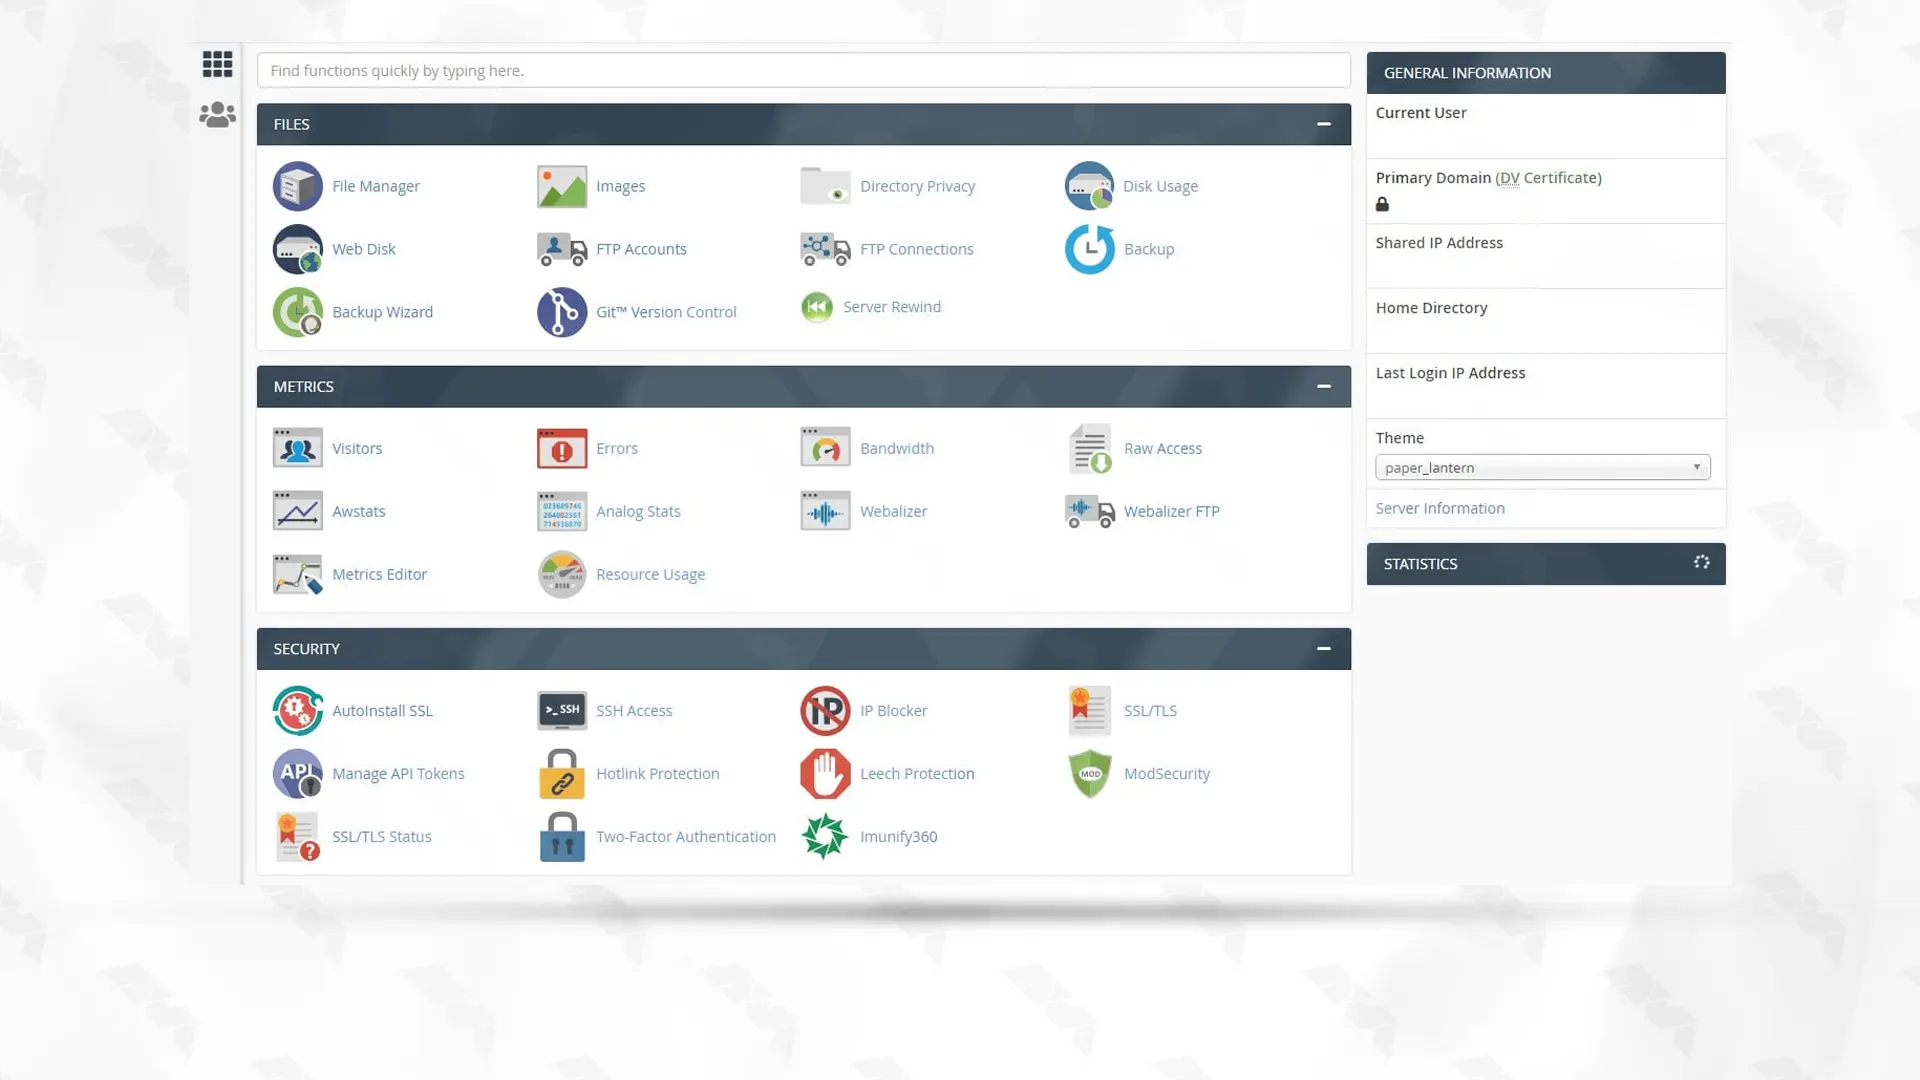
1. cPanel/WHM
cPanel is one of the most widely used control panels known for its intuitive interface and extensive feature set. It offers features like website management, email configuration, database administration, and more. Its companion tool, WHM (Web Host Manager), allows administrators to manage multiple hosting accounts.
Some key features of cPanel include:
– Website management: cPanel allows users to easily create, modify, and delete websites, domains, subdomains, and email accounts.
– File management: It provides a File Manager tool for uploading, organizing, and editing files on the server.
– Database management: cPanel supports popular database systems like MySQL, allowing users to create and manage databases effortlessly.
– Security: The control panel includes options for managing passwords, SSL certificates, access restrictions, and firewall configurations, ensuring website security.
– Email management: cPanel offers various tools for managing email accounts, including email forwarding, autoresponders, spam filters, and webmail access.
– Backup and restoration: It allows users to schedule automatic backups, and provides easy restoration options in case of data loss.
– DNS management: cPanel provides a DNS Manager to edit DNS records, configure name servers, and manage domain aliases.
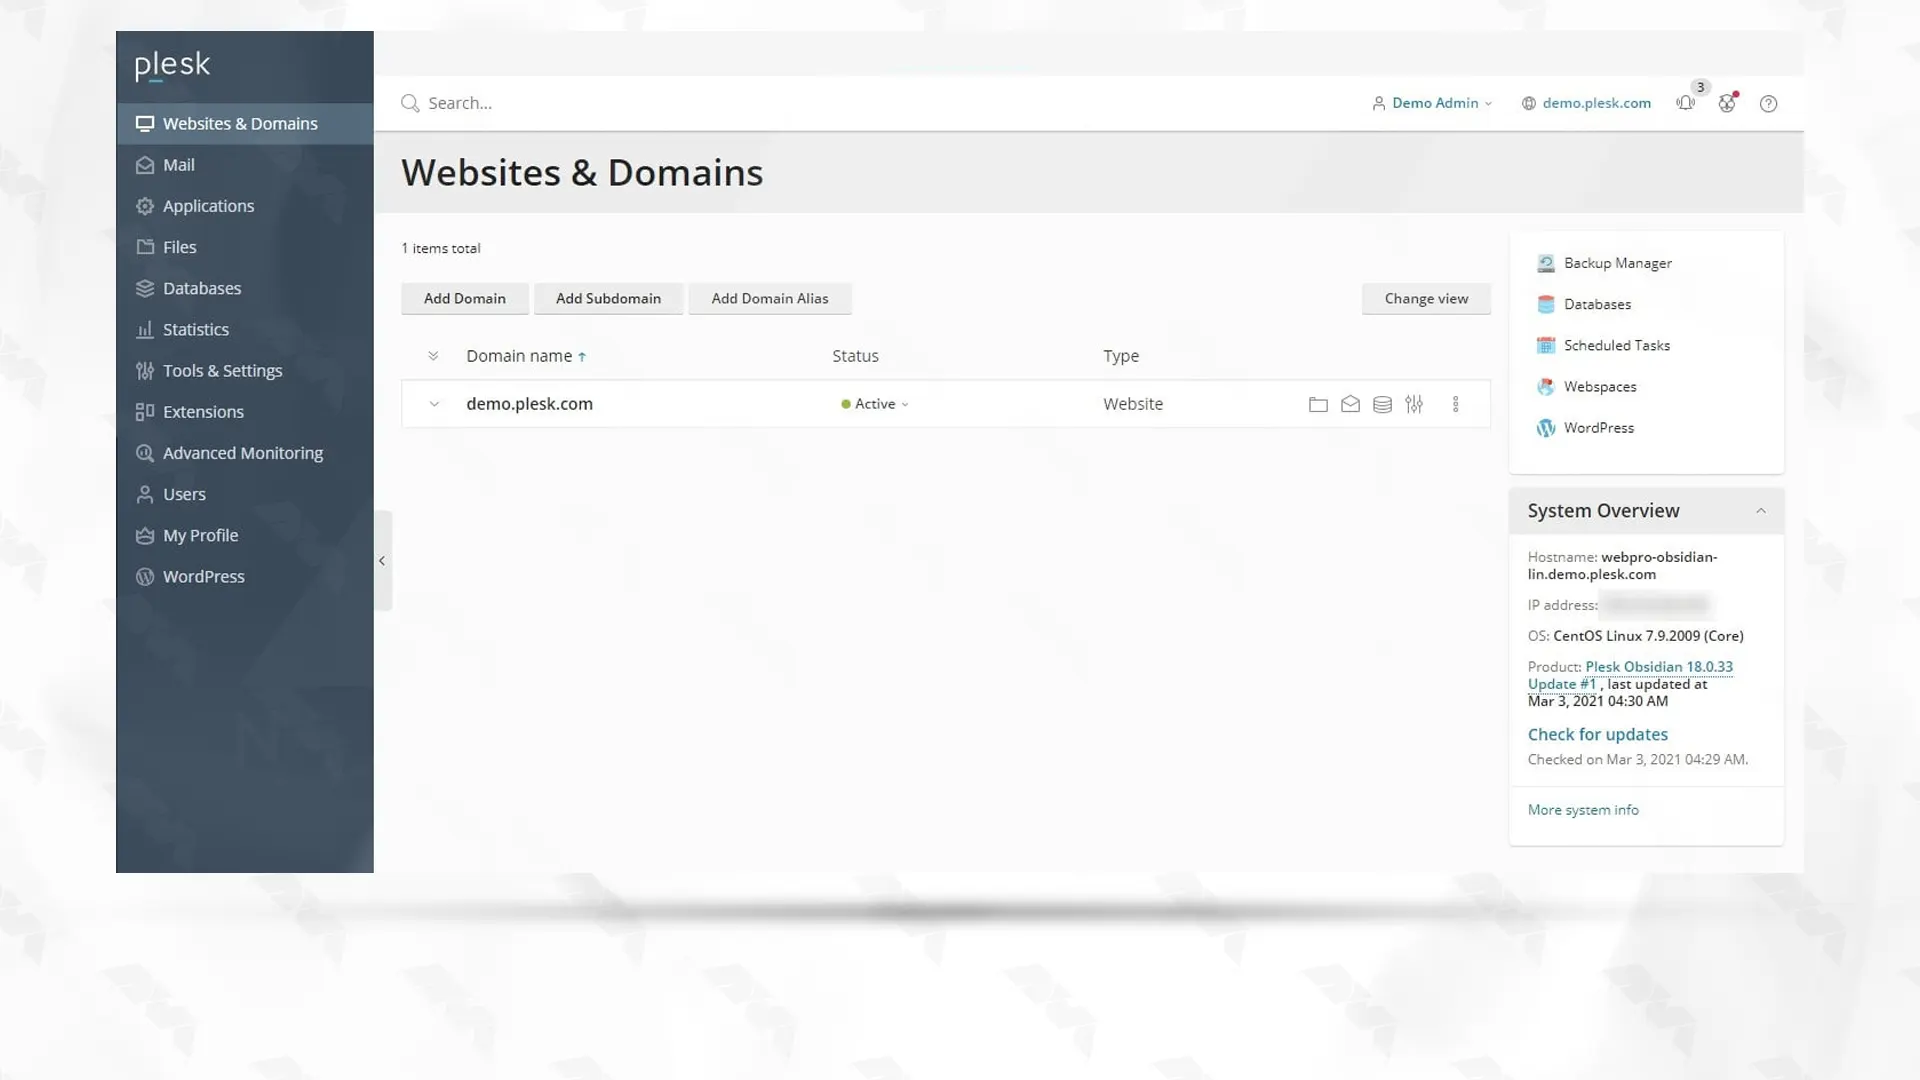
2. Plesk
Plesk is a comprehensive control panel that provides a user-friendly interface and supports both Linux and Windows environments. It offers a wide range of features, including website management, email setup, database administration, and security options.
Here are some key features of Plesk:
– User-friendly interface: Plesk provides a clean and intuitive interface that makes it easy to manage multiple websites and servers from one central location.
– Website management: Plesk allows users to easily create, manage, and deploy websites, including managing domains, files, FTP accounts, and databases.
– Server management: It offers comprehensive server management features, such as server monitoring, resource allocation, security settings, and software updates.
– Security enhancements: Plesk includes various security tools and features to protect websites and servers from threats, such as firewall management, SSL certificate installation, and backup and restoration options.
– Cloud integration: Plesk seamlessly integrates with popular cloud platforms, such as AWS and Microsoft Azure, allowing users to easily deploy and manage cloud-based applications and services.
– Collaboration tools: Plesk enables collaboration between users, allowing multiple users to access and manage websites and servers simultaneously.
– Developer tools: It provides a range of developer-friendly tools and features, including support for multiple programming languages, integration with popular development platforms, and easy deployment of applications.
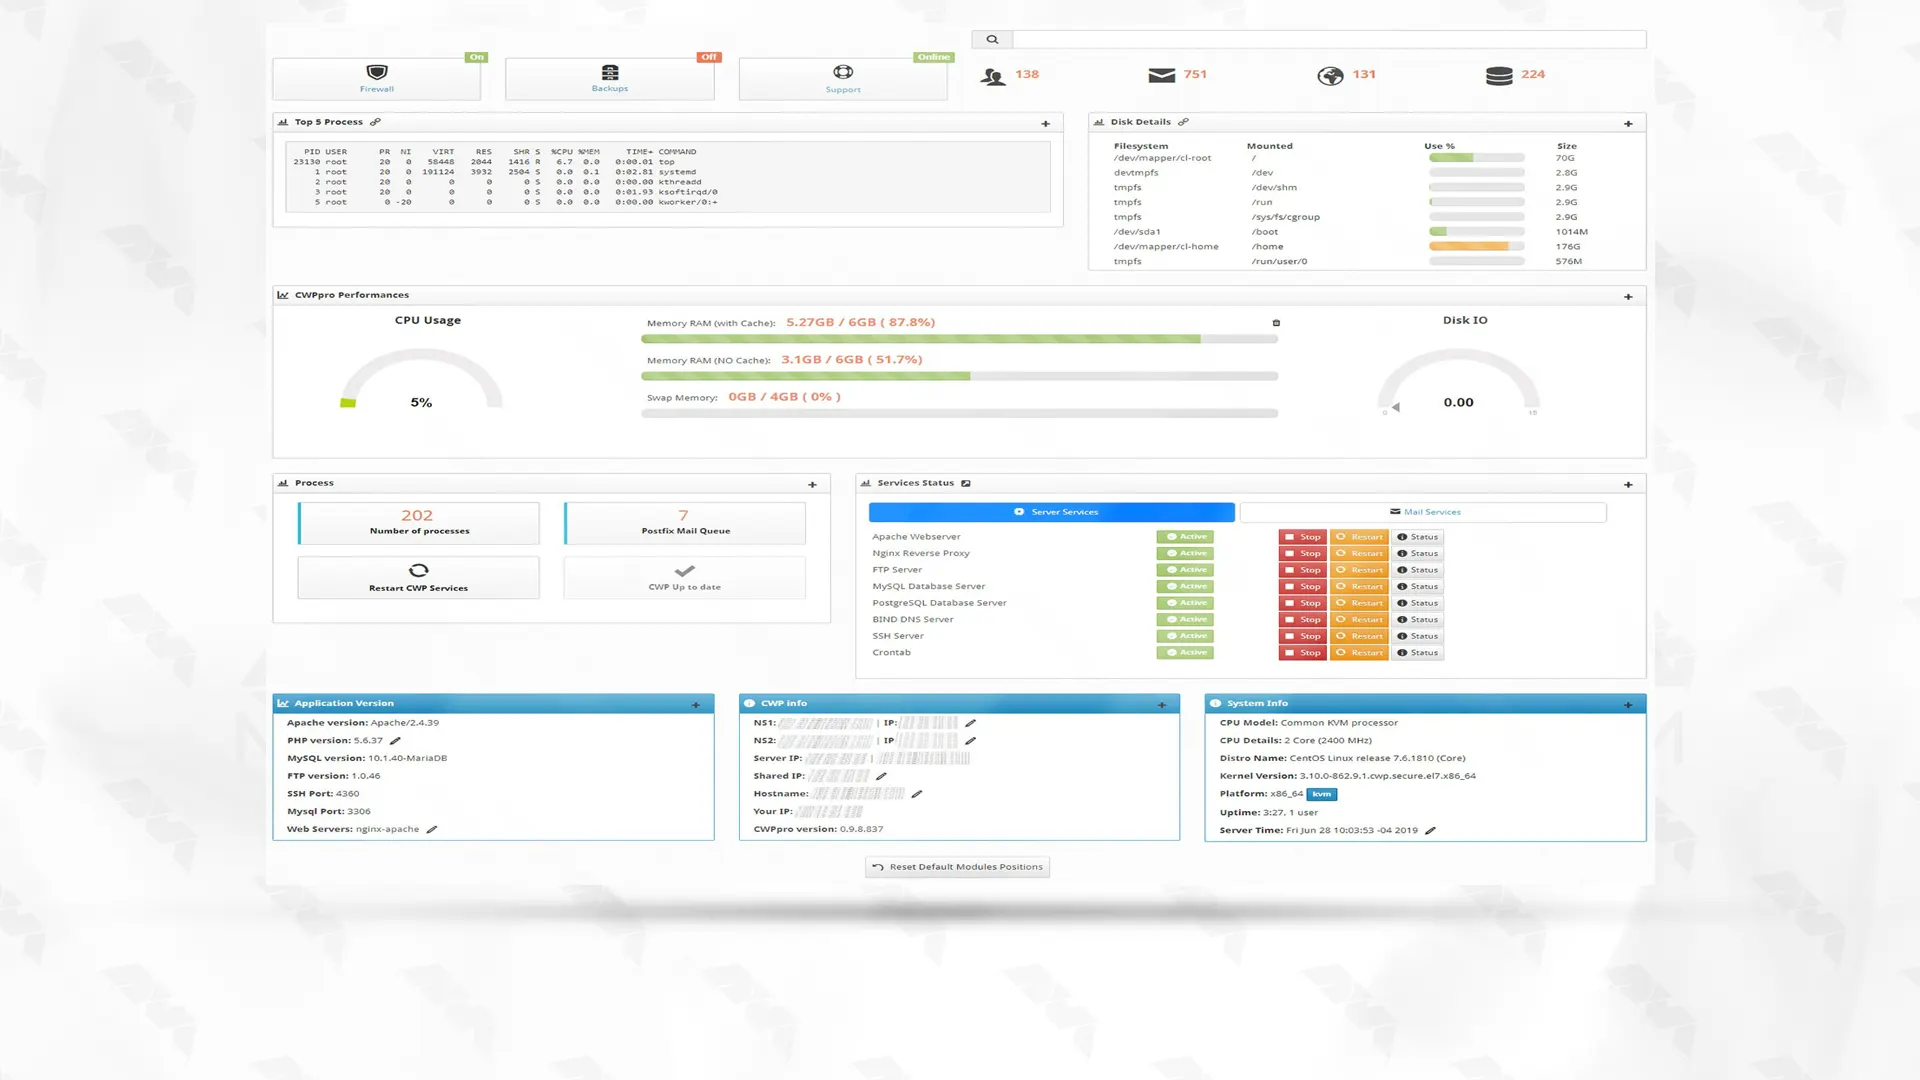
3. CentOS Web Panel (CWP)
CWP (CentOS Web Panel) is a free web hosting control panel designed for CentOS Linux distribution. It provides a range of features to simplify the management of web servers and websites.
Some of its key features include:
– Web server management: CWP provides tools for managing web servers like Apache and Nginx. Users can easily configure virtual hosts, SSL/TLS certificates, and rewrite rules.
– DNS management: CWP includes a DNS management tool that allows users to easily manage DNS zones, A records, MX records, and more.
– Email management: Users can create and manage email accounts, forwarders, autoresponders, and mailing lists with CWP’s email management features.
– Database management: CWP supports various database management tools like MySQL and phpMyAdmin, allowing users to create and manage databases easily.
– Software installation: CWP includes a software installer that allows users to easily install popular web applications like WordPress, Joomla, and Magento.
– System monitoring: CWP provides tools for monitoring system resources, network bandwidth, and service statuses to ensure efficient server performance.
– Backup and restore: CWP offers an easy-to-use backup and restore tool, allowing users to create and restore backups of their websites and databases.
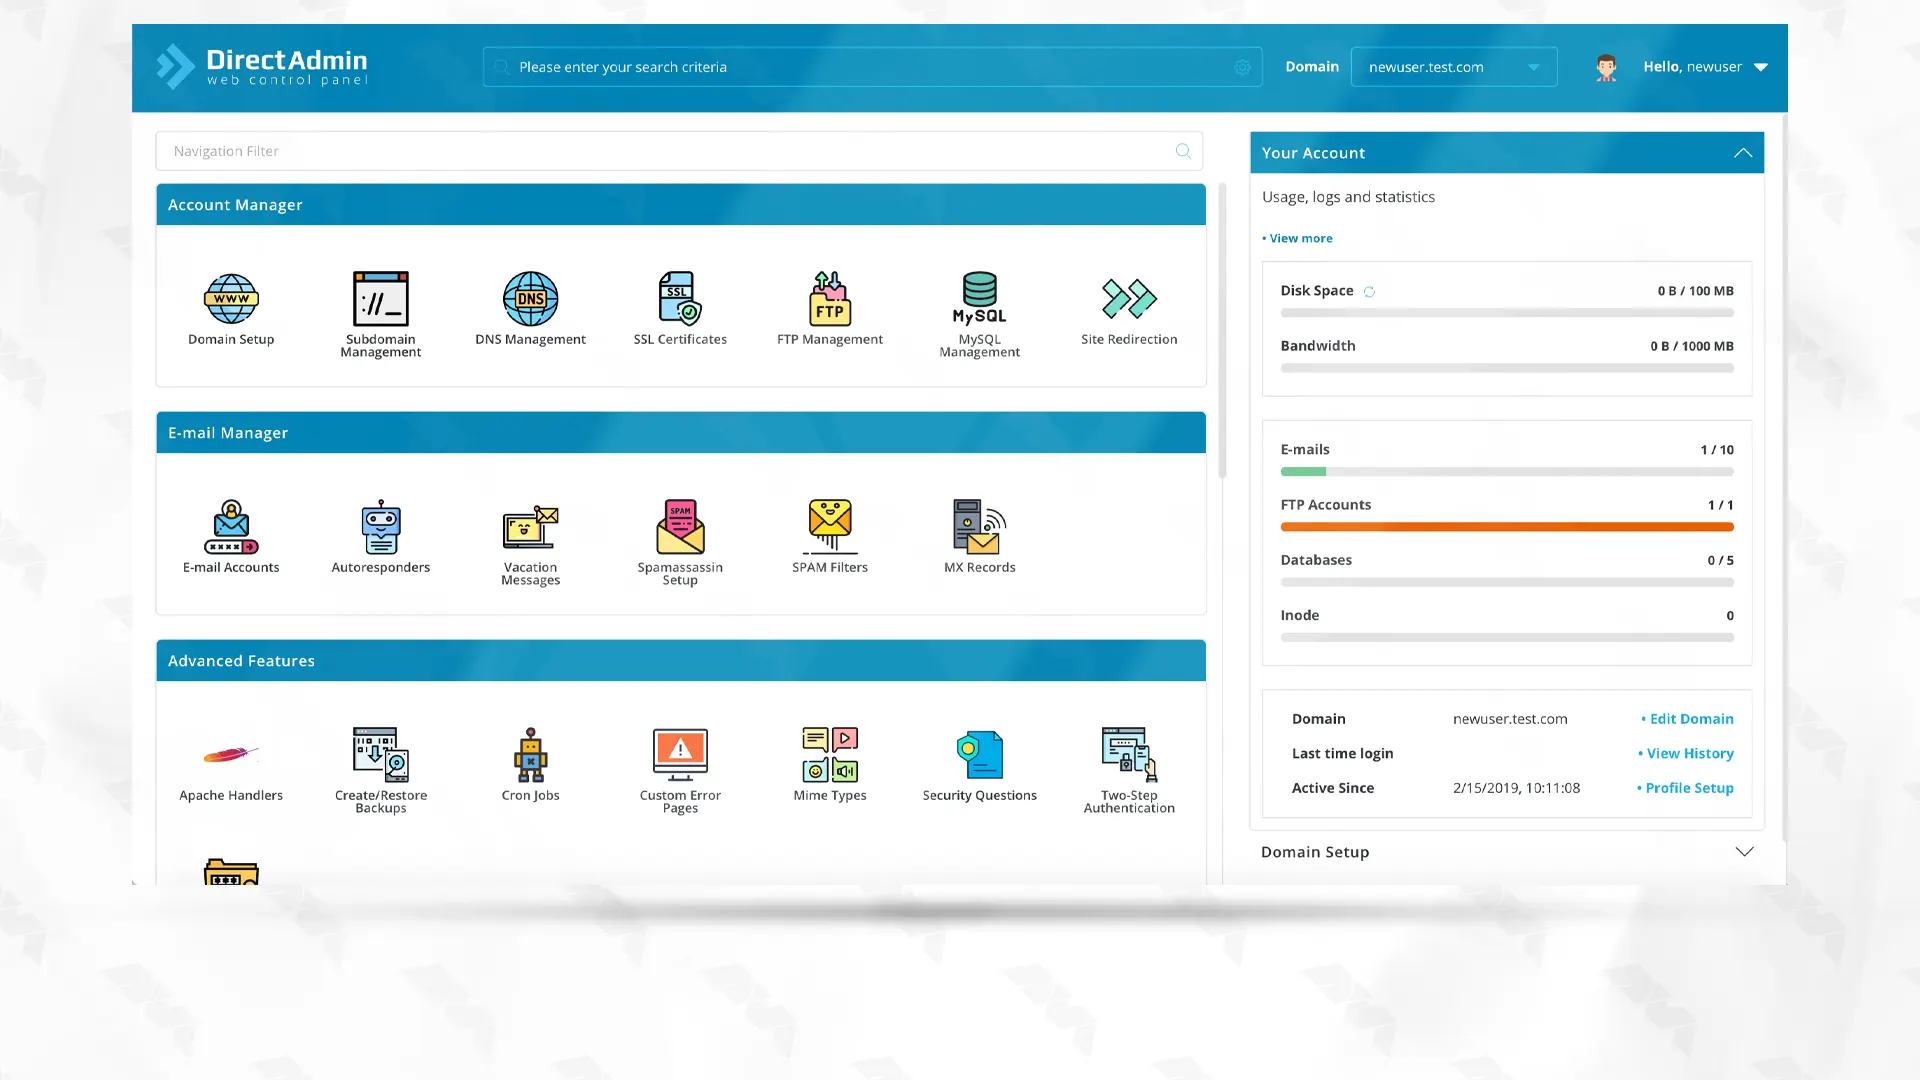
4. DirectAdmin
DirectAdmin is a web hosting control panel software that provides an efficient and user-friendly interface for managing web hosting services. It offers a range of features that make it a popular choice for both administrators and end-users.
One of the key features of DirectAdmin is its easy installation process, which allows users to quickly set up and configure their web hosting environment. It also provides a comprehensive set of tools for managing domains, including the ability to create and edit DNS records, add and remove subdomains, and manage email accounts.
DirectAdmin also includes a file manager that allows users to easily upload, download, and manage their website files. It supports popular scripting languages such as PHP, Perl, and Python, enabling users to develop dynamic websites.
Additionally, DirectAdmin offers a range of security features, including IP blocking, SSL/TLS support, and password-protected directories, to protect websites and data from unauthorized access.
Its advanced features include support for multiple languages, automated backups, server monitoring tools, and integration with popular software applications such as WordPress and Joomla.
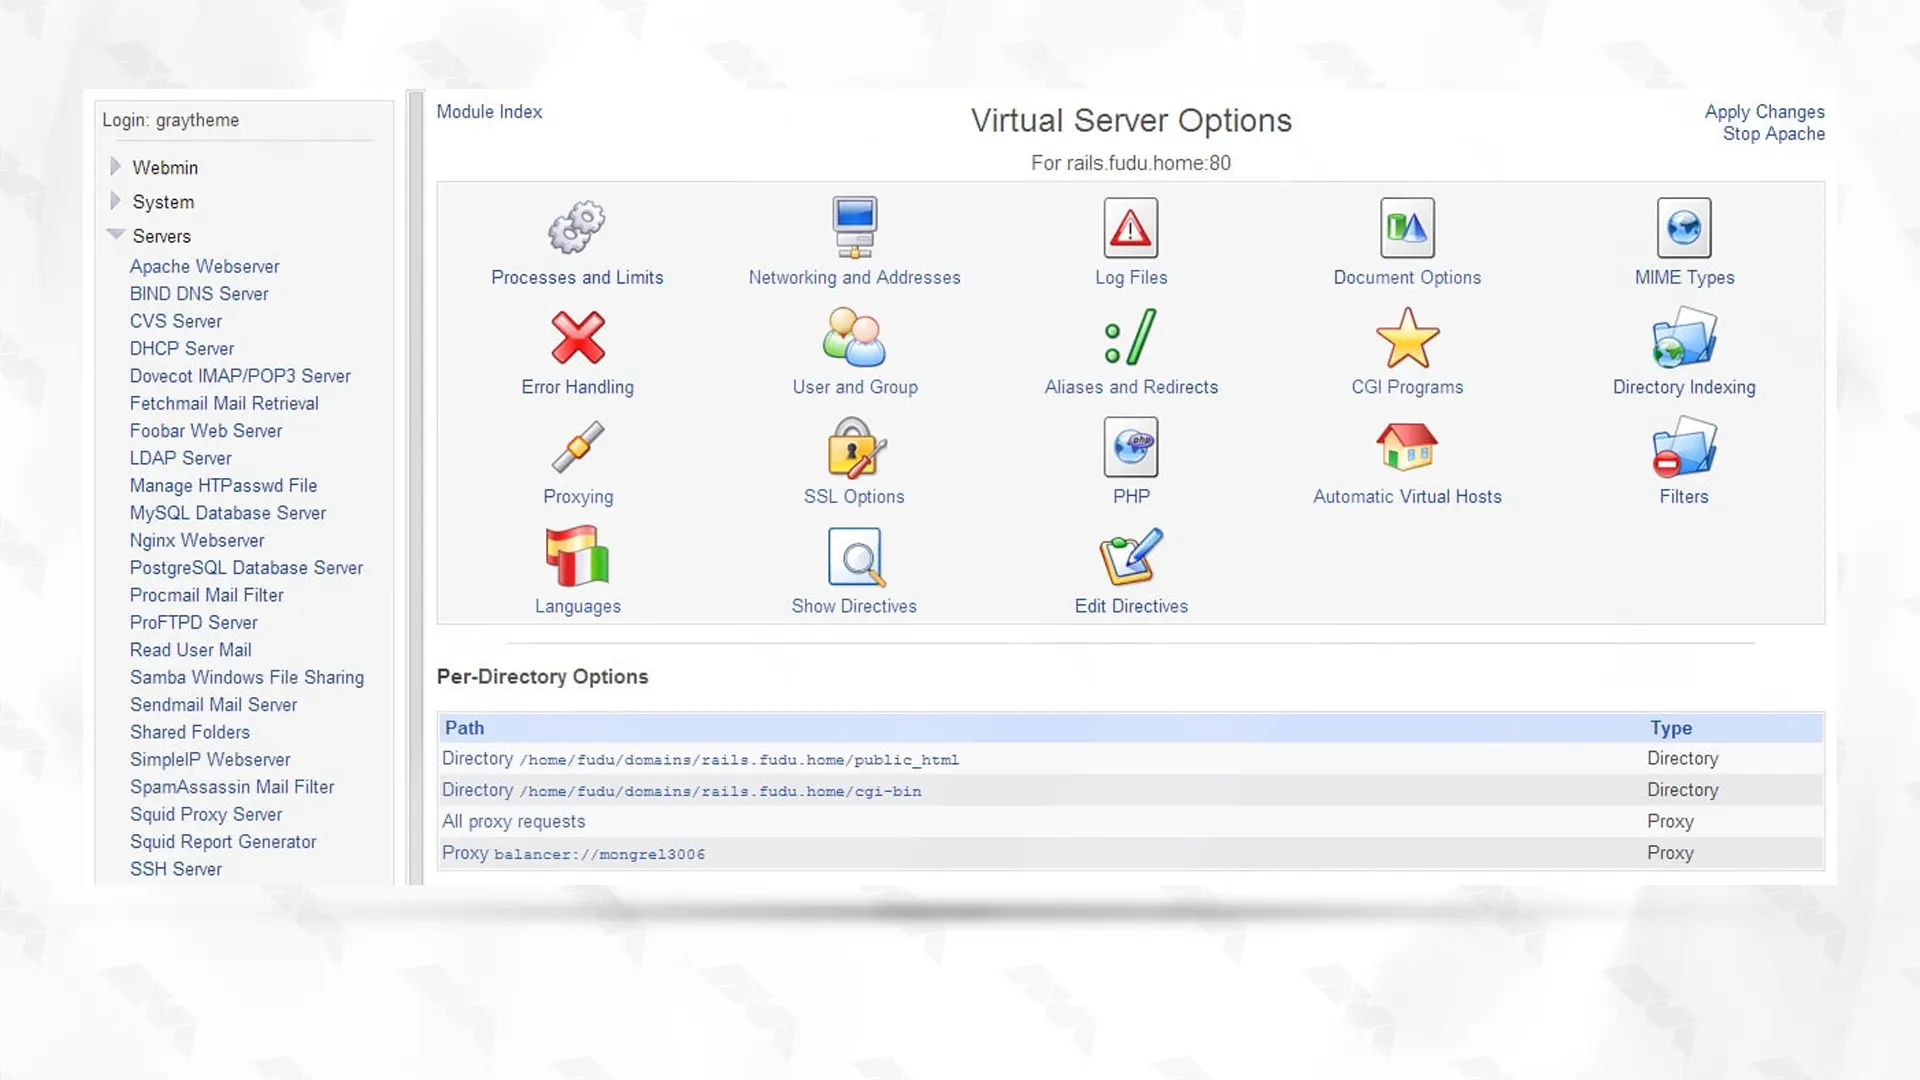
5. Webmin/Virtualmin
Webmin is an open-source control panel that provides a powerful web-based interface for system administration tasks. Virtualmin, built on top of Webmin, adds domain and virtual hosting management capabilities. This combination is a great choice for tech-savvy users looking for flexibility and customization.
Some of the key features of Webmin include:
– Server Configuration: Users can easily configure their server settings such as network interfaces, firewall rules, and system services.
– User and Group Management: Webmin provides a user-friendly interface for managing users and groups, including creating and deleting accounts, setting permissions, and managing passwords.
– File Management: It allows users to navigate and manipulate files and directories on the server, including uploading, downloading, and editing files.
– System Monitoring: Webmin offers tools to monitor system resource usage, network connectivity, and system logs, giving users insights into server performance and potential issues.
– Software Package Management: Users can conveniently install, update, and remove software packages on their server using Webmin, simplifying package management operations.
– Web-based Server Control: Webmin provides a web-based interface for starting, stopping, and restarting server services such as Apache web server, MySQL database server, and many others.
– SSL/TLS Certificate Management: With Webmin, users can generate and manage SSL/TLS certificates, enabling secure communication over HTTPS.
Parameters that you should Consider when Choosing the Right Control Panel
When choosing the right control panel for your Linux VPS or a particular application, there are several parameters that should be considered:
A. User-Friendliness
Consider the ease of use and user-friendliness of the control panel. If you are a beginner or lack technical expertise, opting for a control panel with an intuitive interface can greatly simplify the management of your VPS.
B. Features and Functionality
Different control panels offer varying sets of features and functionalities. Evaluate the features that are essential for your VPS management, such as domain management, email configuration, database administration, security options, one-click installation of applications, and SSL certificate management. Choose a control panel that offers the necessary features to meet your requirements.
C. Support and Documentation
Ensure that the control panel you select has good support and documentation available. Having access to comprehensive documentation, tutorials, and a responsive support team can be crucial when encountering issues or needing assistance.
D. Resource Requirements
Consider the resource requirements of the control panel software itself. Some control panels may consume significant server resources, which could affect the overall performance of your VPS. Make sure your VPS specifications are sufficient to accommodate the control panel of your choice.
Comparison of control panels: Overview
Here’s an overview of cPanel, Plesk, CWP (CentOS Web Panel), DirectAdmin, and Webmin:
Features
cPanel
Plesk
CWP
DirectAdmin
Webmin
Operating System Supported
Linux, Windows
Linux, Windows
Linux
Linux, FreeBSD
Linux, Unix
User Interface
Graphical
Graphical/Command Line
Graphical
Graphical
Graphical/Command Line
Control Panel
Highly responsive
Modern and Intuitive
Easy-to-use
Easy-to-use
Feature-rich and Customizable
Web Server Support
Apache, Nginx, Litespeed
Apache, Nginx, Litespeed
Apache, Nginx, Litespeed
Apache, Nginx, Litespeed
Apache, Nginx, Lighttpd
Database Support
MySQL, MariaDB, PostgreSQL
MySQL, MariaDB, PostgreSQL
MySQL, MariaDB, PostgreSQL
MySQL, MariaDB, PostgreSQL
MySQL, MariaDB, PostgreSQL
Email Support
Yes
Yes
Yes
Yes
Yes
DNS Management
Yes
Yes
Yes
Yes
Yes
File Manager
Yes
Yes
Yes
Yes
Yes
Security Features
SSL/TLS, Firewall, Malware Scan
SSL/TLS, Firewall, Malware Scan
SSL/TLS, Firewall, Malware Scan
SSL/TLS, Firewall, Malware Scan
SSL/TLS, Firewall, Malware Scan
Pricing
Commercial, paid license
Commercial, paid license
Free and Paid versions
Commercial, paid license
Open-source, free
Comparison of control panels
Conclusion
Selecting the right control panel for your Linux VPS is an important decision that can greatly impact your VPS management experience. Assess your specific requirements, evaluate different control panel options, consider user-friendliness, features, support, and resource requirements. By following this comprehensive guide, you will be better equipped to make an informed decision, ensuring a smooth VPS management experience.