VMware is a virtualization software vendor based in Palo Alto, California, founded in 1998 and now a subsidiary of Dell Technologies. Also, bases its virtualization technologies on the ESX/ESXi metal hypervisor in the x86 architecture. In this comprehensive article, we will explain to you what is VMware.
A Brief Explanation of VMware
VMware products now include virtualization, network and security management tools, data center software, and storage software, and VMware vSphere is a server virtualization platform for implementing and managing large-scale VM infrastructures. Desktop products include VMware Workstation, VMware Fusion, and VMware Player.
VMware’s server software line includes VMware ESX Server, VMware ESXi Server, and VMware Server. Since 2004, VMware has been working as a partner of SUSE Alliance, and supporters the Linux system in VMware software, and supports Linux on VMware software, on-premises, or in the cloud. Also, apart from providing a reliable data center virtualization solution, SUSE, and VMware have partnered to provide cloud solutions for both private and public clouds. SUSE Linux Enterprise Server is currently certified and supported on the latest version of vSphere.
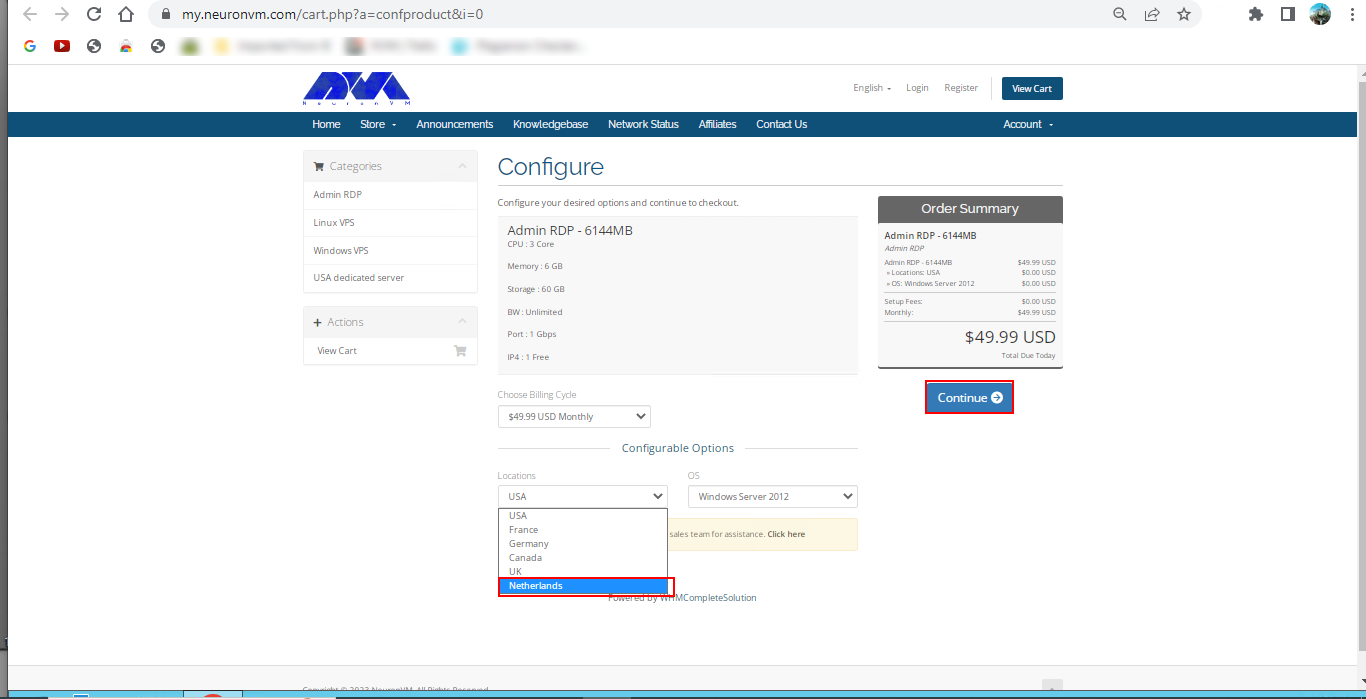
You can visit the Windows VPS server plans offered on our website and then run VMware on it.
Introduction of VMware products
Currently, VMware products include virtualization, network and security management tools, data center software, and storage software.
Cloud infrastructure and Data Center
VMware vSphere is VMware’s suite of virtualization products, known as VMware Infrastructure before 2009, and includes:
– ESXi
– vCenter Server
– vSphere Client
– vMotion
vSphere is available in three versions: Standard, Enterprise Plus, and Platinum. In addition, there are two three-server kits for small and medium businesses called vSphere Essentials and Essentials Plus. Also with VMware Cloud on AWS, customers can run a cluster of vSphere hosts with vSAN and NSX in an Amazon data center and manage their workloads with VMware’s famous tools and skills.
Introduction to Network and Security Tools
In the rest of the article, we will introduce VMware tools.
VMware NSX
It provides virtual networking and security software and was created when VMware acquired Nicera in 2012. NSX allows the administrator to virtualize network components. It also enables them to develop, extend, and configure virtual networks and switches through software rather than hardware.
In this network, a software layer is placed on top of the hypervisor to allow the administrator to divide a physical network into several virtual networks. With the latest version of this product, the NSX-T data center, network virtualization can be added to both ESXi and KVM as hypervisors and bare-metal servers, and containerized workloads can be virtualized and protected in a Kubernetes cluster.
The NSX-T data center now offers network performance virtualization, which enables functions such as firewalls, load balancers, and VPNs to be implemented within the virtualization software stack.
VMware vRealize Network Insight
VMware vRealize Network Insight is a network operations management tool that enables admins to schedule micro-partitioning and monitor the health of VMware NSX. VRealize Network Insight also relies on technology from VMware’s 2016 acquisition of Arkin. VRealize Network Insight collects information from NSX Manager and displays errors in its user interface to help troubleshoot an NSX environment.
Understanding the SDDC platform
VMware Cloud Foundation
It is an integrated software stack that brings together vSphere, VMware vSAN, and VMware NSX into a single platform through SDDC Manager, and an administrator can deploy the software package on-premise as a private cloud or as a service in a public cloud. Run, the administrator can also instantly provision an application for network or storage.
Storage and availability Training
VMware vSAN
It is now a software-based storage feature built into the ESXi hypervisor and integrated with vSphere that aggregates disk space from multiple ESXi hosts and allocates it through intelligent policies, such as protection limits, thin provisioning, and clean-up coding. It also combined with vSphere High Availability to increase compute and storage availability.
VMware Site Recovery Manager (SRM)
A disaster recovery management product that allows administrators to create recovery plans that run automatically in the event of a disaster and allows administrators to automatically configure failover and failback of virtual machines, as well as SRM with NSX Integrated to protect network and security policies on migrated VMs.
VMware vCloud NFV
Network functions virtualization platform that allows a service provider to run network functions as virtualized applications from different vendors. It also offers the benefits of virtualization and the cloud for a communications service provider that previously relied on hardware.
Getting to Know the Cloud Management Platform
vRealize Suite
There is now a group of software that allows users to create and manage hybrid clouds, and the vRealize suite includes vRealize Operations for monitoring, vRealize Log Insight for centralized logging, vRealize Automation for data center automation, and vRealize Business for Cloud for management. It is a cost.
VMware Tanzu
VMware Tanzu allows customers to build containerized applications, run enterprise Kubernetes, and manage Kubernetes for developers and IT. Also, with the help of the software package, an administrator can deploy and manage VMs on multiple hypervisors or cloud platforms from a single management console.
Introduction of Virtual Desktop Infrastructure
VMware Horizon
Here, VMware Horizon allows organizations to run Windows desktops in the data center or in the VMware Cloud on AWS, eliminating the need to place and manage entire desktops in the workplace, as well as management and security for the environment. Centralizes the user and integrates with VMware App Volume and Dynamic Environment Manager products for application delivery and Windows desktop management.
Organizational Mobility and digital workspace Management Departments
Workspace ONE
The Workspace ONE suite includes VMware AirWatch, Horizon Air, and Identity Manager, which allow administrators to manage mobile devices and cloud-hosted virtual desktops and applications from a single management platform. Cloud or on-premise control.
Identity Manager
It enables SSO access to any application from any device based on established policies and is an identity-as-a-service product that provides single sign-on (SSO) capabilities for web, cloud, and mobile applications.
VMware AirWatch
VMware AirWatch is also an enterprise mobility management (EMM) software platform, where administrators are empowered to deploy and manage mobile devices, applications, and data.
Personal Desktop
VMware Workstation
It is the first product offered by a software company that allows users to create and run on a Windows or Linux desktop or laptop, and VMs run concurrently with the physical machine. In fact, each virtual machine runs its own operating system such as Windows or Linux, and this allows users to simultaneously run Windows on a Linux machine with the native operating system installed, or vice versa.
VMware Fusion
Currently, VMware Fusion is software like VMware Workstation that virtualizes Windows or Linux operating systems on Mac computers.
Advantages and necessity of using VMware Products
– Better provision of applications and resources and simple data center management
– Increasing efficiency along with the agility of data center systems
– Security based on a zero-trust model and more secure than container systems like Kubernetes
Disadvantages of VMware Products
– Suitability of Hyper-V and Xen Hypervisor alternatives and high licensing costs
– Lack of support and the existence of various bugs when used alongside Oracle products and hardware compatibility issues
Introducing Alternative Virtual Machines
Other VMware vSphere hypervisors
– Linux KVM
– Microsoft Hyper-V
– Red Hat Virtualization
– Proxmox VE
– Virtuozzo
– Citrix XenServer
– Oracle VM server
VMware Workstation alternatives for Personal Desktop use
– VirtualBox
– QEMU
– bhyve
– Parallels
Introducing the top 27 tools for VMware Administrators
As-Built Report
As Built Report is an open-source configuration documentation framework that generates and builds documents in XML, Text, HTML, and MS Word formats using Windows PowerShell and PScribo. It is also used to easily run and generate reports against the IT environment, allowing contributors to easily create new reports for any vendor and IT technology with RESTful API and/or Windows PowerShell support.

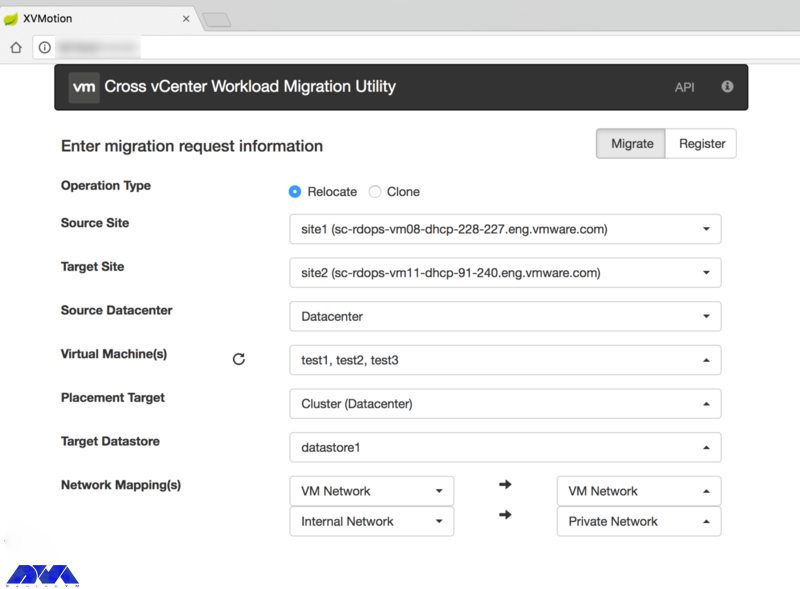
Cross vCenter Workload Migration Utility
It is now a tool to easily move virtual machines between vCenter Servers through the Cross-vCenter vMotion feature using a GUI. Also automatically fills this inventory for ease of management and enables batch migration of multiple virtual machines in parallel. It then implements a REST API to automate migration tasks.
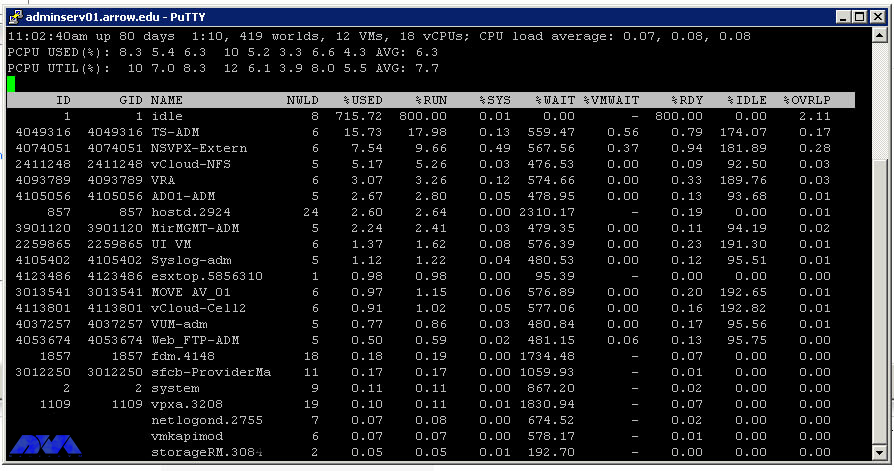
ESXTOP
A powerful command-line tool is included with vSphere to help administrators identify and fix performance issues in real-time, and then provide information about the resource management of the vSphere environment with details on disk, CPU, network, and memory usage. Displays real-time.
Vmware Git
Git is an open-source version control system created by Linux developer Mr. Linus Torvalds in 2005. In fact, this system has thousands of contributors, a large community base for support, and is also compatible with several IDEs and operating systems, including VMware.
HCI Bench
Here, HCI Bench aims to accelerate customer POC performance testing through a controlled and consistent method by fully automating the end-to-end process of setting up test virtual machines, setting workloads, collecting test results, and collecting valuable data for troubleshooting. Also, the Hyperconverged Infrastructure Benchmark, defined as HCI Bench, is an automated wrapper for the open-source VDbench benchmark tool that simplifies automated testing on HCI clusters.
Hyper
A cross-platform, customizable, open-source terminal program built on modern web standards and aiming to be the simplest and most powerful of its kind.
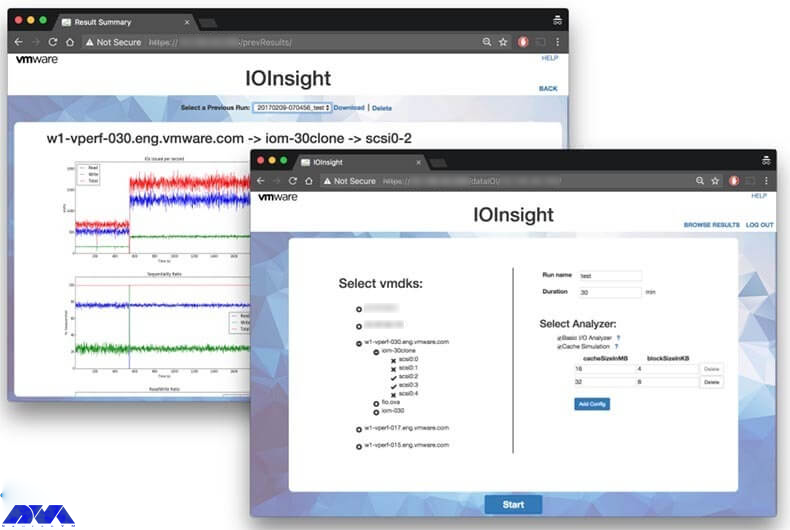
IOInsight
It is a virtual appliance that comes with VMware. Allows users to understand the storage I/O behavior of their virtual machine. It also has a web-based user interface through which users can select a VMDK to monitor and display the results to make better choices about tuning performance and storage capacity.
Linux VSM
There is now an improved port of Linux Software Manager for VMware, which allows users to log into My VMware and access download information, then view the subsets of downloads that VSM allows. Also, Linux VSM is designed to be smarter than the version of VSM for macOS and Linux, for example, instead of breaking operations, it also ignores missing files.
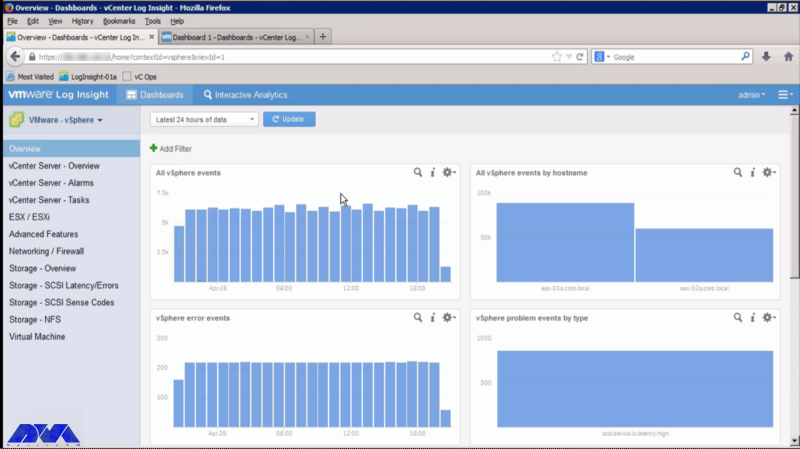
vRealize Log Insight
A virtual tool that administrators can use to view, manage, and analyze Syslog data, and then gain the ability to troubleshoot vSphere and perform compliance and security checks.
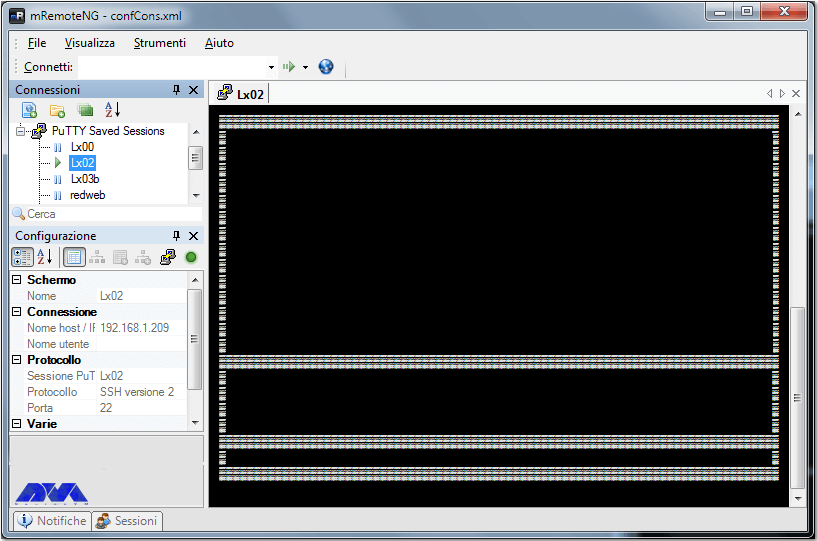
mRemoteNG
Remote Connection Manager is a multi-protocol and tabbed resource created as a fork of mRemote with new features and bug fixes. In fact, the software supports Virtual Network Computing (VNC), SSH, rlogin, HTTP[S], Citrix Independent Computing Architecture (ICA), and Remote Desktop/Terminal Server (RDP).
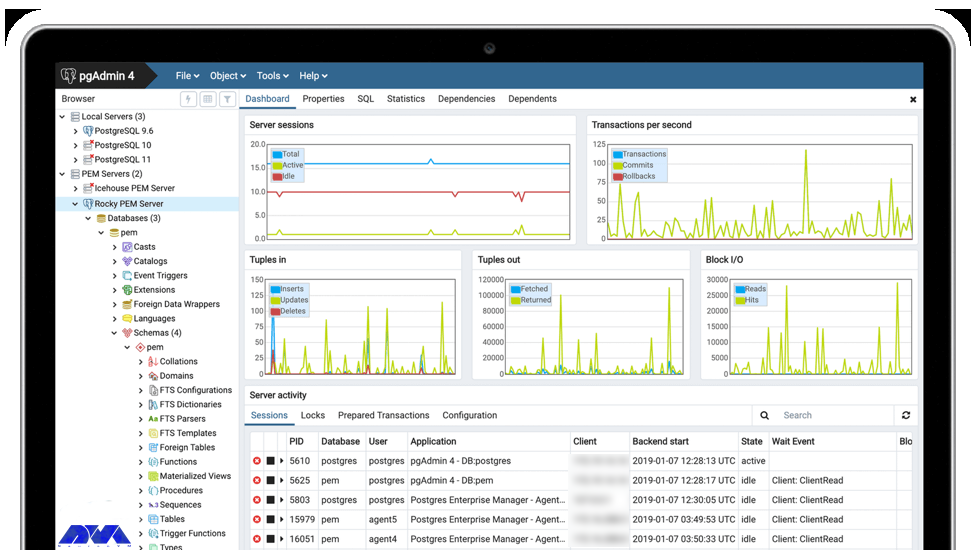
pgAdmin
It is one of the most popular feature-rich tools for managing PostgreSQL and its derivative databases. One of its most important features is its availability of Windows, macOS, and Linux extensive online documentation. It also has a powerful search tool for syntax highlighting, multiple deployment models, and support for most PostgreSQL server-side encryptions, among other features of pgAdmin.
Pocli
It is a Python-based tool that provides a lightweight command-line client for ownCloud for basic file operations such as uploading, downloading, and directory management. Pocli was also motivated by the lack of a tool to quickly upload or download files on computers without The GUI working.
Postman
In fact, Postman is free for individuals and small teams but also offers monthly subscriptions with advanced features for teams of up to 50 users and enterprise solutions. Currently, the HTTP client is very suitable for testing web services and was created to simplify the process of developing, testing, and documenting APIs by allowing users to create simple and complex HTTP requests quickly.
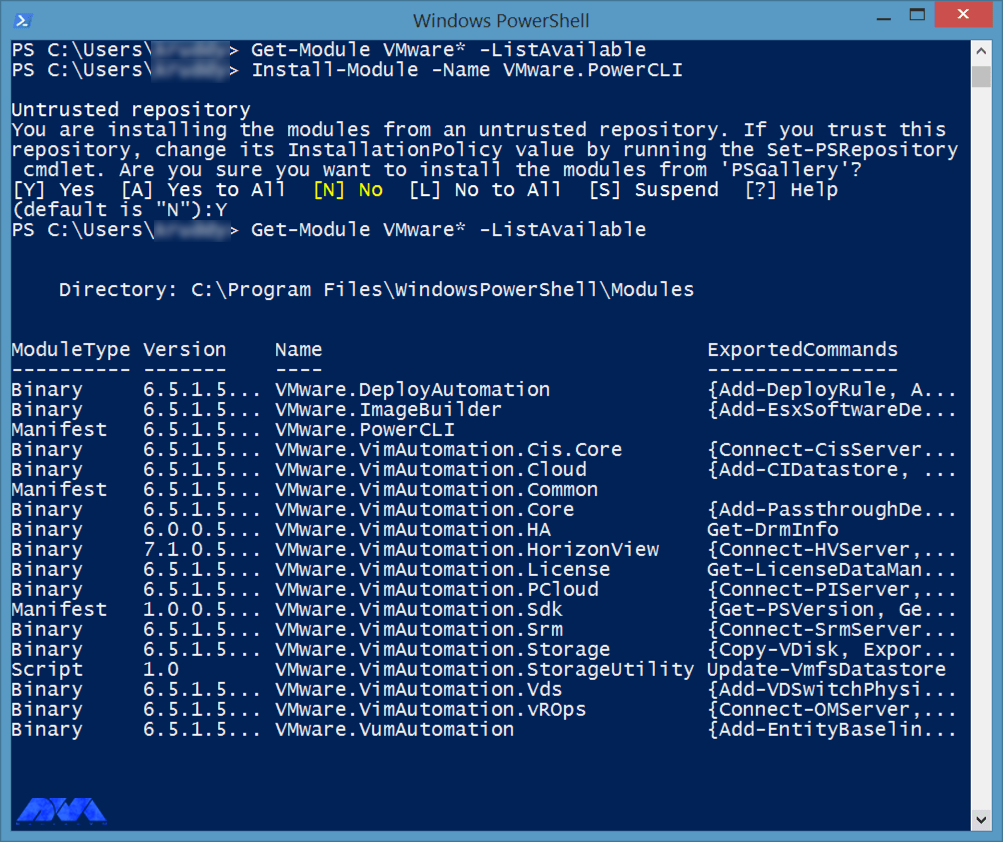
PowerCLI
Here this command-line tool is built on Windows PowerShell to provide more than 600 cmdlets to manage not only vSphere and VMware but also vCloud, vSAN, VMware Site Recovery Manager, NSX-T, VMware HCX, and more. It is also a powerful program for automating and managing VMware vSphere settings and is able to work with any VMware product.
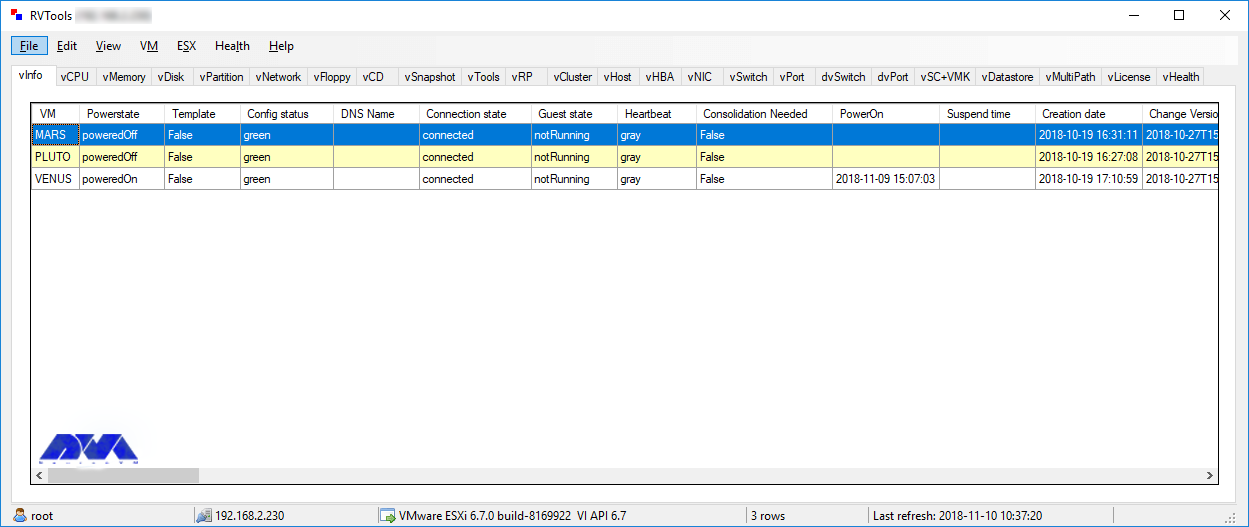
RVTools
With over a million downloads, RVTools excels at displaying information about your virtual environment’s CD drive, snapshots, ESX hosts, VM cores, data stores, health checks, license information, resources, and more. Use it to update. It is actually a .NET application that uses the VI SDK to display critical data about your virtual environments and is compatible with several technologies including VirtualCenter Appliance, ESX Server 4i, ESX Server 4.x, ESX Server 3i, VirtualCenter 2.5 It interacts. You can also update your VMTools to the latest version. It is free to download and use after subscribing to the Veeam mailing list, which provides subscribers with excellent VMware product offerings.
vCenter Converter
It is one of the tools to convert local and remote physical machines to virtual machines without any downtime and also has a centralized console to manage multiple simultaneous conversions both locally and remotely.
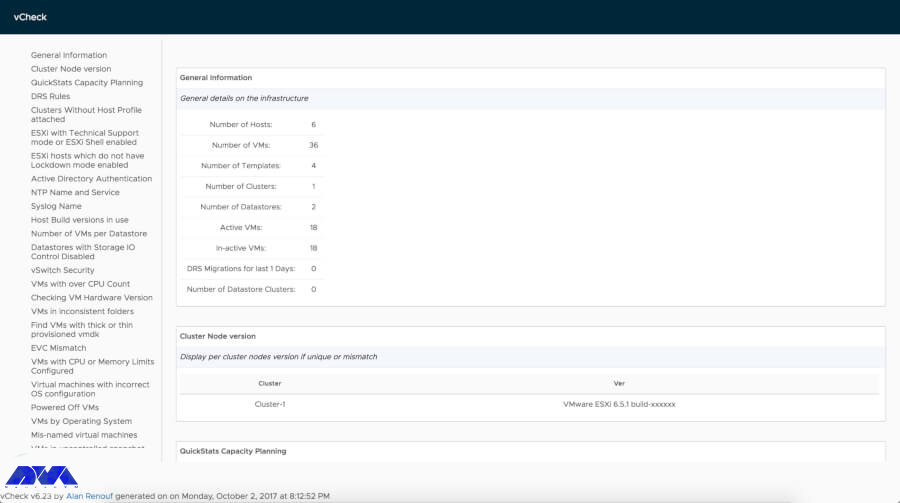
vCheck
vCheck is actually an HTML framework script designed to work with PowerShell to schedule automated tasks to send you the information in a readable format via email. If there is enough space, you will not get any information about the storage disk space. It is now a smart script and sends you vital information. It also removes unnecessary details.
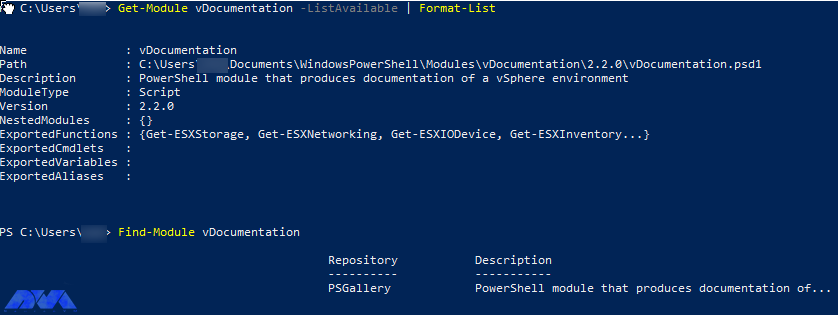
vDocumentation
vDocumentation, maintained by Ariel and Edgar Sanchez, provides a set of PowerCLI scripts created by the PowerShell community to give users with infrastructure documentation of vSphere environments in CSV or Excel formats.
VMware API Explorer
This platform helps you browse, search, and inspect APIs on every major VMware platform except vRealize, NSX, vCloud Suite, and vSphere. Also use the explorer for easy access to SDKs and code samples, among other resources, specific to selected APIs.
VMware Capacity Planner
The tool allows managers to analyze, predict and plan the required capacity of their virtual desktop environment or data centers.
VMware Health Analyzer
This tool helps evaluate VMware environments based on standard practices. It is also used by VMware partners and solution providers. Currently available only to customers with access to Partner Central and VMware employees.
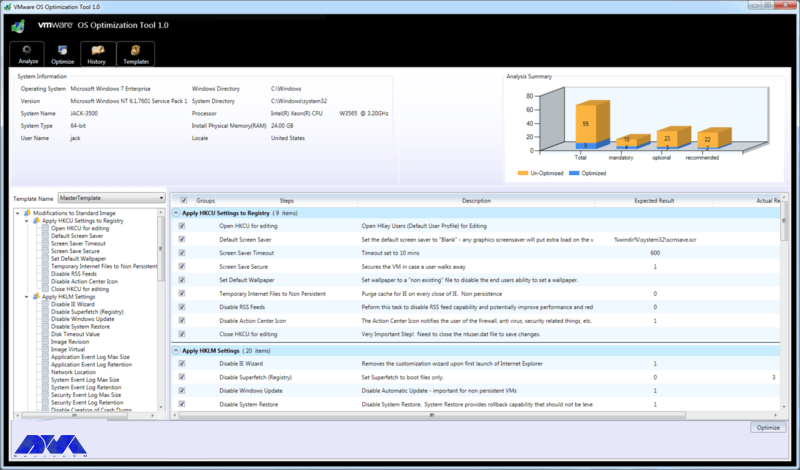
VMware OS Optimization Tool
Its top features include customizable templates across multiple systems that you can use to optimize VMware OS, manage templates, optimize history and rollback, and perform remote and local analytics. Currently, this is a VMware operating system optimization tool that allows administrators to optimize Windows 7 to 10 systems for use with VMware Horizon View.
VMware Project Onyx
Project Onyx monitors the network communication between vSphere Client and vCenter Server and translates it into executable PowerShell code that can be turned into a reusable script or function. It’s also a tool for generating code based on mouse clicks made in the vSphere client and aims to make it easy to visualize what’s going on under the hood to speed up script development.
VMware Skyline
It has automated support technology that aims to improve the overall reliability of VMware environments and increase team productivity by helping customers avoid potential problems.
VMware vRealize Orchestrator
The tool has an extensive library of plugins on the VMware Solution Exchange for third-party solutions and extends its features. Currently one of the most potent VMware management tools, it allows users to create workflows that automate multiple daily tasks using a drag-and-drop graphical interface.
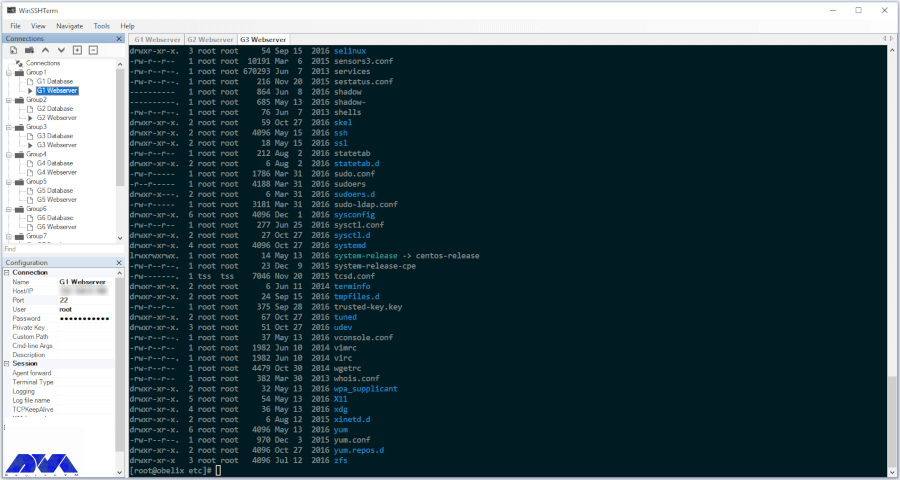
WinSSHterm
A production-ready SSH client tool for Windows combines WinSCP, PuTTY/KiTTY, and VcXsrv into one tabbed solution. It also features the use of a master password, template variables, eye-friendly terminal colors, and keyboard shortcuts.
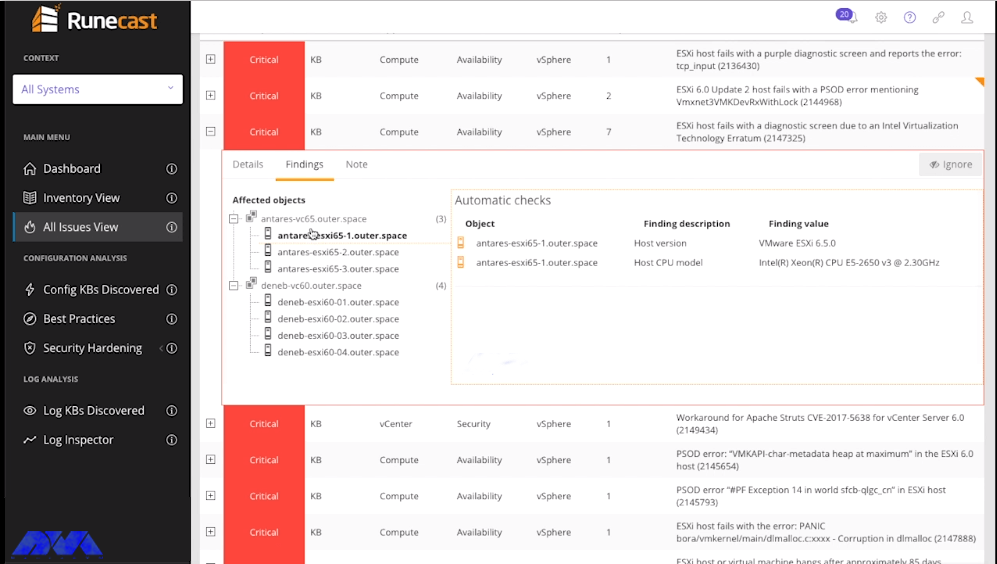
Runecast
This tool empowers users to perform proactive troubleshooting, analyze specific patterns in reports, and implement VMware SDDC best practices without sacrificing speed and simplicity. In fact, Runecast is the real-time security and compliance analyzer for BSI security audits.
Conclusion
VMware is known as a cloud operating system or a virtual data center platform. It also enables IT departments to place application workloads on the most cost-effective computing resources available. It offers applications for desktops as well as servers and VMware desktop software with Linux, Microsoft Windows, and Mac. OS X is compatible. In this educational article, you learned What is VMware? Also got acquainted with many of its tools. We hope this educational article was useful for you. Share your comments with us through the form below.
FAQ
Can we use WMvare for free? Yes, you can use the free version for non-commercial, personal, and home usage.