CentOS, a popular Linux distribution derived from Red Hat Enterprise Linux (RHEL), uses the RPM (Red Hat Package Manager) package format for software installation and management. RPM files contain precompiled software packages in binary format, allowing for easy installation on compatible systems. This article serves as a comprehensive guide on how to install RPM on CentOS.
Prerequisites
– CentOS operating system or a Linux VPS with CentOS Operating system
– A user account with sudo privileges
How to Install RPM on CentOS
To install RPM on CentOS, you can follow these steps:
Step 1: Open the Terminal
You can open the Terminal by pressing Ctrl+Alt+T or by searching for “Terminal” in the applications menu.
Step 2: Update your system
It is recommended to update your system before installing any new packages. Run the following command to update your system:
sudo yum update
Step 3: Install RPM
Run the following command to install RPM:
sudo yum install rpm
Step 4: Confirm the Installation
After running the previous command, you will be prompted to confirm the installation. Press ‘Y‘ and then press Enter to proceed with the installation.
Step 5: Wait for the Installation to Complete
Yum will download and install the RPM package along with its dependencies. This process may take a few minutes depending on your internet speed.
Step 6: Verify the installation
Once the installation is completed, you can verify it by checking the RPM version. Run the following command:
rpm --version
This command will display the RPM version that is installed on your system. That’s it! You have successfully installed RPM on CentOS
Remove RPM Packages
Remove RPM Packages If you no longer need an installed RPM package, you can remove it from your CentOS system using the yum remove command followed by the package name.
For example, to remove the “example-package” package, run the following command:
sudo yum remove example-package
Confirm the removal process by typing ‘y‘ and pressing Enter.
Conclusion
In conclusion, installing RPM packages on CentOS provides an efficient and standardized method for managing software. By using the “yum” command, users can easily install, update, and remove software, ensuring system stability and security. Additionally, RPMs offer the advantage of dependency resolution, simplifying the installation process and ensuring all required packages are properly installed.
V2Ray is a powerful and flexible open-source network proxy that allows you to bypass internet censorship and enhance your online privacy. In this article, we will walk you through the step-by-step process of installing and configuring V2Ray on a CentOS server. All you need is a computer with CentOS or a Linux VPS on it so you can follow the steps mentioned below. Whether you’re a seasoned Linux user or just starting out, this guide will provide you with all the information you need to install V2Ray on CentOS. So let’s dive in and get started with the setup process!
What is V2Ray?
V2Ray is a software tool that helps you maintain your online privacy and security while browsing the internet. It acts as a “middleman” between your device and the websites you visit. When you use V2Ray, it encrypts your internet connection, making it difficult for others to spy on your online activities or steal your personal information. It also allows you to bypass internet restrictions and access blocked websites or services. In simple terms, V2Ray is like a protective shield that keeps you safe and allows you to explore the internet freely and privately.
Requirements to Install V2Ray on CentOS
Although setting up V2Ray on your CentOS server is not a hard job, there are a few prerequisites that you need to ensure are met:
Linux VPS Server with CentOS OS: Make sure you have a CentOS server or a Linux VPS. They should have root access or a user with sudo privileges.
Internet connection: Ensure that your server has a stable internet connection to download the necessary files.
Basic command-line knowledge: Familiarize yourself with basic command-line operations as you will need to execute commands to install and configure V2Ray.
Firewall configuration: If you have a firewall enabled on your CentOS server, you may need to configure it to allow V2Ray traffic.
By ensuring these requirements are met, you will be ready to proceed with the setup of V2Ray on CentOS.
Setup V2Ray on CentOS
First, you should update your CentOS system. Open a terminal or SSH into your CentOS server and run the following command to update the system:
sudo yum update
Download the latest release of V2Ray by visiting the official GitHub repository. Identify the appropriate package for your CentOS system (e.g., 64-bit or 32-bit). Copy the download link of the package. In the terminal, use the `wget` command followed by the download link to download the package. For example:
wget <download_link>
Once the download is complete, extract the package using the following command:
Copy and paste the sample configuration provided by V2Ray into the `config.json` file. Customize the configuration according to your needs, such as changing the listening port or adding inbound and outbound proxies, then save and exit the configuration file.
Create a new systemd service file for V2Ray:
sudo nano /etc/systemd/system/v2ray.service
Copy and paste the following content into the `v2ray.service` file:
Check the status of the V2Ray service to ensure it is running without any errors:
sudo systemctl status v2ray
That’s it! You have now successfully set up V2Ray on CentOS. You can proceed to configure your client devices to connect to the V2Ray server using the specified settings in the `config.json` file.
Troubleshoot Common Issues
While setting up V2Ray on CentOS, you might face some problems. We’ve listed them for you and we have a short solution for each.
Firewall blocking connections: Check if the firewall is blocking the required ports (e.g., 80, 443). Temporarily disable the firewall or allow incoming connections on the necessary ports using the firewall-cmd command.
Port conflicts: Ensure that the ports specified in the V2Ray configuration file are not being used by other services. Use the netstat command to check if any other processes are using the specified ports.
SELinux blocking V2Ray: If SELinux is enforced, it might stop V2Ray from functioning correctly. Temporarily set SELinux to permissive mode using the setenforce command (e.g., setenforce 0) and check if the issue persists. If it does, consider properly configuring SELinux policies.
Incorrect V2Ray configuration: Verify the V2Ray configuration file (/etc/v2ray/config.json) for any syntax errors or missing/wrong settings. Use the v2ray -test -config command to validate the configuration file.
Network connectivity issues: Test the connectivity by pinging external servers or performing a traceroute. Verify DNS configuration in /etc/resolv.conf and ensure it is resolving domain names correctly.
These are just a few problems you might face during setting up V2Ray on CentOS. If you faced any other problems you can comment under this post and we will get back to you in no time!
Conclusion
V2Ray can be a handy tool to bypass censorship and protect your privacy online. It uses a mixture of methods to help users access the websites that may be blocked on their area. If you need this service on CentOS, all you have to do is to follow the steps mentioned above. If you faced any problems in the process of setting up V2Ray on your CentOS server, you can comment down below. We will get to you in no time!
Koel is a simple web-based personal audio player. It is interesting to know that this program is written in Vue on the client side and Laravel on the server side. The interesting point is that the Koel source code is hosted on GitHub. In this post, we will tell you how you can Elevate Your Music Experience. Also, after reading this article, you will see that installing Koel on CentOS is easy.
Benefits of installing Koel on CentOS
In this section, we are going to examine the benefits of installing Koel on CentOS. Koel is a web-based personal audio streaming service that lets you access your music collection from anywhere. In the following, we will introduce you to some advantages of installing Koel on CentOS:
1) Easy installation of Koel on CentOS: To install Koel on CentOS, just install the required dependencies. These dependencies include installing PHP, Node.js, yarn, and FFmpeg, cloning the Koel repository, configuring the database and web server, and running the installation script.
2) Enjoy modern web technologies: As mentioned in the introduction of the article, Koel is written in Vue on the client side and Laravel on the server side, which are popular and powerful web frameworks. You may be interested to know that Koel also uses CSS grid, sound, and drag-and-drop API to provide a stylish and responsive user interface.
3) The possibility of customization and expansion with Koel: Since Koel is open-source and free, you can modify it according to your preferences and needs. You can also help develop and improve the project by reporting issues, submitting pull requests, or donating to the project.
4) Possibility of using HTTPS server and storage: Unlike other streaming services that require you to upload your music to their cloud, Koel lets you use your own server and storage. Koel gives you more control and privacy over your data. On the other hand, you can choose a database system that suits your needs. such as MySQL, MariaDB, PostgreSQL, or SQLite.
PHP version 5.6.4 or greater, with OpenSSL, PDO, Mbstring, Tokenizer, and XML extensions
The latest stable version of Node.js
Nginx
MariaDB
Composer
Setting up CentOS for Koel installation
Before starting the Koel installation process, you need to take some steps to set up CentOS. In the first step, you should check the CentOS version by running the following command:
cat /etc/centos-release
Then you need to create a new non-root user account and switch to it. It should be noted that you can substitute your username instead of Jannson in the following commands.
As mentioned, the dependencies that need to be installed before installing Koel are PHP, MariaDB, Nginx, Node.js, Yarn, and Composer. In the following, we will learn how to install each of these tools.
Downloading and configuring the Koel installation package
Finally, we have reached the installation stage of Koel. In order for Koel to be installed in your desired location, you need to create an empty folder:
sudo mkdir -p /var/www/koel
Now navigate to the desired folder by running the following command:
cd /var/www/koel
Now it is necessary to change the ownership of the /var/www/koel folder to the user Jannson using the following command. Note that you can replace Jannson with your desired username in the following command:
sudo chown -R jannson:jannson /var/www/koel
Clone the Koel repository with the following command:
git clone https://github.com/phanan/koel.git .
Now you need to check the latest tagged version:
git checkout v3.7.2
Finally, you can install its dependencies with the help of the following command:
composer install
Configuring the database for Koel on CentOS
In this section, we want to teach you how to configure the database for Koel on CentOS. Run the following command to start the database and management account:
php artisan koel:init
Run the following command:
vim .env
Now you can set the following command to your URL:
APP_URL=http://example.com
Again, you can use the following command to compile and install front-end dependencies:
yarn install
In this section, use the following command and change the ownership of the /var/www/koel folder to Nginx:
sudo chown -R nginx:nginx /var/www/koel
Set the user and group for Nginx using the following commands:
sudo vim /etc/php-fpm.d/www.conf

# user = nginx

# group = nginx
After completing all the mentioned steps, it is now necessary to restart PHP-FPM:
sudo systemctl restart php-fpm.service
Setting up user authentication for Koel on CentOS
To set up user authentication for Koel on CentOS, you need to follow these steps:
1) Configure your web server (Nginx or Apache) to use PHP-FPM and enable the rewrite module.
2) Configure your database (MySQL, MariaDB, PostgreSQL, or SQLite) to create a database and a user for Koel.
3) Run php artisan koel:init in the Koel root directory to populate the necessary configurations. You will be prompted to enter the database details and create an admin account for Koel.
4) Optionally, you can configure your system to use a centralized authentication service, such as FreeIPA, LDAP, or Active Directory. You can use SSSD or authselect to configure the communication between your system and the authentication service.
Customizing the Koel interface on CentOS
To customize the Koel interface on CentOS, you need to follow these steps. Note that in order for Nginx to be able to read the files, you must grant it the correct rights and permissions:
Troubleshooting common issues during Koel installation on CentOS
Some of the common issues that you may encounter during Koel installation on CentOS are:
1) Permission errors: You may need to set the correct permissions for the Koel directories and files, such as the sqlite database, the logs, the covers cache, and the .env file. You can use the chmod and chown commands to do so. For example:
sudo chown -R www-data:www-data /var/www/koel.
2) Migration errors: You may need to run php artisan migrate:fresh –seed to reset and seed the database if you encounter any errors during the migration step. This will delete all your existing data, so make sure you have a backup before doing this.
3) Authentication errors: You may need to generate a new JWT secret by running php artisan jwt:secret if you encounter any errors during the authentication step. This will invalidate any existing tokens, so make sure you log out and log in again after doing this.
4) Node errors: You may need to update your Node version to the latest stable one by running the following command if you encounter any errors during the asset compilation step:
sudo npm install -g n && sudo n stable
Conclusion and next steps
As we told you in this tutorial, Koel is a web-based audio streaming service written in the Laravel PHP framework. If you have followed all the steps mentioned in this post correctly, you can use this tool to stream your personal music collection and access it from anywhere. It is interesting to know that this program supports multiple media formats including AAC, OGG, WMA, FLAC, and APE.
Choosing an operating system for your server can be a really confusing task due to the huge list of options available. Especially if you want to use your own server with a Linux distribution. There are many choices, but none are as popular as Ubuntu or CentOS. Whether you’re a pro or a beginner, it usually comes down to choosing between the two options. It is safe to say that there is no direct decision. In the post you will read, the comparison of CentOS and Ubuntu will be done using different parameters.
What is Linux?
The Unix operating system was developed and expanded in 1971 by the American Telephone and Telegraph Company. This operating system was expensive and not all people could easily use it. Therefore, the Linux system, which is very similar to Unix and its sub-branches, was chosen as a successor.
In 1991 Torvalds Linux created the Linux kernel. Linux operating system is supported by many companies. Among the most important tasks of the Linux kernel, the following can be mentioned:
Data storage: Data storage is done in memory that works with random access, in permanent memory, or virtual file system.
Access to the computer network
Timing
Using input and output tools such as a mouse, keyboard, webcam, and USB flash drive
Security: This security can include the security of resources as well as users and different user groups.
Types of Linux distribution (distro) is an operating system that is made of a software package based on the Linux kernel and often a package management system. Linux users usually get their operating system by downloading one of the Linux distributions. A typical Linux distribution includes the Linux kernel, GNU tools and libraries, additional software, documentation, a window system, a window manager, and a desktop environment.
To know more about Linux software, you should know its famous distributions. The following distributions are among the most famous:
Debian
Cloud Linux
CentOS
AlmaLinux
Rocky Linux
Ubuntu
Mint
Kali Linux
OpenSUSE
In the rest of this article, we will do a full review of CentOS and Ubuntu distributions and compare them in terms of security, stability, ease of use, and package management.
What is CentOS?
The CentOS operating system (Community Enterprise Operating System) is a server operating system. CentOS is a free distribution of Linux supported by communities and there is no need to pay for it. CentOS is based on the Enterprise version, which is known as the server version of the RedHat Linux distribution. The versions of CentOS that enter the market are basically the mirror version of the versions introduced in Red Hat Enterprise Linux. By choosing this popular distribution, there is no need to pay exorbitant fees to buy Enterprise products.
In most organizations, RHEL is used as the main server, and CentOS is used as a backup and redundant server. This issue will cause other organizations not to need to hire several system administrators, and only by hiring a system administrator who has mastered RHEL, the organization’s CentOS management will be done.
From the perspective of architecture, this distribution has the ability to support x86, x64, and i386 architectures and even PowerPCs. CentOS also supports GNOME and KDE desktops and this operating system can be used as a server and workstation.
Advantages of CentOS:
This operating system is chosen by many users and organizations for several reasons. Some of the important advantages of CentOS are:
Open-Source
Establishment in the industry
Long term support
Active community
Stability
What is Ubuntu?
Ubuntu is a popular free and open-source Linux-based operating system that you can use on your PC or Linux VPS server. It’s a massive project that helps millions of people worldwide run machines built with free and open-source software on various devices.
Linux comes in many shapes and sizes, with Ubuntu being the most popular version on desktops and laptops. Note that when we say Ubuntu is free, we don’t mean that it costs only; Rather, unlike most proprietary software (such as Windows and macOS), free and open-source software allows you to edit its code and install and distribute as many copies as you like. You don’t pay to use it; So, so not only is Ubuntu free to download; But you can use it as you want.
Advantages of Ubuntu:
There are many reasons to use Ubuntu, but here are the most important ones:
This program is free and open source.
It is easy to install and test. In fact, you don’t need to be an expert to install it.
It is beautiful and user-friendly.
It’s stable and fast, typically loading in less than a minute on modern computers.
It does not have any important viruses and is immune to harmful Windows viruses.
is up to date; Because Canonical releases new versions every 6 months and provides regular updates for free.
It is supported and you can get all the backups and guidance you need from the global FOSS community and Canonical.
Among the different versions of the Linux operating system, Ubuntu has the most support.
The differences between CentOS and Ubuntu
CentOS and Ubuntu are both popular operating systems for web servers in the software operations market. CentOS is basically built on the Linux framework and Linux distribution to provide a free and supported computing platform. Ubuntu is also basically an open-source distribution of Linux and it is considered one of the popular cloud operating systems it runs in most cases and places such as desktop and cloud environments and almost everything related to the Internet.
In the rest of this article, we will compare Ubuntu and CentOS in terms of security, stability, ease of use, and package management.
CentOS vs. Ubuntu: Security
Ubuntu is updated frequently. A new version is published every six months. Ubuntu offers LTS (Long Term Support) releases every two years, supported for five years. These different versions allow users to choose whether they want the “latest and greatest” or the “tried-and-true”. Due to frequent updates, Ubuntu often includes newer software in newer versions. This feature can be fun to play with new features and technologies but can conflict with existing software and configurations.
CentOS is rarely updated. This is partly because the CentOS development team is smaller. It is also due to extensive testing on each component before release. CentOS versions are supported for ten years from the release date and include security and compatibility updates. However, a slow release cycle means a lack of access to software updates. If they have failed to release these updates to the main repository, you can either install the updates manually.
CentOS, on the other hand, is based on the Linux framework and is therefore very secure and protected through 3 layers of security. Ubuntu also has good security layers, but sometimes it may be prone to web threats due to frequent updates.
Regardless of the differences between CentOS and Ubuntu, both are secure with regular updates.
CentOS vs. Ubuntu: Stability
The stability of an operating system means that its bugs are fixed quickly. Stability is one of the most important things that affect the performance of servers because an error can lead to the loss of information or server down. This in itself is considered an irreparable disaster, which is associated with a large financial burden. CentOS operating system consists of a strong kernel so its stability is guaranteed and it is better than other Linux distributions.
One of the reasons that makes Ubuntu suitable for beginners is its stability. You may have heard that if you use Linux, you should be well aware of how to manually fix things and use the command line. This is definitely not the case with Ubuntu. Stability is the main reason why Ubuntu is the first choice of operating system for beginners. Once you’re done with the installation process, all you have to do is keep the packages up-to-date on your system, nothing else. Since packages are tested before being included in the official repositories, you can be sure that your system won’t crash when you install new software. Ubuntu is stable enough to run on servers where uptime and performance are a priority.
CentOS vs. Ubuntu: Ease of Use
Ubuntu has gone a long way in designing its system to be user-friendly. The graphical interface is intuitive and easy to manage with useful functionality. Running applications from the command line is simple. But on the other hand, CentOS is more suitable for users with more expertise in this field.
CentOS is primarily based on Red Hat Linux and is more difficult to learn than Ubuntu due to its smaller community and less documentation. In Ubuntu, it is easier to learn due to the support of more communities and the large number of tutorials and books on the market and the Internet.
CentOS vs. Ubuntu: Package Management
A software package is an archive of compiled binary files, resources needed to build the software, and scripts to install and run the software. A package also includes a list of packages in the form of dependencies that must be installed on the system to run the desired software. While the features and facilities of this package manager are very similar in different Linux distributions, the format of packages, tools, and commands are different.
In Ubuntu, the package format is deb. APT (Advanced Packaging Tool) provides commands for various tasks with packages, including installing, updating, removing, and finding packages in repositories. APT commands act as front-end and high-level commands for the low-level dpkg tool. dpkg can be used to install package files that are on the system. You can also use the apt-get and apt-cache commands (the older version of the apt command) to manage packages in most Debian-based distributions.
CentOS uses rpm format packages. In CentOS, the yum tool is used to manage the packages in the repositories as well as the packages on the system. The low-level rpm tool can also be used to install the package files that are on the system. In recent versions, the dnf command is used instead of yum.
Which is better for your needs: CentOS or Ubuntu?
In this section, in general, by providing several different parameters, including the origin, purpose, support model, how to install programs and application communities, we will give you the opportunity to decide which is better for your needs depending on your needs.
CentOS and Ubuntu are both Linux operating systems, but they are based on different Linux distributions. Next, we explore the key differences between CentOS and Ubuntu.
1) Origin: CentOS is developed from Red Hat’s commercial operating system. For this reason, CentOS is commonly used as a commercial-grade Linux distribution. While Ubuntu is developed from the roots of Debian and is known as a Linux distribution based on the Debian family.
2) Purpose: CentOS is primarily designed for server environments and business and enterprise uses. Ubuntu is often considered a general purpose, desktop distribution and is suitable for everyday use, servers, and desktop systems.
3) Support model: CentOS typically uses a long-term support model. This means that released versions of CentOS will be updated and supported for a long time. In contrast, Ubuntu comes with two standard versions, namely LTS (Long-Term Support) and regular (non-LTS) versions. LTS versions receive security updates and support for five years, while non-LTS versions receive support for about nine months.
CentOS consists of a set of Red Hat software, including the Apache web service, MySQL, and Python programming language. On the other hand, Ubuntu uses software such as LibreOffice, Evolution e-mail program, and Firefox browser.
4) How to install applications: CentOS uses the YUM (Yellowdog Updater Modified) package manager, while Ubuntu uses the APT (Advanced Package Tool) package manager. These two package managers work with differences in syntax and functionality.
5) User Communities: Both CentOS and Ubuntu have strong and active user communities. However, the Ubuntu user community is much larger and more active, and there are more discussions about Ubuntu. This means more resources, online tutorials, and community support from users.
Ultimately, choosing between CentOS and Ubuntu depends on your needs, preferences, and uses. If you need a stable and reliable operating system for servers and business use, CentOS is a good choice. If you need a desktop Linux distribution for daily use and development of software and games, Ubuntu can be a good option. Also, if you’re looking for a larger user community and the most training and support resources, Ubuntu might be the best option. However, to choose between CentOS and Ubuntu, it is better to consider your personal needs, skills, and experience and determine the best option for you by testing and experimenting with both distributions.
Conclusion
To conclude this comparison of CentOS and Ubuntu, both are famous and one of the best Linux distributions that have their own advantages and disadvantages. Choosing one is easy if you consider your needs and are willing to do some work. The purpose of this article was to compare CentOS and Ubuntu and provide an overview of the differences between these two Linux distributions to facilitate the decision-making process.
If you are one of the online businesses that provide hosting services to your customers, you may encounter various problems in your field such as performance, source leaks, or security issues. All these issues are recovered by the CloudLinux operating system that is used for the shared hosting environment. So, we will show you how to install CloudLinux on CentOS 7.
What is CloudLinux Operating System?
As mentioned, CloudLinux is an operating system for commercial use and can replace CentOS. The system uses LVE kernel-level technology, allowing you to manage CPU and memory on a per-tenant basis. Some of the benefits that CloudLinux Offers are advanced resource management, performance optimization, and advanced security, which are specially provided for Multi-client hosting environments. This improved performance enables data centers to provide better customer support.
Installing CloudLinux on CentOS 7
To set up and use the CloudLinux operating system, we suggest you purchase from the Linux VPS plans provided on our website and then apply the continuation of this tutorial on our high-speed servers.
According to the usual procedure, you should start the installation by updating the operating system. This important step must be done because CentOS security comes first and security is sent at the CentOS upgrade. So follow the command to upgrade the operating system:
yum -y update && shutdown -r now
The next part is to register a CloudLinux user key. It is a commercial product, So you will need to purchase the correct number of keys depending on your needs.
You will get the installer as a runnable script, So fetch the script before the execution:
Then, you should run the script you have just retrieved:
sh cldeploy -k # if you have activation key
Or you can execute it as follow:
sh cldeploy -i # if you have IP based license
As you complete the process, reboot your server. As a result, various CloudLinux services will be running and all the kernel modules and modifications will be active:
reboot
That’s it. Now you have CloudLinux installed on your CentOS system.
Conclusion
CloudLinux is a great way to upgrade your hosting. So, we tried to introduce a way to install it on the CentOS operating system. It was easy and will takes just a few minutes to install. If you enjoyed this article please share it with those who may also be interested.
FAQ
What are the benefits of using CloudLinux?
This OS is useful to improve server stability, enhance security, and allocate and control resources.
Is it possible to install CloudLinux on an existing CentOS server?
Yes, it is possible. However, it is better to perform a clean installation of CloudLinux to avoid potential problems and conflicts.
CWP, or CentOS Web Panel, is a control panel for web hosting on Linux and is a free alternative to Cpanel. This tutorial has been prepared to introduce you to the Tutorial Install CWP on CentOS 8. Its easy-to-use interface and several other features make it a good choice for beginners. The reason for the ease of using this control panel is that you don’t need to access the server with SSH for every task.
What Is CWP?
As we mentioned in the introduction, Control Web Panel is a management tool that is generally created on unmanaged VPS for users who are interested in working with the command line. If you need to get more information about CWP you can refer to A Full Introduction to CWP.
Some Points to Mention Before CWP Installation
There are some critical points that you should consider before the installation process of CWP:
– It is not possible to remove it after the installation.
– If you want to remove CWP from your Linux VPS, you should reinstall the server.
– Your hostname should be different from the other names on any domain on your server.
– The installation should be on the newly installed operating system without any configuration changes.
– The dynamic, Sticky, or internal IP addresses are not supported.
Steps to Install CWP on CentOS 8
Now let’s find out how we can install CWP on CentOS 8. Follow the instructions below to have a successful installation process.
The first step is to prepare the server by installing the EPEL repository on CentOS 8:
sudo dnf install epel-release
Use the command below to install the required packages like wget to install CWP:
sudo dnf install wget -y
The next step is to update your server using the following command:
sudo dnf update -y
You should reboot your system to make the changes applied:
reboot
Now the system is completely ready to install CWP. So, use the cd command to change the directory /usr/local/src by this command:
Here, you should run the command below to install the downloaded shell script:
sudo sh cwp-el8-latest
Now you have successfully installed CWP on your CentOS system. Reboot the server again to apply changes:
reboot
Also, you can use the command below to automatically reboot the system after the installation:
sudo sh cwp-el8-latest -r yes
Configuring CWP on CentOS 8
In the configuration section, your first step is to access the web panel user interface by giving the IP address and port number 2030.
http://server_IP_address:2030/
You can check the server’s IP by opening the terminal of your system on which you installed CWP. Use the following command:
ip a
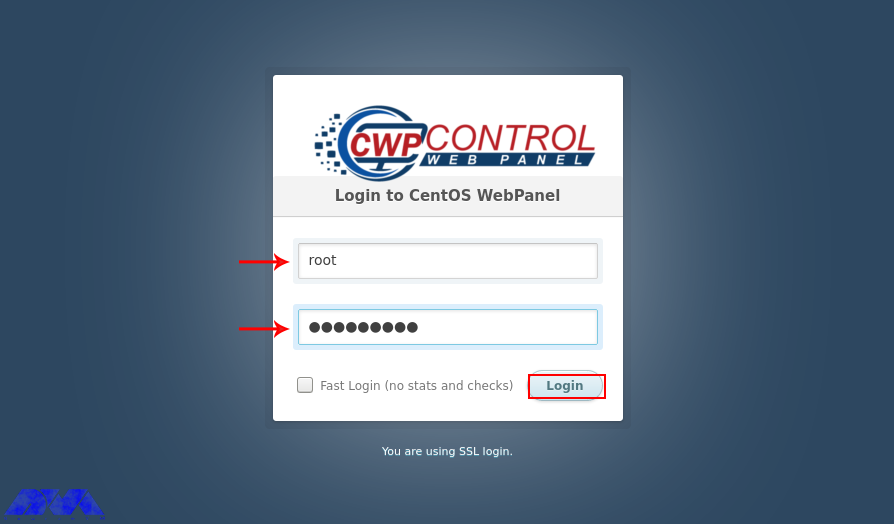
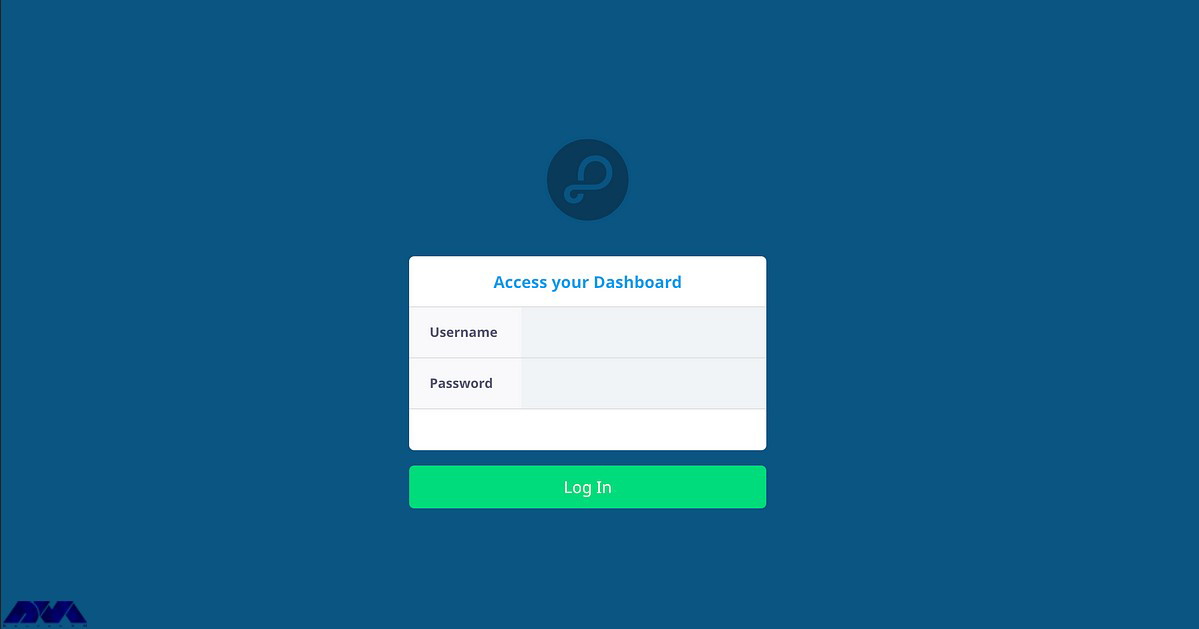
Her, you can access the admin control panel using your IP address. Use the root username and password to login to the CWP:
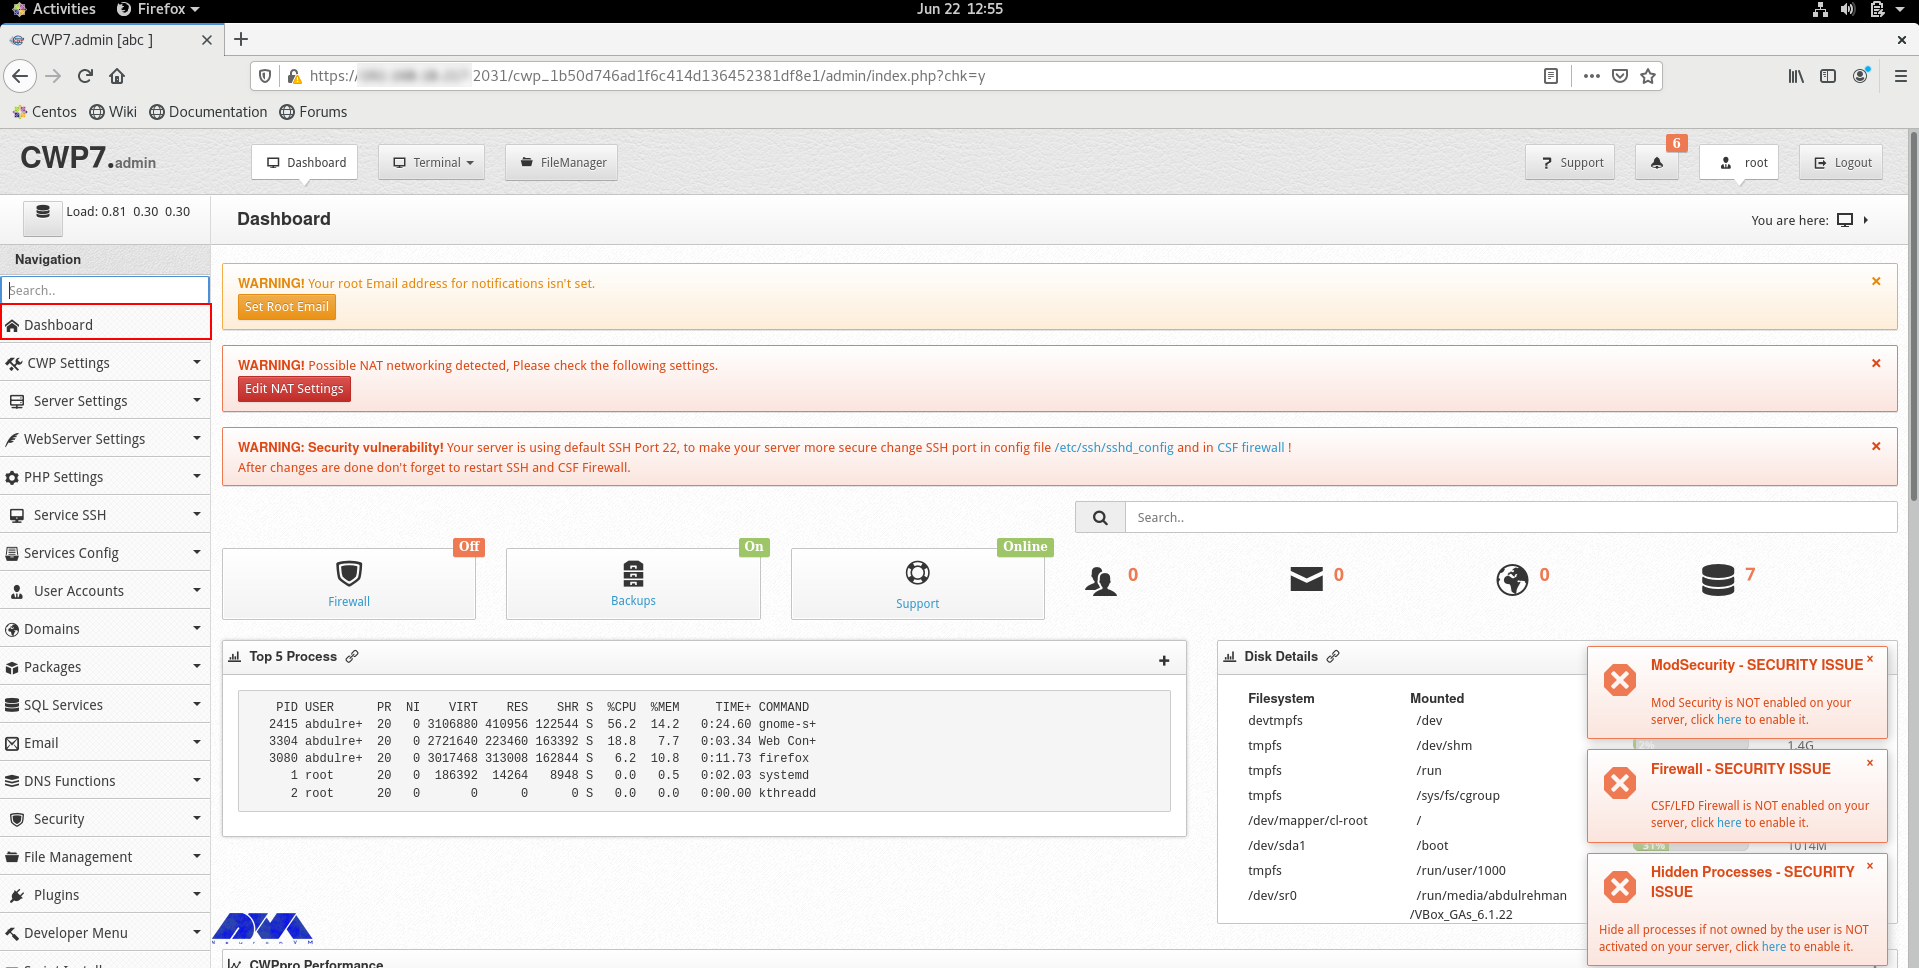
You can see the dashboard here:
If you can log in to the dashboard easily, it shows that your installation is successful.
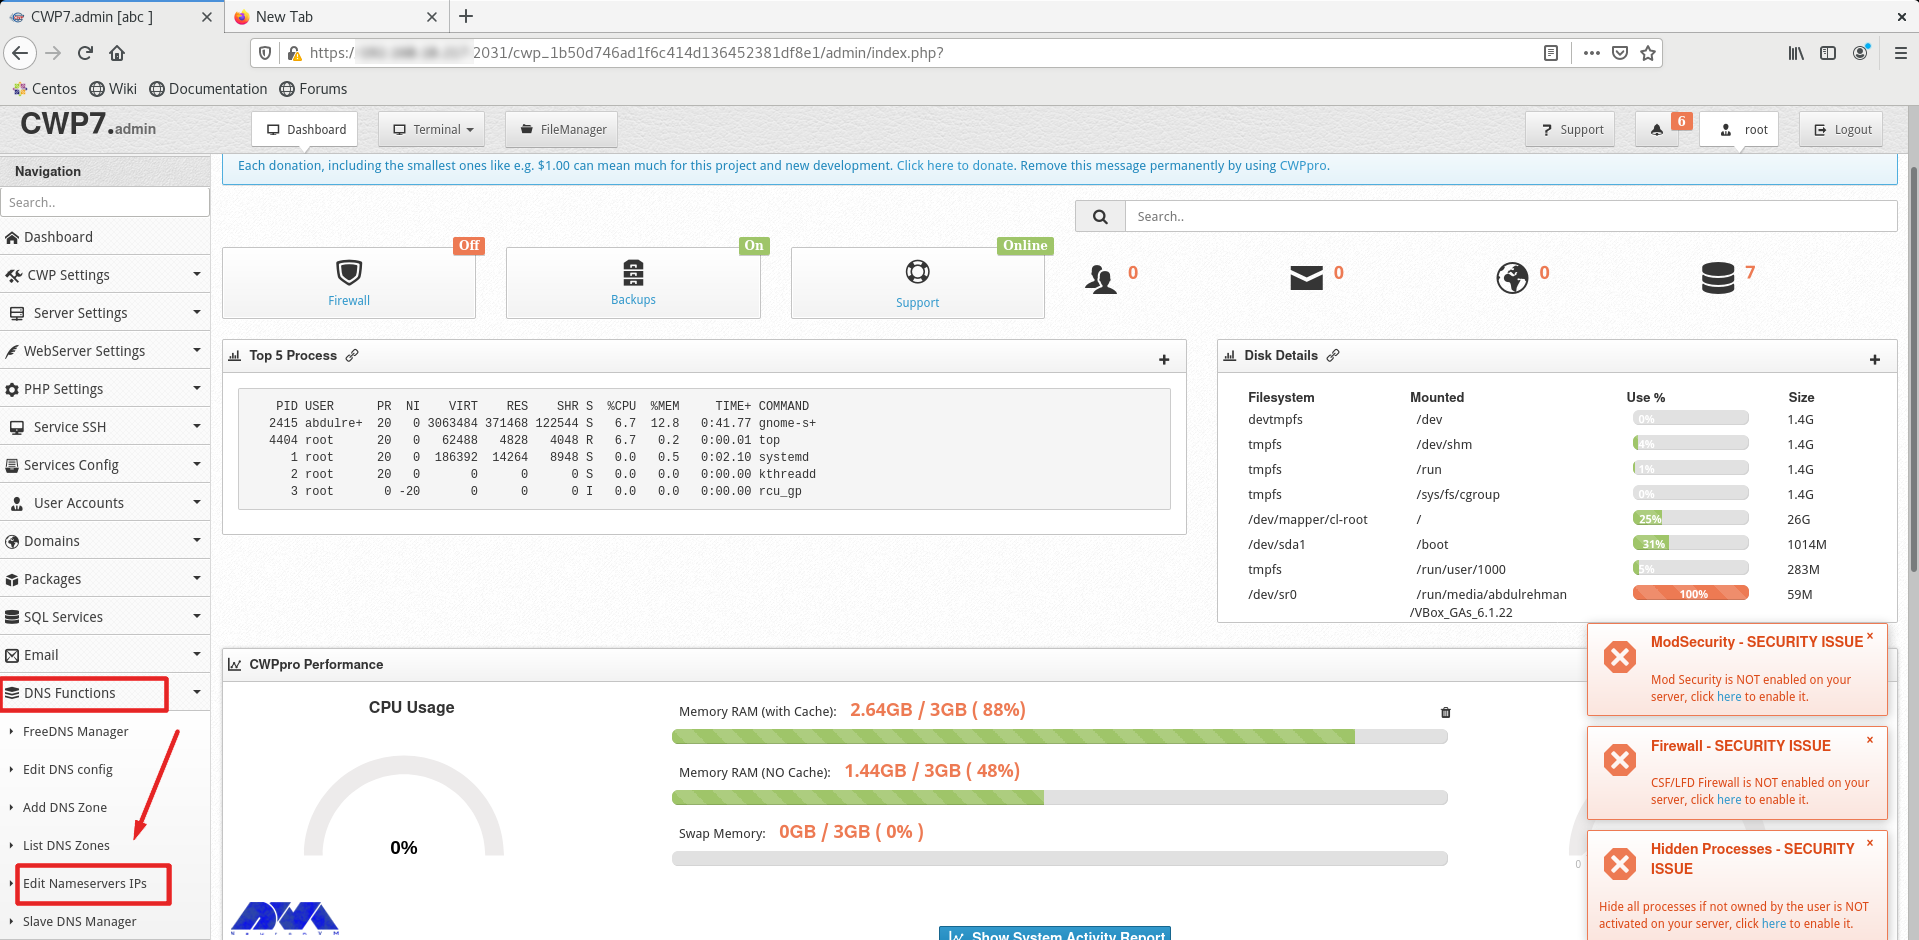
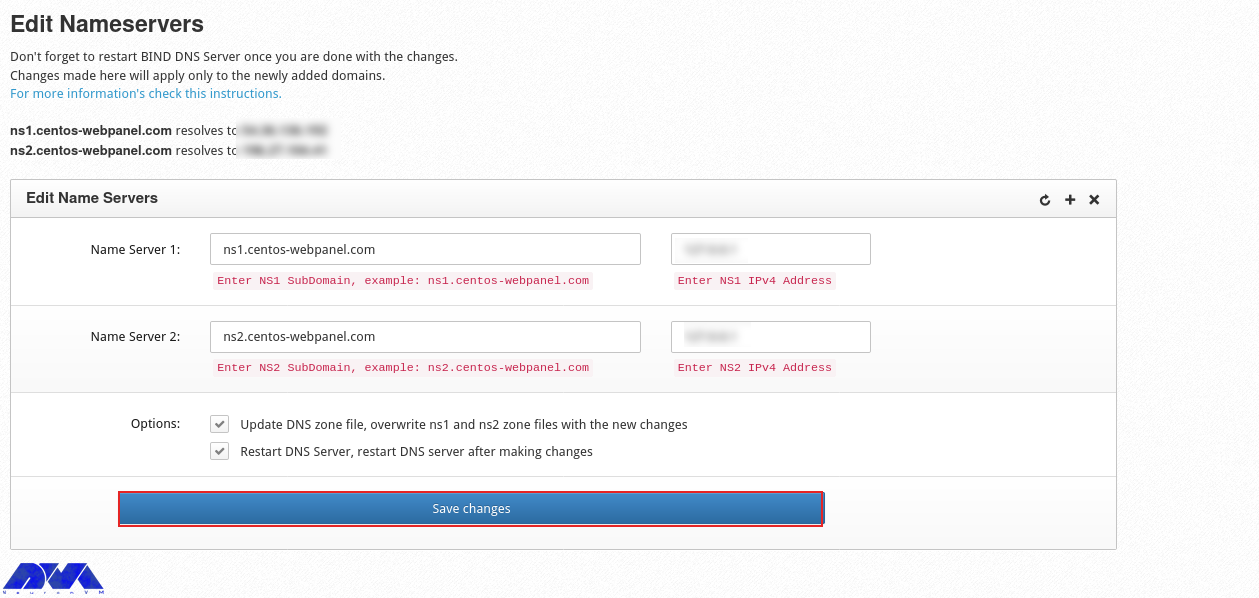
You should do a couple of instructions, to prepare the domain for domain hosting. On the dashboard, you should refer to DNS Functions part and choose Edit Name Server IPs:
You should add nameserver 1 and 2 with related IP addresses and click on Save Changes Button:
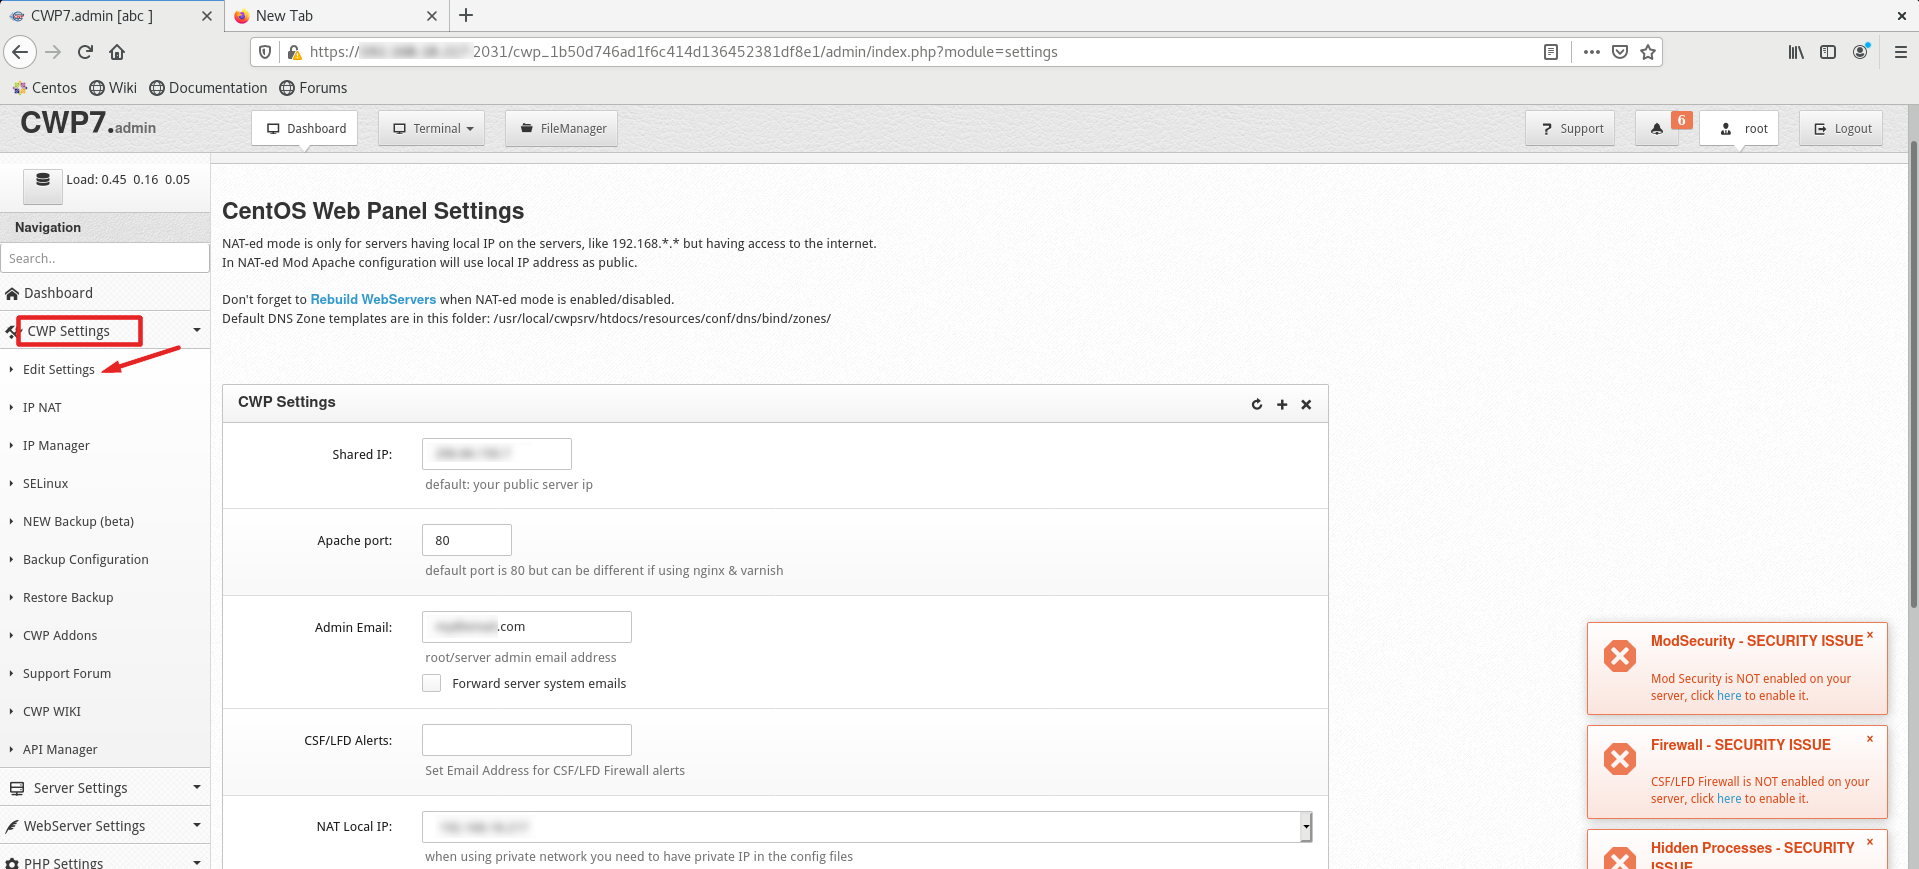
Then go to the CWP Settings and select Edit Settings to determine the shared IP address:
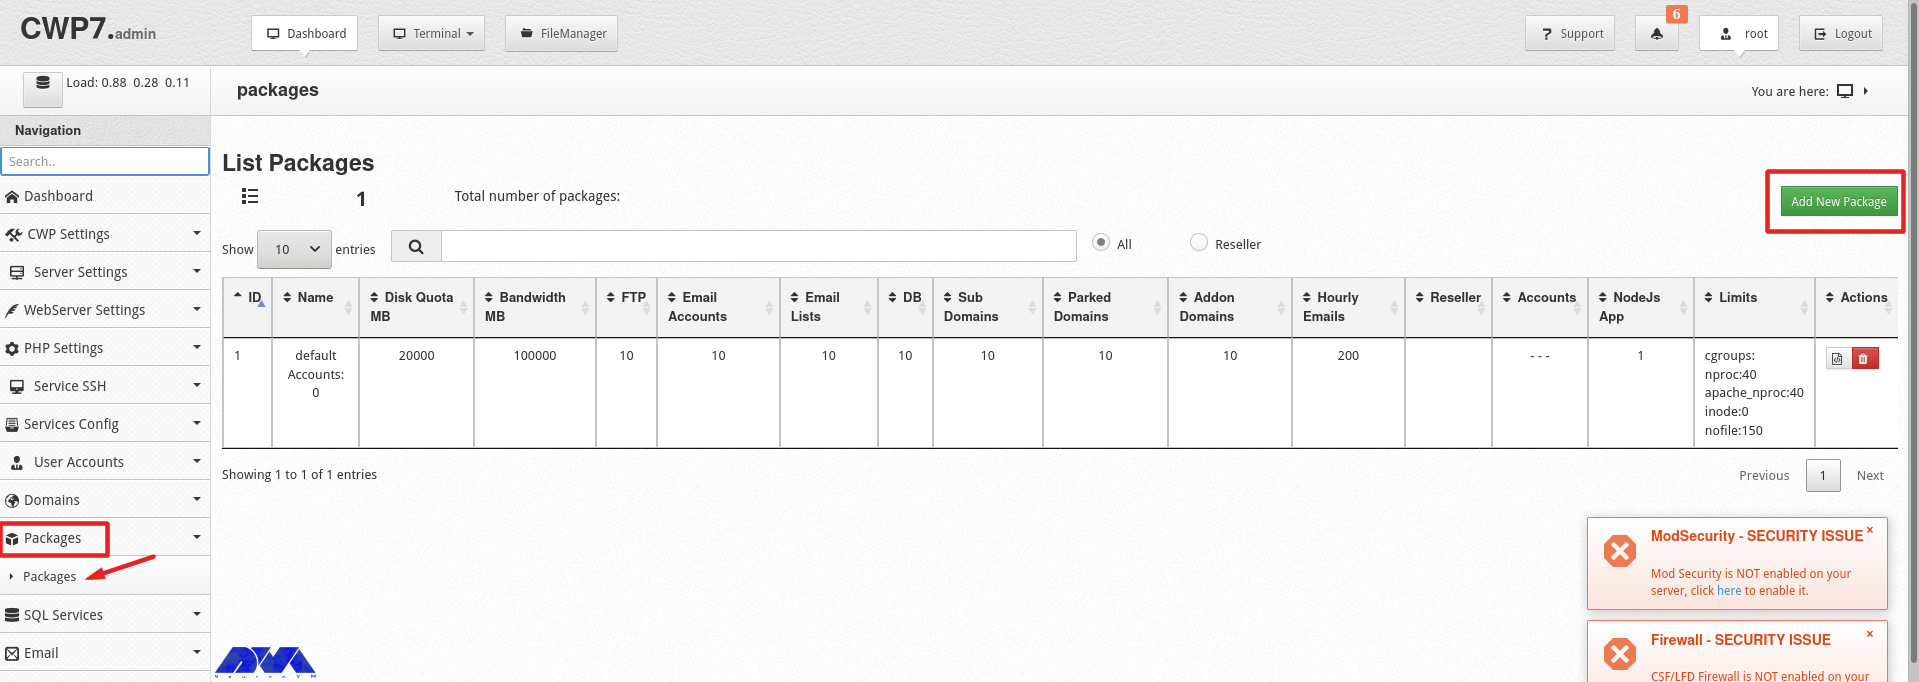
Go to the Packages part and choose to Add a Package:
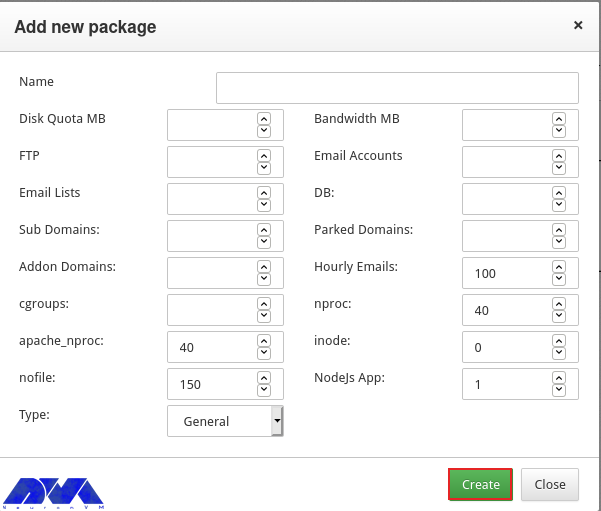
In the end, you will see a pop-up window to add a package, insert the needed values and click on Create button:
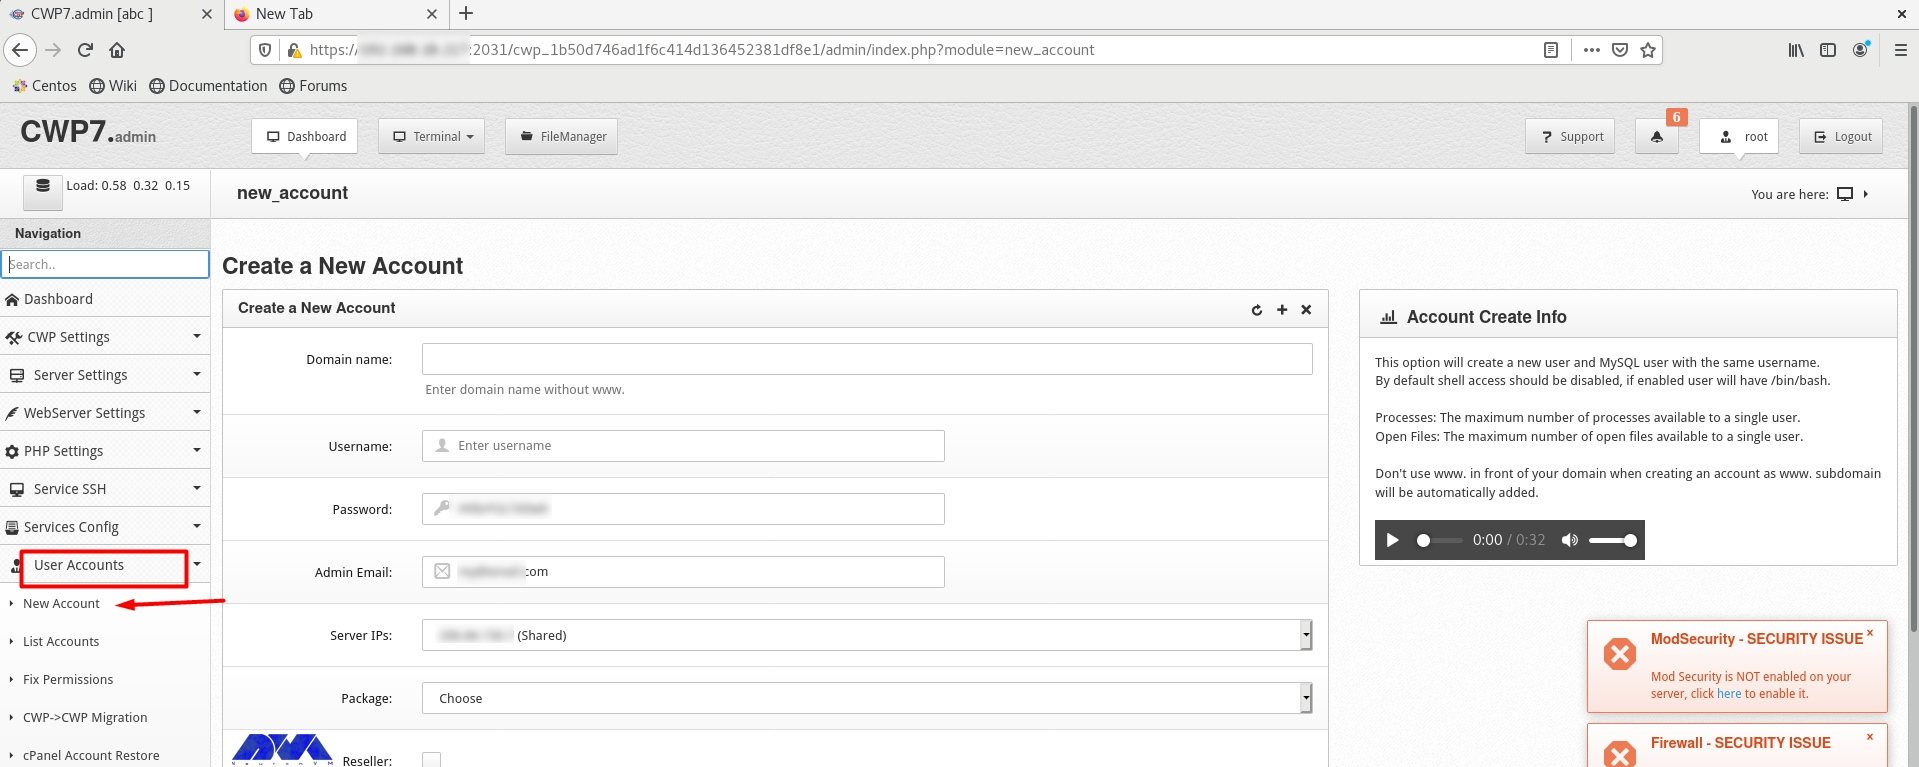
Go to the User Accounts and click on the New Account, to create an account and fill in the necessary information:
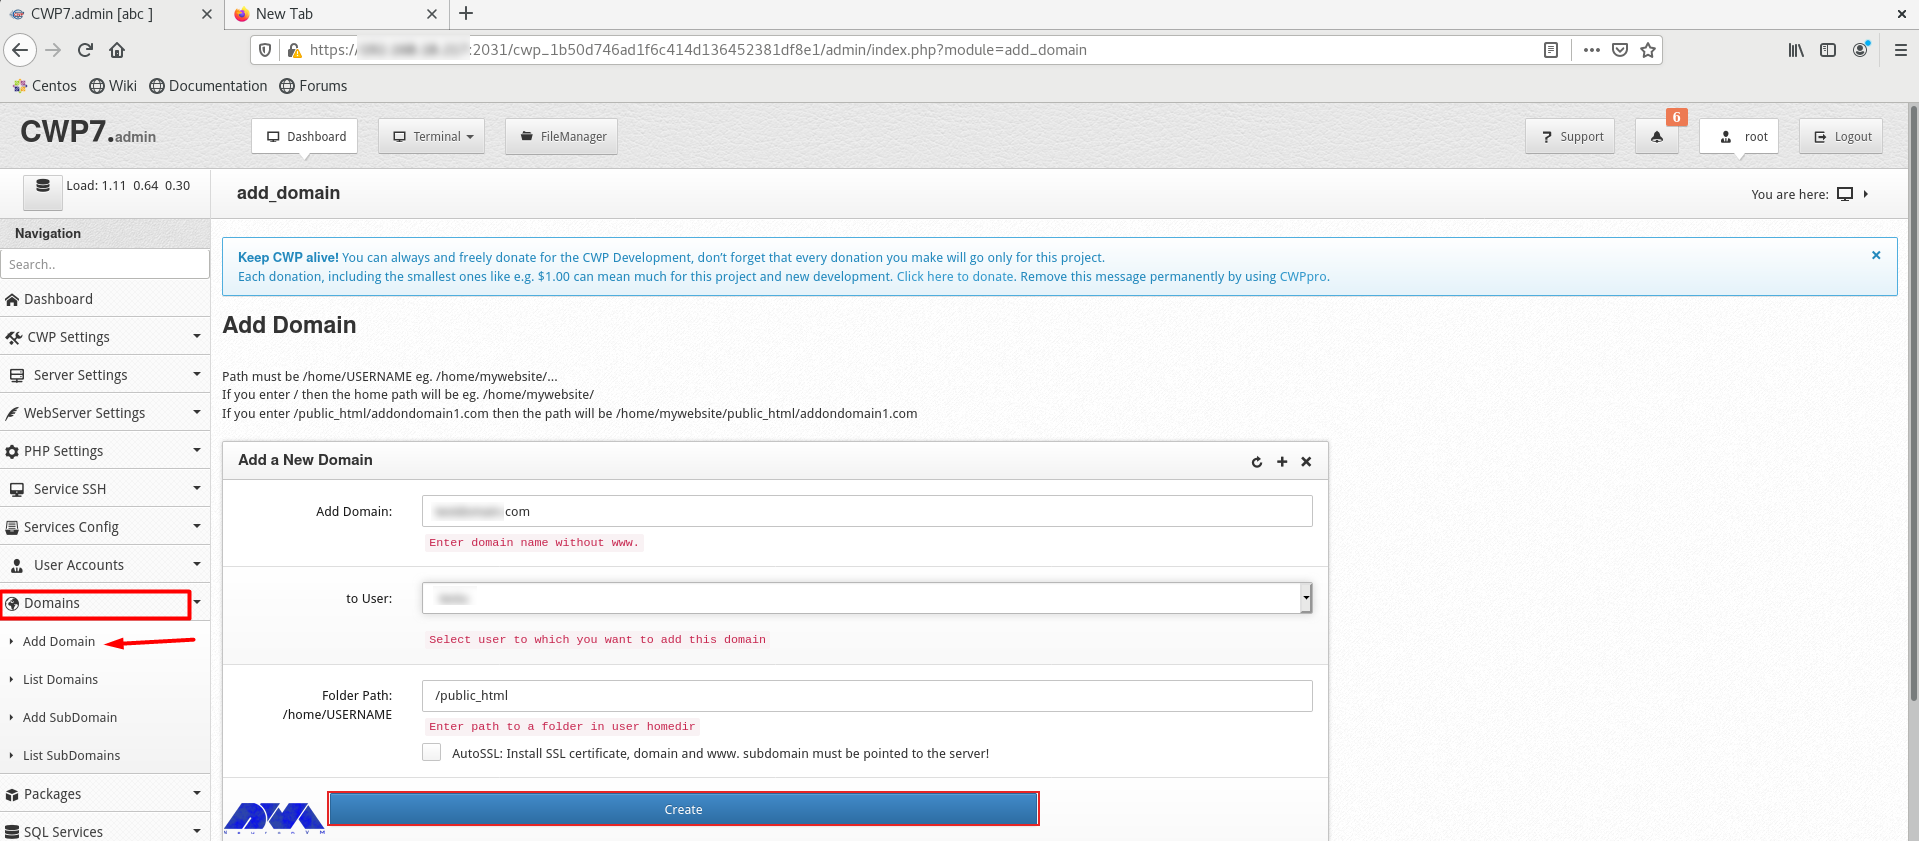
As the final step, add a domain. Click on Domains and then Add Domain by providing the name of the domain and pressing Create button:
Conclusion
CWP is a practical control panel for web hosting with an intuitive interface and great features to manage servers. So, we decided to analyze it and show the way to install CWP on CentOS 8. We also presented all the instructions to configure this management tool.
FAQ
What is required before CWP installation?
A minimum of 2 GB RAM and a 64-bit operating system. Although we recommend using 4 GB RAM.
Which port is used by CWP on CentOS?
The console access ports are 2030 (without SSL) and 2031 (with SSL).
In this article, we are going to teach you How to Configure Parse Server on CentOS 8. Modern applications store data and interact with other services on the Internet. User accounts shared content, documents, and purchases need to be linked and stored elsewhere. All of these programs require complementary server-side applications to communicate with. Before Parse, these items had to be made separately, which requires knowledge in many disciplines. Few people can do this alone. The rest were grouped together and worked with others to complete the whole picture.
What is a Parse Server?
Parse Server is an open-source and self-hosted backend. Parse server can be deployed on any infrastructure that can run Node.js. You can deploy and run the Parse Server on your infrastructure. One of the biggest successes of Parse Server is that you can develop and test your application locally.
The analytics server can be hosted anywhere, and you can even run multiple instances in different regions to serve a global audience. Parse uses MongoDB and PostgreSQLto store information and create new features. Also, Parse has stored all the files in its Amazon S3 bin. Using Parse Server, adapters are written that allow developers to control the database platform and file storage system they want to use. You can develop and test your application using Node.
Now to install Node.js on your server, run the following command:
sudo dnf install -y nodejs
In this step, you must install Yarn. You can install Yarn with the NPM repository or using the DNF package manager tool. By entering the following command, the Yarn repository will be added to your system:
Now you can install Yarn by entering the following command:
sudo dnf install yarn --disablerepo=AppStream
Next, you should install MongoDB according to the required version and architecture of your system. To do this, add the following content to the Yum repository configuration file:
Then run the following command to install the MongoDB server:
sudo dnf install mongodb-org
After installing the required packages, you can install Parse Server. The Parse Server package is available in the global repository and can be installed using the Yarn packaging manager. To install Parse Server, run the following command:
yarn global add parse-server
How to Configure Parse Server on CentOS 8
Now you should create a configuration file for your Parse Server. In the configuration file, you can define parse server attributes. Create a configuration file by entering the following command and editing it in your desired text editor:
nano config.json
Remember to add the following content to the file:
databaseURI – Connection string to the MongoDB database
appID – Set a random string as appID, which is used to connect to the server
masterKey – Set a random string for the master key
serverURL – Set a URL for your parse server
publicServerURL – This allows you to access the parse server from the public network
port – Enter a port to run on the parse server. The default port is 1337
After saving the file, run the parse server by entering the following command. Also, run it as a background process.
nohup parse-server config.json &
How to Install Parse Dashboard on CentOS
In this step, you are going to install a web interface to access the Parse Server called the Parse Dashboard, which is also available as a node module. You can install Parse Dashboard by entering the following command:
yarn global add parse-dashboard
Now you should create a configuration file for the Parse Dashboard using the following command and edit it in your desired text editor:
Multiple Parse Servers can be added to your Parse Dashboard. Add your Parse Server with the server URL and use the same appID and master key you defined for your Parse Server.
After saving the file, start the Parse Dashboard by running the following command:
Next, you should set the FirewallD Rules. Because systems have a firewall enabled, they must allow access to the ports running the Parse Server. Use port 1337 for the parse server and 4040 for the dashboard. By running the following commands, Parse server access will be possible for public users. Run the following commands to open the port type:
By running the following command, the above changes will be applied:
firewall-cmd --reload
How to Access Parse Dashboard on CentOS
By accessing your server on port 4040, you access the web interface of your Parse dashboard. You must log in with the username and password of the dashboard as defined in the parse configuration file (parse-dashboard-config.json).
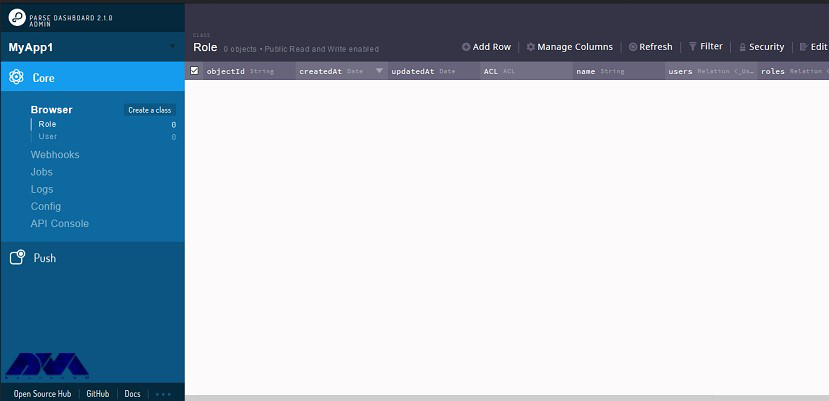
Now you can see the dashboard:
Conclusion
In this article, you learned how to configure Parse Server on CentOS 8. Also, you were taught how to install the Parse Dashboard and how to access it. Note that using Parse, developers will have the opportunity to provide a scalable and powerful back end for an application filled with facilities, android, javascript, windows, and so on.