Tag: Linux Tutorials

  • A Full Introduction to CWP

    A Full Introduction to CWP

    CWP or Control Web Panel is an application software for server management in Linux systems, which was previously known as a Linux panel. This system has many features for managing servers, which makes learning easy for beginners who don’t have much experience in using the command line. So, here we will analyze and try to give a full introduction to CWP.

    What is CWP?

    As we mentioned before, CWP is a management system that is created for Linux distributions specifically AlmaLinux. It is produced to allow users to manage, edit, and maintain website content without requiring advanced technical knowledge. This control panel has a simple and understandable area where the navigation menu is in the form of a sidebar with other subsections. We suggest that you choose and buy from the cheap but high-quality Linux VPS server plans offered on our website to set up the CWP control panel.

    The dashboard is like the image below:

    cwp dashboard

    Important Features of CWP

    CentOS Web Hosting servers or the CWP has many features. In this section, we try to analyze the most notable ones for you:

    – CWP is equipped with user-advanced features and makes it possible to easily manage websites with modern and advanced user interfaces.

    – This control panel provides complete support for the automation of processes. You can set a billing software to help with the creation of user accounts or run user backups or cronjobs, etc.

    – It contains a powerful file manager. Also, you can manage FTP users and user limits with CWP.

    – The advanced file manager is equipping with a code editor that makes it easy to manage your websites.

    – This control panel contains many security and safety features that are dedicating to you. These security functions are integrating into CWP:

    cwp security

    – CWP has several monitoring tools. These tools are NetData, Live monitoring of MySQL process, an AI bot, and so on.

    – An advanced backup system with daily, weakly, and monthly backup options in all fields.

    – CWP helps you configure client packages and service plans so easily.

    – Multiple billing systems are supporting by CWP. These systems are WHMCS, Hostbill, Wisecp, and Blesta.

    What Is the difference between Free and CWPpro?

    As the name suggests, you can get the free version of CWP and use it without any payment, but it has features that require a premium version. These features are:

    – The ability to create unlimited CWP users

    – Having sales agents

    – Immediate update of CWP and ModeSecutity

    – Using multiple versions of PHP simultaneously

    – Migration tools for Cpanel

    – Providing additional system security solutions

    Note that, these are all for use in the CWP interface and you can log into the terminal to update the software or install your web security.

    Conclusion

    This article is prepared to introduction to CWP or Control Web Panel and makes a clear understanding of it for you. By studying the features and analyzing this control panel, you can see how useful and applicable is CWP. We hope you enjoyed the content.

    FAQ

    How secure is CWP

    The security in this control panel depends on various factors like implementation, authentication mechanisms, regular updates, and secure coding practices that are completely effective in this field.

    Cpanel or CWP; Which one is better?

    CWP provides a completely free package, whereas, Cpanel is a paid version.

  • How To Install and Secure Memcached on Ubuntu 22.04

    How To Install and Secure Memcached on Ubuntu 22.04

    Memory object storage systems such as Memcached can optimize the performance of the backup database by temporarily storing information in memory and preserving frequently requested records. This will reduce the number of direct requests to your databases. We’ll look at how to add authentication to secure Memcached using Simple Authentication and Security Layer (SASL), as well as how to connect Memcached to a local or private network interface to make sure only on networks trusted by users. After reading this post, you will fully learn How To Install and Secure Memcached on Ubuntu 22.04. Therefore, we suggest you stay with us until the end of this article.

    What is Memcached?

    Memcached is a very powerful and free cache system that has been released as open source. Memcached is software for performing cache operations on Dynamic website servers that will make better and more efficient use of resources. Typically, it is using as a cache system to speed up applications by storing various objects from the results of database conversations.

    This system is typically using to speed up websites that use the database, using data storage and objects in main memory (RAM) to reduce the number of times the data is read from an external data source (for example, the database). In the continuation of this article, you will learn about Install and Secure Memcached on Ubuntu 22.04

    Prerequisites

    A Linux VPS Ubuntu 22.04 server

    – Non-root sudo user

    – firewall enabled.

    Install and Secure Memcached on Ubuntu 22.04

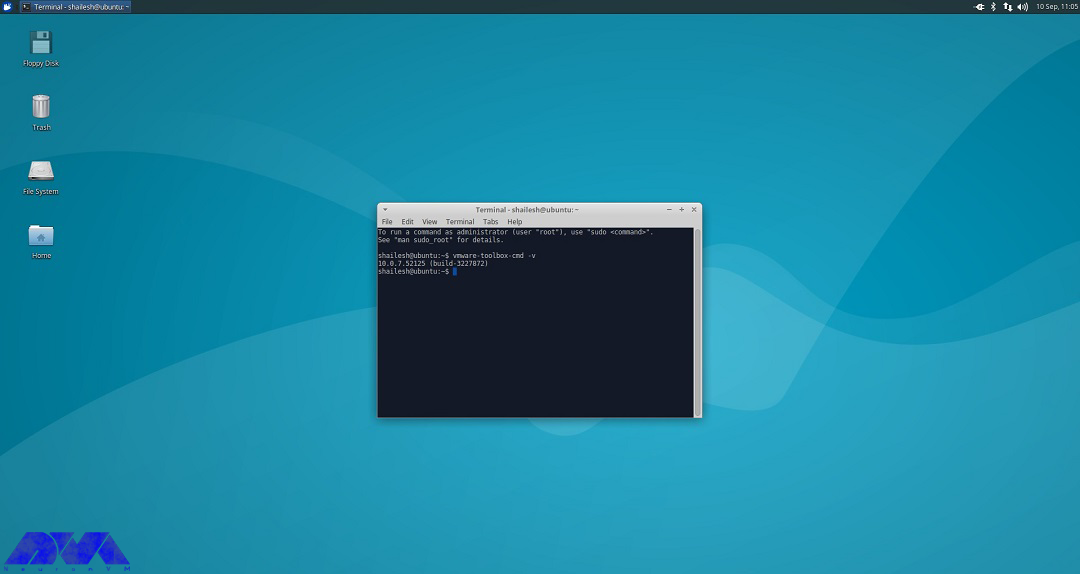
    In this section, we are going to teach you step-by-step how to Install and Secure Memcached on Ubuntu 22.04. If you do not have Memcached installed on your server, install it from the official Ubuntu repositories. First, make sure your local package list is updated using the following command:

    sudo apt update

    Install the official package of memcached as follows:

    sudo apt install memcached

    You can install libmemcached-tools, which contain various tools that you can use to check, test, and manage your Memcached server. Add the package to the server using the following command:

    sudo apt install libmemcached-tools

    Memcached is installed as a service on your server, with tools that allow you to test its connectivity. To launch Memcached, run the systemctl command:

    sudo systemctl start memcached

    You can now go to secure the configuration settings.

    How to Configure Memcached Network Settings

    If the Memcached server only needs to support local IPv4 connections using TCP, you can skip this step and go to the next step. But if you want to configure Memcached to use UDP sockets, Unix domain sockets, or add support for IPv6 connections, follow the steps in this section.

    First, make sure your Memcached instance listens to the local IPv4 127.0.0.1 Loopback interface. The current version of Memcached, which ships with Ubuntu and Debian, has its -l configuration parameter configured on the local interface to receive only connections from the server where Memcached runs.

    Use the following command to verify that Memcached is currently connected to the local IPv4 127.0.0.1 interface and is listening for TCP connections:

    sudo ss -plunt

    The flags will alter ss output in the following ways:

    -p adds the name of the process that is using a socket

    -l limits the output to listening sockets only, as opposed to also including connected sockets to other systems

    -u includes UDP-based sockets in the output

    -n displays numeric values in the output instead of human-readable names and values

    -t includes TCP-based sockets in the output

    You should receive the output as follows:

    This output verifies that Memcached is connected to the IPv4 Loopback address 127.0.0.1 using the TCP protocol. Now that it has been verified that Memcached is configured to support IPv4 with TCP connections only, you can edit /etc/memcached.conf to support UDP connections, Unix domain sockets, or IPv6.

    How to Configuration IPv6 to Memcached

    To enable IPv6 connections to Memcached, open the configuration file with Nano or other editors:

    sudo nano /etc/memcached.conf

    First, find the following command in the file:

    . . .
    -l 127.0.0.1

    This line is where Memcached is configuring to listen to the local IPv4 interface. To add IPv6 support, add the IPv6 local loop address command (:: 1) as follows:

    . . .
    -l 127.0.0.1
    -l ::1

    Save and close the file by pressing CTRL+O, then ENTER to save, and then CTRL+X to exit Nano. Also, restart Memcached using the systemctl command:

    sudo systemctl restart memcached

    You can now check that Memcached also responds to IPv6 connections by repeating the ss command in the previous section:

    sudo ss -plunt

    You should receive the output as follows:

    Output
    Netid State Recv-Q Send-Q Local Address:Port Peer Address:Port Process 
    . . .
    tcp LISTEN 0 1024 127.0.0.1:11211 0.0.0.0:* users:(("memcached",pid=8889,fd=26)) 
    . . .
    tcp LISTEN 0 1024 [::1]:11211 [::]:* users:(("memcached",pid=8889,fd=27))

    Output segments show that Memcached is now responding to TCP connections in the local IPv6 interface. If you want to disable IPv4 support and only listen to IPv6 connections, you can remove the -l 127.0.0.1 command from /etc/memcached.conf and restart the service using the systemctl command.

    How to Configure UDP on Memcached

    If you want to use Memcached with UDP sockets, enable UDP support by editing the configuration file and opening /etc/memcached.conf using the nano or custom editor, then add the following command to the bottom of the file do:

    . . .
    -U 11211

    If you do not need TCP support, find the -p 11211 command and change it to -p 0 to disable TCP connections. After editing the file, save and close it by entering CTRL+O to save and then CTRL+X to exit.

    Restart the Memcached service with the systemctl command to apply the changes:

    sudo systemctl restart memcached

    Memcached listens to UDP connections using the following command:

    sudo ss -plunt

    If you have disabled TCP support and enabled IPv6 connections, you should get the following output:

    [secondary_label Output] 
    Netid State Recv-Q Send-Q Local Address:Port Peer Address:Port Process 
    . . .
    udp UNCONN 0 0 127.0.0.1:11211 0.0.0.0:* users:(("memcached",pid=8889,fd=28))
    udp UNCONN 0 0 [::1]:11211 [::]:* users:(("memcached",pid=8889,fd=29))
    . . .

    Note that if you only enable IPv4 connections and enable TCP connections, your output may be different.

    How to Configure Unix Domain Sockets

    If you want to use Memcached with Unix domain sockets, you can enable support by editing the configuration file. Note that if you configure Memcached to use the Unix domain socket, Memcached disables TCP and UDP support, so before enabling socket support, make sure your applications do not need to connect using those protocols. Open /etc/memcached.conf using Nano or other editors, then add the following commands to the bottom of the file:

    . . .
    -s /var/run/memcached/memcached.sock
    -a 660

    The -a flag specifies the permissions in the socket file. Make sure the user to connect to Memcached is part of the Memcache group on your server, otherwise, a permission message will reject when you try to access the socket. Then, restart the Memcached service with the following command to apply the changes:

    sudo systemctl restart memcached

    Make sure Memcached listens to Unix domain socket connections using the following command:

    sudo ss -lnx | grep memcached

    The -x flag restricts the ss output to display socket files. You should receive the outputs as follows:

    Output
    u_str LISTEN 0 1024 /var/run/memcached/memcached.sock 20234658 * 0

    Now that you have configured the Memcached network settings, go to the next step, adding SASL for authentication to Memcached.

    How to Add Authorized Users to Memcached

    To add authentication users to the Memcached service, use Simple Authentication and Security Layer (SASL), which separates authentication procedures from application protocols. First, add SASL support to the server and configure the user with authentication. Also, enable SASL in the Memcached configuration file and verify that everything is working properly.

    Adding a Verified User

    To start adding SASL support, you must install the sasl2-bin package, which includes management programs for the SASL user database. This tool helps you create an authenticated user. To install this tool, run the following command:

    sudo apt install sasl2-bin

    Create a directory and file that Memcached checks the SASL configuration settings using the mkdir command:

    sudo mkdir -p /etc/sasl2

    Now create the SASL configuration file using nano or the editor:

    sudo nano /etc/sasl2/memcached.conf

    Add the following command:

    log_level: 5
    mech_list: plain
    sasldb_path: /etc/sasl2/memcached-sasldb2

    In addition to setting the report level, mech_list is set to plain, which indicates to Memcached that it must use its password file and confirm the plain text password. The last command you added specifies the path to the user database file that you will create in the next step. Save and close the file when done.

    Now create a valid SASL database and use the saslpasswd2 command with the -c flag to create a new user entry in the SASL database. The user here will be Linda, but you can replace this name with your own. The -f flag specifies the path to the database. This is the path you set in /etc/sasl2/memcached.conf:

    sudo saslpasswd2 -a memcached -c -f /etc/sasl2/memcached-sasldb2 linda

    Give the SASL database ownership to the user and memcache group with the following chown command:

    sudo chown memcache:memcache /etc/sasl2/memcached-sasldb2

    You now have a SASL configuration that Memcached uses for authentication. Next, verify that Memcached is running with its default settings, then reconfigure it and verify that it works with SASL authentication.

    How to Configure SASL Support of the Memcached

    First test the connection of the Memcached instance with the memcstat command. This check helps determine if Memcached is running and properly configured before activating SASL and authenticating the user. After making changes to the configuration files, run the command again to check for different outputs. To verify that Memcached is enabled and running using the memcstat command, type the following:

    memcstat --servers="127.0.0.1"

    If you are using IPv6, replace :: 1 with IPv4 127.0.0.1. If you are using a Unix domain socket, use the socket path instead of the IP address, for example –servers =/var/run/memcached/memached.sock. When you run the memcstat command and successfully connect to Memcached, you should get the following output:

    Output
    Server: 127.0.0.1 (11211)
    pid: 2299875
    uptime: 2020
    time: 1632404590
    version: 1.5.22
    . . .

    Tip: If you are using Memcached with UDP support, the memcstat command cannot connect to the UDP port. Use the following netcat command to confirm the connection:

    nc -u 127.0.0.1 11211 -vz

    If Memcached responds, you should get the output as follows:

    Output
    Connection to 127.0.0.1 11211 port [udp/*] succeeded!

    If you are using Memcached with IPv6 and UDP, the command should look like this:

    nc -6 -u ::1 11211 -vz

    Enable SASL now. Add the -S parameter to the configuration file. Reopen the file with Nano:

    sudo nano /etc/memcached.conf

    In the file, add the following command:

    . . .
    -S

    Next, find and ignore the -vv option, which provides full output to /var/log/memcached. The command without comment should be as follows:

    . . .
    -vv

    Save and close the file. Restart the Memcached service using the systemctl command below:

    sudo systemctl restart memcached

    Check the journalctl report for Memcached to make sure SASL support is enabled:

    sudo journalctl -u memcached |grep SASL

    You should receive the output command as follows to indicate that SASL support is enabled:

    Output
    Sep 23 17:00:55 memcached systemd-memcached-wrapper[2303930]: Initialized SASL.

    Now try connecting to Memcached again. Despite SASL support and initialization, the following memcstat command must fail without valid authentication:

    memcstat --servers="127.0.0.1"

    The command should not generate output. Enter the following shell command to check the status as follows:

    echo $?

    $? Always returns the exit code of the last command that came out. Anything other than 0 indicates process failure. In this case, you should get exit status 1, which indicates the failure of the memcstat command. Re-running memcstat, with the username and password, verifies that the authentication process works.

    If you use different credentials, replace the following command with the values linda and your_password:

    memcstat --servers="127.0.0.1" --username=linda --password=your_password

    You should receive the output as follows:

    Output
    Server: 127.0.0.1 (11211)
    pid: 3831
    uptime: 9
    time: 1520028517
    version: 1.4.25
    . . .

    Memcached is now configuring and executing with SASL support and user authentication.

    Allowing Access Over the Private Network (Optional)

    Memcached is configuring to listen only to the local loopback interface (127.0.0.1), which protects the Memcached interface from being exposed to outside parties. There may be times when you need permission to access from other servers. You can configure it to connect Memcached to a private network interface.

    How to Restrict IP Access with a Firewall

    Before configuring settings, set firewall rules to restrict machines that can connect to your Memcached server. You must first record the private IP address of each device you used to connect to Memcached. Once you have a private IP address, add the explicit firewall rule to allow the device to access Memcached. If you are using a UFW firewall, restrict access to the Memcached instance by entering the following commands in the Memcached server:

    sudo ufw allow from client_system_private_IP/32 to any port 11211

    If more than one system has access to Memcached over a private network, be sure to add the ufw rules for each device using the above rule as a template. Make changes to the Memcached service to connect to the server’s private network interface.

    Memcached Connection to Private Network Interface

    Now that your firewall is in place, configure Memcached to connect to the server’s private network interface instead of 127.0.0.1. Find the Memcached server’s private network interface using the IP command below.

    ip -brief address show

    Depending on the server network configuration, the output may differ.

    Once you find the IP address or private addresses of the server, reopen the configuration file using Nano:

    sudo nano /etc/memcached.conf

    Find the -l 127.0.0.1 command that you previously checked or modified, and change the address to match the server’s private network interface:

    . . .
    -l memcached_servers_private_IP
    . . .

    If you want Memcached to listen to multiple addresses, add another similar instruction for each address, either IPv4 or IPv6 using the -l memcached_servers_private_IP format. Save and close the file after completing the steps. Then restart the Memcached service:

    sudo systemctl restart memcached

    Check the new settings with ss to confirm the change:

    sudo ss -plunt

    Test your external customer connection to make sure you can still access the service. Also, check the access of an unauthorized client (try connecting without a username and password) to make sure your SASL authentication works properly. Also, try connecting to Memcached from another server that is not allowed to connect to make sure the firewall rules created are effective.

    Conclusion

    In this tutorial, you learned How To Install and Secure Memcached on Ubuntu 22.04. Also configure Memcached with IPv4, IPv6, TCP, UDP, and Unix domain sockets and how to secure your Memcached server by enabling SASL authentication. Finally, you learned how to connect Memcached to your local or private network interface and configure firewall rules to restrict access to Memcached. We hope you find this article useful. Share your comments with us via the form below.

  • How to Configure a Mail Server on Linux VPS

    How to Configure a Mail Server on Linux VPS

    It is useful to have a mail server on your system. Setting up a mail server on a Linux system is a useful tool that is used by many users, You can host your email account, also many services send their reports and messages to your email. You can do this with Postfix which is a post-transfer agent for Linux. So follow the instructions here to configure a Mail Server on Linux VPS.

    Configure a Mail Server on Linux VPS

    Now, you can learn how to do configure the mail server step-by-step on Linux.

    Prerequisites

    Here, you can find some requirements before setting up the mail server:

    _ Operating System: Any Linux distro

    _ Software: Postfix and Mailx

    _ Root access or access via sudo command

    Configuring a Mail Server

    As mentioned here, to start the mail server, you need to install the Postfix and Mailx server, which are sometimes installed by default. Now, go through the following instructions carefully.

    Step1)

    Use your system package manager to install Postfix and Mailx by running the commands below:

    1- command to use for Ubuntu, Debian, and Linux mint:

    sudo apt install postfix mailutils

    2- command to use for Fedora, CentOS, AlmaLinux, and RedHat:

    sudo dnf install postfix mailx

    3- Command to use for Arch Linux and Manjaro:

    sudo pacman -S postfix mailx

    Step2)

    During the installation process, you must select the type of email to configure. In this case, you will have two options: ‘Internet site‘ and ‘Local only

    If your domain name is fully qualified, you can choose an internet site, otherwise choose the Local mode:

    Configuring a Mail Server on linux vps

    Step3)

    Here as you see in this image, you can set your fully qualified domain name or local domain name:

    Configuring a Mail Server

    Step4)

    At this point, you can start and enable the postfix server to start automatically on the next boot:

    sudo systemctl start postfix
    sudo systemctl enable postfix

    Step 5)

    Here, you can add your user and any other users who need to use mail service to the mail group:

    sudo usermod -aG mail $(whoami)

    Test your Mail Server

    Now, you can test your mail server by sending an email to a root user account:

    $ mail root
    Cc:
    Subject: Testing email
    This is an email from NeuronVM.com

    Then, press Ctrl+D to send an email, then you can return to your terminal prompt.

    In this section, you can use the command below to check the root inbox and see that you have received the test email:

    $ sudo mail
    "/var/mail/root": 1 message 1 new
    >N 1 NeuronVMNeuronVM.com Sun Mar 12 00:54 15/489 Testing email
    ?

    In this example, N means new email and 1 shows the ID of the massage. As you see, [email protected] (username@hostname) is the sender. Also delivery time and the subject. If you want to check your local mail, you can type massage ID and hit enter to confirm.

    Conclusion

    This article thought you how to configure a mail server on a Linux system. This server is important and useful cause, it allows you to control your email service privately and receive system alerts from various services.

    FAQ

    What is Postfix?

    It is an open-source mail transfer agent which routes and delivers mail.

  • Tutorial Install WHM/Cpanel on Rocky Linux

    Tutorial Install WHM/Cpanel on Rocky Linux

    One of the most popular web hosting control panels in Linux is Cpanel, Which uses a graphical interface to manage and host websites on a server. So you can easily control your website. Follow the instructions to have this useful web server. After reading this post, if you follow all the mentioned steps carefully, you will learn how to Install WHM/Cpanel on Rocky Linux.

    Installing WHM/Cpanel on Rocky Linux

    Let’s see how you can do the installation step by step to have WHM then access to management part and manage your website.

    Prerequisites

    _ A Linux VPS with Rocky Linux OS

    _1.1 GHz processor and 2 GB RAM (1 is also fine)

    _ Having a license for the cpanel web server (go to the Cpanel Store to provide a license)

    _ A valid static IP address

    _ Configuration of your Ethernet device with a static IP address and fully qualified hostname

    _ Disabling the Linux OS firewall before the installation process

    How to Install WHM/Cpanel

    Follow the commands to have a successful installation process for Cpanel.

    1- Update your exciting package to the latest version:

    yum update 
    yum upgrade

    2- As Cpanel is written in Perl, install the Perl command and install curl to download Cpanel installation script:

    yum install perl curl

    3- use the command below to start the automatic installation of WHM/cpanel:

    cd /home && curl -o latest -L https://securedownloads.cpanel.net/latest && sh latest

    4- Now you should log into WHM. So enter (https://Server_IP:2087) in your browser’s address bar. Then enter your Rocky Linux root user and password to access data and confirm the terms and conditions:

    how to install whm/cpanel on rocky linux

    5- Here, you can get the license on Cpanel Store or use the free 15-day trial to create an account with the WHM service by clicking the Log in button:

    cpanel license from Cpanel Store

    After visiting the Cpanel store, you can buy the license you want. You can also activate it for free testing and use it for 15 days. Here we use a free license.

    activate license

    WHM Dashboard and Directories

    In case you need to access different parts of Cpanel, you can go through the directories for Cpanel installed stuff, here are some of the directories:

    WHM dashboard

    _ The pass for Cpanel directories: /usr/local/cpanel

    _ Cpanel binaries: /usr/local/cpanel/bin/

    _ Third-party tools: /usr/local/cpanel/3rdparty/

    _ Cpanel add-ones or directories: /usr/local/cpanel/addons/

    _ WHM files: /usr/local/cpanel/whostmgr/

    _ CGI files: /usr/local/cpanel/cgi-sys/

    _ Basic files and themes: /usr/local/cpanel/base/

    _ The configuration part for Apache: /etc/httpd/conf/httpd.conf

    _ The configuration directory for Exim mail server: /etc/exim.conf

    _ Configuration files for named: /etc/named.conf/

    _ Cpanel user files: /var/cpanel/users/username

    _ Cpanel configuration files: /var/cpanel/cpanel.config

    _ Directory for configuration files Proftp and pure ftpd: /etc/proftpd.conf and /etc/pure-ftpd.conf

    _ Cpanel update files: /etc/cpupdate.conf

    _ Configuration files for MySQL: /etc/my.cnf

    _ Configuration files for PHP.ini: /usr/local/lib/php.ini

    Conclusion

    Here, we tried to show how you can install WHM/Cpanel on Rocky Linux. Then we showed you some directories to access different parts of Cpanel. Also, you can find out what is needed before installation. We hope you enjoy this article. For any questions or ideas, just leave a comment.

    FAQ

    What is the proper disk space for Cpanel?

    20-40 GB of disk space is suitable for cpanel.

    Does Cpanel support Rocky Linux?

    Yes, it does. Cpanel supports all of the official product release kernels for the Rocky Linux.

  • 2 Ways to Install Redis on Ubuntu 22.04

    2 Ways to Install Redis on Ubuntu 22.04

    Redis is a kind of data structure storage and is used as a message broker, key-value database, and also cache system. It is written in C language and supports a large amount of data types like strings, lists, hashes, and many others. Here, we are going to analyze this applicable data store and learn 2 ways to install Redis on Ubuntu 22.04.

    Steps to Install Redis on Ubuntu 22.04

    Installing Redis is an easy process that may take just a few minutes. But first, you should prepare some requirements.

    Prerequisites

    – A Linux VPS with Ubuntu 22.04 OS

    – A root user or non-root user with sudo privileges

    1- Updating system packages

    Before you start the installation part, your system should be up to date. So, use the following command:

    sudo apt update

    2- Adding PPA repository

    This section will show how you can add the PPA repository to the Ubuntu operating system.

    sudo add-apt-repository ppa:redislabs/redis

    3- Installing Redis

    As you add the PPA repository, use the following command to start the installation process:

    sudo apt-get install redis

    4- checking the version of Redis

    If you desire to see the version of the installed Redis, you can run the following command:

    redis-server -v

    After the installation, It’s time to do the configuration part.

    Configuring Redis on Ubuntu 22.04

    Here, you can use step-by-step instructions to Configure Redis on your Ubuntu system.

    1- Enabling Redis on Ubuntu

    If you want to configure Redis, first of all, you should enable the Redis service by running the following command:

    sudo systemctl enable --now redis-server

    2- Opening the Configuration File

    In this section, you should open the Redis configuration file in your desired editor to make changes:

    Tip: Here, we will use nano editor.

    Sudo nano/etc/redis/redis.conf

    Here is what the configuration file looks like:

    redise-config-file

    Now, you should find the Bind address line (127.0.0.1) and replace it with the (Bind 0.0.0.0):

    how to configure redis on ubuntu

    You will need a password for the configuration part which must be specified with the “Requirepass” attribute. Then hit the Ctrl+O keys to apply the changes and return to the terminal:

    install redis on ubuntu

    3- Restarting the Redis

    In this section, you can use the command below to restart the Redis:

    sudo systemctl restart redis-server

    4- Verifying Redis IP and Port

    Use the command below to check the IP and Port number which is used by this service:

    ss -tunelp | grep 6379

    Tip: To have a TCP connection you can use port: (6379)

    sudo ufw allow 6379/tcp

    5- Testing Redis Server

    Run the related command to test the Redis server and connect locally:

    redis-cli

    Now, you should run the “AUTH” command and specify the password you set in the configuration part:

    AUTH specify_the_password

    For a stable connection and positive output (Ok), you should enter the correct password.

    6- Checking the Redis Info

    Use the Info command to get detailed information about Redis:

    INF0

    You can use the ping command to ping the Redis:

    ping

    7- How to exit Redis

    To exit Redis, use the “quit” command:

    quit

    Uninstalling Redis on Ubuntu 22.04

    If you decide to uninstall Redis from your Ubuntu operating system, you can run the following command:

    sudo apt remove --autoremove redis-server -y

    This method was the best and easiest way to install and use Redis on Ubuntu OS.

    Conclusion

    You can install Redis on any server. But here we decided to focus on the Ubuntu operating system. Here, you learned how to install Redis on Ubuntu 22.04. We thought about the way of installation and configuration of this service. Also, we showed how you can uninstall Redis. Hope you enjoyed this article.

    FAQ

    How many connections can we have on Redis?

    There can be up to 10000 connections on Redis or 4 simultaneous connections per MB of your memory.

    Can we use multiple CPUs on Redis?

    As Redis is single-threaded, it can not use multiple cores of the server’s CPU.

  • The Top Way to Setup Thumbor on Ubuntu 20.04

    The Top Way to Setup Thumbor on Ubuntu 20.04

    Have you ever heard of Thumbor? This practical application has many features such as resizing, applying various features, and flipping images. The advantage of this tool is its ease of use because users only need to access the URL of the Thumbor service to make changes to images. In this article, we decided to introduce you to a Top Way to Setup Thumbor on Ubuntu 20.04.

    What is Thumbor?

    As we mentioned in the introduction, Thumbor is a smart imaging service that cuts, resizes, and flips images based on your taste and desire. This tool uses advanced face recognition algorithms to determine the important points of images for better cropping and resizing. In fact, Thumbor is an Http service and is provided as a free and open-source service.

    What is Thumbor? - Setup Thumbor on Ubuntu

    Install and Setup Thumbor on Ubuntu 20.04

    Now that you are somewhat familiar with the Thumbor service, let’s learn how to install and configure it, which is explained step-by-step in this section.

    Prerequisites

    To install Thumbor you have to prepare some requirements:

    – A Linux VPS with Ubuntu 20.04 OS

    – Update the operating system

    – A non-root user with sudo privileges and login with ssh

    How to Install Thumbor on Ubuntu

    We have to mention that Thumbor is a Python service but you can use it for Ubuntu. So, use the apt command to install Thumbor on Ubuntu 20.04 and follow the instructions below to start the process:

    – The first step is Updating the package information:

    sudo apt update

    – Use the following command to do the installation of Python virtual environment library:

    sudo apt install python3-venv -y

    – Then you should install the Thumbor dependencies:

    sudo apt install build-essential libssl-dev libffi-dev python3-dev libcurl4-openssl-dev libcairo2-dev libjpeg-progs gifsicle ffmpeg -y

    – To create a virtual environment use the below command:

    python3 -m venv thumbor-venv

    – Run the command below for activating the virtual command:

    source thumbor-venv/bin/activate

    – Now, you can use this command to install Thumbor:

    (thumbor-venv) $ pip install thumbor[all]

    If you want to check the status of dependencies, follow the command below:

    (thumbor-venv) $ thumbor-Doctor

    After the installation of Thumbor, you will see that all plugins and compiled libraries support this service.

    How to Start Thumbor

    In the Thumbor launch section, you should run the related command in the virtual environment:

    (thumbor-venv) $ thumbor

    Now, the application will run in your system’s foreground, on port 8888.

    Using Thumbor is very easy through URL. So that, if you have an image and you want to resize or apply a filter, the location will be like this:

    https://upload.wikimedia.org/wikipedia/commons/3/37/Acorus_calamus1.jpg

    This is how you can pass an image to Thumbor through a URL.

    If you want to open another ssh session on your server, you can access the image through the URL:

    $ wget http://localhost:8888/unsafe/300x200/https://upload.wikimedia.org/wikipedia/commons/3/37/Acorus_calamus1.jpg -O small_pic.jpg

    If you close the SSL session, the Thumbor command will die, and if you want to prevent that, run it in the background with screen or tmux.

    The common way to run Thumbor is to run this service with supervisors or systems.

    You can use another port for Thumbor. Run it on port 80 using sudo permission. The point is that this solution runs Thumbor outside of the Python virtual environment.

    To deactivate the Thumbor command use Ctrl+C and deactivate Python virtual environment:

    (thumbor-venv) $ deactivate

    Now, run Thumbor with the full pass:

    sudo thumbor-venv/bin/thumbor -p 80

    Then use the command below to make sure that port 80 has been opened to the public:

    sudo /sbin/iptables -I INPUT -p tcp -m tcp --dport 80 -j ACCEPT 

    Use a browser to insert the URL and access Thumbor:

    http://your_server_ip_address/unsafe/300x200/https://upload.wikimedia.org/wikipedia/commons/3/37/Acorus_calamus1.jpg.

    Then, make sure you access the server with the HTTP protocol, and as the final step replace your_server_ip_address with your real IP address or domain.

    An Example of Thumbor Usage

    For example, if you want to flip an image using a URL, you would do it like this:

    http://your_server_ip_address/unsafe/-300x-200/https://upload.wikimedia.org/wikipedia/commons/3/37/Acorus_calamus1.jpg.

    The -300 part will make the image flip horizontally and the -200 part means you flipped vertically.

    If you want to configure and launch Thumbor, then you should kill it and start with the configuration file.

    Configure Thumbor on Ubuntu

    Use a configuration file to configure the behaviors of the Thumbor. The first step is creating a sample configuration file:

    thumbor-venv/bin/thumbor-config > thumbor_sample.conf

    The configuration file is full of comments:

    ################################### Logging ####################################
    
    ## Logging configuration as json
    
    ## Defaults to: None
    
    #THUMBOR_LOG_CONFIG = None
    
    
    ## Log Format to be used by thumbor when writing log messages.
    
    ## Defaults to: '%(asctime)s %(name)s:%(levelname)s %(message)s'
    
    #THUMBOR_LOG_FORMAT = '%(asctime)s %(name)s:%(levelname)s %(message)s'


    ## Date Format to be used by thumbor when writing log messages.
    
    ## Defaults to: '%Y-%m-%d %H:%M:%S'
    
    #THUMBOR_LOG_DATE_FORMAT = '%Y-%m-%d %H:%M:%S'
    
    ################################################################################
    
    ################################### Imaging ####################################
    
    ## Max width in pixels for images read or generated by thumbor
    
    ## Defaults to: 0
    
    #MAX_WIDTH = 0
    ...
    ## Result Storage that will be used with the compatibility layer, instead of the
    
    ## compatibility result storage. Please only use this if you can't use up-to-
    
    ## date result storages.
    
    ## Defaults to: None
    
    #COMPATIBILITY_LEGACY_RESULT_STORAGE = None

    Using the command below, you can edit the setting. Here, uncomment MAX_WIDTH set it like this:

    MAX_WIDTH = 100

    This action will show that you set the maximum width of the image that is allowed to be read.

    Use the configuration file to run the Thumbor command:

    sudo thumbor-venv/bin/thumbor -p 80 -c thumbor_sample.conf

    In the following URL, you will see that the width of your image is much smaller than the height:

    Open this URL, http://your_server_ip_address/unsafe/400x400/https://upload.wikimedia.org/wikipedia/commons/3/37/Acorus_calamus1.jpg.

    To edit the configuration file, kill the Thumbor again. Now, you should uncomment FILE_STORAGE_ROOT_PATH and set it like this:

    FILE_STORAGE_ROOT_PATH = '/tmp/storage'

    Then use the configuration file and run Thumbor again and open the related URL:

    http://your_server_ip_address/unsafe/400x400/https://upload.wikimedia.org/wikipedia/commons/3/37/Acorus_calamus1.jpg.

    Here, do the same action again and kill the Thumbor. Thumbor will save your image in the /tmp/storage directory:

    ls /tmp/storage

    Now that you installed and configured Thumbor successfully, you can edit your images so easily. Enjoy the service.

    Conclusion

    By reading this content, you learned how to install and Setup Thumbor on Ubuntu 20.04. Thumbor is created for Python environments but you can use it on old Ubuntu versions. We hope you enjoyed this article. For any questions, just leave a comment below.

    FAQ

    What is the default port in Thumbor?

    The default port is 8888, but if the virtual machine IP address is 12.123.12.123. Then you will be able to access Thumbor from the web browser at http://12.123.12.123:8888/…/

    What is a qualified and good image size?

    Image size of 1280*720 is large enough to be HD standards and is commonly used in photography and films.

  • How to Configure DNS Server on Ubuntu 22.04

    How to Configure DNS Server on Ubuntu 22.04

    DNS or Domain Name System is a type of network service that every Linux administrator should be familiar with. This internet service acts like a phone book that resolves IP addresses like 192.168.1.1 to FQDNs (Fully Qualified Domain Names). Read the following article carefully to find out how to configure the DNS server on Ubuntu 22.04.

    Steps to Configure DNS Server on Ubuntu

    In order to make the configuration of the DNS server on Ubuntu 22.04, the first action is to install this server. Therefore, we recommend you choose the plan you need with the Ubuntu operating system from our Linux VPS server plans. We will use Bind DNS for this reason. Bind is a software that is open-source, scalable, and full-featured software suited for DNS services.

    how to configure dns server on ubuntu 22.04

    The desired Environment

    First of all, you should create a DNS domain for your site. (e.g. neuronvm.local)

    – Neuronvm.local is the domain name

    – ns.neuronvm.local is the DNS server name

    – The IP address is 192.168.1.1

    Tip 1: Here, the used IP address is just an example.

    Tip 2: Make sure that your DNS server has a static IP address.

    Installing DNS Server on Ubuntu 22.04

    In this part, you will learn how to install a DNS server using Bind software. But first, you need to update your system using the following command:

    sudo apt update

    In this example, the package name is Bind9 and it is accessible in your base OS repository. Now, to update your system use the apt command below:

    sudo apt install -y bind9 bind9-utils

    The installation part was easy and simple.

    Configuring the DNS Server

    The next part of your process is to make the configuration part. For this reason, you can use the /etc/bind/ directory that will hold configuration files and zone files. Also, /etc/bind/named.conf is the global configuration file for the DNS server.

    Creating Zones

    You can apply the /etc/bind/named.conf.local directory and replace it with the global configuration file to create zones.

    Here, we will show with the related command, how you can do this process:

    sudo nano /etc/bind/named.conf.local

    Create Forward Zone

    We will use the domain neuronvm.local for forward zone entry in the file named.conf.local. The role of this forward zone is to translate a fully qualified domain name into an IP address:

    zone "neuronvm.local" IN { // Domain name
    type master;
    file "/etc/bind/neuronvm.local.db"; // Forward Zone file
    allow-update { none; }; // Since this is the primary DNS, it should be none.
    };

    Create Reverse Zone

    For the creation of a reverse name resolution zone in the named.conf.local file, you should go through the command below:

    zone "0.168.192.in-addr.arpa" IN { // Reverse lookup name, should match your network in reverse order
    type master;
    file "/etc/bind/r.neuronvm.local.db"; // Reverse lookup file
    allow-update { none; }; // Since this is the primary DNS, it should be none.
    };

    Create Zone Files

    Now you should create zone files for your forward and reverse DNS zones.

    – To create a forward DNS zone file /etc/bind/neuronvm.local.db, use the following command:

    sudo nano /etc/bind/neuronvm.local.db

    The record types :

    SOA is the start of authority.

    NS is the name server.

    A is A record.

    MX is mail for exchange.

    CN is a canonical name.

    Tip 1: Pay attention that domain names have to be ended with a dot (.).

    Tip 2: As you want to change any record in your zone file, you should update the serial number of +1with the current number.

    $TTL 86400
    @ IN SOA ns.neuronvm.local.root.neuronvm.local.
    200101 ; Serial
    21600 ; Refresh
    3600 ;
    604800 ; Expire
    86400 ) ; Negative Cache TTL
    ;
    ;Name Server Information
    @ IN NS ns.neuronvm.local.
    ;IP address of Name Server
    ns IN A 192.168.0.10
    ;Mail Exchanger
    @ IN MX 10 mail.neuronvm.local.
    ;A – Record HostName To IP Address
    www IN A 192.168.0.101
    mail IN A 192.168.0.102
    ;CNAME record
    ftp IN CNAME www.neuronvm.local.

    – Now, for the creation of reverse DNS zone file /etc/bind/r.neuronvm.local.db, run this command:

    sudo nano /etc/bind/r.neuronvm.local.db

    Update the parts which are shown below:

    PTR is the pointer.

    SOA is the start of authority.

    Tip 3: As you want to change any records in the lookup file, you should update the serial number +1 with the current number.

    $TTL 86400
    @ IN SOA ns.neuronvm.local.root.neuronvm.local.
    200101 ; Serial
    21600 ; Refresh
    3600 ;
    604800 ; Expire
    86400 ) ; Negative Cache TTL
    ;
    ;Name Server Information
    @ IN NS ns.neuronvm.local.
    ;Reverse lookup for Name Server
    10 IN PTR ns.neuronvm.local.
    ;PTR Record IP address to HostName
    101 IN PTR www.neuronvm.local.
    102 IN PTR mail.neuronvm.local.

    DNS Server Validation

    For checking any errors in the syntax of the DNS configuration file, apply this command:

    sudo named-checkconf

    If no error occurred, the command will return to the shell.

    Validation of Forward Zone

    Use the command below to check the validation of the forward zone:

    sudo named-checkzone neuronvm.local /etc/bind/neuronvm.local.db

    Validation of Reverse Zone

    Use the following command, to check the validation of the reverse zone:

    sudo named-checkzone 0.168.192.in-addr.arpa /etc/bind/r.neuronvm.local.db

    As the final step, you can reload both of the file zones. Also, you can use this command when you are willing to change the zone and zone file.

    sudo rndc reload

    Verifying DNS Server

    If you want to verify the DNS server, you should run the dig command by looking up records.

    dig www.neuronvm.local @192.168.1.1

    For confirmation go through this way:

    dig -x 192.168.1.11 @192.168.1.1

    And at the end, you will be able to confirm that both lookup and reverse zones are working well.

    Conclusion

    By reading this article, you learned how you can install a DNS server on the Ubuntu operating system. Also, you learned how to create DNS and file zones and the way to confirm and verify both lookup and reverse zones. We hope you enjoy this tutorial.

    FAQ

    How safe is private DNS?

    Once you enabled private DNS, all of the DNS queries will be encrypted and will provide good safety for users.

    Is it possible to increase speed by DNS?

    Actually, DNS does not affect internet speed directly, but it can influence how fast a webpage appears on your system.

  • What is RedHat?

    What is RedHat?

    RedHat is a software company that combines open-source Linux operating system components with related applications into distribution packages that customers order. In this comprehensive article, we will tell you what is RedHat and introduce you to it completely.

    Introduction To RedHat and its products

    RedHat offers open-source software used by DevOps engineers and businesses, including operating system platforms, storage, middleware, and management products, as well as training, support, and consulting services. Dell, IBM, and Oracle also support the RedHat platform and open-source application community.

    Note that to order a Linux VPS server, you can visit NeuronVM’s popular and cheap plans.

    a- RedHat Linux open-source products include, but are not limited to:

    b- RedHat Package Manager (RPM) program for installing, removing, and managing software in Linux.

    c- RedHat Ansible is an open-source IT configuration management (CM) developer tool and IT automation platform.

    d- RedHat Atomic Host is a variant of RedHat Enterprise Linux optimized for hosting containerized application platforms.

    e- RedHat CloudForms is a virtual machine and container management product based on VMware, RedHat Virtualization, Microsoft Azure, OpenStack, AWS EC2, Google Cloud, and RedHat OpenShift.

    f- RedHat Enterprise Linux (RHEL) is a Linux operating system distribution developed for the commercial market that provides centralized certificate management and cloud security updates.

    g- RedHat’s OpenShift Container Platform is a cloud computing and microservice container platform used in conjunction with Kubernetes to provide traffic and identity management, telemetry, and policy enforcement.

    h- RedHat Virtualization (RHV) is an enterprise-class virtualization platform.

    i- RedHat Enterprise Linux environments, Satellite is part of RedHat’s four-piece system management tool suite for enterprise IT, which also includes Ansible, CloudForms, and the RedHat Insights service.

    What are RedHat services?

    what is redhat

    Application services

    1- RedHat fuse

    2- RedHat Fuse Online

    3- RedHat JBoss Enterprise Application Platform (JBoss EAP)

    4- RedHat JBoss web server

    5- RedHat AMQ

    6- RedHat 3scale API Management

    7- RedHat Data Network

    8- RedHat CodeReady Studio

    9- RedHat Decision Manager

    10- RedHat Process Automation Manager

    Cloud Computing

    1- RedHat Certificate System

    2- RedHat Directory Server

    3- RedHat Quay

    Data services

    1- RedHat Gluster Storage

    2- RedHat Ceph Storage

    3- RedHat OpenShift Data Foundation

    Management

    1- RedHat Smart Management

    2- RedHat Insights

    3- RedHat Advanced Cluster Management for Kubernetes

    4- RedHat Advanced Cluster Security for Kubernetes

    RedHat Services

    1- RedHat Open Innovation Labs

    2- RedHat training and certification

    3- RedHat Consulting

    Data Services and Cloud Computing

    – RedHat Hyperconverged Infrastructure (RHHI)

    Advantages of choosing RedHat for Business

    A large number of active Internet servers are currently supported by solutions developed by RedHat. In the public mind, the North Carolina-based organization is best known for its RedHat Enterprise Linux operating system.

    Redhat Secure Design

    RedHat and RedHat Enterprise Linux are widely recognized and admired for their highly secure engineering. Currently, this Linux distribution, which runs on IBM servers, has even reached the Common Criteria certification, the highest level of security certification in the world, which is allowed for use in government organizations. There are several reasons why the RedHat products have achieved such an advanced level of security.

    Enterprise Linux does not require the use of third-party tools that can be dangerous to fix security flaws. It is also inherent in the transparency of open-source products, and the constant scrutiny they undergo from many independent parties makes it very difficult for malicious actors to create problems.

    RedHat Open APIs

    RedHat maintains a policy of providing open application programming interfaces and provides its customers with flexible tools to create the solutions they need. Open APIs also mean the freedom to build to your specifications.

    RedHat Thorough Product Testing

    RedHat has a policy of testing new hardware before entering the market. Currently, the company uses its various relationships with hardware manufacturers to ensure the performance of its products and those that have been available to consumers for years.

    RedHat Cyber ​​Security Quick Response

    Currently, the RedHat security response team is actively tracking vulnerabilities to resolve them quickly. The team also has a track record of fixing more than 98% of critical vulnerabilities within a day of discovery, and the secret to this rapid response can be attributed to RedHat’s close working relationships with its partners, cybersecurity organizations, and the larger open source community. searched.

    RedHat Legal Protection

    RedHat’s open-source assurance program provides some important legal protections to its subscribers. Under this program, RedHat agrees to replace or modify the disputed portion of the Software while enabling Customer to continue using the Software without interruption. In addition, if another party sues for the alleged infringement, the customer will be provided with an attorney at RedHat’s expense.

    RedHat Cutting-Edge Philosophy

    RedHat has all the qualities to continue striving for innovation rather than settling for stagnation. The company maintains relationships with a large circle of hardware and software vendors, as well as a number of standard-setting industry organizations, ensuring that the company can respond quickly to technology and business trends. RedHat was a founding member and sponsor of the Advanced Message Queuing Protocol (AMQP) working group, which promotes this widely accepted open messaging protocol standard.

    RedHat Scalability

    When we talk about scalability, we refer to the capacity of a platform or application to handle increased operational needs without compromising its performance. A properly scalable platform is invaluable in our fast-moving technological society. A company can also easily experience a sudden increase in activity that it does not anticipate. Unless equipped for such a contingency, the system may be affected by this increase and have potentially harmful effects on the Company’s dealings with customers and vendors. RedHat Enterprise Linux is designed to provide maximum scalability to meet the fluid operational needs of the enterprise sector.

    RedHat Support

    RedHat’s technical support team is available 24/7 to provide the help and solutions you need to keep everything running smoothly. Currently, each of their support engineers holds a RedHat Certified Engineer certification or has years of relevant industry experience. You can also get the answer you need whenever you need it. In addition, RedHat has a policy of supporting its products not only around the clock but also over a long period of time and is committed to supporting the original versions of its software for up to ten years. It also guarantees full version compatibility.

     RedHat Reasonable Cost

    Currently, RedHat software and services operate on a subscription model, and the result is that it allows the company to avoid many support costs often associated with software hardware of this type. As a RedHat Subscription customer, you will not incur licensing, upgrade, or user access fees.

    RedHat Flexible Subscription Options

    RedHat gives its customers a lot of freedom with their subscriptions, which can be easily moved from one server to another, even from a physical server to a virtual server. Subscriptions are also not tied to any specific software version, thus giving customers more options in managing their workloads.

    RedHat Effective Training Options

    Any platform or app can be more trouble than it’s worth if the user can’t effectively use the training options. Also, in our fast-paced, high-tech world, it’s important to be able to find solutions immediately.

    Conclusion

    RedHat is an innovative open-source solution that anyone dealing with proper server operating systems or cloud applications will come across RedHat sooner or later. It identifies both the American software company and Linux distributions with the same name. RedHat symbolizes RedHat’s commitment as an agent in action for open-source in the digital world. In this Tutorial, you learned What is RedHat? We hope this article was useful for you.

  • How to Setup Xubuntu on Vmware

    How to Setup Xubuntu on Vmware

    This article will help you to install Xubuntu on Vmware workstation. We recommend Xubuntu because of its impressive benefits. This beautiful operating system can be used as a free distribution and is fast. Also, using the Xfce desktop environment is a significant advantage for Xubuntu. So, follow this article to find out how you can setup Xubuntu on Vmware.

    What Is Xubuntu?

    Xubuntu is a derivation of the Ubuntu operating system provided by Canonical Ltd company. The name Xubuntu is a combination of Xfce and Ubuntu. This distribution tries to provide a stable, customizable, and lightweight desktop environment using Xfce and also, is intended for both beginners and professional users.

    Steps to Setup Xubuntu on Vmware

    After a short explanation about Xubuntu distribution, let’s see how we can set it up on Vmware workstation through a step-by-step guide prepared for you. After purchasing a Linux VPS server from NeuronVM, you can test this training on it and enjoy it.

    1- Downloading Xubuntu

    This step is straightforward. Just go to the official page and download Xubuntu. It is recommended to use a torrent file because it’s flexible or uses the iso image file under the Mirror Downloads section. you should choose the closest location:

     Downloading Xubuntu

    – Then go to the downloads folder and find the image file. Probably, the file name starts with Xubuntu and is an iso file

    – Now you can start the installation process. open the Vmware workstation but if you don’t have it on your system you can download it from the official page.

    2- Creating a Virtual Machine on Vmware

    – To start the process of installing Xubuntu, Open the Vmware workstation and click on Create a new virtual machine on your home screen or you can go through this pass: File > New Virtual Machine. Also, use the keyboard shortcut Ctrl+N.

     Creating Virtual Machine on Vmware

    – In this section, you will start the Vmware virtual machine Wizard. As soon as you see the welcome window of the wizard, you can do the configuration. Custom is a more advanced setting, so, the only thing you have to do is select the Typical option which is checked in default mode. Enter Next to continue:

    Creating Virtual Machine on Vmware

    – In the next step, you should browse the downloaded iso image file and click Next:

    Creating Virtual Machine on Vmware

    – Here, you should enter your virtual machines Name, Username, and Password:

    Creating Virtual Machine on Vmware

    – Then, specify your VMs name in the dialog box or leave it as the default. Also, you can accept the default location. Your folders name will be the same as your VM file name:

    Creating Virtual Machine on Vmware

    – It is time to determine the Disk Space capacity. The default amount is 20 GB. We should mention that if you are not using heavy applications like Photoshop, this amount will be enough. Mark the Split Virtual Disk into Multiple Files option and go to the next part:

    Creating Virtual Machine-specify disk space

    – This is the final dialog box. Here, you can see the details of your setup. The only thing to do is click on the Finish button:

    Creating Virtual Machine on Vmware

    – Now power on a virtual machine to start and Vmware will start automatically:

    Creating Virtual Machine on Vmware

    3- Setting up Xubuntu

    – After an automatic reboot, you should enter the Username and Password:

    Setting up Xubuntu

    ###

    Setting up Xubuntu

    – Vmware tools will install automatically. If you see the VM > Reinstall Vmware tools then You have already installed them. To check the status, use the command below:

    vmware-toolbox-cmd -v

    If you notice the version number, you have installed the Vmware tools. If not, go through this pass VM > Install VMware tools and restart the system:

    Setting up Xubuntu

    Now, you can see the Xubuntu desktop on full scream. If you can not see the full-screen mode, then you should restart your system:

    Xubuntu desktop environment

    Conclusion

    Xubuntu is an easy-to-use, great operating system that is derived from Ubuntu. This article can be a helpful guide to show the way to setup Xubuntu on Vmware. We tried to teach how you can download and install it on Vmware and how you can create a virtual machine to start your task. Hope you enjoyed the content. If you have any questions or ideas, just leave a comment.

    FAQ

    What file systems are suitable for Xubuntu?

    Xubuntu can use Xfce file manager Thunar.

    How much RAM is needed for Xubuntu?

    You should allocate at least 1 GB RAM and Intel or AMD 64 Bit processor for your Xubuntu distribution.