Tag: Windows Tutorials

  • Desktop Google Drive for Windows, Mac and Linux

    Desktop Google Drive for Windows, Mac and Linux

    In this article, we will show how you can download and use Desktop Google Drive for Windows, Mac & Linux. When we talk about Google Drive it makes sense a lot, Because this drive makes it easy to access and use your cloud storage files. It is very popular, useful, and also compatible with Google online tools. We should mention that if you want to use this drive, you should have a Google account and if you desire to have it, then the best way is to install it on your desktop and mount it to access. Google Drive consolidates with Google’s other services and systems like Chrome, Gmail, Google Docs, YouTube, Google+, and so on.

    If you need to use a Windows VPS or Linux VPS server, we suggest you visit our website plans, which are offered with a wide variety and location of your choice.

    Google Drive Features

    Now let’s analyze some main features of Google Drive:

    – Capability of storing files and folders and serving a backup solution

    – Integration of Google Office apps

    – Include different apps and icons like Google Docs, Google Sheets, Google Forms, and so on

    – Allow to share files and invite others to view, edit, and download them

    – Accessibility of files from any smartphone, tablet, or computer online or offline

    –  Possibility of comprehensive search

    – Saving files safely and protecting them with an AES256 or AES128 encryption

    How to Download and Use Google Drive on Windows / Mac

    Now that you’re familiar with Google Drive, let’s see how we can install it on your desktop for Windows or MacOS. Actually, you can easily do the installation process and it is entirely free for you, so follow our instructions and enjoy your application.

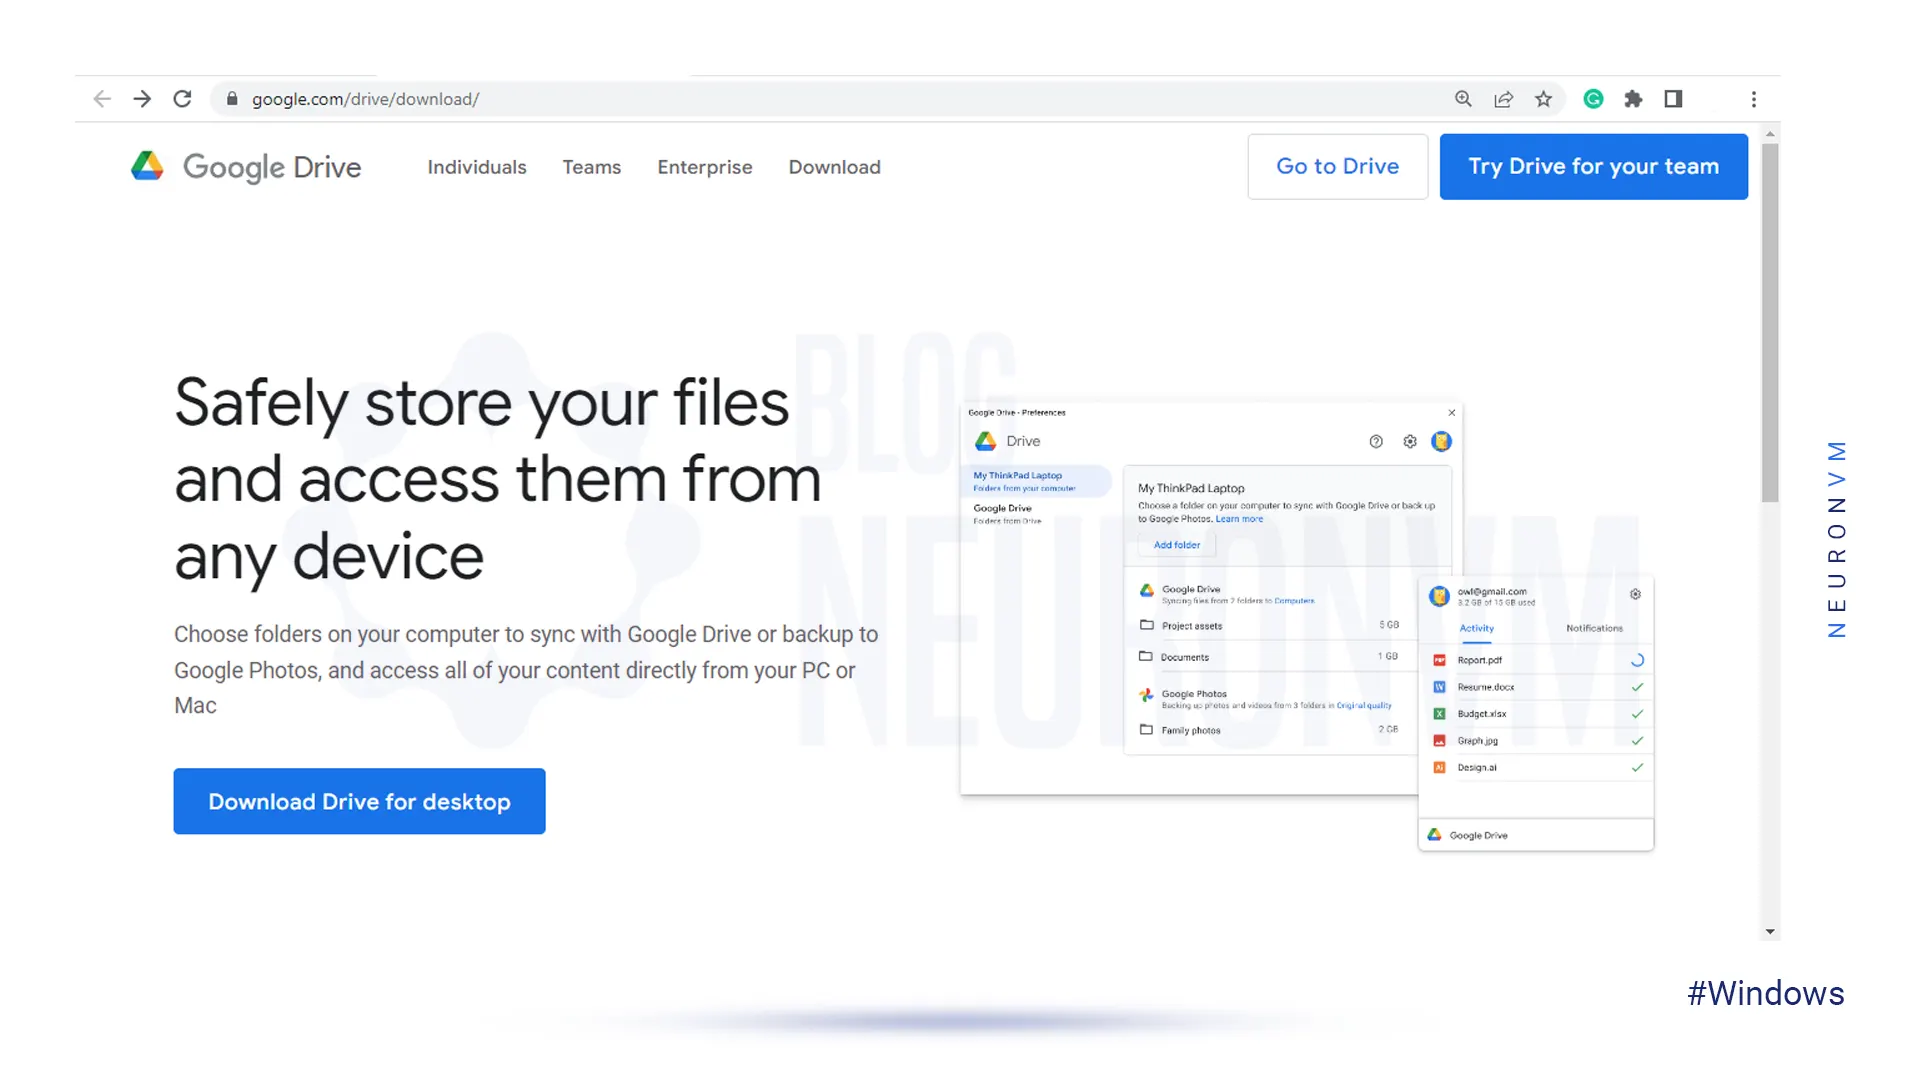
    Navigate to the Google Drive download page and select the option to download Drive for Desktop. As the website is intelligent, it can automatically recognize your operating system and will download the appropriate file type for you:

    how to download google drive

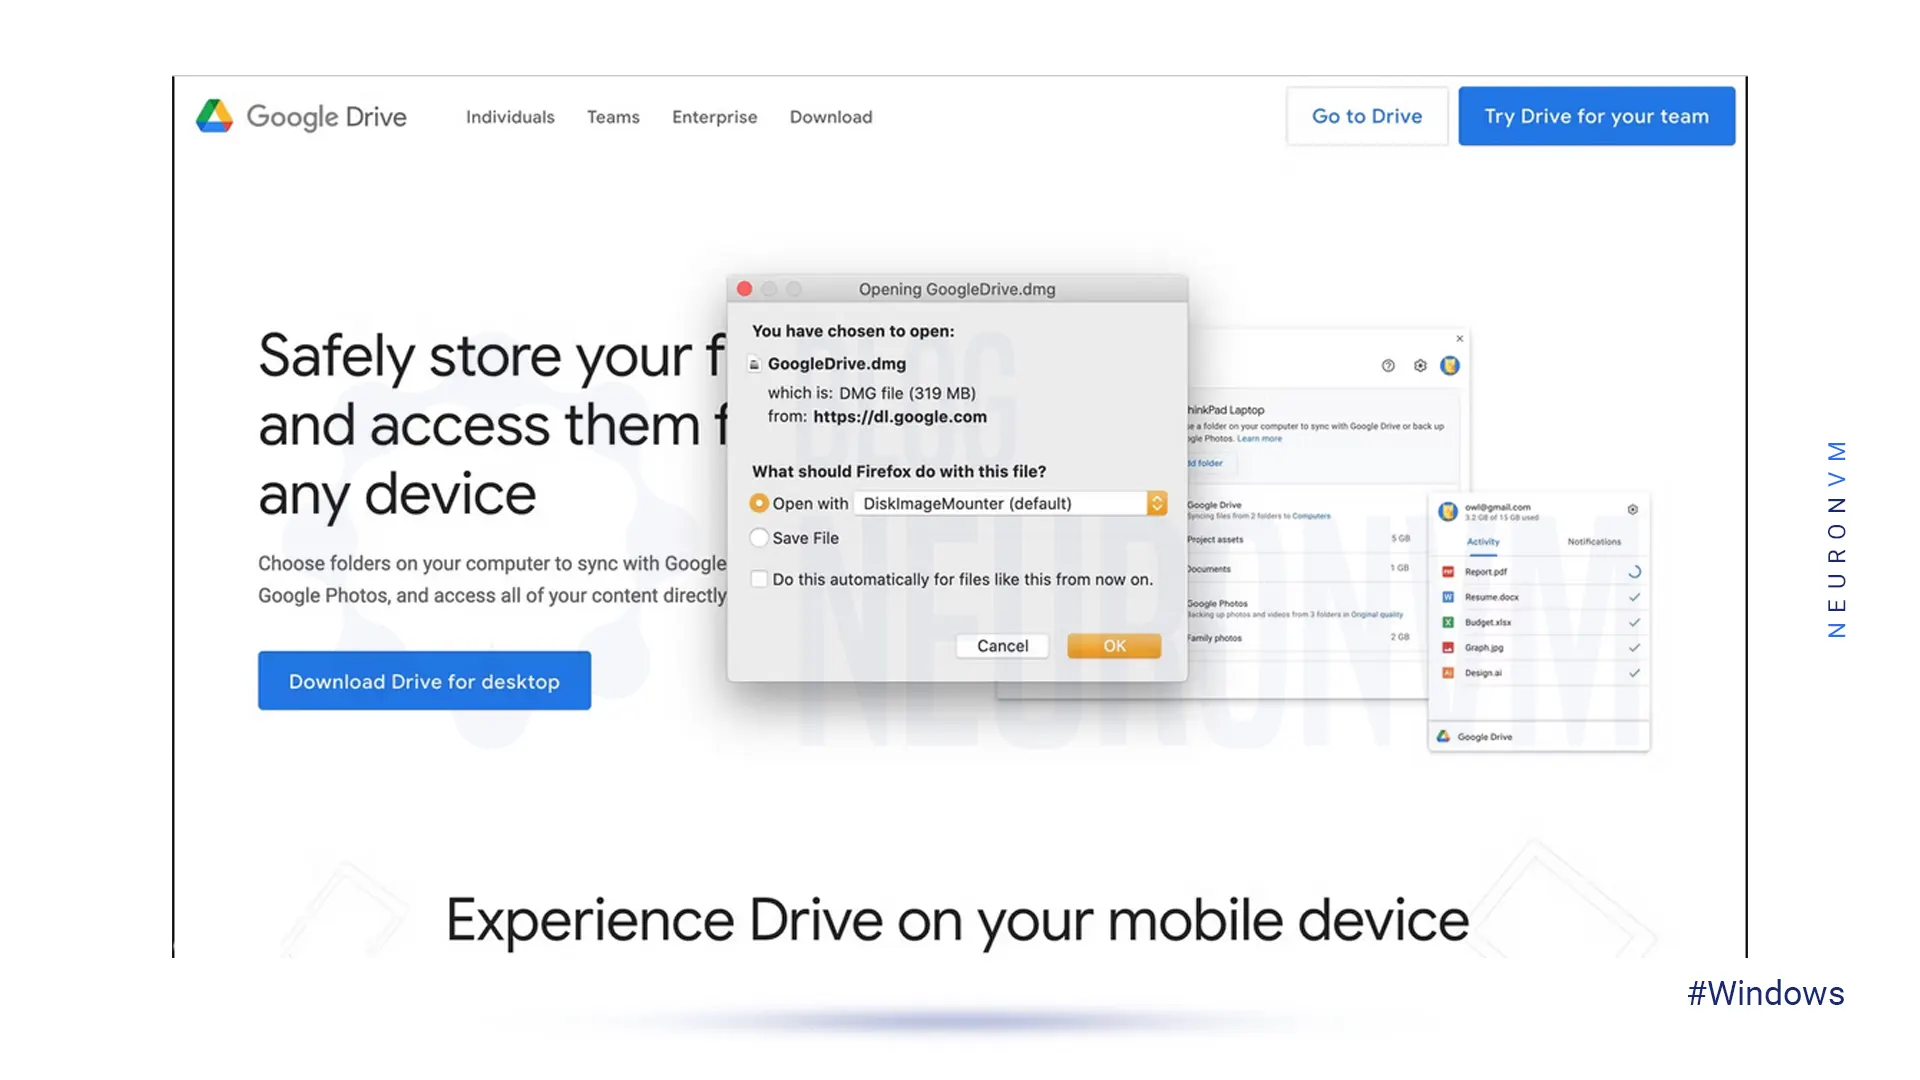
    At this step, as soon as the window appears, select which folder you need to save the installation file and click the Save button.

    For Windows, you should use Googledrivesetup.exe, and for Mac Googledrive.dmg file name.

    Also, you can choose to open files automatically:

    save google drive on desktop

    Now you can click the Install button to start the process.

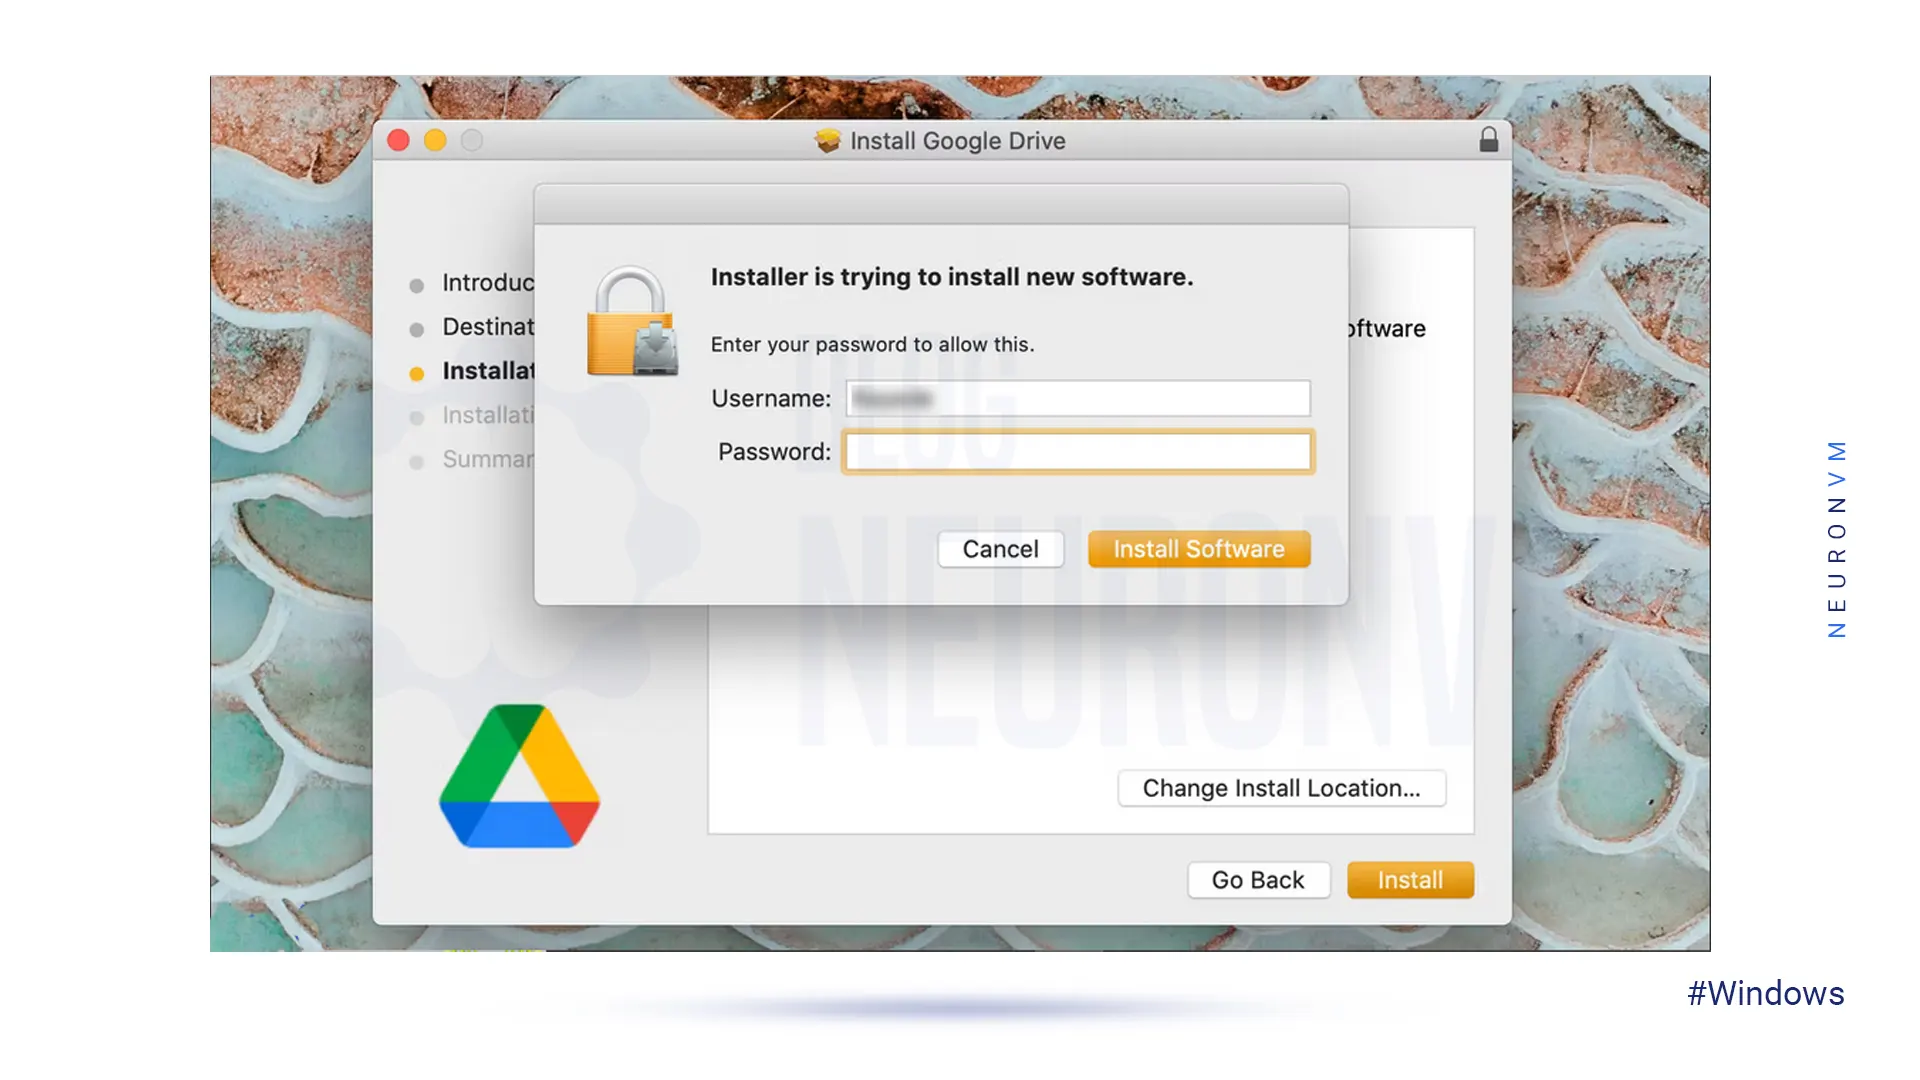
    Note: on MacOS, an extra window will appear, requiring your Mac password to confirm the installation.

    So enter the Password and click Install Software:

    install google drive on windows

    Wait for the installation to complete.

    If your operating system is Windows, a new drive named Google  Drive (G:) will be added to the desktop. But if it is MacOS the Drive icon will show up in the top menu bar:

    Download and use Google Drive on mac

    In the last step, sign in to your Google account to complete your task. On Windows, you will be redirected to the browser and go to the login page. But on Mac, first of all, you should click the drive icon on the top menu bar and if you complete the installation successfully then you can log in to Google Drive.

    How to Download and Use Google Drive on Linux

    As you see, we can use Google Drive on Windows and Mac. But Google hasn’t released an official version for Linux. Don’t worry cause we can use other tools to fill the gap.

    You should know that Google officially recommended using the Google Driver Website on Linux. But if you want to find it on your desktop, then follow our instructions:

    First of all, you should know that Gnome supports Google Drive on its version 3.18 desktop environment. Also, the Ubuntu desktop includes Nautilus which is part of Gnome. You need to spend extra time getting the Google Drive integration. To start this process you should install the Gnome Control Center and Gnome Online accounts package. So open the terminal and use the command below:

    sudo apt install gnome-control-center gnome-online-accounts

    Enter your password and type “y” to install the software.

    Then open the dashboard and search for “Gnome Control Center“. Navigate to the application settings:

    setting linux

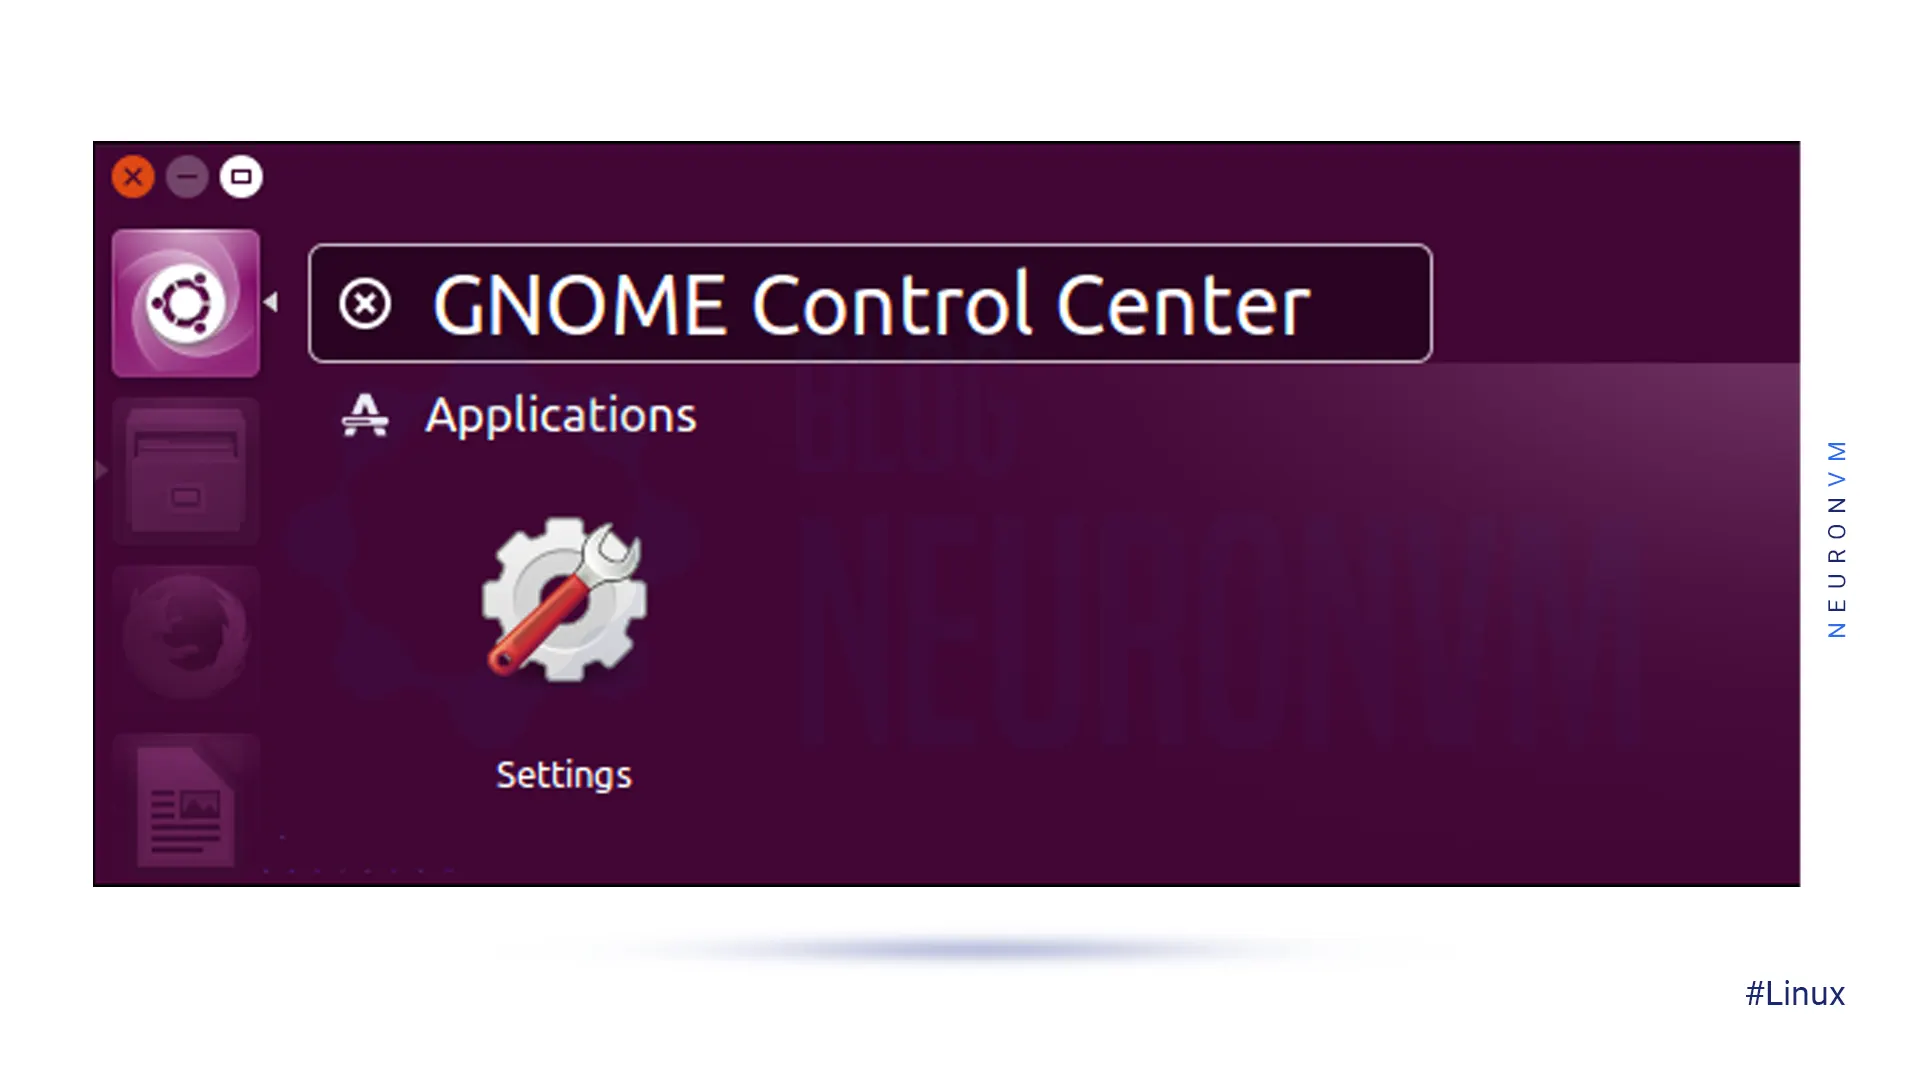
    At the window, click the “Online Accounts” icon in the Gnome Control Center window:

    online accounts on linux

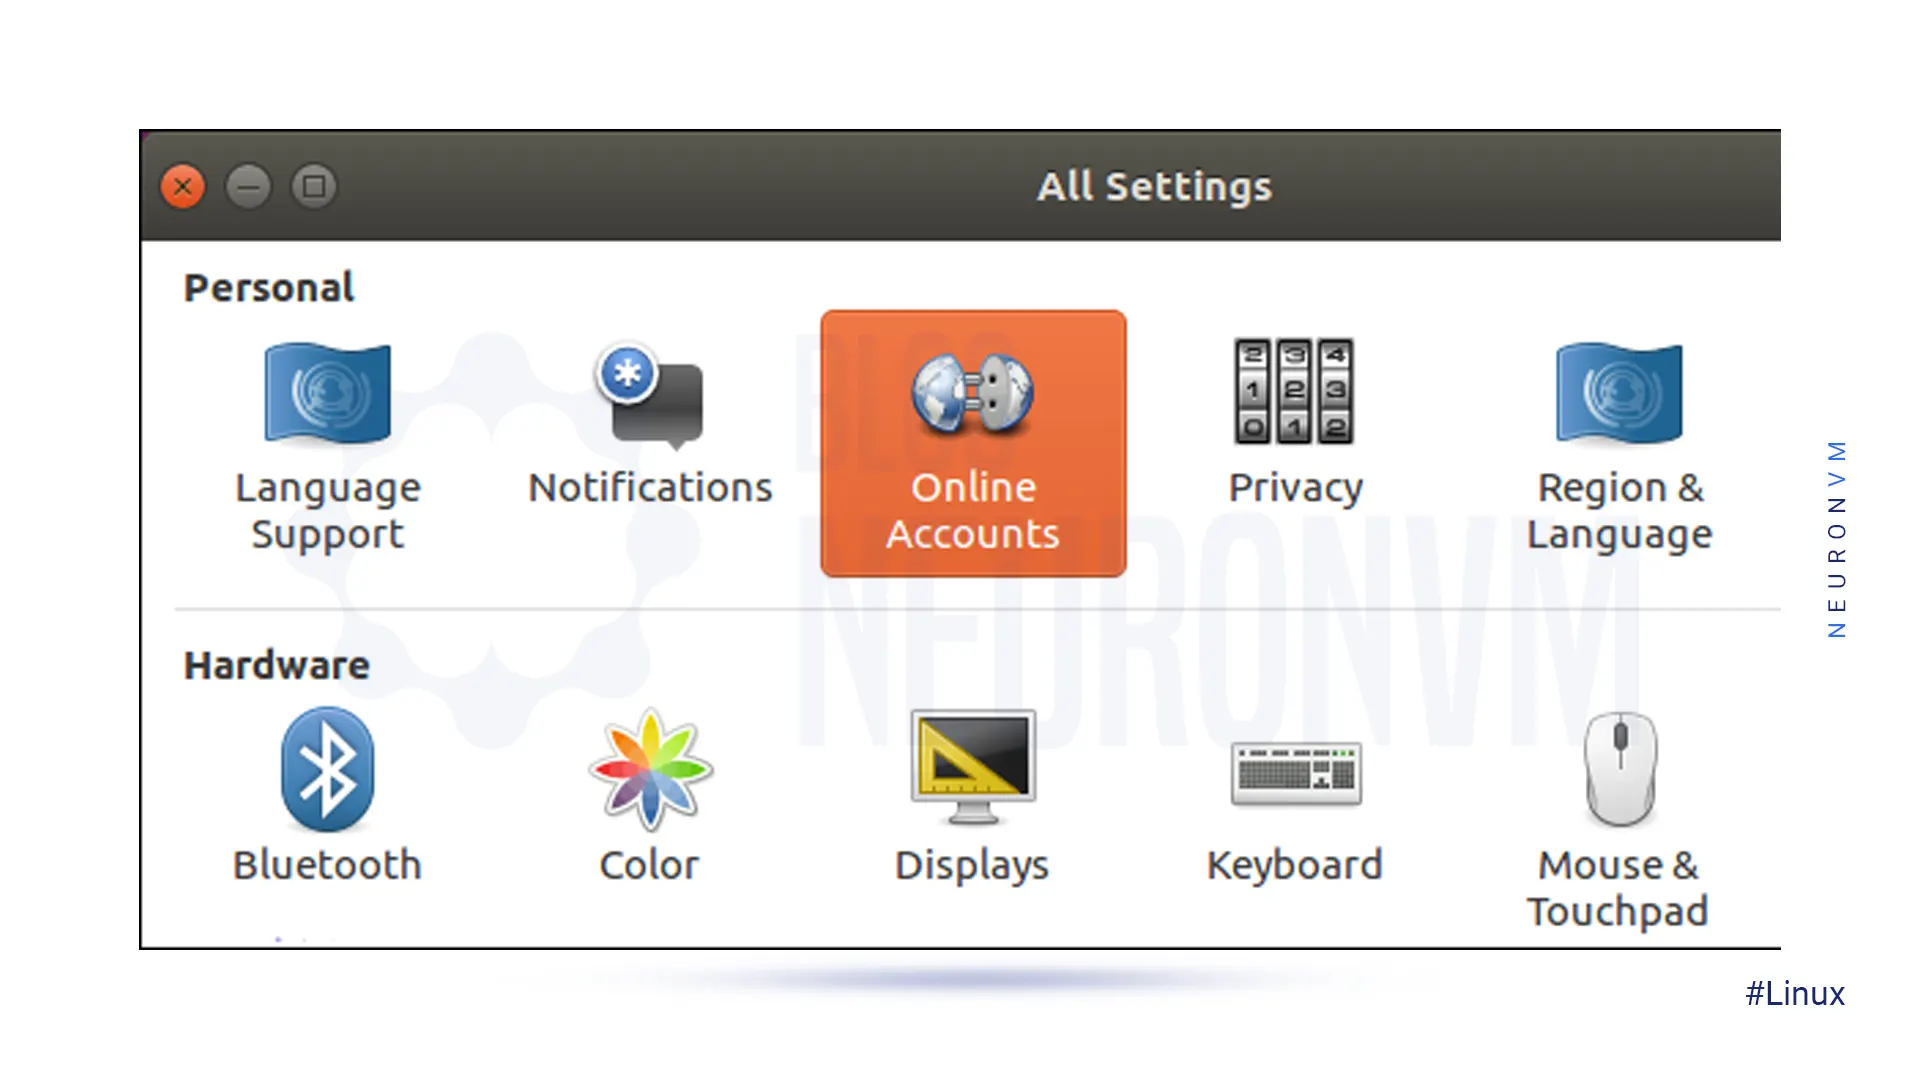
    Now click the “add account” then select “Google” and sign into your Google account.

    You can give access to your account and ensure that the files option is enabled:

    running google drive on linux

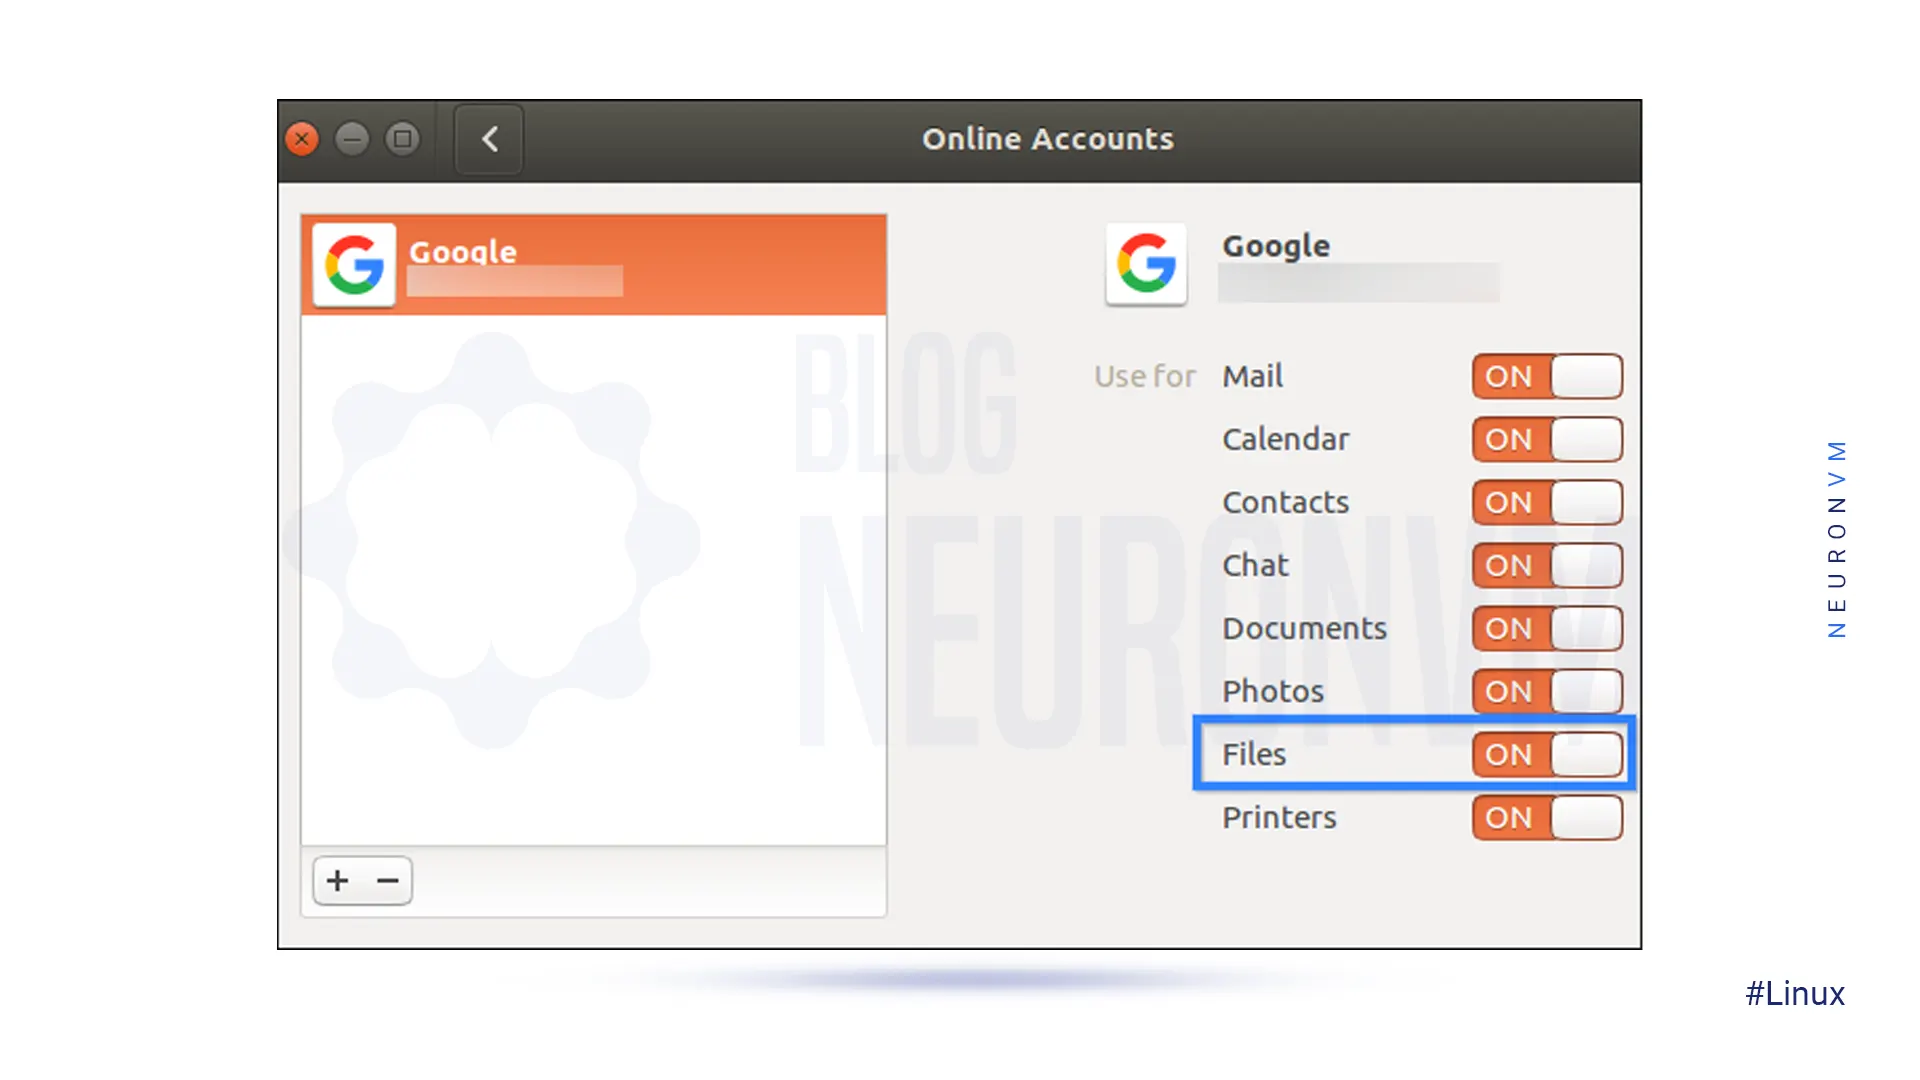
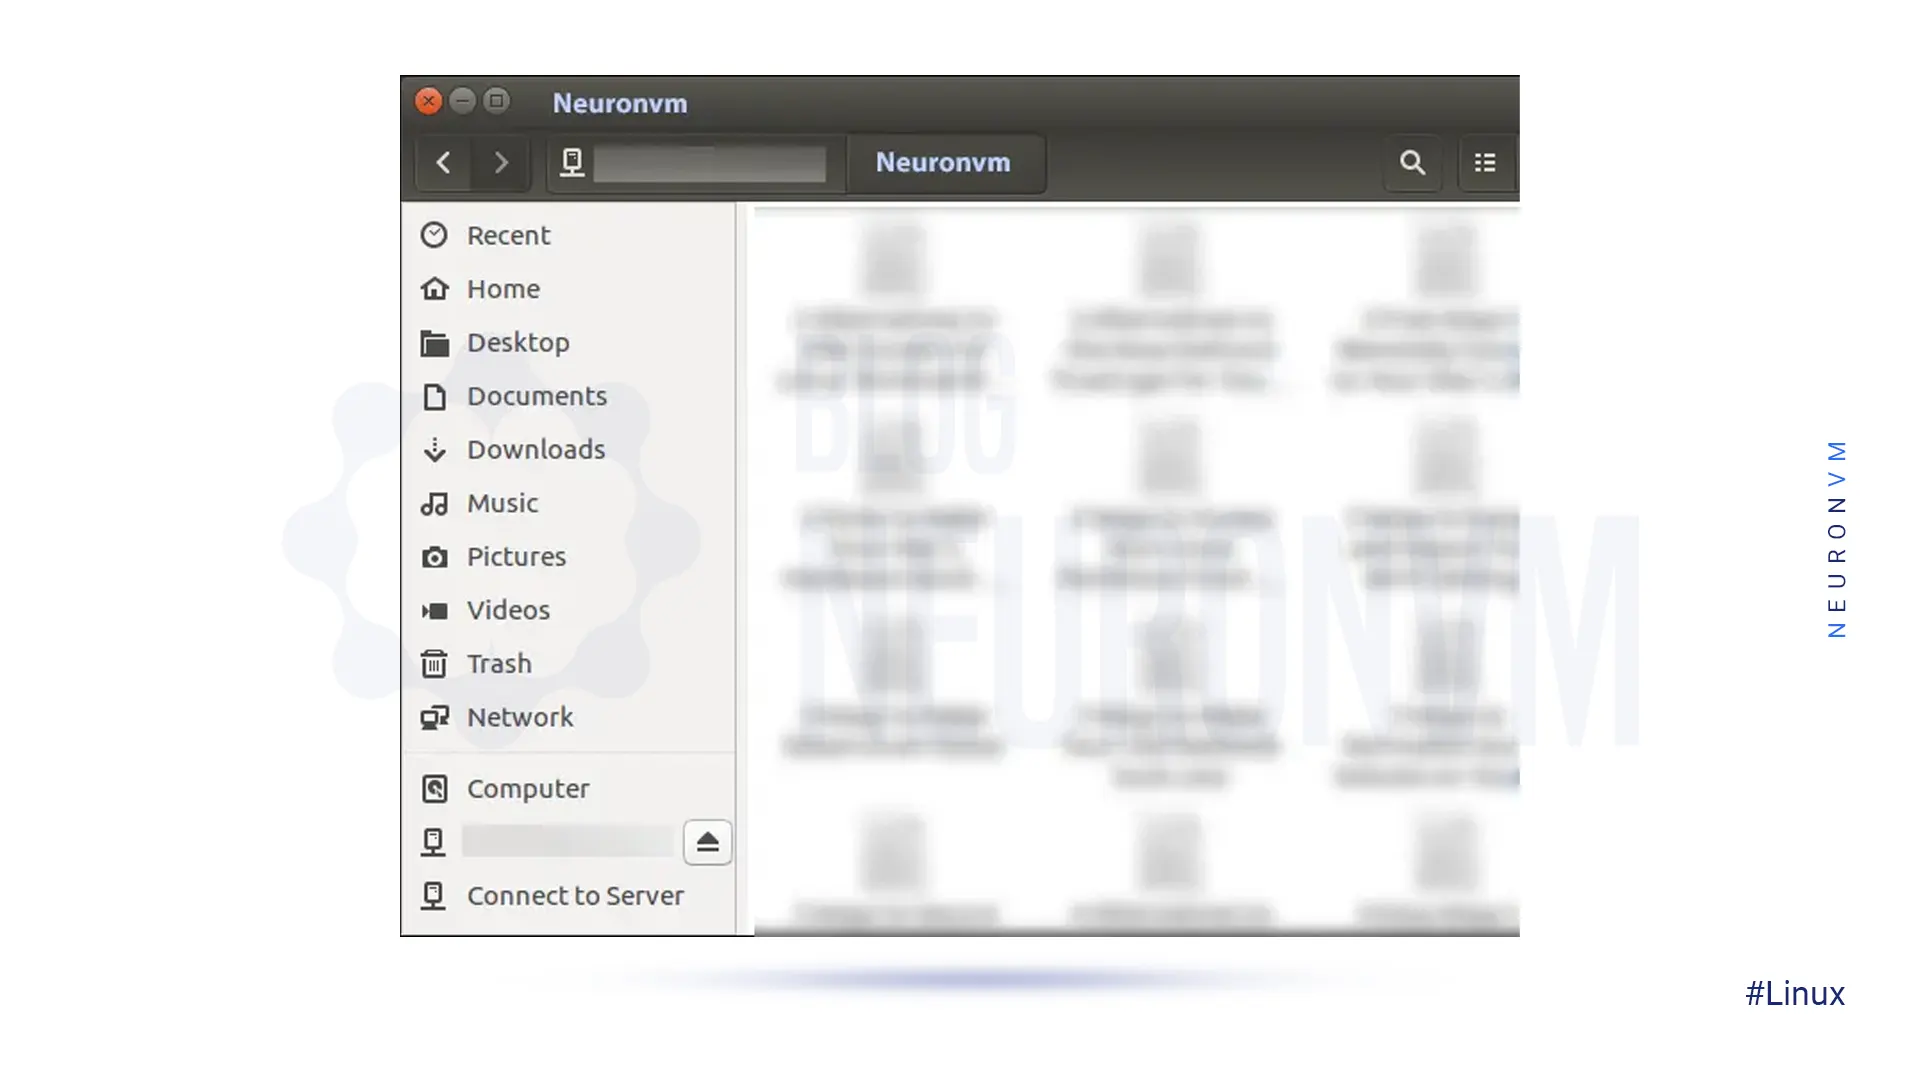
    You can see the Google Account email address as an option in the sidebar at the file manager window.

    Then click to view Google Drive files. You can browse, open, and save files, but files are not synced offline to the desktop. The modified copy will be automatically uploaded by the system:

    Download-and-use-Google-Drive-on-Linux

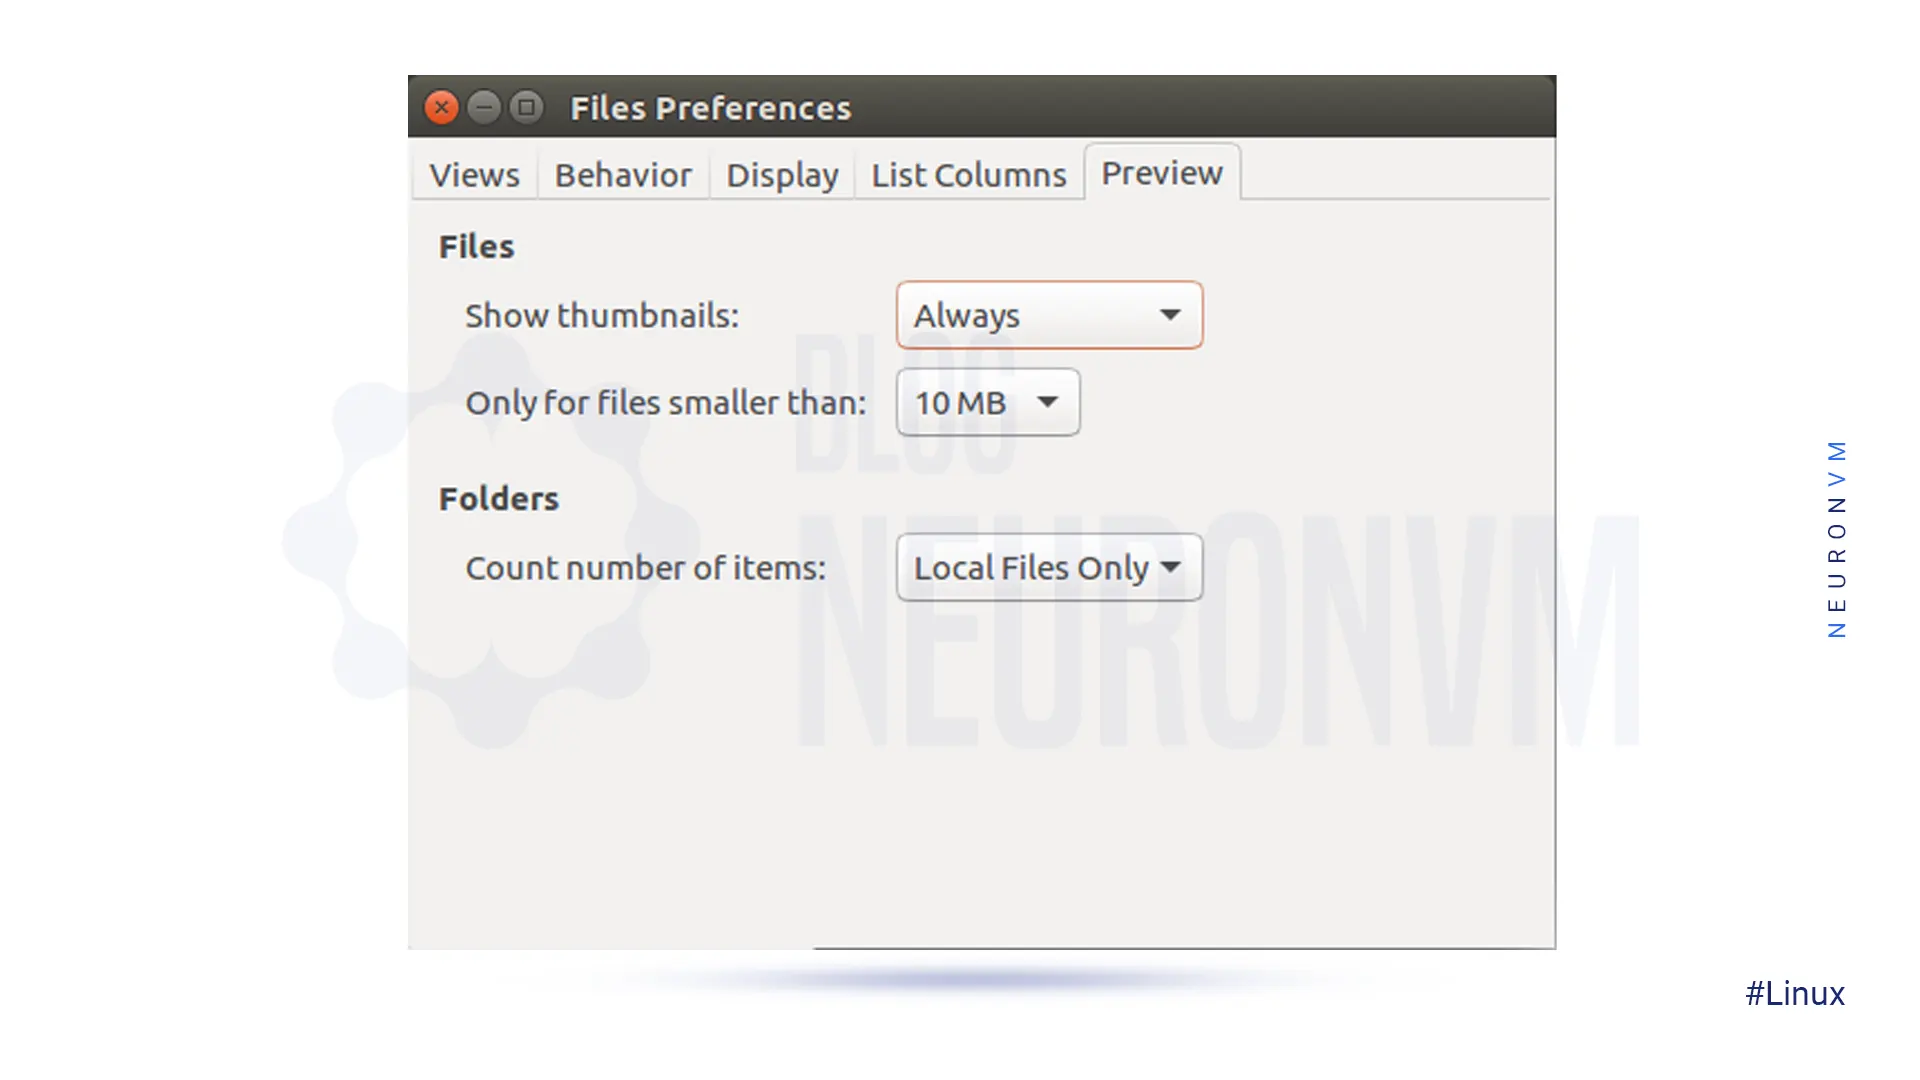
    If you want to see the thumbnail preview, follow the pass below and then select “always“:

    Edit >> Preferences >> Preview, click the “Show Thumbnail”   

    how to use google drive on linux

    That’s it! Now you can use Google Drive on your desktop.

    Conclusion

    Ok, guys! We tried to guide you in learning how to download and use Google Drive on Windows, Mac, and Linux. Now you can easily download it on your operating system, and also manage and access your cloud storage files without any worries about security. We hope you enjoy this article and suggest that you read the interesting infographic post, Cloud Computing Structure.

    FAQ

    1) Is there any difference between Google Drive and Google Drive for Desktop?

    The desktop version synchronizes and stores the content of Google Drive locally on the computer, but the first one streams all files and folders from the cloud.

    2) What is the maximum storage for desktop Google Drive?

    Actually, it comes with 15 GB storage, but if you upgrade it to Google One, your total storage increases to 100 GB or more.

  • Tutorial Setup FTP Server on RDP 2012

    Tutorial Setup FTP Server on RDP 2012

    Tutorial on how to Setup FTP Server on RDP 2012, 2016, and 2019 step by step. FTP or File Transfer Protocol is a protocol developed in 1971 on the Internet. This server is one of the oldest Internet protocols and One of the most common ways to transfer files between computers is through the FTP protocol. FTP is one of the most widely used protocols in web development, which is useful for people working in the field to get acquainted with this protocol and its mechanism. This article will explain the Tutorial Setup FTP Server on RDP 2012 with related concepts and their necessity and applications. Please stay with us until the end of this article. If you want to buy a server and set up an FTP server on it, we suggest you test and use the Admin RDP plans provided on our website.

    How to Install FTP Server on RDP 2012

    First, you must go to the Start menu and type Administrative Tools. On the page that opens, select Server Manager:

    administrator tools on windows server

    Now you need to click Add Roles and Features in the server manager:

    server manager

    In the next step, you should click Next on the “Before You Begin” section.

    Then, make sure the Role-based or feature-based installation is selected in the “Installation Type” section, and click Next in the window that opens:

    Role-based-or-feature-based-installation

    In the “Server Selection” section, make sure to select a server from the server pool. You must click Next after selecting your server in the “server pool” section:

    how-to-Select-a-server-from-the-server-pool

    In this stage click Web Server (IIS) in the “Server Roles” section and check FTP Server, then click Next:

    how-to-check-FTP-Server-on-server-manager-rdp-2012

    You must select the features you want to be installed and then click Next:

    how-to-select-features-and-roles-on-server-manager-of-rdp-2012

    In this step, you should click Install in the “Confirmation” section:

    how-to-install-ftp-server-on-rdp-2012

    After the installation progress bar is completed, click Close:

    ftp-server-installing-progress-on-rdp-2012

    Setup FTP Server on RDP 2012

    You must add an FTP publishing to your site because you can not yet connect to your Website via FTP. Now to add FTP publishing, you should open IIS and expand your computer and Sites, then click on your Website. At the end click on Add FTP Publishing:

    how-to-Setup-FTP-Server-on-RDP-2012

    Next, choose an IP address for your FTP site. You have the option to use the default selection of “All Unassigned“.

    You should choose to accept the default port of 21 because you would enter the TCP/IP port for the FTP site in the port box.

    Note: Do not use the hostname and the virtual host box should be empty. The Certificates drop-down menu should also be “Not Selected” and the No SSL option should be selected. Then click Next:

    add ftp site publishing

    _ To authenticate, you must first select Basic for authentication settings.

    _ Select “Specified users” from the Allow access drop-down list for settings.

    _ Now you must type “Administrator” for the username.

    _ For the Permissions option, you should Select Read and Write. At the end click Finish:

    permissions in add ftp site publishing

    Eventually, you must make sure that your Windows Firewall has a rule set for FTP default port 21.

    To be sure, you should go to the Start menu type Administrative Tools, and open Windows Firewall with Advanced Security.

    administrator tools

    After opening the window, click on Inbound Rules and then on New Rule in the “Actions” section:

    windows firewall with advanced security

    In the window that opens, select Port and click Next:

    new inbound rule wizard

    Now you should select TCP and Specific local ports, then click Next:

    Specific local ports

    You must select Allow the connection on the action page and click Next:

    Allow the connection on the action page

    In this step, you should check all the boxes on the Profile page and click Next:

    Allow the connection on the action page

    Finally, you must select a name for the new rule and click Finish:

    firewall settings

    We suggest that you read the article How to Create an FTP Account with SSH on Dedicated Server if needed.

    Conclusion

    Setting up an FTP server on an RDP 2012 server can greatly enhance your file-sharing and collaboration capabilities. By following the steps outlined in this comprehensive guide, you can easily configure an FTP server on your RDP 2012 server and securely transfer files over the network. Take the time to configure the FTP server properly and test its functionality to ensure that it meets your needs. With a properly configured FTP server, you can streamline file sharing and improve collaboration within your organization.

  • What is RDP Server and How to can connect to Admin RDP?

    What is RDP Server and How to can connect to Admin RDP?

    RDP Server, or Microsoft Windows Server OS, is a series of Enterprise-class server operating systems designed to share services with multiple users and extensive control over data storage, applications, and shared networks. One of the most common and convenient ways to connect to a Windows server is to use Remote Desktop Connection or Admin RDP. This article is about  What is RDP Server and How to can connect to Admin RDP. You can connect to a remote computer or Windows server using the RDP admin over the Internet or over a local area network. RDP gives users full access to the tools and software installed on the Windows server.

    What is an RDP Server?

    RDP Servers are versions of Microsoft Windows operating systems that are specifically designed to be installed and run on servers. Due to the fact that organizations, offices, and many companies have large or medium-sized computer networks, they use servers. These servers have to service and manage hundreds and sometimes thousands of computers. Therefore, the operating system that is installed on these servers must have the necessary facilities and capabilities to manage the network and respond to it.

    RDP Server or Windows Server is mainly using in business and enterprise suites. The appearance of Windows Server may not be much different from regular Windows of the same age. Because the programming foundation of both types of Windows is common, many of their capabilities are common. Because of this, programs such as web browsers and image editors can be downloaded and installed on both types of Windows. Even their desktop environment, including the taskbar, start button, and page layout, is similar, and native Windows applications such as Notepad can be seen on Windows Server. However, there are many differences between a normal Windows application and a Windows server.

    What is RDP Server and How to can connect to Admin RDP

    What does the RDP Server do?

    Because RDP Server is designed for large businesses and enterprise environments, it has a variety of enterprise software. Some of the features of Windows Server for this purpose are:

    1. Active Directory: Active Directory is one of the most important features of Windows Server, consisting of several different services that are used to manage computers and other networked equipment. The network administrator uses Active Directory to create domains and users on the network and grant them various permissions.

    2. Dynamic Host Configuration Protocol (DHCP): DHCP automatically assigns a unique IP address to each network-connected device. DHCP facilitates and accelerates the addressing of network nodes and avoids problems such as duplicate IP address allocation.

    3. File Server: A file Server can consider as a centralized storage system that can be accessed by multiple systems and network users. Large companies and organizations usually need this feature, so this possibility is anticipating in Windows Server. Users with related work tasks can share their files on the network using File Server if they have the relevant permissions.

    Advantages of RDP Server

    RDP Server, or Windows Server operating system, was added to the Microsoft Windows family in 2000 and was particularly popular from the beginning. Numerous roles and features of the Windows Server operating system were very useful for network administrators in setting up service and network control, and this was the reason for its increasing popularity.

    Some of the roles of the Windows Server operating system are:

    1. Active Directory Certificate Services

    2. Active Directory Domain Services

    3. Active Directory Federation Services

    4. Active Directory Rights Management Services

    5. File and Storage Services

    6. Hyper-V

    7. Remote Desktop Services

    8. Web Server IIS

    9. Windows Deployment Services

    Today, with the development of the network world, many roles and features have been added to the RDP server operating system, each of which has its own important and unique capabilities.

    How to Connect to Admin RDP

    In the first stage, you should type the phrase remote desktop in the search section of the taskbar menu. Then you see Remote Desktop Connection as one of the options, select it:

    how-to-open-rdp-admin

    Then in the Remote Desktop Connection window, you need to enter the destination IP address and then click Connect:

    Connect-to-Admin-RDP

    Note: If the default remote port direction has changed, you need to enter IP: Port. For example, you need to enter 123.456.7.8:12345. Which is 123.456.7.8 destination IP address and 12345 connection port.

    In this step, if the security message appears to confirm the identity of the second system, click Yes:

    remote-desktop-connection

    In the next step, you will be asked for your username and password, and you will need to enter the username and password of the destination Windows user interface.

    Then click on OK:

    windows-security-in-opening-windows-server

    By performing the above steps correctly, you will enter the desktop environment of the second system and have full access to it:

    windows-server-environment

    Conclusion

    Connecting to an Admin RDP server can provide users with the flexibility and convenience of accessing their computers remotely. By following the steps outlined in this guide, users can easily set up and connect to an Admin RDP server to access their desktops, files, and applications from anywhere in the world. The Remote Desktop Protocol is a powerful tool that can improve productivity, streamline IT support, and enhance remote collaboration. We suggest you read the article The Best Way to Buy Cheap Admin RDP Server With BTC.

  • How to Setup Virtualbox on RDP 2016

    How to Setup Virtualbox on RDP 2016

    VirtualBox is part of the software released by Oracle. Using this software, operating systems are installed on virtual computers. In this case, the performance of the operating system is the same as when it is installed on real hardware. There are also many applications for virtual machines. One of the best and safest ways to virtualize is to install VirtualBox. This software provides users with another operating system on the computer without causing any problems. It should also be noted that VirtualBox is free for home users. Because of the importance of this topic, How to Setup Virtualbox on RDP 2016 will be taught.

    Prerequisites:

    – An Admin RDP or Windows VPS with Windows server 2016 operating server

    – Hardware virtualization support: Your server CPU must have hardware virtualization support (Intel VT-x or AMD-V) to run Virtualbox.

    – Sufficient RAM: Make sure that your server has enough RAM to run Virtualbox smoothly. The minimum recommended RAM for Virtualbox is 2GB, but more is preferable for better performance.

    – Disk space: Allocate enough disk space for Virtualbox and the virtual machines you plan to run. The installation itself requires only a few hundred megabytes of disk space, but the virtual machines can take up a significant amount of space depending on their size.

    – Administrative privileges: You need to have administrative privileges on the server to install and run Virtualbox.

    How to Install Virtualbox on RDP 2016

    First, You should go to the Virtualbox website and click Windows Hosts:

    how-to-download-virtualbox

    After the download is complete, you must go to the downloads folder and double-click on Virtualbox Installer.

    In the next step, you will see the following window, click Next:

    installing-virtualbox-on-windows-rdp

    The next step is to customize the installation. As you can see, the VirtualBox Application is selected by default. Click Next to continue the installation process:

    custom-setup-in-installing-virtualbox

    In the next step, check your preferred options for displaying VirtualBox and click Next:

    virtualbox-installing-progress

    In the window that opens, click Yes:

    virtualbox-warning-message

    Click Install to begin installing VirtualBox:

    how-to-install-virtualbox-on-rdp-2016

    Finally, click Finish to complete the VirtualBox installation:

    install-oracle-virtualbox-on-windows-server-2016

    Tutorial Setup and Use Virtualbox on RDP 2016

    After you have successfully installed VirtualBox on RDP 2016 in the previous section, you will see the VirtualBox homepage. Note that no virtual machines have been created yet. Therefore, it must be constructed.

    Note: In this tutorial, we are going to look at how to use VirtualBox to run Windows 10 on a virtual machine.

    In the first stage, you must open the Virtualbox and click on the “New” button:

    how-to-use-virtualbox

    Remember to choose a name for the VM.

    You should select “Microsoft Windows” on the first scroll menu, and then select “Windows 10” from the version box.

    Click on Next to continue:

    install-windows-10-on-virtualbox

    On the screen below, configure the amount of RAM that the virtual machine allows to use.

    If you have a surplus or limited RAM, adjusting the slider is fine. Note that if you allocate too much RAM, you will end up with serious performance problems. Then click Next:

    virtualbox-setting-to-instsll-os

    In the window that opens, select “Create a virtual hard disk now” and then click on Create:

    virtualbox-setting-to-instsll-os

    In this window, click ”VDI (VirtualBox Disk Image)” and then select Next:

    hard-disk-file-type-on-virtualbox

    You should set the disk space for your hard drive. You can select a Dynamically allocated or a fixed size. After selecting one of them, click on Next.

    Note: If you want to save disk space, select the dedicated option Dynamically.

    storage-types-in-installing-windows-10-on-virtualbox

    You can change the location of the drive as well as its size, At the final virtual hard disk screen.

    After clicking the “Create” button, you should be able to see your created VM:

    virtualbox-environment

    Conclusion

    Setting up VirtualBox on RDP 2016 can expand the capabilities of your server by allowing you to run multiple operating systems simultaneously. By following the steps outlined in this guide, you can easily set up and manage virtual machines on your RDP server. With VirtualBox, you can create a flexible and scalable virtualized environment that meets your specific needs and requirements.

  • Tutorial Install NetBeans on Windows Server 2016

    Tutorial Install NetBeans on Windows Server 2016

    NetBeans is a popular software development platform, primarily for Java, that provides wizards and templates to help developers build applications quickly and easily. It includes modular components across a wide range of tools and has an IDE (Integrated Development Environment) that allows developers to create applications using the GUI. This article will teach you about Tutorial Install NetBeans on Windows Server 2016 step by step. We suggest you use the various Windows VPS server plans that are offered on our website with immediate delivery.

    Prerequisites

    – Java Development Kit (JDK)

    – The minimum disk space requirement is around 10-15 GB.

    – Minimum of 4 GB of RAM

    How to Install NetBeans on Windows Server 2016

    After entering the Windows server environment, you must first open one of your favorite browsers.

    Then, you must download NetBeans.

    Now click Download:

    download netbeans

    Then you should click on your desired option ie windows like the below image to download the Apache NetBeans:

    downloading netbeans on windows server

    *

    how to download netbeans

    Once the download is complete, go to the place where you downloaded the file and double-click on it:

    how to run netbeans on windows server 2016

    Mark the Accept License Agreement:

    netbeans license agreement

    In this step, you have to click on the link JDK setup or setup NetBeans JDK, which is a Java development kit. Browse your downloaded JDK file and click Next:

    apache netbeans ide installder

    Finally, click on Install:

    How to Run NetBeans on Windows Server 2016

    You have to wait a while for the NetBeans installation to finish:

    How to Install NetBeans on Windows Server 2016

    How to Run NetBeans on Windows Server 2016

    In the Start menu, type NetBeans. Then open it by double-clicking.

    Now you have to click Run.

    You can now use NetBeans.

    9 How to setup NetBeans on Windows Server 2016

    Conclusion

    By following this article, you can easily install NetBeans on your Windows Server 2016 machine. Remember to download the correct installer, configure the installation location, select desired bundles, and customize the settings if necessary. With NetBeans successfully installed, you can now begin developing your applications efficiently, leveraging the powerful features provided by this versatile IDE.

  • Tutorial Setup and Configure Apache on Admin RDP

    Tutorial Setup and Configure Apache on Admin RDP

    Apache is a popular open-source web server software that is widely used to host websites and applications. In this Tutorial, we are going to teach you how to Setup and Configure Apache on Admin RDP (2012, 2016, 2019) step by step. By following the steps outlined in this guide, you will be able to have a fully functioning Apache web server on your Admin RDP, allowing you to host websites and serve content to users.

    Prerequisites

    1) The Admin RDP should be running a supported version of the Windows Server operating system, such as Windows Server 2012 or later.

    2) Administrative Access to the RDP server.

    3) Sufficient hardware resources, including CPU, RAM, and disk space, to handle the expected web traffic.

    How to Download Apache on Admin RDP Server

    In this section, we want to deal with Setup Apache on Admin RDP. The first step is to log in to your Admin RDP.

    Open Remote Desktop by searching your Windows Start menu.

    Then enter the desired IP to enter the RDP Admin and click Connect.

    Note: If you are asked for a password, you must enter the server login password. If you do these steps successfully, you will become an Admin RDP environment.

    1 remote-desktop-connection

    After successfully entering the Admin RDP environment, you must open one of the browsers you want. Then, you must download the Apache webserver.

    2 how-to-download-apache

    You should also have C++ Redistributable Visual Studio because the Apache webserver needs it to run on Windows. You can download this by clicking on vc_redist_x86 for a 32-bit operating system and vc_redist_x64 for a 64-bit operating system and then install it.

    Once the Apache download is complete, you should go to the location where you downloaded the file.

    Then you have to extract it in the place you want. Note that after unzipping the file, you should see the files of this web server. In the next step, we will teach you how to configure Apache.

    Setup and Configure Apache on Admin RDP

    Now is the time to configure Apache.

    First, you should locate the file “httpd.conf” and open it in a standard text editor. Apache can be installed anywhere on the system, but you must change the SVROOT settings to indicate your compressed location:

    Define SRVROOT "C:/Apache24" → Define SRVROOT "D:/Apache"

    If the httpd.conf file does not have the SRVROOT variable, update everything manually as in the following examples:

    ServerRoot "C:/Apache24" → ServerRoot "D:/Apache"
    DocumentRoot "C:/Apache24/htdocs" → DocumentRoot "D:/Apache/htdocs"
    <Directory "C:/Apache24/htdocs"> → <Directory "D:/Apache/htdocs">
    ScriptAlias /cgi-bin/ "C:/Apache24/cgi-bin/" → ScriptAlias /cgi-bin/ "D:/Apache/cgi-bin/"

    1- Now you need to add ExecCGI to the Options directory and locate the following line:

    Options Indexes FollowSymLinks

    and then you must append “ExecCGI“:

    Options Indexes FollowSymLinks ExecCGI

    This means in Apache CGI/Perl scripts are allowed outside of the CGI-bin director.

    2- You need to find and uncomment the following line by removing the # sign from the beginning of the line:

    AddHandler CGI-script .cgi

    and then add the following line to it:

    AddHandler CGI-script .pl

    These two lines show how to handle the .cgi / .pl file to Apache.

    3- You should add the following command to the end of the httpd.conf file:

    ScriptInterpreterSource Registry

    This allows Apache to ignore the first line of .cgi / .pl files and instead determine the location of Perl through the Windows registry.

    How to Setup Apache on Admin RDP

    Now it’s time to start Apache.

    First, go to the Apache extraction location and open the command windows/PowerShell prompt in the bin folder.

    3 download-the-Apache-webserver

    After opening the command prompt, enter the “httpd.exe” command to start Apache.

    Note: If you open the PowerShell prompt, you must enter the command “D:\Apache\bin\httpd.exe” to start Apache.

    Now you should allow access as appropriate after seeing a Windows Firewall prompt.

    The point to note is that you must have access to Apache through the firewall. Otherwise, other devices will not be able to connect to the web server. So allow access accordingly:

    4 windows security alert

    At this point, you should check the Apache. Go to http://127.0.0.1 from your web browser, provided the previous command window is open. If Apache is running, you must see the image below.

    5 setup and configure apache on admin rdp

    Note: To exit Apache, just close the command/PowerShell window.

    Now you should install Apache as a Windows service. After that, you make sure it runs all the time.

    To do this, open the command prompt again and enter the following command:

    httpd.exe -k install

    Or if you open PowerShell, you can run the following command:

    Start-Process PowerShell -Verb RunAs

    Then you should enter:

    & "D:\Apache\bin\httpd.exe" -k install

    Now you must receive a message that Apache is installed.

    Type the following command to start the service:

    net start Apache2.4
    
    
    6 command prompt

    Apache has an “Apache Monitor” with which you can control the current state of the Apache server and start, stop, or restart the server.

    Double-click ApacheMonitor.exe to run the utility. Also, to run it automatically when Windows starts put a shortcut in the Startup folder.

    You can press WinKey+R and type “shell:common startup” to access the Startup folder faster, in Admin RDP:

    apache service monitor - setup and configure apache on admin rdp

    Conclusion

    Setup and configure Apache on Admin RDP server is a foundational step in hosting websites and serving content to users. By following this comprehensive guide, you have learned how to install Apache, configure its settings, start and test the server, host websites, and configure virtual hosts. Apache’s flexibility and robustness make it an ideal choice for web servers, and with the knowledge gained from this tutorial, you are now ready to explore the vast possibilities of hosting websites on your own Admin RDP server. If you wish, you can read the Apache vs Litespeed article.

  • How to Install Photoshop on Admin RDP

    How to Install Photoshop on Admin RDP

    Photoshop is one of the most popular graphic software that is used to edit, reconstruct, and make changes to images within spaces and different color models such as RGB, CMYK, black and white, and so on. This software can run on Windows, Mac, and Linux operating systems through interface software. Activating and installing Photoshop is done in several ways for each of these operating systems. Photoshop software is a graphic software product of Adobe. The features, speed and AI of Photoshop have been greatly improved in the new versions. We will examine this perfect app and teach you how to install Photoshop on Admin RDP.

    Requirements

    To install Photoshop on an Admin RDP, the following requirements are recommended:

    – Processor: Intel Core i5 or higher

    – RAM: 8GB or more

    – Storage: At least 10GB of free disk space for installation and additional space for files.

    – Graphics card: NVIDIA GeForce GTX 1050 or higher with at least 2GB of VRAM.

    If you want to buy Admin RDP Server, we suggest you to test and use different plans with different locations that are presented on our website.

    How to Install Photoshop on Admin RDP

    At first, You must log in to your Creative Cloud account, but if you do not have one, sign up.

    After logging in to your account, now you can download the Photoshop program from the Creative Cloud website. Just click Download.

    Tip: First you have to buy Photoshop, then download it.

    download-photoshop

    Now you have to double-click on the downloaded file to start the installation progress.

    At this point, just follow the onscreen instructions to complete the installation of Photoshop. So in the window that opens, select the language you want and click Continue:

    installing-photoshop-on-windows-server

    Wait a few moments for Photoshop to finish. Finally, click Close:

    how-to-install-photoshop-on-windows-server

    How to Run Photoshop on an Admin RDP Server

    After installing Photoshop, you can run it by clicking on its icon on the desktop or the Start menu. In the image below, you can see the Photoshop environment:

    adobe photoshop on admin rdp

    Troubleshooting

    If you are encountering issues while trying to install Photoshop on admin RDP session, there are a few troubleshooting steps you can try:

    1) Administrative privileges: Make sure you have administrative privileges on the RDP session. To do this, right-click on the installer file and select “Run as administrator.”

    2) Antivirus software: Temporarily disable any antivirus or security software running on the RDP session. Some security applications may interfere with the installation process. Remember to re-enable the antivirus software after installation.

    3) Compatibility mode: Right-click on the installer file and select “Properties.” Under the “Compatibility” tab, enable the option to run the program in compatibility mode. Choose a previous version of Windows that you know is compatible with Photoshop.

    Conclusion

    If you Install Photoshop on Admin RDP, it provides the convenience of accessing and using the software remotely. By following this comprehensive guide, you can successfully install Photoshop on an Admin RDP by setting up the remote desktop connection, downloading and installing the Adobe Creative Cloud application, and then installing and activating Photoshop itself. With Photoshop readily available on your Admin RDP, you can now enjoy all its features and functionalities from anywhere with an internet connection.

  • Tutorial Setup Python on RDP Server 2019

    Tutorial Setup Python on RDP Server 2019

    Python Programming Language is an easy-to-learn language, which is why many novice programmers choose it as their first programming language because Python was developed as a General-Purpose Language and not limited to the development of certain types of software. The main purpose of inventing the Python programming language is high readability of the code of the program commands so that blocks of code appear automatically in the IDE. It is an open-source programming language and is managed by the Python Software Foundation. This article will teach you about Tutorial Setup Python on RDP Server 2019 step by step.

    If you want to buy Admin RDP, we suggest you to use the attractive plans presented on our website, which have high performance and variety of locations.

    Requirements

    To setup Python on Admin RDP server running on Windows Server 2019, you would generally need the following requirements:

    – Processor: A minimum of 1.4 GHz 64-bit processor or faster is recommended.

    – RAM: At least 2 GB of RAM is recommended.

    – Administrative access: You need administrative privileges to install software on the server.

    – Internet connectivity: Ensure that the server has a stable internet connection to download the Python installation files.

    – Python installer: Download the Python installer from the official Python website. Choose the appropriate Windows installer, which would typically be an executable file with the extension “.exe”.

    How to Install Python on RDP Server 2019

    In this section, we plan to teach you how to install Python on Rdp Server 2019. To enter the RDP server environment, you must first search and run the Remote Desktop Connection in your Windows start menu. After entering the required IP as well as the password, you can enter the server by clicking on Connect:

    remote-desktop-connection

    Now, you must first run and install PowerShell with Admin Privilege.

    Download the Python using the following command:

    Invoke-WebRequest -Uri "https://www.python.org/ftp/python/3.7.4/python-3.7.4-amd64.exe" -OutFile "python-3.7.4-amd64.exe"

    Then, you should install Python in PowerShell using the following command:

    .\python-3.7.4-amd64.exe /quiet InstallAllUsers=1 PrependPath=1 Include_test=0

    In the next step, you can reload environment variables by running the command below:

    $env:Path = [System.Environment]::GetEnvironmentVariable("Path","Machine") + ";" + [System.Environment]::GetEnvironmentVariable("Path","User")

    You can also follow the installation steps below in the GUI installation method:

    Double-click the installer in the folder where the file was downloaded.

    Python Path will add to the environment variables by checking the “Add Python ** to PATH” box. Note that if you select the “Install Now” option, Python will be installed only for the current user, and if you select the “Customize install” option, Python will be installed for all users:

    install-python

    Now you must first check “Install for all users” and then click “Install“:

    Advanced-options-python

    Click “Close” to finish the installation process:

    setup-python

    Verify the installation by running PowerShell and entering the following command:

    python -V
    execute-python-command

    Troubleshooting

    If you are experiencing issues while trying to install Python on RDP Server 2019, here are some troubleshooting steps you can follow:

    1) Verify system requirements: Make sure your server meets the system requirements for Python 3.x or the specific Python version you are trying to install. Check if the server has the required operating system version and architecture (32-bit or 64-bit). Also, ensure that you have sufficient disk space available.

    2) Run the installer as an administrator: Right-click on the installer executable and select “Run as administrator” to ensure that you have the necessary permissions to install software on the server.

    3) Disable antivirus/firewall: Sometimes, antivirus or firewall software can interfere with the installation process. Temporarily disable any antivirus or firewall software running on the server before attempting to install Python.

    4) Try a different version: If you are encountering issues with one version of Python, try installing a different version to see if the issue persists. Sometimes, specific versions may have compatibility problems with certain system configurations.

    Conclusion

    By following the above steps, you have successfully installed Python on your RDP Server 2019. Python provides a vast range of libraries and frameworks that can be utilized for various projects, including web development, data analysis, machine learning, and automation tasks. With Python installed, you can begin harnessing the power of this programming language on your RDP Server, enabling you to create efficient and effective applications to meet your requirements. Start exploring Python’s capabilities now and unlock endless possibilities for your development endeavors.

  • A Comprehensive Tutorial on Chrome Remote Desktop

    A Comprehensive Tutorial on Chrome Remote Desktop

    If you are looking for a convenient and easy-to-use solution for remote access and support, we can recommend Chrome remote desktop for you. It’s particularly popular because of its integration with the widely used Google Chrome browser which provides remote access to a computer. It allows you to access your own computer or a remote computer from another location, which can be incredibly useful for various scenarios. So we will focus on this tool and present a comprehensive tutorial on Chrome remote desktop.

    What is Chrome Remote Desktop?

    The Chrome remote desktop tool is a software for management and remote access that was developed for free by Google. With the help of this tool, you can remotely access another computer from devices that run the Google Chrome browser. Monitoring and control as well as remote support are positive points of this software and you can use it with confidence.

    This tool helps you access your workplace system from anywhere in the world and share your screen to guide others. This can be particularly useful for remote technical support, accessing your own computer from a different location, or collaborating with others on a shared computer.

    What Is Chrome Remote Desktop?

    It’s important to note that this tool requires an active internet connection on both the local and remote devices. Also, you can use NeuronVM services like Windows VPS to use the Chrome management tool.

    Benefits of Using Chrome Remote Desktop

    Here are some advantages why users might choose Chrome remote desktop:

    • Security: Chrome Remote Desktop uses secure connections to protect your data during remote access. The optional PIN feature adds an extra layer of security.
    • Convenience: Using this software, users can access their computer from any device with a Chrome browser or app. So you can work from anywhere.
    • Access to Your Own Computer: If you need to access your work or home computer from a different location, you can do so using this tool.
    • Ease of Use: Chrome remote desktop is easy to use and straightforward. It requires minimal setup times and effort.
    • Collaboration: When collaborating on a project, you can use this tool to work on the same computer with others. Your physical location is not important anymore.
    • Cross-Platform Access: Chrome Remote Desktop is cross-platform. In other words, it allows you to access a Windows PC from a Mac, or vice versa. It also supports various operating systems, making it versatile for users with diverse device preferences.
    • Technical Support: It’s commonly used for providing technical support. If you’re tech-savvy, you can help friends or family members troubleshoot computer problems or perform maintenance on their systems from afar.
    • Offline Access: The ability to set up remote access even when the local computer is offline or in sleep mode is a unique feature.

    6 Easy Steps to Access Google Chrome Remote Desktop

    As we mentioned, Google Chrome Remote Desktop is a service that allows you to access and control a remote computer from another device using the Google Chrome web browser. To set up and use this tool, follow these steps:

    1- Open the Chrome browser. Then click on the three lines on the top right and click Extensions. Then search for Chrome Remote Desktop in the search field:

    install chrome desktop

    Tip: If it’s not already installed, download and install Google Chrome from the official website.

    2- Now choose chrome option and press Add to chrome button:

    add-to-chrome

    Tip: It is recommended to install web application too. So, you can have more control.

    Tip: Ensure you are signed in to Google Chrome with the same Google account on both the local and remote computers. This is necessary for synchronization.

    3- Now if you want to remotely access to your desktop after adding chrome extension, click on the blue button to start the download of .msi file and press Accept and Install:

    remote access download

    4- In the next step, press Run on the encountered installation wizard. So, you can open the chrome remote desktop file on Downloads section. You will see the section to choose a name for your device:

    choose a name for chrome device

    6- You should set a PIN code. As soon as you have entered the verification code, you will be connected to the remote computer and control it as if you were physically in front of it:

    Choose a pin for google chrome desktop

    Departments Who Use Chrome Remote Desktop

    As you know, using Chrome Remote Desktop is free and doesn’t cost anything, so many business sectors use it. Let’s analyze various departments that use this tool:

    Departments Who Use Chrome Remote Desktop

    IT Department

    The IT department uses the Chrome remote desktop tool the most and benefits from it. They can help and guide their employees remotely with the help of this software without the need for physical response.

    So, in order to be more productive and save time, they show a great desire to use this tool. It is also possible to support users regardless of location. The only disadvantage of this system is that it is not possible to restart the device.

    Customer Service

    Customer service departments can benefit from using Chrome Remote Desktop (CRD) as a tool to provide remote support to customers. It is free and provided by Google and allows remote support. Among the outstanding options of the support department, we can mention a one-time code that is given to access the desktop and troubleshoot its problems.

    In this way, the customer can continue his work with peace of mind. Also, the user can keep in touch by phone or live chat and always receive expert help.

    Finance

    Since the Chrome remote desktop tool is offered for free, it has attracted the attention of financial sectors. While it may not be as advanced as paid tools, it is good software for small businesses with limited budgets. These departments also take advantage of the screen-sharing function of Chrome desktop in employee-specific situations.

    Marketing

    Marketing departments must constantly work together to achieve the final product. The Chrome remote desktop tool helps users edit documents in real-time or share their home page with each other. Of course, it is not possible to manage multiple sessions with this tool, but it is still ideal for working remotely.

    Best Practices to Use Chrome Remote Desktop

    To ensure a secure and efficient remote desktop experience, here are some best practices to follow:

    – Use strong and unique passwords for your Google account, enable two-factor authentication, and regularly review account security settings.

    – Only share your computer with trusted individuals. Also, When using the service, always require a PIN or a one-time access code for added security.

    – If you encounter connectivity issues, check your firewall settings and ensure that port 443 is open.

    – Make sure you have a strong and unique password. Avoid using easily guessable passwords.

    – Enable session logging for added security and auditing. This feature allows you to review past remote access sessions.

    – For added security, you can configure session time limits, so remote users are automatically disconnected after a specified period.

    – Adjust the quality settings to match your connection speed.

    – Always remember to end your remote sessions when you’re done to prevent unauthorized access.

    – Be aware of the difference between “Guest mode” (where you share your computer) and “Remote Assistance” (where you access another computer). Use the appropriate one.

    – If you’re not actively using Chrome Desktop, it’s a good practice to close your browser.

    By following these best practices, you can make the most of Chrome Remote Desktop while keeping your computer and data secure.

    Conclusion

    Chrome remote desktop is a simple and great remote management software for users to access devices using the Chrome browser. This article was presented to show the way of using Chrome desktop and gave an explanation to make you more familiar with this practical tool and its benefits. If you have any questions or ideas about this issue, please share.