Tag: Windows Tutorials

  • Troubleshooting SSL Certificate Errors on Nginx

    Troubleshooting SSL Certificate Errors on Nginx

    In online businesses, maintaining customer security and brand reputation is very important, So these businesses need a valid SSL certificate. Today, thanks to the Open Certificate Authority (CA) Let’s Encrypt, you can get this certificate for free. If there is a problem with the certificate or its configuration, you may encounter SSL errors. As a result, Keep studying this article because here we will Troubleshoot SSL certificate Errors on Nginx.

    What is an SSL Certificate?

    If you want to ensure the security of your online transactions and sensitive information, you should use SSL (Secure Socket Layer). Nowadays, there are alternatives to SSL, but this certificate is the most well-known type.

    SSL is a digital certificate that verifies the identity of the website and encrypts the connection. Website communications can be in different types, like server to server, browser to server, or another network. The SSL algorithm is complicated and is used to encrypt sensitive and confidential data.

    Troubleshoot SSL Certificate Errors

    Here, we will introduce some most common SSL Certificate issues and provide effective solutions for them. We suggest that you visit the Windows VPS server plans offered on our website.

    SSL certificate warning

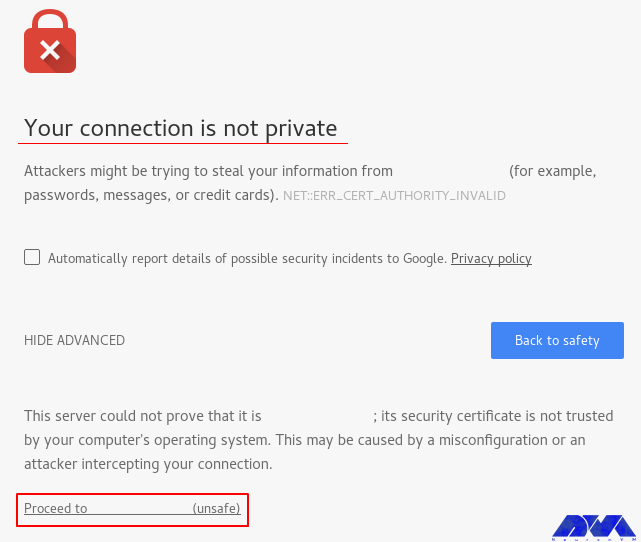
    Invalid or Expired SSL Certificate Error

    This error occurs when the SSL certificate on the server has reached its expiration date. This means that this certificate is no longer valid.

    Solution: To solve this problem, you should get and install a new SSL/TLS certificate for your Nginx server. So first, identify the certificate authority (CA) that provides the original certificate. It can be Let’s Encrypt. Then, contact the provider and ask for a new certificate. After that, you should create a certificate signing request for the new one. Present the CSI to the certificate provider or CA as part of the issuance process. Then, update the configuration and restart the Nginx to apply changes.

    Incomplete or Missing Certificate Files

    When you encounter this error, it means that there is an issue with the SSL/TLS certificate file that is configured for your website. This error will prevent Nginx from properly establishing secure connections:

    Incomplete or Missing Certificate Files

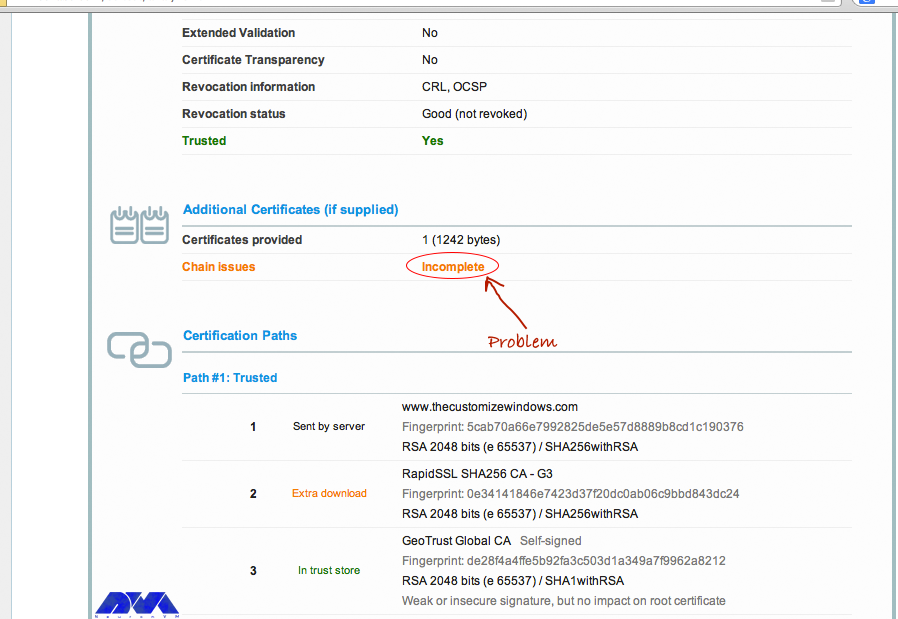
    Solution: To fix this problem, you should modify or add an active intermediate certificate, and you should be careful about certificate chain order. The order of certificates should be SSL certificate, Intermediate Certificate, and Root Certificate.

    Forbidden Error (403 Forbidden) While Running Cert Renew

    The method that is used to authenticate users by Automatic Certificate Installers such as Let’s Encrypt or Certbot uses hidden folders (/path/to/docroot/.well-known). The downside is that if the protection of these folders is enabled, such validation measures will fail.

    Solution: If you encounter the forbidden error (403 Forbidden) in the certificate renewal report file, you should look for such limitations and delete them until a new certificate has been installed.

    Nginx Crashes After Certificate Renewal

    Most of the critical problems are often related to crashed Nginx servers after a failed upgrade. Automatic installers can change configuration entries, but if the installer dies for different reasons, it will corrupt the Nginx configuration file, too.

    Solution: In this case, you should restore the Nginx configuration file from the backup to bring up the site online as quickly as possible. But if the backup is not accessible, you can reset the SSL configuration section to bring the site online, which most automated tools target. So when your site is back online, you should make the changes manually to bring the new certificate online.

    Conclusion

    As you are trying to achieve an SSL certificate for your Nginx server, and as it is a crucial action for your system’s security, we concentrated on this topic. We tried to introduce some of the common issues with SSL certificates on the Nginx server. So, keep tracking and study this article carefully to troubleshoot SSL Certificate Errors on Nginx. If you encounter any other issues, please share them with us in a comment.

  • Tutorial Configure Firewall on Windows Server 2016

    Tutorial Configure Firewall on Windows Server 2016

    A firewall generally prevents dangerous attacks on the local network and computer. In simple terms, a wall that prevents fire from moving from one part to another is called a firewall. Generally, a firewall controls the information that is transmitted between computers and the Internet. In this article, we are going to teach you How to Configure Firewall on Windows Server 2016.

    What is Firewall?

    A Firewall is a network security system that controls and monitors incoming and outgoing network traffic based on predefined security rules. A firewall is a network security device that monitors inbound and outbound network traffic. It protects the network against threats and creates a barrier between a trusted internal network and an unreliable external network such as the Internet. This process is governed by a set of predefined security instructions. It is interesting to know that a Firewall is designed to secure the communication process between different networks. The Firewall prevents unauthorized data from entering computers where ports called ports enter.

    How to Configure Firewall on Windows Server 2016

    Before starting the steps to configure the firewall, we suggest you visit the Windows VPS and Admin RDP plans provided on our website and configure the firewall after installing Windows Server 2016.

    By default, the Windows Firewall with Advanced Security is turned on. Note that you should confirm the current status and turn on the firewall.

    To turn on the firewall first, you need to open “Server Manager“, then click on the Tools tab, and then select Windows Firewall with Advanced Security:


    windows firewall with advanced security


    Now you can check the current status of Windows Firewall profiles from open group policy management and if it was not set to On. You need to click on Windows Firewall properties and turn on the service in each profile:


    firewall console


    You can permit or block specific input and output network packets on your server and select multiple parameters for each inbound or outbound rule with the help of a Windows Firewall. Windows server profiles include Domain, Private, and Public groups. The Domain represents your server’s connection to a corporate domain network, Private is used to connecting to your home or workplace network, and Public represents insecure public network locations.

    How to Open an Inbound Port

    First, you need to launch the Windows Firewall with Advanced Security from the Tools sub-menu under Server Manager. Select Inbound Rules from the left panel of the Firewall console. Then click on New Rule under the right sub-menu of Inbound Rules under Actions: 


    choose inbound rule on windows server


    Now you should select Port in the rule wizard section and then click on Next:


    choose port for windows firewall


    In this step, you have to choose whether the new rule applies to a TCP or UDP port on the server. Then select your desired ports and enter their number. Also, you can enter ports range or multiple ports separated by – and, respectively, and finally click Next:


    choose the port rule for windows firewall


    You can use Allow the connection to allow incoming connections to the specified server port.

    Allow the connection if it is secure will authenticate with IP security and you can deny or allow the connection. For example, HTTP connections will be allowed and HTTP blocked.

    Block the connection will block all incoming connections to your server through the specified port.

    In this step, you should select the allow the connection to open port option and then click Next to assign a new rule to the profile:


    type of connection in windows firewall


    Now select Domain, Private, and Public, or select all to apply the Firewall rule in multiple profiles:


    apply the firewall rule in windows server


    Remember to give your new firewall rule a name and description. Finally, you should click on Finish to enable the new rule. All connections to the server that match the port are accepted:


    choose name for windows server firewall


    How to Open an Outbound Port

    First, you should go to the Windows Firewall with Advanced Security console and click on Outbound Rules on the left pane. Now you will see a list of available outgoing connection rules. Then, you need to click on New Rule on the right pane under the outbound rules node.


    outbound rule on windows firewall


    In the next step, you should select Port as the rule type in the new output rule wizard and then click Next:


    choose rule type on firewall - Configure Firewall on Windows Server 2016


    Next, you have to choose whether the new rule applies to the TCP port or UDP. Select specific remote ports and then enter the port number of the server you want:


    choose the port rule for windows firewall


    In this step, after selecting Allow the connection on the Action page, you should click Next:


    type of connection in windows firewall - Configure Firewall on Windows Server 2016


    Then you need to select the Server Profile on which the rule should be enabled:


    choose server profile for windows server firewall


    Remember to name the new output rule and describe it. Finally, you should click Finish to enable the outbound rule for the target port on all selected server profiles:


    choose the name of firewall - Configure Firewall on Windows Server 2016


    How to Open a Port through Windows PowerShell

    To do this first, you should go to the Windows Start menu and search for PowerShell and open it. Then you have to replace your settings in the following command:

    New-NetFirewallRule  -Enabled:True  -LocalPort 21  -Protocol TCP  -Direction Inbound  -Profile Domain  -Action Allow  -DisplayName example opening a port rule"

    The words in the above command indicate:

    New-NetFirewallRule: It will create a new Firewall rule.

    Enabled: It enables the new rule and by default, it will be set to True.

    LocalPort: It is your target port number.

    Protocol: It specifies the protocol associated with your port number.

    Direction: It sets your target direction to either Inbound or Outbound.

    Profile: It assigns the new rule to a server profile.

    Action: It defines the state for the new firewall rule. You should enter Allow.

    DisplayName: It sets a custom name for the new firewall rule.

    Output:

    PS C:\Users\Administrator> New-NetFirewallRule -Enabled:True -LocalPort 21 -Protocol TCP -Direction Inbound -Profile Domain -Action Allow -DisplayName "example opening a port rule"
    
    
    Name : {427a1b12-ece6-4d54-847d-de482b227c6c}
    DisplayName : example opening a port rule
    Description :
    DisplayGroup :
    Group :
    Enabled : True
    Profile : Domain
    Platform : {}
    Direction : Inbound
    Action : Allow
    EdgeTraversalPolicy : Block
    LooseSourceMapping : False
    LocalOnlyMapping : False
    Owner :
    PrimaryStatus : OK
    Status : The rule was parsed successfully from the store. (65536)
    EnforcementStatus : NotApplicable
    PolicyStoreSource : PersistentStore
    PolicyStoreSourceType : Local

    That is it!

    Conclusion

    This article taught you how to configure the Firewall on Windows Server 2016. You can use this article to open a network port on your Windows Server 2016. The server accepts incoming and outgoing connections through selected ports, but the Firewall blocks profile connections that don’t comply with port rules.

    FAQ

    Are there any other tools available for managing Windows Firewall?

    Yes, you can use a command line provided by Microsoft.

    Is it dangerous to turn off Windows Firewall?

    It allows all the data packets to enter your network easily and makes it vulnerable to all kinds of Cyber attacks.

  • Top way to Install Xubuntu on VirtualBox

    Top way to Install Xubuntu on VirtualBox

    If you aim to install Xubuntu on VirtualBox, you are on the right pass. In this context, we will introduce you to the best way to install this beautiful and user-friendly operating system. Xubuntu is designed for those who want to get the most out of their services and is derived from the Ubuntu operating system.

    What is Xubuntu?

    As we mentioned in the introduction part, Xubuntu is a user-friendly and lightweight distribution based on Ubuntu which is used Xfce as its graphical desktop and is a stable desktop environment for users. a good feature of this distribution is its satisfactory performance on old hardware. Xubuntu is developed by Canonical Ltd. The noticeable point is that this operating system only includes GTK+ applications.

    Prerequisites

    In this section, we will examine Xubuntu installation step-by-step on VirtualBox. But before starting the installation process, it is better to provide the necessary prerequisites. You must first install VirtualBox on the system. We suggest that you visit the plans offered in NeuronVM to buy a Windows VPS server.

    Download and Install VirtualBox

    1- As the first step you should download the VirtualBox from the VirtualBox official website, so that, you can run Xubuntu on it and click on Windows hosts.

    2- As you finished downloading the .exe file. You can start the installation process using the VirtualBox wizard. Press Next to continue:

    Download and Install VirtualBox

    3- In the custom setup, choose the VirtualBox application and select the location of your installation file by pressing the Browse button. Now press Next:

    Install VirtualBox on windows

    4- You can choose the way you want features to be installed and press Next:

    VirtualBox custom setup

    5- In this section, by pressing the Yes button you will accept the installation:

    Install VirtualBox on windows vps

    6- At the last window, you can press the Install button and start the installation:

    how to Install VirtualBox

    ***

    Installing VirtualBox on windows

    8- As you finished the installation part, press the Finish button:

    Download and Install VirtualBox

    Now that you have VirtualBox on your system, it’s time to create it. For this reason, open the VirtualBox manager from your desktop shortcut and click on the New button, which will look like this:

    virtualbox manager

    Here, you should choose a Name for your VirtualBox and set the type on Linux, and the version on Ubuntu:

    create virtual machine

    Now, choose the proper Memory size and press Next:

    create virtual machine

    On the created virtual machine window, check the Create a virtual hard disk now option and Create to add a hard disk to your virtual machine:

    create virtual machine

    Here you should choose the type of file you want for your hard disk:

    hard disk file type on virtual machine

    Choose the storage of your hard disk. It is better to check the Dynamically allocated option and press Next:

    storage on physical hard disk on virtual machine

    Here, in the first box, you should type the name of your virtual machine and specify the size of the virtual hard disk. At last, press create:

    virtual machine file location and size

    Now, you can see the created VirtualBox and it’s time to add the Xubuntu operating system.

    How to Install Xubuntu on VirtualBox

    After downloading the iso file, save the desired file in a specified path. Open VirtualBox and click on the Start button to boot the virtual machine and go to the browse part to put the Xubuntu file. Like the image below:

    adding xubuntu

    As you created the virtual machine, let’s do the instruction below to add Xubuntu. Notice that you should download the iso file of Xubuntu on a 64-bit operating system. For this reason, go to the official page of Xubuntu.

    Here, you will see the Welcome page. Choose the preferred language and click on Install Ubuntu:

    install xubuntu on virtualbox

    In this section, choose the Erase disk and install Xubuntu and click on Install Now:

    installing xubuntu

    There will appear a pop-up window. Press Continue to confirm the changes you did to the disk:

    xubuntu installation type

    Choose the proper location and go to the next part:

    how to setup xubuntu

    Choose the language of the keyboard layout and continue:

    xubuntu kayboard layout settings

    In this section, fill the related details and determine the login way:

    configure xubuntu on virtualbox

    As you continue the process, here you will encounter the Xubuntu Welcome page and the installation process will begin:

    xubuntu installation

    Well done. The following image shows that you successfully finished the installation part. You will restart the system to confirm the changes:

    xubuntu installation progress on virtualbox

    As a result, you have Xubuntu on your VirtualBox. Enjoy using this applicable operating system.

    Conclusion

    Xubuntu is an operating system, based on Ubuntu and if you decided to use it on your system, you should use a virtual machine. Also, as we mentioned in this article, you should download the iso file. We tried to guide you to install Xubuntu on Windows using a VirtualBox and hope it was helpful for you. If you have any questions, leave a comment.

    FAQ

    Is Xubuntu a stable version?

    In fact, Xubuntu is the LTS version which means it has been supported for a long time. LTS versions are also provided as stable.

    How much RAM is needed for Xubuntu?

    As a minimum, you should allocate 512 MB RAM for Xubuntu but the recommended amount is 2 GB.

  • Troubleshooting WampServer Problems on Windows 10

    Troubleshooting WampServer Problems on Windows 10

    This tutorial proposes to give a complete guide for whom needs to know to troubleshoot WampServer problems on Windows 10. These problems may occur during the working process or running this server on your system. Read this article, if you have any problems on WampServer and solve them yourself.

    How to Troubleshoot WampServer on Windows 10

    It is possible that you will encounter problems during various stages such as the installation, startup, or working process of WampServer on Windows VPS or Windows 10. So, we will deal with some of these problems and show how to solve them in this section.

    Problem 1. Why WampServer Icon Is Not Turning Green?

    As you have installed WampServer, you will see the Icon in the trey. In a normal process, this icon goes red, then orange, and after that green. But it may stuck on orange. So you can not enter the MySQL console. As a result, you can not go to the phpMyAdmin site too:

    wampserver icon is not green

    One of the solutions is to right-click on the WampServer icon in the tray and select Restart All Services to be sure that all of the services are running in the right way:

    restart the server on wamp

    Another reason may be that the Apache service doesn’t start. So, click on the icon and select Apache. Then choose service administration ‘wampapache64’ and Install service:

    enable apache on wamp

    Then you will see the command prompt. Close it and go through the same pass to press the start/resume service. Now it will turn green.

    If non of the solutions worked for you. Then, you should check the error log in the logs folder of the WampServer installation part, to find the exact problem.

    Problem 2. Why WampServer is not Working Well?

    One of the reasons for this problem can be insufficient system resources. These resources can be your computer’s memory, CPU, and so on. If you have enough resources then Wampserver will run smoothly. So, if your system is working slowly, it will affect your server’s performance.

    Problem 3. How to Solve Port 80 problem?

    If localhost/PHPMyAdmin is not accessible in the browser, it means that it is in use by another service and requires Apache to function. Apache is set on port 80. So, the solution is to change the port number instead of disabling or removing any other service. Go through this way:

    Right-click on the wamp icon and select on Tools option. So, you will be able to change the port number:

    tools on wampserver

    – Now, choose Test Port 80 option for Apache:

    test port 80 on wampserver

    – Here, you will see the command prompt. It will show which program is using the port:

    the used port on wamp

    – Then, go to the option again and choose the Use a port other than 80 option:

    use a port other than 80 - WampServer problems on windows 10

    Here, enter the desired port for Apache. E.g. 8080:

    changing port of wamp - WampServer problems on windows 10

    In the end, test the port to confirm that Apache is using it:

    test the new port in wamp - WampServer problems on windows 10

    Problem 4. Why the WampServer Is Blocked?

    There may be a verification problem with the firewall section. A firewall or antivirus may block WampServer for security issues. So, you should disable them for a short period and see if your problem is solved. If the problem is with the firewall, then add rules and exceptions to let the WampServer through the firewall or antivirus.

    Conclusion

    Here, we tried to focus on some common Wampserver problems on Windows 10. Also, we analyzed the issues and give some solutions for these problems. So, it can be a helpful guide for you. If you encounter any other issues or have any questions about WampServer, please share in a comment.